4 Ways to Connect Android to PCs [Nearby & Remotely]

W. Ting

/

10 minutes

/

Updated

26 Mei 2025

Connecting Android to PC goes beyond just photo transfers — it's a smart way to boost productivity, streamline file access, and even control your devices remotely. Whether you're working from home, studying, or gaming, a solid Android-to-PC connection can make everyday tasks faster and easier.

In this guide, we'll show you the easiest ways to connect your phone to a PC, using USB, Microsoft Phone Link, Bluetooth file transfer, or using DeskIn, a powerful tool to help you get Android connected to PC remotely or nearby. Let's get started!

👀 Related Reading:

Part 1. Connect Android to PCs Remotely (2 Quick Ways)

For users who need remote file transfers or screen sharing, here are two simple methods to remotely connect your PC. Follow these methods to enhance productivity and access your devices right away!

Way 1. Use Best Remote Desktop Software - DeskIn

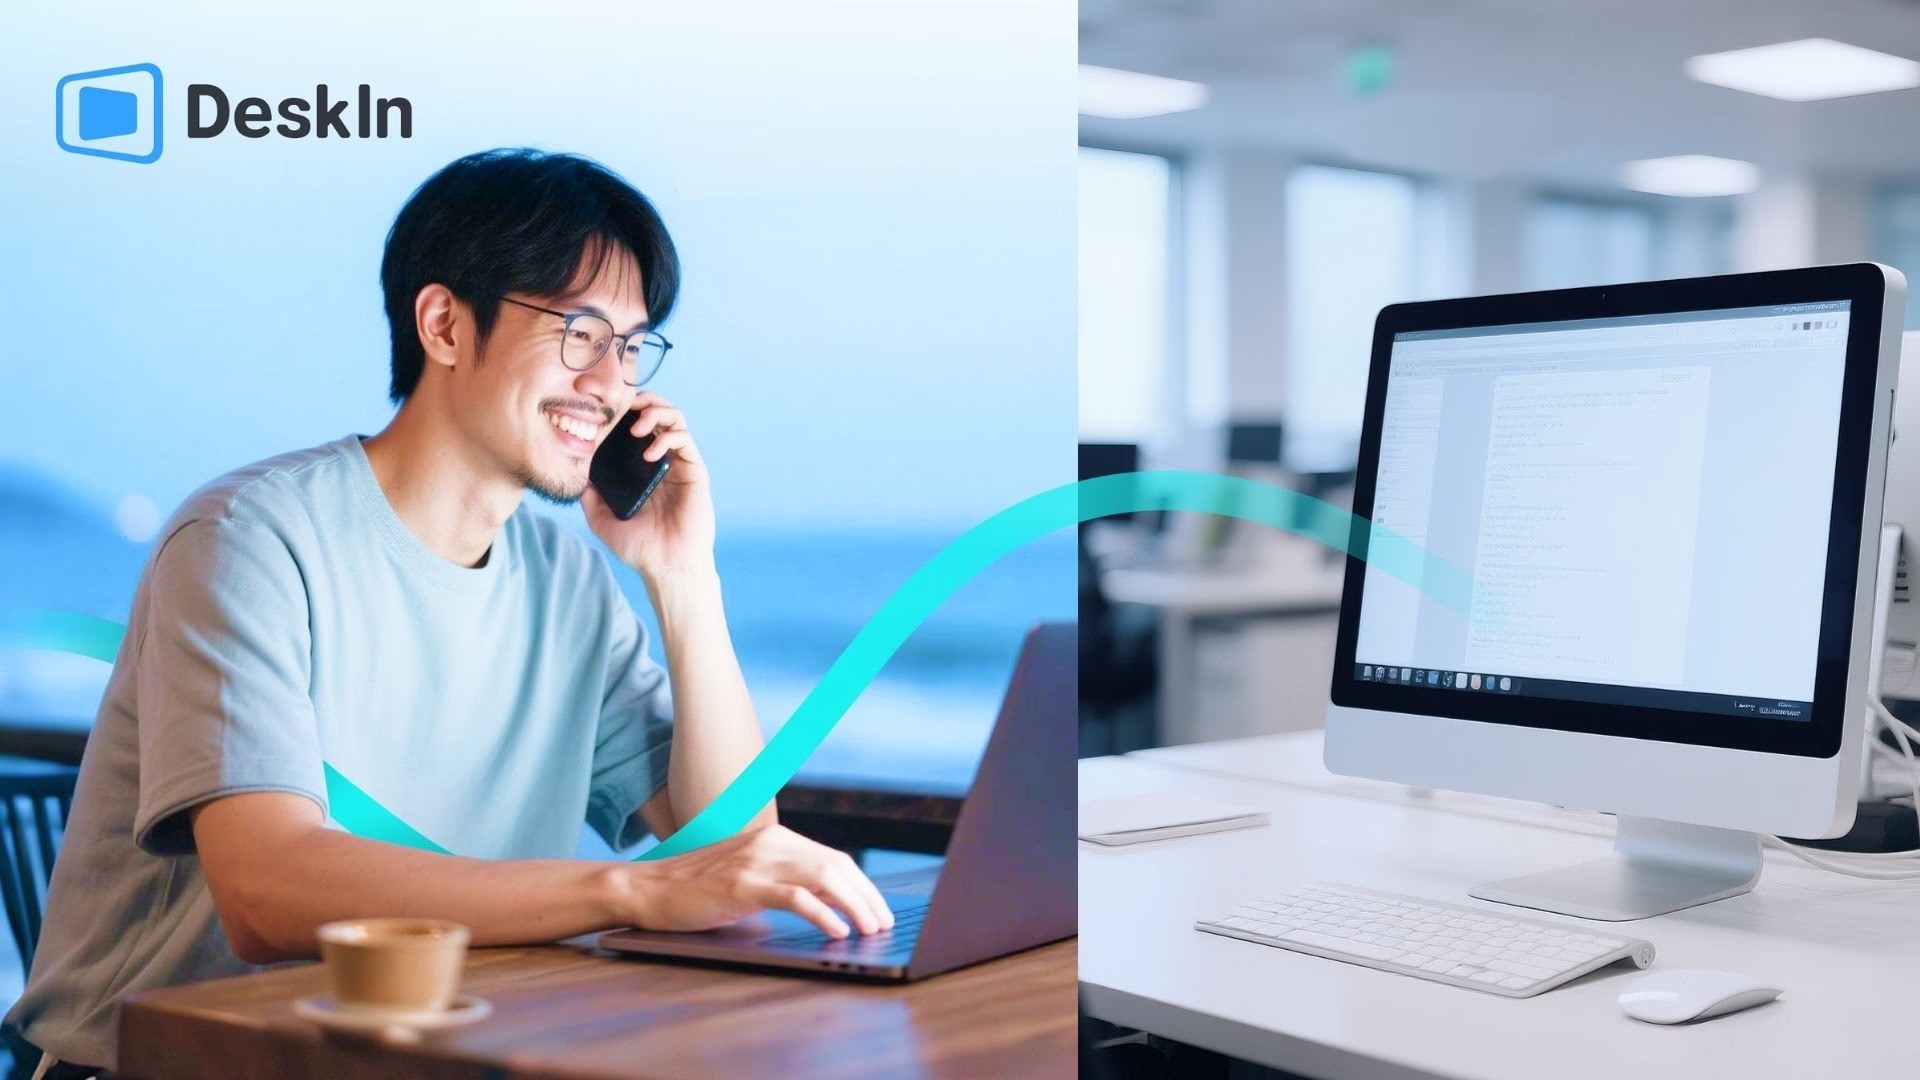
People need to control an Android device from pc, share files between the devices, or cast the android to Windows, the fastest way is using a third-party solution like DeskIn. It is a powerful, cross-platform app that enables wirelessly remote control PC, file transfer, and screen sharing between Android phones and PCs. Whether you're working remotely, gaming, or simply trying to move files without limits, DeskIn provides a smooth and secure connection, even on weak networks like hotspots or public Wi-Fi.

free download DeskInDeskIn for Android-PC Connection

📌 How DeskIn Helps Android PC Remote Connection

  • Remote Control: Fully control your Android device or PC from another device, with support for touch gestures, keyboard input, and game controllers.

  • File Transfer: Transfer large files at speeds up to 12MB/s, with no restrictions on file type or size.

  • Cross-Platform Access: Connect across all major systems — Android, iOS, Windows, and macOS — and even use your tablet or phone as a second screen.

  • Privacy Protection: Includes privacy screen mode, device access management (blacklist/whitelist), and email verification for added security.

  • Extra Tools: Features like virtual screens, remote camera access, multi-screen expansion, and real-time screen mirroring make it ideal for power users, creators, and travelers.

All these sparkling features have made DeskIn the best remote software for Windows PC and mobile phones. Now, let's see how to connect mobile to laptop using DeskIn within easy-handling steps.

Step 1. Download and Install DeskIn

Go to the official DeskIn website on both your Android phone and your PC. Download the appropriate version for each device and complete the installation process.

free download DeskIn

Step 2. Create and Sign In to Your DeskIn Account

Open the DeskIn app on both devices and sign in using the same account. For new users, Deskin now offers free trial with no time limits. Just register with your email address.

Step 3. Link Devices and Choose Connection Mode

Once signed in, you'll see the device ID and the password of your Android device. Input them on your PC, and once the mobile phone and your laptop are successfully connected, you can then explore the features under Connection:

  • Remote Control – Fully control your PC or Android remotely from another device.

  • File Transfer – Send files like docoments and photos quickly between devices.

  • Screen Sharing – Mirror your screen - Android or PC - in real-time.

 Insert Device ID and Password on DeskIn

Step 4. Start the Connection

Click on the function you want to use, and follow the prompts to initiate the session. DeskIn will automatically establish a secure connection. Depending on your needs, you can enable extra features like virtual screen, privacy mode, or remote camera within the app settings.

free download DeskIn

For steps to transfer files, do check: How to Transfer Large Files from PC remotely?

Remotely Connect Windows PC and Android Phone

If you want to connect your Android phone to a PC wirelessly, the Microsoft Phone Link app provides a native solution that's great for syncing messages, calls, and media, especially useful for people who frequently switch between devices.

Before you start, make sure your PC is updated to Windows 10 (October 2018 update or later) or Windows 11, your Android device is running Android 7.0 or newer, and both devices are connected to the same Wi-Fi network.

Step 1. On your Windows 10 or 11 PC, open or install the Phone Link app (preinstalled on most devices).

Step 2. On your Android phone, download the Link to Windows app from Google Play. Some phones (like Samsung Galaxy) may already have it built-in.

Step 3. Open both apps, then sign in with your Microsoft account or scan the QR code shown on your PC to pair the devices.

Step 4. Once paired, you can view and respond to texts, check notifications, view recent photos, and even make phone calls directly from your PC.

Connect Android to PC via Phone Link

📌 Limits or Shortcomings:

  • It does not support full file explorer access (you can view recent photos, but not browse entire folders).

  • No support for remote control or screen mirroring, unless you're using select Samsung or Surface Duo devices with additional integration features.

  • Can't be used for large file transfers — for that, a great third-party app offers more flexibility. Please read on to explore.

Part 2. Connect Android Devices to Nearby PCs (2 Common Ways)

The most common ways to connect Android devices to a PC are still the traditional ones — using a USB cable or Microsoft's built-in Phone Link app. These methods are easy to set up and are ideal for transferring files, viewing notifications, or syncing basic data between devices.

Way 3. Using a USB Cable

Connecting your Android phone to a PC using a USB cable is one of the simplest and most reliable methods. It allows high-speed data transfer without needing an internet connection, and it works on virtually all Android and Windows devices.

Here's how to connect Android to PC via USB:

Step 1. Use a compatible USB cable (preferably the original one) to connect your Android phone to your PC.

Step 2. On your phone, a prompt will appear. Tap "Charging this device via USB", then choose "File Transfer" (MTP) from the list of USB options.

Step 3. On your PC, open "File Explorer". Your Android device will appear under "Devices and Drives."

Step 4. Click on the device to browse internal storage or SD card, then drag and drop files between devices.

Fail to transfer large files with USB?

Using USB cable is slow and prones to failure. Why not try Deskin? The remote access software offers fast and reliable file transfers. It is perfect for transferring sensitive documents and photos. Try it now with a FREE trial!

free download DeskInConnect Android to PC via USB Cable

Fixes: Why is my phone not connecting to PC through USB?

If your Android phone isn't connecting to your PC, this may be your your computer not detecting android phone.

  1. Ensure Your USB cable is working. Or try a different USB cable and port.

  2. Check if the USB mode on your phone is set to "File Transfer" (MTP), and try restarting both devices.

  3. If you're using a wireless connection, ensure both devices are on the same Wi-Fi network.

📌 Tips & Common Issues:

  • Connection not showing? Swipe down your notification panel and manually select the USB mode.

  • Can't connect to pc? Try a different USB port or cable, especially if using a third-party charger.

  • Drivers not installed? Windows may need to install Android USB drivers automatically. If not, check the manufacturer's website.

Way 4. Using Bluetooth for Sending Small Files

If you want to connect your mobile phone to laptop to transfer files between the two devices at work, Bluetooth is an excellent option. Bluetooth file transfer supports documents (PDF, Word, PPT), audio, photos, and short videos. Generally, it can transfer files at speeds of 1-3 MB/s.

It requires no cables and is easy to connect. Here's how to connect android phone to pc via Bluetooth.

Step 1. Turn on Bluetooth on Both Android and Windows

Turn on Bluetooth on your Android. Then, go to Setting > Add Bluetooth or other devices. Toggle on the Bluetooth on Windows.

Turn on Bluetooth on Windows PC

Step 2. Pair Android Phone to PC via Bluetooth

Click Add Device > Bluetooth on PC. Confirm that the pairing code on your computer matches the one on your phone. If it does, click Connect on both devices.

Add a Device via Bluetooth

Step 3. Transfer Files between Android & PC via Bluetooth

To transfer files to your Android over Bluetooth, right-click the Bluetooth icon, then choose Send a File or Receive a File. Select your Android from the list of available Bluetooth devices.

Browse for the file you want to transfer to your Android, you can transfer music, photos, documents between the Android and computer. Then choose Open > Next. Windows should transfer the files to your Android.

Click Send or Receive Files via Bluetooth

[Fixes]: Android can't connect to pc bluetooth? Try the fixes below!

Error 1: Why am I not able to transfer files from phone to laptop via Bluetooth?

Make sure the device that files will be sent from appears and shows as Paired.

Keep the window open and confirm you want to receive a file via Bluetooth whenever you want to send a file to the PC.

The process isn't as automatic and fast as remote desktop apps. If you need a better solution to solve this issue, consider DeskIn, the best remote desktop software. Use its free version to transfer files immediately!

free download DeskInPC not Receiving Files via Bluetooth

✍️ Related Reading: How to Send Sensitive Documents & Files via Email

Quick Comparison: 4 Ways for Android to PC Connection

Now that you've learned about DeskIn and its powerful features, let's take a moment to compare it with other traditional methods of connecting Android to PC. Below is a detailed table that outlines the pros and cons of each connection method, helping you make an informed choice based on your needs and preferences.

Method

Speed

Ease of Use

Security

File Limits

Extra Features

DeskIn

High (up to 12MB/s)

Very High (easy setup, no cables)

High (email verification, privacy mode)

None (unlimited size)

Remote control, 2nd screen, virtual screen, remote camera, cross-platform support, etc.

Microsoft Phone Link

Medium (dependent on Wi-Fi)

High (easy setup with Microsoft account)

High (Microsoft account security)

Yes (limited file types)

Call, SMS, media sync, notifications on PC

USB Cable

High (up to 5 Gbps)

Moderate (requires cable)

High (no internet required)

None (direct access)

Direct file access, reliable for large transfers

Bluetooth

Slow

Moderate

High

Yes (limited file types)

No extra features


FAQs About Connecting Android Phone to PC/Computer

How to connect android phone to PC without USB cable?

Here are two ways to share files. One is using Bluetooth. Bluetooth file transfer is common and can transfer files, music, and documents. However, it's relatively slow and unsuitable for large files.

Therefore, Method 2 is more recommended: using remote desktop access software. This type of software provides fast file transfer capabilities, easily handles large files, and also offers remote screen sharing, making collaboration much easier and more efficient. Choose remote access tools for better performance and flexibility.

free download DeskIn

Can I use my Android phone as a second screen for my PC?

Yes, with DeskIn, you can easily use your Android phone as a second screen for your PC. This can help boost productivity by providing extra screen space for multitasking.

How can I transfer large files from Android to PC?

If you're transferring large files, DeskIn offers a fast and secure way to move files at speeds up to 12MB/s without file size restrictions. However, using a USB cable or Microsoft Phone Link may be slower and have file size limits. DeskIn supports drag-and-drop transfers for large files, including folders, videos, and documents, all at high speed without size or format restrictions.

Conclusion

There are several methods available to connect your Android phone to your PC, each catering to different needs. While USB cables and Microsoft Phone Link are great for basic tasks like file transfers and syncing messages, they have their limitations in terms of flexibility and advanced functionality.

For a seamless, all-in-one solution that offers full control, fast transfers, and cross-device productivity, DeskIn stands out as the best option. Whether you're working remotely, gaming, or managing files, DeskIn provides a smooth and powerful experience across all devices. Give it a try, unlock its range of features, and connect Android to PC to boost your work and play right away!

free download DeskIn

Connecting Android to PC goes beyond just photo transfers — it's a smart way to boost productivity, streamline file access, and even control your devices remotely. Whether you're working from home, studying, or gaming, a solid Android-to-PC connection can make everyday tasks faster and easier.

In this guide, we'll show you the easiest ways to connect your phone to a PC, using USB, Microsoft Phone Link, Bluetooth file transfer, or using DeskIn, a powerful tool to help you get Android connected to PC remotely or nearby. Let's get started!

👀 Related Reading:

Part 1. Connect Android to PCs Remotely (2 Quick Ways)

For users who need remote file transfers or screen sharing, here are two simple methods to remotely connect your PC. Follow these methods to enhance productivity and access your devices right away!

Way 1. Use Best Remote Desktop Software - DeskIn

People need to control an Android device from pc, share files between the devices, or cast the android to Windows, the fastest way is using a third-party solution like DeskIn. It is a powerful, cross-platform app that enables wirelessly remote control PC, file transfer, and screen sharing between Android phones and PCs. Whether you're working remotely, gaming, or simply trying to move files without limits, DeskIn provides a smooth and secure connection, even on weak networks like hotspots or public Wi-Fi.

free download DeskInDeskIn for Android-PC Connection

📌 How DeskIn Helps Android PC Remote Connection

  • Remote Control: Fully control your Android device or PC from another device, with support for touch gestures, keyboard input, and game controllers.

  • File Transfer: Transfer large files at speeds up to 12MB/s, with no restrictions on file type or size.

  • Cross-Platform Access: Connect across all major systems — Android, iOS, Windows, and macOS — and even use your tablet or phone as a second screen.

  • Privacy Protection: Includes privacy screen mode, device access management (blacklist/whitelist), and email verification for added security.

  • Extra Tools: Features like virtual screens, remote camera access, multi-screen expansion, and real-time screen mirroring make it ideal for power users, creators, and travelers.

All these sparkling features have made DeskIn the best remote software for Windows PC and mobile phones. Now, let's see how to connect mobile to laptop using DeskIn within easy-handling steps.

Step 1. Download and Install DeskIn

Go to the official DeskIn website on both your Android phone and your PC. Download the appropriate version for each device and complete the installation process.

free download DeskIn

Step 2. Create and Sign In to Your DeskIn Account

Open the DeskIn app on both devices and sign in using the same account. For new users, Deskin now offers free trial with no time limits. Just register with your email address.

Step 3. Link Devices and Choose Connection Mode

Once signed in, you'll see the device ID and the password of your Android device. Input them on your PC, and once the mobile phone and your laptop are successfully connected, you can then explore the features under Connection:

  • Remote Control – Fully control your PC or Android remotely from another device.

  • File Transfer – Send files like docoments and photos quickly between devices.

  • Screen Sharing – Mirror your screen - Android or PC - in real-time.

 Insert Device ID and Password on DeskIn

Step 4. Start the Connection

Click on the function you want to use, and follow the prompts to initiate the session. DeskIn will automatically establish a secure connection. Depending on your needs, you can enable extra features like virtual screen, privacy mode, or remote camera within the app settings.

free download DeskIn

For steps to transfer files, do check: How to Transfer Large Files from PC remotely?

Remotely Connect Windows PC and Android Phone

If you want to connect your Android phone to a PC wirelessly, the Microsoft Phone Link app provides a native solution that's great for syncing messages, calls, and media, especially useful for people who frequently switch between devices.

Before you start, make sure your PC is updated to Windows 10 (October 2018 update or later) or Windows 11, your Android device is running Android 7.0 or newer, and both devices are connected to the same Wi-Fi network.

Step 1. On your Windows 10 or 11 PC, open or install the Phone Link app (preinstalled on most devices).

Step 2. On your Android phone, download the Link to Windows app from Google Play. Some phones (like Samsung Galaxy) may already have it built-in.

Step 3. Open both apps, then sign in with your Microsoft account or scan the QR code shown on your PC to pair the devices.

Step 4. Once paired, you can view and respond to texts, check notifications, view recent photos, and even make phone calls directly from your PC.

Connect Android to PC via Phone Link

📌 Limits or Shortcomings:

  • It does not support full file explorer access (you can view recent photos, but not browse entire folders).

  • No support for remote control or screen mirroring, unless you're using select Samsung or Surface Duo devices with additional integration features.

  • Can't be used for large file transfers — for that, a great third-party app offers more flexibility. Please read on to explore.

Part 2. Connect Android Devices to Nearby PCs (2 Common Ways)

The most common ways to connect Android devices to a PC are still the traditional ones — using a USB cable or Microsoft's built-in Phone Link app. These methods are easy to set up and are ideal for transferring files, viewing notifications, or syncing basic data between devices.

Way 3. Using a USB Cable

Connecting your Android phone to a PC using a USB cable is one of the simplest and most reliable methods. It allows high-speed data transfer without needing an internet connection, and it works on virtually all Android and Windows devices.

Here's how to connect Android to PC via USB:

Step 1. Use a compatible USB cable (preferably the original one) to connect your Android phone to your PC.

Step 2. On your phone, a prompt will appear. Tap "Charging this device via USB", then choose "File Transfer" (MTP) from the list of USB options.

Step 3. On your PC, open "File Explorer". Your Android device will appear under "Devices and Drives."

Step 4. Click on the device to browse internal storage or SD card, then drag and drop files between devices.

Fail to transfer large files with USB?

Using USB cable is slow and prones to failure. Why not try Deskin? The remote access software offers fast and reliable file transfers. It is perfect for transferring sensitive documents and photos. Try it now with a FREE trial!

free download DeskInConnect Android to PC via USB Cable

Fixes: Why is my phone not connecting to PC through USB?

If your Android phone isn't connecting to your PC, this may be your your computer not detecting android phone.

  1. Ensure Your USB cable is working. Or try a different USB cable and port.

  2. Check if the USB mode on your phone is set to "File Transfer" (MTP), and try restarting both devices.

  3. If you're using a wireless connection, ensure both devices are on the same Wi-Fi network.

📌 Tips & Common Issues:

  • Connection not showing? Swipe down your notification panel and manually select the USB mode.

  • Can't connect to pc? Try a different USB port or cable, especially if using a third-party charger.

  • Drivers not installed? Windows may need to install Android USB drivers automatically. If not, check the manufacturer's website.

Way 4. Using Bluetooth for Sending Small Files

If you want to connect your mobile phone to laptop to transfer files between the two devices at work, Bluetooth is an excellent option. Bluetooth file transfer supports documents (PDF, Word, PPT), audio, photos, and short videos. Generally, it can transfer files at speeds of 1-3 MB/s.

It requires no cables and is easy to connect. Here's how to connect android phone to pc via Bluetooth.

Step 1. Turn on Bluetooth on Both Android and Windows

Turn on Bluetooth on your Android. Then, go to Setting > Add Bluetooth or other devices. Toggle on the Bluetooth on Windows.

Turn on Bluetooth on Windows PC

Step 2. Pair Android Phone to PC via Bluetooth

Click Add Device > Bluetooth on PC. Confirm that the pairing code on your computer matches the one on your phone. If it does, click Connect on both devices.

Add a Device via Bluetooth

Step 3. Transfer Files between Android & PC via Bluetooth

To transfer files to your Android over Bluetooth, right-click the Bluetooth icon, then choose Send a File or Receive a File. Select your Android from the list of available Bluetooth devices.

Browse for the file you want to transfer to your Android, you can transfer music, photos, documents between the Android and computer. Then choose Open > Next. Windows should transfer the files to your Android.

Click Send or Receive Files via Bluetooth

[Fixes]: Android can't connect to pc bluetooth? Try the fixes below!

Error 1: Why am I not able to transfer files from phone to laptop via Bluetooth?

Make sure the device that files will be sent from appears and shows as Paired.

Keep the window open and confirm you want to receive a file via Bluetooth whenever you want to send a file to the PC.

The process isn't as automatic and fast as remote desktop apps. If you need a better solution to solve this issue, consider DeskIn, the best remote desktop software. Use its free version to transfer files immediately!

free download DeskInPC not Receiving Files via Bluetooth

✍️ Related Reading: How to Send Sensitive Documents & Files via Email

Quick Comparison: 4 Ways for Android to PC Connection

Now that you've learned about DeskIn and its powerful features, let's take a moment to compare it with other traditional methods of connecting Android to PC. Below is a detailed table that outlines the pros and cons of each connection method, helping you make an informed choice based on your needs and preferences.

Method

Speed

Ease of Use

Security

File Limits

Extra Features

DeskIn

High (up to 12MB/s)

Very High (easy setup, no cables)

High (email verification, privacy mode)

None (unlimited size)

Remote control, 2nd screen, virtual screen, remote camera, cross-platform support, etc.

Microsoft Phone Link

Medium (dependent on Wi-Fi)

High (easy setup with Microsoft account)

High (Microsoft account security)

Yes (limited file types)

Call, SMS, media sync, notifications on PC

USB Cable

High (up to 5 Gbps)

Moderate (requires cable)

High (no internet required)

None (direct access)

Direct file access, reliable for large transfers

Bluetooth

Slow

Moderate

High

Yes (limited file types)

No extra features


FAQs About Connecting Android Phone to PC/Computer

How to connect android phone to PC without USB cable?

Here are two ways to share files. One is using Bluetooth. Bluetooth file transfer is common and can transfer files, music, and documents. However, it's relatively slow and unsuitable for large files.

Therefore, Method 2 is more recommended: using remote desktop access software. This type of software provides fast file transfer capabilities, easily handles large files, and also offers remote screen sharing, making collaboration much easier and more efficient. Choose remote access tools for better performance and flexibility.

free download DeskIn

Can I use my Android phone as a second screen for my PC?

Yes, with DeskIn, you can easily use your Android phone as a second screen for your PC. This can help boost productivity by providing extra screen space for multitasking.

How can I transfer large files from Android to PC?

If you're transferring large files, DeskIn offers a fast and secure way to move files at speeds up to 12MB/s without file size restrictions. However, using a USB cable or Microsoft Phone Link may be slower and have file size limits. DeskIn supports drag-and-drop transfers for large files, including folders, videos, and documents, all at high speed without size or format restrictions.

Conclusion

There are several methods available to connect your Android phone to your PC, each catering to different needs. While USB cables and Microsoft Phone Link are great for basic tasks like file transfers and syncing messages, they have their limitations in terms of flexibility and advanced functionality.

For a seamless, all-in-one solution that offers full control, fast transfers, and cross-device productivity, DeskIn stands out as the best option. Whether you're working remotely, gaming, or managing files, DeskIn provides a smooth and powerful experience across all devices. Give it a try, unlock its range of features, and connect Android to PC to boost your work and play right away!

free download DeskIn

Play x Work
All at Once

Black Friday SALE
70% OFF

Black Friday SALE 70% OFF

DeskIn Remote Game

only $14.32 USD 🎉 Limited on July 16-31

Add promo code: deskinsummer1

Performance Plan

Only $12.5/Month

Include Root-Free Android Control
👉 Use Promo Code [DESKIN50]

Performance Plan Only $12.5/Month

Include Root-Free Android Control
👉 Use Promo Code [DESKIN50]

How to Connect Android to PC

Table of Contents

Black Friday SALE
70% OFF

Performance Plan

Only $12.5/Month

Include Root-Free Android Control
👉 Use Promo Code [DESKIN50]

What’s next?

what is vnc

PRODUCTIVITY

What Is VNC? A Complete Guide to Remote Desktop Control Technology

VNC (Virtual Network Computing) is a widely used remote desktop technology that allows users to operate another computer over the internet as if physically present. It is commonly applied in remote work, IT maintenance, and cross-platform collaboration. This article explains VNC’s working principles, pros and cons, comparisons with other protocols, and introduces a powerful and secure alternative — DeskIn — to help you find the best remote desktop solution.

What Is VNC?

 What Is VNC

VNC is a graphical remote desktop technology that enables users to connect to and control another computer from anywhere via the internet. Its core concept relies on screen transmission and input feedback — your keyboard and mouse operations are sent to the remote computer in real time, while its screen updates are returned to your device.

VNC is built on two components:

  • VNC Server – Installed on the controlled machine. It captures the screen and sends image data to the client.

  • VNC Viewer – Installed on the user’s device. It displays the remote screen and sends back keyboard/mouse actions.

Communication between these two components is handled through the RFB (Remote Frame Buffer) protocol, which enables cross-platform control across Windows, macOS, Linux, and more. Users only need the remote device’s IP address or access code to establish a connection.

Because VNC is open-source, multiple variants exist — RealVNC, TightVNC, UltraVNC, and others — used widely for enterprise support, server maintenance, and training. However, classic VNC has limitations in speed and security, so later sections cover how it compares to other protocols and why modern alternatives like DeskIn perform better.

free download DeskIn

What Is a VNC Client (VNC Viewer)?

VNC Viewer is the client-side application used to connect to and operate a computer running VNC Server. With it, users can view the remote desktop in real time and control it with their mouse and keyboard as if sitting in front of it.

It is available on Windows, macOS, Linux, iOS, and Android, making it suitable for remote IT support, server management, and online instruction. In most VNC tutorials, the user only needs to enter the remote host’s IP address or access code to establish a secure connection — making VNC a lightweight, cross-device remote desktop solution.

What Is a VNC Server?

VNC Server runs on the machine being controlled. It handles incoming viewer requests, transmits screen data, and processes input commands — essentially the core of the remote desktop system.

In Linux environments, commonly used VNC server programs include TigerVNC, RealVNC, and TightVNC, which can be started and configured via terminal commands. On Windows, users can enable and manage access rights through a graphical interface. Once properly installed and configured, remote users can securely log in and control the device over the network.

How VNC Works & the RFB Protocol

VNC operates through the RFB (Remote Frame Buffer) protocol, which works by compressing pixel data from the server’s screen and transmitting it to the client, while returning mouse and keyboard input back to the server.

Because only screen images and input are transmitted — not full system data — VNC can work across different operating systems and is widely used in remote management and technical support scenarios.

VNC vs. RDP: Similarities and Differences

VNC vs RDP

When choosing a remote desktop solution, VNC and RDP (Remote Desktop Protocol) are the most frequently compared technologies. Both allow remote operation, screen sharing, and maintenance tasks, but their architectures differ significantly.

Similarities

  • Remote control: both allow remote login and operation

  • Screen sharing: display the desktop in real time for support and collaboration

  • Secure connection: both can use encryption and authentication

Differences

  • Protocol: VNC uses RFB to transmit pixel data; RDP reconstructs the desktop using Microsoft's protocol, providing higher performance

  • Cross-platform: VNC supports Windows, macOS, Linux, iOS, and Android; RDP is mainly designed for Windows

  • Performance: RDP performs better on low-bandwidth networks; VNC may experience delays

  • Openness: VNC is open-source and customizable; RDP is closed but stable

If you value cross-platform flexibility, choose VNC. If you need high performance and Windows integration, choose RDP.

Why Linux Remote Desktops Commonly Use VNC

VNC’s open-source nature, lightweight footprint, and cross-platform compatibility make it a go-to solution for Linux remote desktops. It works across nearly all Linux distributions and connects smoothly with Windows, macOS, and mobile systems. Through RFB, users can remotely view and operate Linux desktops for system maintenance, server management, or development work — making VNC a widely adopted choice among Linux users.

VNC Limitations & Security Issues

Though VNC offers flexibility, it has clear limitations regarding security and network performance. Some versions lack built-in encryption, leading to increased risks during cross-network access. Understanding these issues — and deploying protective measures — is essential for safe use.

Common Security Issues & Best Practices

Common security risks:

  • Weak or reused passwords susceptible to brute-force attacks

  • Unencrypted transmissions vulnerable to interception

  • Open ports exposed to network scanning attacks

Recommended protections:

  • Use strong passwords, rotate them regularly, and enable 2FA

  • Tunnel VNC through SSH or a VPN to encrypt traffic

  • Restrict allowed IP addresses and close unused ports

  • Enable TLS/SSL encryption when available

These steps significantly reduce security threats and ensure safer remote desktop usage.

Cross-Network Challenges & Solutions

When accessing VNC across different networks, users may experience:

Common challenges:

  • Slow speeds causing lag or frozen screens

  • Packet loss affecting stability

  • Firewall or router rules blocking the connection

Solutions:

  • Use port forwarding to open a direct communication path

  • Use VPN or SSH tunnels for encrypted and reliable connection

  • Choose a cloud-relay solution like DeskIn for stable cross-network performance

    free download DeskIn

These methods can noticeably improve VNC’s usability across varied network environments.

Best VNC Alternative — DeskIn

 Best VNC Alternative — DeskIn

If you need a more powerful and smoother remote desktop solution, DeskIn is the top alternative to VNC. It delivers high performance, cross-platform support, and ease of use for individuals and businesses alike.

DeskIn supports 4K 60FPS / 2K 144FPS with adjustable resolution and under 40ms latency, providing smooth performance even for gaming or video editing. Its stable server connection and multi-monitor support ensure a seamless experience. DeskIn works on Windows, macOS, Android, iOS, and even offers a Web client for browser-based access.

Additional features such as voice chat, high-speed file transfer (12MB/s), screen mirroring & extension, remote power control, and more are all free. Gamers can use game mode, 3D perspective, controller support, and custom mobile key mappings for PC games.

Overall, DeskIn surpasses classic VNC in image quality, stability, and usability, making it ideal for work, teaching, or entertainment.

DeskIn Key Features & Advantages

As an efficient VNC alternative, DeskIn delivers a smoother and more secure remote desktop experience. Its key advantages include:

  • High quality & low latency: Up to 4K60FPS / 2K144FPS with <40ms latency

  • Cross-platform & multi-monitor: Works across Windows/macOS/iOS/Android, plus Web access

  • Fast connection & file transfer: Stable server relay and 12MB/s transfer speed

  • Full control features: Remote power control, voice chat, whiteboard, remote printing, screen extension

  • Easy to use & centrally managed: Intuitive UI and multi-device management for teams

  • Gaming & privacy modes: Game mode, 3D view, and privacy protections

  • Advanced security: End-to-end encryption, dynamic authentication, and permission controls

Compared with traditional VNC, DeskIn is easier, smoother, and more secure — ideal for business collaboration, IT maintenance, and entertainment.

DeskIn Remote Access Tutorial: 4 Easy Steps

Step 1: Download and install DeskIn

Install DeskIn on both the host and controller devices. Setup takes 1–2 minutes with no advanced configuration.

free download DeskIn

Step 2: Register or log in

Launch DeskIn and sign up using email, Google, or Apple. If you already have an account, simply log in.

Register or log in to DeskIn

Step 3: Get the device code & password

On the target computer, copy the “device code” and “temporary password,” then paste them into the controller device.

Step 4: Start remote control

Click “Connect,” and within seconds, your remote session begins.

Obtain device code and password

FAQs

Is VNC free?

Both open-source and commercial versions exist. Open-source versions (RealVNC, TightVNC) are free but limited, while commercial versions include encryption and support. For a more stable and complete experience, consider a high-performance alternative like DeskIn.

free download DeskIn

Is VNC secure?

Security depends on how it’s configured. Use strong passwords, VPN or SSH tunnels, and proper firewall rules. If you need higher-grade security, DeskIn offers end-to-end encryption, allow/deny lists, connection verification, and granular permission control.

How do I use VNC?

Install VNC Server on the host, use VNC Viewer on the client, then enter the IP address and authentication details to connect.

Can VNC transfer files?

Some VNC variants support file transfer, but speeds are slow and unstable. DeskIn offers 12MB/s high-speed transfer — better for collaboration and device management.

Conclusion

VNC is a reliable remote desktop solution known for being open-source, flexible, and cross-platform. However, it has clear limits in encryption and cross-network performance. For users who need higher image quality, lower latency, and stronger features, DeskIn is an ideal alternative — offering 4K quality, stable connections, and comprehensive multi-device support.

Download DeskIn now and experience a stable, low-latency remote desktop connection that boosts your productivity!

free download DeskIn

PRODUCTIVITY

How to Play Xbox Games on Your Phone Easily (Full Guide)

The old-school debate of PC vs console will never truly die, but modern gaming has transformed the way we play. Today, players want freedom: play anything, anywhere, using any device. PC? Powerful. Console? Iconic. Smart rigs? Trust us—we’ve seen setups much wilder than that.

Thanks to Xbox Remote Play, you don’t even need to sit in front of your TV anymore. You can stream your Xbox One, Series X, or Series S directly to your mobile device—whether it’s a phone, tablet, or even a laptop.

If you’ve ever wondered how to play Xbox games on your phone, this guide walks you through everything you need. No fluff, no jargon—just clear, actionable steps.

What Is Xbox Remote Play? (Quick Overview)

Xbox Remote Play is a feature that lets you stream your Xbox console to another device over the internet or local network.
This allows you to:

  • Play Xbox games on your phone

  • Access your Xbox anywhere within your home

  • Continue gaming even when someone else is using the TV

  • Stream gameplay from your console to a tablet or laptop

It’s important to note: Remote Play is not cloud gaming. You’re streaming from your actual console, so your Xbox must be powered on (or in Sleep mode).

Step 1: Check the Requirements for Xbox Remote Play

Before you start, make sure your device and network meet Xbox’s recommended setup for smooth gameplay.

Supported Devices

To play Xbox on your phone, you’ll need:

  • Android 6.0+

  • iOS 10+

  • Windows 10 or 11

For tablets:

  • iPadOS 10+

  • Android Tablets 6.0+

Internet Requirements

Remote Play relies heavily on network stability. Xbox recommends:

  • Minimum upload speed: 4.75 Mbps

  • Recommended upload speed: 9 Mbps

  • Network: 5 GHz Wi-Fi

  • Best performance: Xbox connected via Ethernet

Even if your phone supports the app, an unstable network can still result in lag or low-quality streaming.

Other Compatibility Notes

  • Works with Xbox Series X|S and Xbox One

  • Instant-On / Sleep Mode must be active

  • Some backward-compatible games cannot be streamed to mobile devices

Once you’ve confirmed your setup meets these requirements, it’s time to configure your console.

Step 2: Set Up Xbox Remote Play on Your Console

xbox remote play

To start using Xbox Remote Play, follow these steps on your Xbox:

1. Open Settings

Go to Settings > Devices & connections > Remote features

2. Enable Remote Features

Check the box labeled Enable remote features

3. Test Your Setup

Select Test remote play to ensure your console is ready

4. Manage Access Permissions

If multiple people use the console, choose who can connect:

  • Any device

  • Only the logged-in profile

  • No remote access

5. Set Power Mode to Sleep

how to play xbox games on mobile

Go to:
Settings > General > Power options > Sleep

This ensures your console is always ready to stream—even when it looks “off.”

Step 3: How to Play Xbox Games on Phone Using the Xbox App

play xbox on your phone

Now for the exciting part—playing your Xbox directly on your phone.

1. Install the Xbox App

Download from:

2. Sign in with Your Xbox Account

Use the same Microsoft account connected to your console.

3. Connect Your Console

Inside the app:

  • Go to My Library

  • Select Consoles

  • Tap your Xbox

4. Start Remote Play

Choose Remote Play on this device
Tap Continue

5. Pair a Controller (Optional but Recommended)

Most games require a controller. You can connect via:

  • Bluetooth

  • USB-C

  • Xbox Wireless Controller (Bluetooth-supported)

If you’re just testing, you may tap Continue without controller, but expect limited functionality.

Your Xbox UI should now appear on your phone screen—fully playable.

Step 4: What to Do If Xbox Remote Play Doesn’t Work Smoothly

Even though Xbox Remote Play is great, it has real-world limitations:

Common Remote Play Issues

  • macOS isn’t supported natively

  • Some Android versions can’t install the app

  • Lower-end phones may lag or downscale video quality

  • Wi-Fi fluctuation causes stutters

  • Latency spikes in crowded networks

If you’re running into any of these problems, don’t worry—there’s a solution.

Step 5: Improve Your Setup Using DeskIn (Recommended)

DeskIn is an additional remote-access tool that enhances your Xbox Remote Play experience. It doesn’t replace Remote Play—it strengthens it.

Here’s why DeskIn + Xbox Remote Play is a powerful combination.

Why DeskIn Makes Xbox Remote Play Better

1. Enables Xbox Streaming on Unsupported Devices

Since Xbox Remote Play doesn’t support macOS, you can:

  1. Run Xbox App on Windows

  2. Stream your PC screen to your mac using DeskIn


    free download DeskIn

Result: You can play Xbox on macOS, smoothly.

2. Perfect for Phones With Weak Hardware

If your phone struggles to handle Remote Play:

This shifts all the heavy processing to your computer.

3. More Stable Video Streaming

DeskIn provides:

  • Faster video encoding

  • Adaptive bitrate

  • Lower latency

  • More stable sessions on weak Wi-Fi

Great for homes with multiple users sharing bandwidth.

4. Universal Compatibility

DeskIn works across:

  • Android

  • iOS

  • Windows

  • macOS

No more worrying about device restrictions.

5. Multi-Use Functionality

DeskIn isn’t just for gaming:

  • Access your PC remotely

  • Manage files

  • Work + play on the go

One tool, multiple benefits.

Final Thoughts

Learning how to play Xbox games on your phone is easier than ever thanks to Xbox Remote Play. With just a few setup steps, your phone becomes a compact Xbox screen.

And if you want even more stability or flexibility, adding DeskIn unlocks support for more devices, better streaming, and lower latency.

free download DeskIn
iPhone Screen Mirroring Output Not Found?

PRODUCTIVITY

iPhone Screen Mirroring Output Not Found? Causes and Complete Fixes

When you try to cast your iPhone screen to a TV or computer but see the message “Screen Mirroring Output Not Found,” it can be frustrating. Many users report that the screen mirroring button doesn’t appear in Control Center or that their iPhone says “No Device Found.” This is a common iPhone screen mirroring output issue — usually related to network connection, device compatibility, or iOS version changes.

Before troubleshooting, let’s clarify what AirPlay is: it’s Apple’s wireless display technology that allows you to mirror your iPhone screen to a TV or Mac to share videos, photos, or presentations. However, if you’re using an iPhone 16 or older model, system setting changes might cause your iPhone to fail in finding available devices for mirroring.

This article will walk you through all the possible causes and fixes — whether you’re trying to connect wirelessly via Wi-Fi or mirror your iPad to a computer — and introduce DeskIn, the ultimate alternative tool that helps you complete screen mirroring smoothly.

Common Reasons Why iPhone Screen Mirroring Output Can’t Be Found

When mirroring your iPhone screen to a TV or Mac, if you see messages like “Unable to connect” or “No device found,” it usually means AirPlay or the network environment has encountered a problem. Common reasons include a missing mirroring button in Control Center, unsupported devices, or AirPlay connection issues with your TV.

Some users also notice lagging or the “spinning” issue when mirroring to a Mac, or even messages like “Mac screen mirroring output not found.” These often relate to firewall settings, Wi-Fi interference, or outdated iOS versions. If AirPlay can’t find your device or the connection keeps failing, keep reading — we’ll cover each cause and its solution in detail.

1. No Screen Mirroring Button in Control Center

If the screen mirroring button doesn’t appear in Control Center, the feature may not be enabled. Go to Settings > Control Center > Customize Controls and manually add “Screen Mirroring.” This solves the issue of iPhone screen mirroring settings not showing up.

For more details on controlling your Mac, see our guide:
How to Control a Mac Remotely with an iPhone – Full Step-by-Step Tutorial!

2. No Available Devices Found

If AirPlay can’t detect your TV or other devices, it’s often because they aren’t on the same Wi-Fi network or AirPlay isn’t enabled on the target device. Ensure your TV supports AirPlay and that your iPhone, TV, Mac, or Apple TV are all connected to the same Wi-Fi network to complete mirroring successfully.

Device Does Not Support AirPlay

If your iPhone can’t find a screen mirroring output, it could be due to device incompatibility. Below are common cases and recommendations:

  • iPhone 15 / 14 / 13 Series: Supports AirPlay 2, compatible with most smart TVs (Samsung, LG, Sony, etc.).

  • iPhone 12 / 11 / XS / XR Series: Requires iOS 16 or above and must be connected to the same Wi-Fi network; otherwise, devices may not appear.

  • iPhone 8 / 7 / 6 Series: Some newer TVs use protocols unsupported by older iPhones. Use a Lightning-to-HDMI cable or a third-party app like DeskIn.

  • Recommended Smart TV Brands: Samsung, LG, Sony, Panasonic, and Philips support AirPlay 2. Some lower-end models require manually enabling “AirPlay” or “Screen Mirroring.”

If you’re using an older iPhone or a non-AirPlay TV, switch to DeskIn — it allows cross-platform screen casting without being on the same network and with lower latency.

4. Outdated iOS or Device Malfunction

If your iPhone 16 can’t find a mirroring output, the issue might be an outdated iOS or a device error. Go to Settings > General > Software Update to check for updates. If the issue persists after updating, restart your iPhone or reset network settings to rule out system malfunctions.

5. Network Interference or Firewall Blocking

If AirPlay fails to connect, your router, firewall, or antivirus software might be blocking the connection. Ensure both devices are on the same Wi-Fi network, then temporarily disable firewall or security software and try again.

If problems persist, switch to DeskIn, a remote collaboration tool that bypasses network restrictions and mirrors your iPhone screen to a Mac or TV — stably and smoothly, without lag or disconnection.

How to Fix the “iPhone Screen Mirroring Output Not Found” Issue

If your iPhone can’t find a mirroring output or keeps failing to connect, don’t panic — this usually isn’t a hardware issue. Follow these troubleshooting steps: restart both devices, verify they’re on the same Wi-Fi, re-add “Screen Mirroring” in Control Center, enable AirPlay, update iOS, and check firewall permissions.

If your iPhone or iPad shows no signal even when connected via HDMI, use DeskIn — a wireless projection tool that easily mirrors your iPhone to a computer or iPad.

1. Restart Devices

When you encounter the “Screen Mirroring Output Not Found” message, the simplest and most effective first step is to restart your iPhone and your TV, Mac, or projector. Rebooting clears temporary system errors, refreshes Wi-Fi and AirPlay connections, and solves most display issues. Then test screen mirroring again.

2. Ensure Devices Are on the Same Wi-Fi

If AirPlay can’t detect your TV or compatible display, ensure your iPhone and receiving device are connected to the same Wi-Fi network. AirPlay only works over a shared local network. Even if one device is on 5GHz and the other on 2.4GHz, they might fail to connect. Try reconnecting or resetting your router.

3. Re-add Screen Mirroring Option in Control Center

After certain iOS updates, users may notice the screen mirroring button disappears. Go to Settings > Control Center > Customize Controls, then re-add “Screen Mirroring.” This restores the quick-cast shortcut, allowing you to mirror your iPhone screen to a Mac, iPad, or TV instantly.

4. Enable AirPlay on the Receiving Device

Knowing what AirPlay is helps: it’s Apple’s wireless display protocol that sends your iPhone screen to a TV or Apple TV. If AirPlay isn’t enabled on the receiving end, your iPhone won’t detect it. Open your TV or Apple TV settings to enable AirPlay and ensure both devices share the same network.

5. Update iOS

If you’re using an older iOS version, check for updates. Outdated systems may cause “iPhone 16 Screen Mirroring Output Not Found” or unstable connections. Go to Settings > General > Software Update, then install the latest version to fix compatibility and improve AirPlay performance.

6. Check Firewall Settings

If AirPlay still can’t connect, a firewall or security program might be blocking communication. Temporarily disable your computer or router’s firewall for testing, or add AirPlay as an allowed app. Make sure ports TCP 7000–7100 are open so your iPhone can detect the receiving device.

Still Can’t Fix It? Try the Ultimate Solution: DeskIn

deskin iPhone screen share

If none of the above methods work and you still can’t mirror your iPhone screen to your TV or computer, it’s time for a more stable solution — DeskIn.

Often called the best iPhone remote access tool, DeskIn easily mirrors your iPhone screen to MacBook, Windows PC, or other devices — without depending on AirPlay or specific network conditions. It delivers Apple TV–level image quality with ultra-low latency, perfect for meetings, gaming, or multi-screen workflows.

DeskIn Key Features:

  • Ultra HD Quality: Supports up to 4K 60FPS and 2K 144FPS for crisp, fluid visuals.

  • Ultra-Low Latency: Less than 40ms, enabling real-time interaction without lag.

  • Cross-Platform Support: Works on Windows, macOS, iOS, Android, and even the web.

  • Full Mobile Control: Lets you both mirror your phone to your computer and remotely control your PC from your phone.

  • Feature-Rich Free Plan: Includes screen projection, voice chat, and file transfer at no cost.

  • Fast and Stable Connection: 200+ global acceleration nodes automatically select the best route for uninterrupted performance.

Whether you’re remotely operating a Mac or sharing screens across devices, DeskIn provides smooth, wireless transmission — the most flexible and efficient AirPlay alternative available today.

How to Use DeskIn for iPhone Screen Mirroring

To mirror your iPhone to a Windows PC, MacBook, iPad, or Android device, there’s no need to rely on AirPlay. DeskIn lets you complete the connection quickly across platforms.

Steps:

  1. Download & Log In: Install DeskIn on both your iPhone and computer (e.g., MacBook). Sign up and log in.

    free download DeskIn
  2. Connect & Mirror: Open DeskIn on your Mac, click “Mirror / Extend Screen,” then scan the QR code using your iPhone.

    use deskin to screen mirroring
  3. Start Mirroring: Tap “Start Projection” to instantly display your iPhone screen on your computer.

    start mirroring iphone via deskin

You can also check out these related guides:

Common Questions About Apple Screen Mirroring

1. Why can’t my iPhone mirror its screen?

Common reasons include unstable Wi-Fi, unsupported devices, or blocked connections by firewalls. If your iPhone can’t find any mirroring output, restart both devices and ensure they’re on the same network. If that fails, use DeskIn, which supports wireless mirroring to Mac, PC, iPad, and Android.

2. Where is the iPhone screen mirroring option?

Open Control Center and tap Screen Mirroring (or “Screen Cast” on some iOS versions). If it’s missing, go to Settings > Control Center and add it manually. This function works with Apple TV or AirPlay-enabled smart TVs.

3. Why can’t AirPlay connect to my TV?

If AirPlay shows “No Device Found,” ensure your TV and iPhone share the same Wi-Fi and that your software is up to date.

4. How can I mirror my iPhone to a TV?

You can use AirPlay, an HDMI adapter, or third-party apps. If your iPhone-to-HDMI connection doesn’t respond, try using an official Lightning adapter. For wireless projection to computers or tablets, DeskIn lets you mirror iPhone → PC → iPad easily — without cables.

Conclusion: Fix iPhone Screen Mirroring Output Issues for a Smoother Casting Experience

When you encounter issues like “iPhone Screen Mirroring Output Not Found,” “AirPlay Connection Failed,” or “Unable to Connect,” most can be solved by restarting devices, checking the Wi-Fi network, and updating iOS.

If none of these work, your device may be incompatible or limited by AirPlay restrictions. In that case, try DeskIn, which makes iPhone-to-computer projection effortless. DeskIn not only supports cross-platform connections with low latency but also works stably even without an internet connection — making it a more flexible and seamless alternative to AirPlay.

Download DeskIn now and experience smoother, more reliable iPhone screen mirroring!

free download DeskIn
what is vnc

PRODUCTIVITY

What Is VNC? A Complete Guide to Remote Desktop Control Technology

VNC (Virtual Network Computing) is a widely used remote desktop technology that allows users to operate another computer over the internet as if physically present. It is commonly applied in remote work, IT maintenance, and cross-platform collaboration. This article explains VNC’s working principles, pros and cons, comparisons with other protocols, and introduces a powerful and secure alternative — DeskIn — to help you find the best remote desktop solution.

What Is VNC?

 What Is VNC

VNC is a graphical remote desktop technology that enables users to connect to and control another computer from anywhere via the internet. Its core concept relies on screen transmission and input feedback — your keyboard and mouse operations are sent to the remote computer in real time, while its screen updates are returned to your device.

VNC is built on two components:

  • VNC Server – Installed on the controlled machine. It captures the screen and sends image data to the client.

  • VNC Viewer – Installed on the user’s device. It displays the remote screen and sends back keyboard/mouse actions.

Communication between these two components is handled through the RFB (Remote Frame Buffer) protocol, which enables cross-platform control across Windows, macOS, Linux, and more. Users only need the remote device’s IP address or access code to establish a connection.

Because VNC is open-source, multiple variants exist — RealVNC, TightVNC, UltraVNC, and others — used widely for enterprise support, server maintenance, and training. However, classic VNC has limitations in speed and security, so later sections cover how it compares to other protocols and why modern alternatives like DeskIn perform better.

free download DeskIn

What Is a VNC Client (VNC Viewer)?

VNC Viewer is the client-side application used to connect to and operate a computer running VNC Server. With it, users can view the remote desktop in real time and control it with their mouse and keyboard as if sitting in front of it.

It is available on Windows, macOS, Linux, iOS, and Android, making it suitable for remote IT support, server management, and online instruction. In most VNC tutorials, the user only needs to enter the remote host’s IP address or access code to establish a secure connection — making VNC a lightweight, cross-device remote desktop solution.

What Is a VNC Server?

VNC Server runs on the machine being controlled. It handles incoming viewer requests, transmits screen data, and processes input commands — essentially the core of the remote desktop system.

In Linux environments, commonly used VNC server programs include TigerVNC, RealVNC, and TightVNC, which can be started and configured via terminal commands. On Windows, users can enable and manage access rights through a graphical interface. Once properly installed and configured, remote users can securely log in and control the device over the network.

How VNC Works & the RFB Protocol

VNC operates through the RFB (Remote Frame Buffer) protocol, which works by compressing pixel data from the server’s screen and transmitting it to the client, while returning mouse and keyboard input back to the server.

Because only screen images and input are transmitted — not full system data — VNC can work across different operating systems and is widely used in remote management and technical support scenarios.

VNC vs. RDP: Similarities and Differences

VNC vs RDP

When choosing a remote desktop solution, VNC and RDP (Remote Desktop Protocol) are the most frequently compared technologies. Both allow remote operation, screen sharing, and maintenance tasks, but their architectures differ significantly.

Similarities

  • Remote control: both allow remote login and operation

  • Screen sharing: display the desktop in real time for support and collaboration

  • Secure connection: both can use encryption and authentication

Differences

  • Protocol: VNC uses RFB to transmit pixel data; RDP reconstructs the desktop using Microsoft's protocol, providing higher performance

  • Cross-platform: VNC supports Windows, macOS, Linux, iOS, and Android; RDP is mainly designed for Windows

  • Performance: RDP performs better on low-bandwidth networks; VNC may experience delays

  • Openness: VNC is open-source and customizable; RDP is closed but stable

If you value cross-platform flexibility, choose VNC. If you need high performance and Windows integration, choose RDP.

Why Linux Remote Desktops Commonly Use VNC

VNC’s open-source nature, lightweight footprint, and cross-platform compatibility make it a go-to solution for Linux remote desktops. It works across nearly all Linux distributions and connects smoothly with Windows, macOS, and mobile systems. Through RFB, users can remotely view and operate Linux desktops for system maintenance, server management, or development work — making VNC a widely adopted choice among Linux users.

VNC Limitations & Security Issues

Though VNC offers flexibility, it has clear limitations regarding security and network performance. Some versions lack built-in encryption, leading to increased risks during cross-network access. Understanding these issues — and deploying protective measures — is essential for safe use.

Common Security Issues & Best Practices

Common security risks:

  • Weak or reused passwords susceptible to brute-force attacks

  • Unencrypted transmissions vulnerable to interception

  • Open ports exposed to network scanning attacks

Recommended protections:

  • Use strong passwords, rotate them regularly, and enable 2FA

  • Tunnel VNC through SSH or a VPN to encrypt traffic

  • Restrict allowed IP addresses and close unused ports

  • Enable TLS/SSL encryption when available

These steps significantly reduce security threats and ensure safer remote desktop usage.

Cross-Network Challenges & Solutions

When accessing VNC across different networks, users may experience:

Common challenges:

  • Slow speeds causing lag or frozen screens

  • Packet loss affecting stability

  • Firewall or router rules blocking the connection

Solutions:

  • Use port forwarding to open a direct communication path

  • Use VPN or SSH tunnels for encrypted and reliable connection

  • Choose a cloud-relay solution like DeskIn for stable cross-network performance

    free download DeskIn

These methods can noticeably improve VNC’s usability across varied network environments.

Best VNC Alternative — DeskIn

 Best VNC Alternative — DeskIn

If you need a more powerful and smoother remote desktop solution, DeskIn is the top alternative to VNC. It delivers high performance, cross-platform support, and ease of use for individuals and businesses alike.

DeskIn supports 4K 60FPS / 2K 144FPS with adjustable resolution and under 40ms latency, providing smooth performance even for gaming or video editing. Its stable server connection and multi-monitor support ensure a seamless experience. DeskIn works on Windows, macOS, Android, iOS, and even offers a Web client for browser-based access.

Additional features such as voice chat, high-speed file transfer (12MB/s), screen mirroring & extension, remote power control, and more are all free. Gamers can use game mode, 3D perspective, controller support, and custom mobile key mappings for PC games.

Overall, DeskIn surpasses classic VNC in image quality, stability, and usability, making it ideal for work, teaching, or entertainment.

DeskIn Key Features & Advantages

As an efficient VNC alternative, DeskIn delivers a smoother and more secure remote desktop experience. Its key advantages include:

  • High quality & low latency: Up to 4K60FPS / 2K144FPS with <40ms latency

  • Cross-platform & multi-monitor: Works across Windows/macOS/iOS/Android, plus Web access

  • Fast connection & file transfer: Stable server relay and 12MB/s transfer speed

  • Full control features: Remote power control, voice chat, whiteboard, remote printing, screen extension

  • Easy to use & centrally managed: Intuitive UI and multi-device management for teams

  • Gaming & privacy modes: Game mode, 3D view, and privacy protections

  • Advanced security: End-to-end encryption, dynamic authentication, and permission controls

Compared with traditional VNC, DeskIn is easier, smoother, and more secure — ideal for business collaboration, IT maintenance, and entertainment.

DeskIn Remote Access Tutorial: 4 Easy Steps

Step 1: Download and install DeskIn

Install DeskIn on both the host and controller devices. Setup takes 1–2 minutes with no advanced configuration.

free download DeskIn

Step 2: Register or log in

Launch DeskIn and sign up using email, Google, or Apple. If you already have an account, simply log in.

Register or log in to DeskIn

Step 3: Get the device code & password

On the target computer, copy the “device code” and “temporary password,” then paste them into the controller device.

Step 4: Start remote control

Click “Connect,” and within seconds, your remote session begins.

Obtain device code and password

FAQs

Is VNC free?

Both open-source and commercial versions exist. Open-source versions (RealVNC, TightVNC) are free but limited, while commercial versions include encryption and support. For a more stable and complete experience, consider a high-performance alternative like DeskIn.

free download DeskIn

Is VNC secure?

Security depends on how it’s configured. Use strong passwords, VPN or SSH tunnels, and proper firewall rules. If you need higher-grade security, DeskIn offers end-to-end encryption, allow/deny lists, connection verification, and granular permission control.

How do I use VNC?

Install VNC Server on the host, use VNC Viewer on the client, then enter the IP address and authentication details to connect.

Can VNC transfer files?

Some VNC variants support file transfer, but speeds are slow and unstable. DeskIn offers 12MB/s high-speed transfer — better for collaboration and device management.

Conclusion

VNC is a reliable remote desktop solution known for being open-source, flexible, and cross-platform. However, it has clear limits in encryption and cross-network performance. For users who need higher image quality, lower latency, and stronger features, DeskIn is an ideal alternative — offering 4K quality, stable connections, and comprehensive multi-device support.

Download DeskIn now and experience a stable, low-latency remote desktop connection that boosts your productivity!

free download DeskIn

PRODUCTIVITY

How to Play Xbox Games on Your Phone Easily (Full Guide)

The old-school debate of PC vs console will never truly die, but modern gaming has transformed the way we play. Today, players want freedom: play anything, anywhere, using any device. PC? Powerful. Console? Iconic. Smart rigs? Trust us—we’ve seen setups much wilder than that.

Thanks to Xbox Remote Play, you don’t even need to sit in front of your TV anymore. You can stream your Xbox One, Series X, or Series S directly to your mobile device—whether it’s a phone, tablet, or even a laptop.

If you’ve ever wondered how to play Xbox games on your phone, this guide walks you through everything you need. No fluff, no jargon—just clear, actionable steps.

What Is Xbox Remote Play? (Quick Overview)

Xbox Remote Play is a feature that lets you stream your Xbox console to another device over the internet or local network.
This allows you to:

  • Play Xbox games on your phone

  • Access your Xbox anywhere within your home

  • Continue gaming even when someone else is using the TV

  • Stream gameplay from your console to a tablet or laptop

It’s important to note: Remote Play is not cloud gaming. You’re streaming from your actual console, so your Xbox must be powered on (or in Sleep mode).

Step 1: Check the Requirements for Xbox Remote Play

Before you start, make sure your device and network meet Xbox’s recommended setup for smooth gameplay.

Supported Devices

To play Xbox on your phone, you’ll need:

  • Android 6.0+

  • iOS 10+

  • Windows 10 or 11

For tablets:

  • iPadOS 10+

  • Android Tablets 6.0+

Internet Requirements

Remote Play relies heavily on network stability. Xbox recommends:

  • Minimum upload speed: 4.75 Mbps

  • Recommended upload speed: 9 Mbps

  • Network: 5 GHz Wi-Fi

  • Best performance: Xbox connected via Ethernet

Even if your phone supports the app, an unstable network can still result in lag or low-quality streaming.

Other Compatibility Notes

  • Works with Xbox Series X|S and Xbox One

  • Instant-On / Sleep Mode must be active

  • Some backward-compatible games cannot be streamed to mobile devices

Once you’ve confirmed your setup meets these requirements, it’s time to configure your console.

Step 2: Set Up Xbox Remote Play on Your Console

xbox remote play

To start using Xbox Remote Play, follow these steps on your Xbox:

1. Open Settings

Go to Settings > Devices & connections > Remote features

2. Enable Remote Features

Check the box labeled Enable remote features

3. Test Your Setup

Select Test remote play to ensure your console is ready

4. Manage Access Permissions

If multiple people use the console, choose who can connect:

  • Any device

  • Only the logged-in profile

  • No remote access

5. Set Power Mode to Sleep

how to play xbox games on mobile

Go to:
Settings > General > Power options > Sleep

This ensures your console is always ready to stream—even when it looks “off.”

Step 3: How to Play Xbox Games on Phone Using the Xbox App

play xbox on your phone

Now for the exciting part—playing your Xbox directly on your phone.

1. Install the Xbox App

Download from:

2. Sign in with Your Xbox Account

Use the same Microsoft account connected to your console.

3. Connect Your Console

Inside the app:

  • Go to My Library

  • Select Consoles

  • Tap your Xbox

4. Start Remote Play

Choose Remote Play on this device
Tap Continue

5. Pair a Controller (Optional but Recommended)

Most games require a controller. You can connect via:

  • Bluetooth

  • USB-C

  • Xbox Wireless Controller (Bluetooth-supported)

If you’re just testing, you may tap Continue without controller, but expect limited functionality.

Your Xbox UI should now appear on your phone screen—fully playable.

Step 4: What to Do If Xbox Remote Play Doesn’t Work Smoothly

Even though Xbox Remote Play is great, it has real-world limitations:

Common Remote Play Issues

  • macOS isn’t supported natively

  • Some Android versions can’t install the app

  • Lower-end phones may lag or downscale video quality

  • Wi-Fi fluctuation causes stutters

  • Latency spikes in crowded networks

If you’re running into any of these problems, don’t worry—there’s a solution.

Step 5: Improve Your Setup Using DeskIn (Recommended)

DeskIn is an additional remote-access tool that enhances your Xbox Remote Play experience. It doesn’t replace Remote Play—it strengthens it.

Here’s why DeskIn + Xbox Remote Play is a powerful combination.

Why DeskIn Makes Xbox Remote Play Better

1. Enables Xbox Streaming on Unsupported Devices

Since Xbox Remote Play doesn’t support macOS, you can:

  1. Run Xbox App on Windows

  2. Stream your PC screen to your mac using DeskIn


    free download DeskIn

Result: You can play Xbox on macOS, smoothly.

2. Perfect for Phones With Weak Hardware

If your phone struggles to handle Remote Play:

This shifts all the heavy processing to your computer.

3. More Stable Video Streaming

DeskIn provides:

  • Faster video encoding

  • Adaptive bitrate

  • Lower latency

  • More stable sessions on weak Wi-Fi

Great for homes with multiple users sharing bandwidth.

4. Universal Compatibility

DeskIn works across:

  • Android

  • iOS

  • Windows

  • macOS

No more worrying about device restrictions.

5. Multi-Use Functionality

DeskIn isn’t just for gaming:

  • Access your PC remotely

  • Manage files

  • Work + play on the go

One tool, multiple benefits.

Final Thoughts

Learning how to play Xbox games on your phone is easier than ever thanks to Xbox Remote Play. With just a few setup steps, your phone becomes a compact Xbox screen.

And if you want even more stability or flexibility, adding DeskIn unlocks support for more devices, better streaming, and lower latency.

free download DeskIn

Jangan ketinggalan.

Jangan ketinggalan.

Jangan ketinggalan.

Hubungi Kami

Email: support@deskin.io

Office: 991D Alexandra Road #02-17, Singapore 119972

Copyright © 2025 Zuler Technology PTE. LTD. All rights reserved.

Hubungi Kami

support@deskin.io

991D Alexandra Road #02-17

Singapore 119972

Copyright © 2025 Zuler Technology PTE. LTD. All rights reserved.

Hubungi Kami

Email: support@deskin.io

Office: 991D Alexandra Road #02-17, Singapore 119972

Copyright © 2025 Zuler Technology PTE. LTD. All rights reserved.