Productivity Hack: Use Remote Viewing to Work Anywhere

GA

/

10 minutes

/

Updated

1 Agu 2025

Let’s face it. We’re living in a world where “the office” could mean your apartment, a train seat, or even a hotel lobby. But what happens when your main computer is many miles away and you need a file or access to an app? What happens when you need a quick fix for a client problem?

Remote viewing comes right in there. It’s simple, incredibly useful, and — let’s be honest — a little sci-fi in the best way. With the right setup, you can access your main device from almost anywhere, without lugging all your gear around. This trick is worth learning for you, whether you are a digital nomad, a freelancer, a remote support tech, or just someone who forgets files.

What Is a Remote Viewing Tool?

So, what is remote viewing in tech?

A remote viewing tool lets you access and control another device (usually your primary desktop or laptop) over the internet from a different device. And it’s more than just watching a screen. You can interact with the system in real-time: open apps, type, click, edit, drag files around — you can even restart the remote computer. Unlike screen sharing, where you’re mostly limited to observing, remote viewing tools give you full control.

Here are a few popular options:

  • DeskIn – DeskIn connects both smoothly and also offers a modern interface. It is great for both professionals and creatives.

  • AnyDesk – Even though free versions can be limited, AnyDesk is popular, and it is easy to use.

  • Chrome Remote Desktop – Chrome Remote Desktop is a Browser-based remote access tool. It is also simple to set up.

For this guide, we will highlight DeskIn– our go-to remote access software for its fast speed, free plan, and also cross-platform compatibility.

Why Use Remote Viewing for Productivity?

Let’s break down how remote viewing makes your day-to-day work easier and more flexible.

Work from Anywhere

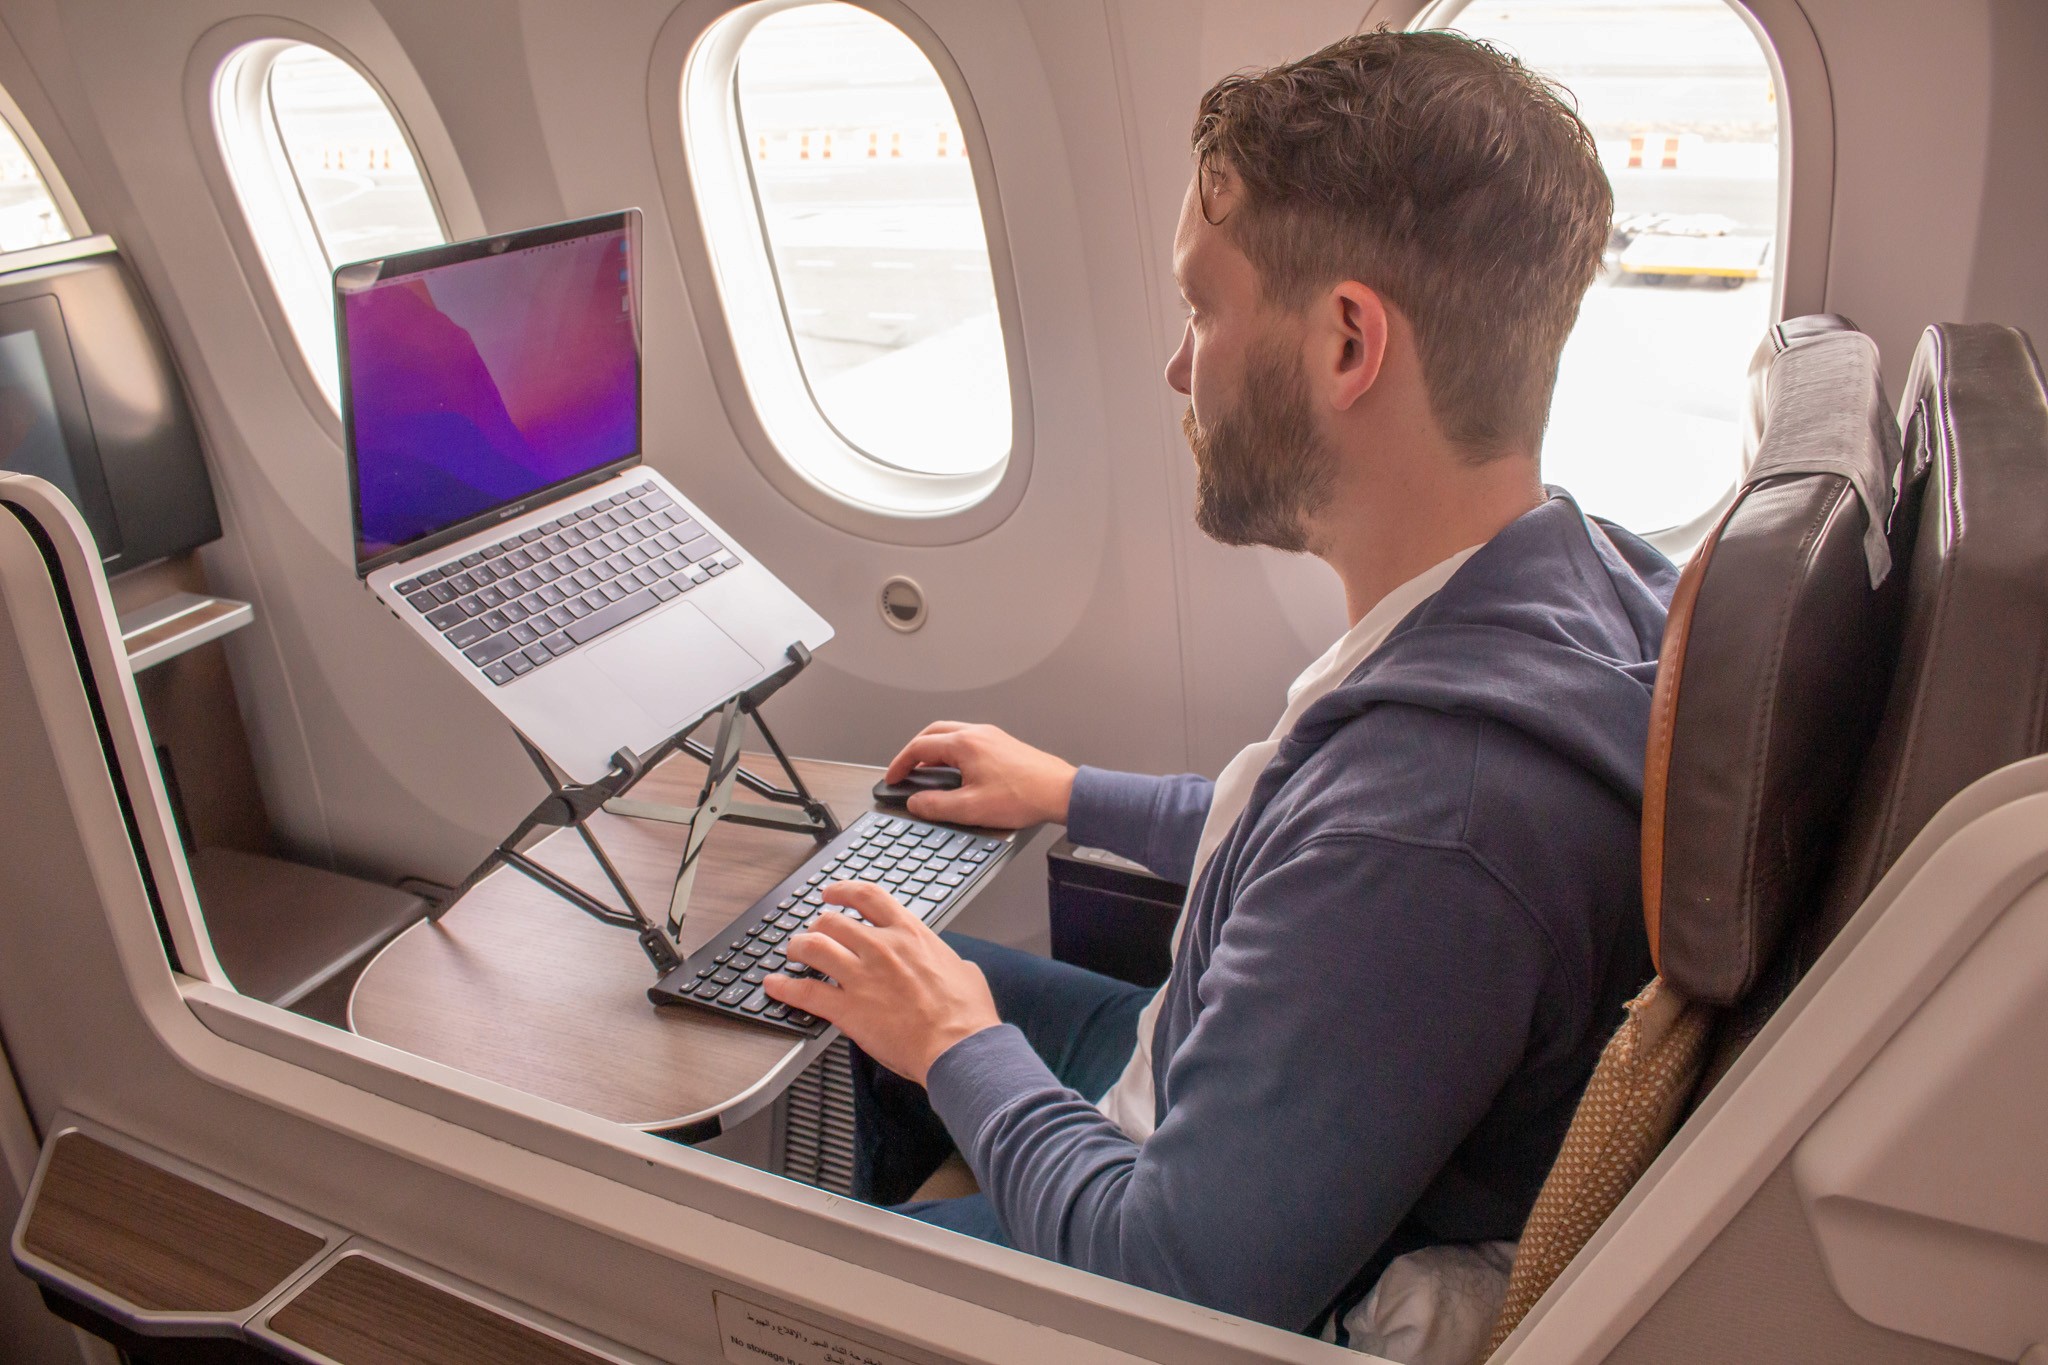
You can say goodbye to carrying a heavy laptop from now on. Your main workstation can stay safely at home while you work through another PC, smartphone, or tablet through remote viewing.

This setup lets you log in to your usual environment quickly and easily, whether you’re traveling, working from a coffee shop, or just in another room. You’ll have full access to all your files, programs, and settings without missing a beat.

It’s particularly useful for:

  • Freelancers on the move

  • Designers needing full desktop power through a lightweight tablet

  • Students accessing school projects from the library

Instant File Access

Deskin features

Ever had that “Oh no, it’s on my other laptop” moment? We’ve all been there — that heart-stopping second when you realize your pitch deck, that ultra-important client file, or even your half-finished design is stranded miles away on your home computer. With a remote tool, it doesn’t matter. Simply open up the app, and then connect to your computer. You are then able to grab whatever you need.

You can:

  • Transfer files between cross-systems.

  • Directly edit files on your remote desktop environment

  • Avoid emailing files back and forth to yourself

Want a quick mobile-focused guide? Learn how to access files on your computer from Android for fast on-the-go productivity.

Reduce Distraction

Sometimes, less is more.

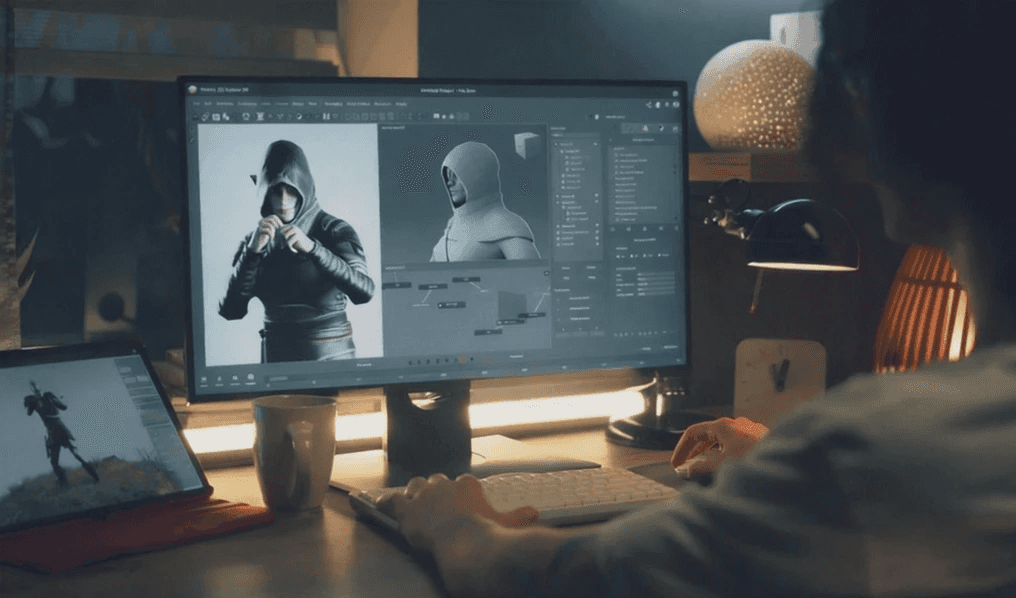
When you use remote viewing from your iPad (or any sleek little sidekick), you’re not just controlling another computer — you’re curating your space. No messy desktops. No side chats. Just you and the one thing you actually need open: your design tool, email app, or whatever mission you're on today.

This setup is great for:

  • Deep work or writing sessions

  • Reviewing work without notifications

  • Creative tasks like video editing, digital art, or layout design

It’s a small change that can make a big difference, especially when you turn your iPad into a second monitor to improve your work efficiency. 

Fix Problems Fast

Remote viewing isn’t just for solo work — it’s for helping people without moving more than a finger. Frankly, if you’re known as the tech-savvy one in your group, you’ve probably been asked to fix someone’s phone — likely during the phone call itself.

  • Your dad can’t find the Settings icon. Again.

  • Your teammate’s screen freezes right before a big deadline.

  • Your client is in full-on panic mode because their app isn’t doing what it’s supposed to.

Instead of walking them through a 12-step process, you just remote in. This eliminates any need for one to say, “No, not that button!”

Curious how remote viewing also helps with remote support and troubleshooting? Here’s how you can rescue your PC from anywhere using DeskIn.

Why DeskIn Is the Remote Viewing Powerhouse for Modern Work

office worker working remotely from

Remote viewing isn’t just about accessing a desktop—it’s about working in a way that is better, faster, and also more flexible. DeskIn delivers that experience, with security, clarity, and speed, that mobile professionals need today.

Whether you’re a designer on an iPad, a digital nomad juggling time zones, or a multitasker who moves between screens, DeskIn isn’t just helpful—it’s transformative.

  • Instant Response, Real-Time Control: Forget the lag. Remote interactions can feel smooth with DeskIn, which delivers performance that is lightning-fast and latency that is as low as 40ms, like local work.

  • 4K Clarity for Pixel-Perfect Work: DeskIn supports up to 4K 60FPS and 2K 144FPS using True Color rendering, giving you a crystal-clear view of your desktop no matter what device you’re using.

  • Security That Protects You, Wherever You Work: Because DeskIn takes security seriously, it ensures remote productivity with enterprise-grade protection for every user. DeskIn lets you confidently work securely on any network, even public Wi-Fi when accessing financial data or editing a slide deck. Here’s what’s built in:

    • AES-256-bit encryption for every session

    • TLS end-to-end encryption to keep data secure during transit

    • Multi-factor authentication (MFA) to block unauthorized logins

    • Permission-based access controls—you choose who can connect and what they can see

  • Free Advanced features: DeskIn includes powerful features at no extra cost

    • Screen Mirroring: Share your screen in real-time—ideal for presentations, gaming, or remote feedback.

    • Screen Extension: Turn a second device into an extra display to boost multitasking.

    • Auto 3D View for Gaming: Enjoy optimized visuals and smoother remote play with automatic 3D rendering.

Get Started with DeskIn: The Remote Viewing Setup on Any Device

DeskIn makes setting up remote viewing as easy as ordering your favorite latte — no tech wizardry required (though the results might feel like it). 

Whether you're editing Photoshop layers from your iPad in bed, reviewing files on your iPhone while riding in an Uber, or tapping into your MacBook from a coffee shop, DeskIn makes it effortless.

Cross-Platform, No Problem

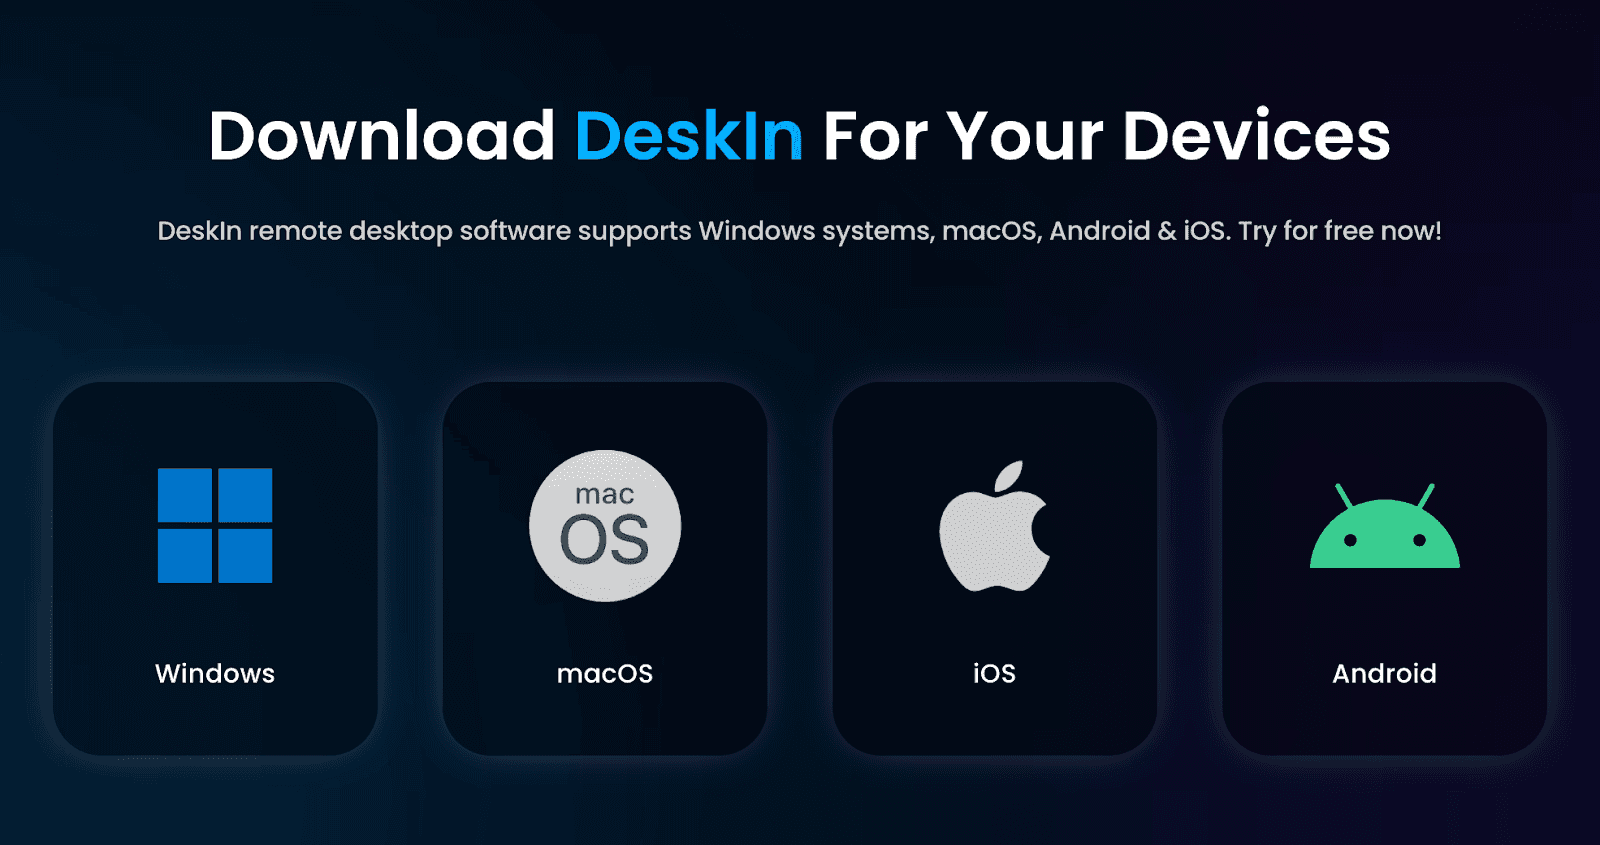
First off, DeskIn is built for cross-platform flexibility. DeskIn works across Windows, macOS, Android, and iOS—mix and match freely. As long as your devices are online, you can connect without cables, OS limits, or hassle.

Remote Viewing Setup for Laptops and Desktops (Windows/macOS)

Your main computer is the hub of your remote setup — it’s the device you’ll be controlling from another pc, phone, or tablet.

Step 1: Download DeskIn on Your Main PC or Mac

Go to DeskIn’s official website or App Store, choose your platform (macOS or Windows), and download and run the installer.

deskin download page

Step 2: Install and Sign Up

  • Open DeskIn after installation, click “Sign Up” or “Log In” as needed, and register your email to get started.

Step 3: Set macOS Permissions (Skip This Step if You’re on Windows)

Mac permission setting
  • macOS will request permissions, just head to Privacy & Security and enable Screen Recording, Accessibility, and Full Disk Access.

Step 4: Customize Device Name and Set Access Password

  • For instance, give your device a name like “Office-PC,” something that is memorable, and set up a connection password for extra security. 

Step 5: Keep DeskIn Running in the Background

Keep DeskIn running for remote sessions, enable auto-start via DeskIn Settings → General → Autostart, and your desktop will be ready for remote control.

Remote Viewing Setup for Smartphones (iOS & Android)

This is your remote control center—perfect for file access, quick edits, or emergency tech support on the move.

Step 1: Download the Mobile App

  • Search for DeskIn on the App Store for iOS or on Google Play for Android.

Step 2: Log In with Your DeskIn Account

  • Use the same email and password you used to register your desktop

Step 3: Choose Your Host Device

  • Once logged in, select the device you want to connect to from the list, enter the password if prompted, choose ‘remote control,’ and start remote viewing.

deskin remote viewing mobile version showing listed devices

Remote Viewing Setup for Tablets (iPad & Android Tablets)

This is your portable workstation—ideal for creatives, writers, and remote workers who want a big screen without the bulk.

Step 1: Download DeskIn from Your App Store

  • Just like mobile, search “DeskIn” on your tablet’s app store and install it

Step 2: Log In

  • Use your existing DeskIn account, and your registered laptop or desktop will appear

Step 3: Connect to Your Computer

  • Tap the listed device, choose the remote control feature, enter the password if prompted, and you’re in your remote workspace.

deskin remote viewing setting on ipad

Step 4: Optimize for Tablet Power Use

Creative Workflows

  • Use Apple Pencil or a stylus to navigate design software (e.g., Figma, Photoshop)

  • Draw, annotate, or sign documents as if you were using a desktop pen tablet

Add Mouse + Keyboard

  • Connect Bluetooth accessories to turn your tablet into a full productivity station

  • Useful for spreadsheet work, copywriting, editing, or software development

Remote Viewing = Freedom + Productivity

In today’s work-anywhere world, productivity isn’t about location but about what you can access. Remote viewing lets you reclaim control of your time, your workflow, and your freedom, not just a connection to a screen.

DeskIn makes it effortless — whether you’re reviewing designs from a café, fixing a file from your phone, or running your entire desktop from a tablet. It’s beautifully clear, secure, also fast, working across all your devices—without the headaches of customary remote access tools.

If you are ready to leave all the limitations behind, now is the time. You, too, can embrace the true productivity that is location-free.

👉 Click here to download DeskIn.

Looking for alternatives before you decide? We’ve compared DeskIn with other remote work software options so you can see why DeskIn stands out for remote viewing.


Let’s face it. We’re living in a world where “the office” could mean your apartment, a train seat, or even a hotel lobby. But what happens when your main computer is many miles away and you need a file or access to an app? What happens when you need a quick fix for a client problem?

Remote viewing comes right in there. It’s simple, incredibly useful, and — let’s be honest — a little sci-fi in the best way. With the right setup, you can access your main device from almost anywhere, without lugging all your gear around. This trick is worth learning for you, whether you are a digital nomad, a freelancer, a remote support tech, or just someone who forgets files.

What Is a Remote Viewing Tool?

So, what is remote viewing in tech?

A remote viewing tool lets you access and control another device (usually your primary desktop or laptop) over the internet from a different device. And it’s more than just watching a screen. You can interact with the system in real-time: open apps, type, click, edit, drag files around — you can even restart the remote computer. Unlike screen sharing, where you’re mostly limited to observing, remote viewing tools give you full control.

Here are a few popular options:

  • DeskIn – DeskIn connects both smoothly and also offers a modern interface. It is great for both professionals and creatives.

  • AnyDesk – Even though free versions can be limited, AnyDesk is popular, and it is easy to use.

  • Chrome Remote Desktop – Chrome Remote Desktop is a Browser-based remote access tool. It is also simple to set up.

For this guide, we will highlight DeskIn– our go-to remote access software for its fast speed, free plan, and also cross-platform compatibility.

Why Use Remote Viewing for Productivity?

Let’s break down how remote viewing makes your day-to-day work easier and more flexible.

Work from Anywhere

You can say goodbye to carrying a heavy laptop from now on. Your main workstation can stay safely at home while you work through another PC, smartphone, or tablet through remote viewing.

This setup lets you log in to your usual environment quickly and easily, whether you’re traveling, working from a coffee shop, or just in another room. You’ll have full access to all your files, programs, and settings without missing a beat.

It’s particularly useful for:

  • Freelancers on the move

  • Designers needing full desktop power through a lightweight tablet

  • Students accessing school projects from the library

Instant File Access

Deskin features

Ever had that “Oh no, it’s on my other laptop” moment? We’ve all been there — that heart-stopping second when you realize your pitch deck, that ultra-important client file, or even your half-finished design is stranded miles away on your home computer. With a remote tool, it doesn’t matter. Simply open up the app, and then connect to your computer. You are then able to grab whatever you need.

You can:

  • Transfer files between cross-systems.

  • Directly edit files on your remote desktop environment

  • Avoid emailing files back and forth to yourself

Want a quick mobile-focused guide? Learn how to access files on your computer from Android for fast on-the-go productivity.

Reduce Distraction

Sometimes, less is more.

When you use remote viewing from your iPad (or any sleek little sidekick), you’re not just controlling another computer — you’re curating your space. No messy desktops. No side chats. Just you and the one thing you actually need open: your design tool, email app, or whatever mission you're on today.

This setup is great for:

  • Deep work or writing sessions

  • Reviewing work without notifications

  • Creative tasks like video editing, digital art, or layout design

It’s a small change that can make a big difference, especially when you turn your iPad into a second monitor to improve your work efficiency. 

Fix Problems Fast

Remote viewing isn’t just for solo work — it’s for helping people without moving more than a finger. Frankly, if you’re known as the tech-savvy one in your group, you’ve probably been asked to fix someone’s phone — likely during the phone call itself.

  • Your dad can’t find the Settings icon. Again.

  • Your teammate’s screen freezes right before a big deadline.

  • Your client is in full-on panic mode because their app isn’t doing what it’s supposed to.

Instead of walking them through a 12-step process, you just remote in. This eliminates any need for one to say, “No, not that button!”

Curious how remote viewing also helps with remote support and troubleshooting? Here’s how you can rescue your PC from anywhere using DeskIn.

Why DeskIn Is the Remote Viewing Powerhouse for Modern Work

office worker working remotely from

Remote viewing isn’t just about accessing a desktop—it’s about working in a way that is better, faster, and also more flexible. DeskIn delivers that experience, with security, clarity, and speed, that mobile professionals need today.

Whether you’re a designer on an iPad, a digital nomad juggling time zones, or a multitasker who moves between screens, DeskIn isn’t just helpful—it’s transformative.

  • Instant Response, Real-Time Control: Forget the lag. Remote interactions can feel smooth with DeskIn, which delivers performance that is lightning-fast and latency that is as low as 40ms, like local work.

  • 4K Clarity for Pixel-Perfect Work: DeskIn supports up to 4K 60FPS and 2K 144FPS using True Color rendering, giving you a crystal-clear view of your desktop no matter what device you’re using.

  • Security That Protects You, Wherever You Work: Because DeskIn takes security seriously, it ensures remote productivity with enterprise-grade protection for every user. DeskIn lets you confidently work securely on any network, even public Wi-Fi when accessing financial data or editing a slide deck. Here’s what’s built in:

    • AES-256-bit encryption for every session

    • TLS end-to-end encryption to keep data secure during transit

    • Multi-factor authentication (MFA) to block unauthorized logins

    • Permission-based access controls—you choose who can connect and what they can see

  • Free Advanced features: DeskIn includes powerful features at no extra cost

    • Screen Mirroring: Share your screen in real-time—ideal for presentations, gaming, or remote feedback.

    • Screen Extension: Turn a second device into an extra display to boost multitasking.

    • Auto 3D View for Gaming: Enjoy optimized visuals and smoother remote play with automatic 3D rendering.

Get Started with DeskIn: The Remote Viewing Setup on Any Device

DeskIn makes setting up remote viewing as easy as ordering your favorite latte — no tech wizardry required (though the results might feel like it). 

Whether you're editing Photoshop layers from your iPad in bed, reviewing files on your iPhone while riding in an Uber, or tapping into your MacBook from a coffee shop, DeskIn makes it effortless.

Cross-Platform, No Problem

First off, DeskIn is built for cross-platform flexibility. DeskIn works across Windows, macOS, Android, and iOS—mix and match freely. As long as your devices are online, you can connect without cables, OS limits, or hassle.

Remote Viewing Setup for Laptops and Desktops (Windows/macOS)

Your main computer is the hub of your remote setup — it’s the device you’ll be controlling from another pc, phone, or tablet.

Step 1: Download DeskIn on Your Main PC or Mac

Go to DeskIn’s official website or App Store, choose your platform (macOS or Windows), and download and run the installer.

deskin download page

Step 2: Install and Sign Up

  • Open DeskIn after installation, click “Sign Up” or “Log In” as needed, and register your email to get started.

Step 3: Set macOS Permissions (Skip This Step if You’re on Windows)

Mac permission setting
  • macOS will request permissions, just head to Privacy & Security and enable Screen Recording, Accessibility, and Full Disk Access.

Step 4: Customize Device Name and Set Access Password

  • For instance, give your device a name like “Office-PC,” something that is memorable, and set up a connection password for extra security. 

Step 5: Keep DeskIn Running in the Background

Keep DeskIn running for remote sessions, enable auto-start via DeskIn Settings → General → Autostart, and your desktop will be ready for remote control.

Remote Viewing Setup for Smartphones (iOS & Android)

This is your remote control center—perfect for file access, quick edits, or emergency tech support on the move.

Step 1: Download the Mobile App

  • Search for DeskIn on the App Store for iOS or on Google Play for Android.

Step 2: Log In with Your DeskIn Account

  • Use the same email and password you used to register your desktop

Step 3: Choose Your Host Device

  • Once logged in, select the device you want to connect to from the list, enter the password if prompted, choose ‘remote control,’ and start remote viewing.

deskin remote viewing mobile version showing listed devices

Remote Viewing Setup for Tablets (iPad & Android Tablets)

This is your portable workstation—ideal for creatives, writers, and remote workers who want a big screen without the bulk.

Step 1: Download DeskIn from Your App Store

  • Just like mobile, search “DeskIn” on your tablet’s app store and install it

Step 2: Log In

  • Use your existing DeskIn account, and your registered laptop or desktop will appear

Step 3: Connect to Your Computer

  • Tap the listed device, choose the remote control feature, enter the password if prompted, and you’re in your remote workspace.

deskin remote viewing setting on ipad

Step 4: Optimize for Tablet Power Use

Creative Workflows

  • Use Apple Pencil or a stylus to navigate design software (e.g., Figma, Photoshop)

  • Draw, annotate, or sign documents as if you were using a desktop pen tablet

Add Mouse + Keyboard

  • Connect Bluetooth accessories to turn your tablet into a full productivity station

  • Useful for spreadsheet work, copywriting, editing, or software development

Remote Viewing = Freedom + Productivity

In today’s work-anywhere world, productivity isn’t about location but about what you can access. Remote viewing lets you reclaim control of your time, your workflow, and your freedom, not just a connection to a screen.

DeskIn makes it effortless — whether you’re reviewing designs from a café, fixing a file from your phone, or running your entire desktop from a tablet. It’s beautifully clear, secure, also fast, working across all your devices—without the headaches of customary remote access tools.

If you are ready to leave all the limitations behind, now is the time. You, too, can embrace the true productivity that is location-free.

👉 Click here to download DeskIn.

Looking for alternatives before you decide? We’ve compared DeskIn with other remote work software options so you can see why DeskIn stands out for remote viewing.




Play x Work
All at Once

1111 Best Deal 25% OFF

1111 Best Deal 25% OFF

DeskIn Remote Game

only $14.32 USD 🎉 Limited on July 16-31

Add promo code: deskinsummer1

Yearly Plan

Gaming Plan $8.13/Month

Performance Plan $12.5/Month
👉 Use Promo Code [DESKIN25]

& Enjoy Premium Features

Yearly Plan

🎮 Gaming Plan $8.13/Month 🚀Performance Plan $12.5/Month
👉 Use Promo Code [DESKIN25] & Enjoy Premium Features

freelancer working remotely in the park

Table of Contents

1111 Best Deal 25% OFF

Yearly Plan

Gaming Plan $8.13/Month

Performance Plan $12.5/Month
👉 Use Promo Code [DESKIN25]

& Enjoy Premium Features

What’s next?

TeamViewer Not Connecting

PRODUCTIVITY

TeamViewer Not Connecting or Flagged for Commercial Use? 9 Fixes That Work

Whether your TeamViewer fails to connect, disconnects frequently, or is suddenly flagged for “commercial use,” this complete guide will help you quickly fix all TeamViewer connection and functionality issues. We’ll walk you through how to check your network, permissions, and system settings, and introduce a reliable alternative so your remote control can return to smooth operation.

Recommended Reads:

Why Is My TeamViewer Not Connecting?

If TeamViewer can’t connect, shows “Unable to connect to partner,” or gets stuck on “Connecting,” or even fails to log in, the issue usually comes from one of several core areas. Common causes include unstable internet, incorrect Windows permissions, firewall or proxy blocking, IPv6 conflicts, licensing errors, or temporary server maintenance.
Don’t want the hassle? Try DeskIn — it offers stable connections and supports commercial use for free!

Common Problems and Fixes:

Problem Source

Corresponding Fix

Network or VPN blocking

Method 1: Check Internet Connection & VPN Status

Insufficient permissions

Method 2: Change TeamViewer Access Permissions

System configuration error

Method 3: Check and Adjust Windows Settings

Firewall blocking

Method 4: Adjust Firewall & Proxy Settings

IPv6 conflict

Method 5: Disable IPv6 on Both Devices

Outdated software version

Method 6: Update or Reinstall TeamViewer

DNS/TCP errors

Method 7: Refresh DNS & TCP/IP via CMD

Server issues

Method 8: Check TeamViewer Server Status

Background program conflict

Method 9: Perform a Clean Boot to Isolate Conflicts

For more remote connection guides:

9 Ways to Fix TeamViewer Connection Issues

Whether you’re using the free or business edition of TeamViewer on Windows, macOS, iPhone/iPad, or Android, these 9 fixes will help you troubleshoot and restore your connection quickly. These steps are simple, effective, and compatible with all devices to ensure smooth remote access.

For more device-based tutorials, check out:

Method 1: Check Internet Connection and VPN Status

Network instability is the most common reason for TeamViewer connection failures. Unstable Wi-Fi, VPN misconfigurations, or proxies may cause timeouts or connection blocking.

Steps:

  1. Press Win + R, type cmd, and hit Enter.

  2. Type ping -t 8.8.8.8 and observe the response time. If latency spikes or packets drop frequently, your network is unstable.

  3. Use Speedtest to check your internet speed or restart your router / switch to a wired connection for better stability.

check network speedtest

If your internet is fine but TeamViewer still won’t connect, move on to the next fix.

Method 2: Change TeamViewer Access Permissions

If you can’t connect or can’t control your partner’s screen, your access permissions may be too limited.

Steps:

  1. On the remote computer, open TeamViewer, click the gear icon, and open Options.

  2. Go to Advanced, then click Show advanced options.

  3. Under “Advanced settings for connections to this computer,” set Access Control to Full Access.

This ensures you have full control and can solve most permission-related connection problems.

Method 3: Check and Adjust Windows Settings

If TeamViewer keeps failing to connect, Windows User Account Control (UAC) or Remote Desktop settings may be interfering.

  • Make sure UAC allows TeamViewer to make system changes.

  • Verify that Remote Desktop services are running.

  • Restart your computer after major Windows or TeamViewer updates.

Method 4: Adjust Firewall and Proxy Settings

Windows Firewall or proxy restrictions can block TeamViewer’s necessary ports.

Steps:

  1. Open Windows Defender Firewall → Allow an app through Firewall.

  2. Click Change settings, then ensure TeamViewer Remote Control Service is checked.

  3. Go to Control Panel → Internet Options → Connections → LAN Settings, and uncheck Use a proxy server for your LAN if it’s enabled.

If it’s too complex to reconfigure, consider switching to DeskIn — it connects instantly without firewall hassle.

Method 5: Disable IPv6 on Both Computers

IPv6 incompatibility can sometimes cause connection failures.

Steps:

  1. Press Win + R, type ncpa.cpl, and hit Enter.

  2. Right-click your active network → Properties.

  3. Uncheck Internet Protocol Version 6 (TCP/IPv6) and click OK.

  4. Repeat the same on the remote PC.

Reboot and retry — this often resolves unknown “Cannot connect to partner” errors.

Method 6: Update or Reinstall TeamViewer

Outdated or unofficial versions can lead to compatibility issues.

Steps:

  1. Open TeamViewer → Menu (≡) → Check for new version.

  2. If updating doesn’t help, uninstall TeamViewer from Control Panel → Programs and Features, then reinstall the latest version from the official website.

Pro tip: If you’re on Mac, you can also use Microsoft Remote Desktop or turn your iPad into a second screen for smoother multitasking.

Method 7: Refresh DNS and TCP/IP via CMD

If login or verification fails, network cache may be corrupted.

Steps:

  1. Open CMD as Administrator.

  2. Type the following commands one by one:

ipconfig /release  

ipconfig /flushdns  

ipconfig /renew  

nbtstat –r  

netsh int ip reset resetlog.txt  

netsh winsock reset

teamviewer cmd refresh
  1. Restart your PC and reconnect TeamViewer.

Method 8: Check TeamViewer Server Status

Sometimes, the issue isn’t on your end.

Steps:

  1. Visit the TeamViewer server status page.

  2. Check if your regional servers are down.

  3. If there’s downtime, wait or use DeskIn as a stable alternative.

Method 9: Perform a Clean Boot to Eliminate Background Conflicts

Antivirus or startup apps may interfere with TeamViewer.

Steps:

  1. Press Win + R, type msconfig, and hit Enter.

  2. Under General, select Selective startup and uncheck “Load startup items.”

  3. In Services, check “Hide all Microsoft services” and click Disable all.

  4. Restart your PC.

  5. Temporarily disable antivirus software and try connecting again.

This isolates background conflicts that cause TeamViewer connection drops.

Recommended Alternative: DeskIn Remote Control

If you’re tired of TeamViewer’s connection limits or false commercial-use flags, DeskIn is a reliable alternative. It offers industry-leading 4K 60FPS quality, ultra-low latency, and free commercial usage.With 200+ global nodes and smart routing, DeskIn ensures stable remote sessions, even for high-load tasks.

Pricing highlights:

  • Standard plan: $4.16/month (annual billing)

  • Performance plan: $16.66/month with multi-monitor and fast file transfer

  • Free version: includes Wake-on-LAN, screen mirroring, voice chat, and whiteboard collaboration

    free download DeskIn

Why Choose DeskIn Over TeamViewer?

  • Superior connection stability — long sessions without disconnects, even on free plans. You can connect two computers easily with DeskIn

  • High-quality visuals & low latency — up to 4K60FPS or 2K144FPS with 4:4:4 color accuracy.

  • Comprehensive multi-monitor & interaction features — screen extension, projection, virtual screens, voice chat, whiteboard.

  • Remote Wake (Wake-on-LAN) power on your PC remotely.

  • Unlimited file transfers — up to 12MB/s without size limits.

  • Cross-platform support — Windows, macOS, Android, iOS.

  • Affordable pricing — starting at $4.16/month vs. TeamViewer’s $50.9/month.

DeskIn combines high performance, flexibility, and cost efficiency — ideal for individuals and teams alike.

3 Simple Steps to Use DeskIn

  1. Install DeskIn on both computers and log in with the same account.

    free download DeskInlog into your deskin account
  2. Select your target device from the list and click “Remote Control.”

    choose another computer to remote connect
  3. Control remotely — transfer files, share screen, or communicate instantly.

    two computers share same screen

Fixing “Commercial Use Detected” on TeamViewer

Even personal users are sometimes flagged for commercial use due to TeamViewer’s detection algorithms. This disrupts workflow and limits functionality. You can appeal to unlock your account or switch to DeskIn, which allows free commercial usage without restrictions.

Why Does TeamViewer Flag for Commercial Use?

TeamViewer monitors your IP, domain, connection frequency, and activity. Using corporate domains or connecting to multiple devices may trigger a “commercial use suspected” warning.

How to Submit an Appeal

  1. Visit the TeamViewer Commercial Use Suspected page.

    teamviewer commerical use form
  2. Fill out your name, email, affected TeamViewer ID, and explain your personal use case.

  3. Upload your log files

  4. Wait about 7 days for review.

After approval, your account will return to the free version.

Temporary Workaround: Use DeskIn

If you’re locked out of TeamViewer, DeskIn offers free, unrestricted remote control for both personal and business use. It’s fast, stable, and won’t get blocked for “commercial activity.”

free download DeskIn

FAQ

Q: Why does TeamViewer disconnect after 5 minutes?

A: The free version has a session time limit or may be flagged as commercial. DeskIn has no time limit and offers stable connections.

Q: What are the limitations of TeamViewer Free?

A: Free users face time limits, feature restrictions, and commercial detection. DeskIn Free removes all these barriers and allows business use.

Q: Can I control my PC from a phone with TeamViewer?

A: TeamViewer mobile is limited and may fail to connect. DeskIn supports iOS/Android remote control with full features like screen extension and voice chat.

Conclusion

This guide outlined 9 fixes for TeamViewer connection failures — from checking your network and permissions to disabling IPv6, reinstalling the app, and resetting DNS/TCP settings. We also covered how to resolve or appeal a commercial-use restriction.

To avoid these issues entirely, try DeskIn — a stable, high-performance, and free-for-commercial-use alternative with 4K streaming, multi-screen support, and no session limits. It’s the smarter way to remote work securely and efficiently.

free download DeskIn
share screen with another computer

PRODUCTIVITY

How to Share Screen With Another Computer: 4 Most Practical Methods Explained

With the rise of remote work and content creation, the need to share one screen between two computers has become increasingly common. Whether you’re setting up a dual-monitor workstation, connecting your laptop to a desktop, or want a flexible screen-sharing setup, there are easy ways to make it happen.

When rendering or running simulations on one PC, you can easily switch to another for gaming or chatting—no more constant plugging and unplugging cables.

This guide introduces four of the most practical solutions: the DeskIn remote desktop software, KVM switch, Microsoft Quick Assist, and Windows Miracast wireless projection. Whether you’re connecting Windows-to-Windows, setting up Mac-to-Windows remote access, or creating a stable extended monitor setup, you’ll find the best method here.

Why Share Screen With Another Computers?

In the era of hybrid work and creative workflows, sharing one screen between two computers is a practical need for many professionals. For example, while rendering videos, 3D modeling, or coding, one computer can handle processing while the other is used for meetings, research, or entertainment. This setup saves desk space and enhances multitasking efficiency.

Main Benefits

  • Extend your laptop screen: External monitor displays and operates in sync.

  • Flexible dual-screen setup: Easily switch or divide display tasks.

  • Show two windows simultaneously: Perfect for comparison or multitasking.

  • Different wallpapers for each screen: Maintain independent environments.

  • Quick and convenient: No cables or compatibility worries.

Unlike “one computer with two monitors,” this setup allows two separate systems to share one display, switching seamlessly through software or hardware for a smoother, more flexible workflow.

Method 1: Use DeskIn Remote Desktop Software — The Easiest Way to Share Screen With Another Computer

DeskIn share screens with another computer

If you want to switch or share screens between different computers without buying extra hardware, DeskIn is the most intuitive and versatile choice. Designed for remote access and cross-device screen sharing, it lets you easily connect your laptop and desktop—even when they’re not on the same network.

Ideal For

  • Remote work, team collaboration, and cross-device control (laptop + desktop)

  • Users who want to save hardware costs (no KVM switch needed)

  • Those who need to access another device from a different location or network

Key Advantages

  • High-quality, low-latency performance: Supports up to 4K resolution with latency <40ms for clear and precise visuals.

  • Real-time responsiveness: Smooth cursor and click response—perfect for design review, teaching, or code inspection.

  • Built-in collaboration tools: Includes voice chat and whiteboard annotation for live teaching or team discussions.

  • Cross-platform compatibility: Works seamlessly across Windows, Mac, and mobile devices for multi-device synchronization.

  • Multi-display mirroring: Mirror one computer to multiple screens—ideal for presentations or remote meetings.

  • Free and beginner-friendly: Easy setup with a modern, intuitive interface.

💡 Note: You’ll need to install DeskIn on both devices first—but setup only takes a few minutes.

If you’d like to explore similar tools, check out:

DeskIn Setup Tutorial | How to Share Screen With Another Computer

Follow these simple steps to use DeskIn for screen sharing or extending your laptop display:

1. Download and Sign In

Go to the DeskIn website and install the app on both computers. Log in with the same account to enable remote connection and screen sharing.

free download DeskInlog in to DeskIn account

2. Choose Mirroring or Extension Mode

Click “Mirror/Extend Screen” from the sidebar. Then select “Start Mirroring” or “Start Extending” to share one screen between two computers.

choose another device to share screen

3. Start Sharing or End Connection

Once connected, you can transfer files, chat via voice, and share screens instantly. When done, click “Exit Remote Control” to secure your privacy.

two computers share same screen

More recommended reads:

Method 2: Use a KVM Switch — A Hardware Solution to Share One Monitor Between Two PCs

kvm switch enabling two hosts share a single monitor

If you want both PCs to share one monitor and use the same keyboard and mouse, consider a KVM (Keyboard Video Mouse) switch. This hardware device connects two computers via HDMI or USB, allowing you to switch displays instantly—no need to unplug cables or sign in/out of accounts.

Ideal For

  • Users who want to control two PCs using one monitor, keyboard, and mouse

  • Those switching frequently between work and gaming PCs

  • Users who prefer a stable, zero-latency hardware setup

Pros

  • Simple plug-and-play setup

  • Near-zero latency, ideal for gaming and media use

  • No software installation required

Cons

  • Requires separate hardware purchase

  • Some models have limited support for 4K / 144Hz monitors

If your laptop supports HDMI input, it can directly switch between dual-display modes. However, most laptops only support output, not input. To bypass this limitation, use DeskIn for software-based multi-PC control—no cables needed.

See also:

KVM Setup Guide | Quickly Switch Between Two Computers Sharing One Screen

To set up a KVM switch:

  1. Connect Devices

    • Plug the monitor, keyboard, and mouse into the KVM switch.

    • Connect each PC to the KVM using HDMI/USB cables.

      kvm switch connects to computers
  2. Switch Between Computers

    • Panel Button: Press the physical button on the switch to toggle between computers.

    • Keyboard Shortcut: Double-tap Scroll Lock + number key to switch inputs.

    • OSD Menu: Some models provide an on-screen menu for switching.

    • Mouse Gesture Switching: Advanced models allow mouse-based switching.

This setup enables quick, cable-free switching between systems for efficient multi-PC workflows.

Method 3: Use Microsoft Quick Assist to Share Screens Between Two Windows Computers

microsoft quick assist

Microsoft Quick Assist is a built-in Windows remote control tool that lets two computers share screens securely—no third-party software needed. Both users simply open Quick Assist and connect using a temporary security code.

This is especially useful for Windows-to-Windows setups—ideal for remote teaching, IT support, or quick collaboration.

Pros

  • Completely free: Pre-installed on Windows.

  • Secure connections: Uses one-time verification codes.

  • Simple interface: Intuitive and beginner-friendly.

  • Supports mouse/keyboard control: Great for guidance or troubleshooting.

Cons

  • Windows-only: No Mac or Linux support.

  • Dependent on internet speed: May lag on slow networks.

If you’re on Mac, try DeskIn for multi-platform screen sharing without compatibility issues. See also: How to Use Microsoft Remote Desktop on Mac [Full Guide]

Quick Assist Setup Guide | Share or Extend Laptop Screens on Windows

To share screens between two Windows laptops using Quick Assist:

  1. Launch the App
    Press Win + S, search for “Quick Assist,” and open it.

  2. Select Assistance Mode
    On the main (control) PC, click “Assist another person.”

  3. Sign In
    Log in with your Microsoft account to generate a security code.

  4. Enter Security Code
    On the other laptop, enter the code under “Get assistance” and submit.
    Note: Security code expires in 10 minutes.

  5. Allow Screen Sharing
    Click “Allow” on the receiving PC.

  6. Start Remote Control
    Choose between “View screen” or “Take full control.”

During control, use the toolbar to restart, open Task Manager, or send messages. When finished, simply end the session. A new code is needed for the next connection.

Method 4: Use Windows Miracast Wireless Display

Windows Miracast

If you want to extend or mirror screens wirelessly between two laptops without HDMI cables, Windows Miracast is a convenient built-in solution. It allows wireless projection and display sharing over the same Wi-Fi network.

Ideal Use Cases

  • Create a wireless dual-monitor setup

  • Project one laptop to another for meetings or demos

  • Quickly share visuals during presentations

Pros

  • No software installation required

  • Supports “Duplicate” or “Extend” display modes

  • Fast and stable connection

Check compatibility first: press Win + P. If you see “Connect to a wireless display,” your device supports Miracast.

Cons

  • Both devices must support Miracast

  • Quality and latency depend on Wi-Fi stability

If your devices are on different platforms (e.g., Mac + Windows), use DeskIn for smoother cross-system sharing.

Miracast Setup Guide | Extend Laptop Display or Share Screens Wirelessly

  1. Open the Connection Panel

    Click the Notification Center icon or press Win + K to open “Connect.”

  2. Find Available Devices

    Select your target device from the list of nearby Miracast-enabled PCs.

  3. Enable Input Control
    Check “Allow input from a connected device” to enable keyboard and mouse control.

Once connected, your two laptops can display mirrored or extended screens wirelessly—ideal for mobile and clutter-free dual-screen setups.

FAQ | Troubleshooting and Common Questions

How to Set Up a Wireless Dual-Screen with Two Windows 11 Laptops?

Use Miracast or DeskIn to connect wirelessly. You can extend your display without cables—perfect for multitasking or remote collaboration.

How to Synchronize Two Computers?

In display settings, choose Extend or Duplicate mode. Adjust the monitor arrangement and resolution for smooth dual-display performance.

Why Can’t My Mouse Move Across Screens?

Check your display alignment under Settings → System → Display. Adjust screen order to match the physical layout.

What’s the Shortcut for Switching Displays?

Press Windows + P to open the projection menu. Choose among “Duplicate,” “Extend,” or “Second screen only.”

Conclusion: Which Method Is Best for Sharing One Screen Between Two Computers?

Here’s a quick summary of all four methods:

  • DeskIn: The most flexible and complete option—cross-network, multi-device, with screen extension and collaboration tools.

  • KVM Switch: Ideal for gamers or professionals who prefer hardware-based, zero-latency control.

  • Microsoft Quick Assist: Great free tool for Windows-only setups.

  • Miracast: Best for wireless, cable-free environments.

Overall, DeskIn stands out as the most comprehensive and user-friendly solution, offering excellent performance, cross-platform support, and remote access convenience—all in one tool.

👉 Download DeskIn now and start sharing screens between two computers effortlessly.

free download DeskIn
Transferring iPhone Photos to Your Computer

PRODUCTIVITY

The Ultimate Guide to Transferring iPhone Photos to Your Computer: Wireless & Wired for Windows/Mac

Do you often get that dreaded iPhone warning — “Storage Almost Full”? You look at all those precious photos and memories piling up, wanting to back them up on your computer but don’t know where to start. Finding an efficient yet simple method to transfer photos from your iPhone is a common struggle for many users.

Don’t worry — this article puts together the most complete guide for both wired and wireless transfers. Whether you’re on Windows or Mac, you’ll find detailed steps below — from the fastest recommended tools to built-in system methods — to make photo backup effortless. Let’s dive in!

Read more:

Recommended Method: Transfer iPhone Photos to Computer with DeskIn (Unlimited & Fast)

DeskIn is a powerful cross-platform remote desktop tool that perfectly solves the issue of how to transfer photos from iPhone to computer. It allows wireless photo transfer between your iPhone and PC via a high-speed, stable connection. There are no limits on file size, type, or quantity, and it supports transfer speeds up to 12MB/s, letting you easily back up all your precious photos and videos.

Key Features:

  • Unlimited transfer: Send any number of photos or even large 4K videos without restrictions.

  • Cross-platform compatibility: Works seamlessly across Windows, macOS, and iOS.

  • High-speed transmission: Up to 12MB/s—faster than most remote desktop or cloud methods.

  • Rich remote features: Beyond file transfer, DeskIn supports screen extension (turn your iPad or phone into a second monitor), screen mirroring, voice calls, annotations, shared clipboard, and more—perfect for both personal and work use.

On Windows PC / On Mac

Step 1: Download & Install DeskIn

Install DeskIn on both your iPhone (via App Store) and Windows PC/Mac (via DeskIn’s official site). Then sign up using the same email and verify your account.

📥 Tip: DeskIn offers a free version with enterprise-level encryption for safe and secure use.

free download DeskIn

Step 2: Connect Your Devices

On your iPhone, open the DeskIn app and go to the Device List. Find your computer or manually enter its device code under Remote Control and tap File Transfer.

Choose file transfer

Step 3: Connect devices

Input the computer’s security or temporary password to establish a secure connection.

Step 4: Transfer Your Photos

Once connected, tap Send File → select the desired photos/videos → choose the target folder on your computer → then tap Send.

Click to send files

Step 5: View Files on Computer

The transferred files will appear in your chosen computer folder or under “Me” → “Downloaded Files” in DeskIn’s desktop app. You can also transfer files from your computer to your iPhone the same way.

Windows Users: 4 Ways to Transfer iPhone Photos to Your PC

Besides DeskIn, there are several traditional ways to transfer photos from iPhone to Windows. Below are four reliable methods — both wired and wireless — including their limitations and setup requirements.

1. Transfer via USB Cable (Windows 10/11)

The simplest method is to use a USB data cable. However, compatibility issues or photo format problems (like HEIC) might prevent your PC from reading images correctly.

Steps:

  1. Use an original or MFi-certified Lightning cable to connect your iPhone to your PC.

  2. Unlock your iPhone and tap Trust This Computer when prompted.

  3. On your PC, open File Explorer → find your iPhone under “This PC.”

  4. Open Internal Storage > DCIM, where your camera photos and videos are stored.

  5. Copy and paste (Ctrl+C / Ctrl+V) the desired photos or folders into a target location on your PC.

Tip: If your PC can’t read HEIC files, go to Settings > Camera > Formats on iPhone and select Most Compatible, or install a HEIC extension on your PC.

Read more:

2. Use iCloud for Windows

The biggest advantage of iCloud is wireless synchronization—no cables required.
However, it depends on internet speed and only offers 5GB of free storage.

Steps:

  1. Download iCloud for Windows from the Microsoft Store.

  2. Sign in with your Apple ID (same as your iPhone).

  3. Check Photos, click Options, and enable “iCloud Photos.”

  4. On your iPhone, go to Settings > [Your Name] > iCloud > Photos and enable iCloud Photos.

  5. On your PC, open File Explorer > iCloud Photos to view or download synced photos.

3. Use Microsoft Photos App

The built-in Photos app on Windows lets you easily import photos without extra software.
However, large transfers may be less stable.

Steps:

  1. Connect your iPhone to your PC using a Lightning cable.

  2. Open Photos on your computer (search “Photos” in Start Menu).

  3. Click Import > From a USB device.

  4. Select the desired photos and click Import Selected.

4. Use Cloud Services (Wireless Transfer)

Using cloud storage services like OneDrive, Dropbox, or Google Photos allows wireless transfer without cables, but you’ll rely on internet speed and limited free storage.

Steps:

  1. Install your chosen cloud app (OneDrive, Dropbox, etc.) on your iPhone.

  2. Upload your desired photos (enable “Auto Upload” if available).

  3. Log in to the same cloud account on your PC to download the files.

Mac Users: 4 Ways to Transfer iPhone Photos to a Mac

Apple’s ecosystem makes transferring photos to Mac much smoother.
Here are four commonly used methods — both wired and wireless.

Read more:

1. Use the Built-In Photos App

Fully integrated with macOS, this app lets you import and organize photos efficiently.

Steps:

  1. Connect your iPhone to your Mac via USB and tap Trust This Computer.

  2. Open the Photos app.

  3. Select your iPhone from the sidebar.

  4. Choose Import Selected or Import All New Photos.

  5. Photos will be stored in your Mac’s Photos Library.

2. Use AirDrop Wireless Transfer iPhone Photos To Mac

AirDrop is fast and cable-free, though less stable for large transfers.

Steps:

  1. Enable Bluetooth and Wi-Fi on both iPhone and Mac.

  2. On iPhone, open Photos, select items, and tap Share > AirDrop.

  3. Choose your Mac from the list.

  4. On your Mac, accept the transfer; photos will save to the Downloads folder.

Airdrop photo to Mac

3. Use Image Capture

The Image Capture app gives direct access to your iPhone’s original photos and videos.

Steps:

  1. Connect your iPhone to your Mac and tap Trust This Computer.

  2. Open Image Capture (Applications folder or Spotlight).

  3. Select your iPhone from the sidebar.

  4. Choose target photos and a destination folder.

  5. Click Import to transfer.

4. Use iTunes for Full Backup

iTunes syncs and backs up your entire iPhone, ensuring data safety—but not selective transfer.

Steps:

  1. Connect your iPhone to Mac via USB, open iTunes, and trust the computer.

  2. Select your device icon.

  3. Under Photos, check Sync Photos and choose source folders.

  4. Click Apply or Sync to start transfer.

Summary

This guide covered various ways to transfer iPhone photos to your computer. Whether you’re a Windows or Mac user, you can choose between wired and wireless methods — from simple USB connections and iCloud syncing to cross-platform cloud services and the high-speed DeskIn tool.

Pick the method that fits your setup, transfer size, and speed needs, and free up iPhone storage while safely preserving your memories.

📥Tip: Try DeskIn’s free version — enterprise-grade encryption and fast, secure file transfer.

free download DeskIn

Common Q&A: iPhone Photo Transfer

Q1: How can I view iPhone photos on my computer?

Use a USB cable to connect and browse photos with your computer’s built-in Photos app (Windows Photos or Mac Image Capture).
Alternatively, use iCloud’s web version or a cross-device tool like DeskIn for wireless viewing.

Q2: Why choose DeskIn to transfer photos?

DeskIn offers up to 12MB/s wireless speed, supports all major OS platforms, and transfers multiple photo formats without limits — making it ideal for users in mixed Apple-Windows environments.

Q3: Why can’t I import iPhone photos to my computer?

Possible causes include unstable USB connection, not tapping Trust This Computer, iCloud sync conflicts, or lack of disk space.
DeskIn provides a stable and efficient alternative that avoids these issues.

Q4: How much does iCloud cost per month?

iCloud offers 5GB free, with paid iCloud+ plans:

  • 50GB – $0.99/month

  • 200GB – $2.99/month

  • 2TB – $9.99/month

Q5: Can I use a memory card on iPhone?

No, iPhones don’t support external memory cards. However, you can use Apple’s Lightning to SD Card Camera Reader or USB-C to SD Card Reader to import photos directly from SD cards.

TeamViewer Not Connecting

PRODUCTIVITY

TeamViewer Not Connecting or Flagged for Commercial Use? 9 Fixes That Work

Whether your TeamViewer fails to connect, disconnects frequently, or is suddenly flagged for “commercial use,” this complete guide will help you quickly fix all TeamViewer connection and functionality issues. We’ll walk you through how to check your network, permissions, and system settings, and introduce a reliable alternative so your remote control can return to smooth operation.

Recommended Reads:

Why Is My TeamViewer Not Connecting?

If TeamViewer can’t connect, shows “Unable to connect to partner,” or gets stuck on “Connecting,” or even fails to log in, the issue usually comes from one of several core areas. Common causes include unstable internet, incorrect Windows permissions, firewall or proxy blocking, IPv6 conflicts, licensing errors, or temporary server maintenance.
Don’t want the hassle? Try DeskIn — it offers stable connections and supports commercial use for free!

Common Problems and Fixes:

Problem Source

Corresponding Fix

Network or VPN blocking

Method 1: Check Internet Connection & VPN Status

Insufficient permissions

Method 2: Change TeamViewer Access Permissions

System configuration error

Method 3: Check and Adjust Windows Settings

Firewall blocking

Method 4: Adjust Firewall & Proxy Settings

IPv6 conflict

Method 5: Disable IPv6 on Both Devices

Outdated software version

Method 6: Update or Reinstall TeamViewer

DNS/TCP errors

Method 7: Refresh DNS & TCP/IP via CMD

Server issues

Method 8: Check TeamViewer Server Status

Background program conflict

Method 9: Perform a Clean Boot to Isolate Conflicts

For more remote connection guides:

9 Ways to Fix TeamViewer Connection Issues

Whether you’re using the free or business edition of TeamViewer on Windows, macOS, iPhone/iPad, or Android, these 9 fixes will help you troubleshoot and restore your connection quickly. These steps are simple, effective, and compatible with all devices to ensure smooth remote access.

For more device-based tutorials, check out:

Method 1: Check Internet Connection and VPN Status

Network instability is the most common reason for TeamViewer connection failures. Unstable Wi-Fi, VPN misconfigurations, or proxies may cause timeouts or connection blocking.

Steps:

  1. Press Win + R, type cmd, and hit Enter.

  2. Type ping -t 8.8.8.8 and observe the response time. If latency spikes or packets drop frequently, your network is unstable.

  3. Use Speedtest to check your internet speed or restart your router / switch to a wired connection for better stability.

check network speedtest

If your internet is fine but TeamViewer still won’t connect, move on to the next fix.

Method 2: Change TeamViewer Access Permissions

If you can’t connect or can’t control your partner’s screen, your access permissions may be too limited.

Steps:

  1. On the remote computer, open TeamViewer, click the gear icon, and open Options.

  2. Go to Advanced, then click Show advanced options.

  3. Under “Advanced settings for connections to this computer,” set Access Control to Full Access.

This ensures you have full control and can solve most permission-related connection problems.

Method 3: Check and Adjust Windows Settings

If TeamViewer keeps failing to connect, Windows User Account Control (UAC) or Remote Desktop settings may be interfering.

  • Make sure UAC allows TeamViewer to make system changes.

  • Verify that Remote Desktop services are running.

  • Restart your computer after major Windows or TeamViewer updates.

Method 4: Adjust Firewall and Proxy Settings

Windows Firewall or proxy restrictions can block TeamViewer’s necessary ports.

Steps:

  1. Open Windows Defender Firewall → Allow an app through Firewall.

  2. Click Change settings, then ensure TeamViewer Remote Control Service is checked.

  3. Go to Control Panel → Internet Options → Connections → LAN Settings, and uncheck Use a proxy server for your LAN if it’s enabled.

If it’s too complex to reconfigure, consider switching to DeskIn — it connects instantly without firewall hassle.

Method 5: Disable IPv6 on Both Computers

IPv6 incompatibility can sometimes cause connection failures.

Steps:

  1. Press Win + R, type ncpa.cpl, and hit Enter.

  2. Right-click your active network → Properties.

  3. Uncheck Internet Protocol Version 6 (TCP/IPv6) and click OK.

  4. Repeat the same on the remote PC.

Reboot and retry — this often resolves unknown “Cannot connect to partner” errors.

Method 6: Update or Reinstall TeamViewer

Outdated or unofficial versions can lead to compatibility issues.

Steps:

  1. Open TeamViewer → Menu (≡) → Check for new version.

  2. If updating doesn’t help, uninstall TeamViewer from Control Panel → Programs and Features, then reinstall the latest version from the official website.

Pro tip: If you’re on Mac, you can also use Microsoft Remote Desktop or turn your iPad into a second screen for smoother multitasking.

Method 7: Refresh DNS and TCP/IP via CMD

If login or verification fails, network cache may be corrupted.

Steps:

  1. Open CMD as Administrator.

  2. Type the following commands one by one:

ipconfig /release  

ipconfig /flushdns  

ipconfig /renew  

nbtstat –r  

netsh int ip reset resetlog.txt  

netsh winsock reset

teamviewer cmd refresh
  1. Restart your PC and reconnect TeamViewer.

Method 8: Check TeamViewer Server Status

Sometimes, the issue isn’t on your end.

Steps:

  1. Visit the TeamViewer server status page.

  2. Check if your regional servers are down.

  3. If there’s downtime, wait or use DeskIn as a stable alternative.

Method 9: Perform a Clean Boot to Eliminate Background Conflicts

Antivirus or startup apps may interfere with TeamViewer.

Steps:

  1. Press Win + R, type msconfig, and hit Enter.

  2. Under General, select Selective startup and uncheck “Load startup items.”

  3. In Services, check “Hide all Microsoft services” and click Disable all.

  4. Restart your PC.

  5. Temporarily disable antivirus software and try connecting again.

This isolates background conflicts that cause TeamViewer connection drops.

Recommended Alternative: DeskIn Remote Control

If you’re tired of TeamViewer’s connection limits or false commercial-use flags, DeskIn is a reliable alternative. It offers industry-leading 4K 60FPS quality, ultra-low latency, and free commercial usage.With 200+ global nodes and smart routing, DeskIn ensures stable remote sessions, even for high-load tasks.

Pricing highlights:

  • Standard plan: $4.16/month (annual billing)

  • Performance plan: $16.66/month with multi-monitor and fast file transfer

  • Free version: includes Wake-on-LAN, screen mirroring, voice chat, and whiteboard collaboration

    free download DeskIn

Why Choose DeskIn Over TeamViewer?

  • Superior connection stability — long sessions without disconnects, even on free plans. You can connect two computers easily with DeskIn

  • High-quality visuals & low latency — up to 4K60FPS or 2K144FPS with 4:4:4 color accuracy.

  • Comprehensive multi-monitor & interaction features — screen extension, projection, virtual screens, voice chat, whiteboard.

  • Remote Wake (Wake-on-LAN) power on your PC remotely.

  • Unlimited file transfers — up to 12MB/s without size limits.

  • Cross-platform support — Windows, macOS, Android, iOS.

  • Affordable pricing — starting at $4.16/month vs. TeamViewer’s $50.9/month.

DeskIn combines high performance, flexibility, and cost efficiency — ideal for individuals and teams alike.

3 Simple Steps to Use DeskIn

  1. Install DeskIn on both computers and log in with the same account.

    free download DeskInlog into your deskin account
  2. Select your target device from the list and click “Remote Control.”

    choose another computer to remote connect
  3. Control remotely — transfer files, share screen, or communicate instantly.

    two computers share same screen

Fixing “Commercial Use Detected” on TeamViewer

Even personal users are sometimes flagged for commercial use due to TeamViewer’s detection algorithms. This disrupts workflow and limits functionality. You can appeal to unlock your account or switch to DeskIn, which allows free commercial usage without restrictions.

Why Does TeamViewer Flag for Commercial Use?

TeamViewer monitors your IP, domain, connection frequency, and activity. Using corporate domains or connecting to multiple devices may trigger a “commercial use suspected” warning.

How to Submit an Appeal

  1. Visit the TeamViewer Commercial Use Suspected page.

    teamviewer commerical use form
  2. Fill out your name, email, affected TeamViewer ID, and explain your personal use case.

  3. Upload your log files

  4. Wait about 7 days for review.

After approval, your account will return to the free version.

Temporary Workaround: Use DeskIn

If you’re locked out of TeamViewer, DeskIn offers free, unrestricted remote control for both personal and business use. It’s fast, stable, and won’t get blocked for “commercial activity.”

free download DeskIn

FAQ

Q: Why does TeamViewer disconnect after 5 minutes?

A: The free version has a session time limit or may be flagged as commercial. DeskIn has no time limit and offers stable connections.

Q: What are the limitations of TeamViewer Free?

A: Free users face time limits, feature restrictions, and commercial detection. DeskIn Free removes all these barriers and allows business use.

Q: Can I control my PC from a phone with TeamViewer?

A: TeamViewer mobile is limited and may fail to connect. DeskIn supports iOS/Android remote control with full features like screen extension and voice chat.

Conclusion

This guide outlined 9 fixes for TeamViewer connection failures — from checking your network and permissions to disabling IPv6, reinstalling the app, and resetting DNS/TCP settings. We also covered how to resolve or appeal a commercial-use restriction.

To avoid these issues entirely, try DeskIn — a stable, high-performance, and free-for-commercial-use alternative with 4K streaming, multi-screen support, and no session limits. It’s the smarter way to remote work securely and efficiently.

free download DeskIn
share screen with another computer

PRODUCTIVITY

How to Share Screen With Another Computer: 4 Most Practical Methods Explained

With the rise of remote work and content creation, the need to share one screen between two computers has become increasingly common. Whether you’re setting up a dual-monitor workstation, connecting your laptop to a desktop, or want a flexible screen-sharing setup, there are easy ways to make it happen.

When rendering or running simulations on one PC, you can easily switch to another for gaming or chatting—no more constant plugging and unplugging cables.

This guide introduces four of the most practical solutions: the DeskIn remote desktop software, KVM switch, Microsoft Quick Assist, and Windows Miracast wireless projection. Whether you’re connecting Windows-to-Windows, setting up Mac-to-Windows remote access, or creating a stable extended monitor setup, you’ll find the best method here.

Why Share Screen With Another Computers?

In the era of hybrid work and creative workflows, sharing one screen between two computers is a practical need for many professionals. For example, while rendering videos, 3D modeling, or coding, one computer can handle processing while the other is used for meetings, research, or entertainment. This setup saves desk space and enhances multitasking efficiency.

Main Benefits

  • Extend your laptop screen: External monitor displays and operates in sync.

  • Flexible dual-screen setup: Easily switch or divide display tasks.

  • Show two windows simultaneously: Perfect for comparison or multitasking.

  • Different wallpapers for each screen: Maintain independent environments.

  • Quick and convenient: No cables or compatibility worries.

Unlike “one computer with two monitors,” this setup allows two separate systems to share one display, switching seamlessly through software or hardware for a smoother, more flexible workflow.

Method 1: Use DeskIn Remote Desktop Software — The Easiest Way to Share Screen With Another Computer

DeskIn share screens with another computer

If you want to switch or share screens between different computers without buying extra hardware, DeskIn is the most intuitive and versatile choice. Designed for remote access and cross-device screen sharing, it lets you easily connect your laptop and desktop—even when they’re not on the same network.

Ideal For

  • Remote work, team collaboration, and cross-device control (laptop + desktop)

  • Users who want to save hardware costs (no KVM switch needed)

  • Those who need to access another device from a different location or network

Key Advantages

  • High-quality, low-latency performance: Supports up to 4K resolution with latency <40ms for clear and precise visuals.

  • Real-time responsiveness: Smooth cursor and click response—perfect for design review, teaching, or code inspection.

  • Built-in collaboration tools: Includes voice chat and whiteboard annotation for live teaching or team discussions.

  • Cross-platform compatibility: Works seamlessly across Windows, Mac, and mobile devices for multi-device synchronization.

  • Multi-display mirroring: Mirror one computer to multiple screens—ideal for presentations or remote meetings.

  • Free and beginner-friendly: Easy setup with a modern, intuitive interface.

💡 Note: You’ll need to install DeskIn on both devices first—but setup only takes a few minutes.

If you’d like to explore similar tools, check out:

DeskIn Setup Tutorial | How to Share Screen With Another Computer

Follow these simple steps to use DeskIn for screen sharing or extending your laptop display:

1. Download and Sign In

Go to the DeskIn website and install the app on both computers. Log in with the same account to enable remote connection and screen sharing.

free download DeskInlog in to DeskIn account

2. Choose Mirroring or Extension Mode

Click “Mirror/Extend Screen” from the sidebar. Then select “Start Mirroring” or “Start Extending” to share one screen between two computers.

choose another device to share screen

3. Start Sharing or End Connection

Once connected, you can transfer files, chat via voice, and share screens instantly. When done, click “Exit Remote Control” to secure your privacy.

two computers share same screen

More recommended reads:

Method 2: Use a KVM Switch — A Hardware Solution to Share One Monitor Between Two PCs

kvm switch enabling two hosts share a single monitor

If you want both PCs to share one monitor and use the same keyboard and mouse, consider a KVM (Keyboard Video Mouse) switch. This hardware device connects two computers via HDMI or USB, allowing you to switch displays instantly—no need to unplug cables or sign in/out of accounts.

Ideal For

  • Users who want to control two PCs using one monitor, keyboard, and mouse

  • Those switching frequently between work and gaming PCs

  • Users who prefer a stable, zero-latency hardware setup

Pros

  • Simple plug-and-play setup

  • Near-zero latency, ideal for gaming and media use

  • No software installation required

Cons

  • Requires separate hardware purchase

  • Some models have limited support for 4K / 144Hz monitors

If your laptop supports HDMI input, it can directly switch between dual-display modes. However, most laptops only support output, not input. To bypass this limitation, use DeskIn for software-based multi-PC control—no cables needed.

See also:

KVM Setup Guide | Quickly Switch Between Two Computers Sharing One Screen

To set up a KVM switch:

  1. Connect Devices

    • Plug the monitor, keyboard, and mouse into the KVM switch.

    • Connect each PC to the KVM using HDMI/USB cables.

      kvm switch connects to computers
  2. Switch Between Computers

    • Panel Button: Press the physical button on the switch to toggle between computers.

    • Keyboard Shortcut: Double-tap Scroll Lock + number key to switch inputs.

    • OSD Menu: Some models provide an on-screen menu for switching.

    • Mouse Gesture Switching: Advanced models allow mouse-based switching.

This setup enables quick, cable-free switching between systems for efficient multi-PC workflows.

Method 3: Use Microsoft Quick Assist to Share Screens Between Two Windows Computers

microsoft quick assist

Microsoft Quick Assist is a built-in Windows remote control tool that lets two computers share screens securely—no third-party software needed. Both users simply open Quick Assist and connect using a temporary security code.

This is especially useful for Windows-to-Windows setups—ideal for remote teaching, IT support, or quick collaboration.

Pros

  • Completely free: Pre-installed on Windows.

  • Secure connections: Uses one-time verification codes.

  • Simple interface: Intuitive and beginner-friendly.

  • Supports mouse/keyboard control: Great for guidance or troubleshooting.

Cons

  • Windows-only: No Mac or Linux support.

  • Dependent on internet speed: May lag on slow networks.

If you’re on Mac, try DeskIn for multi-platform screen sharing without compatibility issues. See also: How to Use Microsoft Remote Desktop on Mac [Full Guide]

Quick Assist Setup Guide | Share or Extend Laptop Screens on Windows

To share screens between two Windows laptops using Quick Assist:

  1. Launch the App
    Press Win + S, search for “Quick Assist,” and open it.

  2. Select Assistance Mode
    On the main (control) PC, click “Assist another person.”

  3. Sign In
    Log in with your Microsoft account to generate a security code.

  4. Enter Security Code
    On the other laptop, enter the code under “Get assistance” and submit.
    Note: Security code expires in 10 minutes.

  5. Allow Screen Sharing
    Click “Allow” on the receiving PC.

  6. Start Remote Control
    Choose between “View screen” or “Take full control.”

During control, use the toolbar to restart, open Task Manager, or send messages. When finished, simply end the session. A new code is needed for the next connection.

Method 4: Use Windows Miracast Wireless Display

Windows Miracast

If you want to extend or mirror screens wirelessly between two laptops without HDMI cables, Windows Miracast is a convenient built-in solution. It allows wireless projection and display sharing over the same Wi-Fi network.

Ideal Use Cases

  • Create a wireless dual-monitor setup

  • Project one laptop to another for meetings or demos

  • Quickly share visuals during presentations

Pros

  • No software installation required

  • Supports “Duplicate” or “Extend” display modes

  • Fast and stable connection

Check compatibility first: press Win + P. If you see “Connect to a wireless display,” your device supports Miracast.

Cons

  • Both devices must support Miracast

  • Quality and latency depend on Wi-Fi stability

If your devices are on different platforms (e.g., Mac + Windows), use DeskIn for smoother cross-system sharing.

Miracast Setup Guide | Extend Laptop Display or Share Screens Wirelessly

  1. Open the Connection Panel

    Click the Notification Center icon or press Win + K to open “Connect.”

  2. Find Available Devices

    Select your target device from the list of nearby Miracast-enabled PCs.

  3. Enable Input Control
    Check “Allow input from a connected device” to enable keyboard and mouse control.

Once connected, your two laptops can display mirrored or extended screens wirelessly—ideal for mobile and clutter-free dual-screen setups.

FAQ | Troubleshooting and Common Questions

How to Set Up a Wireless Dual-Screen with Two Windows 11 Laptops?

Use Miracast or DeskIn to connect wirelessly. You can extend your display without cables—perfect for multitasking or remote collaboration.

How to Synchronize Two Computers?

In display settings, choose Extend or Duplicate mode. Adjust the monitor arrangement and resolution for smooth dual-display performance.

Why Can’t My Mouse Move Across Screens?

Check your display alignment under Settings → System → Display. Adjust screen order to match the physical layout.

What’s the Shortcut for Switching Displays?

Press Windows + P to open the projection menu. Choose among “Duplicate,” “Extend,” or “Second screen only.”

Conclusion: Which Method Is Best for Sharing One Screen Between Two Computers?

Here’s a quick summary of all four methods:

  • DeskIn: The most flexible and complete option—cross-network, multi-device, with screen extension and collaboration tools.

  • KVM Switch: Ideal for gamers or professionals who prefer hardware-based, zero-latency control.

  • Microsoft Quick Assist: Great free tool for Windows-only setups.

  • Miracast: Best for wireless, cable-free environments.

Overall, DeskIn stands out as the most comprehensive and user-friendly solution, offering excellent performance, cross-platform support, and remote access convenience—all in one tool.

👉 Download DeskIn now and start sharing screens between two computers effortlessly.

free download DeskIn

Jangan ketinggalan.

Jangan ketinggalan.

Jangan ketinggalan.

Hubungi Kami

Email: support@deskin.io

Office: 991D Alexandra Road #02-17, Singapore 119972

Copyright © 2025 Zuler Technology PTE. LTD. All rights reserved.

Hubungi Kami

support@deskin.io

991D Alexandra Road #02-17

Singapore 119972

Copyright © 2025 Zuler Technology PTE. LTD. All rights reserved.

Hubungi Kami

Email: support@deskin.io

Office: 991D Alexandra Road #02-17, Singapore 119972

Copyright © 2025 Zuler Technology PTE. LTD. All rights reserved.