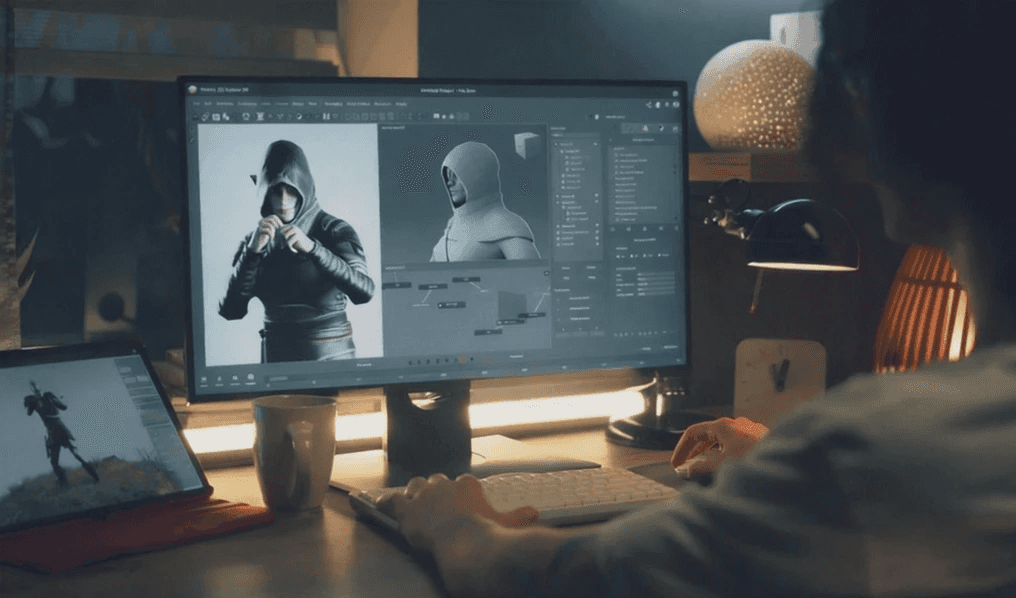
Chắc hẳn bạn còn nhớ khi chơi game trên một màn hình dường như là đỉnh cao của giải trí kỹ thuật số? Những ngày tháng đó đã qua lâu rồi. Là một game thủ tận tụy đã dành vô số giờ đồng hồ cả chơi và tối ưu hóa các thiết lập chơi game, tôi có thể nói với bạn rằng việc thiết lập chính xác hai màn hình cho chơi game không chỉ là một bản nâng cấp—đó là một bước chuyển mình. Dù bạn đang phát trực tiếp gameplay của mình, theo dõi các cuộc hội thoại trên Discord trong khi đang chơi game, hay đơn giản chỉ thèm khát một cái nhìn toàn cảnh hấp dẫn, một thiết lập hai màn hình mang lại trải nghiệm mà các màn hình đơn giản không thể so sánh được.
Nhưng đây là vấn đề—việc thiết lập hai màn hình cho chơi game không đơn giản chỉ là cắm thêm một màn hình vào và nhấn nút nguồn. Có những yếu tố phần cứng, cấu hình phần mềm và kỹ thuật tối ưu hóa tạo ra sự khác biệt giữa một trải nghiệm vụng về, khó chịu và một thiên đường chơi game mượt mà. Trong hướng dẫn này, tôi sẽ hướng dẫn bạn qua mọi điều bạn cần biết về việc tạo nên thiết lập chơi game hai màn hình hoàn hảo sẽ cách mạng hóa cách bạn chơi.
Các Phiên Bản Windows Hỗ Trợ
Không phải tất cả các phiên bản của Windows đều hỗ trợ nhiều màn hình qua kết nối Remote Desktop. Đối với chức năng hai màn hình, hãy đảm bảo bạn có:
Windows 10 Pro hoặc Enterprise: Những phiên bản này hỗ trợ Remote Desktop với nhiều màn hình một cách tự nhiên.
Windows Server (2016 hoặc mới hơn): Các phiên bản Server cung cấp khả năng đa màn hình rộng rãi trong các môi trường doanh nghiệp.
Nâng cấp từ Windows Home: Nếu bạn đang sử dụng Windows Home, bạn sẽ cần nâng cấp lên Pro hoặc Enterprise, vì phiên bản Home không hỗ trợ kết nối Remote Desktop.
Các Màn Hình và Cài Đặt Phần Cứng
Trước khi bắt đầu phiên Remote Desktop hai màn hình, hãy xác nhận rằng tất cả các yêu cầu phần cứng đã được đáp ứng:
Cấu Hình Hai Màn Hình: Cả hai màn hình phải được kết nối và thiết lập đúng cách trong Cài Đặt Hiển Thị của hệ thống cục bộ của bạn.
Cài Đặt Hiển Thị: Đảm bảo rằng cả hai màn hình được thiết lập ở chế độ “Mở rộng” trong cài đặt hiển thị của máy tính cục bộ của bạn. Để truy cập tùy chọn này, hãy vào Cài Đặt > Hệ thống > Hiển thị, sau đó trong phần Nhiều màn hình, hãy chọn Mở rộng các màn hình này.
Trình điều khiển Đồ họa: Việc cập nhật trình điều khiển đồ họa của máy tính cục bộ là rất quan trọng. Trình điều khiển cũ có thể gây ra các vấn đề với sự chuyển tiếp mượt mà giữa các màn hình trong một phiên từ xa.
Các Yếu Tố Mạng và Hiệu Suất
Một kết nối internet ổn định và tốc độ cao là điều cần thiết cho trải nghiệm Remote Desktop nhiều màn hình mượt mà. Băng thông kém hoặc sự không ổn định của mạng có thể dẫn đến việc màn hình bị treo hoặc lag giữa các màn hình.
Băng Thông Đề Xuất: Đối với các phiên Remote Desktop hai màn hình, tốc độ kết nối tối thiểu là 10 Mbps được khuyến nghị. Các màn hình với độ phân giải cao hơn có thể yêu cầu thêm băng thông.
Cấu Hình Remote Desktop cho Băng Thông Thấp: Trong cài đặt Remote Desktop Connection, hãy chuyển đến tab Trải nghiệm và chọn các tùy chọn tối ưu cho môi trường băng thông thấp, chẳng hạn như điều chỉnh các cài đặt hình ảnh như phối cảnh màn hình và làm mịn phông chữ.
Bạn cũng có thể thích:
Cách mở rộng Remote Desktop sang hai màn hình
Once you've confirmed the prerequisites, you can proceed with enabling multi-monitor support. There are several methods to configure dual monitors in Microsoft Remote Desktop, based on your preferred interaction.
Phương pháp 1. Kích hoạt hỗ trợ nhiều màn hình trong ứng dụng RDC
Cách dễ nhất để bật hai màn hình là sử dụng công cụ Kết nối Remote Desktop của Microsoft (RDC).
Bước 1. Khởi động RDC: Mở công cụ Kết nối Remote Desktop bằng cách nhập "mstsc" vào thanh tìm kiếm của menu Bắt đầu.

Bước 2. Mở rộng Tùy chọn: Nhấp vào “Hiển thị Tùy chọn” để truy cập các cài đặt nâng cao.

Bước 3. Đi đến tab Hiển Thị: Trong tab Hiển thị, đánh dấu tùy chọn “Sử dụng tất cả các màn hình của tôi cho phiên từ xa.”

Bước 4. Kết nối: Nhập địa chỉ IP hoặc tên máy của máy tính mục tiêu và nhấp vào “Kết nối.” Phiên Remote Desktop của bạn bây giờ sẽ trải dài trên tất cả các màn hình có sẵn.

Phương pháp 2. Cấu hình tệp RDP cho cấu hình nhiều màn hình
Để có khả năng linh hoạt hơn hoặc tự động hóa, các quản trị viên CNTT có thể cấu hình một tệp .rdp để quản lý các thiết lập nhiều màn hình.
Bước 1. Tạo hoặc Chỉnh sửa tệp RDP: Mở hoặc tạo một tệp .rdp bằng cách sử dụng một trình soạn thảo văn bản như Notepad.
Bước 2. Thêm Tham số Nhiều Màn Hình: Thêm hoặc sửa đổi dòng sau trong tệp để bật hỗ trợ nhiều màn hình:

Bước 3. Lưu tệp: Sau khi lưu các thay đổi, nhấp đúp vào tệp .rdp để khởi động một phiên nhiều màn hình.
Phương pháp này đặc biệt hữu ích cho các quản trị viên hệ thống cần xử lý nhiều kết nối từ xa hoặc muốn cấu hình các cài đặt cụ thể cho người dùng trước.
Phương pháp 3. Sử dụng dòng lệnh cho Remote Desktop với hai màn hình
Đối với những ai thích sử dụng công cụ dòng lệnh hoặc cần tự động hóa, bạn có thể khởi động một phiên nhiều màn hình trực tiếp từ Command Prompt.
Bước 1. Mở Command Prompt: Chạy Command Prompt với quyền quản trị.
Bước 2. Thực thi lệnh: Nhập lệnh sau để khởi động một phiên Remote Desktop với hai màn hình.

Cách tiếp cận dòng lệnh này rất phù hợp cho các chuyên gia CNTT cần nhanh chóng thiết lập hoặc tự động hóa các phiên từ xa.
Khắc phục sự cố với các vấn đề Remote Desktop đa màn hình
Gặp phải các vấn đề với thiết lập Remote Desktop nhiều màn hình không phải là hiếm, ngay cả sau khi cấu hình. Dưới đây là những vấn đề phổ biến nhất và cách giải quyết chúng hiệu quả.
Màn hình thứ hai không hiển thị trong phiên từ xa
Đôi khi, màn hình thứ hai có thể không xuất hiện trong một phiên Remote Desktop. Điều này có thể do cài đặt cục bộ không chính xác hoặc cấu hình phiên không đúng.
Kiểm tra Cài Đặt Hiển Thị Cục Bộ: Đảm bảo màn hình thứ cấp được phát hiện đúng và được cấu hình như một màn hình mở rộng trên hệ thống cục bộ của bạn.
Xem lại Cài Đặt Remote Desktop: Xác nhận rằng tùy chọn “Sử dụng tất cả các màn hình” đã được bật trong cài đặt RDC.
Xác minh Cấu hình tệp .rdp: Nếu bạn đang sử dụng tệp .rdp, hãy đảm bảo tham số “use multimon” được thiết lập chính xác.
Hiệu suất kém trên màn hình thứ hai
Thời gian phản hồi chậm hoặc lag trên màn hình thứ hai thường chỉ ra giới hạn mạng hoặc cài đặt độ phân giải quá cao.
Giảm Độ Phân Giải Hiển Thị: Điều hướng đến tab Hiển Thị trong cài đặt Remote Desktop và giảm độ phân giải màn hình để cải thiện hiệu suất.
Tối ưu Hóa Cài Đặt Mạng: Trong tab Trải nghiệm, tắt các cải tiến hình ảnh để thích ứng với băng thông hạn chế.
Phiên không trải dài trên hai màn hình
Nếu phiên của bạn không trải dài trên cả hai màn hình, vấn đề có thể nằm ở ứng dụng Remote Desktop hoặc cấu hình hệ điều hành.
Cập nhật Client RDC của bạn: Đảm bảo rằng bạn đang sử dụng phiên bản mới nhất của Client Remote Desktop của Microsoft. Các phiên bản cũ có thể không hỗ trợ hiệu quả việc thiết lập nhiều màn hình.
Xác nhận Tính Tương Thích Windows: Kiểm tra rằng phiên bản Windows của bạn bao gồm hỗ trợ cho chức năng Remote Desktop nhiều màn hình.
Bằng cách giải quyết hệ thống những vấn đề này, bạn có thể đảm bảo một trải nghiệm Remote Desktop nhiều màn hình mượt mà và hiệu quả.
Nâng cao Trải Nghiệm của Bạn với DeskIn
Trong khi thiết lập hai màn hình cho chơi game tạo ra những khả năng tuyệt vời, việc quản lý nhiều màn hình một cách hiệu quả vẫn có thể là thách thức. Đó là lý do DeskIn xuất hiện như một công cụ tùy chọn để nâng cao trải nghiệm nhiều màn hình của bạn.
DeskIn cung cấp một số tính năng bổ sung cho thiết lập chơi game hai màn hình của bạn:
Di Chuyển Chuột Mượt Mà: Điều hướng giữa các màn hình mà không bị mắc kẹt ở các cạnh màn hình
Cấu Hình Phím Tắt: Tạo các phím tắt tùy chỉnh để chuyển đổi giữa các màn hình
Quản Lý Cửa Sổ: Nhanh chóng ghim các cửa sổ liên quan đến trò chơi vào các vị trí lý tưởng
Để mở rộng hiển thị của bạn bằng cách sử dụng DeskIn, hãy làm theo các bước này một cách cẩn thận để đảm bảo thiết lập hai màn hình liền mạch:
Cài Đặt và Mở DeskIn trên Cả Hai Thiết Bị
Đảm bảo DeskIn được cài đặt trên cả thiết bị chính và thứ cấp. Nếu bạn chưa cài đặt ứng dụng, bạn có thể tải xuống từ trang web chính thức.
Nhấp vào đây để tải xuống DeskInĐăng Nhập Sử Dụng Cùng Một Tài Khoản trên Cả Hai Thiết Bị
Khởi động DeskIn trên mỗi thiết bị và đăng nhập bằng tài khoản DeskIn giống nhau. Điều này đảm bảo sự đồng bộ hóa đúng cách giữa các thiết bị.

Chọn Thiết Bị Mục Tiêu Để Sử Dụng Là Màn Hình Mở Rộng
Trên thiết bị chính của bạn (thiết bị mà bạn sẽ sử dụng tích cực), tìm và chọn thiết bị thứ hai mà bạn muốn sử dụng làm màn hình mở rộng.

Đi đến Quản Lý Màn Hình và Nhấp “Mở Rộng Màn Hình”
Sau khi đã chọn thiết bị mục tiêu, hãy chuyển đến menu Quản Lý Màn Hình. Sau đó, nhấp vào “Mở Rộng Màn Hình” để khởi động kết nối màn hình mở rộng.

Cấp Quyền trên Thiết Bị Thứ Hai
Một yêu cầu cấp quyền sẽ xuất hiện trên thiết bị thứ hai. Chấp nhận yêu cầu để cho phép kết nối và kích hoạt việc mở rộng màn hình.Điều Chỉnh Cài Đặt Độ Phân Giải và Tốc Độ Khung Hình
Sau khi màn hình đã được mở rộng, điều chỉnh độ phân giải và tốc độ khung hình (FPS) để phù hợp với các cài đặt tối ưu cho việc sử dụng của bạn, đặc biệt nếu bạn có kế hoạch sử dụng thiết lập này cho chơi game hoặc các tác vụ đòi hỏi đồ họa cao.

Bắt Đầu Sử Dụng Hai Màn Hình Hiệu Quả
Màn hình của bạn bây giờ đã được mở rộng thành công. Bạn có thể bắt đầu làm việc hoặc chơi game trên hai màn hình với sự linh hoạt và không gian hình ảnh được cải thiện.

DeskIn giúp giải quyết những khó khăn phổ biến khi chơi game trên nhiều màn hình, tạo ra một trải nghiệm trực quan hơn mà không gặp phải những rắc rối khi sử dụng nhiều màn hình mà nhiều game thủ thường gặp.
Kết luận: Chuyển đổi Trải Nghiệm Chơi Game của Bạn với Thiết Lập Hai Màn Hình Hoàn Hảo
Việc thiết lập hai màn hình cho chơi game đại diện cho một trong những nâng cấp quan trọng nhất mà bạn có thể thực hiện để cải thiện trải nghiệm chơi game của mình. Từ việc đa nhiệm tốt hơn đến gameplay thực sự hấp dẫn, những lợi ích là đáng kể và hoàn toàn xứng đáng với nỗ lực ban đầu trong việc cấu hình.
Nhớ những điểm chính này:
Chọn các màn hình có thông số kỹ thuật tương tự khi có thể
Đảm bảo GPU của bạn có thể xử lý các yêu cầu hiển thị bổ sung
Dành thời gian để cấu hình đúng cách cài đặt hiển thị của Windows
Xem xét DeskIn như một công cụ tùy chọn để đơn giản hóa trải nghiệm hai màn hình của bạn
Chuẩn bị biến đổi thiết lập chơi game của bạn? Làm theo các bước trong hướng dẫn này để tạo nên một môi trường chơi game hai màn hình sẽ mãi mãi thay đổi cách bạn chơi.
Chắc hẳn bạn còn nhớ khi chơi game trên một màn hình dường như là đỉnh cao của giải trí kỹ thuật số? Những ngày tháng đó đã qua lâu rồi. Là một game thủ tận tụy đã dành vô số giờ đồng hồ cả chơi và tối ưu hóa các thiết lập chơi game, tôi có thể nói với bạn rằng việc thiết lập chính xác hai màn hình cho chơi game không chỉ là một bản nâng cấp—đó là một bước chuyển mình. Dù bạn đang phát trực tiếp gameplay của mình, theo dõi các cuộc hội thoại trên Discord trong khi đang chơi game, hay đơn giản chỉ thèm khát một cái nhìn toàn cảnh hấp dẫn, một thiết lập hai màn hình mang lại trải nghiệm mà các màn hình đơn giản không thể so sánh được.
Nhưng đây là vấn đề—việc thiết lập hai màn hình cho chơi game không đơn giản chỉ là cắm thêm một màn hình vào và nhấn nút nguồn. Có những yếu tố phần cứng, cấu hình phần mềm và kỹ thuật tối ưu hóa tạo ra sự khác biệt giữa một trải nghiệm vụng về, khó chịu và một thiên đường chơi game mượt mà. Trong hướng dẫn này, tôi sẽ hướng dẫn bạn qua mọi điều bạn cần biết về việc tạo nên thiết lập chơi game hai màn hình hoàn hảo sẽ cách mạng hóa cách bạn chơi.
Các Phiên Bản Windows Hỗ Trợ
Không phải tất cả các phiên bản của Windows đều hỗ trợ nhiều màn hình qua kết nối Remote Desktop. Đối với chức năng hai màn hình, hãy đảm bảo bạn có:
Windows 10 Pro hoặc Enterprise: Những phiên bản này hỗ trợ Remote Desktop với nhiều màn hình một cách tự nhiên.
Windows Server (2016 hoặc mới hơn): Các phiên bản Server cung cấp khả năng đa màn hình rộng rãi trong các môi trường doanh nghiệp.
Nâng cấp từ Windows Home: Nếu bạn đang sử dụng Windows Home, bạn sẽ cần nâng cấp lên Pro hoặc Enterprise, vì phiên bản Home không hỗ trợ kết nối Remote Desktop.
Các Màn Hình và Cài Đặt Phần Cứng
Trước khi bắt đầu phiên Remote Desktop hai màn hình, hãy xác nhận rằng tất cả các yêu cầu phần cứng đã được đáp ứng:
Cấu Hình Hai Màn Hình: Cả hai màn hình phải được kết nối và thiết lập đúng cách trong Cài Đặt Hiển Thị của hệ thống cục bộ của bạn.
Cài Đặt Hiển Thị: Đảm bảo rằng cả hai màn hình được thiết lập ở chế độ “Mở rộng” trong cài đặt hiển thị của máy tính cục bộ của bạn. Để truy cập tùy chọn này, hãy vào Cài Đặt > Hệ thống > Hiển thị, sau đó trong phần Nhiều màn hình, hãy chọn Mở rộng các màn hình này.
Trình điều khiển Đồ họa: Việc cập nhật trình điều khiển đồ họa của máy tính cục bộ là rất quan trọng. Trình điều khiển cũ có thể gây ra các vấn đề với sự chuyển tiếp mượt mà giữa các màn hình trong một phiên từ xa.
Các Yếu Tố Mạng và Hiệu Suất
Một kết nối internet ổn định và tốc độ cao là điều cần thiết cho trải nghiệm Remote Desktop nhiều màn hình mượt mà. Băng thông kém hoặc sự không ổn định của mạng có thể dẫn đến việc màn hình bị treo hoặc lag giữa các màn hình.
Băng Thông Đề Xuất: Đối với các phiên Remote Desktop hai màn hình, tốc độ kết nối tối thiểu là 10 Mbps được khuyến nghị. Các màn hình với độ phân giải cao hơn có thể yêu cầu thêm băng thông.
Cấu Hình Remote Desktop cho Băng Thông Thấp: Trong cài đặt Remote Desktop Connection, hãy chuyển đến tab Trải nghiệm và chọn các tùy chọn tối ưu cho môi trường băng thông thấp, chẳng hạn như điều chỉnh các cài đặt hình ảnh như phối cảnh màn hình và làm mịn phông chữ.
Bạn cũng có thể thích:
Cách mở rộng Remote Desktop sang hai màn hình
Once you've confirmed the prerequisites, you can proceed with enabling multi-monitor support. There are several methods to configure dual monitors in Microsoft Remote Desktop, based on your preferred interaction.
Phương pháp 1. Kích hoạt hỗ trợ nhiều màn hình trong ứng dụng RDC
Cách dễ nhất để bật hai màn hình là sử dụng công cụ Kết nối Remote Desktop của Microsoft (RDC).
Bước 1. Khởi động RDC: Mở công cụ Kết nối Remote Desktop bằng cách nhập "mstsc" vào thanh tìm kiếm của menu Bắt đầu.

Bước 2. Mở rộng Tùy chọn: Nhấp vào “Hiển thị Tùy chọn” để truy cập các cài đặt nâng cao.

Bước 3. Đi đến tab Hiển Thị: Trong tab Hiển thị, đánh dấu tùy chọn “Sử dụng tất cả các màn hình của tôi cho phiên từ xa.”

Bước 4. Kết nối: Nhập địa chỉ IP hoặc tên máy của máy tính mục tiêu và nhấp vào “Kết nối.” Phiên Remote Desktop của bạn bây giờ sẽ trải dài trên tất cả các màn hình có sẵn.

Phương pháp 2. Cấu hình tệp RDP cho cấu hình nhiều màn hình
Để có khả năng linh hoạt hơn hoặc tự động hóa, các quản trị viên CNTT có thể cấu hình một tệp .rdp để quản lý các thiết lập nhiều màn hình.
Bước 1. Tạo hoặc Chỉnh sửa tệp RDP: Mở hoặc tạo một tệp .rdp bằng cách sử dụng một trình soạn thảo văn bản như Notepad.
Bước 2. Thêm Tham số Nhiều Màn Hình: Thêm hoặc sửa đổi dòng sau trong tệp để bật hỗ trợ nhiều màn hình:

Bước 3. Lưu tệp: Sau khi lưu các thay đổi, nhấp đúp vào tệp .rdp để khởi động một phiên nhiều màn hình.
Phương pháp này đặc biệt hữu ích cho các quản trị viên hệ thống cần xử lý nhiều kết nối từ xa hoặc muốn cấu hình các cài đặt cụ thể cho người dùng trước.
Phương pháp 3. Sử dụng dòng lệnh cho Remote Desktop với hai màn hình
Đối với những ai thích sử dụng công cụ dòng lệnh hoặc cần tự động hóa, bạn có thể khởi động một phiên nhiều màn hình trực tiếp từ Command Prompt.
Bước 1. Mở Command Prompt: Chạy Command Prompt với quyền quản trị.
Bước 2. Thực thi lệnh: Nhập lệnh sau để khởi động một phiên Remote Desktop với hai màn hình.

Cách tiếp cận dòng lệnh này rất phù hợp cho các chuyên gia CNTT cần nhanh chóng thiết lập hoặc tự động hóa các phiên từ xa.
Khắc phục sự cố với các vấn đề Remote Desktop đa màn hình
Gặp phải các vấn đề với thiết lập Remote Desktop nhiều màn hình không phải là hiếm, ngay cả sau khi cấu hình. Dưới đây là những vấn đề phổ biến nhất và cách giải quyết chúng hiệu quả.
Màn hình thứ hai không hiển thị trong phiên từ xa
Đôi khi, màn hình thứ hai có thể không xuất hiện trong một phiên Remote Desktop. Điều này có thể do cài đặt cục bộ không chính xác hoặc cấu hình phiên không đúng.
Kiểm tra Cài Đặt Hiển Thị Cục Bộ: Đảm bảo màn hình thứ cấp được phát hiện đúng và được cấu hình như một màn hình mở rộng trên hệ thống cục bộ của bạn.
Xem lại Cài Đặt Remote Desktop: Xác nhận rằng tùy chọn “Sử dụng tất cả các màn hình” đã được bật trong cài đặt RDC.
Xác minh Cấu hình tệp .rdp: Nếu bạn đang sử dụng tệp .rdp, hãy đảm bảo tham số “use multimon” được thiết lập chính xác.
Hiệu suất kém trên màn hình thứ hai
Thời gian phản hồi chậm hoặc lag trên màn hình thứ hai thường chỉ ra giới hạn mạng hoặc cài đặt độ phân giải quá cao.
Giảm Độ Phân Giải Hiển Thị: Điều hướng đến tab Hiển Thị trong cài đặt Remote Desktop và giảm độ phân giải màn hình để cải thiện hiệu suất.
Tối ưu Hóa Cài Đặt Mạng: Trong tab Trải nghiệm, tắt các cải tiến hình ảnh để thích ứng với băng thông hạn chế.
Phiên không trải dài trên hai màn hình
Nếu phiên của bạn không trải dài trên cả hai màn hình, vấn đề có thể nằm ở ứng dụng Remote Desktop hoặc cấu hình hệ điều hành.
Cập nhật Client RDC của bạn: Đảm bảo rằng bạn đang sử dụng phiên bản mới nhất của Client Remote Desktop của Microsoft. Các phiên bản cũ có thể không hỗ trợ hiệu quả việc thiết lập nhiều màn hình.
Xác nhận Tính Tương Thích Windows: Kiểm tra rằng phiên bản Windows của bạn bao gồm hỗ trợ cho chức năng Remote Desktop nhiều màn hình.
Bằng cách giải quyết hệ thống những vấn đề này, bạn có thể đảm bảo một trải nghiệm Remote Desktop nhiều màn hình mượt mà và hiệu quả.
Nâng cao Trải Nghiệm của Bạn với DeskIn
Trong khi thiết lập hai màn hình cho chơi game tạo ra những khả năng tuyệt vời, việc quản lý nhiều màn hình một cách hiệu quả vẫn có thể là thách thức. Đó là lý do DeskIn xuất hiện như một công cụ tùy chọn để nâng cao trải nghiệm nhiều màn hình của bạn.
DeskIn cung cấp một số tính năng bổ sung cho thiết lập chơi game hai màn hình của bạn:
Di Chuyển Chuột Mượt Mà: Điều hướng giữa các màn hình mà không bị mắc kẹt ở các cạnh màn hình
Cấu Hình Phím Tắt: Tạo các phím tắt tùy chỉnh để chuyển đổi giữa các màn hình
Quản Lý Cửa Sổ: Nhanh chóng ghim các cửa sổ liên quan đến trò chơi vào các vị trí lý tưởng
Để mở rộng hiển thị của bạn bằng cách sử dụng DeskIn, hãy làm theo các bước này một cách cẩn thận để đảm bảo thiết lập hai màn hình liền mạch:
Cài Đặt và Mở DeskIn trên Cả Hai Thiết Bị
Đảm bảo DeskIn được cài đặt trên cả thiết bị chính và thứ cấp. Nếu bạn chưa cài đặt ứng dụng, bạn có thể tải xuống từ trang web chính thức.
Nhấp vào đây để tải xuống DeskInĐăng Nhập Sử Dụng Cùng Một Tài Khoản trên Cả Hai Thiết Bị
Khởi động DeskIn trên mỗi thiết bị và đăng nhập bằng tài khoản DeskIn giống nhau. Điều này đảm bảo sự đồng bộ hóa đúng cách giữa các thiết bị.

Chọn Thiết Bị Mục Tiêu Để Sử Dụng Là Màn Hình Mở Rộng
Trên thiết bị chính của bạn (thiết bị mà bạn sẽ sử dụng tích cực), tìm và chọn thiết bị thứ hai mà bạn muốn sử dụng làm màn hình mở rộng.

Đi đến Quản Lý Màn Hình và Nhấp “Mở Rộng Màn Hình”
Sau khi đã chọn thiết bị mục tiêu, hãy chuyển đến menu Quản Lý Màn Hình. Sau đó, nhấp vào “Mở Rộng Màn Hình” để khởi động kết nối màn hình mở rộng.

Cấp Quyền trên Thiết Bị Thứ Hai
Một yêu cầu cấp quyền sẽ xuất hiện trên thiết bị thứ hai. Chấp nhận yêu cầu để cho phép kết nối và kích hoạt việc mở rộng màn hình.Điều Chỉnh Cài Đặt Độ Phân Giải và Tốc Độ Khung Hình
Sau khi màn hình đã được mở rộng, điều chỉnh độ phân giải và tốc độ khung hình (FPS) để phù hợp với các cài đặt tối ưu cho việc sử dụng của bạn, đặc biệt nếu bạn có kế hoạch sử dụng thiết lập này cho chơi game hoặc các tác vụ đòi hỏi đồ họa cao.

Bắt Đầu Sử Dụng Hai Màn Hình Hiệu Quả
Màn hình của bạn bây giờ đã được mở rộng thành công. Bạn có thể bắt đầu làm việc hoặc chơi game trên hai màn hình với sự linh hoạt và không gian hình ảnh được cải thiện.

DeskIn giúp giải quyết những khó khăn phổ biến khi chơi game trên nhiều màn hình, tạo ra một trải nghiệm trực quan hơn mà không gặp phải những rắc rối khi sử dụng nhiều màn hình mà nhiều game thủ thường gặp.
Kết luận: Chuyển đổi Trải Nghiệm Chơi Game của Bạn với Thiết Lập Hai Màn Hình Hoàn Hảo
Việc thiết lập hai màn hình cho chơi game đại diện cho một trong những nâng cấp quan trọng nhất mà bạn có thể thực hiện để cải thiện trải nghiệm chơi game của mình. Từ việc đa nhiệm tốt hơn đến gameplay thực sự hấp dẫn, những lợi ích là đáng kể và hoàn toàn xứng đáng với nỗ lực ban đầu trong việc cấu hình.
Nhớ những điểm chính này:
Chọn các màn hình có thông số kỹ thuật tương tự khi có thể
Đảm bảo GPU của bạn có thể xử lý các yêu cầu hiển thị bổ sung
Dành thời gian để cấu hình đúng cách cài đặt hiển thị của Windows
Xem xét DeskIn như một công cụ tùy chọn để đơn giản hóa trải nghiệm hai màn hình của bạn
Chuẩn bị biến đổi thiết lập chơi game của bạn? Làm theo các bước trong hướng dẫn này để tạo nên một môi trường chơi game hai màn hình sẽ mãi mãi thay đổi cách bạn chơi.


