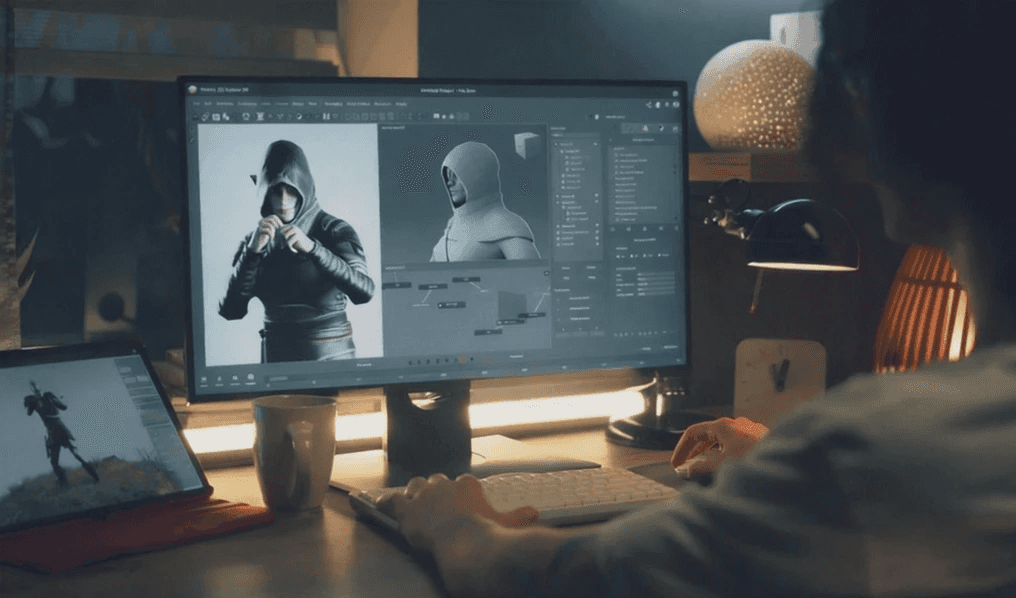
In today's hybrid work and learning environments, screen sharing and remote desktop access have become essential tools. Whether you're delivering a presentation, providing tech support, or working across multiple devices, the ability to share screen between PC and Mac simplifies collaboration and boosts productivity.
However, connecting a Mac to a PC for remote desktop screen sharing isn't always straightforward, as different systems, settings, and tools can make the process confusing. This guide will walk you through clear, step-by-step methods, including reliable screen mirroring apps like DeskIn, to connect your Mac to a PC, so you can mirror displays, control desktops remotely, and ensure smooth cross-platform interaction.
👉 Click here to download DeskIn
Recommended Reading:
[Before Reading] Can You Use Remote Desktop from Windows to Mac?
Yes, you can remotely control a Mac from a Windows PC using VNC (Virtual Network Computing). However, VNC can be complex to configure for control screens between Mac and PC and may pose security risks. For a simpler and more secure solution to control screens between Mac and PC, we recommend using DeskIn.
Method 1. Share Screen Between Two Macs Using macOS Screen Sharing
Screen Sharing on macOS is Apple's built-in solution, ideal for sharing the Screen between two Macs. It requires both computers running macOS, being on the same local network, or signed in with the same Apple ID/iCloud. This feature provides screen share on Mac with options for view-only mode, full remote access to Mac, file drag-and-drop transfer, and shared clipboard. If your setup meets these conditions, this is the simplest and most integrated method (see steps below).
However, if you need a Remote Desktop for Windows or screen sharing between a Mac and a Windows PC, Method 2 (DeskIn) offers a seamless cross-platform alternative.
Step 1. Enable Screen Sharing on the Target Mac
Go to System Settings (macOS Ventura and later) or System Preferences (earlier macOS).
Click General > Sharing.
Turn on Screen Sharing.

Click the ⓘ icon to manage who can access (e.g., "All users" or specific users).
Note the hostname (e.g.,
MacBook-Pro.local) or IP address displayed.
Step 2. Connect from Another Mac via Finder or VNC
On the second Mac, open Finder.

In the menu bar, click Go > Connect to Server (or press
Command + K).Type:
vnc://[hostname or IP address]Click Connect.
Enter the username and password of the host Mac if prompted. Once connected, you can choose to observe or control the host Mac's screen. Use the toolbar at the top to adjust quality, scale, or disconnect.
Method 2. Mirror Mac to PC Screen via a Third-Party Tool: DeskIn
Unlike macOS Screen Sharing (Method 1), which is limited to displaying a mirror from a MacBook to a PC only between Macs, DeskIn offers a versatile alternative for seamless wireless screen extension from Mac to Windows and beyond.
DeskIn stands out as the best remote desktop software for stable connections and low latency. It enables effortless display mirroring from a MacBook to a PC and full remote control Mac from Windows, all in high definition. Beyond mirroring, it supports multi-device management and file transfer, making it a true all-in-one solution. Crucially, DeskIn prioritizes security with 256-bit AES encryption, password protection, whitelist/blacklist access control, account-locked connections, and client-side locking to safeguard your sessions. Setup is remarkably simple, requiring no complex network configurations.
👉 Click here to download DeskIn
DeskIn Key Features for Mac-to-PC Screen Sharing
Cross-platform screen mirroring – Mirror your Mac screen to a Windows PC in real time, ideal for presentations, collaboration, and demonstrations.
Remote control support – Offers optional control features, allowing interactive sessions across platforms.
Enterprise-grade security – 256-bit AES encryption secures your data, with options for access passwords, whitelist/blacklist control, account-locked connections, and client-side locking.
Wireless connection – No need for shared networks or manual IP entry; works over the internet.
High performance – Low latency and high-definition mirroring, suitable for both work and creative tasks.
Free for personal use – DeskIn offers a generous free tier, making it a cost-effective solution.
Easy account-based login – No need for complex network configuration—just sign in and connect.
DeskIn is considered to be the best screen mirroring app on mobile phones and computers. Now, let's see how it works.
Step 1. Install DeskIn on Both Mac and PC
Visit the DeskIn official website and download the app for both Mac and Windows.
Install the app on both devices and sign in using the same DeskIn account.

Step 2. Start Screen Mirroring from Mac to PC
On your PC, open DeskIn, and find the Device ID and connection password.
Enter the Device ID and connection password of your Windows PC on your Mac.
Once connected, your PC screen will appear on the Mac instantly, enabling seamless viewing and interaction.

Method 3. Access Mac Desktop from Windows with VNC Viewer
One of the most direct ways to connect a Mac to a PC for remote desktop screen share is by enabling macOS's built-in Screen Sharing feature and accessing it from Windows using a VNC viewer. macOS's built-in Screen Sharing uses VNC, making it accessible via many free remote desktop softwares. VNC Viewer offers a basic, cross-platform way for remote access to a Mac from Windows (and Linux).
However, this method has significant limitations. Crucially, macOS's VNC server typically uses unencrypted connections by default, posing a security risk. Performance can also suffer from noticeable lag. For a more secure and reliable way to connect a Mac to a PC remote desktop screen share, consider DeskIn, which ensures a smoother remote into Mac from Windows experience.
Step 1. Enable Screen Sharing on Mac
Go to "System Settings > General > Sharing".
Toggle on "Screen Sharing".
Click the info icon next to Screen Sharing to view or modify settings.
Choose who can access the Mac: either "All Users" or "Only these users".
Note down your Mac's IP address shown under "Allow access for" — you'll need this in the next step.

Step 2. Connect to Mac from Windows Using a VNC Viewer
Install a VNC client like RealVNC, TightVNC, or UltraVNC on your Windows PC. Then:
Open the VNC viewer and enter your Mac's IP address (e.g., 192.168.1.12).
If required, add port 5900 (e.g., 192.168.1.12:5900).
Enter the username and password of the Mac user account (or the VNC password if configured).
You should now see your Mac's desktop on your Windows screen and can interact with it in real-time.

This method is reliable and doesn't require installing extra software on your Mac, but the interface and performance may feel basic compared to dedicated third-party apps.
Method 4. Use Microsoft Remote Desktop for Mac-to-PC Sharing
Microsoft Remote Desktop provides a secure and official way to remotely share the desktop screen between a Mac and a Windows PC using the RDP protocol. To connect remotely to a Mac from Windows, you'll need the Windows app Remote Desktop installed on your PC. However, a key limitation is that the Windows PC being accessed must be running Pro or Enterprise edition to accept RDP connections.
For RDP to Mac from Windows scenarios or connecting to any Windows edition (Home included), DeskIn offers a versatile alternative.
You may also be interested in:
RDP Security: Keep Remote Desktop Safe [Tips & Alternatives]
Microsoft Remote Desktop Is Shutting Down: Everything You Want to Know
Step 1. Enable Remote Desktop on Windows PC
On your Windows PC, go to "Settings > System > Remote Desktop".
Toggle on "Remote Desktop".
Confirm the PC name listed under "How to connect to this PC" — you'll need this later.
Ensure the user account you're using has remote access permissions.
(Optional) Allow connections only with "Network Level Authentication (NLA)" for better security.
Make sure the PC is connected to the same network as the Mac or properly configured for external access.

Step 2. Use Microsoft Remote Desktop on Mac
Note: If you're using the latest systems, Microsoft offers the Windows App instead, a newer cross-platform version that integrates RDP, Windows 365, and Azure Virtual Desktop. It's also available for macOS, providing a modern UI and smoother performance.
Download the Microsoft Remote Desktop client from the Mac App Store.
Open the app and click the + icon to add a PC.
Enter the PC name or IP address, and input your Windows login credentials.
Click "Save," then double-click the connection to launch the session.

Related Readings
FAQs on Remote Desktop and Screen Sharing Between Mac and PC
What's the difference between screen mirroring and remote desktop?
Screen mirroring displays the screen of one device on another without interaction, ideal for presentations or passive viewing. Remote desktop, on the other hand, lets you fully control the remote device's system, keyboard, and mouse, enabling deeper productivity tasks.
Is it safe to share the screen between Windows and Mac?
Screen sharing is generally safe when you use trusted apps and secure connections. Always enable password protection, use encrypted protocols like VNC or RDP, and avoid sharing screens over public networks without a VPN.
Final Thoughts
Whether you're conducting a remote class, presenting slides across devices, or managing cross-platform systems from home or the office, sharing screens between Mac and PC has become a powerful tool for modern productivity. From passive display mirroring to full remote desktop control, there are solutions for every need.
If you want ease of use, stability, security, and cross-platform support, DeskIn stands out as the top recommendation. Its intuitive setup, smooth mirroring performance, and secure connection method make it ideal for both tech-savvy users and beginners. Ultimately, your best option depends on your platform preferences, technical comfort level, and whether you prioritize visual display or full interaction control, so choose the tool that best fits your workflow.
In today's hybrid work and learning environments, screen sharing and remote desktop access have become essential tools. Whether you're delivering a presentation, providing tech support, or working across multiple devices, the ability to share screen between PC and Mac simplifies collaboration and boosts productivity.
However, connecting a Mac to a PC for remote desktop screen sharing isn't always straightforward, as different systems, settings, and tools can make the process confusing. This guide will walk you through clear, step-by-step methods, including reliable screen mirroring apps like DeskIn, to connect your Mac to a PC, so you can mirror displays, control desktops remotely, and ensure smooth cross-platform interaction.
👉 Click here to download DeskIn
Recommended Reading:
[Before Reading] Can You Use Remote Desktop from Windows to Mac?
Yes, you can remotely control a Mac from a Windows PC using VNC (Virtual Network Computing). However, VNC can be complex to configure for control screens between Mac and PC and may pose security risks. For a simpler and more secure solution to control screens between Mac and PC, we recommend using DeskIn.
Method 1. Share Screen Between Two Macs Using macOS Screen Sharing
Screen Sharing on macOS is Apple's built-in solution, ideal for sharing the Screen between two Macs. It requires both computers running macOS, being on the same local network, or signed in with the same Apple ID/iCloud. This feature provides screen share on Mac with options for view-only mode, full remote access to Mac, file drag-and-drop transfer, and shared clipboard. If your setup meets these conditions, this is the simplest and most integrated method (see steps below).
However, if you need a Remote Desktop for Windows or screen sharing between a Mac and a Windows PC, Method 2 (DeskIn) offers a seamless cross-platform alternative.
Step 1. Enable Screen Sharing on the Target Mac
Go to System Settings (macOS Ventura and later) or System Preferences (earlier macOS).
Click General > Sharing.
Turn on Screen Sharing.

Click the ⓘ icon to manage who can access (e.g., "All users" or specific users).
Note the hostname (e.g.,
MacBook-Pro.local) or IP address displayed.
Step 2. Connect from Another Mac via Finder or VNC
On the second Mac, open Finder.

In the menu bar, click Go > Connect to Server (or press
Command + K).Type:
vnc://[hostname or IP address]Click Connect.
Enter the username and password of the host Mac if prompted. Once connected, you can choose to observe or control the host Mac's screen. Use the toolbar at the top to adjust quality, scale, or disconnect.
Method 2. Mirror Mac to PC Screen via a Third-Party Tool: DeskIn
Unlike macOS Screen Sharing (Method 1), which is limited to displaying a mirror from a MacBook to a PC only between Macs, DeskIn offers a versatile alternative for seamless wireless screen extension from Mac to Windows and beyond.
DeskIn stands out as the best remote desktop software for stable connections and low latency. It enables effortless display mirroring from a MacBook to a PC and full remote control Mac from Windows, all in high definition. Beyond mirroring, it supports multi-device management and file transfer, making it a true all-in-one solution. Crucially, DeskIn prioritizes security with 256-bit AES encryption, password protection, whitelist/blacklist access control, account-locked connections, and client-side locking to safeguard your sessions. Setup is remarkably simple, requiring no complex network configurations.
👉 Click here to download DeskIn
DeskIn Key Features for Mac-to-PC Screen Sharing
Cross-platform screen mirroring – Mirror your Mac screen to a Windows PC in real time, ideal for presentations, collaboration, and demonstrations.
Remote control support – Offers optional control features, allowing interactive sessions across platforms.
Enterprise-grade security – 256-bit AES encryption secures your data, with options for access passwords, whitelist/blacklist control, account-locked connections, and client-side locking.
Wireless connection – No need for shared networks or manual IP entry; works over the internet.
High performance – Low latency and high-definition mirroring, suitable for both work and creative tasks.
Free for personal use – DeskIn offers a generous free tier, making it a cost-effective solution.
Easy account-based login – No need for complex network configuration—just sign in and connect.
DeskIn is considered to be the best screen mirroring app on mobile phones and computers. Now, let's see how it works.
Step 1. Install DeskIn on Both Mac and PC
Visit the DeskIn official website and download the app for both Mac and Windows.
Install the app on both devices and sign in using the same DeskIn account.

Step 2. Start Screen Mirroring from Mac to PC
On your PC, open DeskIn, and find the Device ID and connection password.
Enter the Device ID and connection password of your Windows PC on your Mac.
Once connected, your PC screen will appear on the Mac instantly, enabling seamless viewing and interaction.

Method 3. Access Mac Desktop from Windows with VNC Viewer
One of the most direct ways to connect a Mac to a PC for remote desktop screen share is by enabling macOS's built-in Screen Sharing feature and accessing it from Windows using a VNC viewer. macOS's built-in Screen Sharing uses VNC, making it accessible via many free remote desktop softwares. VNC Viewer offers a basic, cross-platform way for remote access to a Mac from Windows (and Linux).
However, this method has significant limitations. Crucially, macOS's VNC server typically uses unencrypted connections by default, posing a security risk. Performance can also suffer from noticeable lag. For a more secure and reliable way to connect a Mac to a PC remote desktop screen share, consider DeskIn, which ensures a smoother remote into Mac from Windows experience.
Step 1. Enable Screen Sharing on Mac
Go to "System Settings > General > Sharing".
Toggle on "Screen Sharing".
Click the info icon next to Screen Sharing to view or modify settings.
Choose who can access the Mac: either "All Users" or "Only these users".
Note down your Mac's IP address shown under "Allow access for" — you'll need this in the next step.

Step 2. Connect to Mac from Windows Using a VNC Viewer
Install a VNC client like RealVNC, TightVNC, or UltraVNC on your Windows PC. Then:
Open the VNC viewer and enter your Mac's IP address (e.g., 192.168.1.12).
If required, add port 5900 (e.g., 192.168.1.12:5900).
Enter the username and password of the Mac user account (or the VNC password if configured).
You should now see your Mac's desktop on your Windows screen and can interact with it in real-time.

This method is reliable and doesn't require installing extra software on your Mac, but the interface and performance may feel basic compared to dedicated third-party apps.
Method 4. Use Microsoft Remote Desktop for Mac-to-PC Sharing
Microsoft Remote Desktop provides a secure and official way to remotely share the desktop screen between a Mac and a Windows PC using the RDP protocol. To connect remotely to a Mac from Windows, you'll need the Windows app Remote Desktop installed on your PC. However, a key limitation is that the Windows PC being accessed must be running Pro or Enterprise edition to accept RDP connections.
For RDP to Mac from Windows scenarios or connecting to any Windows edition (Home included), DeskIn offers a versatile alternative.
You may also be interested in:
RDP Security: Keep Remote Desktop Safe [Tips & Alternatives]
Microsoft Remote Desktop Is Shutting Down: Everything You Want to Know
Step 1. Enable Remote Desktop on Windows PC
On your Windows PC, go to "Settings > System > Remote Desktop".
Toggle on "Remote Desktop".
Confirm the PC name listed under "How to connect to this PC" — you'll need this later.
Ensure the user account you're using has remote access permissions.
(Optional) Allow connections only with "Network Level Authentication (NLA)" for better security.
Make sure the PC is connected to the same network as the Mac or properly configured for external access.

Step 2. Use Microsoft Remote Desktop on Mac
Note: If you're using the latest systems, Microsoft offers the Windows App instead, a newer cross-platform version that integrates RDP, Windows 365, and Azure Virtual Desktop. It's also available for macOS, providing a modern UI and smoother performance.
Download the Microsoft Remote Desktop client from the Mac App Store.
Open the app and click the + icon to add a PC.
Enter the PC name or IP address, and input your Windows login credentials.
Click "Save," then double-click the connection to launch the session.

Related Readings
FAQs on Remote Desktop and Screen Sharing Between Mac and PC
What's the difference between screen mirroring and remote desktop?
Screen mirroring displays the screen of one device on another without interaction, ideal for presentations or passive viewing. Remote desktop, on the other hand, lets you fully control the remote device's system, keyboard, and mouse, enabling deeper productivity tasks.
Is it safe to share the screen between Windows and Mac?
Screen sharing is generally safe when you use trusted apps and secure connections. Always enable password protection, use encrypted protocols like VNC or RDP, and avoid sharing screens over public networks without a VPN.
Final Thoughts
Whether you're conducting a remote class, presenting slides across devices, or managing cross-platform systems from home or the office, sharing screens between Mac and PC has become a powerful tool for modern productivity. From passive display mirroring to full remote desktop control, there are solutions for every need.
If you want ease of use, stability, security, and cross-platform support, DeskIn stands out as the top recommendation. Its intuitive setup, smooth mirroring performance, and secure connection method make it ideal for both tech-savvy users and beginners. Ultimately, your best option depends on your platform preferences, technical comfort level, and whether you prioritize visual display or full interaction control, so choose the tool that best fits your workflow.


