Windows App Remote Desktop: What Change & How to Use

W. Ting

/

10 minutes

/

Updated

21 Mei 2025

If you've been using Microsoft's Remote Desktop app, you may have noticed some recent changes that raise questions about whether you're using the right version, or if something's gone wrong. Starting May 27, 2025, the Remote Desktop app will no longer be supported. Microsoft is replacing it with the new, unified Windows App, designed to offer better integration with services like Windows 365, Azure Virtual Desktop, and RemoteApp.

In this guide, we'll walk you through the Windows App, how to install it, use it effectively, and explore its key features. We'll also introduce an alternative solution, DeskIn, which could better fit your remote desktop needs depending on your specific use case.

👉 Click here to download DeskIn

You May Also Like:

Overview: Microsoft Remote Desktop vs. The Windows App

Microsoft Remote Desktop VS. The Windows App

If you've been using Microsoft Remote Desktop on Mac, on Windows or any device, you might have noticed its recent name and functionality changes, since Microsoft has already released the unified Windows App on Mac's App Store. It reflects Microsoft's shift towards a more integrated platform that offers a comprehensive solution for connecting to Windows devices, virtual desktops, and cloud services.

This change has led to mixed references across forums, support pages, and download sources, leaving some users uncertain about whether they are using the correct version or if something has gone wrong during the installation process. As the Windows App becomes the standard tool, it's important to understand the differences and why this update is beneficial for remote desktop access.

You May Also Need:

What's the Difference?

For years, the Microsoft Remote Desktop app was the primary tool for connecting from macOS to Windows PCs. However, in 2024, Microsoft rebranded its remote desktop solution under the Windows App umbrella. The Windows App replaces the legacy Microsoft Remote Desktop client and introduces significant improvements, including enhanced integration with Windows 365, Azure Virtual Desktop, and other Microsoft services.

The good news is that, the new name, Windows App, is currently only effective for iOS/Android/Mac. For Windows users, you can still use the old version, Remote Desktop Connection. As the Microsoft Remote Desktop is shutting down, if you still want to enjoy the flexibility of remote control, it's advisable to make the switch to the Windows App for continued support, security updates, and access to newer features designed to improve your remote access experience.

Platform Support

The Windows App is now the go-to solution for remote desktop access across multiple platforms:

  • Windows

  • macOS

  • iOS/iPadOS. You can also use visionOS, but it's only supported in compatibility mode.

  • Android/Chrome OS

  • Web browsers

Connect to

Windows

macOS

iOS/
iPadOS

Android/
Chrome OS

Web
browser

Azure Virtual Desktop

Windows 365

Microsoft Dev Box

Remote Desktop Services

Remote PC

Note: To connect to Remote Desktop Services on Windows, continue to use the Remote Desktop app on Windows. And to connect to a remote PC on Windows, continue to use the Remote Desktop Connection app that comes with Windows (also known as MSTSC).

How to Use the Windows App for Remote Desktop Access

Now that you understand the difference between Microsoft Remote Desktop and the new Windows App, it's time to see how the updated experience works. Whether you're accessing a remote PC, logging into your Cloud PC from a tablet, or managing a virtual desktop in Azure, the Windows App simplifies the process with a more intuitive setup. Here's how to get started.

Step 1: Download the Windows App

To begin, you'll need to install the Windows App on your device. Fortunately, the Windows App for desktop is available across multiple platforms:

  • Windows: Available through the Microsoft Store.

  • macOS: Download via the Mac App Store.

  • iOS / iPadOS / Android: Available on the App Store and Google Play.

  • Web version: Access through supported browsers at "https://windows.cloud.microsoft".

If you're still searching for where to get the tool, just look for "Windows App download" in your device's app store or visit Microsoft's official website.

Remote Access Windows via Windows App

📌 Tips: Make sure your operating system meets the minimum requirements. On Windows, for example, you'll need Windows 10 version 1903 or later.

Step 2: Add a New Connection

Once installed, launch the Windows App and click "+ Add" to begin creating your first connection. You'll be prompted to choose from several connection types:

  • Remote PC: Enter the IP address or name of the Windows PC you want to control. This is ideal for one-on-one direct access.

  • Workspaces: These are pre-configured by your organization and can include virtual desktops or RemoteApp programs.

  • Cloud PC / Windows 365: Sign in with your Microsoft 365 account to access your cloud-hosted desktop.

  • Azure Virtual Desktop: For enterprise use, sign in with your work account to connect to virtual environments hosted on Azure.

After entering the required information, save the connection for quick access later.

Step 3: Connect and Control

Once your connection is set up, simply select it from your list and click "Connect". You'll be prompted to enter your credentials (if not saved earlier), and within seconds, you'll be controlling your remote environment.

You can interact with your remote PC just like you would on a local machine, open files, run apps, and even use multiple monitors (if supported). The Windows App also supports clipboard syncing, printer redirection, and dynamic resolution scaling for a seamless user experience.

Setup Remote Resources in Windows App on PC

[Bonus] Better Option to Replace the Windows App

While the Windows App offers a more modern and unified remote desktop experience, it may not suit everyone's needs. Some users find its setup a bit complex, especially when dealing with network configurations, cloud permissions, or multiple sign-in steps. If you're looking for a more straightforward, lightweight, and flexible alternative, DeskIn is worth considering.

DeskIn is an all-in-one remote access software that lets you connect two of your computers from anywhere, whether they are PCs or Macs, without the hassle of VPNs, corporate accounts, and cloud subscriptions. It's designed for personal users, freelancers, IT support professionals, and small businesses who need secure and fast remote access without the learning curve.

👉 Click here to download DeskIn.

Why Choose DeskIn over the Windows App:

  • Faster Setup: Download, install, and connect in minutes—no need to configure RDP ports or cloud workspace logins.

  • Cross-platform Support: Control Windows from Mac, iOS, Android, or another Windows PC effortlessly.

  • No Account Required (Optional Login): You can use DeskIn without registering, making it ideal for quick, one-time remote sessions.

  • High-Speed Performance: Optimized for low-latency connections even on slower networks.

  • Free for Personal Use: Unlike some remote solutions, DeskIn's version is completely free to use.

If you've decided to use DeskIn as an alternative method, follow these simple steps to get started:

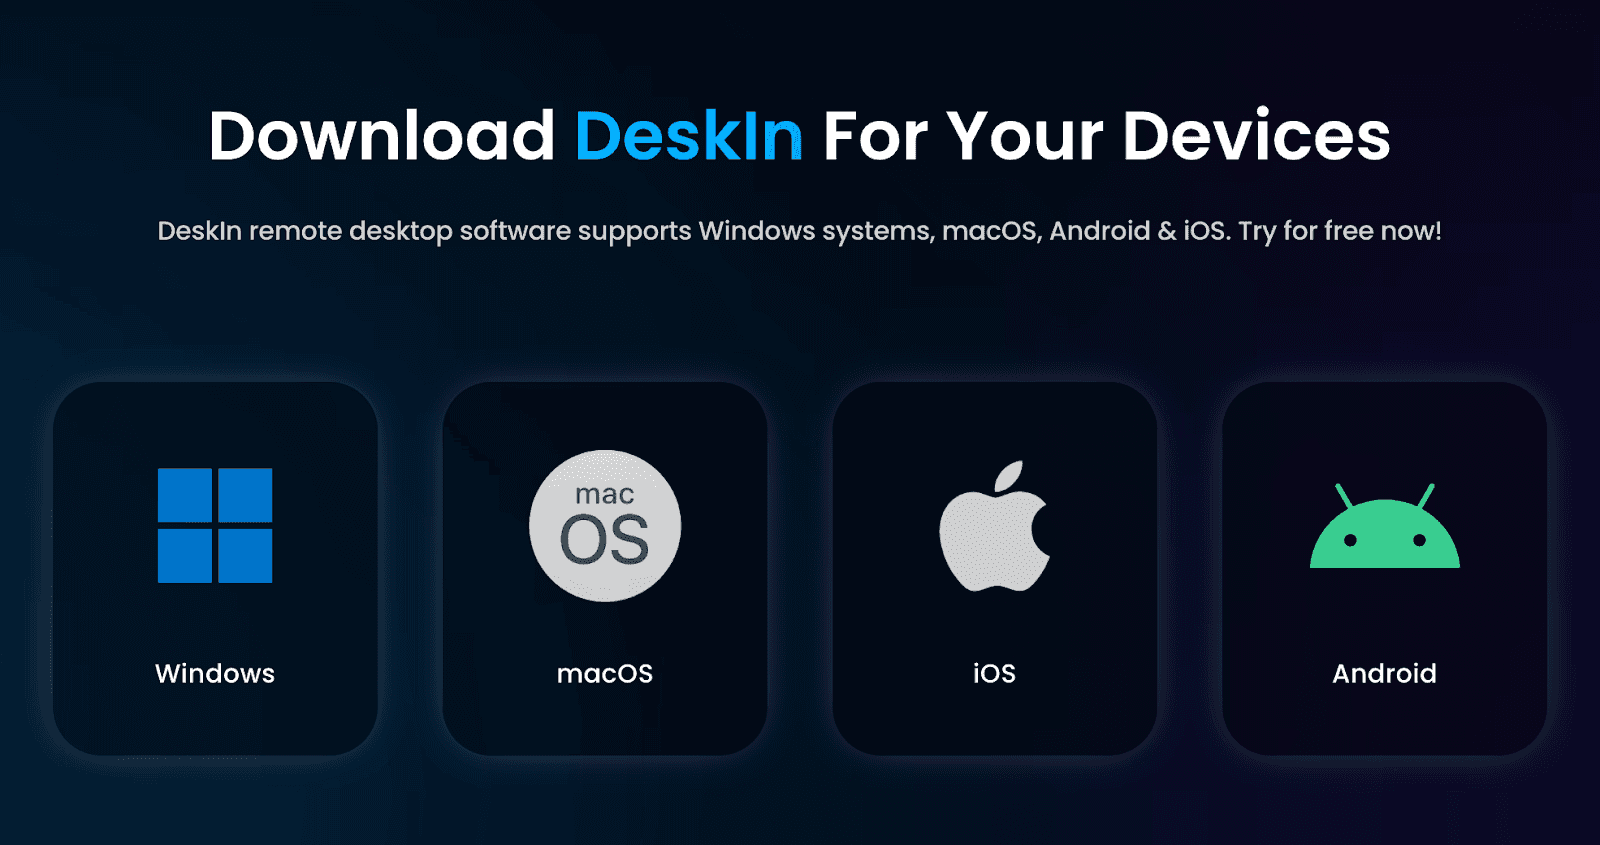
STEP 1: Visit the official DeskIn download page and choose the version for your system (Windows or macOS).

STEP 2: Run the installer and open the application. No account is required, though you can log in for additional features.

STEP 3: To access a remote device, enter the DeskIn code displayed on the host computer. To be controlled, just share your DeskIn code with the person connecting.

Remote Desktop via DeskIn Instead of Windows App

STEP 4: Once the connection is established, you can instantly control the remote PC with full keyboard and mouse support, file transfer, and HD-quality screen sharing.

Whether you're accessing your home PC while traveling, helping a family member troubleshoot a device, or simply want a more intuitive alternative to the remote desktop Windows app, DeskIn gives you everything you need with less complexity.

Another Alternative: Chrome Remote Desktop

If you only need occasional remote access and want something simpler than DeskIn, Chrome Remote Desktop is another excellent lightweight option to consider. It's perfect for quick, one-off connections without heavy setup.

The Chrome Remote Desktop service runs directly in your Chrome browser, eliminating complex software installations. It's free, supports cross-platform access (Windows, macOS, Linux, Chrome OS, Android, iOS, Raspberry Pi), and imposes no device limits.

However, it lacks a built-in chat tool, doesn't blank the host's screen during sessions, and requires both parties to use the "same Google account". For Windows 10 users, start with the Chrome Remote Desktop App download for windows 10.

Step-by-Step Guide:

STEP 1: On the Windows 10 PC you want to access remotely, open Chrome, search "Chrome Remote Desktop", visit the official Chrome Web Store page, and install the "Chrome Remote Desktop" extension. Click "Turn on" under "Remote Access".

STEP 2: Set a secure PIN (at least 6 digits) when prompted and confirm. This enables remote connections to this host PC.

Set PIN On Chrome Remote Desktop

STEP 3: On your local device (any OS with Chrome or the mobile app), go to remotedesktop.google.com/access. Sign in with the same Google account used on the host PC.

STEP 4: Under "Remote Devices", select the host PC's name and enter the PIN you created in Step 2.

STEP 5: Click "Connect". You'll now control the remote Windows 10 desktop securely in your browser or app window.

FAQs About the Windows App for Remote Desktop

Will the old Remote Desktop app still work after May 2025?

No. Microsoft has officially announced that the classic Remote Desktop app will reach end-of-support on May 27, 2025. After this date, the app will no longer receive updates, security patches, or official support. While it may still function temporarily on some devices, continued use could expose you to potential security risks or compatibility issues, especially with newer Windows 10/11 updates.

To stay secure and benefit from improved cloud integration, users are strongly encouraged to switch to the Windows App for Remote Desktop, which supports features like Azure Virtual Desktop, Windows 365, and RemoteApp in a more seamless experience.

What is the Alternative to Windows Remote Desktop?

A powerful alternative is DeskIn. We recommend it for seamless cross-platform access to any Windows PC (old or new versions), Mac or mobile. DeskIn stands out with its simplicity, high-quality streaming, and zero cost for commercial use in its free plan. You get reliable, lag-free control without complex setup. For teams or individuals needing professional-grade remote access without licensing fees, DeskIn delivers.

Summary: Try the Windows App for Remote Desktop?

The Windows App for Remote Desktop is Microsoft's new standard, offering better integration, modern design, and cross-platform support. If you're still using the old Remote Desktop app, it's time to switch, especially with support ending in May 2025.

That said, if you want a more intuitive alternative, DeskIn is a great choice for faster setup and smoother remote access. Whether you go with the Windows App or explore another option like DeskIn, the key is finding a remote desktop solution that fits your workflow best. Ready to switch? Start with the Windows App download, test it out, and see if it meets your needs, or try DeskIn for a different, often more user-friendly approach.

👉 Click here to download

If you've been using Microsoft's Remote Desktop app, you may have noticed some recent changes that raise questions about whether you're using the right version, or if something's gone wrong. Starting May 27, 2025, the Remote Desktop app will no longer be supported. Microsoft is replacing it with the new, unified Windows App, designed to offer better integration with services like Windows 365, Azure Virtual Desktop, and RemoteApp.

In this guide, we'll walk you through the Windows App, how to install it, use it effectively, and explore its key features. We'll also introduce an alternative solution, DeskIn, which could better fit your remote desktop needs depending on your specific use case.

👉 Click here to download DeskIn

You May Also Like:

Overview: Microsoft Remote Desktop vs. The Windows App

Microsoft Remote Desktop VS. The Windows App

If you've been using Microsoft Remote Desktop on Mac, on Windows or any device, you might have noticed its recent name and functionality changes, since Microsoft has already released the unified Windows App on Mac's App Store. It reflects Microsoft's shift towards a more integrated platform that offers a comprehensive solution for connecting to Windows devices, virtual desktops, and cloud services.

This change has led to mixed references across forums, support pages, and download sources, leaving some users uncertain about whether they are using the correct version or if something has gone wrong during the installation process. As the Windows App becomes the standard tool, it's important to understand the differences and why this update is beneficial for remote desktop access.

You May Also Need:

What's the Difference?

For years, the Microsoft Remote Desktop app was the primary tool for connecting from macOS to Windows PCs. However, in 2024, Microsoft rebranded its remote desktop solution under the Windows App umbrella. The Windows App replaces the legacy Microsoft Remote Desktop client and introduces significant improvements, including enhanced integration with Windows 365, Azure Virtual Desktop, and other Microsoft services.

The good news is that, the new name, Windows App, is currently only effective for iOS/Android/Mac. For Windows users, you can still use the old version, Remote Desktop Connection. As the Microsoft Remote Desktop is shutting down, if you still want to enjoy the flexibility of remote control, it's advisable to make the switch to the Windows App for continued support, security updates, and access to newer features designed to improve your remote access experience.

Platform Support

The Windows App is now the go-to solution for remote desktop access across multiple platforms:

  • Windows

  • macOS

  • iOS/iPadOS. You can also use visionOS, but it's only supported in compatibility mode.

  • Android/Chrome OS

  • Web browsers

Connect to

Windows

macOS

iOS/
iPadOS

Android/
Chrome OS

Web
browser

Azure Virtual Desktop

Windows 365

Microsoft Dev Box

Remote Desktop Services

Remote PC

Note: To connect to Remote Desktop Services on Windows, continue to use the Remote Desktop app on Windows. And to connect to a remote PC on Windows, continue to use the Remote Desktop Connection app that comes with Windows (also known as MSTSC).

How to Use the Windows App for Remote Desktop Access

Now that you understand the difference between Microsoft Remote Desktop and the new Windows App, it's time to see how the updated experience works. Whether you're accessing a remote PC, logging into your Cloud PC from a tablet, or managing a virtual desktop in Azure, the Windows App simplifies the process with a more intuitive setup. Here's how to get started.

Step 1: Download the Windows App

To begin, you'll need to install the Windows App on your device. Fortunately, the Windows App for desktop is available across multiple platforms:

  • Windows: Available through the Microsoft Store.

  • macOS: Download via the Mac App Store.

  • iOS / iPadOS / Android: Available on the App Store and Google Play.

  • Web version: Access through supported browsers at "https://windows.cloud.microsoft".

If you're still searching for where to get the tool, just look for "Windows App download" in your device's app store or visit Microsoft's official website.

Remote Access Windows via Windows App

📌 Tips: Make sure your operating system meets the minimum requirements. On Windows, for example, you'll need Windows 10 version 1903 or later.

Step 2: Add a New Connection

Once installed, launch the Windows App and click "+ Add" to begin creating your first connection. You'll be prompted to choose from several connection types:

  • Remote PC: Enter the IP address or name of the Windows PC you want to control. This is ideal for one-on-one direct access.

  • Workspaces: These are pre-configured by your organization and can include virtual desktops or RemoteApp programs.

  • Cloud PC / Windows 365: Sign in with your Microsoft 365 account to access your cloud-hosted desktop.

  • Azure Virtual Desktop: For enterprise use, sign in with your work account to connect to virtual environments hosted on Azure.

After entering the required information, save the connection for quick access later.

Step 3: Connect and Control

Once your connection is set up, simply select it from your list and click "Connect". You'll be prompted to enter your credentials (if not saved earlier), and within seconds, you'll be controlling your remote environment.

You can interact with your remote PC just like you would on a local machine, open files, run apps, and even use multiple monitors (if supported). The Windows App also supports clipboard syncing, printer redirection, and dynamic resolution scaling for a seamless user experience.

Setup Remote Resources in Windows App on PC

[Bonus] Better Option to Replace the Windows App

While the Windows App offers a more modern and unified remote desktop experience, it may not suit everyone's needs. Some users find its setup a bit complex, especially when dealing with network configurations, cloud permissions, or multiple sign-in steps. If you're looking for a more straightforward, lightweight, and flexible alternative, DeskIn is worth considering.

DeskIn is an all-in-one remote access software that lets you connect two of your computers from anywhere, whether they are PCs or Macs, without the hassle of VPNs, corporate accounts, and cloud subscriptions. It's designed for personal users, freelancers, IT support professionals, and small businesses who need secure and fast remote access without the learning curve.

👉 Click here to download DeskIn.

Why Choose DeskIn over the Windows App:

  • Faster Setup: Download, install, and connect in minutes—no need to configure RDP ports or cloud workspace logins.

  • Cross-platform Support: Control Windows from Mac, iOS, Android, or another Windows PC effortlessly.

  • No Account Required (Optional Login): You can use DeskIn without registering, making it ideal for quick, one-time remote sessions.

  • High-Speed Performance: Optimized for low-latency connections even on slower networks.

  • Free for Personal Use: Unlike some remote solutions, DeskIn's version is completely free to use.

If you've decided to use DeskIn as an alternative method, follow these simple steps to get started:

STEP 1: Visit the official DeskIn download page and choose the version for your system (Windows or macOS).

STEP 2: Run the installer and open the application. No account is required, though you can log in for additional features.

STEP 3: To access a remote device, enter the DeskIn code displayed on the host computer. To be controlled, just share your DeskIn code with the person connecting.

Remote Desktop via DeskIn Instead of Windows App

STEP 4: Once the connection is established, you can instantly control the remote PC with full keyboard and mouse support, file transfer, and HD-quality screen sharing.

Whether you're accessing your home PC while traveling, helping a family member troubleshoot a device, or simply want a more intuitive alternative to the remote desktop Windows app, DeskIn gives you everything you need with less complexity.

Another Alternative: Chrome Remote Desktop

If you only need occasional remote access and want something simpler than DeskIn, Chrome Remote Desktop is another excellent lightweight option to consider. It's perfect for quick, one-off connections without heavy setup.

The Chrome Remote Desktop service runs directly in your Chrome browser, eliminating complex software installations. It's free, supports cross-platform access (Windows, macOS, Linux, Chrome OS, Android, iOS, Raspberry Pi), and imposes no device limits.

However, it lacks a built-in chat tool, doesn't blank the host's screen during sessions, and requires both parties to use the "same Google account". For Windows 10 users, start with the Chrome Remote Desktop App download for windows 10.

Step-by-Step Guide:

STEP 1: On the Windows 10 PC you want to access remotely, open Chrome, search "Chrome Remote Desktop", visit the official Chrome Web Store page, and install the "Chrome Remote Desktop" extension. Click "Turn on" under "Remote Access".

STEP 2: Set a secure PIN (at least 6 digits) when prompted and confirm. This enables remote connections to this host PC.

Set PIN On Chrome Remote Desktop

STEP 3: On your local device (any OS with Chrome or the mobile app), go to remotedesktop.google.com/access. Sign in with the same Google account used on the host PC.

STEP 4: Under "Remote Devices", select the host PC's name and enter the PIN you created in Step 2.

STEP 5: Click "Connect". You'll now control the remote Windows 10 desktop securely in your browser or app window.

FAQs About the Windows App for Remote Desktop

Will the old Remote Desktop app still work after May 2025?

No. Microsoft has officially announced that the classic Remote Desktop app will reach end-of-support on May 27, 2025. After this date, the app will no longer receive updates, security patches, or official support. While it may still function temporarily on some devices, continued use could expose you to potential security risks or compatibility issues, especially with newer Windows 10/11 updates.

To stay secure and benefit from improved cloud integration, users are strongly encouraged to switch to the Windows App for Remote Desktop, which supports features like Azure Virtual Desktop, Windows 365, and RemoteApp in a more seamless experience.

What is the Alternative to Windows Remote Desktop?

A powerful alternative is DeskIn. We recommend it for seamless cross-platform access to any Windows PC (old or new versions), Mac or mobile. DeskIn stands out with its simplicity, high-quality streaming, and zero cost for commercial use in its free plan. You get reliable, lag-free control without complex setup. For teams or individuals needing professional-grade remote access without licensing fees, DeskIn delivers.

Summary: Try the Windows App for Remote Desktop?

The Windows App for Remote Desktop is Microsoft's new standard, offering better integration, modern design, and cross-platform support. If you're still using the old Remote Desktop app, it's time to switch, especially with support ending in May 2025.

That said, if you want a more intuitive alternative, DeskIn is a great choice for faster setup and smoother remote access. Whether you go with the Windows App or explore another option like DeskIn, the key is finding a remote desktop solution that fits your workflow best. Ready to switch? Start with the Windows App download, test it out, and see if it meets your needs, or try DeskIn for a different, often more user-friendly approach.

👉 Click here to download

Play x Work
All at Once

👻 Halloween Sale

👻 Halloween Sale

DeskIn Remote Game

only $14.32 USD 🎉 Limited on July 16-31

Add promo code: deskinsummer1

🎃 Remote Game 🎃

Save Over 60%
Only $9.75/Month 🎉 Reg. $25.9
👉 Use Promo Code [GAME60]

And Get Special Price

🎃 Remote Game 🎃 Save Over 60%
Only $9.75/Month 🎉Reg. $25.9
👉 Use Promo Code [GAME60] And Get Special Price

Windows App Remote Desktop: What Change & How to Use

Table of Contents

👻 Halloween Sale

🎃 Remote Game 🎃

Save Over 60%
Only $9.75/Month 🎉 Reg. $25.9
👉 Use Promo Code [GAME60]

And Get Special Price

What’s next?

TROUBLESHOOTING

Screen Mirroring iPhone/iPad To MacBook Guides 2025

A larger screen can bring a better viewing experience. Whether it is sharing files during work reports, watching movies with family and friends or taking travel photos on the big screen, the mirror projection function can bring us great benefits. Connecting screens together brings us closer. For Apple users, how to project the screen of iPhone or iPad to MacBook? This article will provide three simple and practical methods with step-by-step instructions. One of them is also suitable for remote projection. Let’s take a look.


Use DeskIn Remote Desktop to Share iPhone/iPad Screen to MacBook

DeskIn is a remote desktop application that works on iOS, Android, Mac and Windows, providing fast, safe and stable remote access services. Whether you are remote-workers, IT engineer, designer, gamer, student, or freelancer, DeskIn has a solution for you. In addition to remote connection features, DeskIn had many screen management functions, including screen projection, screen expansion, virtual screen generation, etc.

Advantages:

1. Easily realize wireless screen mirroring between different systems and devices.

2. Ultra-low latency, no connection time limit, and pretty high image quality.

3. Supports doing voice calls during the projection process, making real-time communication more convenient.

Step 1: Install and Register an DeskIn Account

Download DeskIn on your MacBook and iPhone/iPad, register a free account and log in separately.

free download DeskIn

Note: On your first log in to a new device, you need to complete an email verification, which is to protect the security of your account.

Step 2: Screen Mirroring by Scanning QR Code

Open DeskIn on MacBook and click "Screen Mgt" on the sidebar, then you can see the QR code.

Open DeskIn on iPhone/iPad, click the scan button in the upper right corner, scan the QR Code on the Mac DeskIn, then click "Start Broadcasting".

Step 3: Access iPhone/iPad screen from Macbook

Note: Projection can be completed in step 3 or step 2.

Open DeskIn on iPhone/iPad, go to "Remote Control" Tab >> Toggle on the "Allow" button >> Choose "Screen Mirroring" >> Then a "Screen Broadcast" reminder will pop up, just click "Start Broadcast".

Open DeskIn on your MacBook >> Go to "Device list" >> Select your iPhone/iPad device >> Click "View Mode" on the toolbar. You can finish the connection verification using password or Password-free Connection method——which is to do manual verification on iPhone/iPad. Once connected, you can see the screen of the iPhone/iPad on the MacBook. This method is also suitable for situations where the mobile device and computer are not in the same place and remote projection is required. You can also do audio-call during the projection process.


Use QuickTime Player to Cast iPhone/iPad Screen to MacBook

Advantages:

  1. QuickTime Player is a built-in app of MacOS, and you don't have to download extra softwares.

  2. Using USB connection, 2 devices no need to be on the same network, high image quality, low latency.

Limitations:

USB cable is required to connect iPhone/iPad and MacBook using this method, wireless mirroring is not supported.

Step 1: Connect the Devices

Connect your iPhone/iPad to your MacBook with a USB cable.

Step 2: Complete QuickTime Player Settings

  1. Open QuickTime Player on your MacBook. You can find it by searching.


  1. Find the QuickTime Player toolbar on the top toolbar of your MacBook >> Click "File" > > Click "New video recording"


  1. In the recording window, click the down arrow next to the record button >> Find and select your iPhone/iPhone in the Screen section of the device list that pops up. Then your iPhone/iPhone screen will be projected onto your MacBook.


Use AirPlay to Cast iPhone/iPad Screen to MacBook

Advantages:

  1. Airplay is a built-in function of Apple devices, and you don't have to download extra softwares.

  2. Supports wireless mirror projection, no USB data cable required.

Limitations:

  1. The device needs to be in the same network to use AirPlay.

  2. The MacBook cannot perform other operations during the projection process.


Steps:

  1. Make sure your iPhone/iPad and MacBook are connected to the same network.

  2. Swipe down from the upper right corner of the iPhone/iPad screen to open the Control Center. Click the "Airplay" icon >> Select your MacBook, then the iPhone/iPad screen will be projected to the MacBook.

  3. A pop-up reminder may appear on your MacBook asking whether to allow projection requests from the iOS devices. Once the request is accepted, the iPhone/iPad screen will be projected to the MacBook.


Conclusion

This article introduces three methods for mirroring iPhone to MacBook, two of which are implemented through Apple's own built-in programs. The most recommended thing is to use DeskIn remote software for mirror projection - it is not restricted by the same WIFI network and does not require a USB data cable to complete the mirror projection from iPhone/iPad to MacBook, and it does not affect the normal operation of MacBook during the projection period. use. The steps are very simple, download DeskIn and give it a try.

free download DeskIn

TROUBLESHOOTING

2 Simple Ways To Share Windows 10/11 Screen

Do you want to share your computer screen with your colleagues during a meeting or project videos/photos onto a larger screen? This article will introduce two simple methods to project your Windows 10/11 computer screen.

Method 1: Use professional projector app DeskIn to share screen

Advantages of using DeskIn remote desktop for projection:

  • Cross-platform support: DeskIn supports screen sharing between iOS, Windows, Android, and macOS systems.

  • No need for the same network environment: DeskIn allows projection even when devices are not on the same network, making it possible to share screens over long distances.

  • Screen adaptation: You can modify resolution, frame rate, and other settings to better adapt to remote screens.

  • Secure: DeskIn uses 256-bit encryption to ensure that your projected content remains private and secure.

  • Easy to use: No complicated setup is required.


Step 1: Install DeskIn on both your computer and the device you want to share your screen with.

Register for a free account and log in.

free download DeskIn

Note: On your first login to a new device, you will need to complete an email verification to protect the security of your account.

Step 2: Extend your screen

Open the DeskIn app on your Windows/Mac computer >> Go to the "Screen Mgt" tab >> Click “Mirror my screen."

Step 3: Select the device you want to share your screen with and click "Start Mirroring."


Step 4: You can find the device you are sharing your screen with in the「Device list」and adjust the resolution, frame rate, and other settings as needed.


Method 2: Use Windows Built-in Tool "Wireless Display" to Project Your Computer Screen

Step 1: On both the computer you want to share the screen from and the one you want to share it to select "Windows Start" >> "Settings" >> "System" >> "Optional Features".

Step 2: On the "Optional Features" page, click "View Features" next to "Add an optional feature.” Search for "Wireless Display," then click and install it.


Step 3: Once installed, go back to "Settings" >> "System" >> "Projecting to this PC" to manage your projection preferences.


Step 4: On the computer you want to share the screen to, search for "Wireless Display" in the taskbar search box and launch the app. The device will now be discoverable and ready to receive projected content.


Step 5: Press "Windows+K" on the computer you want to share screen from, select the device you want to share screen to on the device list that pops up.

You can also project your computer screen to a Miracast-enabled TV, projector, or other type of external display.

Conclusion

This article introduced two simple methods for projecting and sharing your screen on Windows 10/11. While Method 2 uses built-in Windows tools, the setup process is relatively complicated and is only applicable to Windows systems or displays that support Miracast. If you want to project your Windows computer screen to any macOS, iOS, Android, or Windows device, we recommend using the remote software DeskIn. It is not restricted by the operating system and does not require devices to be on the same network, making it a versatile solution for all your projection needs

free download DeskIn

TROUBLESHOOTING

Use Samsung Galaxy Tablet As Second Monitor For Windows PC

For multitasking workers, having a second monitor can increase productivity greatly. If you are a home office person or a student who don't have a dual screen. Here's how you can easily turn your Samsung Galaxy Tablet into a second monitor for your computer.


Step 1: Turn on your Samsung tablet, swipe down from the top of the screen to open the 「Quick Settings」panel.

Step 2: Find the "Second Screen" icon and tap it.


Step 3: Keep the tablet in the "Second Screen" screen (as shown below)

Note: If your Samsung tablet and Galaxy Book are logged into the same Samsung account, you can directly start from step 4 to connect through the Galaxy Book

Step 4: Press "Windows + K" on your computer, find and select your tablet from the pop-up device list, your tablet will become the extended screen.


Step 5: If you find the tablet only mirrors the contents of the computer, click "Change Projection Mode" and switch the projection mode to "Extended".


Note: The extended screen feature only available on Galaxy Tab S7、S8 and S9 running One UI 3.1 and later, and Windows PC running Windows 10 v.2004 and higher.

Best tool to extend screen on Windows and macOS: DeskIn

The method introduced above is only applicable to Samsung tablets and Windows computers. If you are looking for a more comprehensive screen extension solution, you should try DeskIn- supports cross-platform screen extension on iOS, Android, Windows, and MacBook, adjusting resolution and completely free. Whether you're using an iPad, MacBook, laptop, or PC, it's easy to do that in just a few steps:

Step 1: Download and register a DeskIn account

Download DeskIn on both your devices, register for a free account and log in.

free download DeskIn

Step 2: Open DeskIn on the computer, go to "Screen Mgt" tab and click "Extend my screen".


Step 3: Select the device you want to expand the screen on and click "Start Extending". Then the selected device would become the second display of the computer.


Conclusion

This article introduces how to use a Samsung tablet as a second monitor. If you are looking for a screen extension tool that is suitable for all devices and has no limit on brand or system, we recommend using DeskIn. Click DeskIn Personal | Free Remote Desktop App with 40M+ Users to learn more.

free download DeskIn

TROUBLESHOOTING

Screen Mirroring iPhone/iPad To MacBook Guides 2025

A larger screen can bring a better viewing experience. Whether it is sharing files during work reports, watching movies with family and friends or taking travel photos on the big screen, the mirror projection function can bring us great benefits. Connecting screens together brings us closer. For Apple users, how to project the screen of iPhone or iPad to MacBook? This article will provide three simple and practical methods with step-by-step instructions. One of them is also suitable for remote projection. Let’s take a look.


Use DeskIn Remote Desktop to Share iPhone/iPad Screen to MacBook

DeskIn is a remote desktop application that works on iOS, Android, Mac and Windows, providing fast, safe and stable remote access services. Whether you are remote-workers, IT engineer, designer, gamer, student, or freelancer, DeskIn has a solution for you. In addition to remote connection features, DeskIn had many screen management functions, including screen projection, screen expansion, virtual screen generation, etc.

Advantages:

1. Easily realize wireless screen mirroring between different systems and devices.

2. Ultra-low latency, no connection time limit, and pretty high image quality.

3. Supports doing voice calls during the projection process, making real-time communication more convenient.

Step 1: Install and Register an DeskIn Account

Download DeskIn on your MacBook and iPhone/iPad, register a free account and log in separately.

free download DeskIn

Note: On your first log in to a new device, you need to complete an email verification, which is to protect the security of your account.

Step 2: Screen Mirroring by Scanning QR Code

Open DeskIn on MacBook and click "Screen Mgt" on the sidebar, then you can see the QR code.

Open DeskIn on iPhone/iPad, click the scan button in the upper right corner, scan the QR Code on the Mac DeskIn, then click "Start Broadcasting".

Step 3: Access iPhone/iPad screen from Macbook

Note: Projection can be completed in step 3 or step 2.

Open DeskIn on iPhone/iPad, go to "Remote Control" Tab >> Toggle on the "Allow" button >> Choose "Screen Mirroring" >> Then a "Screen Broadcast" reminder will pop up, just click "Start Broadcast".

Open DeskIn on your MacBook >> Go to "Device list" >> Select your iPhone/iPad device >> Click "View Mode" on the toolbar. You can finish the connection verification using password or Password-free Connection method——which is to do manual verification on iPhone/iPad. Once connected, you can see the screen of the iPhone/iPad on the MacBook. This method is also suitable for situations where the mobile device and computer are not in the same place and remote projection is required. You can also do audio-call during the projection process.


Use QuickTime Player to Cast iPhone/iPad Screen to MacBook

Advantages:

  1. QuickTime Player is a built-in app of MacOS, and you don't have to download extra softwares.

  2. Using USB connection, 2 devices no need to be on the same network, high image quality, low latency.

Limitations:

USB cable is required to connect iPhone/iPad and MacBook using this method, wireless mirroring is not supported.

Step 1: Connect the Devices

Connect your iPhone/iPad to your MacBook with a USB cable.

Step 2: Complete QuickTime Player Settings

  1. Open QuickTime Player on your MacBook. You can find it by searching.


  1. Find the QuickTime Player toolbar on the top toolbar of your MacBook >> Click "File" > > Click "New video recording"


  1. In the recording window, click the down arrow next to the record button >> Find and select your iPhone/iPhone in the Screen section of the device list that pops up. Then your iPhone/iPhone screen will be projected onto your MacBook.


Use AirPlay to Cast iPhone/iPad Screen to MacBook

Advantages:

  1. Airplay is a built-in function of Apple devices, and you don't have to download extra softwares.

  2. Supports wireless mirror projection, no USB data cable required.

Limitations:

  1. The device needs to be in the same network to use AirPlay.

  2. The MacBook cannot perform other operations during the projection process.


Steps:

  1. Make sure your iPhone/iPad and MacBook are connected to the same network.

  2. Swipe down from the upper right corner of the iPhone/iPad screen to open the Control Center. Click the "Airplay" icon >> Select your MacBook, then the iPhone/iPad screen will be projected to the MacBook.

  3. A pop-up reminder may appear on your MacBook asking whether to allow projection requests from the iOS devices. Once the request is accepted, the iPhone/iPad screen will be projected to the MacBook.


Conclusion

This article introduces three methods for mirroring iPhone to MacBook, two of which are implemented through Apple's own built-in programs. The most recommended thing is to use DeskIn remote software for mirror projection - it is not restricted by the same WIFI network and does not require a USB data cable to complete the mirror projection from iPhone/iPad to MacBook, and it does not affect the normal operation of MacBook during the projection period. use. The steps are very simple, download DeskIn and give it a try.

free download DeskIn

TROUBLESHOOTING

2 Simple Ways To Share Windows 10/11 Screen

Do you want to share your computer screen with your colleagues during a meeting or project videos/photos onto a larger screen? This article will introduce two simple methods to project your Windows 10/11 computer screen.

Method 1: Use professional projector app DeskIn to share screen

Advantages of using DeskIn remote desktop for projection:

  • Cross-platform support: DeskIn supports screen sharing between iOS, Windows, Android, and macOS systems.

  • No need for the same network environment: DeskIn allows projection even when devices are not on the same network, making it possible to share screens over long distances.

  • Screen adaptation: You can modify resolution, frame rate, and other settings to better adapt to remote screens.

  • Secure: DeskIn uses 256-bit encryption to ensure that your projected content remains private and secure.

  • Easy to use: No complicated setup is required.


Step 1: Install DeskIn on both your computer and the device you want to share your screen with.

Register for a free account and log in.

free download DeskIn

Note: On your first login to a new device, you will need to complete an email verification to protect the security of your account.

Step 2: Extend your screen

Open the DeskIn app on your Windows/Mac computer >> Go to the "Screen Mgt" tab >> Click “Mirror my screen."

Step 3: Select the device you want to share your screen with and click "Start Mirroring."


Step 4: You can find the device you are sharing your screen with in the「Device list」and adjust the resolution, frame rate, and other settings as needed.


Method 2: Use Windows Built-in Tool "Wireless Display" to Project Your Computer Screen

Step 1: On both the computer you want to share the screen from and the one you want to share it to select "Windows Start" >> "Settings" >> "System" >> "Optional Features".

Step 2: On the "Optional Features" page, click "View Features" next to "Add an optional feature.” Search for "Wireless Display," then click and install it.


Step 3: Once installed, go back to "Settings" >> "System" >> "Projecting to this PC" to manage your projection preferences.


Step 4: On the computer you want to share the screen to, search for "Wireless Display" in the taskbar search box and launch the app. The device will now be discoverable and ready to receive projected content.


Step 5: Press "Windows+K" on the computer you want to share screen from, select the device you want to share screen to on the device list that pops up.

You can also project your computer screen to a Miracast-enabled TV, projector, or other type of external display.

Conclusion

This article introduced two simple methods for projecting and sharing your screen on Windows 10/11. While Method 2 uses built-in Windows tools, the setup process is relatively complicated and is only applicable to Windows systems or displays that support Miracast. If you want to project your Windows computer screen to any macOS, iOS, Android, or Windows device, we recommend using the remote software DeskIn. It is not restricted by the operating system and does not require devices to be on the same network, making it a versatile solution for all your projection needs

free download DeskIn

Jangan ketinggalan.

Jangan ketinggalan.

Jangan ketinggalan.

Hubungi Kami

Email: support@deskin.io

Office: 991D Alexandra Road #02-17, Singapore 119972

Copyright © 2025 Zuler Technology PTE. LTD. All rights reserved.

Hubungi Kami

support@deskin.io

991D Alexandra Road #02-17

Singapore 119972

Copyright © 2025 Zuler Technology PTE. LTD. All rights reserved.

Hubungi Kami

Email: support@deskin.io

Office: 991D Alexandra Road #02-17, Singapore 119972

Copyright © 2025 Zuler Technology PTE. LTD. All rights reserved.