4 Best Parental Control App 2025. What Should Pay Attention To When Using.

Karly Chan

/

10 minutes

/

Updated

May 1, 2025

More and more kids have their own smartpgones. While bringing more communication convenience, it also exposes them to more dangers. Out of concern for their children's safety and excessive phone usage time, some parents use parental control app software to monitor their kid’s phone. What should parents pay attention to when using their app? This article gives you 4 tips and introduces 4 best parental control apps. Check it out.

Why Should Parents Monitor Their Children's Phones?

1. Manage phone usage time

Children may be addicted to games, short videos, social media, and use mobile phones uncontrollably. At this time, by monitoring their children's mobile phone usage time and managing app usage time, parents can guide their children to live a healthier, more time-managed life.

2. Detect harmful messages and programs

Children may not be able to distinguish toxic and harmful information on the Internet at their young age.Regularly checking your children’s mobile text messages, web browsing history and social media can prevent them from getting bad influence from sexual, violent, gambling, fraud and drug-related content. At the same time, you can give them proper guidence of using internet.

3. Avoid accidental payment

Currently the payment verification process on phones is becoming more and more simple, which brings convenience but also hidden dangers. Children may purchase in-game items, donate to streamers, or accidentally subscribe to an app. If not discovered in time, it may cause big losses.

4. Keep eyes on children and prevent dangers

Parents cannot be with their children at all times and cannot 100% be aware of what happens at school or with friends. By monitoring the text messages or chat records of children's mobile phones, they may be able to know at the first time when there are conflicts with classmates, school bullying (being bullied or bullying), violence, etc. Some monitoring programs can also track the location of kid’s phones, so when kids are in danger, parents can arrive as soon as possible.

5. Fix tech problems

When kids encounter technical problems with their phone, such as settings, backup problems, upload files etc,. parents can use remote programs to control their children's mobile phones and help fix it.

4 things to pay attention to before monitoring your children’s phones

1. Respect children

Although we understand that parents monitor their children's mobile phones out of concern. But please remember that the child also has their own ideas, secrets and privacy. Please remember this before using a monitoring program:always respect your child and their opinions. Don't go too far or you may cause the relationship to deteriorate.

2. Communicate with your children

Talk about your thoughts and reasons with your child before monitoring their phone. At the same time, listen to theirs, communicate to reach a consensus. Make sure you have your child's consent before downloading and using a phone monitoring program. If they strongly disagree with the idea, communitate and figure out other ways.

3. Make an agreement and stick to it

Make an agreement with your child when you can monitor their phone, what apps you can monitor and can’t and stick to it. Remember, trust and communication are more important than anything else.

4. Choose safe monitoring software

When you decide to use a monitoring program, remember to choose one with a high security level. Since these programs gain access to most of your phone's permissions, using unsafe programs may cause the risk of information leakage. In serious cases, it may also pose a threat to the safety of your children.

4 best parental control software 2024

DeskIn

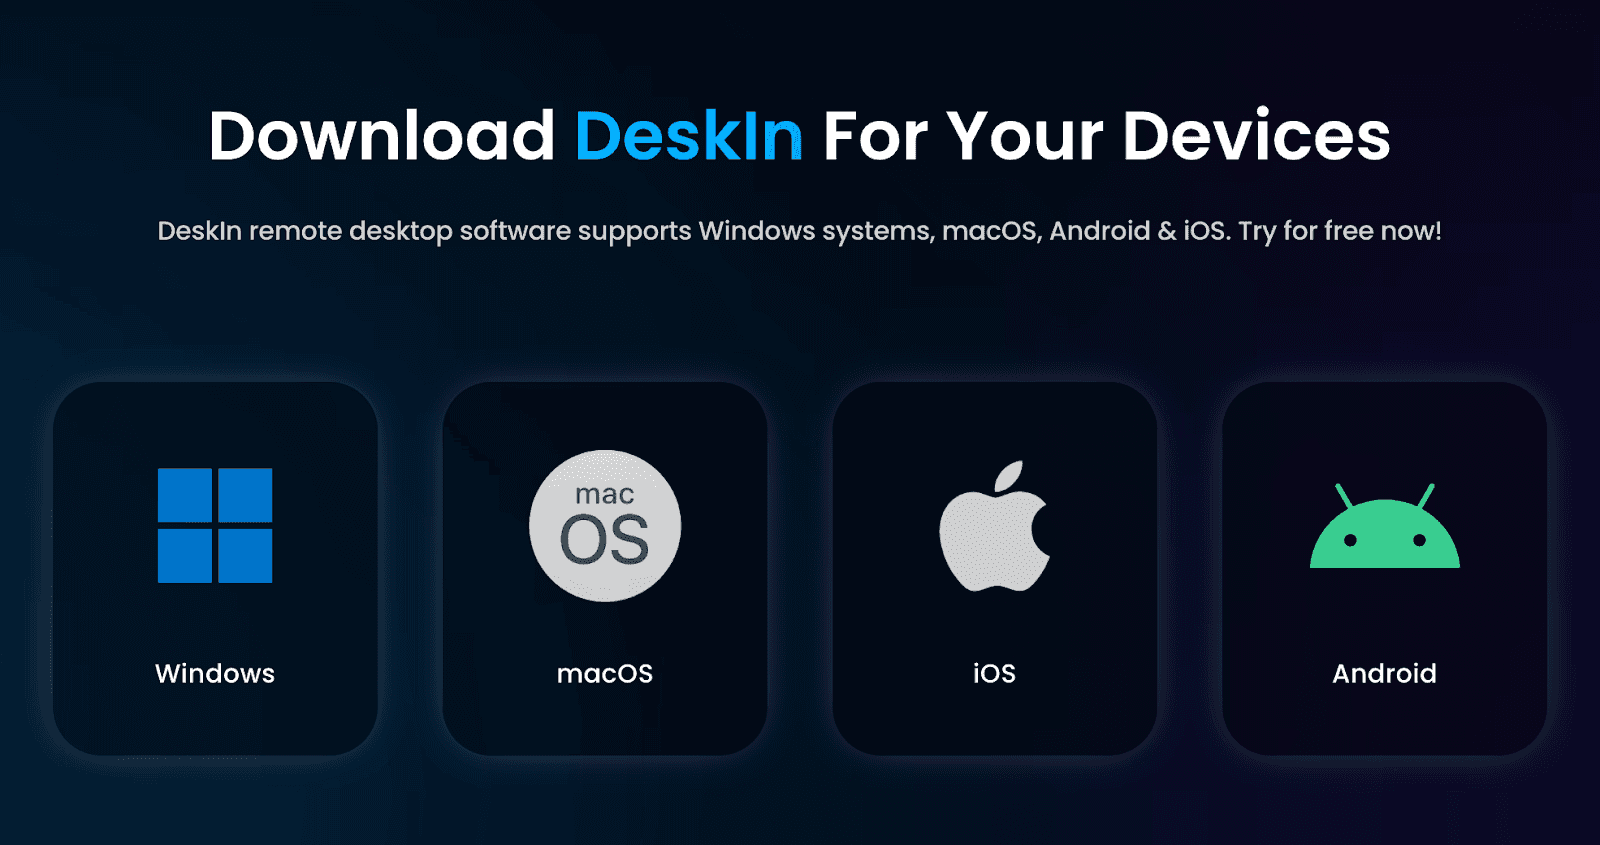
DeskIn is a remote desktop software suitable for web, Android, ios, Windows and MacBook. This means that you can use not only your phone, but also a computer to remotely control your child's mobile phone. You can delete risky messages, check phone usage time, block apps by remotely accessing your kid’s phone. Compared to other programs, DeskIn will not record the browsing history, track location of the remote mobile phone. You can only view and operate the remote phone with its permission. This leaves space for kid’s privacy and makes it easier for children to accept.

Pros:

  1. Secure: DeskIn only allows devices under the same account to remotely control the phone ,which can prevent children's phones from being monitored by strangers.

  2. Cross-system compatible: DeskIn has Android, ios, Windows and MacBook versions. You can use a computer to remotely monitor your child's phone, or you can use your phone to remotely monitor your child's computer.

  3. Voice call: DeskIn allows you to make voice calls while accessing your child's phone. When you discover some harmful apps or messages, even if the children are not around, you can ask your kids for more details and provide guidance. You can also conduct synchronous teaching when helping them fix tech problems.

  4. Use the remote camera: You can also use DeskIn to access the front and rear camera of your kid’s phone. When your child is in danger, you can know where they are are what’s going on.

  5. Flexible connection methods: DeskIn allows two connection methods, manual verification and unattended password connection, which makes it more acceptable to children. Under normal circumstances, you can ask your child to do manual verification when monitoring their phone, just to inform them. In an emergency, you can still use a password for unattended connection.

Cons:

  1. Can't track the location of the kid's phone.

Family Link is a parental control software developed by Google that allows users to manage Android phones. It essentially manages children’s phones by managing their Google accounts. It can block or allow individual apps, hide apps, find devices, set a bedtime and set app limits. But it also has loopholes that when using a hidden browser, kids can bypass browsing restrictions. Some netizens also reported that its time limit function is easy to be bypassed by children.


Pros:

  1. Set time limit: You can set downtime for kids’ devices and time limit for apps.

  2. Block software or websites: You can manage app permissions and website browsing permissions of your kid’s phone. Limit the display of adult content or even allow them to view only certain websites.

  3. You can approve or block apps kids download from Playstore and .

  4. Track your child’s location: You can use a map to track your child’s real-time location, or you can set to receive a reminder when your child reaches a certain location.

Cons:

  1. Can manage Android phones only

  2. Don't support remote control the mobile phone

  3. Website browsing restrictions and control time can be bypassed

KidsGuard

KidsGuard is more of a “spyware”, it can monitor all operations of the mobile phone, obtain all files on the mobile phone and record chat messages. Basically, all usage information of the binded mobile phone will be scanned and recorded. However, it does not have many operational functions, such as setting usage time limits, restricting web pages to browse, etc.


Pros:

  1. Free simulation demo screen is provided. You can simulate it first and then decide whether to pay.

  2. Can monitor iPhone via iCloud, receive and manage emails, view contacts, photos, reminders, etc.

  3. Track social media messages with keywords: You can query messages using keywords.

  4. Payment monitoring: can record children’s subscription consumption in the app store

  5. You can view all usage status and reports of the remote mobile phone through the web panel: usage time, mobile phone files, browsing history, chat history, etc.

Cons:

  1. You need to pay to unlock advanced features

  2. The mobile phone cannot be directly controlled and set.

  3. Obtaining too many permissions on the mobile phone and recording too much content can easily lead to privacy leaks.

Airdroid

Airdroid is a comprehensive control application that allows you to control devices with AirDroid Kids through AirDroid Parental Control App. Supports monitoring remote mobile devices using mobile phones or web pages. After payment, it supports management of up to 10 devices.


Pros:

  1. You can use the camera and microphone of your kid’s Android phone to view and listen to the environment and sounds around your child.

  2. Synchronously receive notifications from apps on your child’s Android phone, such as Line and Facebook.

  3. You can get the daily/weekly report of your child’s mobile phone usage through the report panel.

  4. You can manage and limit the usage time or permissions of mobile phones, software, and web pages.

  5. Keyword detection: Conduct keyword detection on social software to identify harmful content or potential bullying issues.

  6. Track the location of the mobile phone.

Cons:

  1. There is no free version, you need to pay to unlock all features

  2. Obtaining too many permissions on mobile phones and recording too much content can easily lead to privacy leaks.

How to use DeskIn to access your child’s phone

  • Step 1: Install DeskIn on your device and your child’s phone, register and log in to a same DeskIn account.

free download DeskIn
  • Step 2: Ask your child to open DeskIn, toggle on “Allow remote control" button to allow accessing, and set a connection password.

  • Step 3: Then you can find your child's phone in the device list or use the device ID to access their phone. Your child can do manual verification, or you can use password to do unattended access.

Conclusion

This article introduces 4 parental control software to help parents monitor their children's mobile phone. Each software has its pros and cons, and you can choose according to your needs. Among the four softwares, DeskIn can full-control kid’s mobile phone and requires fewer permissions, making it easier for children to accept. Although parents have a good intention to monitor their children's mobile phones, parents should not go too far and give children space and respect their privacy. What’s important in a good parent and kid relationship is mutual trust.

free download DeskIn

More and more kids have their own smartpgones. While bringing more communication convenience, it also exposes them to more dangers. Out of concern for their children's safety and excessive phone usage time, some parents use parental control app software to monitor their kid’s phone. What should parents pay attention to when using their app? This article gives you 4 tips and introduces 4 best parental control apps. Check it out.

Why Should Parents Monitor Their Children's Phones?

1. Manage phone usage time

Children may be addicted to games, short videos, social media, and use mobile phones uncontrollably. At this time, by monitoring their children's mobile phone usage time and managing app usage time, parents can guide their children to live a healthier, more time-managed life.

2. Detect harmful messages and programs

Children may not be able to distinguish toxic and harmful information on the Internet at their young age.Regularly checking your children’s mobile text messages, web browsing history and social media can prevent them from getting bad influence from sexual, violent, gambling, fraud and drug-related content. At the same time, you can give them proper guidence of using internet.

3. Avoid accidental payment

Currently the payment verification process on phones is becoming more and more simple, which brings convenience but also hidden dangers. Children may purchase in-game items, donate to streamers, or accidentally subscribe to an app. If not discovered in time, it may cause big losses.

4. Keep eyes on children and prevent dangers

Parents cannot be with their children at all times and cannot 100% be aware of what happens at school or with friends. By monitoring the text messages or chat records of children's mobile phones, they may be able to know at the first time when there are conflicts with classmates, school bullying (being bullied or bullying), violence, etc. Some monitoring programs can also track the location of kid’s phones, so when kids are in danger, parents can arrive as soon as possible.

5. Fix tech problems

When kids encounter technical problems with their phone, such as settings, backup problems, upload files etc,. parents can use remote programs to control their children's mobile phones and help fix it.

4 things to pay attention to before monitoring your children’s phones

1. Respect children

Although we understand that parents monitor their children's mobile phones out of concern. But please remember that the child also has their own ideas, secrets and privacy. Please remember this before using a monitoring program:always respect your child and their opinions. Don't go too far or you may cause the relationship to deteriorate.

2. Communicate with your children

Talk about your thoughts and reasons with your child before monitoring their phone. At the same time, listen to theirs, communicate to reach a consensus. Make sure you have your child's consent before downloading and using a phone monitoring program. If they strongly disagree with the idea, communitate and figure out other ways.

3. Make an agreement and stick to it

Make an agreement with your child when you can monitor their phone, what apps you can monitor and can’t and stick to it. Remember, trust and communication are more important than anything else.

4. Choose safe monitoring software

When you decide to use a monitoring program, remember to choose one with a high security level. Since these programs gain access to most of your phone's permissions, using unsafe programs may cause the risk of information leakage. In serious cases, it may also pose a threat to the safety of your children.

4 best parental control software 2024

DeskIn

DeskIn is a remote desktop software suitable for web, Android, ios, Windows and MacBook. This means that you can use not only your phone, but also a computer to remotely control your child's mobile phone. You can delete risky messages, check phone usage time, block apps by remotely accessing your kid’s phone. Compared to other programs, DeskIn will not record the browsing history, track location of the remote mobile phone. You can only view and operate the remote phone with its permission. This leaves space for kid’s privacy and makes it easier for children to accept.

Pros:

  1. Secure: DeskIn only allows devices under the same account to remotely control the phone ,which can prevent children's phones from being monitored by strangers.

  2. Cross-system compatible: DeskIn has Android, ios, Windows and MacBook versions. You can use a computer to remotely monitor your child's phone, or you can use your phone to remotely monitor your child's computer.

  3. Voice call: DeskIn allows you to make voice calls while accessing your child's phone. When you discover some harmful apps or messages, even if the children are not around, you can ask your kids for more details and provide guidance. You can also conduct synchronous teaching when helping them fix tech problems.

  4. Use the remote camera: You can also use DeskIn to access the front and rear camera of your kid’s phone. When your child is in danger, you can know where they are are what’s going on.

  5. Flexible connection methods: DeskIn allows two connection methods, manual verification and unattended password connection, which makes it more acceptable to children. Under normal circumstances, you can ask your child to do manual verification when monitoring their phone, just to inform them. In an emergency, you can still use a password for unattended connection.

Cons:

  1. Can't track the location of the kid's phone.

Family Link is a parental control software developed by Google that allows users to manage Android phones. It essentially manages children’s phones by managing their Google accounts. It can block or allow individual apps, hide apps, find devices, set a bedtime and set app limits. But it also has loopholes that when using a hidden browser, kids can bypass browsing restrictions. Some netizens also reported that its time limit function is easy to be bypassed by children.


Pros:

  1. Set time limit: You can set downtime for kids’ devices and time limit for apps.

  2. Block software or websites: You can manage app permissions and website browsing permissions of your kid’s phone. Limit the display of adult content or even allow them to view only certain websites.

  3. You can approve or block apps kids download from Playstore and .

  4. Track your child’s location: You can use a map to track your child’s real-time location, or you can set to receive a reminder when your child reaches a certain location.

Cons:

  1. Can manage Android phones only

  2. Don't support remote control the mobile phone

  3. Website browsing restrictions and control time can be bypassed

KidsGuard

KidsGuard is more of a “spyware”, it can monitor all operations of the mobile phone, obtain all files on the mobile phone and record chat messages. Basically, all usage information of the binded mobile phone will be scanned and recorded. However, it does not have many operational functions, such as setting usage time limits, restricting web pages to browse, etc.


Pros:

  1. Free simulation demo screen is provided. You can simulate it first and then decide whether to pay.

  2. Can monitor iPhone via iCloud, receive and manage emails, view contacts, photos, reminders, etc.

  3. Track social media messages with keywords: You can query messages using keywords.

  4. Payment monitoring: can record children’s subscription consumption in the app store

  5. You can view all usage status and reports of the remote mobile phone through the web panel: usage time, mobile phone files, browsing history, chat history, etc.

Cons:

  1. You need to pay to unlock advanced features

  2. The mobile phone cannot be directly controlled and set.

  3. Obtaining too many permissions on the mobile phone and recording too much content can easily lead to privacy leaks.

Airdroid

Airdroid is a comprehensive control application that allows you to control devices with AirDroid Kids through AirDroid Parental Control App. Supports monitoring remote mobile devices using mobile phones or web pages. After payment, it supports management of up to 10 devices.


Pros:

  1. You can use the camera and microphone of your kid’s Android phone to view and listen to the environment and sounds around your child.

  2. Synchronously receive notifications from apps on your child’s Android phone, such as Line and Facebook.

  3. You can get the daily/weekly report of your child’s mobile phone usage through the report panel.

  4. You can manage and limit the usage time or permissions of mobile phones, software, and web pages.

  5. Keyword detection: Conduct keyword detection on social software to identify harmful content or potential bullying issues.

  6. Track the location of the mobile phone.

Cons:

  1. There is no free version, you need to pay to unlock all features

  2. Obtaining too many permissions on mobile phones and recording too much content can easily lead to privacy leaks.

How to use DeskIn to access your child’s phone

  • Step 1: Install DeskIn on your device and your child’s phone, register and log in to a same DeskIn account.

free download DeskIn
  • Step 2: Ask your child to open DeskIn, toggle on “Allow remote control" button to allow accessing, and set a connection password.

  • Step 3: Then you can find your child's phone in the device list or use the device ID to access their phone. Your child can do manual verification, or you can use password to do unattended access.

Conclusion

This article introduces 4 parental control software to help parents monitor their children's mobile phone. Each software has its pros and cons, and you can choose according to your needs. Among the four softwares, DeskIn can full-control kid’s mobile phone and requires fewer permissions, making it easier for children to accept. Although parents have a good intention to monitor their children's mobile phones, parents should not go too far and give children space and respect their privacy. What’s important in a good parent and kid relationship is mutual trust.

free download DeskIn

Play x Work
All at Once

👻 Halloween Sale

👻 Halloween Sale

DeskIn Remote Game

only $14.32 USD 🎉 Limited on July 16-31

Add promo code: deskinsummer1

🎃 Remote Game 🎃

Save Over 60%
Only $9.75/Month 🎉 Reg. $25.9
👉 Use Promo Code [GAME60]

And Get Special Price

🎃 Remote Game 🎃 Save Over 60%
Only $9.75/Month 🎉Reg. $25.9
👉 Use Promo Code [GAME60] And Get Special Price

Table of Contents

👻 Halloween Sale

🎃 Remote Game 🎃

Save Over 60%
Only $9.75/Month 🎉 Reg. $25.9
👉 Use Promo Code [GAME60]

And Get Special Price

What’s next?

PRODUCTIVITY

Screen Mirroring iPhone/iPad To MacBook Guides 2025

A larger screen can bring a better viewing experience. Whether it is sharing files during work reports, watching movies with family and friends or taking travel photos on the big screen, the mirror projection function can bring us great benefits. Connecting screens together brings us closer. For Apple users, how to project the screen of iPhone or iPad to MacBook? This article will provide three simple and practical methods with step-by-step instructions. One of them is also suitable for remote projection. Let’s take a look.


Use DeskIn Remote Desktop to Share iPhone/iPad Screen to MacBook

DeskIn is a remote desktop application that works on iOS, Android, Mac and Windows, providing fast, safe and stable remote access services. Whether you are remote-workers, IT engineer, designer, gamer, student, or freelancer, DeskIn has a solution for you. In addition to remote connection features, DeskIn had many screen management functions, including screen projection, screen expansion, virtual screen generation, etc.

Advantages:

1. Easily realize wireless screen mirroring between different systems and devices.

2. Ultra-low latency, no connection time limit, and pretty high image quality.

3. Supports doing voice calls during the projection process, making real-time communication more convenient.

Step 1: Install and Register an DeskIn Account

Download DeskIn on your MacBook and iPhone/iPad, register a free account and log in separately.

free download DeskIn

Note: On your first log in to a new device, you need to complete an email verification, which is to protect the security of your account.

Step 2: Screen Mirroring by Scanning QR Code

Open DeskIn on MacBook and click "Screen Mgt" on the sidebar, then you can see the QR code.

Open DeskIn on iPhone/iPad, click the scan button in the upper right corner, scan the QR Code on the Mac DeskIn, then click "Start Broadcasting".

Step 3: Access iPhone/iPad screen from Macbook

Note: Projection can be completed in step 3 or step 2.

Open DeskIn on iPhone/iPad, go to "Remote Control" Tab >> Toggle on the "Allow" button >> Choose "Screen Mirroring" >> Then a "Screen Broadcast" reminder will pop up, just click "Start Broadcast".

Open DeskIn on your MacBook >> Go to "Device list" >> Select your iPhone/iPad device >> Click "View Mode" on the toolbar. You can finish the connection verification using password or Password-free Connection method——which is to do manual verification on iPhone/iPad. Once connected, you can see the screen of the iPhone/iPad on the MacBook. This method is also suitable for situations where the mobile device and computer are not in the same place and remote projection is required. You can also do audio-call during the projection process.


Use QuickTime Player to Cast iPhone/iPad Screen to MacBook

Advantages:

  1. QuickTime Player is a built-in app of MacOS, and you don't have to download extra softwares.

  2. Using USB connection, 2 devices no need to be on the same network, high image quality, low latency.

Limitations:

USB cable is required to connect iPhone/iPad and MacBook using this method, wireless mirroring is not supported.

Step 1: Connect the Devices

Connect your iPhone/iPad to your MacBook with a USB cable.

Step 2: Complete QuickTime Player Settings

  1. Open QuickTime Player on your MacBook. You can find it by searching.


  1. Find the QuickTime Player toolbar on the top toolbar of your MacBook >> Click "File" > > Click "New video recording"


  1. In the recording window, click the down arrow next to the record button >> Find and select your iPhone/iPhone in the Screen section of the device list that pops up. Then your iPhone/iPhone screen will be projected onto your MacBook.


Use AirPlay to Cast iPhone/iPad Screen to MacBook

Advantages:

  1. Airplay is a built-in function of Apple devices, and you don't have to download extra softwares.

  2. Supports wireless mirror projection, no USB data cable required.

Limitations:

  1. The device needs to be in the same network to use AirPlay.

  2. The MacBook cannot perform other operations during the projection process.


Steps:

  1. Make sure your iPhone/iPad and MacBook are connected to the same network.

  2. Swipe down from the upper right corner of the iPhone/iPad screen to open the Control Center. Click the "Airplay" icon >> Select your MacBook, then the iPhone/iPad screen will be projected to the MacBook.

  3. A pop-up reminder may appear on your MacBook asking whether to allow projection requests from the iOS devices. Once the request is accepted, the iPhone/iPad screen will be projected to the MacBook.


Conclusion

This article introduces three methods for mirroring iPhone to MacBook, two of which are implemented through Apple's own built-in programs. The most recommended thing is to use DeskIn remote software for mirror projection - it is not restricted by the same WIFI network and does not require a USB data cable to complete the mirror projection from iPhone/iPad to MacBook, and it does not affect the normal operation of MacBook during the projection period. use. The steps are very simple, download DeskIn and give it a try.

free download DeskIn

PRODUCTIVITY

2 Simple Ways To Share Windows 10/11 Screen

Do you want to share your computer screen with your colleagues during a meeting or project videos/photos onto a larger screen? This article will introduce two simple methods to project your Windows 10/11 computer screen.

Method 1: Use professional projector app DeskIn to share screen

Advantages of using DeskIn remote desktop for projection:

  • Cross-platform support: DeskIn supports screen sharing between iOS, Windows, Android, and macOS systems.

  • No need for the same network environment: DeskIn allows projection even when devices are not on the same network, making it possible to share screens over long distances.

  • Screen adaptation: You can modify resolution, frame rate, and other settings to better adapt to remote screens.

  • Secure: DeskIn uses 256-bit encryption to ensure that your projected content remains private and secure.

  • Easy to use: No complicated setup is required.


Step 1: Install DeskIn on both your computer and the device you want to share your screen with.

Register for a free account and log in.

free download DeskIn

Note: On your first login to a new device, you will need to complete an email verification to protect the security of your account.

Step 2: Extend your screen

Open the DeskIn app on your Windows/Mac computer >> Go to the "Screen Mgt" tab >> Click “Mirror my screen."

Step 3: Select the device you want to share your screen with and click "Start Mirroring."


Step 4: You can find the device you are sharing your screen with in the「Device list」and adjust the resolution, frame rate, and other settings as needed.


Method 2: Use Windows Built-in Tool "Wireless Display" to Project Your Computer Screen

Step 1: On both the computer you want to share the screen from and the one you want to share it to select "Windows Start" >> "Settings" >> "System" >> "Optional Features".

Step 2: On the "Optional Features" page, click "View Features" next to "Add an optional feature.” Search for "Wireless Display," then click and install it.


Step 3: Once installed, go back to "Settings" >> "System" >> "Projecting to this PC" to manage your projection preferences.


Step 4: On the computer you want to share the screen to, search for "Wireless Display" in the taskbar search box and launch the app. The device will now be discoverable and ready to receive projected content.


Step 5: Press "Windows+K" on the computer you want to share screen from, select the device you want to share screen to on the device list that pops up.

You can also project your computer screen to a Miracast-enabled TV, projector, or other type of external display.

Conclusion

This article introduced two simple methods for projecting and sharing your screen on Windows 10/11. While Method 2 uses built-in Windows tools, the setup process is relatively complicated and is only applicable to Windows systems or displays that support Miracast. If you want to project your Windows computer screen to any macOS, iOS, Android, or Windows device, we recommend using the remote software DeskIn. It is not restricted by the operating system and does not require devices to be on the same network, making it a versatile solution for all your projection needs

free download DeskIn

PRODUCTIVITY

Use Samsung Galaxy Tablet As Second Monitor For Windows PC

For multitasking workers, having a second monitor can increase productivity greatly. If you are a home office person or a student who don't have a dual screen. Here's how you can easily turn your Samsung Galaxy Tablet into a second monitor for your computer.


Step 1: Turn on your Samsung tablet, swipe down from the top of the screen to open the 「Quick Settings」panel.

Step 2: Find the "Second Screen" icon and tap it.


Step 3: Keep the tablet in the "Second Screen" screen (as shown below)

Note: If your Samsung tablet and Galaxy Book are logged into the same Samsung account, you can directly start from step 4 to connect through the Galaxy Book

Step 4: Press "Windows + K" on your computer, find and select your tablet from the pop-up device list, your tablet will become the extended screen.


Step 5: If you find the tablet only mirrors the contents of the computer, click "Change Projection Mode" and switch the projection mode to "Extended".


Note: The extended screen feature only available on Galaxy Tab S7、S8 and S9 running One UI 3.1 and later, and Windows PC running Windows 10 v.2004 and higher.

Best tool to extend screen on Windows and macOS: DeskIn

The method introduced above is only applicable to Samsung tablets and Windows computers. If you are looking for a more comprehensive screen extension solution, you should try DeskIn- supports cross-platform screen extension on iOS, Android, Windows, and MacBook, adjusting resolution and completely free. Whether you're using an iPad, MacBook, laptop, or PC, it's easy to do that in just a few steps:

Step 1: Download and register a DeskIn account

Download DeskIn on both your devices, register for a free account and log in.

free download DeskIn

Step 2: Open DeskIn on the computer, go to "Screen Mgt" tab and click "Extend my screen".


Step 3: Select the device you want to expand the screen on and click "Start Extending". Then the selected device would become the second display of the computer.


Conclusion

This article introduces how to use a Samsung tablet as a second monitor. If you are looking for a screen extension tool that is suitable for all devices and has no limit on brand or system, we recommend using DeskIn. Click DeskIn Personal | Free Remote Desktop App with 40M+ Users to learn more.

free download DeskIn

PRODUCTIVITY

Screen Mirroring iPhone/iPad To MacBook Guides 2025

A larger screen can bring a better viewing experience. Whether it is sharing files during work reports, watching movies with family and friends or taking travel photos on the big screen, the mirror projection function can bring us great benefits. Connecting screens together brings us closer. For Apple users, how to project the screen of iPhone or iPad to MacBook? This article will provide three simple and practical methods with step-by-step instructions. One of them is also suitable for remote projection. Let’s take a look.


Use DeskIn Remote Desktop to Share iPhone/iPad Screen to MacBook

DeskIn is a remote desktop application that works on iOS, Android, Mac and Windows, providing fast, safe and stable remote access services. Whether you are remote-workers, IT engineer, designer, gamer, student, or freelancer, DeskIn has a solution for you. In addition to remote connection features, DeskIn had many screen management functions, including screen projection, screen expansion, virtual screen generation, etc.

Advantages:

1. Easily realize wireless screen mirroring between different systems and devices.

2. Ultra-low latency, no connection time limit, and pretty high image quality.

3. Supports doing voice calls during the projection process, making real-time communication more convenient.

Step 1: Install and Register an DeskIn Account

Download DeskIn on your MacBook and iPhone/iPad, register a free account and log in separately.

free download DeskIn

Note: On your first log in to a new device, you need to complete an email verification, which is to protect the security of your account.

Step 2: Screen Mirroring by Scanning QR Code

Open DeskIn on MacBook and click "Screen Mgt" on the sidebar, then you can see the QR code.

Open DeskIn on iPhone/iPad, click the scan button in the upper right corner, scan the QR Code on the Mac DeskIn, then click "Start Broadcasting".

Step 3: Access iPhone/iPad screen from Macbook

Note: Projection can be completed in step 3 or step 2.

Open DeskIn on iPhone/iPad, go to "Remote Control" Tab >> Toggle on the "Allow" button >> Choose "Screen Mirroring" >> Then a "Screen Broadcast" reminder will pop up, just click "Start Broadcast".

Open DeskIn on your MacBook >> Go to "Device list" >> Select your iPhone/iPad device >> Click "View Mode" on the toolbar. You can finish the connection verification using password or Password-free Connection method——which is to do manual verification on iPhone/iPad. Once connected, you can see the screen of the iPhone/iPad on the MacBook. This method is also suitable for situations where the mobile device and computer are not in the same place and remote projection is required. You can also do audio-call during the projection process.


Use QuickTime Player to Cast iPhone/iPad Screen to MacBook

Advantages:

  1. QuickTime Player is a built-in app of MacOS, and you don't have to download extra softwares.

  2. Using USB connection, 2 devices no need to be on the same network, high image quality, low latency.

Limitations:

USB cable is required to connect iPhone/iPad and MacBook using this method, wireless mirroring is not supported.

Step 1: Connect the Devices

Connect your iPhone/iPad to your MacBook with a USB cable.

Step 2: Complete QuickTime Player Settings

  1. Open QuickTime Player on your MacBook. You can find it by searching.


  1. Find the QuickTime Player toolbar on the top toolbar of your MacBook >> Click "File" > > Click "New video recording"


  1. In the recording window, click the down arrow next to the record button >> Find and select your iPhone/iPhone in the Screen section of the device list that pops up. Then your iPhone/iPhone screen will be projected onto your MacBook.


Use AirPlay to Cast iPhone/iPad Screen to MacBook

Advantages:

  1. Airplay is a built-in function of Apple devices, and you don't have to download extra softwares.

  2. Supports wireless mirror projection, no USB data cable required.

Limitations:

  1. The device needs to be in the same network to use AirPlay.

  2. The MacBook cannot perform other operations during the projection process.


Steps:

  1. Make sure your iPhone/iPad and MacBook are connected to the same network.

  2. Swipe down from the upper right corner of the iPhone/iPad screen to open the Control Center. Click the "Airplay" icon >> Select your MacBook, then the iPhone/iPad screen will be projected to the MacBook.

  3. A pop-up reminder may appear on your MacBook asking whether to allow projection requests from the iOS devices. Once the request is accepted, the iPhone/iPad screen will be projected to the MacBook.


Conclusion

This article introduces three methods for mirroring iPhone to MacBook, two of which are implemented through Apple's own built-in programs. The most recommended thing is to use DeskIn remote software for mirror projection - it is not restricted by the same WIFI network and does not require a USB data cable to complete the mirror projection from iPhone/iPad to MacBook, and it does not affect the normal operation of MacBook during the projection period. use. The steps are very simple, download DeskIn and give it a try.

free download DeskIn

PRODUCTIVITY

2 Simple Ways To Share Windows 10/11 Screen

Do you want to share your computer screen with your colleagues during a meeting or project videos/photos onto a larger screen? This article will introduce two simple methods to project your Windows 10/11 computer screen.

Method 1: Use professional projector app DeskIn to share screen

Advantages of using DeskIn remote desktop for projection:

  • Cross-platform support: DeskIn supports screen sharing between iOS, Windows, Android, and macOS systems.

  • No need for the same network environment: DeskIn allows projection even when devices are not on the same network, making it possible to share screens over long distances.

  • Screen adaptation: You can modify resolution, frame rate, and other settings to better adapt to remote screens.

  • Secure: DeskIn uses 256-bit encryption to ensure that your projected content remains private and secure.

  • Easy to use: No complicated setup is required.


Step 1: Install DeskIn on both your computer and the device you want to share your screen with.

Register for a free account and log in.

free download DeskIn

Note: On your first login to a new device, you will need to complete an email verification to protect the security of your account.

Step 2: Extend your screen

Open the DeskIn app on your Windows/Mac computer >> Go to the "Screen Mgt" tab >> Click “Mirror my screen."

Step 3: Select the device you want to share your screen with and click "Start Mirroring."


Step 4: You can find the device you are sharing your screen with in the「Device list」and adjust the resolution, frame rate, and other settings as needed.


Method 2: Use Windows Built-in Tool "Wireless Display" to Project Your Computer Screen

Step 1: On both the computer you want to share the screen from and the one you want to share it to select "Windows Start" >> "Settings" >> "System" >> "Optional Features".

Step 2: On the "Optional Features" page, click "View Features" next to "Add an optional feature.” Search for "Wireless Display," then click and install it.


Step 3: Once installed, go back to "Settings" >> "System" >> "Projecting to this PC" to manage your projection preferences.


Step 4: On the computer you want to share the screen to, search for "Wireless Display" in the taskbar search box and launch the app. The device will now be discoverable and ready to receive projected content.


Step 5: Press "Windows+K" on the computer you want to share screen from, select the device you want to share screen to on the device list that pops up.

You can also project your computer screen to a Miracast-enabled TV, projector, or other type of external display.

Conclusion

This article introduced two simple methods for projecting and sharing your screen on Windows 10/11. While Method 2 uses built-in Windows tools, the setup process is relatively complicated and is only applicable to Windows systems or displays that support Miracast. If you want to project your Windows computer screen to any macOS, iOS, Android, or Windows device, we recommend using the remote software DeskIn. It is not restricted by the operating system and does not require devices to be on the same network, making it a versatile solution for all your projection needs

free download DeskIn

Don't miss out.

Don't miss out.

Don't miss out.

Contact Us

Email: support@deskin.io

Office: 991D Alexandra Road #02-17, Singapore 119972

Copyright © 2025 Zuler Technology PTE. LTD. All rights reserved.

Contact Us

support@deskin.io

991D Alexandra Road #02-17

Singapore 119972

Copyright © 2025 Zuler Technology PTE. LTD. All rights reserved.

Contact Us

Email: support@deskin.io

Office: 991D Alexandra Road #02-17, Singapore 119972

Copyright © 2025 Zuler Technology PTE. LTD. All rights reserved.