Công nghệ
Công nghệ
/
5 phút
/
5 phút
Faris còn sống
Đã cập nhật
Đã cập nhật
Đã cập nhật
Trong bối cảnh kỹ thuật số ngày nay, doanh nghiệp phải đối mặt với những thách thức chưa từng có trong việc duy trì hạ tầng CNTT an toàn và hiệu quả trên các mạng lưới phân tán. Khi làm việc từ xa trở thành chuẩn mực và các mối đe dọa an ninh mạng phát triển nhanh chóng, các phương pháp giám sát tại chỗ truyền thống không còn đủ đáp ứng.
Vấn đề rất rõ ràng: các tổ chức gặp khó khăn trong việc duy trì khả năng quan sát và kiểm soát tài sản CNTT khi các nhóm làm việc phân tán ở nhiều địa điểm. Sự cố hệ thống, vi phạm bảo mật và vấn đề hiệu năng có thể không bị phát hiện trong nhiều giờ, dẫn đến thời gian ngừng hoạt động tốn kém và năng suất bị ảnh hưởng.
Hướng dẫn toàn diện này khám phá cách các hệ thống giám sát từ xa hiện đại mang lại giải pháp mà doanh nghiệp cần. Bạn sẽ khám phá các chiến lược triển khai thực tiễn, hiểu những lợi ích chính và học cách chọn nền tảng kiểm soát giám sát từ xa phù hợp với các yêu cầu riêng của tổ chức mình.
Hệ thống giám sát từ xa đại diện cho một sự chuyển đổi nền tảng trong cách các tổ chức quản lý hạ tầng CNTT của mình. Các nền tảng tinh vi này cho phép giám sát liên tục mạng, thiết bị và ứng dụng từ bất kỳ đâu, cung cấp thông tin chi tiết theo thời gian thực mà trước đây không thể có được.
Về cốt lõi, một hệ thống giám sát từ xa hoạt động như hệ thần kinh số của tổ chức bạn, liên tục thu thập dữ liệu, phân tích các chỉ số hiệu năng và cảnh báo quản trị viên về các vấn đề tiềm ẩn trước khi chúng leo thang thành sự cố nghiêm trọng. Cách tiếp cận chủ động này biến quản lý CNTT phản ứng bị động thành một lợi thế chiến lược.
Các giải pháp giám sát từ xa hiện đại tích hợp liền mạch với hạ tầng hiện có, hỗ trợ nhiều hệ điều hành bao gồm Windows, macOS và Chrome OS. Tính linh hoạt này đảm bảo phạm vi bao phủ toàn diện bất kể mức độ đa dạng công nghệ của tổ chức bạn.
Các hệ thống kiểm soát giám sát từ xa thành công tích hợp một số yếu tố thiết yếu:
Thu thập Dữ liệu Theo Thời gian Thực: Thu thập liên tục các chỉ số hiệu năng, nhật ký hệ thống và sự kiện bảo mật
Phân tích Thông minh: Các thuật toán nâng cao xác định mẫu và dự đoán các vấn đề tiềm ẩn
Cơ chế Phản hồi Tự động: Hành động tức thì được kích hoạt bởi các điều kiện định sẵn
Bảng điều khiển Tập trung: Giao diện hợp nhất cung cấp khả năng quan sát toàn diện trên tất cả tài sản được giám sát
Kiến trúc Có khả năng Mở rộng: Hạ tầng phát triển theo nhu cầu kinh doanh của bạn
Các thành phần này phối hợp với nhau để tạo ra một hệ sinh thái giám sát mạnh mẽ, nâng cao hiệu quả vận hành đồng thời giảm gánh nặng cho các đội ngũ CNTT.
Hệ thống giám sát từ xa đóng vai trò là tuyến phòng thủ đầu tiên của bạn trước các mối đe dọa an ninh mạng và vi phạm tuân thủ. Bằng cách duy trì giám sát liên tục các hoạt động mạng, những nền tảng này có thể phát hiện các mẫu hành vi đáng ngờ, các nỗ lực truy cập trái phép và các vi phạm bảo mật tiềm ẩn theo thời gian thực.
Lợi ích về tuân thủ cũng quan trọng không kém. Các tính năng ghi nhật ký và báo cáo tự động đảm bảo tổ chức của bạn duy trì dấu vết kiểm toán chi tiết, giúp việc tuân thủ quy định dễ quản lý hơn và giảm nguy cơ bị phạt tốn kém.
Các tổ chức triển khai giải pháp giám sát từ xa toàn diện thường trải nghiệm:
Giảm Thời gian Ngừng hoạt động: Xác định vấn đề chủ động ngăn các lỗi nhỏ trở thành sự cố lớn
Giảm Chi phí Vận hành: Quy trình tự động giảm nhu cầu giám sát và can thiệp thủ công
Cải thiện Phân bổ Nguồn lực: Thông tin chi tiết dựa trên dữ liệu cho phép ra quyết định tốt hơn về đầu tư phần cứng và phần mềm
Nâng cao Năng suất: Các đội ngũ CNTT có thể tập trung vào các sáng kiến chiến lược thay vì xử lý sự cố bị động
Các nền tảng kiểm soát giám sát từ xa hiện đại được thiết kế với khả năng mở rộng làm trọng tâm. Dù tổ chức của bạn có hàng chục hay hàng nghìn điểm cuối, các hệ thống này đều thích ứng với nhu cầu của bạn mà không cần thay đổi lớn về hạ tầng.
Khả năng mở rộng này vượt xa việc chỉ đếm thiết bị. Các nền tảng nâng cao có thể đáp ứng công nghệ mới, tích hợp với các công cụ mới nổi và phát triển cùng các yêu cầu kinh doanh của bạn.
Trước khi triển khai bất kỳ giải pháp giám sát từ xa nào, hãy thực hiện đánh giá kỹ lưỡng hạ tầng hiện tại và nhu cầu giám sát của bạn. Việc đánh giá này nên bao gồm:
Kiểm kê Tài sản: Danh mục toàn diện tất cả thiết bị, ứng dụng và thành phần mạng
Đánh giá Rủi ro: Xác định các hệ thống trọng yếu và các điểm có thể xảy ra lỗi
Mốc Hiệu năng Cơ sở: Các chỉ số hiệu năng hiện tại để đo lường cải thiện
Yêu cầu Tuân thủ: Nghĩa vụ pháp lý ảnh hưởng đến chiến lược giám sát
Khi đánh giá các tùy chọn hệ thống giám sát từ xa, hãy cân nhắc các nền tảng cung cấp:
Khả năng tương thích đa nền tảng
Giao diện người dùng trực quan
Tính năng bảo mật mạnh mẽ
Cơ chế cảnh báo linh hoạt
Khả năng báo cáo toàn diện
Hỗ trợ khách hàng đáng tin cậy
Giải pháp desktop từ xa cho doanh nghiệp của Deskin, ví dụ, cung cấp khả năng giám sát tích hợp kết hợp liền mạch truy cập từ xa với giám sát hệ thống toàn diện, mang đến một giải pháp hợp nhất cho nhu cầu quản lý CNTT hiện đại.
Triển khai thành công đòi hỏi cách tiếp cận theo từng giai đoạn:
Chương trình Thử nghiệm: Bắt đầu với một nhóm nhỏ các hệ thống trọng yếu để kiểm tra chức năng và tinh chỉnh quy trình
Triển khai Dần dần: Mở rộng phạm vi giám sát một cách có hệ thống để tránh gây quá tải cho nhóm của bạn
Đào tạo và Tài liệu hóa: Đảm bảo tất cả các bên liên quan hiểu cách sử dụng hệ thống hiệu quả
Tối ưu hóa Liên tục: Thường xuyên rà soát và điều chỉnh các tham số giám sát dựa trên kinh nghiệm vận hành
Hệ thống giám sát từ xa đã phát triển từ công cụ "có thì tốt" thành hạ tầng kinh doanh thiết yếu. Các tổ chức đón nhận những công nghệ này sẽ tạo vị thế để cải thiện bảo mật, nâng cao hiệu quả và quản lý nguồn lực tốt hơn trong môi trường số ngày càng phức tạp.
Chìa khóa thành công nằm ở việc lựa chọn đúng nền tảng và triển khai một cách chiến lược. Dù bạn đang quản lý mạng của doanh nghiệp nhỏ hay hạ tầng cấp doanh nghiệp, giải pháp kiểm soát giám sát từ xa phù hợp có thể thay đổi cách bạn tiếp cận quản lý CNTT.
Sẵn sàng cách mạng hóa năng lực giám sát của tổ chức bạn chưa? Hãy khám phá các giải pháp giám sát từ xa toàn diện của Deskin và tìm hiểu cách nền tảng của chúng tôi có thể tinh gọn vận hành CNTT của bạn đồng thời nâng cao bảo mật và hiệu năng trên toàn bộ hạ tầng.


Control Windows from Your Mac with Chrome Remote Desktop: Setup Guide & Pitfalls | DeskIn Japan
For Mac users working in Japan, there's a recurring frustration: a piece of software you need exists only on Windows. Whether it's CAD tools, Japanese accounting software (kaikei sofuto, 会計ソフト) required by your company, Windows-exclusive business systems, or PC games — the need to run Windows doesn't go away just because you prefer Mac.
The good news is you don't need to buy a separate Windows machine. Google's free tool Chrome Remote Desktop lets you control a Windows PC remotely from your Mac, and the setup is simpler than most people expect.
This guide walks through the fastest path to getting connected, and then covers the cross-platform quirks that tend to catch Mac users off guard once they're actually in a session.
Chrome Remote Desktop's configuration is straightforward, but it requires preparation on both machines — the Windows PC being controlled (the host) and the Mac doing the controlling (the client). Here's the fastest path to a working connection.
Start by allowing remote access on the Windows machine.
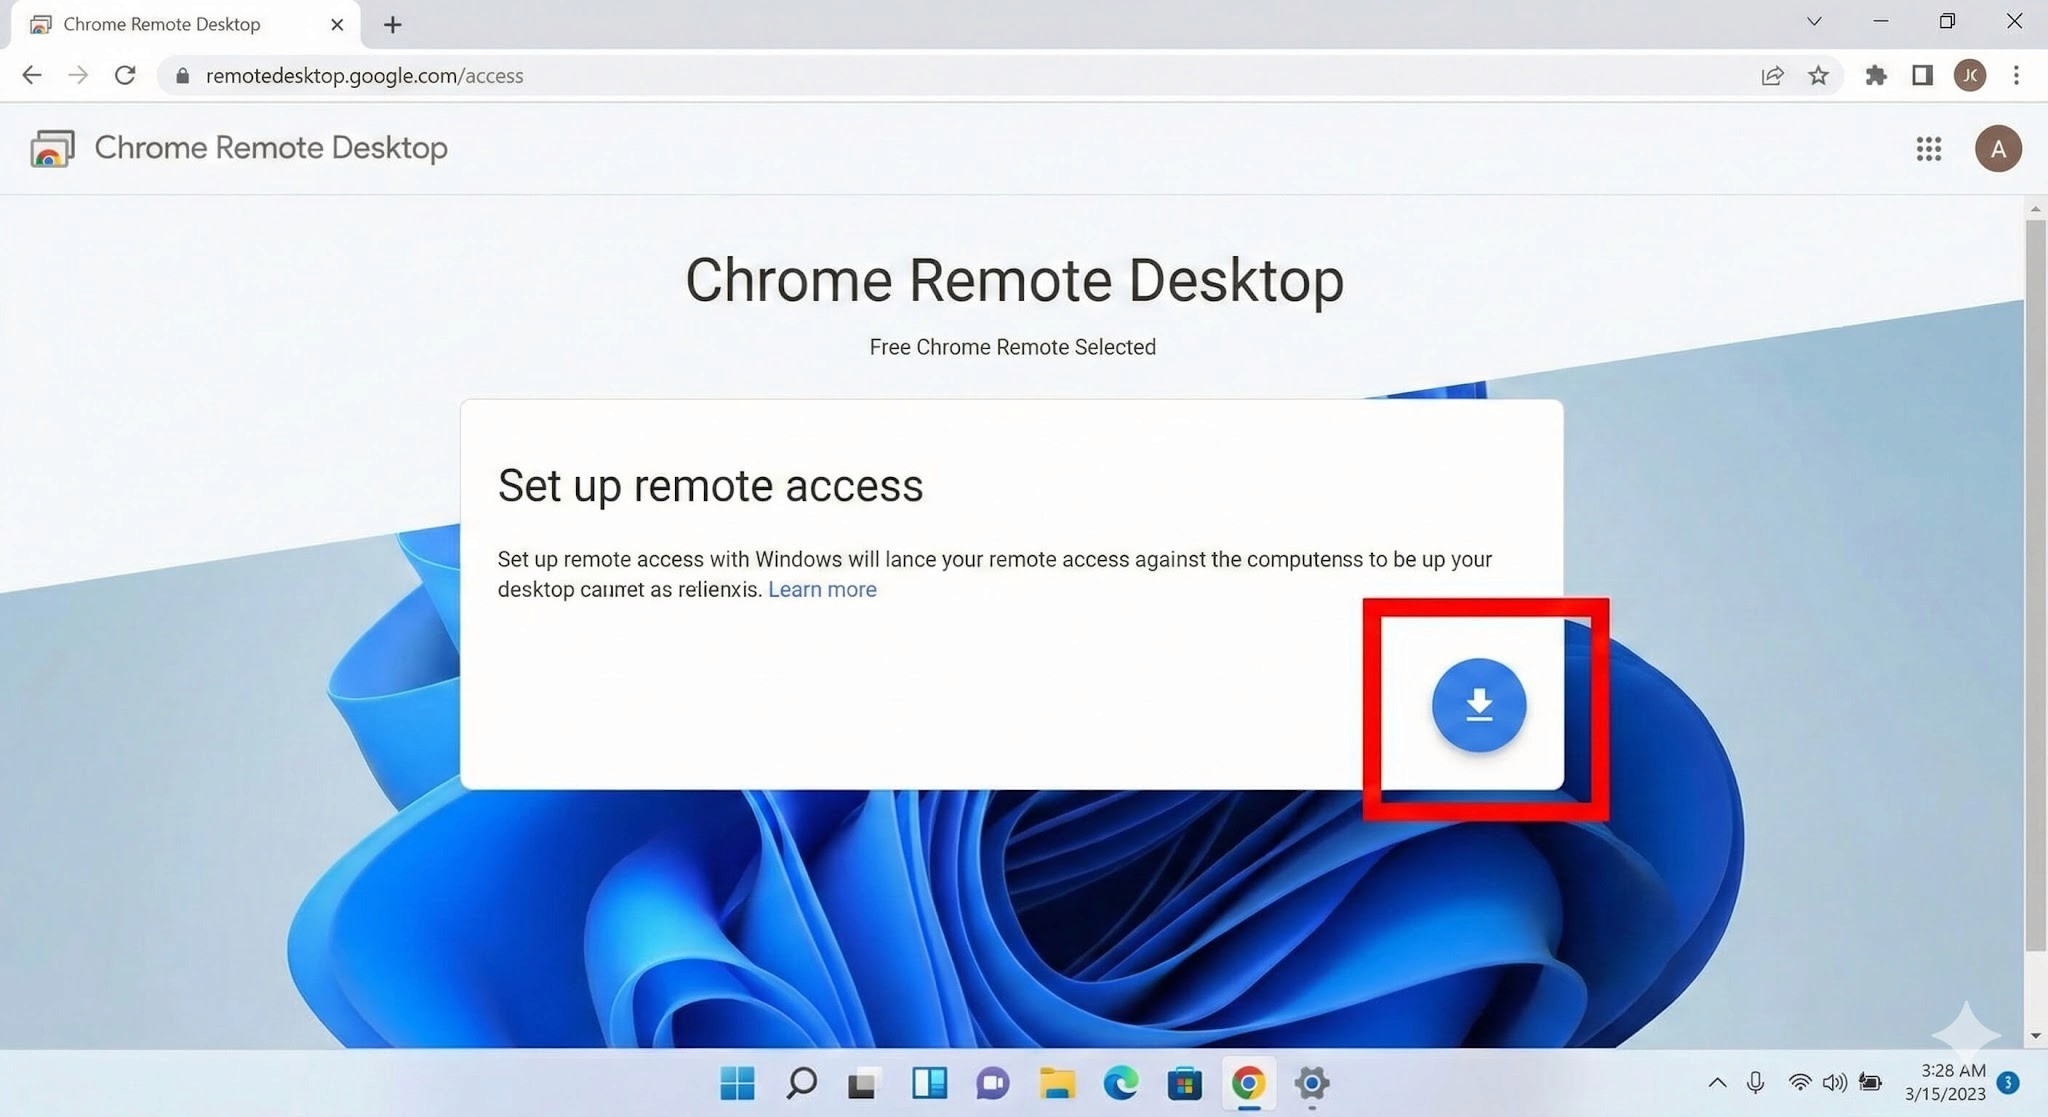
Install the extension and host software
Open Chrome and go to the Chrome Remote Desktop access page. Under "Set up remote access," click the blue download icon. Follow the prompts to add the Chrome extension and run the installer (.msi file).
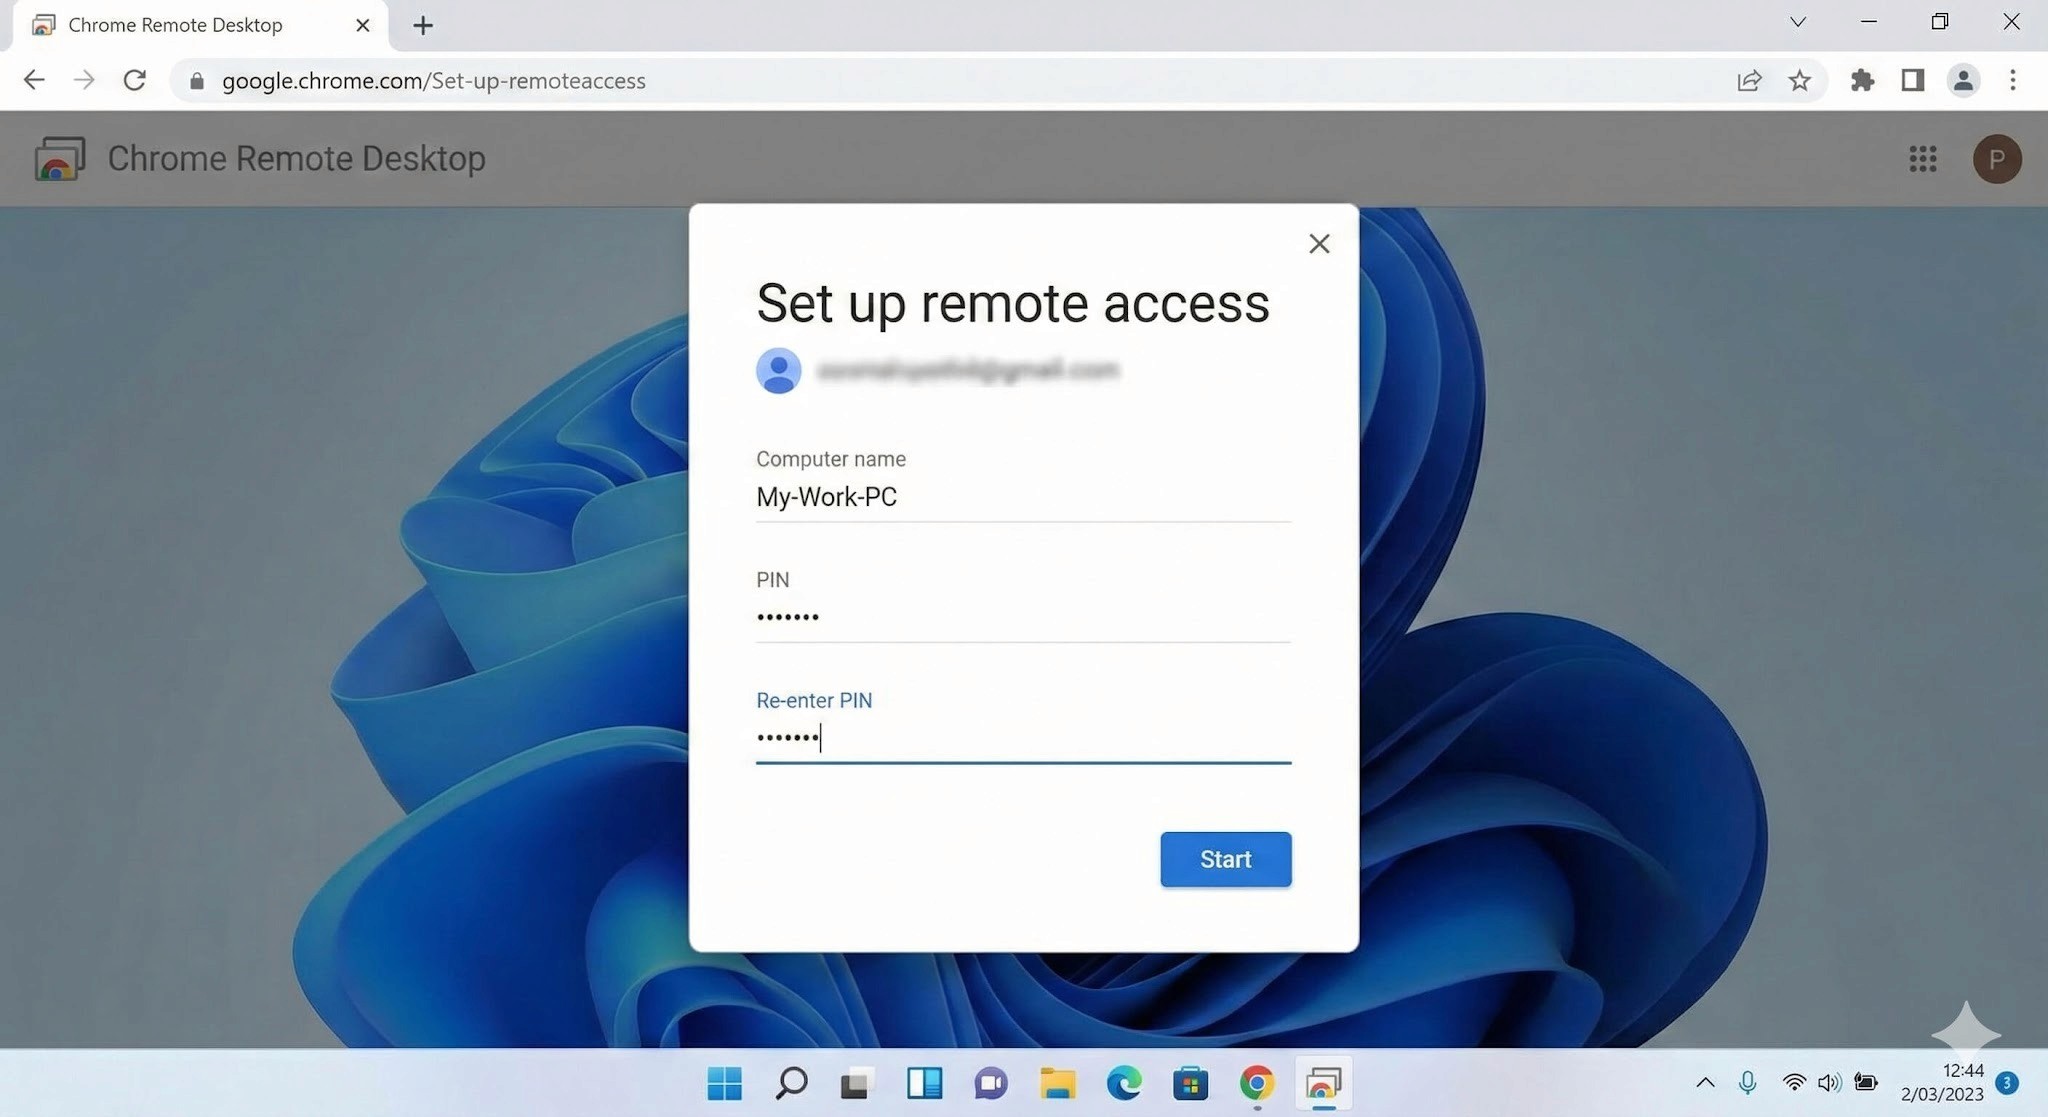
Name your PC and set a PIN
After installation, give the PC a name you'll recognise. Then set a PIN of at least six digits — you'll need to enter this every time you connect from your Mac, so write it somewhere safe.
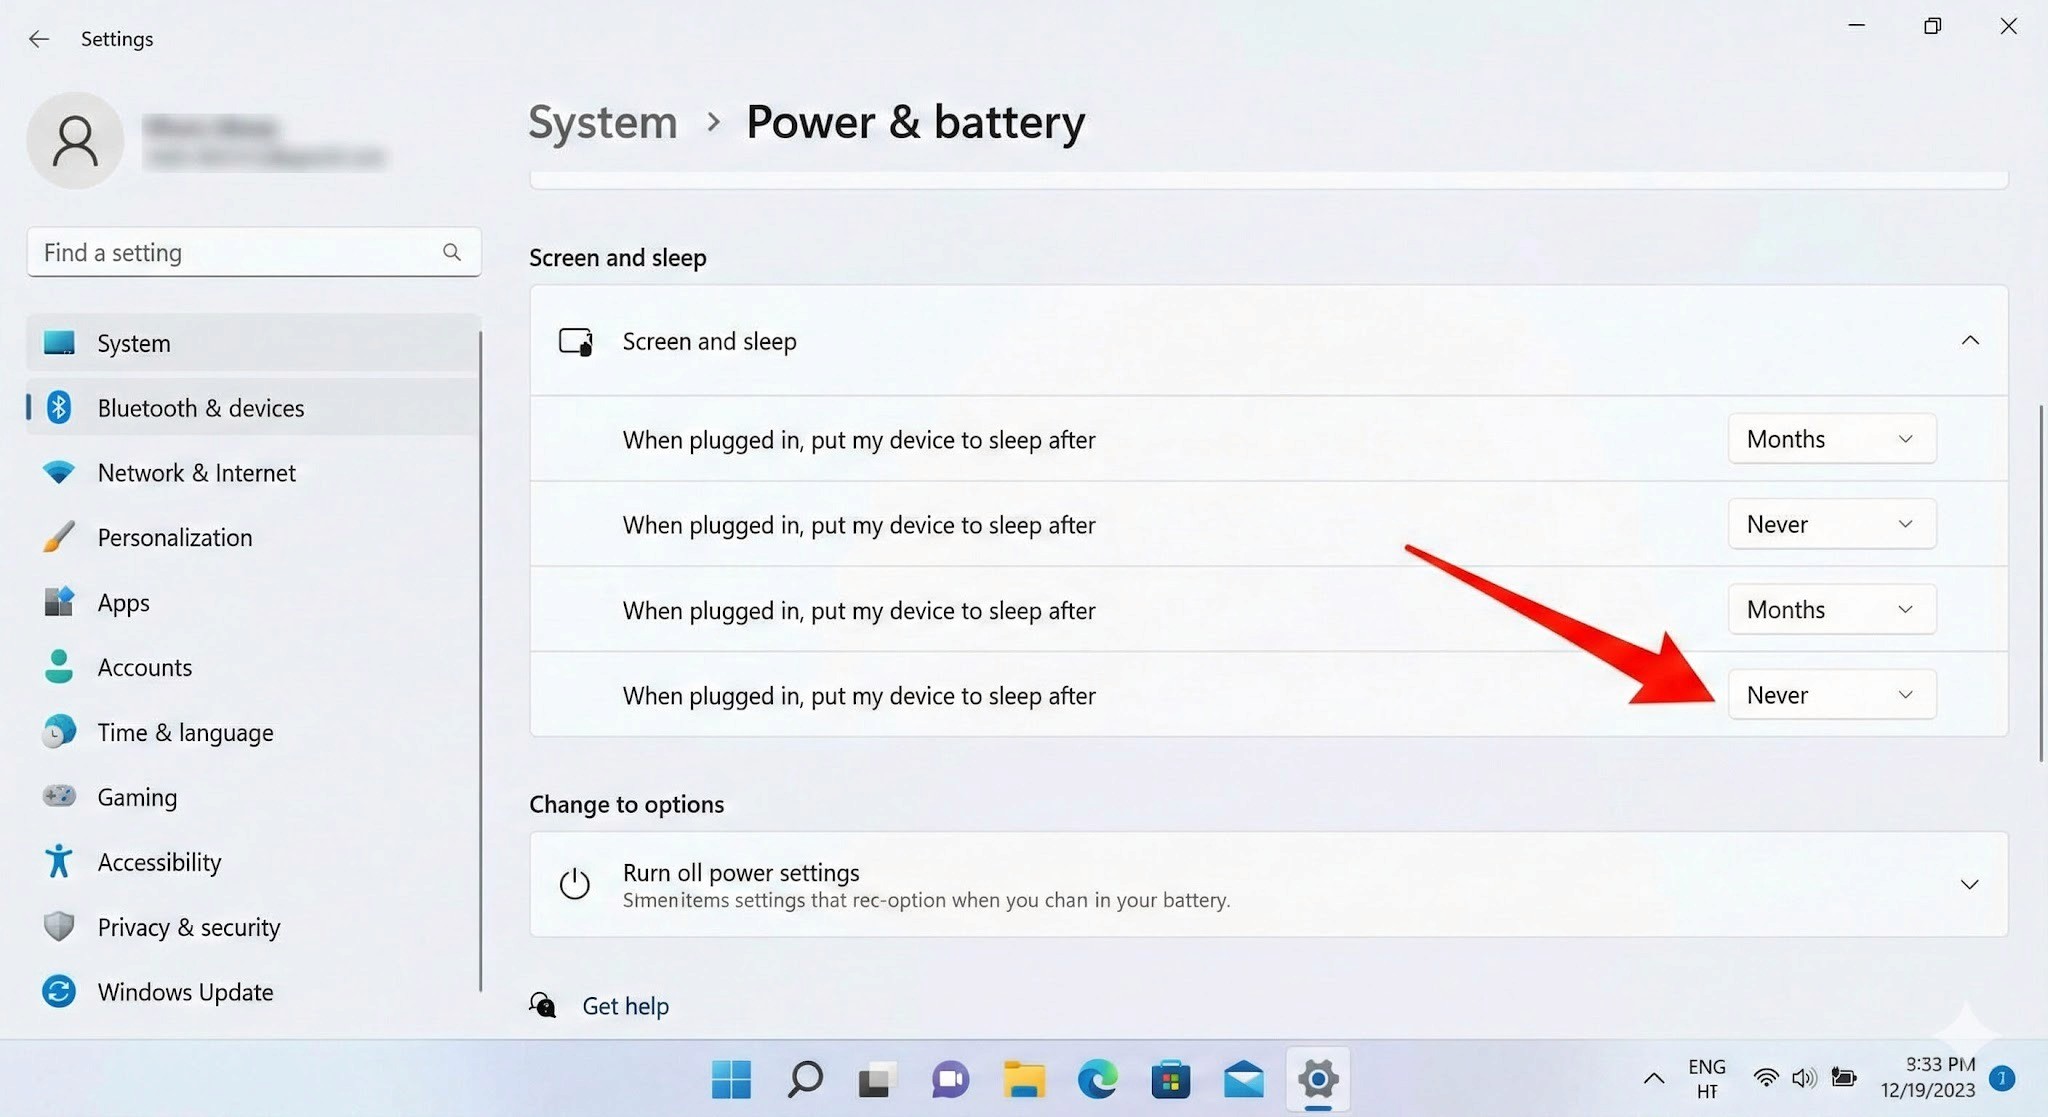
3. Important: Disable Sleep Mode
This is the step most people miss, and it will prevent connections entirely if skipped. A Windows PC in sleep mode cannot be reached remotely.
Go to Settings → System → Power & Battery
Under "Screen and Sleep," set "Put device to sleep after" to Never when plugged in
Once the Windows side is configured, connecting from your Mac is simple.
Log in to the access site
Open Chrome on your Mac and navigate to the same Chrome Remote Desktop access page. Make sure you're logged into the same Google account you used when setting up the Windows PC.
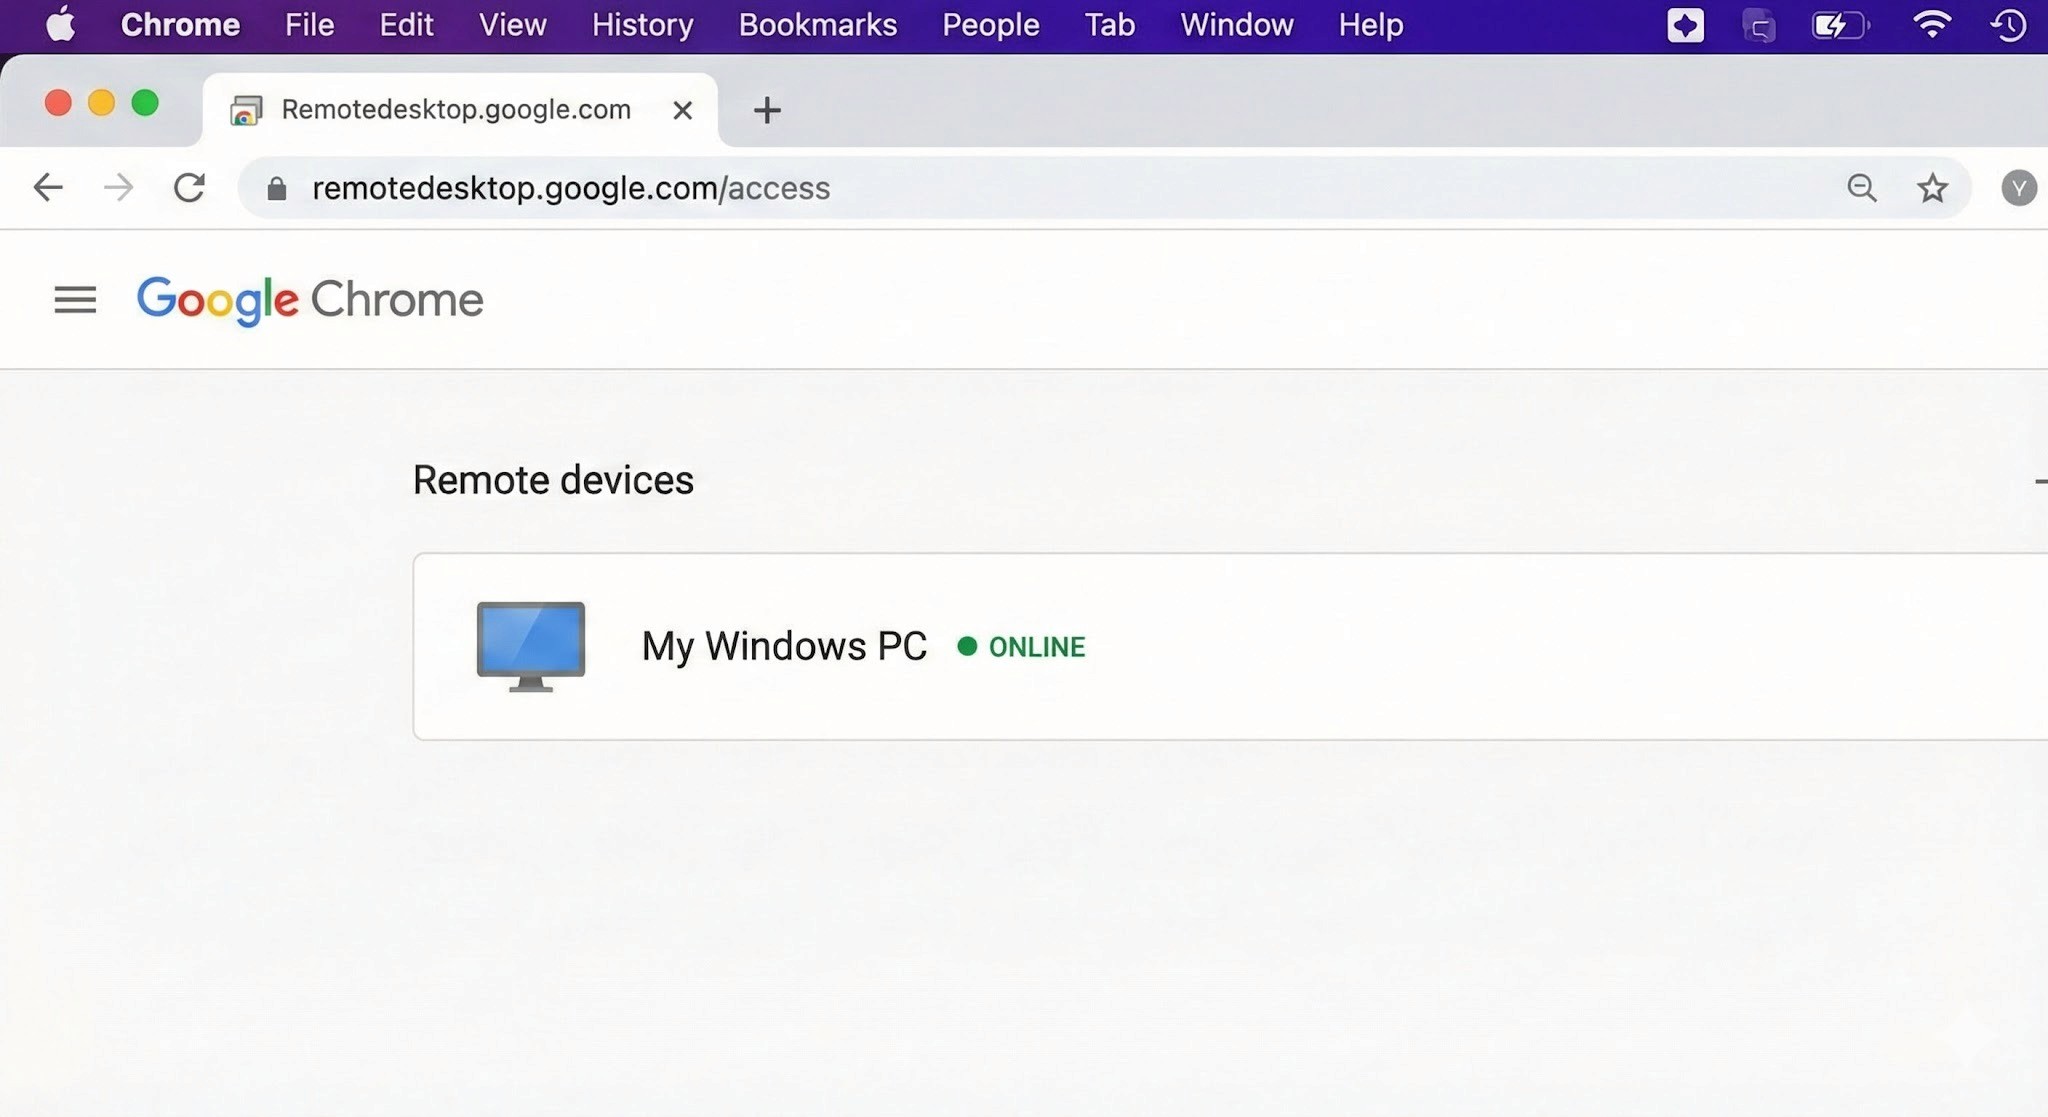
Select your PC and authenticate
Your Windows PC will appear under "Remote devices." Click it and enter your PIN — the Windows desktop will open inside your Chrome browser.
3. Connection complete
You can now control Windows using your Mac's keyboard and mouse.
Tip: For quicker access in the future, use Chrome's "Install as app" option to add Chrome Remote Desktop to your Mac's Dock — saves a few clicks every time.
H2: Cross-Platform Pitfalls: What Mac Users Run Into
Chrome Remote Desktop is easy to set up, but once you're inside a session, the Mac–Windows gap creates friction points that directly affect how much work you can actually get done. These are worth understanding before you depend on CRD for anything important.
H3: Keyboard Mapping Conflicts
The biggest source of frustration for Mac users is the modifier key difference.
Command key vs Control key: On Mac, you copy with Command + C. On Windows, it's Control + C.. In a remote session, Mac's Command key is sometimes interpreted as the Windows key rather than Control — meaning the shortcuts your hands have memorised simply don't work as expected.
The Command + Q problem: This one catches people regularly. If you're working in a Windows application and instinctively press Command + Q to close it, you don't close the Windows app — you close Chrome on your Mac, ending the remote session entirely. It happens more than once before you break the habit.
This is a significant operational limitation, and worth understanding before you depend on CRD for regular remote access.
Wake on LAN (WoL) not supported: Chrome Remote Desktop cannot remotely power on or wake up a PC that is off or sleeping. To maintain reliable remote access, the Windows PC must be left powered on continuously.
Always-on requirement: For people living in Japan, where electricity costs are relatively high and there's a cultural awareness around energy waste (mottainai, もったいない — the Japanese concept of waste-aversion that runs through everyday life), leaving a PC running overnight when it doesn't need to be is a friction point both practically and psychologically.
No more struggling with key input or power management. Stop here and try DeskIn — built for Mac users. [Install DeskIn for free]
The smooth, precise feel that makes Mac trackpads enjoyable doesn't carry through to a remote Windows session cleanly.
Lost gestures: Mac-specific gestures — three-finger swipes to switch desktops, pinch-to-zoom — don't transmit to Windows correctly and either do nothing or trigger the wrong action.
Unnatural scrolling: Mac's inertial scrolling feels choppy in the remote environment. Right-click response has a slight lag. These are small things individually, but they add up over a full work session.
As a browser-based tool, Chrome Remote Desktop is constrained by what it can push through a browser window.
Frame rate cap: Chrome Remote Desktop typically runs at around 30FPS. For standard document editing this is fine, but anything with fast on-screen movement shows obvious lag and ghosting.
Not suited for demanding tasks: Video editing, FPS games, or any application requiring sub-second responsiveness — the latency is too significant to be practical.
Based on everything above, here's an honest assessment of where CRD works well and where it doesn't. Use this as a checklist before you decide.
✓ Recommended — CRD is a good fit for:
Quick file checks: Accessing a document on your home PC from the office or a café
Occasional admin tasks: Restarting a server, running a quick software update
Light office work: Simple browser-based data entry, sending emails — tasks where speed isn't critical
Zero-cost access: When "free and connected" is the overriding priority over performance
✗ Not recommended — CRD is a poor fit for:
Daily remote work: Working remotely for several hours at a stretch. Keyboard friction and choppy performance become a real source of stress.
Creative work: Video editing, graphic design, CAD. Accurate mouse movement, colour fidelity, and smooth rendering are all compromised.
Latency-sensitive tasks (gaming etc.): Any application where split-second responsiveness matters.
Professionals who need native performance: Not "can I connect" — but "does it feel like my own machine?"
In short: Chrome Remote Desktop is best treated as an emergency backup tool, not a primary workflow. If any of the "not recommended" scenarios describe your situation, a more capable tool is worth exploring.
There's a gap between "it connects" and "it feels like my own machine." If you've spent time with Chrome Remote Desktop and found yourself in that gap — frustrated by keyboard confusion, the always-on power requirement, or choppy performance — DeskIn is the purpose-built solution for exactly those problems.
One of DeskIn's standout features is its intelligent key mapping that bridges the OS divide automatically.
The Command/Control confusion that CRD leaves unresolved — and the "Command + Q closes Chrome" problem that ends remote sessions unexpectedly — are both solved. Your Mac keyboard layout works as expected in Windows, without workarounds. You can type at full speed without stopping to think about which key does what.
"I want to connect from outside, but I don't want to leave my PC running all day..." — DeskIn solves this.
With Wake on LAN (WoL) support, you can remotely power on a Windows PC from your Mac — even if it's shut down or sleeping. Start it when you need it, work, then let it sleep again. Less electricity, less wear on hardware, and a smarter way to work.
DeskIn streams at 4K resolution and up to 60FPS — far beyond what CRD's browser-based approach can achieve.
Whether you're doing fine-detail design work, editing video, or playing a game, the response feels close to native. The lag that makes CRD frustrating for demanding tasks effectively disappears.
DeskIn's performance advantage extends beyond Mac to mobile — connecting from an iPad or smartphone delivers the same quality experience.
Use your iPad as an extended display for Windows, or connect a mouse and keyboard for a complete remote work setup. Gesture support is optimised for touch in a way that CRD's mobile app isn't. If you move between Mac and iPad regularly, DeskIn handles both well.
Feature | Chrome Remote Desktop | DeskIn |
Primary use case | Occasional access / emergency use | Business, creative work, gaming |
Display quality | Up to 30FPS (choppy) | 4K / 60–144FPS (extremely smooth) |
Keyboard mapping | Basic — Command/Ctrl conflicts | Auto-optimised for Mac/Windows (no conflicts) |
Wake on LAN | Not supported — PC must stay on | Supported — start PC remotely |
Input feel | Noticeable lag, gesture loss | Low latency, Mac-native feel |
Cost | Free | Free tier available / Pro version |
Chrome Remote Desktop earns its place as an entry-level tool. Its ease of use and zero cost make it a great starting point for quick file access, occasional light tasks, and situations where budget is the overriding factor.
But if you're using a remote desktop regularly — for work, creative projects, or gaming — the accumulated frustrations of keyboard conflicts, always-on power requirements, and performance caps start to outweigh the convenience of free.
When that point arrives, DeskIn is the obvious next step: a tool designed from the ground up for people who need remote access to actually feel like working locally. Whether you're at your apartment, in a café in Kichioji, or somewhere further afield — your Windows machine should feel like it's right in front of you.
Experience professional-grade performance now — [Download DeskIn free and try it]

DeskIn vs Chrome Remote Desktop: Which One Fits Your Workflow Best?
When it comes to remote access tools, the comparison between DeskIn and Chrome Remote Desktop often comes down to one simple question: do you just need quick access, or do you need performance and control?
Both tools are reliable, secure, and widely used. But they are built for very different types of users. Chrome Remote Desktop focuses on simplicity and accessibility, while DeskIn is designed for users who need high performance, stability, and advanced features across multiple devices.
If you're deciding between the two, this guide breaks down not just what they offer, but which one actually fits your workflow.
Feature | DeskIn | Chrome Remote Desktop |
|---|---|---|
Performance | Up to 4K 60FPS/2K 240FPS, low latency | Standard performance |
Ease of Use | Requires app installation | Browser-based, very simple |
Device Support | Windows, macOS, iOS, Android | Works via Chrome browser |
File Transfer | Fast and stable | Limited |
Multi-device Management | Yes | No |
Mobile Experience | Optimized for iPad & iPhone | Basic |
Security | Privacy screens and granular black/whitelists | Basic |
Price | Free + paid plans | Completely free |
In short, Chrome Remote Desktop is great for quick, lightweight access, while DeskIn is built for users who expect more from their remote desktop experience.

Chrome Remote Desktop is one of the simplest remote access tools available. It runs directly through the Chrome browser and requires only a Google account to get started. This makes it especially popular among casual users and those already working within the Google ecosystem.
It works particularly well on devices like Chromebooks, where everything is already browser-based. It's also accessible across platforms, including mobile devices like iPhone and iPad, though the experience on mobile can feel limited compared to desktop use.
If you're wondering how to use Chrome Remote Desktop, the process is straightforward. You install the Chrome extension, sign in with your Google account, set up a PIN on the host device, and then connect from another device using the same account. The entire setup usually takes just a few minutes.
That said, simplicity comes with trade-offs. Chrome Remote Desktop lacks advanced features like high frame rate streaming, multi-monitor control, or professional-grade file transfer. For occasional access, it works well. But for more demanding tasks, users often start to feel its limitations.
👀You may also be interested in:
If Chrome Remote Desktop is a lightweight sketch, DeskIn is a full workstation painted in high resolution. DeskIn focuses on performance, stability, and flexibility. It supports up to 4K 60FPS streaming, making it suitable for tasks where visual clarity and responsiveness matter, such as design work, video editing, or even gaming.
As a Chrome remote desktop alternative, unlike browser-based tools, DeskIn is a dedicated remote desktop application. While this requires installation, it unlocks a much more stable and feature-rich experience. Users can manage multiple devices, transfer large files efficiently, and enjoy smoother control across different platforms.
DeskIn is also optimized for mobile workflows. Whether you're using an iPad or smartphone, the interaction feels more responsive and closer to a desktop experience, rather than a simplified viewer. For users who find Chrome Remote Desktop "good enough" at first but limiting over time, DeskIn often becomes the natural upgrade path.
The real difference between these two tools becomes clear when you look at how they perform in everyday scenarios.
If you only need to check files on your home computer or help a friend troubleshoot something quickly, Chrome Remote Desktop is more than enough. It's free, easy to set up, and doesn't require installing extra software beyond Chrome. In this case, DeskIn may feel like overkill.
For professionals working remotely on a daily basis, stability and efficiency matter much more. This is where DeskIn starts to stand out.
Tasks like editing documents, managing multiple screens, or transferring files between devices become smoother and faster. Chrome Remote Desktop can handle basic workflows, but it often struggles with responsiveness and lacks the tools needed for a seamless work environment.
This is where the gap becomes impossible to ignore. DeskIn's support for high resolution and high frame rates makes it suitable for visually demanding work. Whether you're editing videos, working with design software, or running simulations, performance consistency is critical. Chrome Remote Desktop, on the other hand, is not designed for these scenarios. It works, but not comfortably.
If you rely heavily on Google services or use a Chromebook, Chrome Remote Desktop integrates naturally into your workflow. It's lightweight, requires no additional setup, and feels like an extension of the browser itself. In this scenario, it remains a very practical choice.
Mobile usage highlights another important difference. While remote desktop Chrome iPhone, and Chrome Remote Desktop iPad are functional, they often feel like simplified versions of the desktop experience. Controls can be less intuitive, and performance may vary depending on the connection.
DeskIn, by contrast, is designed with cross-device interaction in mind, offering a smoother and more responsive mobile experience.
👀 You may also be interested in:
Yes. Tools like DeskIn offer better performance, more features, and improved stability, especially for professional use cases.
No, Chrome Remote Desktop is still actively maintained by Google. It continues to receive security updates and remains available for users needing simple, free remote access.
Yes, DeskIn is a legitimate remote desktop solution. It uses encryption to secure connections and provides access controls, making it safe for both personal and professional use.
When comparing DeskIn vs Chrome Remote Desktop, the choice depends on how demanding your remote access needs are. Chrome Remote Desktop is simple, free, and ideal for occasional use, especially if you just need quick access to a device without extra setup.
As your workflow becomes more intensive, the limitations start to surface. DeskIn offers a smoother, more stable experience with better performance and control, making it a strong long-term Chrome remote desktop alternative for users who rely on remote access every day.

8 Best Remote Desktops for Video Editing in 2026
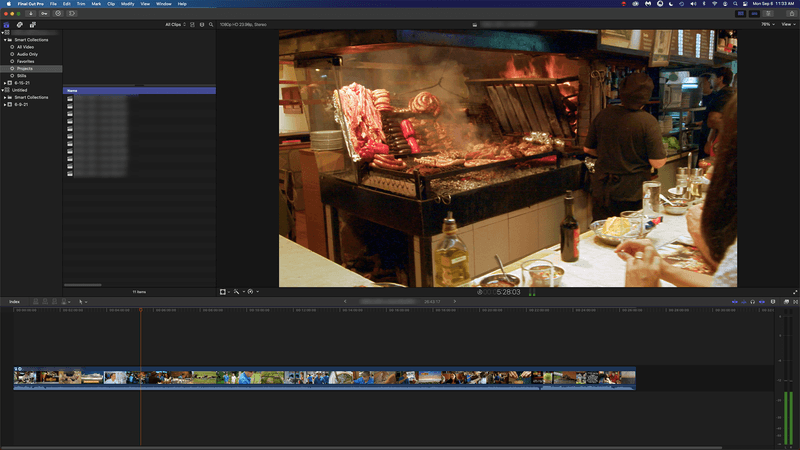
Remote video editing is no longer a compromise; it's a workflow upgrade. Whether you're working in Adobe Premiere Pro, After Effects, or DaVinci Resolve, the right remote desktop can turn your laptop into a high-performance editing station.
But not all tools are built for remote video editing collaboration. Lag, poor color accuracy, and unstable connections can ruin productivity. In this guide, we'll break down the best remote desktop for video editing tools so that you can edit smoothly from anywhere.
Modern creators are no longer tied to a single workstation. With remote work software, you can access your powerful desktop from anywhere without investing in an expensive laptop. For many editors, especially freelancers and small teams, this solves a real problem: you already have a high-performance PC, but mobility is limited. Instead of duplicating hardware, video editing remote desktop tools let you stream your workflow in real time.
Another key benefit is remote collaboration. Teams can work on the same project across different locations, review edits instantly, and avoid large file transfers via remote collaboration tools. However, this only works if your remote desktop software supports high frame rates, low latency, and stable connections. Otherwise, editing becomes frustrating.
Here's a quick overview of the best tools and who they're for:
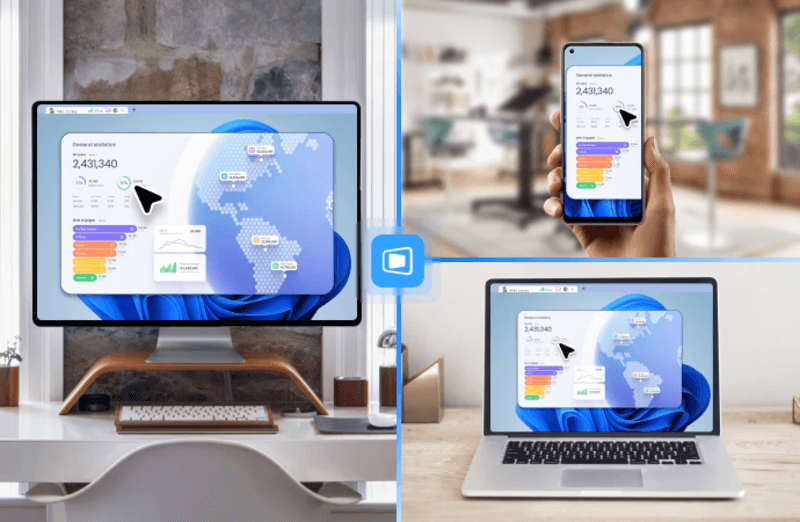
DeskIn – Best overall for performance + affordability + multi-device workflows
Parsec – Best for ultra-low latency editing
Splashtop – Best for high-resolution streaming
HP Anyware – Best for enterprise-level workflows
Jump Desktop – Best for Mac users
AnyDesk – Best lightweight remote access
Chrome Remote Desktop – Best free basic option
RustDesk – Best open-source alternative
Up to 4K 60FPS / 2K 240FPS performance
Ultra-low latency for smooth editing timelines
Multi-device support (PC, Mac, iPad, Android)
Affordable pricing with free plan available
Smaller brand awareness compared to legacy tools
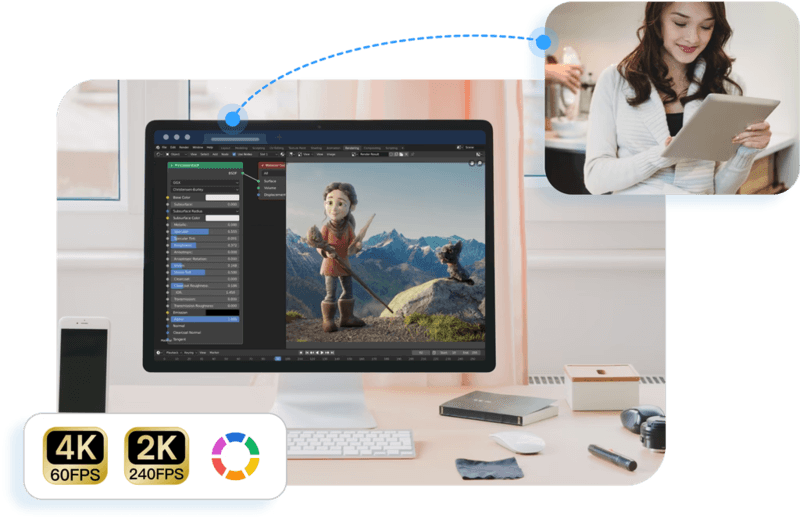
DeskIn stands out as the best remote desktop for video editing by balancing performance, stability, and accessibility. Unlike many traditional remote support tools, it is designed for high-frame-rate tasks, making timeline scrubbing, preview playback, and effects editing feel responsive and fluid.
For creators working across devices, DeskIn enables seamless remote video editing collaboration. You can access your main editing PC from a laptop, tablet, or even a secondary workstation without noticeable lag. Compared to tools like Chrome Remote Desktop, which struggle with video-heavy workloads, DeskIn maintains consistent quality and responsiveness—making it a practical choice for both solo editors and distributed teams.
Extremely low latency
High frame rate streaming
Popular among creative professionals
Limited collaboration features
Setup can be complex for beginners
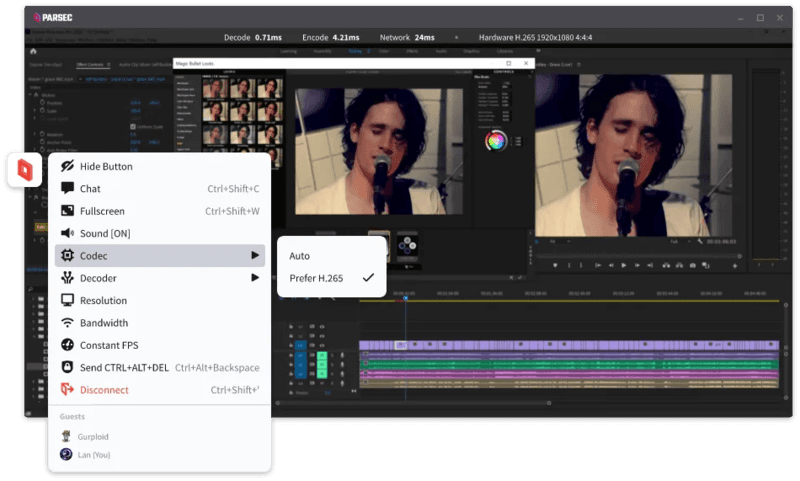
Parsec is widely recognized as a top choice for remote video editing, especially when latency is your biggest concern. Its streaming technology is optimized for real-time responsiveness, which makes it ideal for tasks like timeline scrubbing and motion graphics work in After Effects.
However, while Parsec excels in performance, it lacks some features needed for full remote video editing collaboration. Multi-user workflows and advanced access control are not as robust as some newer tools. For users who need both performance and flexibility, alternatives like DeskIn may provide a more balanced solution.
Supports 4K streaming
Strong color accuracy
Reliable for creative tasks
Higher cost for advanced features
Can experience latency over long distances
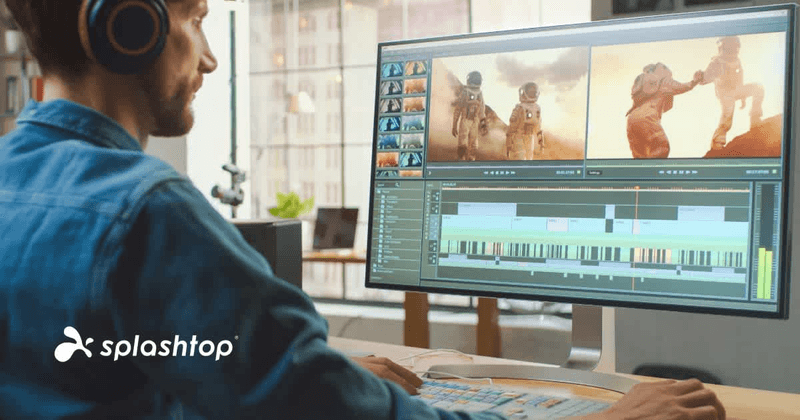
Splashtop is a solid option for editors who prioritize visual fidelity. Its support for high-resolution streaming and 4:4:4 color makes it suitable for color grading and detailed editing work.
That said, performance consistency can vary depending on network conditions. Some users report lag when working outside local networks. Compared to more optimized remote work software like DeskIn, Splashtop may require a stronger connection to maintain the same level of smoothness.
Industry-grade performance
Secure and scalable
Used in professional studios
Expensive
Complex setup
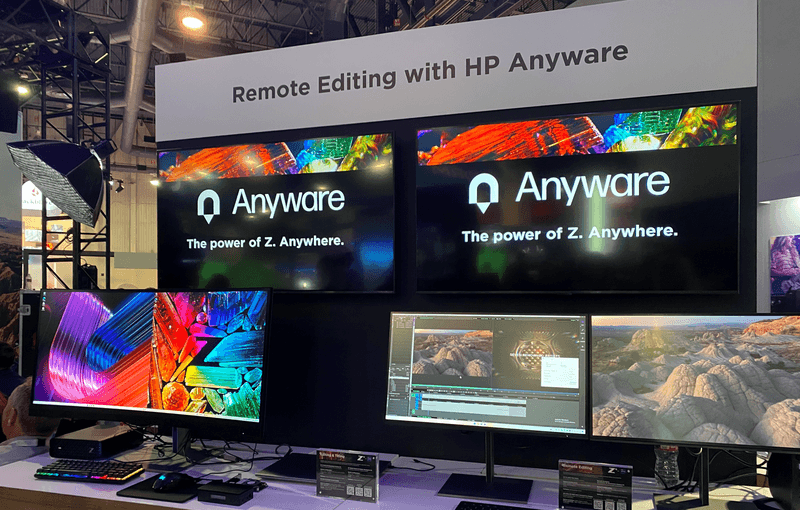
HP Anyware (formerly Teradici) is designed for high-end production environments. It uses advanced protocols to deliver excellent performance and security, making it a common choice in the media and entertainment industries.
However, for small teams or individual creators, it may be overkill. The cost and setup complexity make it less accessible compared to modern remote desktops for video editing tools that offer similar performance with easier deployment. The high cost and technical complexity create barriers that modern remote desktop solutions have eliminated, like DeskIn, offering comparable performance with far simpler deployment.
Great macOS integration
Smooth performance
Easy to use
Limited advanced features
Not ideal for heavy collaboration
Jump Desktop has earned a loyal following among Mac users seeking a straightforward, efficient remote desktop for video editing. Its Fluid Remote Desktop protocol provides smooth, responsive performance for most editing tasks without unnecessary complexity.
Where it falls short is in collaboration. Jump Desktop is built for individual use, lacking the team-oriented features that creative groups need. For solo professionals, it works well, but teams will quickly miss real-time collaboration tools found on other platforms.
Pros
Fast and lightweight
Easy to set up
Works on multiple devices
Cons
Limited performance for video editing
Lower visual quality

AnyDesk has built its reputation on lightweight design and remarkable ease of use for general remote access. It handles everyday tasks competently, connecting quickly and running smoothly on modest hardware.
The limitations become apparent with demanding creative work. Remote video editing requires consistent frame rates and crystal-clear visuals—areas where AnyDesk struggles. For professional editors who need precision, the performance gap becomes impossible to ignore.
Completely free
Easy browser-based setup
Works on any device
Poor performance for editing
Limited features
Chrome Remote Desktop is one of the most accessible remote support tools, offering a simple way to access your computer from anywhere. It's free, requires almost no setup, and lets you access your computer from anywhere with just a browser. For basic technical support or quick file grabs, it gets the job done.
However, it is not built for remote video editing. Users often experience lag, compression artifacts, and low frame rates. If you're working on professional projects, upgrading to a more capable solution is highly recommended.
Open-source
Self-hosting available
Free to use
Requires technical setup
Performance can vary
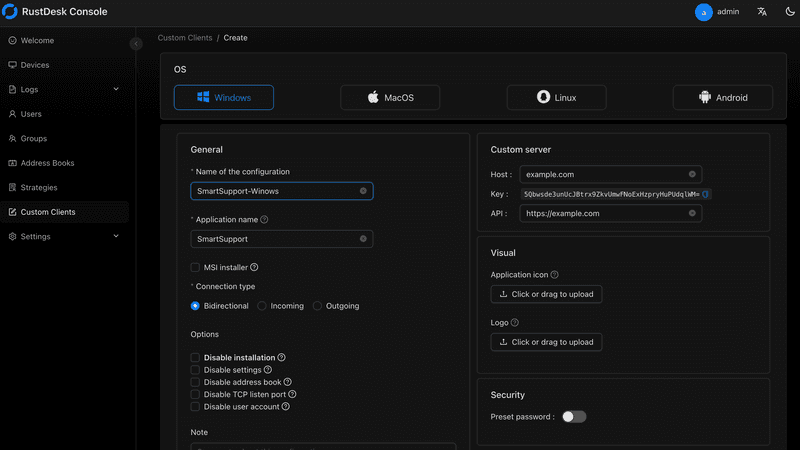
RustDesk appeals to users who prioritize open-source philosophy and want complete control over their remote access infrastructure. The flexibility to self-host and customize is genuinely valuable for privacy-conscious users. RustDesk is an interesting option for users who prefer open-source remote desktop not working alternatives or want full control over their infrastructure.
Performance, however, depends entirely on your configuration skills. Without technical expertise, achieving the smooth, low-latency experience required for professional editing is challenging. It's powerful for those who know how to tune it, but not plug-and-play.
Yes, with the right remote desktop for video editing, you can edit videos smoothly from anywhere. Tools like DeskIn and Parsec provide low latency and high frame rates for professional workflows.
Free options like Chrome Remote Desktop exist, but they lack performance. DeskIn offers a free plan with better performance, making it a stronger choice for real editing work.
Yes, Parsec is excellent for low-latency editing. However, it may lack collaboration features needed for team workflows.
Common issues include poor network connection, low bandwidth, or software limitations. Choosing optimized remote work software like DeskIn can significantly improve performance.
Choosing the best remote desktop for video editing depends on your workflow, budget, and performance needs. While tools like Parsec and Splashtop excel in specific areas, many solutions struggle to balance performance, stability, and usability.
If you're looking for a well-rounded solution, DeskIn offers a strong combination of high performance, smooth streaming, and cross-device flexibility. Whether you're working solo or collaborating remotely, it provides a reliable foundation for modern remote video editing workflows.
Control Windows from Your Mac with Chrome Remote Desktop: Setup Guide & Pitfalls | DeskIn Japan
For Mac users working in Japan, there's a recurring frustration: a piece of software you need exists only on Windows. Whether it's CAD tools, Japanese accounting software (kaikei sofuto, 会計ソフト) required by your company, Windows-exclusive business systems, or PC games — the need to run Windows doesn't go away just because you prefer Mac.
The good news is you don't need to buy a separate Windows machine. Google's free tool Chrome Remote Desktop lets you control a Windows PC remotely from your Mac, and the setup is simpler than most people expect.
This guide walks through the fastest path to getting connected, and then covers the cross-platform quirks that tend to catch Mac users off guard once they're actually in a session.
Chrome Remote Desktop's configuration is straightforward, but it requires preparation on both machines — the Windows PC being controlled (the host) and the Mac doing the controlling (the client). Here's the fastest path to a working connection.
Start by allowing remote access on the Windows machine.
Install the extension and host software
Open Chrome and go to the Chrome Remote Desktop access page. Under "Set up remote access," click the blue download icon. Follow the prompts to add the Chrome extension and run the installer (.msi file).
Name your PC and set a PIN
After installation, give the PC a name you'll recognise. Then set a PIN of at least six digits — you'll need to enter this every time you connect from your Mac, so write it somewhere safe.
3. Important: Disable Sleep Mode
This is the step most people miss, and it will prevent connections entirely if skipped. A Windows PC in sleep mode cannot be reached remotely.
Go to Settings → System → Power & Battery
Under "Screen and Sleep," set "Put device to sleep after" to Never when plugged in
Once the Windows side is configured, connecting from your Mac is simple.
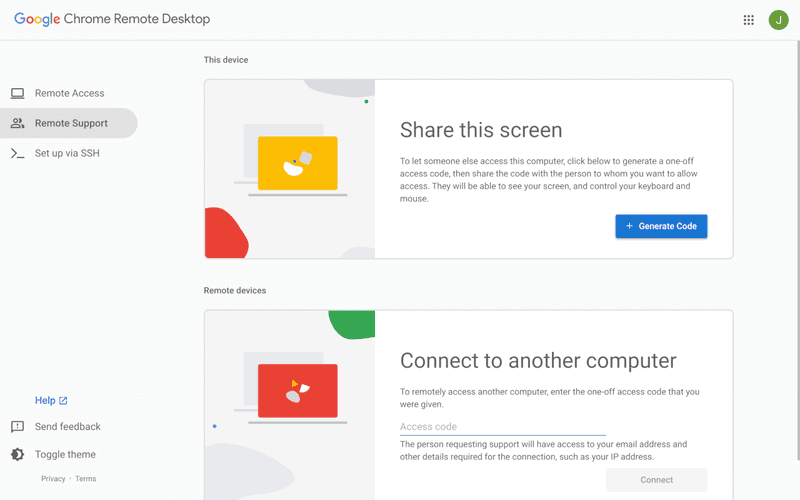
Log in to the access site
Open Chrome on your Mac and navigate to the same Chrome Remote Desktop access page. Make sure you're logged into the same Google account you used when setting up the Windows PC.
Select your PC and authenticate
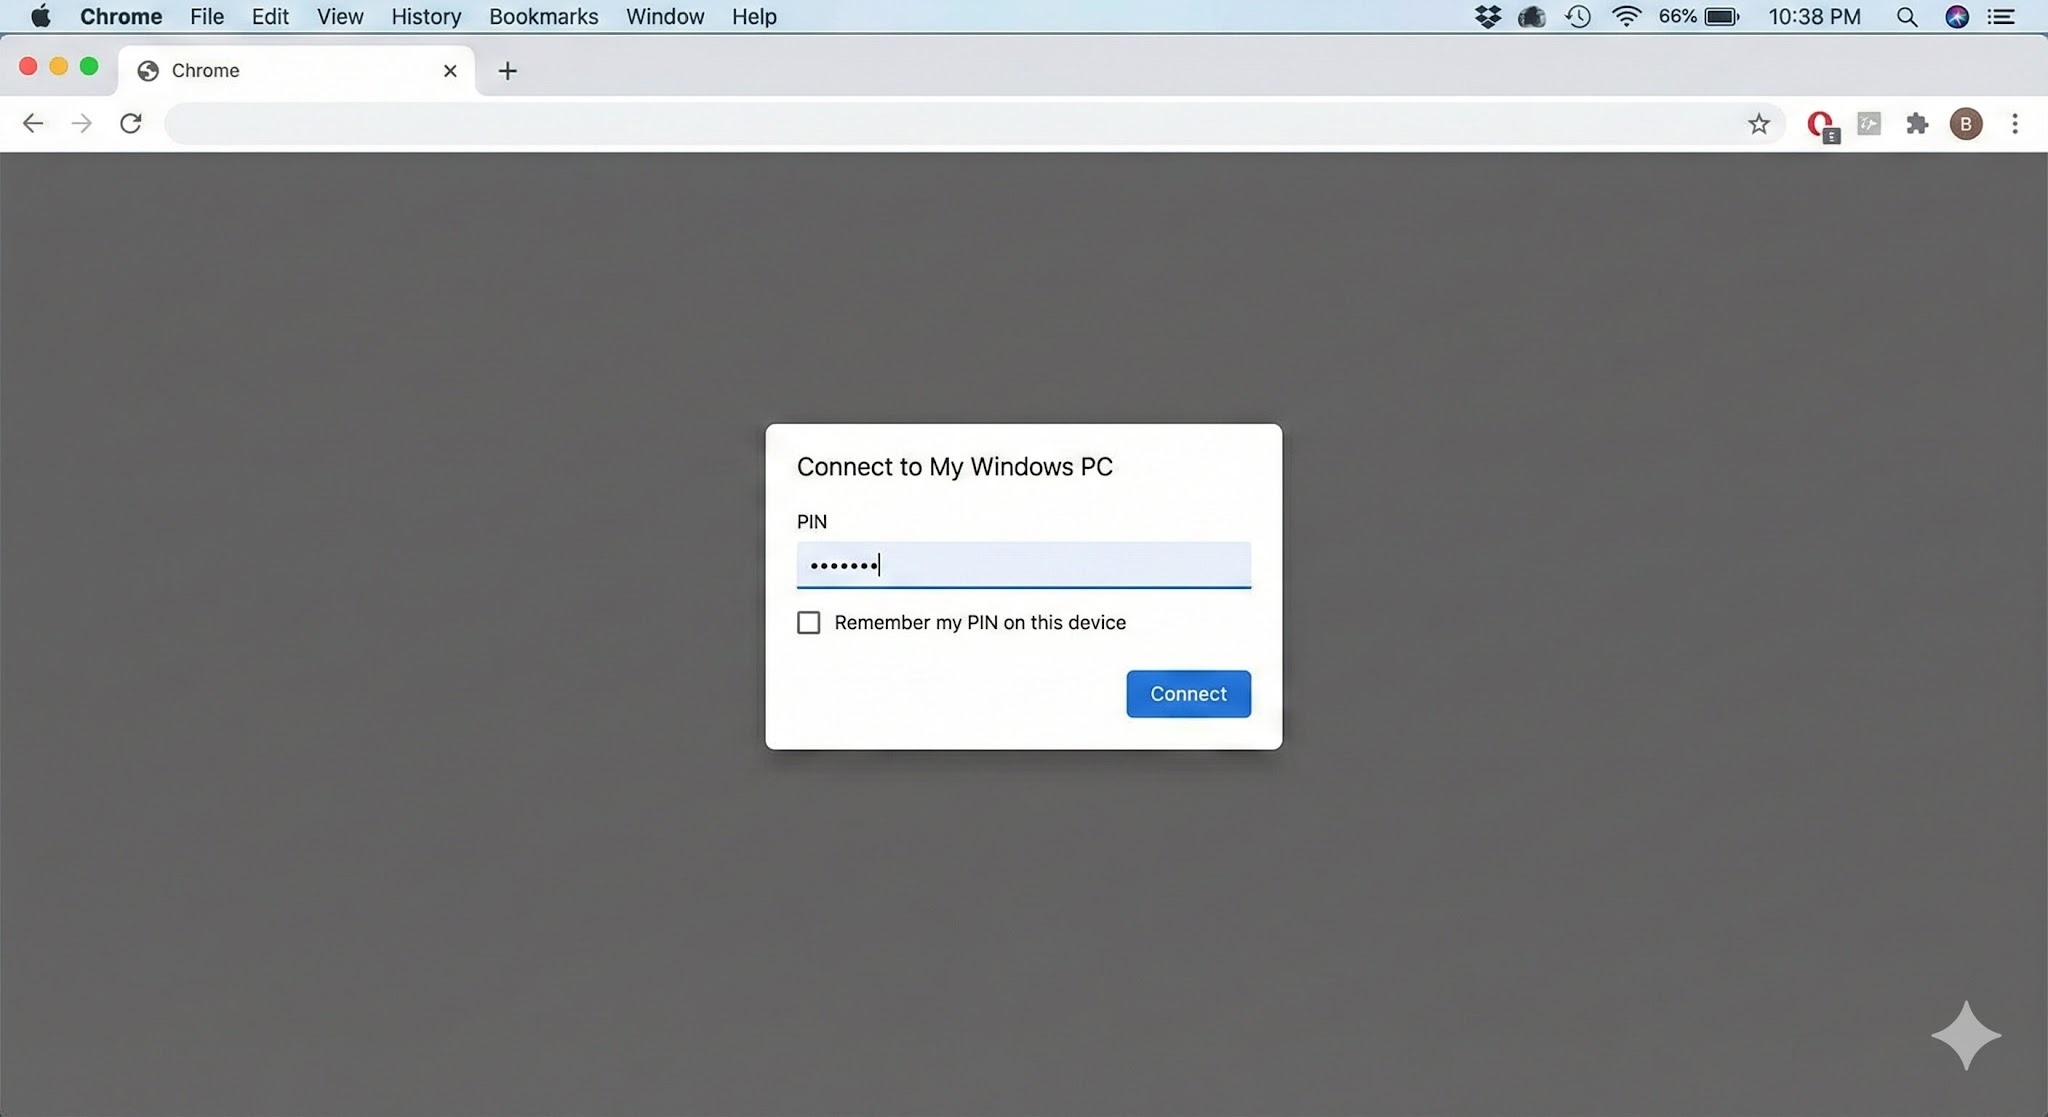
Your Windows PC will appear under "Remote devices." Click it and enter your PIN — the Windows desktop will open inside your Chrome browser.
3. Connection complete
You can now control Windows using your Mac's keyboard and mouse.
Tip: For quicker access in the future, use Chrome's "Install as app" option to add Chrome Remote Desktop to your Mac's Dock — saves a few clicks every time.
H2: Cross-Platform Pitfalls: What Mac Users Run Into
Chrome Remote Desktop is easy to set up, but once you're inside a session, the Mac–Windows gap creates friction points that directly affect how much work you can actually get done. These are worth understanding before you depend on CRD for anything important.
H3: Keyboard Mapping Conflicts
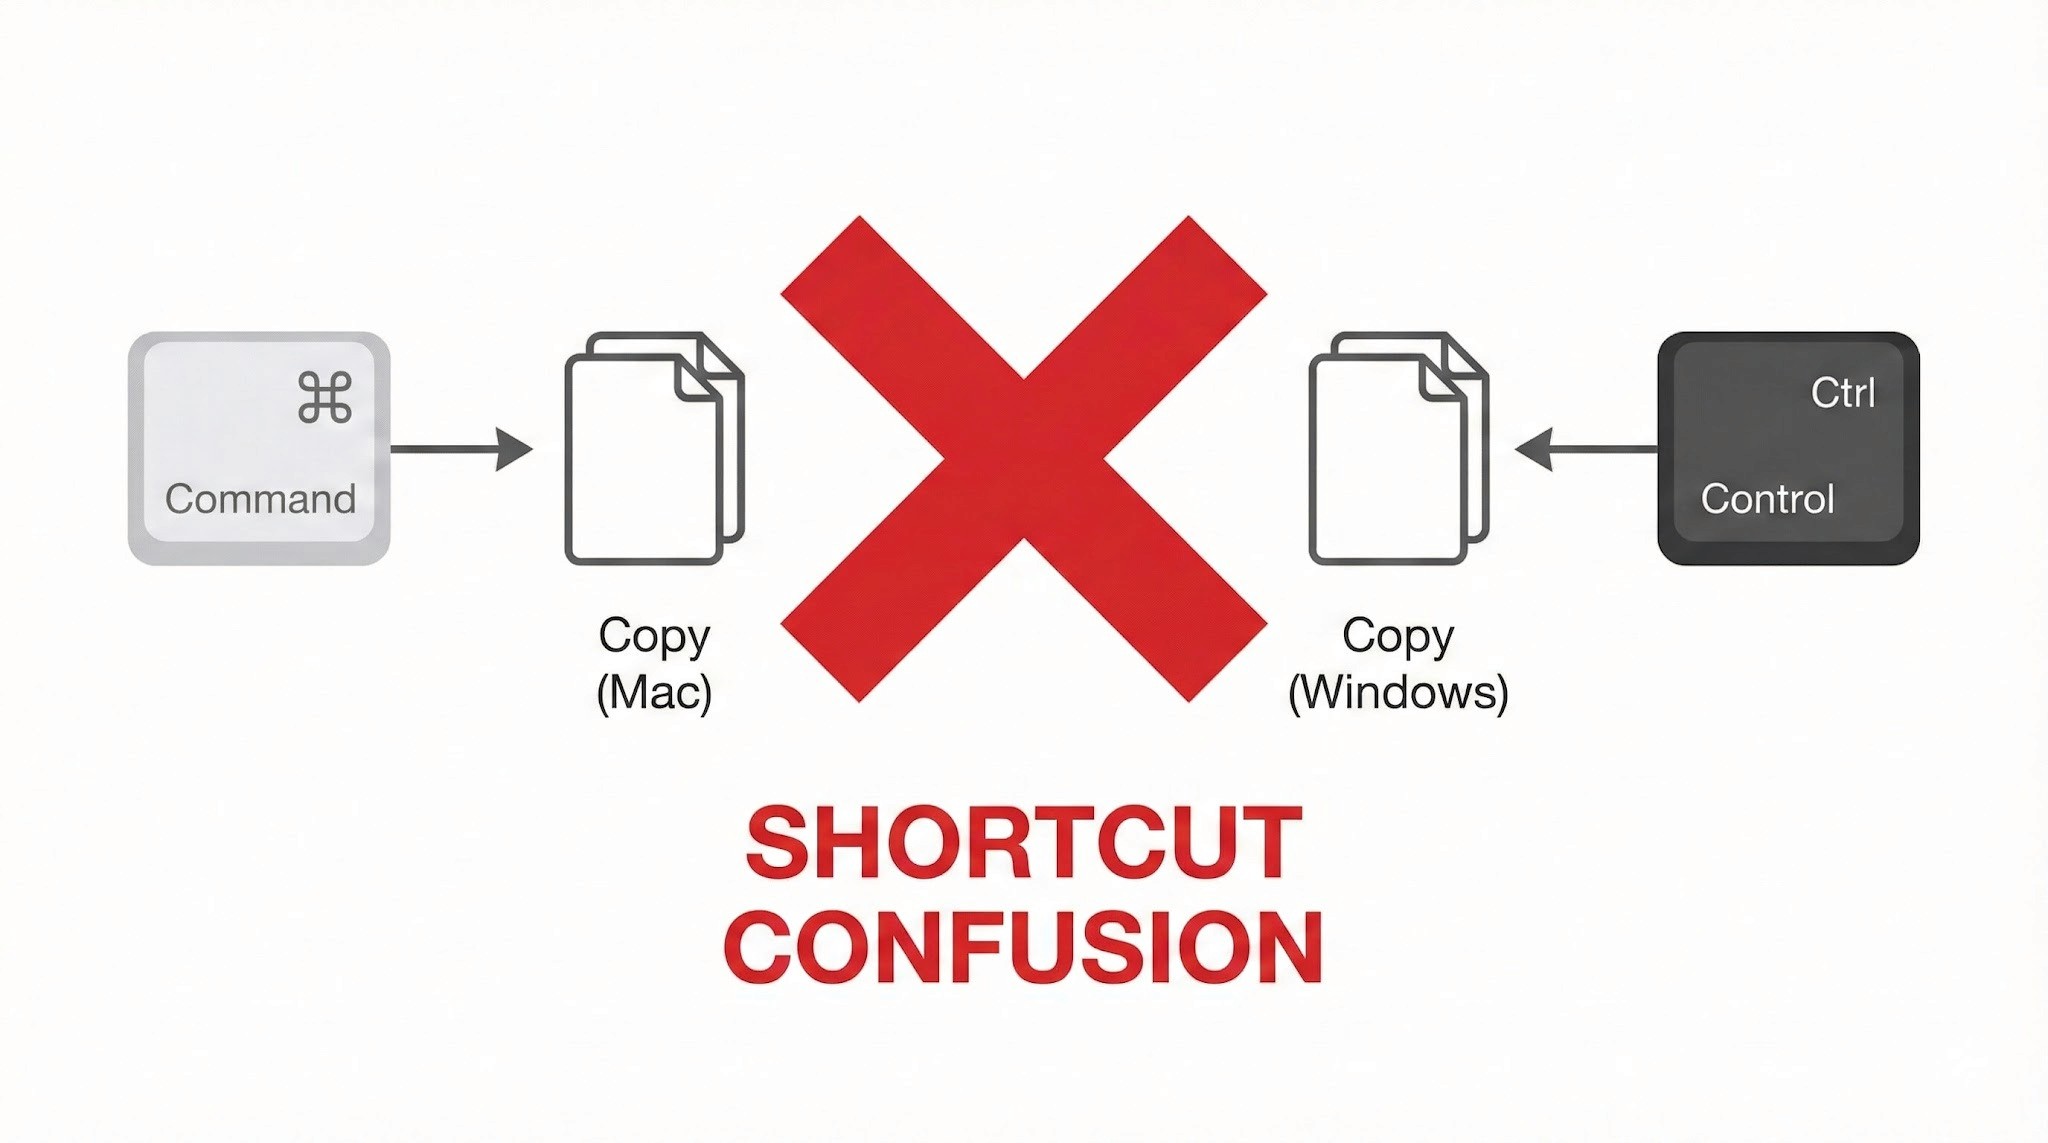
The biggest source of frustration for Mac users is the modifier key difference.
Command key vs Control key: On Mac, you copy with Command + C. On Windows, it's Control + C.. In a remote session, Mac's Command key is sometimes interpreted as the Windows key rather than Control — meaning the shortcuts your hands have memorised simply don't work as expected.
The Command + Q problem: This one catches people regularly. If you're working in a Windows application and instinctively press Command + Q to close it, you don't close the Windows app — you close Chrome on your Mac, ending the remote session entirely. It happens more than once before you break the habit.
This is a significant operational limitation, and worth understanding before you depend on CRD for regular remote access.
Wake on LAN (WoL) not supported: Chrome Remote Desktop cannot remotely power on or wake up a PC that is off or sleeping. To maintain reliable remote access, the Windows PC must be left powered on continuously.
Always-on requirement: For people living in Japan, where electricity costs are relatively high and there's a cultural awareness around energy waste (mottainai, もったいない — the Japanese concept of waste-aversion that runs through everyday life), leaving a PC running overnight when it doesn't need to be is a friction point both practically and psychologically.
No more struggling with key input or power management. Stop here and try DeskIn — built for Mac users. [Install DeskIn for free]
The smooth, precise feel that makes Mac trackpads enjoyable doesn't carry through to a remote Windows session cleanly.
Lost gestures: Mac-specific gestures — three-finger swipes to switch desktops, pinch-to-zoom — don't transmit to Windows correctly and either do nothing or trigger the wrong action.
Unnatural scrolling: Mac's inertial scrolling feels choppy in the remote environment. Right-click response has a slight lag. These are small things individually, but they add up over a full work session.
As a browser-based tool, Chrome Remote Desktop is constrained by what it can push through a browser window.
Frame rate cap: Chrome Remote Desktop typically runs at around 30FPS. For standard document editing this is fine, but anything with fast on-screen movement shows obvious lag and ghosting.
Not suited for demanding tasks: Video editing, FPS games, or any application requiring sub-second responsiveness — the latency is too significant to be practical.
Based on everything above, here's an honest assessment of where CRD works well and where it doesn't. Use this as a checklist before you decide.
✓ Recommended — CRD is a good fit for:
Quick file checks: Accessing a document on your home PC from the office or a café
Occasional admin tasks: Restarting a server, running a quick software update
Light office work: Simple browser-based data entry, sending emails — tasks where speed isn't critical
Zero-cost access: When "free and connected" is the overriding priority over performance
✗ Not recommended — CRD is a poor fit for:
Daily remote work: Working remotely for several hours at a stretch. Keyboard friction and choppy performance become a real source of stress.
Creative work: Video editing, graphic design, CAD. Accurate mouse movement, colour fidelity, and smooth rendering are all compromised.
Latency-sensitive tasks (gaming etc.): Any application where split-second responsiveness matters.
Professionals who need native performance: Not "can I connect" — but "does it feel like my own machine?"
In short: Chrome Remote Desktop is best treated as an emergency backup tool, not a primary workflow. If any of the "not recommended" scenarios describe your situation, a more capable tool is worth exploring.
There's a gap between "it connects" and "it feels like my own machine." If you've spent time with Chrome Remote Desktop and found yourself in that gap — frustrated by keyboard confusion, the always-on power requirement, or choppy performance — DeskIn is the purpose-built solution for exactly those problems.
One of DeskIn's standout features is its intelligent key mapping that bridges the OS divide automatically.
The Command/Control confusion that CRD leaves unresolved — and the "Command + Q closes Chrome" problem that ends remote sessions unexpectedly — are both solved. Your Mac keyboard layout works as expected in Windows, without workarounds. You can type at full speed without stopping to think about which key does what.
"I want to connect from outside, but I don't want to leave my PC running all day..." — DeskIn solves this.
With Wake on LAN (WoL) support, you can remotely power on a Windows PC from your Mac — even if it's shut down or sleeping. Start it when you need it, work, then let it sleep again. Less electricity, less wear on hardware, and a smarter way to work.
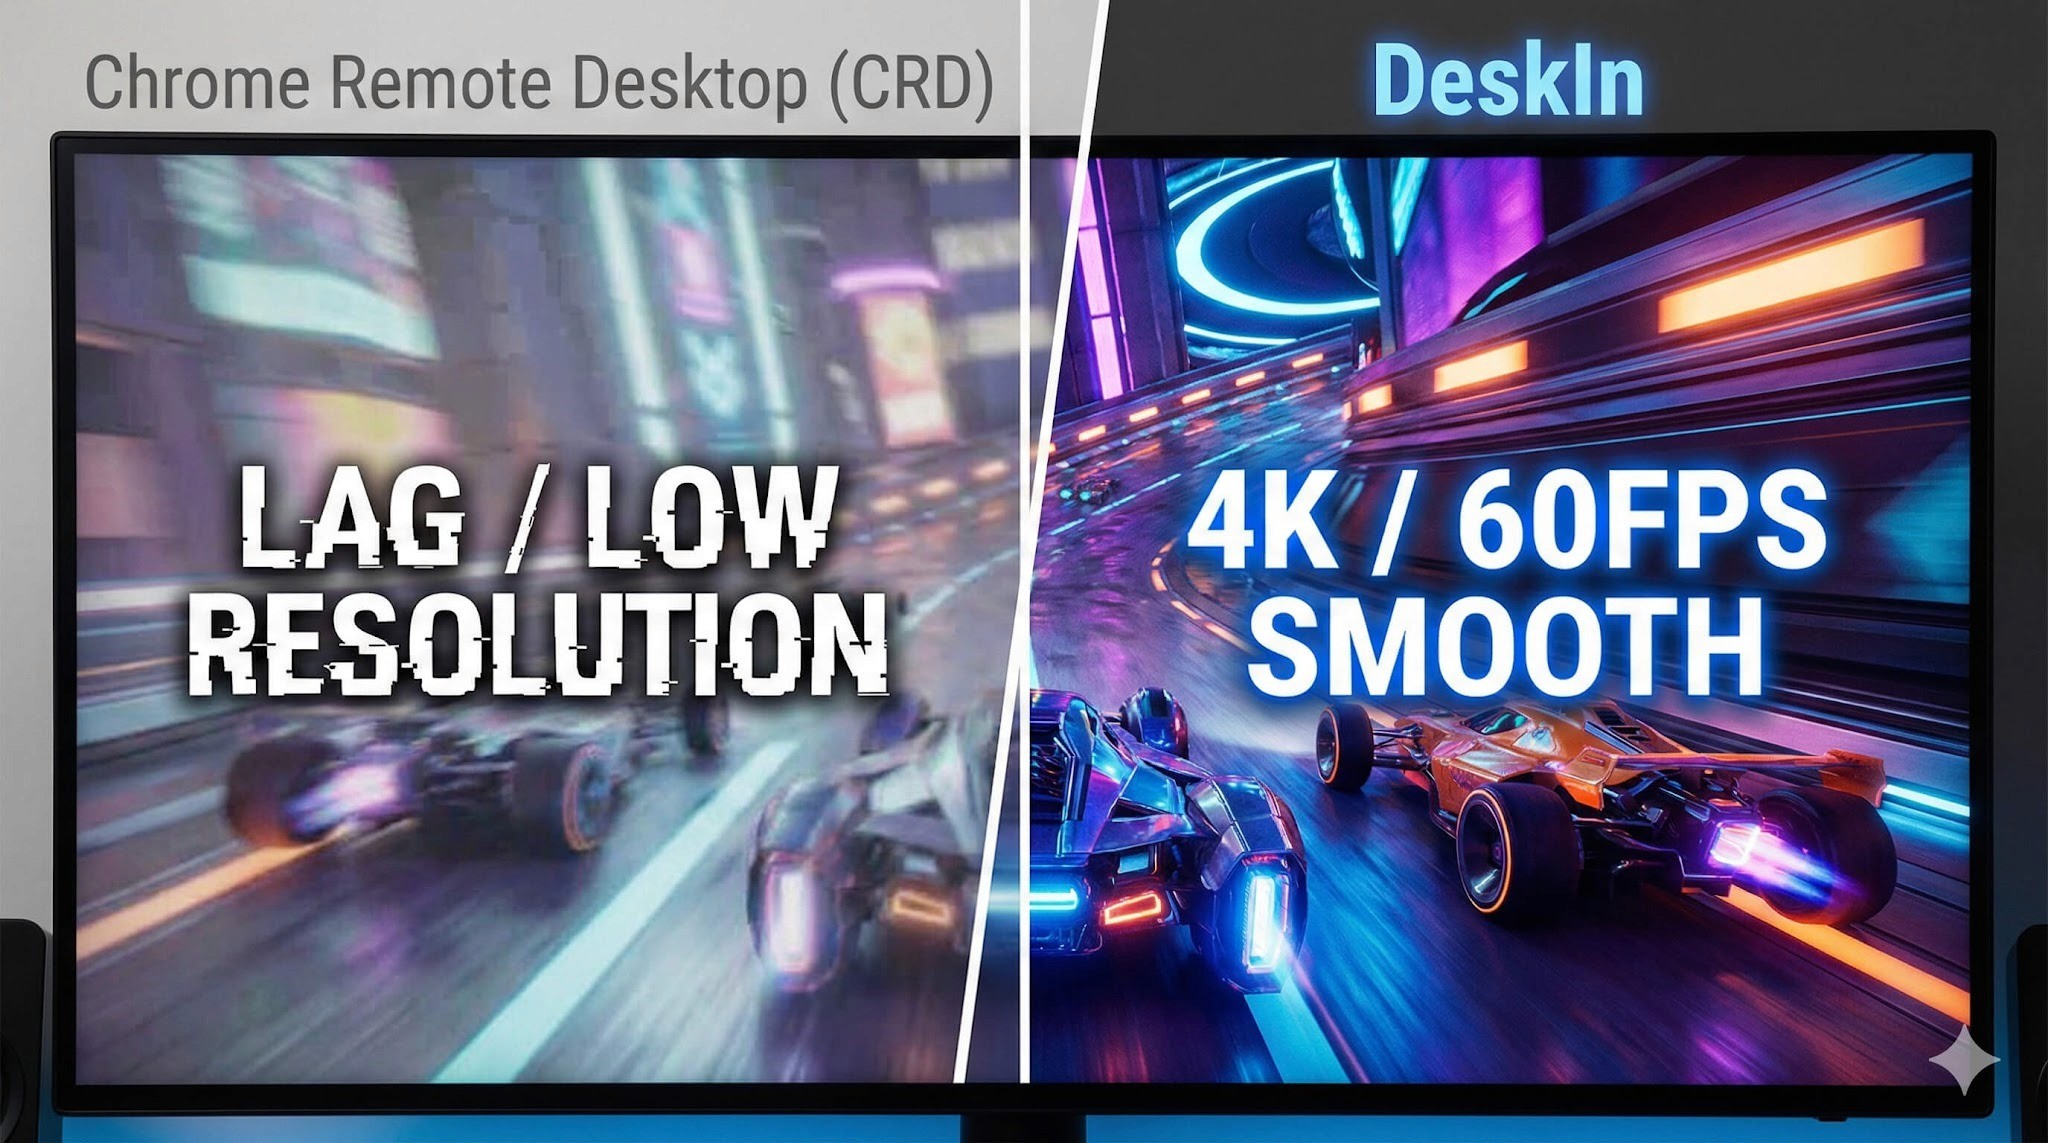
DeskIn streams at 4K resolution and up to 60FPS — far beyond what CRD's browser-based approach can achieve.
Whether you're doing fine-detail design work, editing video, or playing a game, the response feels close to native. The lag that makes CRD frustrating for demanding tasks effectively disappears.
DeskIn's performance advantage extends beyond Mac to mobile — connecting from an iPad or smartphone delivers the same quality experience.
Use your iPad as an extended display for Windows, or connect a mouse and keyboard for a complete remote work setup. Gesture support is optimised for touch in a way that CRD's mobile app isn't. If you move between Mac and iPad regularly, DeskIn handles both well.
Feature | Chrome Remote Desktop | DeskIn |
Primary use case | Occasional access / emergency use | Business, creative work, gaming |
Display quality | Up to 30FPS (choppy) | 4K / 60–144FPS (extremely smooth) |
Keyboard mapping | Basic — Command/Ctrl conflicts | Auto-optimised for Mac/Windows (no conflicts) |
Wake on LAN | Not supported — PC must stay on | Supported — start PC remotely |
Input feel | Noticeable lag, gesture loss | Low latency, Mac-native feel |
Cost | Free | Free tier available / Pro version |
Chrome Remote Desktop earns its place as an entry-level tool. Its ease of use and zero cost make it a great starting point for quick file access, occasional light tasks, and situations where budget is the overriding factor.
But if you're using a remote desktop regularly — for work, creative projects, or gaming — the accumulated frustrations of keyboard conflicts, always-on power requirements, and performance caps start to outweigh the convenience of free.
When that point arrives, DeskIn is the obvious next step: a tool designed from the ground up for people who need remote access to actually feel like working locally. Whether you're at your apartment, in a café in Kichioji, or somewhere further afield — your Windows machine should feel like it's right in front of you.
Experience professional-grade performance now — [Download DeskIn free and try it]
DeskIn vs Chrome Remote Desktop: Which One Fits Your Workflow Best?
When it comes to remote access tools, the comparison between DeskIn and Chrome Remote Desktop often comes down to one simple question: do you just need quick access, or do you need performance and control?
Both tools are reliable, secure, and widely used. But they are built for very different types of users. Chrome Remote Desktop focuses on simplicity and accessibility, while DeskIn is designed for users who need high performance, stability, and advanced features across multiple devices.
If you're deciding between the two, this guide breaks down not just what they offer, but which one actually fits your workflow.
Feature | DeskIn | Chrome Remote Desktop |
|---|---|---|
Performance | Up to 4K 60FPS/2K 240FPS, low latency | Standard performance |
Ease of Use | Requires app installation | Browser-based, very simple |
Device Support | Windows, macOS, iOS, Android | Works via Chrome browser |
File Transfer | Fast and stable | Limited |
Multi-device Management | Yes | No |
Mobile Experience | Optimized for iPad & iPhone | Basic |
Security | Privacy screens and granular black/whitelists | Basic |
Price | Free + paid plans | Completely free |
In short, Chrome Remote Desktop is great for quick, lightweight access, while DeskIn is built for users who expect more from their remote desktop experience.
Chrome Remote Desktop is one of the simplest remote access tools available. It runs directly through the Chrome browser and requires only a Google account to get started. This makes it especially popular among casual users and those already working within the Google ecosystem.
It works particularly well on devices like Chromebooks, where everything is already browser-based. It's also accessible across platforms, including mobile devices like iPhone and iPad, though the experience on mobile can feel limited compared to desktop use.
If you're wondering how to use Chrome Remote Desktop, the process is straightforward. You install the Chrome extension, sign in with your Google account, set up a PIN on the host device, and then connect from another device using the same account. The entire setup usually takes just a few minutes.
That said, simplicity comes with trade-offs. Chrome Remote Desktop lacks advanced features like high frame rate streaming, multi-monitor control, or professional-grade file transfer. For occasional access, it works well. But for more demanding tasks, users often start to feel its limitations.
👀You may also be interested in:
If Chrome Remote Desktop is a lightweight sketch, DeskIn is a full workstation painted in high resolution. DeskIn focuses on performance, stability, and flexibility. It supports up to 4K 60FPS streaming, making it suitable for tasks where visual clarity and responsiveness matter, such as design work, video editing, or even gaming.
As a Chrome remote desktop alternative, unlike browser-based tools, DeskIn is a dedicated remote desktop application. While this requires installation, it unlocks a much more stable and feature-rich experience. Users can manage multiple devices, transfer large files efficiently, and enjoy smoother control across different platforms.
DeskIn is also optimized for mobile workflows. Whether you're using an iPad or smartphone, the interaction feels more responsive and closer to a desktop experience, rather than a simplified viewer. For users who find Chrome Remote Desktop "good enough" at first but limiting over time, DeskIn often becomes the natural upgrade path.
The real difference between these two tools becomes clear when you look at how they perform in everyday scenarios.
If you only need to check files on your home computer or help a friend troubleshoot something quickly, Chrome Remote Desktop is more than enough. It's free, easy to set up, and doesn't require installing extra software beyond Chrome. In this case, DeskIn may feel like overkill.
For professionals working remotely on a daily basis, stability and efficiency matter much more. This is where DeskIn starts to stand out.
Tasks like editing documents, managing multiple screens, or transferring files between devices become smoother and faster. Chrome Remote Desktop can handle basic workflows, but it often struggles with responsiveness and lacks the tools needed for a seamless work environment.
This is where the gap becomes impossible to ignore. DeskIn's support for high resolution and high frame rates makes it suitable for visually demanding work. Whether you're editing videos, working with design software, or running simulations, performance consistency is critical. Chrome Remote Desktop, on the other hand, is not designed for these scenarios. It works, but not comfortably.
If you rely heavily on Google services or use a Chromebook, Chrome Remote Desktop integrates naturally into your workflow. It's lightweight, requires no additional setup, and feels like an extension of the browser itself. In this scenario, it remains a very practical choice.
Mobile usage highlights another important difference. While remote desktop Chrome iPhone, and Chrome Remote Desktop iPad are functional, they often feel like simplified versions of the desktop experience. Controls can be less intuitive, and performance may vary depending on the connection.
DeskIn, by contrast, is designed with cross-device interaction in mind, offering a smoother and more responsive mobile experience.
👀 You may also be interested in:
Yes. Tools like DeskIn offer better performance, more features, and improved stability, especially for professional use cases.
No, Chrome Remote Desktop is still actively maintained by Google. It continues to receive security updates and remains available for users needing simple, free remote access.
Yes, DeskIn is a legitimate remote desktop solution. It uses encryption to secure connections and provides access controls, making it safe for both personal and professional use.
When comparing DeskIn vs Chrome Remote Desktop, the choice depends on how demanding your remote access needs are. Chrome Remote Desktop is simple, free, and ideal for occasional use, especially if you just need quick access to a device without extra setup.
As your workflow becomes more intensive, the limitations start to surface. DeskIn offers a smoother, more stable experience with better performance and control, making it a strong long-term Chrome remote desktop alternative for users who rely on remote access every day.
Products
Tải xuống
Resources
Contact Us
Email: support@deskin.io
Office: 991D Alexandra Road #02-17, Singapore 119972
Copyright © 2026 Zuler Technology PTE. LTD. All rights reserved.
Contact Us
Email: support@deskin.io
Office: 991D Alexandra Road #02-17, Singapore 119972
Products
Tải xuống
Resources
Copyright © 2026 Zuler Technology PTE. LTD. All rights reserved.
Products
Tải xuống
Resources
Contact Us
support@deskin.io
991D Alexandra Road #02-17
Singapore 119972
Copyright © 2026 Zuler Technology PTE. LTD. All rights reserved.

