生産性
生産性
/
10 分間
/
10 分間
中村 恒一
更新済み
更新済み
更新済み
こうした場面を解決してくれるのが「リモート起動」、英語では Wake on LAN と呼ばれる機能です。シャットダウン中やスリープ中のPCを、ネットワーク経由で遠隔から起動できる技術です。ところが、多くのリモートデスクトップツールはこの機能を標準搭載しておらず、「PCを起動するアプリ」と「PCを操作するアプリ」を別々に用意しなければならない、という手間が生じます。
そこで登場するのが DeskIn(デスクイン) です。DeskIn は、リモート起動とリモートデスクトップ操作を一つのアプリに統合しています。PCの起動から操作まで、ワンクリックで完結します。
本記事では、リモート起動の仕組みから具体的な設定手順、よくあるトラブルの対処法まで、わかりやすく解説します。
リモート起動(Wake on LAN)とは、マジックパケット(Magic Packet)と呼ばれる特殊なデータ信号をネットワーク上に送信することで、電源オフまたはスリープ中のコンピューターを遠隔起動する技術です。対象PCのネットワークカード(NIC)がこのパケットを検出すると、マザーボードに電源投入の信号を送り、PCが起動します。OSがシャットダウンされた状態でも、マザーボードに待機電力が供給されていれば動作します。
マジックパケットは、特定のデータ構造を持つ小さなデータフレームです。先頭に 0xFF が6バイト(すべて「1」のビット列)並び、続いて対象PCのMACアドレスが16回繰り返されます。Wake on LAN に対応したネットワークカードは、PCがオフの状態でもこのパターンを常時監視しており、検出次第、マザーボードへ起動信号を送ります。
リモート起動を正常に機能させるには、以下の3点がすべて揃っている必要があります。
ハードウェア: ネットワークカードが Wake on LAN に対応していること(現代の有線イーサネットアダプターのほとんどは対応済み)
BIOS/UEFI: ファームウェアの設定でリモート起動が有効になっていること
電源: PCが電源コンセントに接続されており、ネットワークカードに待機電力が供給されていること
Windows リモートデスクトップや Chrome リモートデスクトップ、その他のサードパーティ製リモートデスクトップツールを使っている方なら、一度はこんな悩みを持ったことがあるはずです。「いざというときのために、PCを24時間つけっぱなしにしておくしかないのか。」
常時起動は電力の無駄であり、PCパーツへの負荷を高め、セキュリティ上のリスクにもなります。リモート起動(Wake on LAN)があれば、普段はPCをオフまたはスリープ状態に保ち、必要なときだけ遠隔で起動できます。
特に Windows 10 / Windows 11 ユーザーにとっては重要な機能です。これらのOSには優れた省電力機能が備わっており、リモート起動と組み合わせることで「節電」と「いつでもアクセス」を両立できます。
リモート起動の設定は、大きく3つのステップで構成されます。①ネットワークアダプターの設定 ②BIOSの設定 ③DeskIn でのリモート起動テスト。順を追って解説します。
注意事項:
リモート起動を使用するには、起動したいPCと同じローカルネットワーク(LAN)内に、DeskIn をインストールした補助デバイス(スマートフォン、タブレット、別のPCなど)が必要です。
Linux デバイスはリモート起動パケットの送信に非対応です。 また、Mac および Linux デバイスはリモート起動による電源投入に非対応です。
ブルースクリーンやクラッシュなど、異常終了した状態のデバイスはリモート起動に対応していません。
Windowsロゴを右クリック(または Win + X)し、「デバイスマネージャー」を選択します。
「ネットワークアダプター」を展開し、有線イーサネットアダプター(例:Realtek PCIe GbE Family Controller)を右クリックして「プロパティ」を開きます。
「電源の管理」タブを開き、「このデバイスで、コンピューターのスタンバイ状態を解除できるようにする」にチェックを入れます。
「詳細設定」タブに切り替えます。プロパティ一覧から「Wake on Magic Packet」を探し、値を「有効(Enabled)」に設定します。他にもリモート起動関連の項目があれば、同様に有効にしてください。
「OK」をクリックして設定を保存します。
PCを再起動します。起動中に Delete キーまたは F2 キーを連打してBIOS設定画面に入ります(キーはマザーボードのメーカーにより異なります)。
「Advanced(詳細設定)」または「Power Management(電源管理)」のセクションに移動します。
以下のいずれかに近い名前の項目を探し、有効(Enabled) に設定します(表示される項目はマザーボードによって異なります):
Power On By PCI-E
Wake on LAN
Resume on LAN
Power on PME
F10 を押して設定を保存し、再起動します。
補足: メニューの名称はマザーボードのメーカー・モデルによって異なります。見つからない場合は、使用しているマザーボードのマニュアルを参照してください。
補助デバイス(スマートフォンやタブレットなど)を、起動したいPCと同じローカルネットワークに接続します。DeskIn をインストールし、同じアカウントでログインしておきます。
補助デバイスで DeskIn を開き、「設定 → 一般設定」から「リモート起動のサポート」を有効にします。
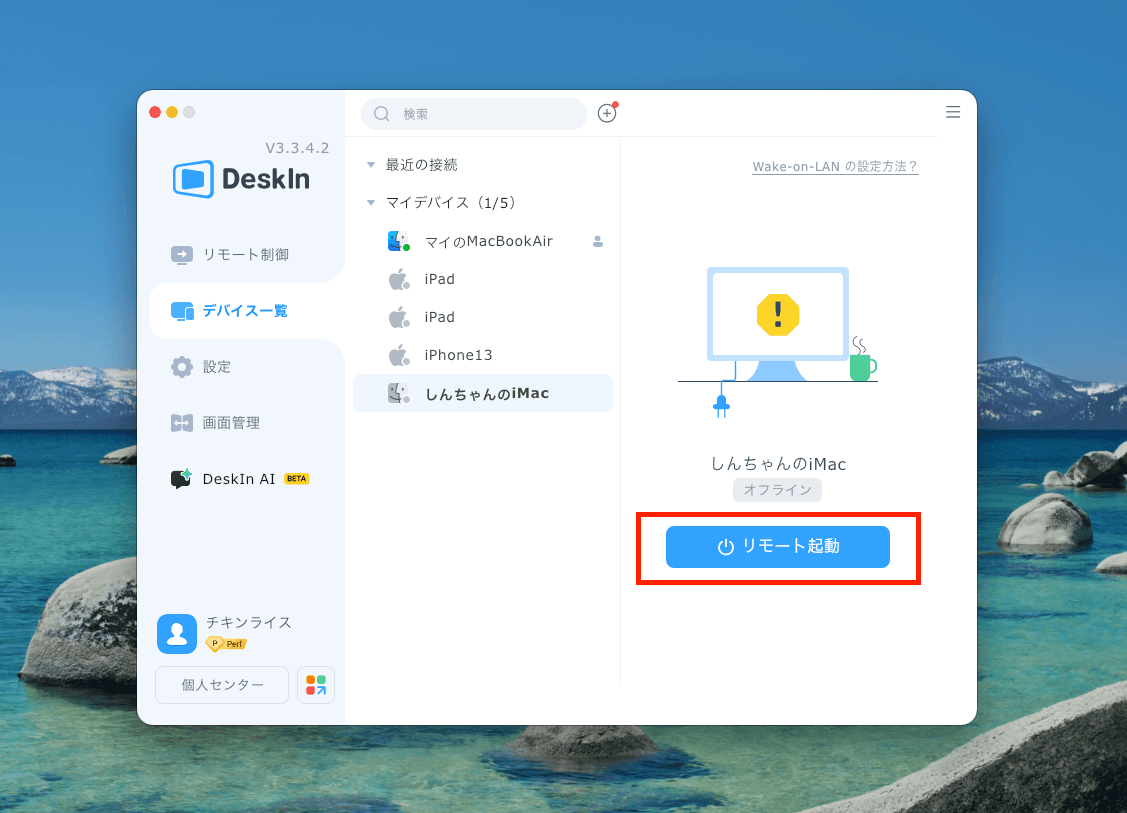
DeskIn のデバイス一覧に戻ります。電源オフ状態のPCは「オフライン」と表示されています。そのデバイスの横にある「リモート起動」ボタンをタップします。
数秒待つと、対象PCが起動し、ステータスが「オンライン」に変わります。そのままクリックしてリモートデスクトップ接続を開始できます。
DeskIn なら、リモート起動の動作確認とリモート操作への移行がすべて一つのアプリで完結します。別途テストツールを用意する手間は不要です。
Yahoo!知恵袋や価格.comの掲示板には、こんな質問や投稿が多く見られます。
「Windows リモートデスクトップで、PCの電源を遠隔投入できますか?それとも別のツールが必要ですか?」
「リモート起動(Wake on LAN)に対応した無料のリモートデスクトップアプリはありますか?」
よくあるトラブルの原因と症状はおおむね以下のとおりです。
ネットワークカードの設定が正しくないため、リモート起動が動作しない
マジックパケットがインターネット越しに届かず、リモート起動ができない
Chrome リモートデスクトップはリモート起動(Wake on LAN)を標準サポートしていない
Windows 10 / 11 でスリープ後にリモート起動が効かなくなる
これらの問題のほとんどは、電源管理の設定ミス、ルーターの設定不足、または使用ソフトウェア側の機能制限が原因です。上記のステップ1〜3を順番に確認することで、多くのケースは解決できます。
多くのユーザーが「リモート起動用アプリ」と「リモートデスクトップアプリ」を別々に使う二度手間を強いられています。DeskIn はこの問題を、両機能を一つのインターフェースに統合することで根本から解決しています。
DeskIn では、IPアドレスやMACアドレスを手動で入力したり、ルーターのポート開放設定をしたりする必要はありません。DeskIn のクラウドインフラがリモート起動(Wake on LAN)の信号送信を自動で処理します。スリープ中のPCに接続しようとすると、起動リクエストが自動的に送信されます。余計な手順は一切ありません。
ツール | リモート起動サポート(Wake on LAN) |
DeskIn | 無料で標準搭載。リモートデスクトップと完全統合、設定も簡単 |
Chrome リモートデスクトップ | 非対応(別途ツールが必要) |
Splashtop | 対応しているが、上位プランへの加入が必要な場合あり |
AnyDesk / TeamViewer | 制限あり、または追加設定が必要な場合あり |
リモート起動(Wake on LAN)は、デバイスを常時起動させずに遠隔アクセスや管理が必要な場面に適しています。主な用途としては、リモートITサポート、定期メンテナンス作業、始業前のサーバー・ワークステーション起動、在宅勤務中の会社PCへのアクセスなどが挙げられます。
はい、可能です。ただし、ルーターのポートフォワーディング設定か、クラウドベースのリモート起動サービスが必要になります。DeskIn のクラウドリレー機能(Wake on LAN 対応)を使えば、ポートフォワーディングの設定なしにインターネット越しのリモート起動が実現できます。
リモート起動自体は、PCの電源を投入するだけの機能であり、基本的に安全です。ただし、ポート9番を外部に開放したままにするとセキュリティリスクが生じる可能性があります。DeskIn のようなサービスを使うことで、Wake on LAN に認証と暗号化によるセキュリティが加わります。
Wi-Fi 環境でのリモート起動は動作が不安定です。Wi-Fiアダプターはスリープ中に電力供給が切れることが多く、マジックパケット(Wake on LAN の起動信号)を受信できない場合があります。リモート起動には有線イーサネット接続の使用を強く推奨します。
BIOS/UEFI の設定と、OSのネットワークアダプター設定でリモート起動(Wake on LAN)を無効にすることで、遠隔からの電源投入を停止できます。この機能が不要になった場合は、それぞれの設定をオフに戻してください。
リモート起動とリモートデスクトップの組み合わせは、コンピューターへのアクセス方法を根本から変えます。PCを常時起動しておく必要がなくなり、電力の節約、ハードウェアへの負荷軽減、そしてセキュリティの向上が同時に実現できます。
リモート起動(Wake on LAN)の手動設定は手順が多く、つまずきやすい部分もあります。しかし DeskIn を使えば、その複雑さをすべて解消し、起動からリモート操作までをひとつの体験としてシームレスに提供します。
Windows リモートデスクトップからの移行を検討している方も、Windows 10 / 11 環境でのリモート起動に悩んでいる方も、「リモート起動が動かない」というトラブルを抱えている方にも、DeskIn がその答えを出します。ぜひ一度試してみてください。真の「オンデマンド・リモートデスクトップ」を体験できます。
こうした場面を解決してくれるのが「リモート起動」、英語では Wake on LAN と呼ばれる機能です。シャットダウン中やスリープ中のPCを、ネットワーク経由で遠隔から起動できる技術です。ところが、多くのリモートデスクトップツールはこの機能を標準搭載しておらず、「PCを起動するアプリ」と「PCを操作するアプリ」を別々に用意しなければならない、という手間が生じます。
そこで登場するのが DeskIn(デスクイン) です。DeskIn は、リモート起動とリモートデスクトップ操作を一つのアプリに統合しています。PCの起動から操作まで、ワンクリックで完結します。
本記事では、リモート起動の仕組みから具体的な設定手順、よくあるトラブルの対処法まで、わかりやすく解説します。
リモート起動(Wake on LAN)とは、マジックパケット(Magic Packet)と呼ばれる特殊なデータ信号をネットワーク上に送信することで、電源オフまたはスリープ中のコンピューターを遠隔起動する技術です。対象PCのネットワークカード(NIC)がこのパケットを検出すると、マザーボードに電源投入の信号を送り、PCが起動します。OSがシャットダウンされた状態でも、マザーボードに待機電力が供給されていれば動作します。
マジックパケットは、特定のデータ構造を持つ小さなデータフレームです。先頭に 0xFF が6バイト(すべて「1」のビット列)並び、続いて対象PCのMACアドレスが16回繰り返されます。Wake on LAN に対応したネットワークカードは、PCがオフの状態でもこのパターンを常時監視しており、検出次第、マザーボードへ起動信号を送ります。
リモート起動を正常に機能させるには、以下の3点がすべて揃っている必要があります。
ハードウェア: ネットワークカードが Wake on LAN に対応していること(現代の有線イーサネットアダプターのほとんどは対応済み)
BIOS/UEFI: ファームウェアの設定でリモート起動が有効になっていること
電源: PCが電源コンセントに接続されており、ネットワークカードに待機電力が供給されていること
Windows リモートデスクトップや Chrome リモートデスクトップ、その他のサードパーティ製リモートデスクトップツールを使っている方なら、一度はこんな悩みを持ったことがあるはずです。「いざというときのために、PCを24時間つけっぱなしにしておくしかないのか。」
常時起動は電力の無駄であり、PCパーツへの負荷を高め、セキュリティ上のリスクにもなります。リモート起動(Wake on LAN)があれば、普段はPCをオフまたはスリープ状態に保ち、必要なときだけ遠隔で起動できます。
特に Windows 10 / Windows 11 ユーザーにとっては重要な機能です。これらのOSには優れた省電力機能が備わっており、リモート起動と組み合わせることで「節電」と「いつでもアクセス」を両立できます。
リモート起動の設定は、大きく3つのステップで構成されます。①ネットワークアダプターの設定 ②BIOSの設定 ③DeskIn でのリモート起動テスト。順を追って解説します。
注意事項:
リモート起動を使用するには、起動したいPCと同じローカルネットワーク(LAN)内に、DeskIn をインストールした補助デバイス(スマートフォン、タブレット、別のPCなど)が必要です。
Linux デバイスはリモート起動パケットの送信に非対応です。 また、Mac および Linux デバイスはリモート起動による電源投入に非対応です。
ブルースクリーンやクラッシュなど、異常終了した状態のデバイスはリモート起動に対応していません。
Windowsロゴを右クリック(または Win + X)し、「デバイスマネージャー」を選択します。
「ネットワークアダプター」を展開し、有線イーサネットアダプター(例:Realtek PCIe GbE Family Controller)を右クリックして「プロパティ」を開きます。
「電源の管理」タブを開き、「このデバイスで、コンピューターのスタンバイ状態を解除できるようにする」にチェックを入れます。
「詳細設定」タブに切り替えます。プロパティ一覧から「Wake on Magic Packet」を探し、値を「有効(Enabled)」に設定します。他にもリモート起動関連の項目があれば、同様に有効にしてください。
「OK」をクリックして設定を保存します。
PCを再起動します。起動中に Delete キーまたは F2 キーを連打してBIOS設定画面に入ります(キーはマザーボードのメーカーにより異なります)。
「Advanced(詳細設定)」または「Power Management(電源管理)」のセクションに移動します。
以下のいずれかに近い名前の項目を探し、有効(Enabled) に設定します(表示される項目はマザーボードによって異なります):
Power On By PCI-E
Wake on LAN
Resume on LAN
Power on PME
F10 を押して設定を保存し、再起動します。
補足: メニューの名称はマザーボードのメーカー・モデルによって異なります。見つからない場合は、使用しているマザーボードのマニュアルを参照してください。
補助デバイス(スマートフォンやタブレットなど)を、起動したいPCと同じローカルネットワークに接続します。DeskIn をインストールし、同じアカウントでログインしておきます。
補助デバイスで DeskIn を開き、「設定 → 一般設定」から「リモート起動のサポート」を有効にします。
DeskIn のデバイス一覧に戻ります。電源オフ状態のPCは「オフライン」と表示されています。そのデバイスの横にある「リモート起動」ボタンをタップします。
数秒待つと、対象PCが起動し、ステータスが「オンライン」に変わります。そのままクリックしてリモートデスクトップ接続を開始できます。
DeskIn なら、リモート起動の動作確認とリモート操作への移行がすべて一つのアプリで完結します。別途テストツールを用意する手間は不要です。
Yahoo!知恵袋や価格.comの掲示板には、こんな質問や投稿が多く見られます。
「Windows リモートデスクトップで、PCの電源を遠隔投入できますか?それとも別のツールが必要ですか?」
「リモート起動(Wake on LAN)に対応した無料のリモートデスクトップアプリはありますか?」
よくあるトラブルの原因と症状はおおむね以下のとおりです。
ネットワークカードの設定が正しくないため、リモート起動が動作しない
マジックパケットがインターネット越しに届かず、リモート起動ができない
Chrome リモートデスクトップはリモート起動(Wake on LAN)を標準サポートしていない
Windows 10 / 11 でスリープ後にリモート起動が効かなくなる
これらの問題のほとんどは、電源管理の設定ミス、ルーターの設定不足、または使用ソフトウェア側の機能制限が原因です。上記のステップ1〜3を順番に確認することで、多くのケースは解決できます。
多くのユーザーが「リモート起動用アプリ」と「リモートデスクトップアプリ」を別々に使う二度手間を強いられています。DeskIn はこの問題を、両機能を一つのインターフェースに統合することで根本から解決しています。
DeskIn では、IPアドレスやMACアドレスを手動で入力したり、ルーターのポート開放設定をしたりする必要はありません。DeskIn のクラウドインフラがリモート起動(Wake on LAN)の信号送信を自動で処理します。スリープ中のPCに接続しようとすると、起動リクエストが自動的に送信されます。余計な手順は一切ありません。
ツール | リモート起動サポート(Wake on LAN) |
DeskIn | 無料で標準搭載。リモートデスクトップと完全統合、設定も簡単 |
Chrome リモートデスクトップ | 非対応(別途ツールが必要) |
Splashtop | 対応しているが、上位プランへの加入が必要な場合あり |
AnyDesk / TeamViewer | 制限あり、または追加設定が必要な場合あり |
リモート起動(Wake on LAN)は、デバイスを常時起動させずに遠隔アクセスや管理が必要な場面に適しています。主な用途としては、リモートITサポート、定期メンテナンス作業、始業前のサーバー・ワークステーション起動、在宅勤務中の会社PCへのアクセスなどが挙げられます。
はい、可能です。ただし、ルーターのポートフォワーディング設定か、クラウドベースのリモート起動サービスが必要になります。DeskIn のクラウドリレー機能(Wake on LAN 対応)を使えば、ポートフォワーディングの設定なしにインターネット越しのリモート起動が実現できます。
リモート起動自体は、PCの電源を投入するだけの機能であり、基本的に安全です。ただし、ポート9番を外部に開放したままにするとセキュリティリスクが生じる可能性があります。DeskIn のようなサービスを使うことで、Wake on LAN に認証と暗号化によるセキュリティが加わります。
Wi-Fi 環境でのリモート起動は動作が不安定です。Wi-Fiアダプターはスリープ中に電力供給が切れることが多く、マジックパケット(Wake on LAN の起動信号)を受信できない場合があります。リモート起動には有線イーサネット接続の使用を強く推奨します。
BIOS/UEFI の設定と、OSのネットワークアダプター設定でリモート起動(Wake on LAN)を無効にすることで、遠隔からの電源投入を停止できます。この機能が不要になった場合は、それぞれの設定をオフに戻してください。
リモート起動とリモートデスクトップの組み合わせは、コンピューターへのアクセス方法を根本から変えます。PCを常時起動しておく必要がなくなり、電力の節約、ハードウェアへの負荷軽減、そしてセキュリティの向上が同時に実現できます。
リモート起動(Wake on LAN)の手動設定は手順が多く、つまずきやすい部分もあります。しかし DeskIn を使えば、その複雑さをすべて解消し、起動からリモート操作までをひとつの体験としてシームレスに提供します。
Windows リモートデスクトップからの移行を検討している方も、Windows 10 / 11 環境でのリモート起動に悩んでいる方も、「リモート起動が動かない」というトラブルを抱えている方にも、DeskIn がその答えを出します。ぜひ一度試してみてください。真の「オンデマンド・リモートデスクトップ」を体験できます。


WindowsとMacコンピュータをiPadでセカンドモニターに!
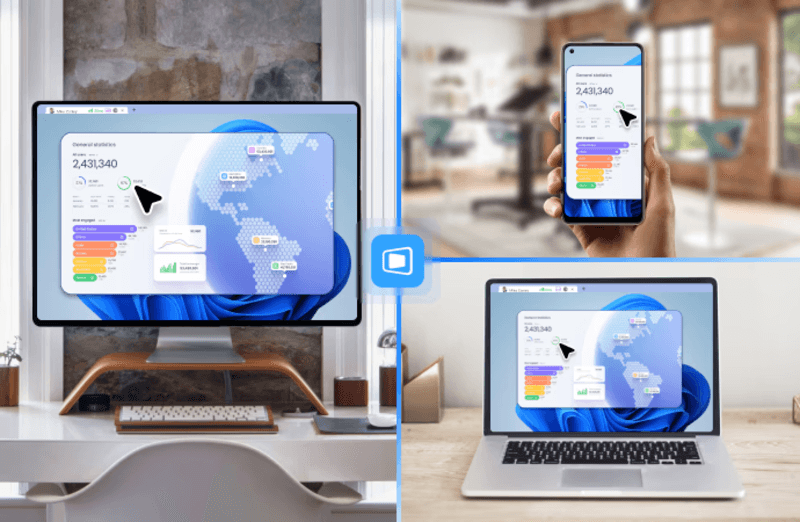
マルチタスクをこなすにとっ社員にとって、セカンドモニターを使用することは生産性を大幅に向上させることができます。ホームオフィスの方やデュアルスクリーンを持っていない学生の方へ。使用していないiPadを簡単にコンピュータのセカンドモニターに変える方法をご紹介します。
1. 画面スペースを増やして同時により多く表示できます。マルチタスクユーザーは、ウィンドウの切り替えを避けることで時間を節約できます。
2. 各画面が独立して動作するため、作業スペースがより整理されます。
ビデオ編集では、一つの画面を編集に、もう一つの画面を素材置き場に。論文を書く場合、片方の画面で執筆、もう片方で情報を検索などです。
3. iPadの画面サイズは十分大きく、表示品質も非常に良好です。デザイン作業のニーズがあるユーザーやMacBookユーザーにとって、追加のスクリーンを購入するよりもコスト効率が高く、色差の問題もありません。
4. 多くの人が家にiPadを持っています。この手持ちのデバイスをデュアルスクリーンとして使用することで、別のスクリーンを購入するコストや置くスペースを節約できます。
Appleのネイティブ機能であるApple Sidecarを使用すると、iPadをMacBookやiMacの外部ディスプレイとして使用できます。簡単な設定を行うだけで、iPadとコンピュータ間のシームレスな接続が可能です。
注意:Apple Sidecarを使用するには、2台のデバイスが同じApple IDにログインしているか、同じネットワークに接続していることが必要です。両方のデバイスにBluetooth、Wi-Fiがオンになっており、距離は10メートル以内である必要があります。
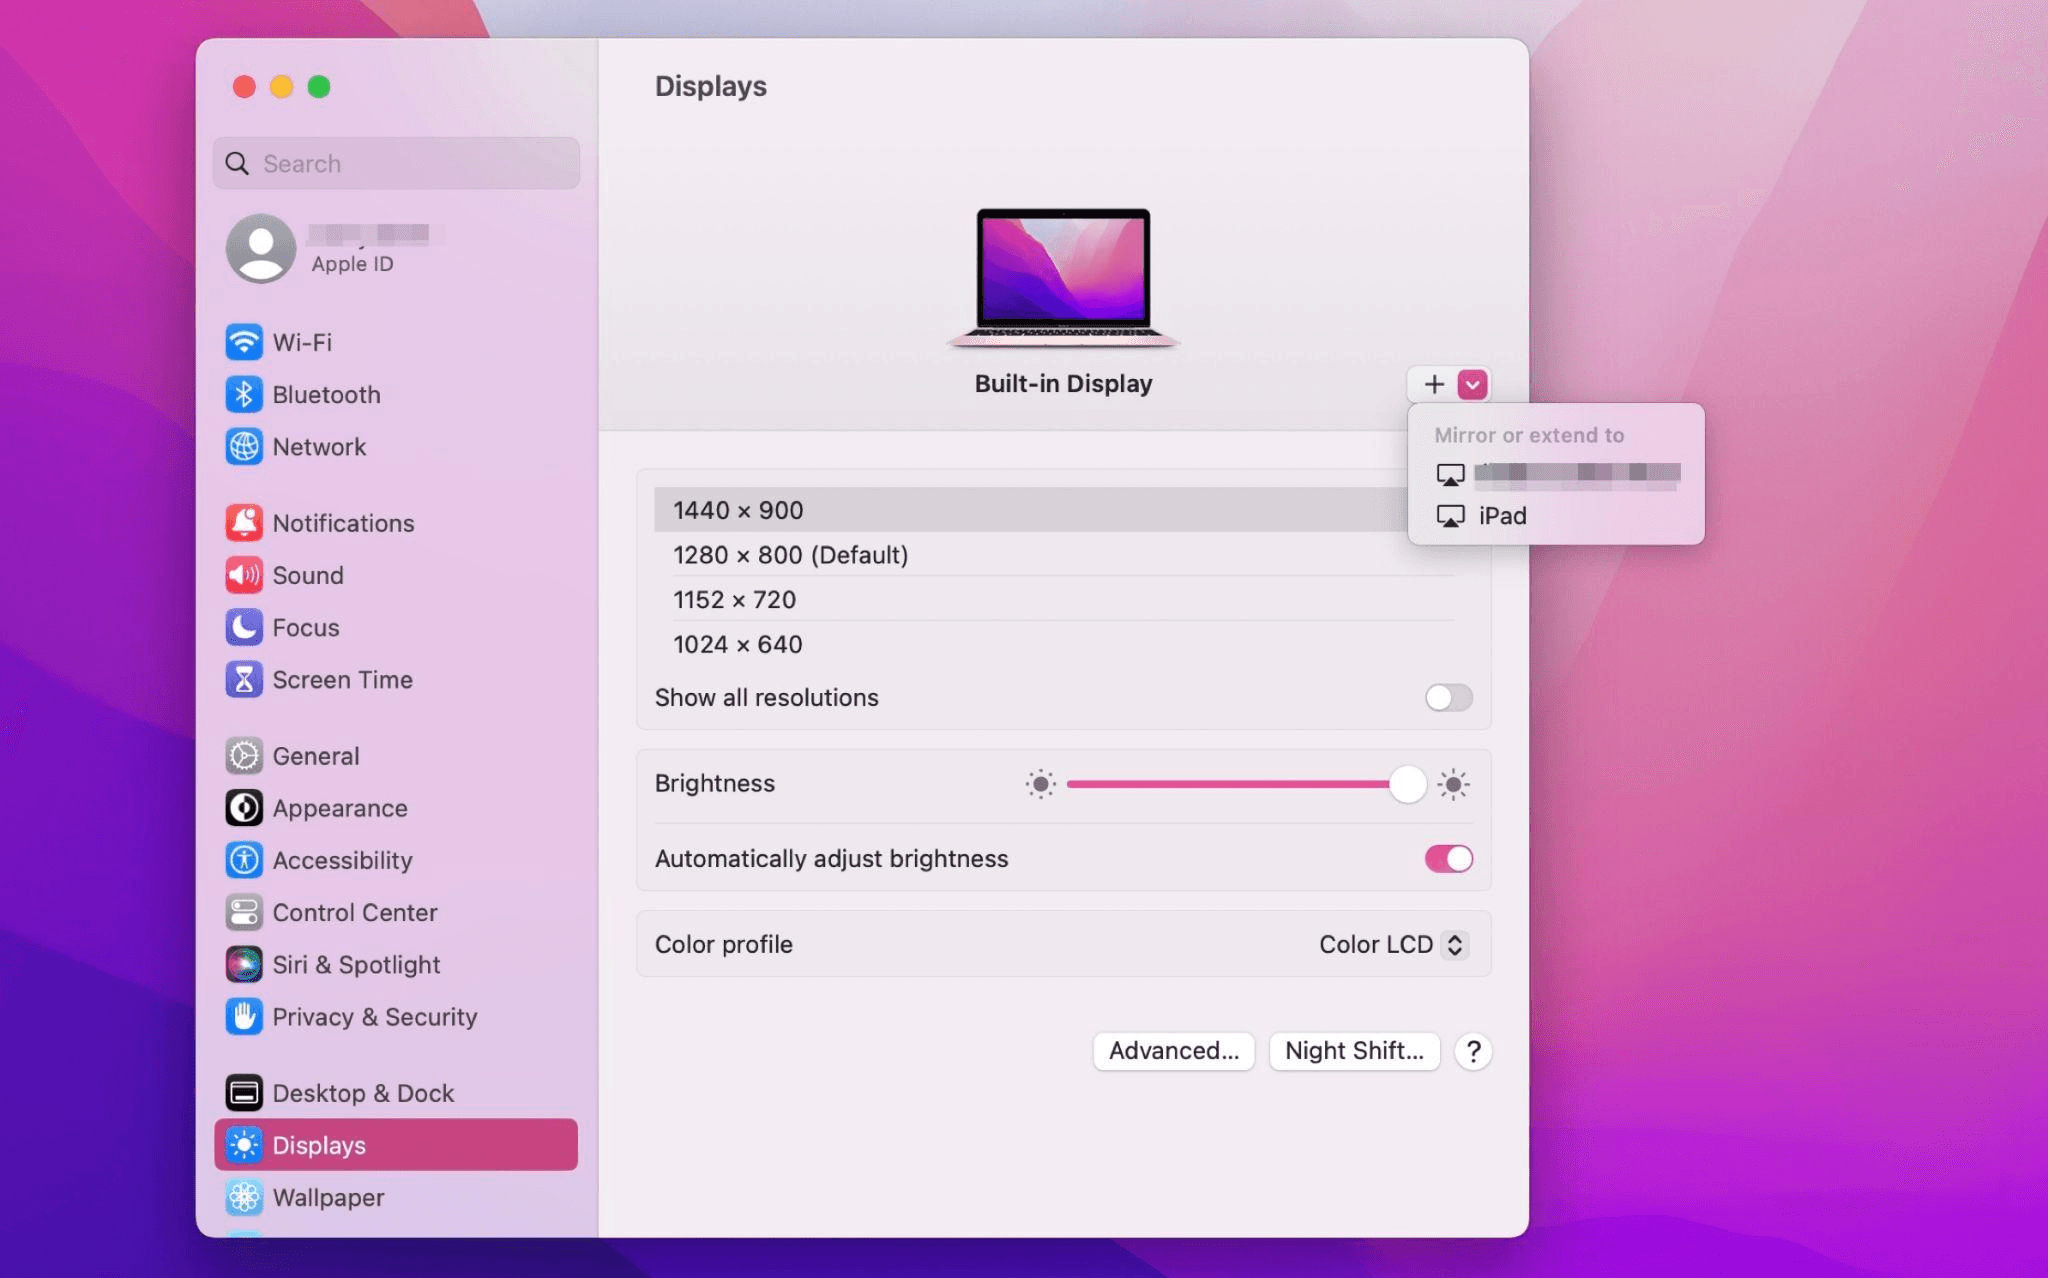
Macシステム設定を開き、サイドバーの「ディスプレイ」クリック >> 右側の「+」ポップアップメニューをクリックし、iPadを選択します。
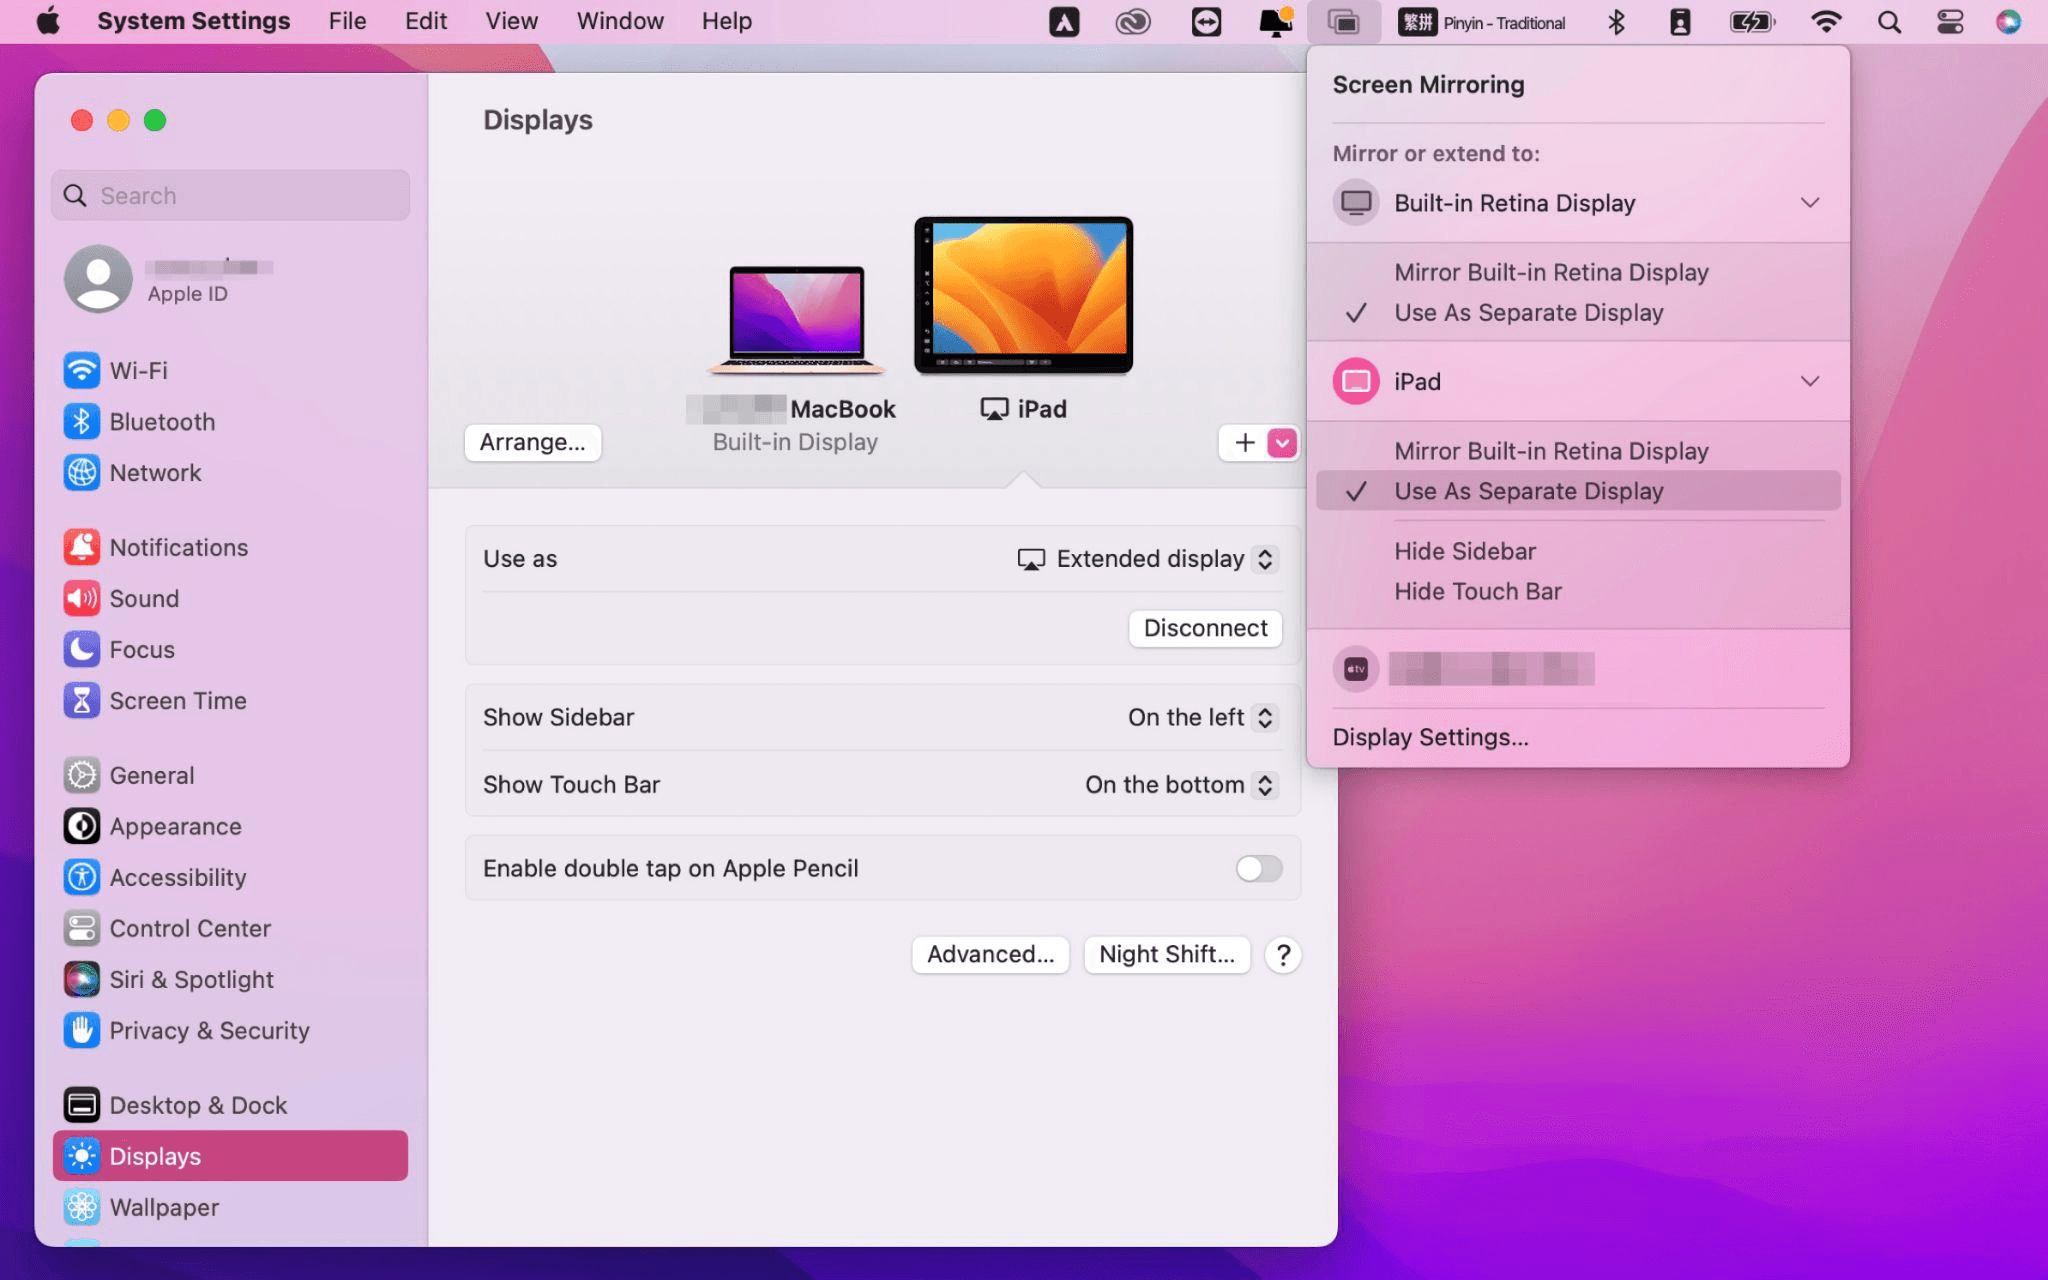
iPadを選択し、使用設定を「拡張ディスプレイ」に変更します。Macの上部ツールバーのAirplay設定を確認し、iPadを「別のディスプレイとして使用」に設定します。
設定が完了すると、iPadがMacのセカンドディスプレイとなります。MacからiPadにウィンドウをスムーズにドラッグすることができます。また、iPadのサイドバーを使用したり、システムディスプレイ設定でサイドバーの位置を変更したりできます。
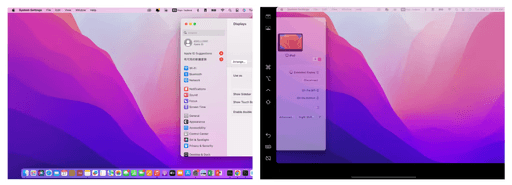
MacBookスクリーン(左)とiPadスクリーン(右)
Apple Sidecarは、2016年以降に発売されたMacとiPadOS13以上のみをサポートします。古いAppleデバイスやWindowsデバイスを使用している場合でも、DeskInリモートソフトウェアを利用して画面拡張を行うことができます。iPadをMacやWindowsのセカンドディスプレイとして使用でき、その滑らかさはSidecarに劣りません。
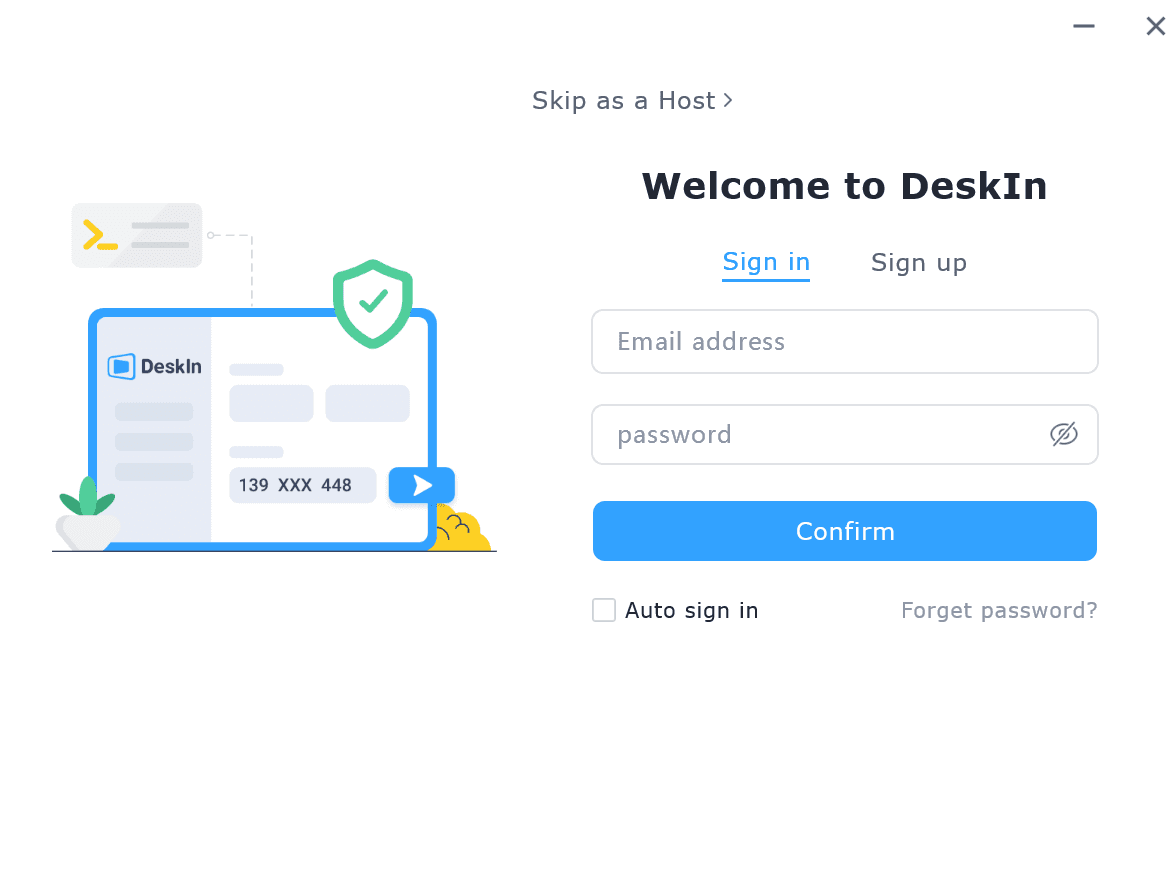
コンピューターとiPadにDeskInをダウンロードし、無料アカウントを登録して別々にログインします。

注意: 新しいデバイスに初めてログインする際には、アカウントのセキュリティを保護するためにメール認証を完了する必要があります。
Windows/MacコンピュータでDeskInアプリを開き、「スクリーン管理」タブに行き、「画面を拡張する」をクリックします。
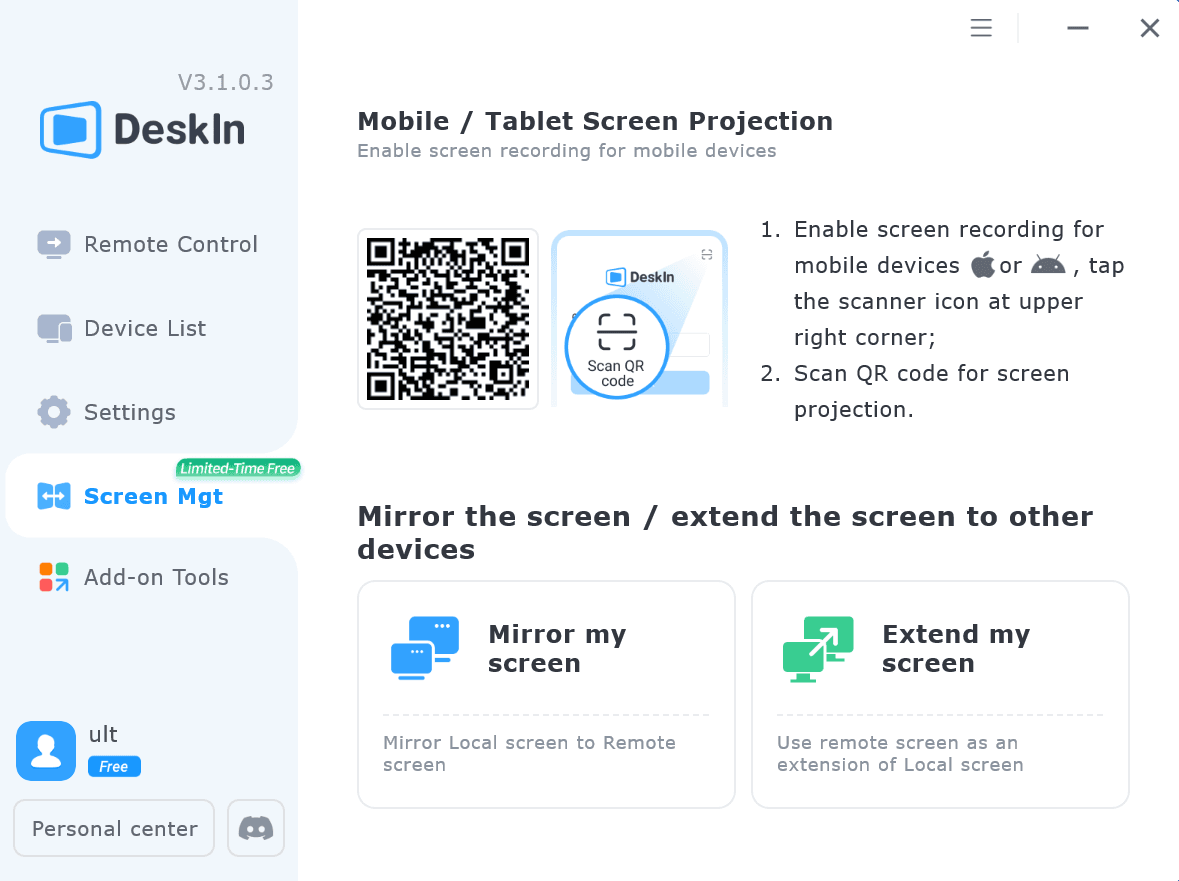
iPadを選択し、「拡張を開始」をクリックします。接続が完了すると、iPadはWindows/Macコンピューターのセカンドディスプレイとなり、2つのスクリーンを1つのもののようにウィンドウを移動できます。
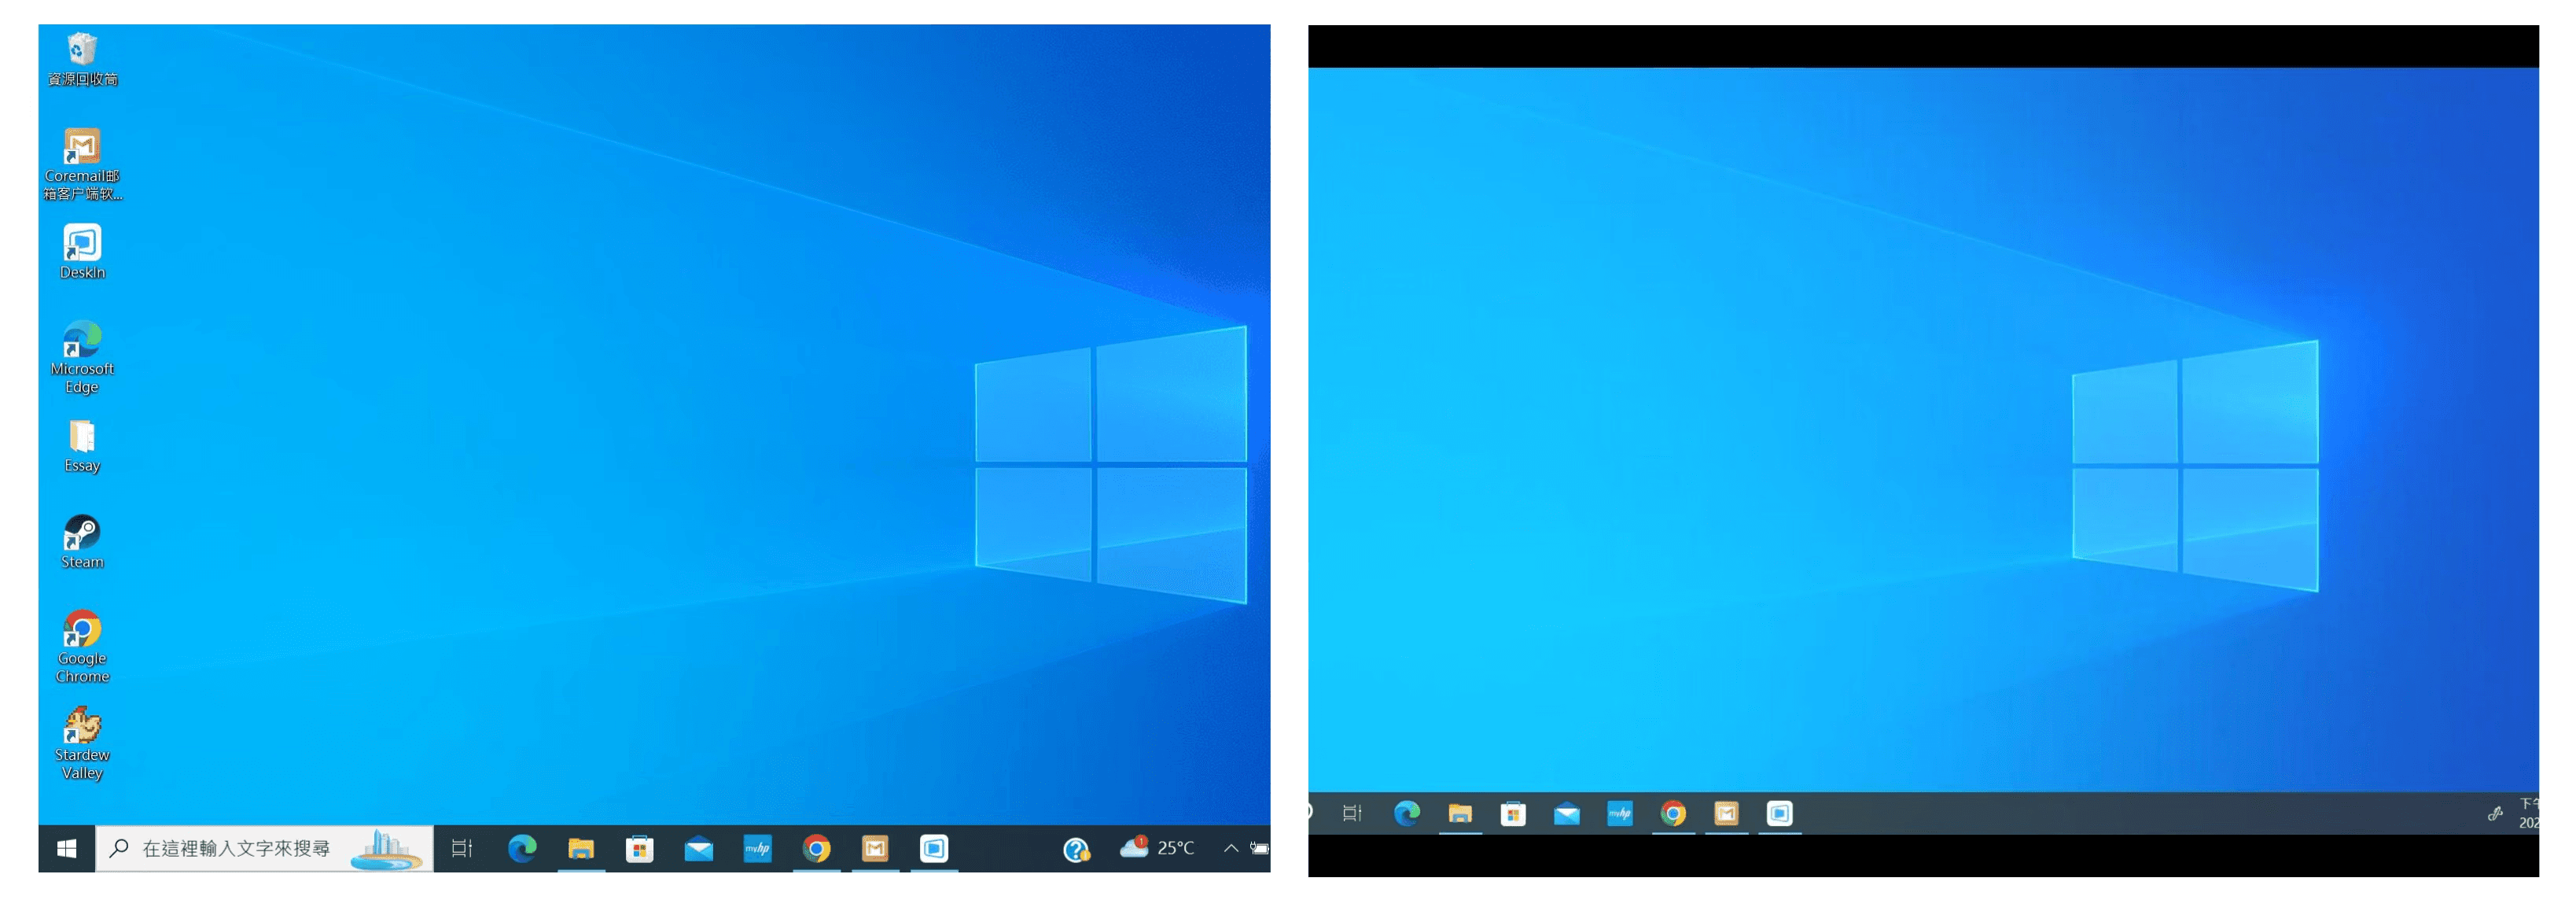
コンピュータスクリーン(左)とiPadスクリーン(右)
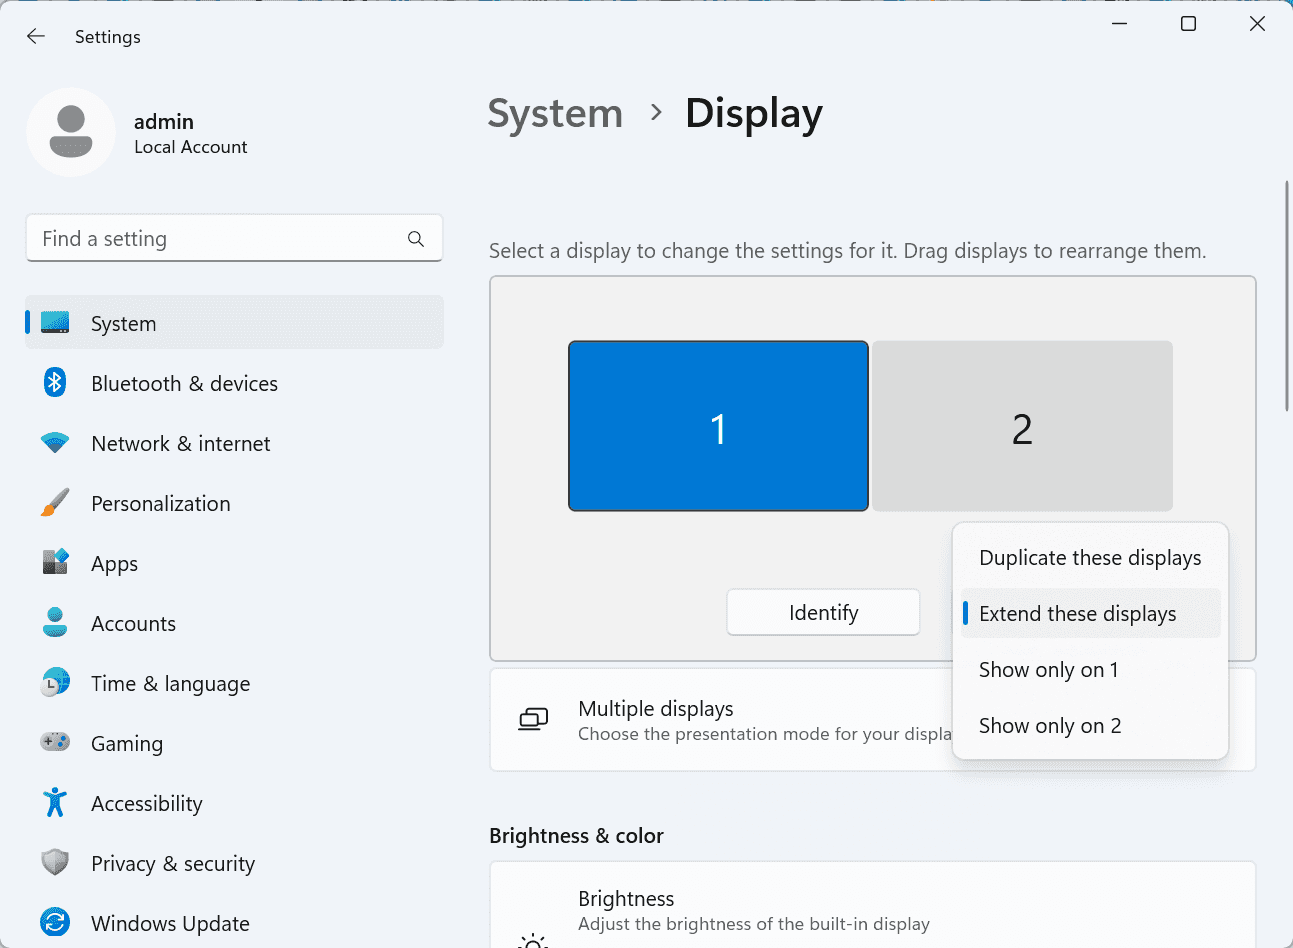
拡張後、iPadがコンピュータ画面の内容をミラーリングしているだけの場合はWindowsシステム設定 >>ディスプレイ設定に行き、「これらのディスプレイを拡張」を選択してください。2つの画面をドラッグして画面の位置を変更することもできます。
この記事では、DeskInリモートデスクトップソフトウェアを使用してiPadをMacおよびWindowsコンピューターの「セカンドスクリーン」にする方法を紹介します。これは、同時に複数のタスクを処理し、生産性を向上させたい方に特に有用です。MacBook、iPad、Androidタブレット、およびWindows PCで動作する画面拡張ツールを探している場合、DeskInリモートデスクトップは最適なソリューションです。DeskInをダウンロードして、ぜひお試しください!

Top 6 RustDesk Alternative Tools for Faster, Easier Remote Access
Remote access should feel like flipping a light switch, not decoding a control panel. Yet many users exploring RustDesk eventually run into friction: connection IDs, server setup, or occasional lag. While RustDesk is powerful, it’s not always the easiest or smoothest option, especially for non-technical users.
That’s why more people are actively searching for a reliable RustDesk alternative that combines performance, simplicity, and flexibility. Whether you want a plug-and-play solution or something more advanced, this guide will help you find the best fit.
RustDesk stands out as a privacy-friendly, self-hosted remote desktop tool. However, real-world usage reveals a few common challenges:
Complicated setup for the RustDesk self-hosted environments
Manual connection steps requiring IDs and passwords
Occasional latency or unstable connections
Limited user-friendly features out of the box
For many users, especially those helping family or managing multiple devices, simplicity matters just as much as control.
When evaluating a RustDesk alternative, focus on these key factors:
Ease of use: Quick setup without technical overhead
Performance: Smooth, low-latency remote sessions
Compatibility: Support for Windows, macOS, Linux, and mobile
Security: Strong encryption and access controls
Flexibility: Options ranging from cloud-based to open source
The ideal tool strikes a balance between power and convenience, something many modern solutions now deliver better than traditional setups.
Here’s a quick breakdown of the top tools and where they shine:
DeskIn – Best all-in-one RustDesk alternative for performance and ease of use
AnyDesk – Best lightweight tool for fast connections
TeamViewer – Best for enterprise-grade remote support
MeshCentral – Best open-source and self-hosted solution
DWService – Best free browser-based tool
Chrome Remote Desktop – Best simple, no-frills option
Ultra-low latency with smooth high-frame-rate streaming
No complex setup or server deployment required
Cross-platform including Rustdesk alternative for Android
Secure with encryption and device control features
Built-in file transfer and multi-device management
Smaller awareness than legacy competitors
Best for: Users who want a powerful yet simple remote desktop solution
DeskIn removes the friction that often comes with remote access tools. Instead of relying on IDs or manual configurations, it offers a streamlined connection experience that works right out of the box. This makes it especially valuable for users supporting non-technical family members or managing multiple remote devices.
Performance is where DeskIn truly distinguishes itself. Compared to RustDesk, which can sometimes struggle with latency, DeskIn delivers consistently smooth sessions with minimal lag. It also eliminates the need for self-hosting, making it a strong free RustDesk alternative option for users who want powerful features without the complexity.
For those exploring options beyond the RustDesk alternative GitHub projects, DeskIn provides a polished, ready-to-use experience that balances simplicity with professional-grade performance.
Lightweight and fast installation
Good performance on low bandwidth
Cross-platform support
Easy-to-use interface
Performance may drop during long sessions
File transfer can be inconsistent
Best for: Users needing quick and simple remote access
AnyDesk is often considered a natural step up from RustDesk for users who want something easier to deploy. It offers a lightweight application that connects quickly and performs well under normal conditions. This makes it suitable for quick troubleshooting or occasional remote access.
However, performance consistency can be an issue. Users frequently report lag or instability during extended sessions or when handling more demanding tasks. While AnyDesk is a solid option for basic needs, it may not fully satisfy users looking for a more robust, all-in-one solution.
👀 You may also be interested in: |
|---|
Enterprise-grade security with encryption and 2FA
Stable performance across global networks
Rich features like file transfer and session recording
Broad device compatibility
Expensive for commercial use
Free version has limitations
Heavier resource usage on some systems
Best for: Businesses and IT teams managing multiple endpoints
TeamViewer has long been a dominant player in the remote desktop space, offering a comprehensive suite of features designed for enterprise environments. It excels in reliability and global connectivity, making it a popular choice for IT support teams.
That said, its pricing model is a major drawback for many users. Frequent users may quickly encounter licensing restrictions, and costs can escalate for businesses. Additionally, its heavier footprint can impact performance on lower-end devices. DeskIn offers a more modern alternative by delivering similar performance and essential features without the same cost barriers. For users who want enterprise-level capabilities with better efficiency, it presents a compelling option.
👀 You may also be interested in: |
|---|
Fully RustDesk alternative open source solution
Web-based management dashboard
Supports multi-device environments
Strong customization and control
Complex setup and maintenance
Requires technical expertise
Best for: Advanced users needing a Rustdesk alternative self-hosted
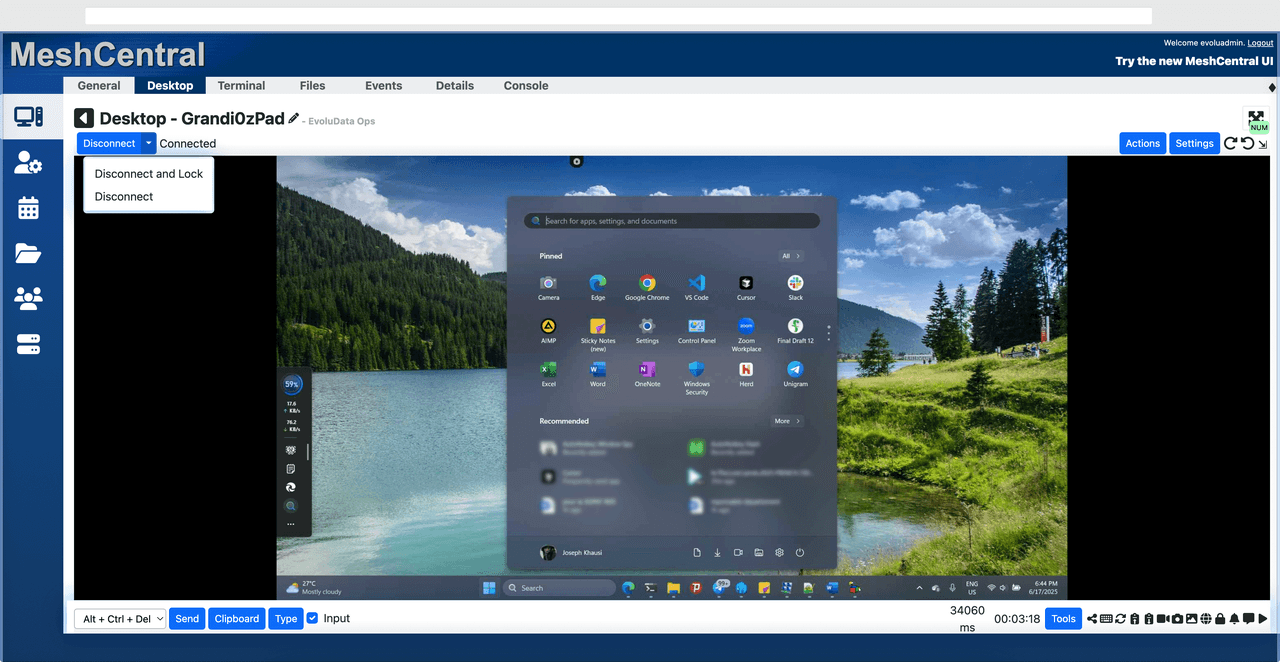
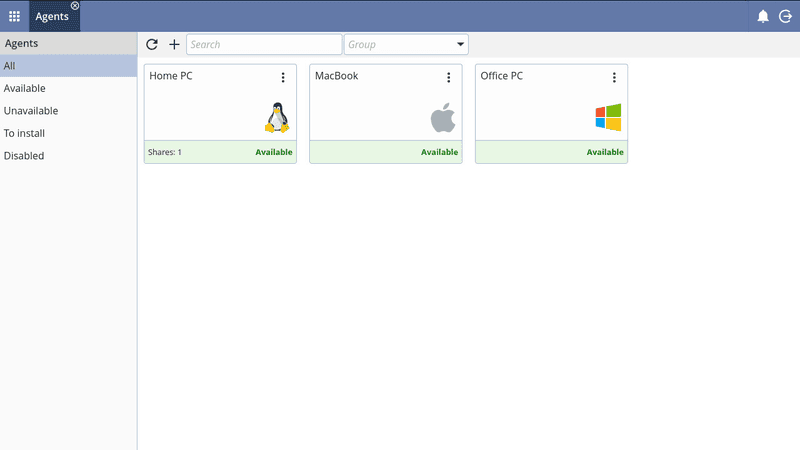
MeshCentral is a powerful open-source platform designed for users who want full control over their remote access infrastructure. It supports multiple devices and provides a centralized dashboard for management, making it attractive for IT professionals.
However, this flexibility comes with complexity. Setting up and maintaining a MeshCentral server requires technical knowledge, which can be a barrier for many users. Compared to this, DeskIn offers a much simpler deployment process while still delivering strong performance and security. For users who prioritize ease of use over full control, modern solutions like DeskIn provide a more accessible alternative.
Completely free
Browser-based access
Open-source foundation
Simple setup
Limited performance
Basic feature set
Best for: Users looking for a simple, free RustDesk alternative
DWService offers a browser-based approach to remote access with no heavy installation, making it convenient for quick connections in restricted environments. It supports both desktop access and file management across major platforms.
However, performance often feels sluggish, especially on demanding tasks, and features remain basic; lacking session recording, smooth multi-monitor support, or advanced security controls. While suitable for occasional personal use, it falls short for professional or high-performance scenarios.
Free and easy to use
Browser-based setup
Cross-platform compatibility
Very limited features
No advanced management or collaboration tools
Best for: Casual users needing basic remote access

Chrome Remote Desktop is one of the simplest remote access tools available. It’s easy to set up and works across devices, making it a convenient choice for occasional use.
However, it lacks many essential features such as file transfer, session management, and advanced security controls. For users with more demanding needs, it quickly becomes insufficient. Compared to Chrome Remote Desktop, DeskIn provides a much more complete experience without sacrificing ease of use, making it a better long-term solution.
👀 You may also be interested in: |
|---|
RustDesk is powerful but can be difficult to set up and manage, especially with self-hosting. Many users prefer tools that offer similar performance without technical complexity. DeskIn simplifies remote access while maintaining strong performance and security.
Several tools qualify as a free RustDesk alternative, including DWService and Chrome Remote Desktop. However, DeskIn stands out by offering better performance and usability even in its free version.
Yes, tools like MeshCentral and DWService are considered RustDesk alternative open source options. They provide flexibility and control but often require technical expertise to set up and maintain.
Beginners should choose tools with a simple setup and intuitive interfaces. DeskIn is an excellent option because it removes the need for manual configuration while still delivering advanced features.
RustDesk is a powerful starting point, but it’s not always the easiest or most efficient tool for everyday use. From setup complexity to performance limitations, many users eventually look for a better RustDesk alternative.
Among all the options, DeskIn stands out as the most balanced solution. It combines speed, simplicity, and cross-platform support into one seamless experience. If you’re ready to move beyond technical friction and enjoy truly smooth remote access, DeskIn is a choice that simply works.

Top 7 RDP Alternative Tools for Faster, Safer Remote Access
Remote desktop access used to feel like a solid bridge. Now, for many users, traditional RDP feels more like a creaky rope ladder. With performance issues, security concerns, and limited cross-platform support, it's no surprise that more people are actively searching for a better RDP alternative that actually keeps up with modern workflows.
If you're managing multiple servers, working across devices, or just tired of unstable connections, this guide will walk you through the best tools worth switching to.
RDP (Remote Desktop Protocol) is a proprietary protocol developed by Microsoft that allows users to connect to another computer over a network. It's widely used for accessing Windows servers, virtual machines, and remote workstations.
While powerful in controlled environments, RDP is often tied to Windows systems and requires configuration like port forwarding or VPNs. Compared to newer tools, it can feel rigid and outdated.
You may also be interested in: |
|---|
RDP still works, but it comes with trade-offs that many users find frustrating:
Security risks if not properly configured
Complex setup for remote or external access
Limited cross-platform compatibility
Performance issues over unstable networks
Many IT teams are now actively replacing it, especially when looking for a Windows RDP client alternative or something that works seamlessly across macOS, Linux, and mobile devices. That's where modern Remote Desktop alternatives shine.
Choosing the right tool is like picking the right vehicle. Some are built for speed, others for heavy-duty enterprise work. Here's a quick snapshot:
DeskIn – Best all-in-one RDP alternative for performance and cross-platform use
TeamViewer – Best for enterprise remote support
AnyDesk – Best lightweight option for fast connections
RustDesk – Best Windows RDP alternative open-source solution
Remmina – Best RDP alternative for Linux users
Chrome Remote Desktop – Best simple browser-based tool
Splashtop – Best for high-performance business environments
Ultra-low latency with smooth high-frame-rate streaming
Works across Windows, macOS, Linux, iOS, and Android
Strong encryption and secure access controls
Built-in file transfer and multi-session support
Newer compared to legacy brands
Best for: Users who want a powerful, flexible RDP alternative

DeskIn feels less like remote access and more like teleportation for your desktop. Whether you're managing servers, supporting clients, or working remotely, it delivers consistently smooth performance without the usual lag spikes seen in traditional RDP setups.
Unlike many tools, DeskIn eliminates the need for complex configurations. You don't need to wrestle with firewalls or VPNs just to connect. It also works seamlessly across platforms, making it a strong alternative to Microsoft Remote Desktop for Mac and mobile users alike.
For teams juggling multiple systems, DeskIn provides a unified experience that replaces fragmented workflows. It's also a strong free RDP alternative option with premium-level capabilities, making it ideal for both individuals and businesses.
Enterprise-grade security and compliance
Extensive feature set including collaboration tools
Cross-platform compatibility
Reliable global performance
Expensive licensing
Can be overkill for individuals
Best for: Enterprises needing secure and scalable remote access
TeamViewer is a comprehensive remote desktop platform widely adopted by IT teams, support professionals, and enterprises. Its feature set extends far beyond simple screen sharing—it includes robust device management, remote printing, file transfer, session recording, and even augmented reality support for field service. TeamViewer's security architecture relies on AES‑256 encryption, two‑factor authentication, and whitelisting, making it suitable for organizations with strict compliance requirements. It runs on virtually every operating system and mobile platform.
The main trade‑off is its pricing: licenses are subscription‑based and can become expensive for small teams or individual users, especially as TeamViewer aggressively flags personal use as commercial, leading to session restrictions.
Fast and responsive
Lightweight installation
Works well on low bandwidth
Easy to use
File transfer can be inconsistent
Lag during longer sessions
Best for: Users needing quick, simple remote access
AnyDesk is a lightweight remote desktop application prized for its speed and efficiency, often recommended as a fast alternative to Microsoft's native Remote Desktop on Windows 10 and Android. It uses a proprietary video codec, DeskRT, to achieve low latency even on limited bandwidth, making it ideal for quick support sessions and accessing devices over mobile networks. The interface is clean and minimalist, with features like address book management, file transfer, and session recording available.
However, users frequently report instability during extended sessions; performance can degrade over time, and file transfers may slow considerably compared to competitors. While its free version is generous for personal use, professional users often find the performance ceiling limits its suitability for continuous, demanding workloads. DeskIn, by contrast, maintains consistent performance even during extended use, making it better suited for professional workloads.
You may also be interested in: |
|---|
Free and open-source
Self-hosting for full control
Strong privacy protection
Active community
Technical setup required
Limited user-friendly features
Best for: Developers and privacy-focused users
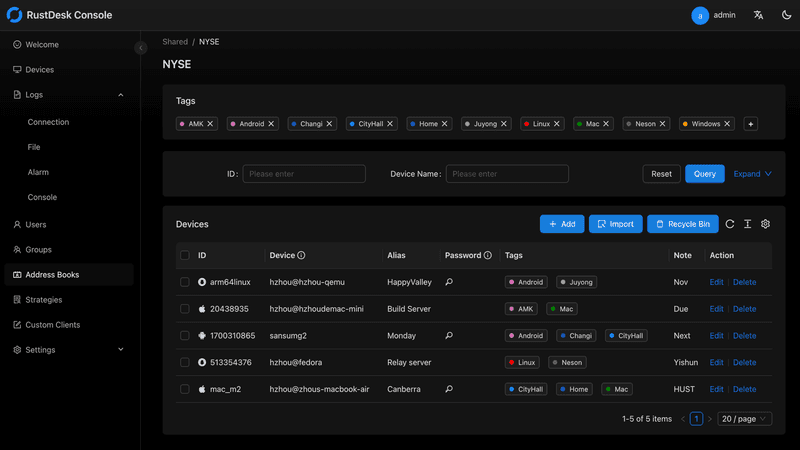
RustDesk has emerged as a leading open‑source remote desktop alternative, appealing to developers and organizations that require full control over their data. It allows users to self‑host the relay and rendezvous servers, meaning no third‑party infrastructure handles connection metadata. Built with Rust, it offers a modern codebase with cross‑platform clients (Windows, macOS, Linux, Android, iOS) and supports essential features such as file transfer, TCP tunneling, and customizable address books.
The major barrier is its complexity: deploying a self‑hosted environment requires technical expertise to configure firewalls, SSL certificates, and ongoing server maintenance. For those using the public relay, performance can be inconsistent depending on server load and geographic proximity.
You may also be interested in: Top RustDesk Alternatives for Better Performance, Security & Ease of Use |
|---|
Open-source and free
Supports multiple protocols including RDP and VNC
Lightweight and flexible
Native to Linux environments
Limited features compared to modern tools
UI can feel outdated
Best for: Linux users looking for a traditional RDP alternative Linux
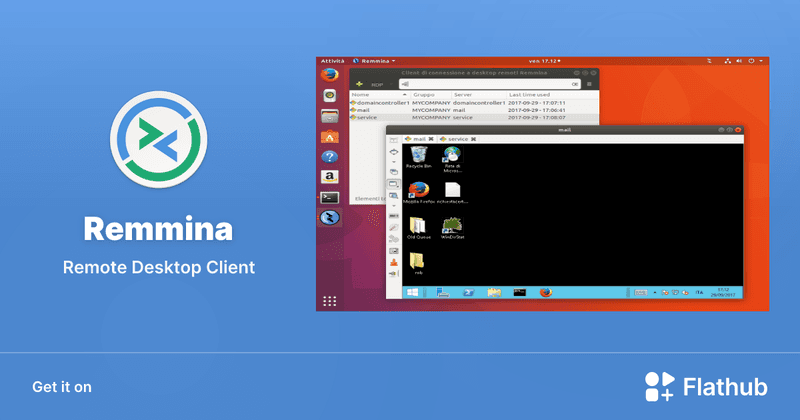
Remmina is a beloved open‑source remote desktop client for Linux, supporting multiple protocols (RDP, VNC, SSH, SPICE, and others) in a single unified interface. It is frequently chosen by system administrators and Linux enthusiasts who need a flexible, lightweight tool to manage diverse environments. Remmina offers tabbed sessions, quick‑connect profiles, and a plugin system that extends its capabilities.
However, its strength - protocol flexibility, also highlights its limitations. As a frontend client rather than a full remote access solution, it lacks features like unattended access, centralized account management, or robust session recording out of the box. Performance can vary by protocol, and the user experience lags behind more polished commercial tools, particularly for users seeking a plug‑and‑play setup.
Free and easy to use
Browser-based setup
Cross-platform access
Very limited features
No advanced management tools
Best for: Casual users needing basic remote access
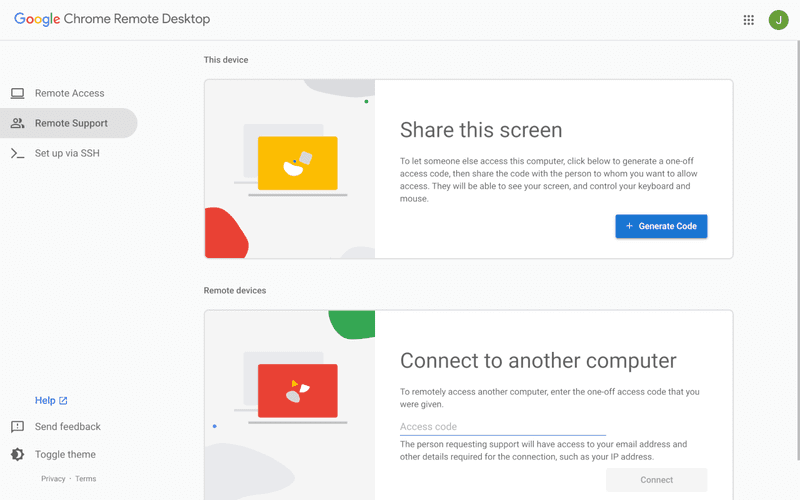
Chrome Remote Desktop is a free, browser‑based remote access tool from Google that requires nothing more than a Chrome browser and a Google account. It excels in simplicity: installation takes seconds, and connections are mediated through Google's infrastructure, eliminating complex firewall configurations. For occasional use—such as helping a family member or quickly accessing a home computer—it works reliably across Windows, macOS, Linux, and even ChromeOS.
The trade‑off is its minimal feature set. There is no native file transfer, multi‑session management, remote printing, or granular permission controls. Collaboration tools are absent, and the reliance on a Google account for authentication can be a limitation in professional environments. It remains a convenient entry‑level tool but struggles to meet the needs of power users or IT teams.
You may also be interested in: |
|---|
High-quality streaming performance
Strong security features
Good for business environments
Reliable connections
Subscription-based pricing
Limited free version
Best for: Businesses needing performance-focused remote access
Splashtop is a high‑performance remote desktop solution frequently adopted by creative professionals, educational institutions, and enterprises that prioritize fluid interaction. It delivers low‑latency streaming with support for high‑frame‑rate displays, making it suitable for video editing, CAD work, and other graphics‑intensive tasks. Splashtop offers a range of editions—from Business Access to SOS for on‑demand support—all of which include robust security (AES‑256, device authentication) and features like file transfer, remote printing, and multi‑monitor navigation. Its performance over local networks and the internet is consistently praised.
The primary drawback is cost: while competitive, the subscription model can accumulate quickly for users needing access to multiple devices or advanced features, especially when compared to similarly capable tools with more flexible pricing structures. DeskIn offers similar performance benefits with a more flexible pricing structure, making it a compelling alternative.
You may also be interested in: |
|---|
RDP can be difficult to configure, less secure if exposed, and limited outside Windows environments. Modern tools like DeskIn provide better performance, security, and ease of use.
The best RDP alternative depends on your needs, but DeskIn stands out for its balance of speed, security, and cross-platform compatibility.
Yes, several tools qualify as an RDP alternative free, including RustDesk and Chrome Remote Desktop. DeskIn also offers a free tier with advanced capabilities.
Microsoft is evolving its remote desktop ecosystem, but traditional RDP isn't disappearing overnight. However, many users are already transitioning to more modern solutions like DeskIn for better reliability and flexibility.
RDP has served its purpose, but the digital world has outgrown its limitations. Whether you need better performance, stronger security, or true cross-platform access, switching to a modern RDP alternative is no longer optional, it's inevitable.
Among all the options, DeskIn stands out as a future-ready solution. It combines speed, simplicity, and power into one seamless experience, helping you leave behind the friction of traditional remote desktop tools and step into something far more efficient.
WindowsとMacコンピュータをiPadでセカンドモニターに!
マルチタスクをこなすにとっ社員にとって、セカンドモニターを使用することは生産性を大幅に向上させることができます。ホームオフィスの方やデュアルスクリーンを持っていない学生の方へ。使用していないiPadを簡単にコンピュータのセカンドモニターに変える方法をご紹介します。
1. 画面スペースを増やして同時により多く表示できます。マルチタスクユーザーは、ウィンドウの切り替えを避けることで時間を節約できます。
2. 各画面が独立して動作するため、作業スペースがより整理されます。
ビデオ編集では、一つの画面を編集に、もう一つの画面を素材置き場に。論文を書く場合、片方の画面で執筆、もう片方で情報を検索などです。
3. iPadの画面サイズは十分大きく、表示品質も非常に良好です。デザイン作業のニーズがあるユーザーやMacBookユーザーにとって、追加のスクリーンを購入するよりもコスト効率が高く、色差の問題もありません。
4. 多くの人が家にiPadを持っています。この手持ちのデバイスをデュアルスクリーンとして使用することで、別のスクリーンを購入するコストや置くスペースを節約できます。
Appleのネイティブ機能であるApple Sidecarを使用すると、iPadをMacBookやiMacの外部ディスプレイとして使用できます。簡単な設定を行うだけで、iPadとコンピュータ間のシームレスな接続が可能です。
注意:Apple Sidecarを使用するには、2台のデバイスが同じApple IDにログインしているか、同じネットワークに接続していることが必要です。両方のデバイスにBluetooth、Wi-Fiがオンになっており、距離は10メートル以内である必要があります。
Macシステム設定を開き、サイドバーの「ディスプレイ」クリック >> 右側の「+」ポップアップメニューをクリックし、iPadを選択します。
iPadを選択し、使用設定を「拡張ディスプレイ」に変更します。Macの上部ツールバーのAirplay設定を確認し、iPadを「別のディスプレイとして使用」に設定します。
設定が完了すると、iPadがMacのセカンドディスプレイとなります。MacからiPadにウィンドウをスムーズにドラッグすることができます。また、iPadのサイドバーを使用したり、システムディスプレイ設定でサイドバーの位置を変更したりできます。
MacBookスクリーン(左)とiPadスクリーン(右)
Apple Sidecarは、2016年以降に発売されたMacとiPadOS13以上のみをサポートします。古いAppleデバイスやWindowsデバイスを使用している場合でも、DeskInリモートソフトウェアを利用して画面拡張を行うことができます。iPadをMacやWindowsのセカンドディスプレイとして使用でき、その滑らかさはSidecarに劣りません。
コンピューターとiPadにDeskInをダウンロードし、無料アカウントを登録して別々にログインします。
注意: 新しいデバイスに初めてログインする際には、アカウントのセキュリティを保護するためにメール認証を完了する必要があります。
Windows/MacコンピュータでDeskInアプリを開き、「スクリーン管理」タブに行き、「画面を拡張する」をクリックします。
iPadを選択し、「拡張を開始」をクリックします。接続が完了すると、iPadはWindows/Macコンピューターのセカンドディスプレイとなり、2つのスクリーンを1つのもののようにウィンドウを移動できます。
コンピュータスクリーン(左)とiPadスクリーン(右)
拡張後、iPadがコンピュータ画面の内容をミラーリングしているだけの場合はWindowsシステム設定 >>ディスプレイ設定に行き、「これらのディスプレイを拡張」を選択してください。2つの画面をドラッグして画面の位置を変更することもできます。
この記事では、DeskInリモートデスクトップソフトウェアを使用してiPadをMacおよびWindowsコンピューターの「セカンドスクリーン」にする方法を紹介します。これは、同時に複数のタスクを処理し、生産性を向上させたい方に特に有用です。MacBook、iPad、Androidタブレット、およびWindows PCで動作する画面拡張ツールを探している場合、DeskInリモートデスクトップは最適なソリューションです。DeskInをダウンロードして、ぜひお試しください!
Top 6 RustDesk Alternative Tools for Faster, Easier Remote Access
Remote access should feel like flipping a light switch, not decoding a control panel. Yet many users exploring RustDesk eventually run into friction: connection IDs, server setup, or occasional lag. While RustDesk is powerful, it’s not always the easiest or smoothest option, especially for non-technical users.
That’s why more people are actively searching for a reliable RustDesk alternative that combines performance, simplicity, and flexibility. Whether you want a plug-and-play solution or something more advanced, this guide will help you find the best fit.
RustDesk stands out as a privacy-friendly, self-hosted remote desktop tool. However, real-world usage reveals a few common challenges:
Complicated setup for the RustDesk self-hosted environments
Manual connection steps requiring IDs and passwords
Occasional latency or unstable connections
Limited user-friendly features out of the box
For many users, especially those helping family or managing multiple devices, simplicity matters just as much as control.
When evaluating a RustDesk alternative, focus on these key factors:
Ease of use: Quick setup without technical overhead
Performance: Smooth, low-latency remote sessions
Compatibility: Support for Windows, macOS, Linux, and mobile
Security: Strong encryption and access controls
Flexibility: Options ranging from cloud-based to open source
The ideal tool strikes a balance between power and convenience, something many modern solutions now deliver better than traditional setups.
Here’s a quick breakdown of the top tools and where they shine:
DeskIn – Best all-in-one RustDesk alternative for performance and ease of use
AnyDesk – Best lightweight tool for fast connections
TeamViewer – Best for enterprise-grade remote support
MeshCentral – Best open-source and self-hosted solution
DWService – Best free browser-based tool
Chrome Remote Desktop – Best simple, no-frills option
Ultra-low latency with smooth high-frame-rate streaming
No complex setup or server deployment required
Cross-platform including Rustdesk alternative for Android
Secure with encryption and device control features
Built-in file transfer and multi-device management
Smaller awareness than legacy competitors
Best for: Users who want a powerful yet simple remote desktop solution
DeskIn removes the friction that often comes with remote access tools. Instead of relying on IDs or manual configurations, it offers a streamlined connection experience that works right out of the box. This makes it especially valuable for users supporting non-technical family members or managing multiple remote devices.
Performance is where DeskIn truly distinguishes itself. Compared to RustDesk, which can sometimes struggle with latency, DeskIn delivers consistently smooth sessions with minimal lag. It also eliminates the need for self-hosting, making it a strong free RustDesk alternative option for users who want powerful features without the complexity.
For those exploring options beyond the RustDesk alternative GitHub projects, DeskIn provides a polished, ready-to-use experience that balances simplicity with professional-grade performance.
Lightweight and fast installation
Good performance on low bandwidth
Cross-platform support
Easy-to-use interface
Performance may drop during long sessions
File transfer can be inconsistent
Best for: Users needing quick and simple remote access
AnyDesk is often considered a natural step up from RustDesk for users who want something easier to deploy. It offers a lightweight application that connects quickly and performs well under normal conditions. This makes it suitable for quick troubleshooting or occasional remote access.
However, performance consistency can be an issue. Users frequently report lag or instability during extended sessions or when handling more demanding tasks. While AnyDesk is a solid option for basic needs, it may not fully satisfy users looking for a more robust, all-in-one solution.
👀 You may also be interested in: |
|---|
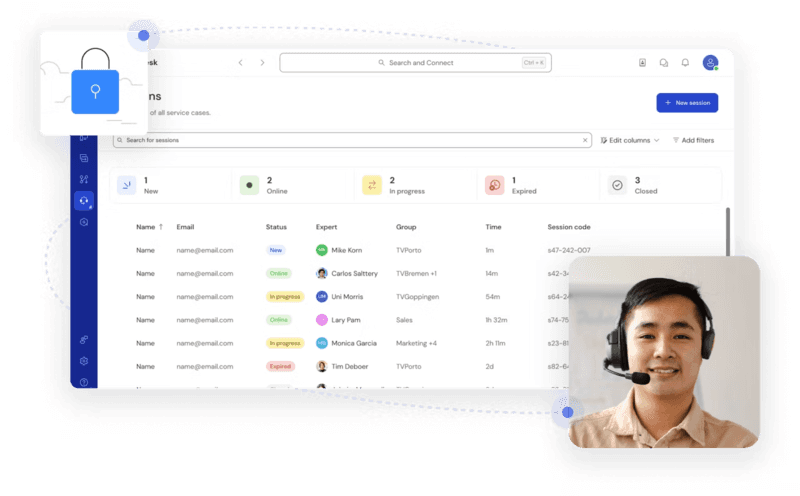
Enterprise-grade security with encryption and 2FA
Stable performance across global networks
Rich features like file transfer and session recording
Broad device compatibility
Expensive for commercial use
Free version has limitations
Heavier resource usage on some systems
Best for: Businesses and IT teams managing multiple endpoints
TeamViewer has long been a dominant player in the remote desktop space, offering a comprehensive suite of features designed for enterprise environments. It excels in reliability and global connectivity, making it a popular choice for IT support teams.
That said, its pricing model is a major drawback for many users. Frequent users may quickly encounter licensing restrictions, and costs can escalate for businesses. Additionally, its heavier footprint can impact performance on lower-end devices. DeskIn offers a more modern alternative by delivering similar performance and essential features without the same cost barriers. For users who want enterprise-level capabilities with better efficiency, it presents a compelling option.
👀 You may also be interested in: |
|---|
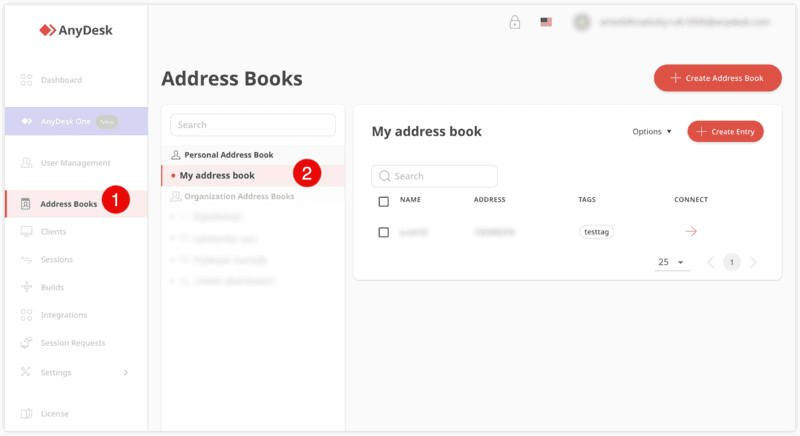
Fully RustDesk alternative open source solution
Web-based management dashboard
Supports multi-device environments
Strong customization and control
Complex setup and maintenance
Requires technical expertise
Best for: Advanced users needing a Rustdesk alternative self-hosted
MeshCentral is a powerful open-source platform designed for users who want full control over their remote access infrastructure. It supports multiple devices and provides a centralized dashboard for management, making it attractive for IT professionals.
However, this flexibility comes with complexity. Setting up and maintaining a MeshCentral server requires technical knowledge, which can be a barrier for many users. Compared to this, DeskIn offers a much simpler deployment process while still delivering strong performance and security. For users who prioritize ease of use over full control, modern solutions like DeskIn provide a more accessible alternative.
Completely free
Browser-based access
Open-source foundation
Simple setup
Limited performance
Basic feature set
Best for: Users looking for a simple, free RustDesk alternative
DWService offers a browser-based approach to remote access with no heavy installation, making it convenient for quick connections in restricted environments. It supports both desktop access and file management across major platforms.
However, performance often feels sluggish, especially on demanding tasks, and features remain basic; lacking session recording, smooth multi-monitor support, or advanced security controls. While suitable for occasional personal use, it falls short for professional or high-performance scenarios.
Free and easy to use
Browser-based setup
Cross-platform compatibility
Very limited features
No advanced management or collaboration tools
Best for: Casual users needing basic remote access
Chrome Remote Desktop is one of the simplest remote access tools available. It’s easy to set up and works across devices, making it a convenient choice for occasional use.
However, it lacks many essential features such as file transfer, session management, and advanced security controls. For users with more demanding needs, it quickly becomes insufficient. Compared to Chrome Remote Desktop, DeskIn provides a much more complete experience without sacrificing ease of use, making it a better long-term solution.
👀 You may also be interested in: |
|---|
RustDesk is powerful but can be difficult to set up and manage, especially with self-hosting. Many users prefer tools that offer similar performance without technical complexity. DeskIn simplifies remote access while maintaining strong performance and security.
Several tools qualify as a free RustDesk alternative, including DWService and Chrome Remote Desktop. However, DeskIn stands out by offering better performance and usability even in its free version.
Yes, tools like MeshCentral and DWService are considered RustDesk alternative open source options. They provide flexibility and control but often require technical expertise to set up and maintain.
Beginners should choose tools with a simple setup and intuitive interfaces. DeskIn is an excellent option because it removes the need for manual configuration while still delivering advanced features.
RustDesk is a powerful starting point, but it’s not always the easiest or most efficient tool for everyday use. From setup complexity to performance limitations, many users eventually look for a better RustDesk alternative.
Among all the options, DeskIn stands out as the most balanced solution. It combines speed, simplicity, and cross-platform support into one seamless experience. If you’re ready to move beyond technical friction and enjoy truly smooth remote access, DeskIn is a choice that simply works.
連絡先
メール: support@deskin.io
オフィスの住所:
991D Alexandra Road #02-17
シンガポール 119972
著作権 © 2026 Zuler Technology PTE. LTD. 無断複写・転載を禁じます。
お問い合わせ
Eメール: support@deskin.io
本社: 991D Alexandra Road #02-17, シンガポール 119972
著作権 © 2026 Zuler Technology PTE. LTD. 無断複写・転載を禁じます。
連絡先
support@deskin.io
991D Alexandra Road #02-17
シンガポール 119972
著作権 © 2026 Zuler Technology PTE. LTD. 無断複写・転載を禁じます。

