How Walmart Enabled Remote Work Across 27 Countries with DeskIn’s Enterprise Solution

Benjamin Lee

/

10

/

Updated

Jun 24, 2025

Walmart, a well-known global retail chain, is currently the largest company in the world in terms of revenue. Operating over 10,000 shopping malls across 27 countries, Walmart carries 69 brands, and employs more than 2.2 million employees worldwide. More than 200 million customers visit Walmart every week.

Walmart has implemented a new concept of “one-stop” shopping

In recent years, Walmart has implemented a new concept of “one-stop” shopping, which allows consumers to purchase all the goods they need in the shortest possible time and at the fastest possible speed. This fast and convenient way of shopping online has attracted large-scale users and pushed the company to new heights.

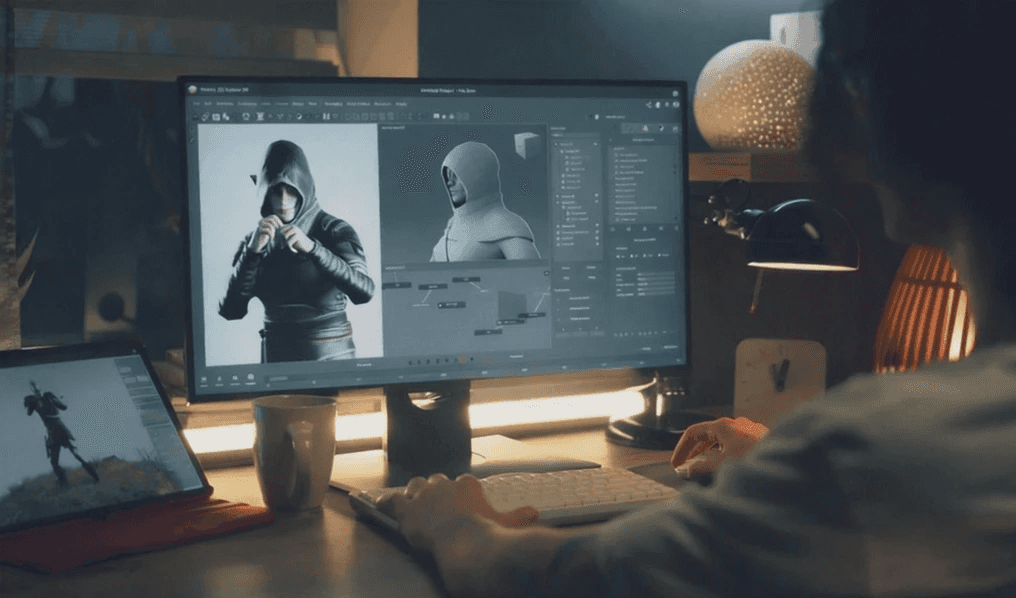
As a mega company operating across retail, ecommerce, logistics, and maintenance, Walmart faced a challenge during the pandemic: its employees were working remotely across various regions and could not reach the onsite offices in time to support project progress. To address this, the team implemented DeskIn Enterprise Edition, enabling efficient offsite management. Employees could now work remotely with stable, smooth, and high definition access, editing documents, processing data, printing orders, and managing store equipment—all essential tasks for on time delivery.

Walmart as a mega company operating across retail, ecommerce, logistics and maintenance

Obstacles to Walmart's Cross-Regional Work 

The Walmart team, with its extensive operations and widely dispersed workforce across retail, logistics, administration, and operations, is equipped with numerous high-performance computers at regional offices. However, during frequent pandemic-related disruptions, many employees do not have access to their previous work data—such as order information—on their personal home computers, which were often underpowered and unable to run professional applications. In addition, the decentralized nature of working from home became a managerial obstacle.

To address these unique remote work and management challenges, Walmart ultimately chose DeskIn Enterprise Edition. It delivered a secure, efficient, and low-barrier solution for employees working from home, significantly improving the speed and quality of their remote work.

DeskIn enterprise enable enterprise-grade security

The Story of Working with DeskIn 

At first, the Walmart team tried several remote products, but found that using traditional VPN+RDP or other remote software didn't effectively solve the stability and security problems of simultaneous remote work for multiple people:

  • -VPN+RDP: Bandwidth is severely limited, almost impossible to operate during peak hours.

  • Other remote software: In addition to frequent lagging and security concerns, unclear interfaces and complex operations greatly increased communication costs and impacted the user experience. 

Initially, the Walmart team tried multiple remote solutions but found that traditional VPN + RDP and other remote tools failed to reliably and securely support multiple users working remotely:

  • VPN + RDP: Severely bandwidth limited—virtually unusable during peak hours.

  • Other remote software: Suffered frequent lag, security concerns, unclear interfaces, and complex operation, significantly increasing communication overhead and degrading user experience.

After trying out the DeskIn Enterprise Edition and experiencing truly smooth control firsthand, Walmart immediately equipped its functional teams with the DeskIn remote work suite. During the pandemic, this precise remote access solution enabled efficient management of remote work and ensured project progress stayed on schedule. Post-pandemic, the company has continued using DeskIn for hybrid work environments and business trips—quickly resolving urgent tasks and maintaining business continuity.

DeskIn Enterprise has a manageable file transfer direction

Detailed Connection Log Records 

DeskIn Enterprise Edition’s connection log feature captures detailed information—such as user account, device, start time, and connection duration. Administrators can review these logs to gain a clear, visual understanding of each employee’s remote work activities.

On one hand, the log function provides departments with valuable insights for performance analysis, helping boost overall efficiency. On the other hand, the operational records can be audited and traced, fulfilling corporate security and compliance requirements. checked and traced back to meet the requirements of corporate security compliance.

Unified Console Management

The Enterprise Edition’s product console features a clear and precise internal design logic that helps businesses standardize management practices and maximize efficiency. Administrators can perform all-roles, devices, and permissions using one central console.

  • User–Device 1:1 Binding: With a single command, installation and binding are completed simultaneously. Once the controlled-side installation finishes, the device is automatically added to the enterprise device list, making corporate device management more orderly.

batch deployment
  • Fine-grained role and permission management: Administrators are allowed to restrict employee operations as needed—such as disabling file transfer or clipboard functionality—thereby safeguarding corporate assets and providing secure, compliant remote support to clients.

  • Dynamic unified account management: When an employee leaves, their account is immediately deactivated—greatly reducing the risk of data leakage.

Easy deployment and unified management

With outstanding, leading product technology—combined with the versatile features and robust management backend described above—the Walmart team found DeskIn Enterprise Edition to be truly reassuring during their deployment. Our professional, attentive service has also laid a solid foundation for future collaborations between both parties.

For enterprise-level remote control, choose DeskIn!

Click here to download DeskIn Enterprise


Walmart, a well-known global retail chain, is currently the largest company in the world in terms of revenue. Operating over 10,000 shopping malls across 27 countries, Walmart carries 69 brands, and employs more than 2.2 million employees worldwide. More than 200 million customers visit Walmart every week.

Walmart has implemented a new concept of “one-stop” shopping

In recent years, Walmart has implemented a new concept of “one-stop” shopping, which allows consumers to purchase all the goods they need in the shortest possible time and at the fastest possible speed. This fast and convenient way of shopping online has attracted large-scale users and pushed the company to new heights.

As a mega company operating across retail, ecommerce, logistics, and maintenance, Walmart faced a challenge during the pandemic: its employees were working remotely across various regions and could not reach the onsite offices in time to support project progress. To address this, the team implemented DeskIn Enterprise Edition, enabling efficient offsite management. Employees could now work remotely with stable, smooth, and high definition access, editing documents, processing data, printing orders, and managing store equipment—all essential tasks for on time delivery.

Walmart as a mega company operating across retail, ecommerce, logistics and maintenance

Obstacles to Walmart's Cross-Regional Work 

The Walmart team, with its extensive operations and widely dispersed workforce across retail, logistics, administration, and operations, is equipped with numerous high-performance computers at regional offices. However, during frequent pandemic-related disruptions, many employees do not have access to their previous work data—such as order information—on their personal home computers, which were often underpowered and unable to run professional applications. In addition, the decentralized nature of working from home became a managerial obstacle.

To address these unique remote work and management challenges, Walmart ultimately chose DeskIn Enterprise Edition. It delivered a secure, efficient, and low-barrier solution for employees working from home, significantly improving the speed and quality of their remote work.

DeskIn enterprise enable enterprise-grade security

The Story of Working with DeskIn 

At first, the Walmart team tried several remote products, but found that using traditional VPN+RDP or other remote software didn't effectively solve the stability and security problems of simultaneous remote work for multiple people:

  • -VPN+RDP: Bandwidth is severely limited, almost impossible to operate during peak hours.

  • Other remote software: In addition to frequent lagging and security concerns, unclear interfaces and complex operations greatly increased communication costs and impacted the user experience. 

Initially, the Walmart team tried multiple remote solutions but found that traditional VPN + RDP and other remote tools failed to reliably and securely support multiple users working remotely:

  • VPN + RDP: Severely bandwidth limited—virtually unusable during peak hours.

  • Other remote software: Suffered frequent lag, security concerns, unclear interfaces, and complex operation, significantly increasing communication overhead and degrading user experience.

After trying out the DeskIn Enterprise Edition and experiencing truly smooth control firsthand, Walmart immediately equipped its functional teams with the DeskIn remote work suite. During the pandemic, this precise remote access solution enabled efficient management of remote work and ensured project progress stayed on schedule. Post-pandemic, the company has continued using DeskIn for hybrid work environments and business trips—quickly resolving urgent tasks and maintaining business continuity.

DeskIn Enterprise has a manageable file transfer direction

Detailed Connection Log Records 

DeskIn Enterprise Edition’s connection log feature captures detailed information—such as user account, device, start time, and connection duration. Administrators can review these logs to gain a clear, visual understanding of each employee’s remote work activities.

On one hand, the log function provides departments with valuable insights for performance analysis, helping boost overall efficiency. On the other hand, the operational records can be audited and traced, fulfilling corporate security and compliance requirements. checked and traced back to meet the requirements of corporate security compliance.

Unified Console Management

The Enterprise Edition’s product console features a clear and precise internal design logic that helps businesses standardize management practices and maximize efficiency. Administrators can perform all-roles, devices, and permissions using one central console.

  • User–Device 1:1 Binding: With a single command, installation and binding are completed simultaneously. Once the controlled-side installation finishes, the device is automatically added to the enterprise device list, making corporate device management more orderly.

batch deployment
  • Fine-grained role and permission management: Administrators are allowed to restrict employee operations as needed—such as disabling file transfer or clipboard functionality—thereby safeguarding corporate assets and providing secure, compliant remote support to clients.

  • Dynamic unified account management: When an employee leaves, their account is immediately deactivated—greatly reducing the risk of data leakage.

Easy deployment and unified management

With outstanding, leading product technology—combined with the versatile features and robust management backend described above—the Walmart team found DeskIn Enterprise Edition to be truly reassuring during their deployment. Our professional, attentive service has also laid a solid foundation for future collaborations between both parties.

For enterprise-level remote control, choose DeskIn!

Click here to download DeskIn Enterprise


Play x Work
All at Once

👻 Halloween Sale

👻 Halloween Sale

DeskIn Remote Game

only $14.32 USD 🎉 Limited on July 16-31

Add promo code: deskinsummer1

🎃 Remote Game 🎃

Save Over 60%
Only $9.75/Month 🎉 Reg. $25.9
👉 Use Promo Code [GAME60]

And Get Special Price

🎃 Remote Game 🎃 Save Over 60%
Only $9.75/Month 🎉Reg. $25.9
👉 Use Promo Code [GAME60] And Get Special Price

How Walmart Enabled Remote Work Across 27 Countries with DeskIn’s Enterprise Solution

Table of Contents

👻 Halloween Sale

🎃 Remote Game 🎃

Save Over 60%
Only $9.75/Month 🎉 Reg. $25.9
👉 Use Promo Code [GAME60]

And Get Special Price

What’s next?

PRODUCTIVITY

Screen Mirroring iPhone/iPad To MacBook Guides 2025

A larger screen can bring a better viewing experience. Whether it is sharing files during work reports, watching movies with family and friends or taking travel photos on the big screen, the mirror projection function can bring us great benefits. Connecting screens together brings us closer. For Apple users, how to project the screen of iPhone or iPad to MacBook? This article will provide three simple and practical methods with step-by-step instructions. One of them is also suitable for remote projection. Let’s take a look.


Use DeskIn Remote Desktop to Share iPhone/iPad Screen to MacBook

DeskIn is a remote desktop application that works on iOS, Android, Mac and Windows, providing fast, safe and stable remote access services. Whether you are remote-workers, IT engineer, designer, gamer, student, or freelancer, DeskIn has a solution for you. In addition to remote connection features, DeskIn had many screen management functions, including screen projection, screen expansion, virtual screen generation, etc.

Advantages:

1. Easily realize wireless screen mirroring between different systems and devices.

2. Ultra-low latency, no connection time limit, and pretty high image quality.

3. Supports doing voice calls during the projection process, making real-time communication more convenient.

Step 1: Install and Register an DeskIn Account

Download DeskIn on your MacBook and iPhone/iPad, register a free account and log in separately.

free download DeskIn

Note: On your first log in to a new device, you need to complete an email verification, which is to protect the security of your account.

Step 2: Screen Mirroring by Scanning QR Code

Open DeskIn on MacBook and click "Screen Mgt" on the sidebar, then you can see the QR code.

Open DeskIn on iPhone/iPad, click the scan button in the upper right corner, scan the QR Code on the Mac DeskIn, then click "Start Broadcasting".

Step 3: Access iPhone/iPad screen from Macbook

Note: Projection can be completed in step 3 or step 2.

Open DeskIn on iPhone/iPad, go to "Remote Control" Tab >> Toggle on the "Allow" button >> Choose "Screen Mirroring" >> Then a "Screen Broadcast" reminder will pop up, just click "Start Broadcast".

Open DeskIn on your MacBook >> Go to "Device list" >> Select your iPhone/iPad device >> Click "View Mode" on the toolbar. You can finish the connection verification using password or Password-free Connection method——which is to do manual verification on iPhone/iPad. Once connected, you can see the screen of the iPhone/iPad on the MacBook. This method is also suitable for situations where the mobile device and computer are not in the same place and remote projection is required. You can also do audio-call during the projection process.


Use QuickTime Player to Cast iPhone/iPad Screen to MacBook

Advantages:

  1. QuickTime Player is a built-in app of MacOS, and you don't have to download extra softwares.

  2. Using USB connection, 2 devices no need to be on the same network, high image quality, low latency.

Limitations:

USB cable is required to connect iPhone/iPad and MacBook using this method, wireless mirroring is not supported.

Step 1: Connect the Devices

Connect your iPhone/iPad to your MacBook with a USB cable.

Step 2: Complete QuickTime Player Settings

  1. Open QuickTime Player on your MacBook. You can find it by searching.


  1. Find the QuickTime Player toolbar on the top toolbar of your MacBook >> Click "File" > > Click "New video recording"


  1. In the recording window, click the down arrow next to the record button >> Find and select your iPhone/iPhone in the Screen section of the device list that pops up. Then your iPhone/iPhone screen will be projected onto your MacBook.


Use AirPlay to Cast iPhone/iPad Screen to MacBook

Advantages:

  1. Airplay is a built-in function of Apple devices, and you don't have to download extra softwares.

  2. Supports wireless mirror projection, no USB data cable required.

Limitations:

  1. The device needs to be in the same network to use AirPlay.

  2. The MacBook cannot perform other operations during the projection process.


Steps:

  1. Make sure your iPhone/iPad and MacBook are connected to the same network.

  2. Swipe down from the upper right corner of the iPhone/iPad screen to open the Control Center. Click the "Airplay" icon >> Select your MacBook, then the iPhone/iPad screen will be projected to the MacBook.

  3. A pop-up reminder may appear on your MacBook asking whether to allow projection requests from the iOS devices. Once the request is accepted, the iPhone/iPad screen will be projected to the MacBook.


Conclusion

This article introduces three methods for mirroring iPhone to MacBook, two of which are implemented through Apple's own built-in programs. The most recommended thing is to use DeskIn remote software for mirror projection - it is not restricted by the same WIFI network and does not require a USB data cable to complete the mirror projection from iPhone/iPad to MacBook, and it does not affect the normal operation of MacBook during the projection period. use. The steps are very simple, download DeskIn and give it a try.

free download DeskIn

PRODUCTIVITY

2 Simple Ways To Share Windows 10/11 Screen

Do you want to share your computer screen with your colleagues during a meeting or project videos/photos onto a larger screen? This article will introduce two simple methods to project your Windows 10/11 computer screen.

Method 1: Use professional projector app DeskIn to share screen

Advantages of using DeskIn remote desktop for projection:

  • Cross-platform support: DeskIn supports screen sharing between iOS, Windows, Android, and macOS systems.

  • No need for the same network environment: DeskIn allows projection even when devices are not on the same network, making it possible to share screens over long distances.

  • Screen adaptation: You can modify resolution, frame rate, and other settings to better adapt to remote screens.

  • Secure: DeskIn uses 256-bit encryption to ensure that your projected content remains private and secure.

  • Easy to use: No complicated setup is required.


Step 1: Install DeskIn on both your computer and the device you want to share your screen with.

Register for a free account and log in.

free download DeskIn

Note: On your first login to a new device, you will need to complete an email verification to protect the security of your account.

Step 2: Extend your screen

Open the DeskIn app on your Windows/Mac computer >> Go to the "Screen Mgt" tab >> Click “Mirror my screen."

Step 3: Select the device you want to share your screen with and click "Start Mirroring."


Step 4: You can find the device you are sharing your screen with in the「Device list」and adjust the resolution, frame rate, and other settings as needed.


Method 2: Use Windows Built-in Tool "Wireless Display" to Project Your Computer Screen

Step 1: On both the computer you want to share the screen from and the one you want to share it to select "Windows Start" >> "Settings" >> "System" >> "Optional Features".

Step 2: On the "Optional Features" page, click "View Features" next to "Add an optional feature.” Search for "Wireless Display," then click and install it.


Step 3: Once installed, go back to "Settings" >> "System" >> "Projecting to this PC" to manage your projection preferences.


Step 4: On the computer you want to share the screen to, search for "Wireless Display" in the taskbar search box and launch the app. The device will now be discoverable and ready to receive projected content.


Step 5: Press "Windows+K" on the computer you want to share screen from, select the device you want to share screen to on the device list that pops up.

You can also project your computer screen to a Miracast-enabled TV, projector, or other type of external display.

Conclusion

This article introduced two simple methods for projecting and sharing your screen on Windows 10/11. While Method 2 uses built-in Windows tools, the setup process is relatively complicated and is only applicable to Windows systems or displays that support Miracast. If you want to project your Windows computer screen to any macOS, iOS, Android, or Windows device, we recommend using the remote software DeskIn. It is not restricted by the operating system and does not require devices to be on the same network, making it a versatile solution for all your projection needs

free download DeskIn

PRODUCTIVITY

Use Samsung Galaxy Tablet As Second Monitor For Windows PC

For multitasking workers, having a second monitor can increase productivity greatly. If you are a home office person or a student who don't have a dual screen. Here's how you can easily turn your Samsung Galaxy Tablet into a second monitor for your computer.


Step 1: Turn on your Samsung tablet, swipe down from the top of the screen to open the 「Quick Settings」panel.

Step 2: Find the "Second Screen" icon and tap it.


Step 3: Keep the tablet in the "Second Screen" screen (as shown below)

Note: If your Samsung tablet and Galaxy Book are logged into the same Samsung account, you can directly start from step 4 to connect through the Galaxy Book

Step 4: Press "Windows + K" on your computer, find and select your tablet from the pop-up device list, your tablet will become the extended screen.


Step 5: If you find the tablet only mirrors the contents of the computer, click "Change Projection Mode" and switch the projection mode to "Extended".


Note: The extended screen feature only available on Galaxy Tab S7、S8 and S9 running One UI 3.1 and later, and Windows PC running Windows 10 v.2004 and higher.

Best tool to extend screen on Windows and macOS: DeskIn

The method introduced above is only applicable to Samsung tablets and Windows computers. If you are looking for a more comprehensive screen extension solution, you should try DeskIn- supports cross-platform screen extension on iOS, Android, Windows, and MacBook, adjusting resolution and completely free. Whether you're using an iPad, MacBook, laptop, or PC, it's easy to do that in just a few steps:

Step 1: Download and register a DeskIn account

Download DeskIn on both your devices, register for a free account and log in.

free download DeskIn

Step 2: Open DeskIn on the computer, go to "Screen Mgt" tab and click "Extend my screen".


Step 3: Select the device you want to expand the screen on and click "Start Extending". Then the selected device would become the second display of the computer.


Conclusion

This article introduces how to use a Samsung tablet as a second monitor. If you are looking for a screen extension tool that is suitable for all devices and has no limit on brand or system, we recommend using DeskIn. Click DeskIn Personal | Free Remote Desktop App with 40M+ Users to learn more.

free download DeskIn

PRODUCTIVITY

Screen Mirroring iPhone/iPad To MacBook Guides 2025

A larger screen can bring a better viewing experience. Whether it is sharing files during work reports, watching movies with family and friends or taking travel photos on the big screen, the mirror projection function can bring us great benefits. Connecting screens together brings us closer. For Apple users, how to project the screen of iPhone or iPad to MacBook? This article will provide three simple and practical methods with step-by-step instructions. One of them is also suitable for remote projection. Let’s take a look.


Use DeskIn Remote Desktop to Share iPhone/iPad Screen to MacBook

DeskIn is a remote desktop application that works on iOS, Android, Mac and Windows, providing fast, safe and stable remote access services. Whether you are remote-workers, IT engineer, designer, gamer, student, or freelancer, DeskIn has a solution for you. In addition to remote connection features, DeskIn had many screen management functions, including screen projection, screen expansion, virtual screen generation, etc.

Advantages:

1. Easily realize wireless screen mirroring between different systems and devices.

2. Ultra-low latency, no connection time limit, and pretty high image quality.

3. Supports doing voice calls during the projection process, making real-time communication more convenient.

Step 1: Install and Register an DeskIn Account

Download DeskIn on your MacBook and iPhone/iPad, register a free account and log in separately.

free download DeskIn

Note: On your first log in to a new device, you need to complete an email verification, which is to protect the security of your account.

Step 2: Screen Mirroring by Scanning QR Code

Open DeskIn on MacBook and click "Screen Mgt" on the sidebar, then you can see the QR code.

Open DeskIn on iPhone/iPad, click the scan button in the upper right corner, scan the QR Code on the Mac DeskIn, then click "Start Broadcasting".

Step 3: Access iPhone/iPad screen from Macbook

Note: Projection can be completed in step 3 or step 2.

Open DeskIn on iPhone/iPad, go to "Remote Control" Tab >> Toggle on the "Allow" button >> Choose "Screen Mirroring" >> Then a "Screen Broadcast" reminder will pop up, just click "Start Broadcast".

Open DeskIn on your MacBook >> Go to "Device list" >> Select your iPhone/iPad device >> Click "View Mode" on the toolbar. You can finish the connection verification using password or Password-free Connection method——which is to do manual verification on iPhone/iPad. Once connected, you can see the screen of the iPhone/iPad on the MacBook. This method is also suitable for situations where the mobile device and computer are not in the same place and remote projection is required. You can also do audio-call during the projection process.


Use QuickTime Player to Cast iPhone/iPad Screen to MacBook

Advantages:

  1. QuickTime Player is a built-in app of MacOS, and you don't have to download extra softwares.

  2. Using USB connection, 2 devices no need to be on the same network, high image quality, low latency.

Limitations:

USB cable is required to connect iPhone/iPad and MacBook using this method, wireless mirroring is not supported.

Step 1: Connect the Devices

Connect your iPhone/iPad to your MacBook with a USB cable.

Step 2: Complete QuickTime Player Settings

  1. Open QuickTime Player on your MacBook. You can find it by searching.


  1. Find the QuickTime Player toolbar on the top toolbar of your MacBook >> Click "File" > > Click "New video recording"


  1. In the recording window, click the down arrow next to the record button >> Find and select your iPhone/iPhone in the Screen section of the device list that pops up. Then your iPhone/iPhone screen will be projected onto your MacBook.


Use AirPlay to Cast iPhone/iPad Screen to MacBook

Advantages:

  1. Airplay is a built-in function of Apple devices, and you don't have to download extra softwares.

  2. Supports wireless mirror projection, no USB data cable required.

Limitations:

  1. The device needs to be in the same network to use AirPlay.

  2. The MacBook cannot perform other operations during the projection process.


Steps:

  1. Make sure your iPhone/iPad and MacBook are connected to the same network.

  2. Swipe down from the upper right corner of the iPhone/iPad screen to open the Control Center. Click the "Airplay" icon >> Select your MacBook, then the iPhone/iPad screen will be projected to the MacBook.

  3. A pop-up reminder may appear on your MacBook asking whether to allow projection requests from the iOS devices. Once the request is accepted, the iPhone/iPad screen will be projected to the MacBook.


Conclusion

This article introduces three methods for mirroring iPhone to MacBook, two of which are implemented through Apple's own built-in programs. The most recommended thing is to use DeskIn remote software for mirror projection - it is not restricted by the same WIFI network and does not require a USB data cable to complete the mirror projection from iPhone/iPad to MacBook, and it does not affect the normal operation of MacBook during the projection period. use. The steps are very simple, download DeskIn and give it a try.

free download DeskIn

PRODUCTIVITY

2 Simple Ways To Share Windows 10/11 Screen

Do you want to share your computer screen with your colleagues during a meeting or project videos/photos onto a larger screen? This article will introduce two simple methods to project your Windows 10/11 computer screen.

Method 1: Use professional projector app DeskIn to share screen

Advantages of using DeskIn remote desktop for projection:

  • Cross-platform support: DeskIn supports screen sharing between iOS, Windows, Android, and macOS systems.

  • No need for the same network environment: DeskIn allows projection even when devices are not on the same network, making it possible to share screens over long distances.

  • Screen adaptation: You can modify resolution, frame rate, and other settings to better adapt to remote screens.

  • Secure: DeskIn uses 256-bit encryption to ensure that your projected content remains private and secure.

  • Easy to use: No complicated setup is required.


Step 1: Install DeskIn on both your computer and the device you want to share your screen with.

Register for a free account and log in.

free download DeskIn

Note: On your first login to a new device, you will need to complete an email verification to protect the security of your account.

Step 2: Extend your screen

Open the DeskIn app on your Windows/Mac computer >> Go to the "Screen Mgt" tab >> Click “Mirror my screen."

Step 3: Select the device you want to share your screen with and click "Start Mirroring."


Step 4: You can find the device you are sharing your screen with in the「Device list」and adjust the resolution, frame rate, and other settings as needed.


Method 2: Use Windows Built-in Tool "Wireless Display" to Project Your Computer Screen

Step 1: On both the computer you want to share the screen from and the one you want to share it to select "Windows Start" >> "Settings" >> "System" >> "Optional Features".

Step 2: On the "Optional Features" page, click "View Features" next to "Add an optional feature.” Search for "Wireless Display," then click and install it.


Step 3: Once installed, go back to "Settings" >> "System" >> "Projecting to this PC" to manage your projection preferences.


Step 4: On the computer you want to share the screen to, search for "Wireless Display" in the taskbar search box and launch the app. The device will now be discoverable and ready to receive projected content.


Step 5: Press "Windows+K" on the computer you want to share screen from, select the device you want to share screen to on the device list that pops up.

You can also project your computer screen to a Miracast-enabled TV, projector, or other type of external display.

Conclusion

This article introduced two simple methods for projecting and sharing your screen on Windows 10/11. While Method 2 uses built-in Windows tools, the setup process is relatively complicated and is only applicable to Windows systems or displays that support Miracast. If you want to project your Windows computer screen to any macOS, iOS, Android, or Windows device, we recommend using the remote software DeskIn. It is not restricted by the operating system and does not require devices to be on the same network, making it a versatile solution for all your projection needs

free download DeskIn

Don't miss out.

Don't miss out.

Don't miss out.

Contact Us

Email: support@deskin.io

Office: 991D Alexandra Road #02-17, Singapore 119972

Copyright © 2025 Zuler Technology PTE. LTD. All rights reserved.

Contact Us

support@deskin.io

991D Alexandra Road #02-17

Singapore 119972

Copyright © 2025 Zuler Technology PTE. LTD. All rights reserved.

Contact Us

Email: support@deskin.io

Office: 991D Alexandra Road #02-17, Singapore 119972

Copyright © 2025 Zuler Technology PTE. LTD. All rights reserved.