7 นาที
·
·
ประสิทธิภาพ
·
·
Updated on
Updated on
Your new PC is ready, but all your files are still trapped in the old one. USB‑C won't talk to USB‑A, 1TB of data won't fit on a dusty 16GB flash drive, and that transfer cable you bought ships with a driver CD—but new PC doesn't even have a disc drive. These aren't one‑off headaches; they're the exact scenarios real users describe when they search for how to transfer files from PC to PC:
"I have a PC with a Type C port and another PC with a Type A port.
When I connect these, I am unable to transfer files.""My new computer does not have a CD-ROM drive. How do I install the driver?"
"How do I get everything on my old PC on my new PC?"
Six methods exist. One of them is wireless, free to start, and completely independent of whether your computers run Windows, macOS, or other USB languages. Let's find yours!
Quick Comparison: Which Method Fits You?
Method | Best For | Hardware Needed | Speed | Skill Level |
|---|---|---|---|---|
DeskIn | Users with mismatched ports, mixed Windows/Mac, or anyone who hates cables | None
| Fast | Beginner |
External Hard Drive | One‑time, massive transfers (1 TB+) where the internet is slow | USB drive/ SSD | Very fast | Beginner |
USB Transfer Cable | Offline wired transfer; both PCs on the same desk | Special bridging cable | Fast | Intermediate (driver hunt) |
Local Network | Home/office users with both PCs on the same router | None | Medium | Intermediate |
Cloud Storage | Ongoing sync; files needed on multiple devices | None | Slow | Beginner |
PC Migration Software | Full system migration, including apps and settings | None | Medium‑Fast | Advanced / IT pro |
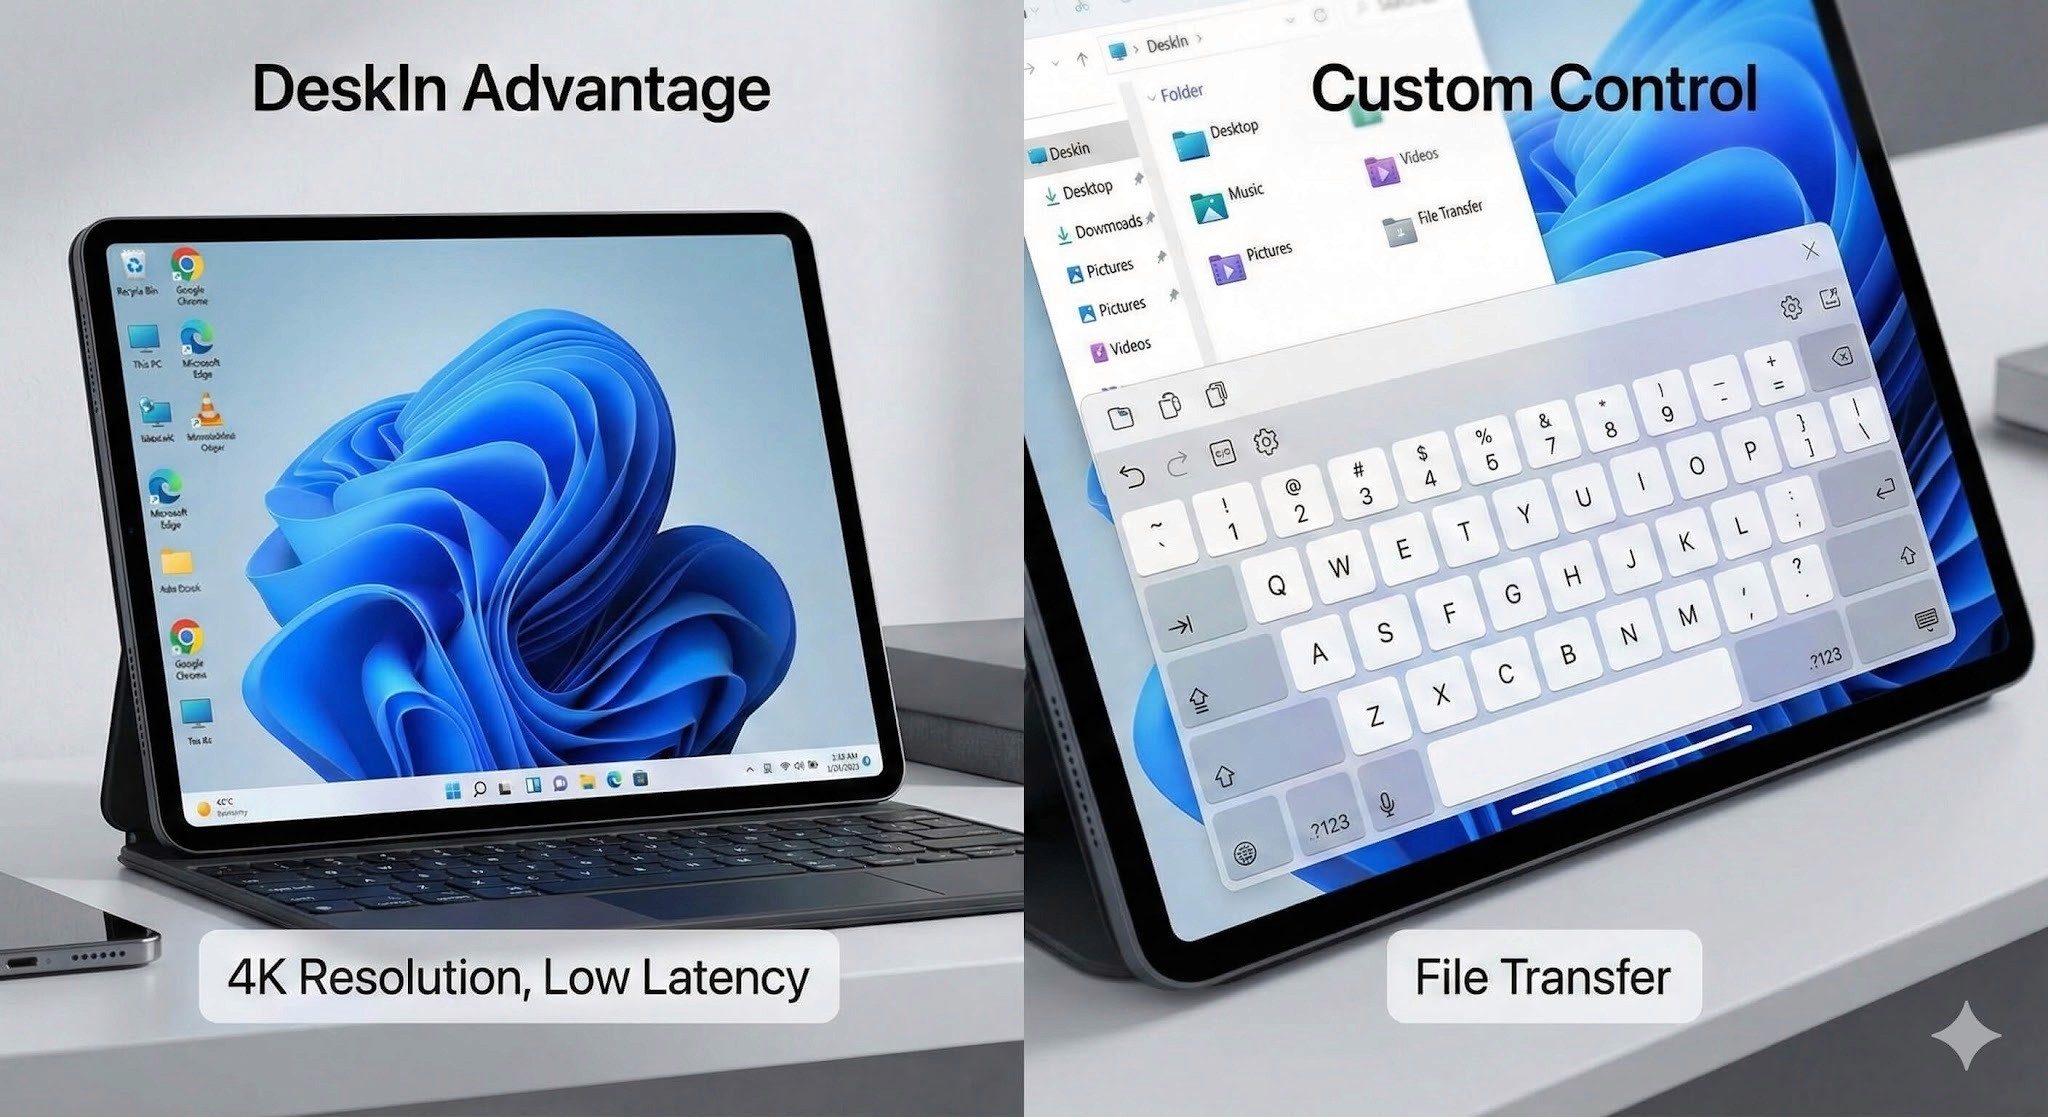
1. DeskIn — Best for Wireless, Cross-Platform, Cable‑Free Transfer
Advantages with DeskIn
No cables, no adapters, no driver CDs – works entirely over Wi-Fi
Compatible with both Windows and macOS – easy cross-platform transfer
No file size limits – send 100GB+ videos or backups without splitting
Direct peer-to-peer transfer – files never touch a third-party cloud server
Drag-and-drop simplicity – no network discovery or drive mapping required
AES-256 encryption – your files are secure
Free tier available – no credit card required to start
Disadvantage
Requires both PCs to be on the internet
Mismatched ports and missing drivers are the most common reasons PC-to-PC transfers fail. DeskIn removes both problems. No cable. No adapter. No installation media required. The application establishes a direct, encrypted peer-to-peer connection over Wi-Fi. It works on both Windows and macOS, and port types don’t matter.
DeskIn bypasses the physical layer entirely: No dongles, no "driver not found" errors, no expensive docks. This is also the only consumer‑friendly tool on this list that lets you transfer files between Windows and Mac wirelessly without any technical setup. Your old Windows workhorse and your new MacBook Air? They shake hands instantly.
How to transfer files with DeskIn
Step 1. Download DeskIn
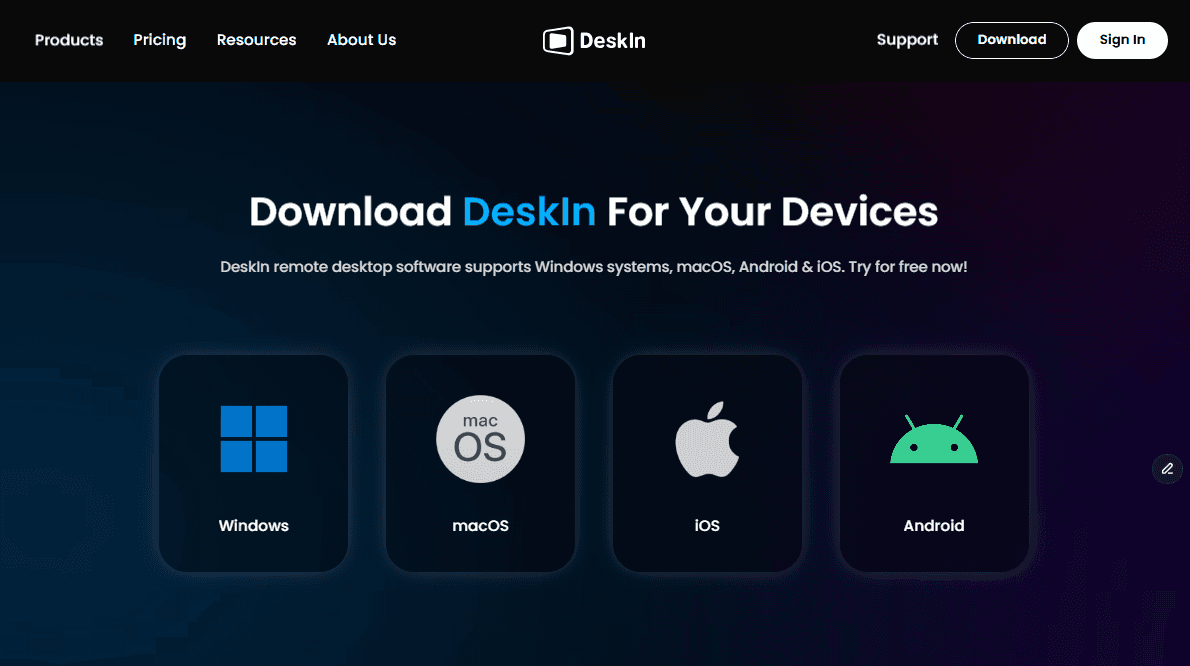
Visit DeskIn Personal Download and install it on both devices. Create and log in to your account on both devices. DeskIn offers a free trial, and you can start using it immediately.

Step 2. Choose Remote PC to Connect
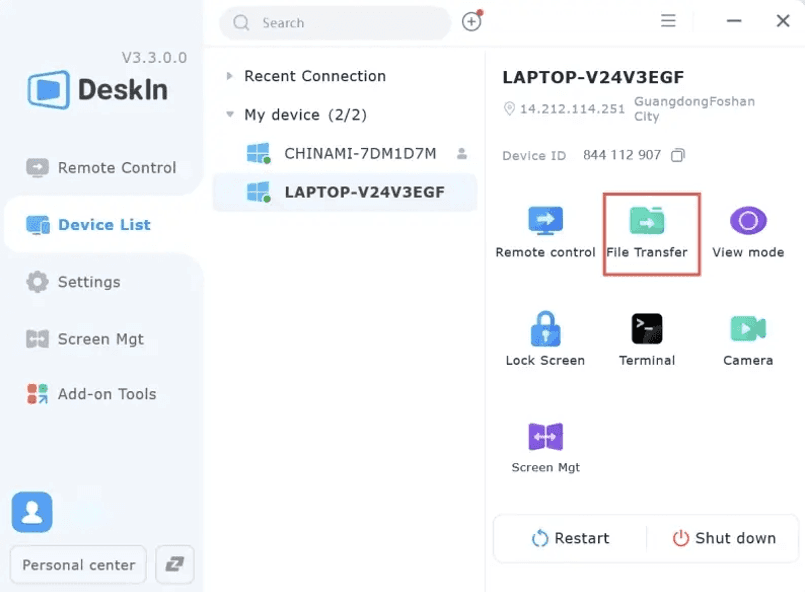
Navigate to the Device List, find the target PC, click the File Transfer button, and enter the Password (Remote Control).
Note: If your two devices are not logged into the same account, you will also need to enter the device code.
Step 3. Send Files Instantly
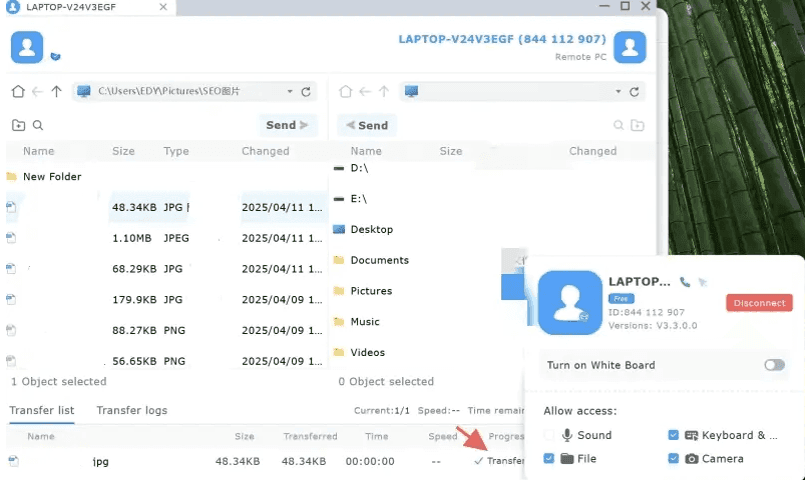
Simply drag and drop files between your computers. DeskIn will transfer files at 12MB/s. At the bottom of the page, you can track the progress of the file transfer. After a successful transfer, you can see the transferred files in your folder.
Note: DeskIn supports cross-system file transfers of unlimited size, type, and number.
That's it. Your files move directly - no cloud staging, no size limits on the free tier for transfers, and no waiting for uploads to finish before downloads can start.
You may also like:
2. External Hard Drive: Best for Massive Offline Transfers (1 TB+)
Advantages
No internet required; works anywhere
One‑time hardware cost; no subscriptions
Total physical control: Are files directly on my computer at all times
Disadvantages
A physical device can be lost, stolen, or dropped
No built‑in encryption; data is exposed if the drive is misplaced
You must own a drive large enough to hold all your data
The Reddit user facing a terabyte of data wasn't exaggerating: "I want to transfer about 1TB of data. It's mostly just in a few folders." When you're moving that much information, cloud uploads can take days. External drives are still the fastest option for moving large amounts of data.
How to transfer files with an external hard drive
Connect the external hard drive to your old PC
Open your file explorer and drag the files or folders you want to transfer into the drive
Safely eject the hard drive and connect it to your new PC
Open the drive in your File Explorer and move the files to their new location
Pro tip: If you are moving your files directly to Windows system folders (like the entire C:\Users directory), you may need administrator permissions. Copy what you can; use DeskIn for the rest.
You may also like:
3. USB Transfer Cable: Best for Direct Wired Transfer Without a Network
Advantages
Faster than external HDDs for thousands of small files
No router or Wi‑Fi needed
Often includes simple transfer software
Disadvantages
Requires a specialized USB cable transfer files — not a standard USB cord
PCs must be within cable length (usually 1–2 meters)
Driver CDs are often included; new PCs may lack optical drives
Cable becomes e‑waste after one use
The Reddit user who asked about bridging cables hit the exact pain point: "I've read about USB bridging cables, but you seem to need to install software from a CD. My new computer does not have a CD-ROM drive." This method works—if you can solve the driver dependency before your old PC is packed away.
How to transfer files with the USB Transfer Cable
Connect the cable to both PCs using the appropriate USB ports
Launch the software that came with the cable (usually auto-installs)
Select the files or folders you want to transfer and begin the process
Can you use an HDMI cable?
No. This question appears in forums constantly. HDMI carries video and audio. It does not carry your documents.
4. Local Network (Wi‑Fi / LAN) — Best for Frequent Transfers on the Same Router
Advantages
No new hardware to buy
Good for ongoing, recurring transfers
Works wirelessly; no cables between PCs
Disadvantages
Speed is capped by your router and Wi‑Fi congestion
Both PCs must be powered on and on the same network
Initial setup requires navigating Windows Settings
If you frequently ask how to move downloads from one laptop to another in the same household, network sharing is the easiest ongoing option. Once set up, it works like moving files between folders on one computer — no speed limits, no USB sticks.
How to set up network sharing (Windows 10/11)
Connect both PCs to the same Wi‑Fi or wired network.
On the source PC, open Settings > Network & Internet > Ethernet (or Wi‑Fi) and ensure the network profile is set to Private.
Go to Control Panel > Network and Sharing Center > Advanced sharing settings.
Turn on Network discovery and File and printer sharing.
Right‑click the folder you want to share → Properties → Sharing → Share.
On the destination PC, open File Explorer, click Network in the sidebar, and double‑click the source PC's name.
For remote workers: You can also transfer files over remote desktop by connecting to the office PC and mapping local drives in the Remote Desktop session—ideal for pulling specific files while travelling.
Cloud Storage — Best for Ongoing Sync and Always‑Available Access
Advantages
Files are encrypted in transit and at rest
Accessible from any device, anywhere
No physical media to lose or damage
Disadvantages
Requires a paid subscription for large volumes
Upload then = double the time
Speed is entirely dependent on your internet pipe
Not everyone is doing a one-time migration. Some users want their files to live in the cloud permanently—available on their phone, tablet, and laptop simultaneously. Cloud storage is less a "transfer method" and more a permanent relocation.
How to transfer files with Cloud Storage
Install your preferred cloud provider's desktop app (Google Drive, OneDrive, Dropbox) on the old PC.
Sign in. Choose which folders to sync to the cloud.
Wait for the upload to complete. (For 1TB of data on average U.S. broadband, plan for roughly 48 hours of uninterrupted upload.)
On the new PC, install the same app and sign in with the same account.
The files will sync down to the new machine.
Heads up: If you delete a synced file on one device while both are signed in, it will be deleted everywhere. Always sign out of your old PC before wiping it.
6. PC Migration Software: Best for Full System State Migration
Advantages
Transfers applications, settings, and user profiles — not just files
High security (SFTP, AES‑256) for regulated industries
Can schedule transfers during off‑peak hours
Disadvantages
Expensive (often enterprise licensing)
Steep learning curve
Massive overkill for most home users
The Reddit user asking "How do I get everything on my old PC on my new PC?" might not realize that "everything" includes application configurations, saved login sessions, and system tweaks accumulated over the years. Regular tools move your files. Migration software moves everything, including your apps, settings, and saved sessions.
How to transfer files with PC Migration Software (varies by vendor)
Install the migration software on both PCs.
Choose a transfer type: network, direct cable, or external media.
Select which system elements to migrate (files, apps, settings).
Follow the vendor's wizard to complete the transfer.
When you actually need this: If you are moving your files directly on Windows system folders that Windows locks during normal operation, or if you are migrating an entire domain‑joined corporate machine, consumer tools won't cut it. This is a job for IT.
You may also like:
FAQs on Transferring Files (PC to PC)
1. How do I transfer everything from my old computer to my new computer Windows 10 to Windows 11?
For personal files: Use DeskIn for a fast, wireless transfer—it's free for up to 2 GB and inexpensive for larger volumes. Unlike a bridging cable, you don't need to hunt down drivers or worry about whether your new PC has a CD-ROM drive.
For system settings: Use the built‑in Windows Backup app (Settings > Accounts > Windows Backup) to sync your preferences to your Microsoft account. Restore them during Windows 11 setup.
2. What is the easiest way to transfer files from PC to PC wirelessly?
DeskIn requires zero configuration beyond installing and logging in to the app. Both PCs discover each other automatically: no network sharing settings to toggle, no folder permissions to configure. If you prefer native tools, Windows Nearby Sharing works when both devices are on the same Wi‑Fi, but it can be finicky with large folders. DeskIn handles bulk transfers more reliably.
3. How do I transfer files if my PCs have different USB port types?
This is the exact situation DeskIn was built for. The Reddit user with "a PC with a Type C port and another PC with a Type A port" doesn't need an adapter, a dongle, or a special cable. Use a wireless method. DeskIn or local network sharing means port types don’t matter at all. Your files move over Wi-Fi instead.
4. Should I wipe my old computer after transferring files?
Yes, absolutely — if you plan to sell, recycle, or give it away. Deleting files and emptying the Recycle Bin is not enough. On Windows 10 or 11: go to Settings > System > Recovery, click Reset this PC, and select Remove everything. This ensures your personal data is unrecoverable. Before you wipe it, double-check that DeskIn (or your chosen transfer method) successfully moved everything. Once you reset, there's no going back.
Pick the Right Method for Your Transfer
No single method works for everyone — only the right one for your situation. External drives are fastest for large data. Windows Sharing works well at home. Migration software is for IT pros. But if you're dealing with mismatched ports, missing CD-ROM drives, or transferring between Windows and Mac, DeskIn is the only tool that skips all those problems. No cables, no drivers, no frustration. DeskIn also works for ongoing remote access, not just one-time transfers.
Start your free DeskIn backup today. No credit card required.
Your new PC is ready, but all your files are still trapped in the old one. USB‑C won't talk to USB‑A, 1TB of data won't fit on a dusty 16GB flash drive, and that transfer cable you bought ships with a driver CD—but new PC doesn't even have a disc drive. These aren't one‑off headaches; they're the exact scenarios real users describe when they search for how to transfer files from PC to PC:
"I have a PC with a Type C port and another PC with a Type A port.
When I connect these, I am unable to transfer files.""My new computer does not have a CD-ROM drive. How do I install the driver?"
"How do I get everything on my old PC on my new PC?"
Six methods exist. One of them is wireless, free to start, and completely independent of whether your computers run Windows, macOS, or other USB languages. Let's find yours!
Quick Comparison: Which Method Fits You?
Method | Best For | Hardware Needed | Speed | Skill Level |
|---|---|---|---|---|
DeskIn | Users with mismatched ports, mixed Windows/Mac, or anyone who hates cables | None
| Fast | Beginner |
External Hard Drive | One‑time, massive transfers (1 TB+) where the internet is slow | USB drive/ SSD | Very fast | Beginner |
USB Transfer Cable | Offline wired transfer; both PCs on the same desk | Special bridging cable | Fast | Intermediate (driver hunt) |
Local Network | Home/office users with both PCs on the same router | None | Medium | Intermediate |
Cloud Storage | Ongoing sync; files needed on multiple devices | None | Slow | Beginner |
PC Migration Software | Full system migration, including apps and settings | None | Medium‑Fast | Advanced / IT pro |
1. DeskIn — Best for Wireless, Cross-Platform, Cable‑Free Transfer
Advantages with DeskIn
No cables, no adapters, no driver CDs – works entirely over Wi-Fi
Compatible with both Windows and macOS – easy cross-platform transfer
No file size limits – send 100GB+ videos or backups without splitting
Direct peer-to-peer transfer – files never touch a third-party cloud server
Drag-and-drop simplicity – no network discovery or drive mapping required
AES-256 encryption – your files are secure
Free tier available – no credit card required to start
Disadvantage
Requires both PCs to be on the internet
Mismatched ports and missing drivers are the most common reasons PC-to-PC transfers fail. DeskIn removes both problems. No cable. No adapter. No installation media required. The application establishes a direct, encrypted peer-to-peer connection over Wi-Fi. It works on both Windows and macOS, and port types don’t matter.
DeskIn bypasses the physical layer entirely: No dongles, no "driver not found" errors, no expensive docks. This is also the only consumer‑friendly tool on this list that lets you transfer files between Windows and Mac wirelessly without any technical setup. Your old Windows workhorse and your new MacBook Air? They shake hands instantly.
How to transfer files with DeskIn
Step 1. Download DeskIn
Visit DeskIn Personal Download and install it on both devices. Create and log in to your account on both devices. DeskIn offers a free trial, and you can start using it immediately.
Step 2. Choose Remote PC to Connect
Navigate to the Device List, find the target PC, click the File Transfer button, and enter the Password (Remote Control).
Note: If your two devices are not logged into the same account, you will also need to enter the device code.
Step 3. Send Files Instantly
Simply drag and drop files between your computers. DeskIn will transfer files at 12MB/s. At the bottom of the page, you can track the progress of the file transfer. After a successful transfer, you can see the transferred files in your folder.
Note: DeskIn supports cross-system file transfers of unlimited size, type, and number.
That's it. Your files move directly - no cloud staging, no size limits on the free tier for transfers, and no waiting for uploads to finish before downloads can start.
You may also like:
2. External Hard Drive: Best for Massive Offline Transfers (1 TB+)
Advantages
No internet required; works anywhere
One‑time hardware cost; no subscriptions
Total physical control: Are files directly on my computer at all times
Disadvantages
A physical device can be lost, stolen, or dropped
No built‑in encryption; data is exposed if the drive is misplaced
You must own a drive large enough to hold all your data
The Reddit user facing a terabyte of data wasn't exaggerating: "I want to transfer about 1TB of data. It's mostly just in a few folders." When you're moving that much information, cloud uploads can take days. External drives are still the fastest option for moving large amounts of data.
How to transfer files with an external hard drive
Connect the external hard drive to your old PC
Open your file explorer and drag the files or folders you want to transfer into the drive
Safely eject the hard drive and connect it to your new PC
Open the drive in your File Explorer and move the files to their new location
Pro tip: If you are moving your files directly to Windows system folders (like the entire C:\Users directory), you may need administrator permissions. Copy what you can; use DeskIn for the rest.
You may also like:
3. USB Transfer Cable: Best for Direct Wired Transfer Without a Network
Advantages
Faster than external HDDs for thousands of small files
No router or Wi‑Fi needed
Often includes simple transfer software
Disadvantages
Requires a specialized USB cable transfer files — not a standard USB cord
PCs must be within cable length (usually 1–2 meters)
Driver CDs are often included; new PCs may lack optical drives
Cable becomes e‑waste after one use
The Reddit user who asked about bridging cables hit the exact pain point: "I've read about USB bridging cables, but you seem to need to install software from a CD. My new computer does not have a CD-ROM drive." This method works—if you can solve the driver dependency before your old PC is packed away.
How to transfer files with the USB Transfer Cable
Connect the cable to both PCs using the appropriate USB ports
Launch the software that came with the cable (usually auto-installs)
Select the files or folders you want to transfer and begin the process
Can you use an HDMI cable?
No. This question appears in forums constantly. HDMI carries video and audio. It does not carry your documents.
4. Local Network (Wi‑Fi / LAN) — Best for Frequent Transfers on the Same Router
Advantages
No new hardware to buy
Good for ongoing, recurring transfers
Works wirelessly; no cables between PCs
Disadvantages
Speed is capped by your router and Wi‑Fi congestion
Both PCs must be powered on and on the same network
Initial setup requires navigating Windows Settings
If you frequently ask how to move downloads from one laptop to another in the same household, network sharing is the easiest ongoing option. Once set up, it works like moving files between folders on one computer — no speed limits, no USB sticks.
How to set up network sharing (Windows 10/11)
Connect both PCs to the same Wi‑Fi or wired network.
On the source PC, open Settings > Network & Internet > Ethernet (or Wi‑Fi) and ensure the network profile is set to Private.
Go to Control Panel > Network and Sharing Center > Advanced sharing settings.
Turn on Network discovery and File and printer sharing.
Right‑click the folder you want to share → Properties → Sharing → Share.
On the destination PC, open File Explorer, click Network in the sidebar, and double‑click the source PC's name.
For remote workers: You can also transfer files over remote desktop by connecting to the office PC and mapping local drives in the Remote Desktop session—ideal for pulling specific files while travelling.
Cloud Storage — Best for Ongoing Sync and Always‑Available Access
Advantages
Files are encrypted in transit and at rest
Accessible from any device, anywhere
No physical media to lose or damage
Disadvantages
Requires a paid subscription for large volumes
Upload then = double the time
Speed is entirely dependent on your internet pipe
Not everyone is doing a one-time migration. Some users want their files to live in the cloud permanently—available on their phone, tablet, and laptop simultaneously. Cloud storage is less a "transfer method" and more a permanent relocation.
How to transfer files with Cloud Storage
Install your preferred cloud provider's desktop app (Google Drive, OneDrive, Dropbox) on the old PC.
Sign in. Choose which folders to sync to the cloud.
Wait for the upload to complete. (For 1TB of data on average U.S. broadband, plan for roughly 48 hours of uninterrupted upload.)
On the new PC, install the same app and sign in with the same account.
The files will sync down to the new machine.
Heads up: If you delete a synced file on one device while both are signed in, it will be deleted everywhere. Always sign out of your old PC before wiping it.
6. PC Migration Software: Best for Full System State Migration
Advantages
Transfers applications, settings, and user profiles — not just files
High security (SFTP, AES‑256) for regulated industries
Can schedule transfers during off‑peak hours
Disadvantages
Expensive (often enterprise licensing)
Steep learning curve
Massive overkill for most home users
The Reddit user asking "How do I get everything on my old PC on my new PC?" might not realize that "everything" includes application configurations, saved login sessions, and system tweaks accumulated over the years. Regular tools move your files. Migration software moves everything, including your apps, settings, and saved sessions.
How to transfer files with PC Migration Software (varies by vendor)
Install the migration software on both PCs.
Choose a transfer type: network, direct cable, or external media.
Select which system elements to migrate (files, apps, settings).
Follow the vendor's wizard to complete the transfer.
When you actually need this: If you are moving your files directly on Windows system folders that Windows locks during normal operation, or if you are migrating an entire domain‑joined corporate machine, consumer tools won't cut it. This is a job for IT.
You may also like:
FAQs on Transferring Files (PC to PC)
1. How do I transfer everything from my old computer to my new computer Windows 10 to Windows 11?
For personal files: Use DeskIn for a fast, wireless transfer—it's free for up to 2 GB and inexpensive for larger volumes. Unlike a bridging cable, you don't need to hunt down drivers or worry about whether your new PC has a CD-ROM drive.
For system settings: Use the built‑in Windows Backup app (Settings > Accounts > Windows Backup) to sync your preferences to your Microsoft account. Restore them during Windows 11 setup.
2. What is the easiest way to transfer files from PC to PC wirelessly?
DeskIn requires zero configuration beyond installing and logging in to the app. Both PCs discover each other automatically: no network sharing settings to toggle, no folder permissions to configure. If you prefer native tools, Windows Nearby Sharing works when both devices are on the same Wi‑Fi, but it can be finicky with large folders. DeskIn handles bulk transfers more reliably.
3. How do I transfer files if my PCs have different USB port types?
This is the exact situation DeskIn was built for. The Reddit user with "a PC with a Type C port and another PC with a Type A port" doesn't need an adapter, a dongle, or a special cable. Use a wireless method. DeskIn or local network sharing means port types don’t matter at all. Your files move over Wi-Fi instead.
4. Should I wipe my old computer after transferring files?
Yes, absolutely — if you plan to sell, recycle, or give it away. Deleting files and emptying the Recycle Bin is not enough. On Windows 10 or 11: go to Settings > System > Recovery, click Reset this PC, and select Remove everything. This ensures your personal data is unrecoverable. Before you wipe it, double-check that DeskIn (or your chosen transfer method) successfully moved everything. Once you reset, there's no going back.
Pick the Right Method for Your Transfer
No single method works for everyone — only the right one for your situation. External drives are fastest for large data. Windows Sharing works well at home. Migration software is for IT pros. But if you're dealing with mismatched ports, missing CD-ROM drives, or transferring between Windows and Mac, DeskIn is the only tool that skips all those problems. No cables, no drivers, no frustration. DeskIn also works for ongoing remote access, not just one-time transfers.
Start your free DeskIn backup today. No credit card required.