Top 5 Best iPhone Remote Control Apps

Search Docs…

Top 5 Best iPhone Remote Control Apps【2025 Tested! 】

Whether you're a digital nomad hopping between cafes, a student needing to access design software during class, or a remote worker troubleshooting an office computer from home, a reliable iPhone remote control app can be a lifesaver to stay productive, even when away from your desk.

But not all apps are created equal. Some lag during video playback, while others limit file transfers or restrict features behind paywalls. To help you find the right solution that balances performance and affordability, we've rounded up the top 5 iPhone remote control apps, including both free and premium options, tested for stability, speed, and usability.

👍 More to Explore:

How to Choose the Remote Control App for iPhone?

Before jumping into our top picks, it's important to understand what makes an iPhone remote desktop app truly reliable. Whether you're looking for it for casual use, business purposes, or even gaming, these key factors will help you make an informed decision.

  • Cross-Platform Compatibility: Make sure the app supports both macOS and Windows if you work across multiple systems. The best remote desktop apps for iPhone offer flexible access regardless of your desktop OS.

  • Connection Stability & Performance: Look for apps with low latency, high frame rates, and stable connectivity, even on weak or mobile networks. This is especially critical for users who want to control their desktops during travel or while using public Wi-Fi or mobile data.

  • Ease of Use: The user interface should be intuitive and mobile-optimized. You shouldn't need a manual just to connect your iPhone to your PC or Mac.

  • Security & Privacy: Prioritize apps with strong encryption, multi-factor authentication, and privacy options like screen masking or session timeouts, especially if you're accessing sensitive files or remote systems.

  • File Transfer & Control Features: A good app should do more than just screen mirroring. It should let you transfer files between devices, use touch gestures or game controllers, and even interact with peripheral devices if needed.

  • Cost and Licensing Flexibility: Some apps offer free versions with basic features, while others require subscriptions for full access. Consider whether you need a free iPhone remote control app for desktop, or if a premium tool better suits your needs in terms of performance and device limits.


Top 1. DeskIn (Best Overall!)

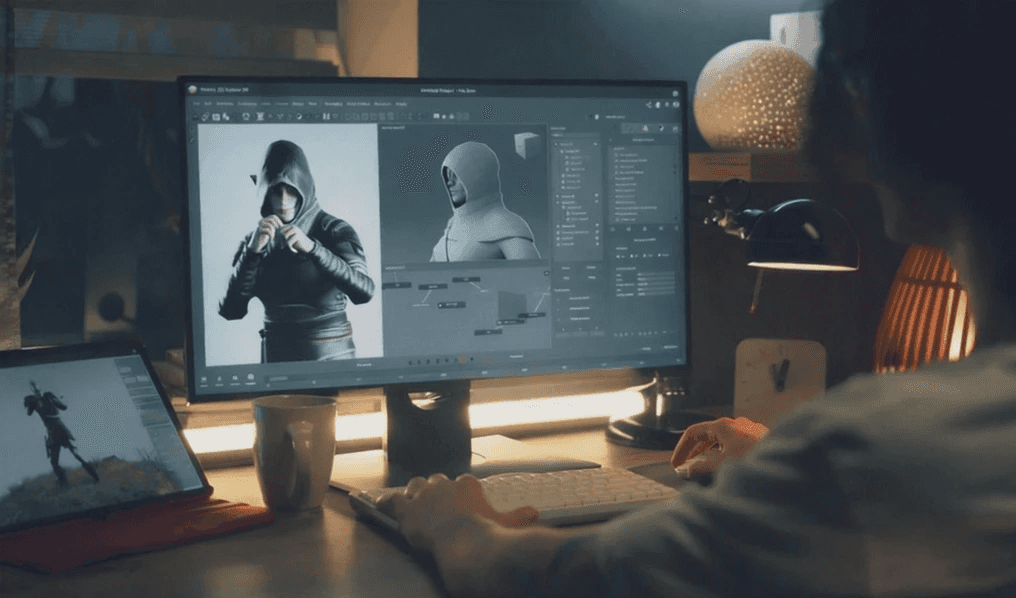
If you're looking for the best iPhone remote control app for desktop, DeskIn easily takes the top spot. Designed for creators, professionals, and remote workers alike, DeskIn offers high-speed, ultra-stable remote access, making it easy for you to access your Windows PC or remotely control your Mac from your iPhone. Whether you're editing a design file, accessing a business document, or even playing a PC game from your phone, DeskIn delivers an exceptionally smooth experience.

What sets DeskIn apart is its powerful performance at an unbeatable price. Unlike many premium tools that limit features behind paywalls, DeskIn's free version already supports up to 3 devices and allows full commercial use. Its optimized infrastructure, powered by over 200 global relay nodes, ensures minimal latency, no session limits, and uninterrupted connectivity, even on weak networks like mobile hotspots or airplane Wi-Fi. This makes it the go-to remote app for iPhone users who prioritize reliability, performance, and cross-platform access.

With these sparkling features, DeskIn Remote Desktop is considered to be the best free remote desktop software overall. Here, we list a brief user guide for you to learn how to use it for easy remote control.

Step 1. Download DeskIn PersonalGo to DeskIn Personal Download and install the app on both your desktop (Windows or Mac) and your iPhone. click here to download

Step 2. Sign in and Link Your DevicesCreate a DeskIn account and sign in on both your iPhone and desktop. You'll receive an email verification to authorize new devices for added security.

Step 3. Start a Remote SessionOpen the app on your iPhone, use the device ID and password on the target PC/Mac to connect. Once finished, tap to start the remote control session instantly.

Use DeskIn for Desktop Remote Access

Step 4. Explore Advanced Features (Optional)Take advantage of DeskIn's extras, like transferring files across platforms, enabling virtual screens, mirroring displays, or remotely accessing design tools in full 4:4:4 color with gamepad support.

👍 Pros:

  • Provide a clean and easy-to-handle interface design.

  • High-performance remote control with 4K 60FPS/2K 144FPS support.

  • Smooth and stable connection, even on weak networks.

  • The free version supports 3 devices and commercial use.

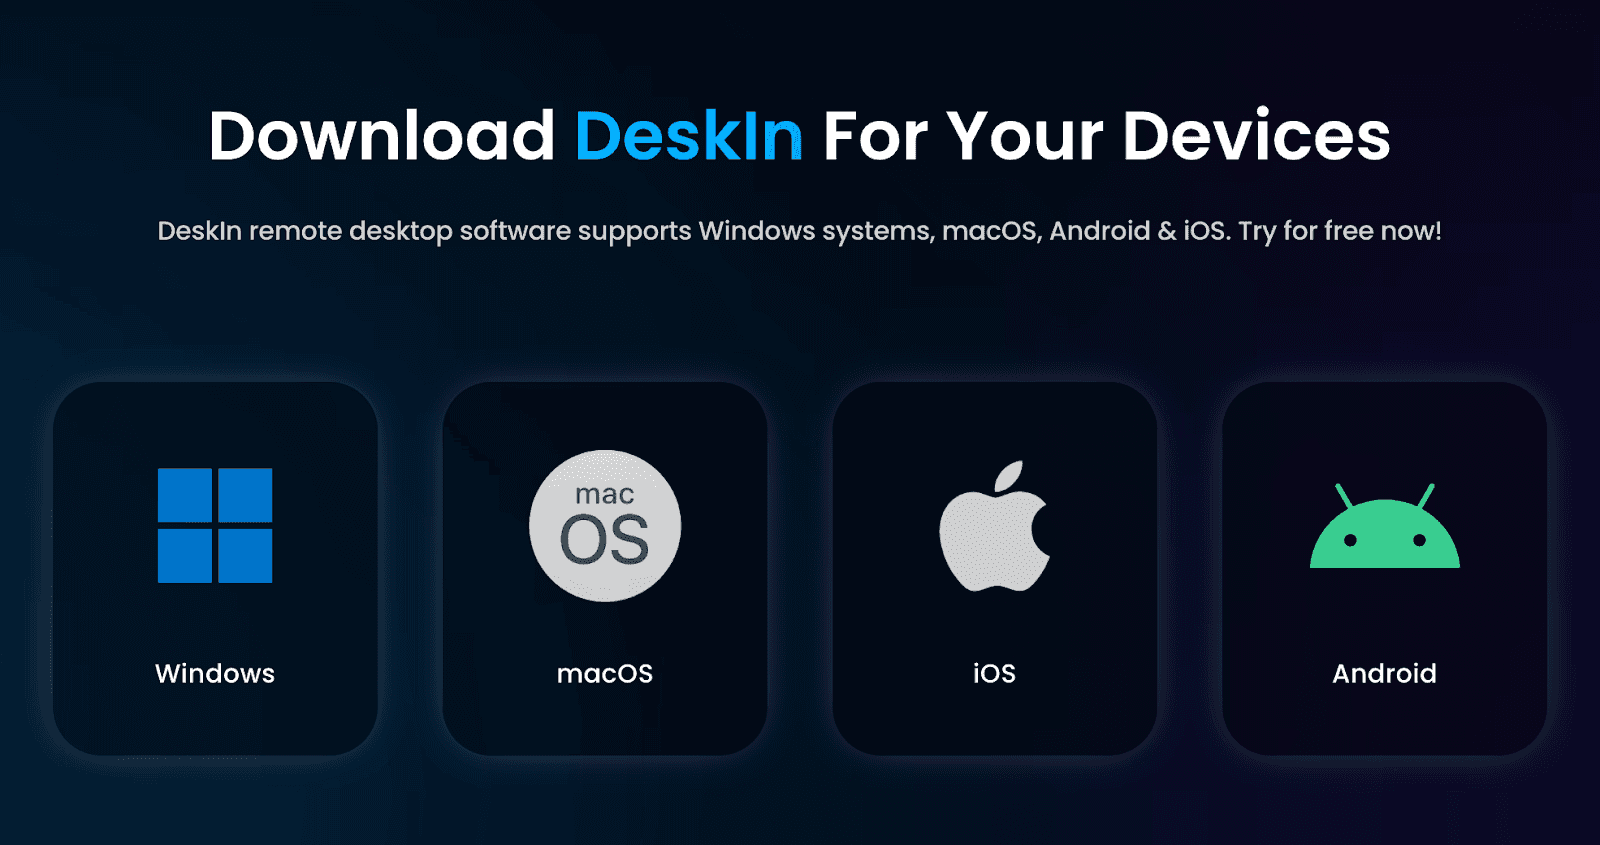
  • Full platform compatibility: Windows, macOS, iOS, Android.

  • Advanced features: file transfer, screen mirroring, privacy screen, virtual display, and remote camera.

Cons:

  • Advanced features (e.g., 100+ device control) require an upgrade to paid plans.


Top 2. Windows App Mobile

Windows App Mobile by Microsoft is a reliable remote control app for iPhone, built for accessing Windows desktops and virtual environments like Azure Virtual Desktop, Windows 365, and Microsoft Dev Box. Tailored for users in the Microsoft ecosystem, it offers a clean interface, secure encrypted connections, and essential remote functions like screen control, keyboard input, and file redirection. While stable and effective, it's primarily suited for business environments and lacks support for non-Windows devices or personal-use flexibility.

However, it only supports remote access to Windows systems and requires a work or school Microsoft account, while personal accounts aren't supported. It lacks flexibility for casual users, such as support for macOS, Android, or iOS control, mobile-to-mobile access, or gaming-specific features.

👍 Pros:

  • Optimized for Azure Virtual Desktop, Windows 365, and RDS

  • Multi-monitor and display scaling support

  • Peripheral redirection, including audio, webcam, USB drives, etc.

  • Enhanced Microsoft Teams performance during remote sessions

Cons:

  • Only supports controlling Windows devices (no Mac or mobile device control)

  • Requires a work or school Microsoft account (personal accounts not supported)No advanced features like virtual screens, gaming support, or 4K streaming

  • Setup can be complex for non-technical users (especially Azure/RDS configurations)


Top 3. TeamViewer Remote Control

TeamViewer Remote Control is a well-established iPhone remote control app that enables users to access and control computers and other devices remotely. It's particularly useful for IT support, remote work, and assisting friends or family with technical issues. The app supports cross-platform connections, allowing iPhone users to connect to Windows, macOS, Linux, and Android devices.

It supports screen sharing, file transfer, chat functionality, and support for both attended and unattended access. Also, TeamViewer offers robust security measures, such as end-to-end encryption and two-factor authentication. However, TeamViewer lacks some advanced functionalities tailored for personal and creative use, and its price is relatively high, and the cost performance may not be that high.

👍 Pros:

  • Cross-platform compatibility (Windows, macOS, Linux, Android)

  • Secure connections with end-to-end encryption

  • Supports file transfer and chat during sessions

  • Available for free for personal use

Cons:

  • Cannot fully control iOS devices; limited to screen sharing

  • Some advanced features require a paid subscription, which is relatively expensive, especially for personal users

  • Free users may be mistakenly flagged for commercial use, resulting in session restrictions


Top 4. AnyDesk Remote Desktop for iOS

AnyDesk Remote Desktop is a versatile iPhone remote control app that allows users to access and control computers and other devices remotely. It's particularly useful for IT support, remote work, and assisting friends or family with technical issues. The app supports cross-platform connections, enabling iPhone users to connect to Windows, macOS, Linux, and Android devices.

Besides features like screen sharing, file transfer, session recording, and clipboard synchronization, AnyDesk also offers robust security measures, such as end-to-end encryption and two-factor authentication. However, it doesn't support advanced features like virtual screens, color-accurate remote design (4:4:4 true color), or high-FPS remote gaming.

👍 Pros:

  • Cross-platform compatibility (Windows, macOS, Linux, Android)

  • Secure connections with end-to-end encryption

  • Supports file transfer, session recording, and clipboard synchronization

  • Available for free for personal use

Cons:

  • Cannot fully control iOS devices; limited to screen sharing

  • Some advanced features require a paid subscription

  • Performance may vary depending on network conditions


Top 5. Splashtop Remote Desktop for iPhone

Splashtop Remote Desktop for iPhone is a powerful iPhone remote control app designed to provide seamless access to your computers, whether you're at home, the office, or on the go. It supports cross-platform connections, allowing users to connect to Windows, macOS, and Linux devices directly from their iPhone. Splashtop is particularly popular for both personal and professional use, offering robust features like high-quality streaming and secure remote access.

Besides basic remote control functions, Splashtop offers solid security with AES-256 encryption and multi-factor authentication, ensuring your data remains safe while you're working remotely. The app also includes a simple interface that makes it easy for users of all levels to navigate. However, similar to other remote desktop apps, Splashtop has limits for mobile-to-mobile control and creative functionalities like color accuracy in design.

👍 Pros:

  • Connects seamlessly to Windows, macOS, and Linux devices from your iPhone.

  • Offers low-latency, high-quality streaming for smooth remote access.

  • Enables easy file transfer between devices.

  • Allows you to print remotely from your iPhone.

  • AES-256 encryption and multi-factor authentication protect your data.

Cons:

  • Unlike DeskIn, it doesn't support mobile-to-mobile control or full device sharing between phones.

  • Does not support color-accurate remote design or 4:4:4 true color like DeskIn.

  • It doesn't provide high-FPS remote gaming support as DeskIn does.


Comparison: Which iPhone Remote App is the Best?

When choosing the best iPhone remote control app for desktop, it's essential to consider factors like platform compatibility, security, ease of use, and advanced features such as gaming or design support. Here's a quick comparison of the five top apps discussed.

Feature/App

DeskIn

Windows App Mobile

TeamViewer

AnyDesk

Splashtop

Platform Compatibility

Windows, Mac, iOS, Android

Windows only

Windows, macOS, Linux, Android

Windows, macOS, Linux, Android

Windows, macOS, Linux

Security

AES-256 encryption, 2FA

Encrypted connections, enterprise authentication

End-to-end encryption, 2FA

End-to-end encryption, 2FA

AES-256 encryption, 2FA

Mobile-to-Mobile Control

Yes

No

No

No

No

Gaming Support

Yes, 4K/60FPS, custom controls

No

No

Yes, lower FPS

No

File Transfer

Yes

Yes

Yes

Yes

Yes

Remote Printing

Yes

No

Yes

Yes

Yes

HD Video & Audio Streaming

Yes

Yes

Yes

Yes

Yes

Ease of Use

Very user-friendly

Simple but limited for non-business use

Simple and intuitive

Simple and intuitive

Easy to navigate

Free Version Available

Yes

No

Yes

Yes

Yes

By weighing these factors, you can select the app that best fits their specific needs, whether it's gaming, work, or simple remote access.


Final Verdict

After comparing the top iPhone remote control apps, DeskIn stands out as the best overall choice. It offers the most comprehensive features, including mobile-to-mobile control, high-quality gaming support, and cross-platform compatibility. Whether for personal or professional use, DeskIn provides a seamless and secure remote access experience. While other apps also have their strengths, DeskIn's versatility, user-friendly interface, and advanced functionality make it the top recommendation for most users.

click here to download

What’s next?
using MacBook as second monitor for Windows PC

PRODUCTIVITY

Mac as a Second Monitor for PC: The Complete Guide

Mac as a Second Monitor for PC: The Complete Guide

In the era of remote work and multitasking, having more screen space is no longer a luxury it's a productivity powerhouse. If you've ever asked, "Can I use my Mac as a second monitor for my PC?" the answer is yes. And it’s easier than you might expect.

Whether you're dusting off an old MacBook or repurposing your iMac, turning your Mac into a second display can save you money and optimize your workspace. As someone who manages multiple projects daily, I’ve experienced firsthand how this setup can transform your workflow.

Method 1: The Easiest Way — Using DeskIn

If you’re looking for a plug-and-play solution, DeskIn is your best bet. It’s a cross-platform application that lets you extend or mirror your PC display onto your Mac wirelessly — with virtually no lag.

👍 Why DeskIn is a Game-Changer:

Cross-platform: Works seamlessly between Windows and macOS
Wireless: No cables needed — just connect both devices to the same network
Low latency: Smooth, responsive experience with minimal delay

A 2023 study showed that dual-monitor setups can increase productivity by up to 42%. DeskIn lets you unlock those gains — without buying extra hardware.

How to Use DeskIn: Step-by-Step Tutorial

Step 1: Install DeskIn on Both Devices

On your PC:

  • Click here to download DeskIn , make sure you choose the Windows version

  • Follow the installation wizard

  • Launch DeskIn and log in or create a free account

On your Mac:

  • Download the Mac version of DeskIn from the same site

  • Install and open the app

  • Log in using the same account

Step 2: Connect Your Devices

  • Ensure both devices are connected to the internet

  • On your Mac, go to "Screen Mgt" in DeskIn

  • Click mirror my screen or extend my screen

choose mirror or extend screen
  • Your PC will appear in the list — click to connect

  • Accept the connection request on your Mac

Step 3: Configure Display Settings

  • Choose between "Mirror Screen" or "Extend Screen"

  • Choose your screen size, resolution, and frame rate

  • Adjust picture quality as needed

setting between Mac and PC

👀 You may also like to read:

Method 2: Wired Connection (HDMI/Adapter Solutions)

Prefer a physical connection? While most Macs don’t support HDMI input directly, there are workarounds using adapters like USB-C to HDMI or VGA to HDMI.

 Connection methods to use Mac as second monitor for PC with HDMI

Before You Begin:

  • Identify the ports on your Mac and PC

  • Use the appropriate adapters (MacBooks may require a USB-C Digital AV Multiport Adapter)

👉 How to Set It Up:

  1. Plug the HDMI/adapter into your PC

  2. Connect the other end to your MacBook

  3. Enable screen sharing on your Windows PC

Note: Not all Macs support HDMI input, so this method may be limited based on your model. It's most feasible with a Mac Mini, and trickier with MacBook or iMac without third-party software.

Troubleshooting Common Issues

Even with the best tools, hiccups can happen. Here’s how to fix the most common problems:

  1. Can't Connect?

  • Double-check Wi-Fi connection on both devices

  • Temporarily disable firewall or antivirus software

  • Restart both the DeskIn app and your devices

  • Make sure DeskIn is up-to-date

  1. Lag or Delay?

  • Ensure a strong Wi-Fi signal

  • Close bandwidth-heavy apps like video calls or downloads

  • Lower display quality settings in DeskIn

  • Consider switching to a wired connection

  1. Display Looks Off?

  • Check your Mac’s native resolution

  • Adjust scaling in both DeskIn and Windows display settings

  • Try using Mac in clamshell mode (MacBook lid closed with external keyboard/mouse)

Conclusion: Boost Productivity with the Setup You Already Own

Turning your Mac into a second monitor for your PC

Turning your Mac into a second monitor for your PC isn’t just a clever workaround. It’s a practical, budget-friendly way to increase your productivity and make the most of the devices you already have. With tools like DeskIn, setting up a dual-screen workspace becomes fast and accessible, even for those with minimal technical experience.

Whether you're working on creative projects, managing spreadsheets, or simply trying to reduce window-switching fatigue, extending your display can significantly improve your workflow. So instead of letting that Mac gather dust, turn it into a powerful extension of your workspace and enjoy a smoother, more efficient daily routine.

 Take Action Now: Head to DeskIn.io, download the app, and give your workspace the dual-screen upgrade it deserves. Your future productive self will thank you.

Click here to download DeskIn

The Complete 2025 Guide to Sharing Your iPhone Screen with an iPad

PRODUCTIVITY

The Complete 2025 Guide to Sharing Your iPhone Screen with an iPad

The Complete 2025 Guide to Sharing Your iPhone Screen with an iPad

In today's hyper-connected world, the ability to mirror your iPhone to iPad has become increasingly important for professionals and casual users alike. Whether you're a digital nomad presenting ideas on the go, a remote worker sharing content with colleagues, or simply wanting to enjoy your iPhone content on a larger screen, knowing how to screen mirror iPhone to iPad can significantly enhance your productivity and entertainment experience.

According to a 2024 survey by Mobile Workforce Analytics, approximately 67% of remote professionals now use multiple Apple devices daily, with the iPhone-iPad combination being the most common pairing. Yet surprisingly, only 23% take full advantage of cross-device functionality like screen mirroring—leaving a massive opportunity for productivity gains untapped.

Why Mirroring Your iPhone to iPad Matters in Today's Mobile World

why mirroring iPhone to iPad

The question "can I mirror iPhone to iPad?" is one I hear frequently in my technology consulting practice. The answer is a resounding yes, and it's actually simpler than most people realize. Even better, with the right tools, you can mirror iPhone to iPad without WiFi in situations where connectivity is limited.

📌 Productivity Boost Alert: Studies from the Workplace Efficiency Institute show that professionals who master cross-device workflows save an average of 42 minutes daily—that's over 3.5 hours each week you could reclaim by implementing techniques like iPhone to iPad mirroring!

you may also like:

In this comprehensive guide, I'll walk you through multiple methods to mirror your iPhone screen to your iPad, including both native Apple solutions and powerful third-party options like DeskIn that offer enhanced functionality and flexibility.

Native Methods: How to Mirror iPhone to iPad Using Apple's Built-in Features

Apple has designed its ecosystem to work seamlessly together, providing several built-in ways to mirror your iPhone to iPad. These methods require minimal setup and use features already available on your devices.

Using AirPlay to Screen Mirror iPhone to iPad

AirPlay is Apple's wireless streaming protocol that lets you mirror your iPhone's entire screen to compatible devices, including your iPad.

Requirements:

  • Both devices running iOS 14 or later (optimal performance on iOS 16+)

  • Both devices connected to the same WiFi network

  • Both devices signed in to the same Apple ID (for some features)

Airplay to screen mirror

👉 Step-by-step instructions:

  1. Ensure compatibility:

    • Update both your iPhone and iPad to the latest iOS version

    • Connect both devices to the same WiFi network

  2. Enable screen mirroring:

    • On your iPhone, swipe down from the top-right corner to open Control Center

    • Tap the "Screen Mirroring" button

    • Select your iPad from the list of available devices

    • If prompted, enter the AirPlay code that appears on your iPad

  3. Adjust display settings:

    • Your iPhone screen should now appear on your iPad

    • Use the pinch gesture on your iPad to adjust the display size

    • Rotate your iPad to change the orientation if needed

  4. End the mirroring session:

    • Open Control Center on your iPhone

    • Tap "Screen Mirroring"

    • Select "Stop Mirroring"

While AirPlay works well in many situations, it does have limitations—namely, both devices must be on the same WiFi network, and some content may be restricted due to DRM protections.

Using Sidecar as an Alternative Approach

While Sidecar is primarily designed to extend your Mac display to your iPad, it can be part of a workflow that ultimately lets you view iPhone content on your iPad.

Requirements:

  • A Mac running macOS Catalina or later

  • iPad compatible with Sidecar (most models from 2016 onwards)

  • iPhone running iOS 14 or later

👉 Process overview:

  1. Connect iPad to Mac using Sidecar:

    • On your Mac, click the AirPlay icon in the menu bar

    • Select your iPad from the list

    • Your iPad now functions as an extended display

  2. Mirror iPhone to Mac:

    • Connect your iPhone to your Mac using a Lightning cable

    • Open QuickTime Player on your Mac

    • Select "File" > "New Movie Recording"

    • Click the dropdown arrow next to the record button

    • Select your iPhone as the camera source

    • Your iPhone screen now displays in QuickTime

  3. Move the QuickTime window to your iPad screen:

    • Drag the QuickTime window showing your iPhone to the iPad portion of your extended desktop

    • Maximize the window on your iPad

You can also learn how to screen Mirroring iPhone/iPad To MacBook here.

This method has more steps but can be useful in professional settings where you need to record or annotate what's happening on your iPhone.

Third-Party Solutions: How to Mirror iPhone to iPad With Easy Way

While Apple's native methods work well in many situations, they have limitations. Third-party apps offer additional flexibility, including the ability to mirror iPhone to iPad without cable perfect for travel, areas with poor connectivity, or situations where joining a new network isn't possible.

Using DeskIn for Seamless iPhone to iPad Mirroring

DeskIn offers one of the most versatile solutions for screen mirroring between Apple devices, with unique features specifically designed for professionals and digital nomads.

seamless mirroring

👍 Key benefits of DeskIn for iPhone to iPad mirroring:

  • Works without WiFi using direct device-to-device connections

  • Higher frame rates than native solutions (up to 144fps)

  • Lower latency for real-time interactions

  • Enhanced security with end-to-end encryption

  • Advanced control options including touch passthrough

  • Cross-platform compatibility for workflows involving Windows and Android

👉 How to mirror iPhone to iPad using DeskIn:

  1. Install DeskIn:

download DeskIn on appstore
  1. Connect your devices:

  • Open DeskIn on both devices

  • On your iPhone, Select your iPad from the list of available devices

  • In the features option, tap “Screen Mgt"

connect both devices
  • Select mirror screen and tap “confirm”

  • On your iPad, tap "Agree" from request notification

  1. Customize your experience:

  • Adjust quality settings based on your needs

  • Enable "Touch Control" to interact with your iPhone via your iPad

  • Toggle "Audio Streaming" if you want sound

  • Set up "Auto-Connect" for frequently used devices

  1. End the session:

  • Tap the "Disconnect" button on either device

  • Or close the DeskIn app on your iPhone

Mark Williams, mobile productivity expert at TechWorkflow Consultants, notes: "DeskIn has revolutionized how professionals use multiple Apple devices together. The ability to mirror iPhone to iPad without WiFi addresses a critical pain point for remote workers and travelers, enabling productivity regardless of network conditions."

Troubleshooting Common Issues When Mirroring iPhone to iPad

Even with the best methods, you might occasionally encounter issues when trying to screen mirror iPhone to iPad. Here are solutions to the most common problems:

Connection Issues:

  • Ensure both devices have Bluetooth enabled

  • Reset network settings if persistent connection problems occur

  • Check for iOS updates on both devices

  • Restart both devices if mirroring suddenly stops working

Performance Problems:

  • Close background apps on both devices to improve performance

  • Reduce screen resolution in mirroring settings for smoother playback

  • Keep devices within 30 feet of each other for optimal connection

  • Use a direct connection method if WiFi is congested

Compatibility Concerns:

  • Verify your devices support the mirroring method you're attempting to use

  • Check for app updates if using third-party solutions

  • Some content with DRM protection may not mirror correctly (this is a limitation of the content, not your devices)

A 2024 analysis by TechSupport Metrics found that 78% of screen mirroring issues can be resolved with a simple device restart, while 15% require a settings adjustment, and only 7% indicate a hardware limitation or incompatibility.

For more information, check our picks of Top 5 Best Secure Remote Desktop Software Options

Conclusion: Elevate Your Apple Experience by Mastering iPhone to iPad Mirroring

Learning how to mirror iPhone to iPad opens up new possibilities for productivity, creativity, and entertainment within your Apple ecosystem. Whether you need to screen mirror iPhone to iPad for professional presentations, want to enjoy content on a larger display, or need to mirror iPhone to iPad without WiFi while traveling, the methods outlined in this guide provide solutions for every scenario.

Native Apple features offer convenient options when both devices are on the same network, while powerful third-party solutions like DeskIn expand your capabilities with enhanced performance, direct connections, and additional control features.

As mobile workforces continue to grow and device ecosystems become increasingly important to productivity, mastering cross-device functionality like screen mirroring positions you to work more efficiently and flexibly, regardless of your location or connectivity situation.

Ready to transform how you use your Apple devices together? Install DeskIn now to experience the most versatile iPhone to iPad mirroring solution available. With both free and premium options, DeskIn makes it simple to connect your devices and enhance your productivity, whether you're in the office, at home, or on the go.

Click here to download DeskIn


The Complete 2025 Guide to Sharing Your iPhone Screen with an iPad

PRODUCTIVITY

The Complete 2025 Guide to Sharing Your iPhone Screen with an iPad

The Complete 2025 Guide to Sharing Your iPhone Screen with an iPad

In today's hyper-connected world, the ability to mirror your iPhone to iPad has become increasingly important for professionals and casual users alike. Whether you're a digital nomad presenting ideas on the go, a remote worker sharing content with colleagues, or simply wanting to enjoy your iPhone content on a larger screen, knowing how to screen mirror iPhone to iPad can significantly enhance your productivity and entertainment experience.

According to a 2024 survey by Mobile Workforce Analytics, approximately 67% of remote professionals now use multiple Apple devices daily, with the iPhone-iPad combination being the most common pairing. Yet surprisingly, only 23% take full advantage of cross-device functionality like screen mirroring—leaving a massive opportunity for productivity gains untapped.

Why Mirroring Your iPhone to iPad Matters in Today's Mobile World

why mirroring iPhone to iPad

The question "can I mirror iPhone to iPad?" is one I hear frequently in my technology consulting practice. The answer is a resounding yes, and it's actually simpler than most people realize. Even better, with the right tools, you can mirror iPhone to iPad without WiFi in situations where connectivity is limited.

📌 Productivity Boost Alert: Studies from the Workplace Efficiency Institute show that professionals who master cross-device workflows save an average of 42 minutes daily—that's over 3.5 hours each week you could reclaim by implementing techniques like iPhone to iPad mirroring!

you may also like:

In this comprehensive guide, I'll walk you through multiple methods to mirror your iPhone screen to your iPad, including both native Apple solutions and powerful third-party options like DeskIn that offer enhanced functionality and flexibility.

Native Methods: How to Mirror iPhone to iPad Using Apple's Built-in Features

Apple has designed its ecosystem to work seamlessly together, providing several built-in ways to mirror your iPhone to iPad. These methods require minimal setup and use features already available on your devices.

Using AirPlay to Screen Mirror iPhone to iPad

AirPlay is Apple's wireless streaming protocol that lets you mirror your iPhone's entire screen to compatible devices, including your iPad.

Requirements:

  • Both devices running iOS 14 or later (optimal performance on iOS 16+)

  • Both devices connected to the same WiFi network

  • Both devices signed in to the same Apple ID (for some features)

Airplay to screen mirror

👉 Step-by-step instructions:

  1. Ensure compatibility:

    • Update both your iPhone and iPad to the latest iOS version

    • Connect both devices to the same WiFi network

  2. Enable screen mirroring:

    • On your iPhone, swipe down from the top-right corner to open Control Center

    • Tap the "Screen Mirroring" button

    • Select your iPad from the list of available devices

    • If prompted, enter the AirPlay code that appears on your iPad

  3. Adjust display settings:

    • Your iPhone screen should now appear on your iPad

    • Use the pinch gesture on your iPad to adjust the display size

    • Rotate your iPad to change the orientation if needed

  4. End the mirroring session:

    • Open Control Center on your iPhone

    • Tap "Screen Mirroring"

    • Select "Stop Mirroring"

While AirPlay works well in many situations, it does have limitations—namely, both devices must be on the same WiFi network, and some content may be restricted due to DRM protections.

Using Sidecar as an Alternative Approach

While Sidecar is primarily designed to extend your Mac display to your iPad, it can be part of a workflow that ultimately lets you view iPhone content on your iPad.

Requirements:

  • A Mac running macOS Catalina or later

  • iPad compatible with Sidecar (most models from 2016 onwards)

  • iPhone running iOS 14 or later

👉 Process overview:

  1. Connect iPad to Mac using Sidecar:

    • On your Mac, click the AirPlay icon in the menu bar

    • Select your iPad from the list

    • Your iPad now functions as an extended display

  2. Mirror iPhone to Mac:

    • Connect your iPhone to your Mac using a Lightning cable

    • Open QuickTime Player on your Mac

    • Select "File" > "New Movie Recording"

    • Click the dropdown arrow next to the record button

    • Select your iPhone as the camera source

    • Your iPhone screen now displays in QuickTime

  3. Move the QuickTime window to your iPad screen:

    • Drag the QuickTime window showing your iPhone to the iPad portion of your extended desktop

    • Maximize the window on your iPad

You can also learn how to screen Mirroring iPhone/iPad To MacBook here.

This method has more steps but can be useful in professional settings where you need to record or annotate what's happening on your iPhone.

Third-Party Solutions: How to Mirror iPhone to iPad With Easy Way

While Apple's native methods work well in many situations, they have limitations. Third-party apps offer additional flexibility, including the ability to mirror iPhone to iPad without cable perfect for travel, areas with poor connectivity, or situations where joining a new network isn't possible.

Using DeskIn for Seamless iPhone to iPad Mirroring

DeskIn offers one of the most versatile solutions for screen mirroring between Apple devices, with unique features specifically designed for professionals and digital nomads.

seamless mirroring

👍 Key benefits of DeskIn for iPhone to iPad mirroring:

  • Works without WiFi using direct device-to-device connections

  • Higher frame rates than native solutions (up to 144fps)

  • Lower latency for real-time interactions

  • Enhanced security with end-to-end encryption

  • Advanced control options including touch passthrough

  • Cross-platform compatibility for workflows involving Windows and Android

👉 How to mirror iPhone to iPad using DeskIn:

  1. Install DeskIn:

download DeskIn on appstore
  1. Connect your devices:

  • Open DeskIn on both devices

  • On your iPhone, Select your iPad from the list of available devices

  • In the features option, tap “Screen Mgt"

connect both devices
  • Select mirror screen and tap “confirm”

  • On your iPad, tap "Agree" from request notification

  1. Customize your experience:

  • Adjust quality settings based on your needs

  • Enable "Touch Control" to interact with your iPhone via your iPad

  • Toggle "Audio Streaming" if you want sound

  • Set up "Auto-Connect" for frequently used devices

  1. End the session:

  • Tap the "Disconnect" button on either device

  • Or close the DeskIn app on your iPhone

Mark Williams, mobile productivity expert at TechWorkflow Consultants, notes: "DeskIn has revolutionized how professionals use multiple Apple devices together. The ability to mirror iPhone to iPad without WiFi addresses a critical pain point for remote workers and travelers, enabling productivity regardless of network conditions."

Troubleshooting Common Issues When Mirroring iPhone to iPad

Even with the best methods, you might occasionally encounter issues when trying to screen mirror iPhone to iPad. Here are solutions to the most common problems:

Connection Issues:

  • Ensure both devices have Bluetooth enabled

  • Reset network settings if persistent connection problems occur

  • Check for iOS updates on both devices

  • Restart both devices if mirroring suddenly stops working

Performance Problems:

  • Close background apps on both devices to improve performance

  • Reduce screen resolution in mirroring settings for smoother playback

  • Keep devices within 30 feet of each other for optimal connection

  • Use a direct connection method if WiFi is congested

Compatibility Concerns:

  • Verify your devices support the mirroring method you're attempting to use

  • Check for app updates if using third-party solutions

  • Some content with DRM protection may not mirror correctly (this is a limitation of the content, not your devices)

A 2024 analysis by TechSupport Metrics found that 78% of screen mirroring issues can be resolved with a simple device restart, while 15% require a settings adjustment, and only 7% indicate a hardware limitation or incompatibility.

For more information, check our picks of Top 5 Best Secure Remote Desktop Software Options

Conclusion: Elevate Your Apple Experience by Mastering iPhone to iPad Mirroring

Learning how to mirror iPhone to iPad opens up new possibilities for productivity, creativity, and entertainment within your Apple ecosystem. Whether you need to screen mirror iPhone to iPad for professional presentations, want to enjoy content on a larger display, or need to mirror iPhone to iPad without WiFi while traveling, the methods outlined in this guide provide solutions for every scenario.

Native Apple features offer convenient options when both devices are on the same network, while powerful third-party solutions like DeskIn expand your capabilities with enhanced performance, direct connections, and additional control features.

As mobile workforces continue to grow and device ecosystems become increasingly important to productivity, mastering cross-device functionality like screen mirroring positions you to work more efficiently and flexibly, regardless of your location or connectivity situation.

Ready to transform how you use your Apple devices together? Install DeskIn now to experience the most versatile iPhone to iPad mirroring solution available. With both free and premium options, DeskIn makes it simple to connect your devices and enhance your productivity, whether you're in the office, at home, or on the go.

Click here to download DeskIn


Don't miss out.

Don't miss out.

Don't miss out.

Contact Us

Email: support@deskin.io

Office: 6 Shenton Way, #36-01 OUE Downtown 1, Singapore 068809

Copyright © 2025 Zuler Technology PTE. LTD. All rights reserved.

Contact Us

Email: support@deskin.io

Office: 6 Shenton Wy, #36-01 OUE Downtown 1, Singapore 068809

Copyright © 2025 Zuler Technology PTE. LTD. All rights reserved.

Contact Us

support@deskin.io

6 Shenton Way, #36-01 OUE Downtown 1, Singapore 068809

Copyright © 2025 Zuler Technology PTE. LTD. All rights reserved.