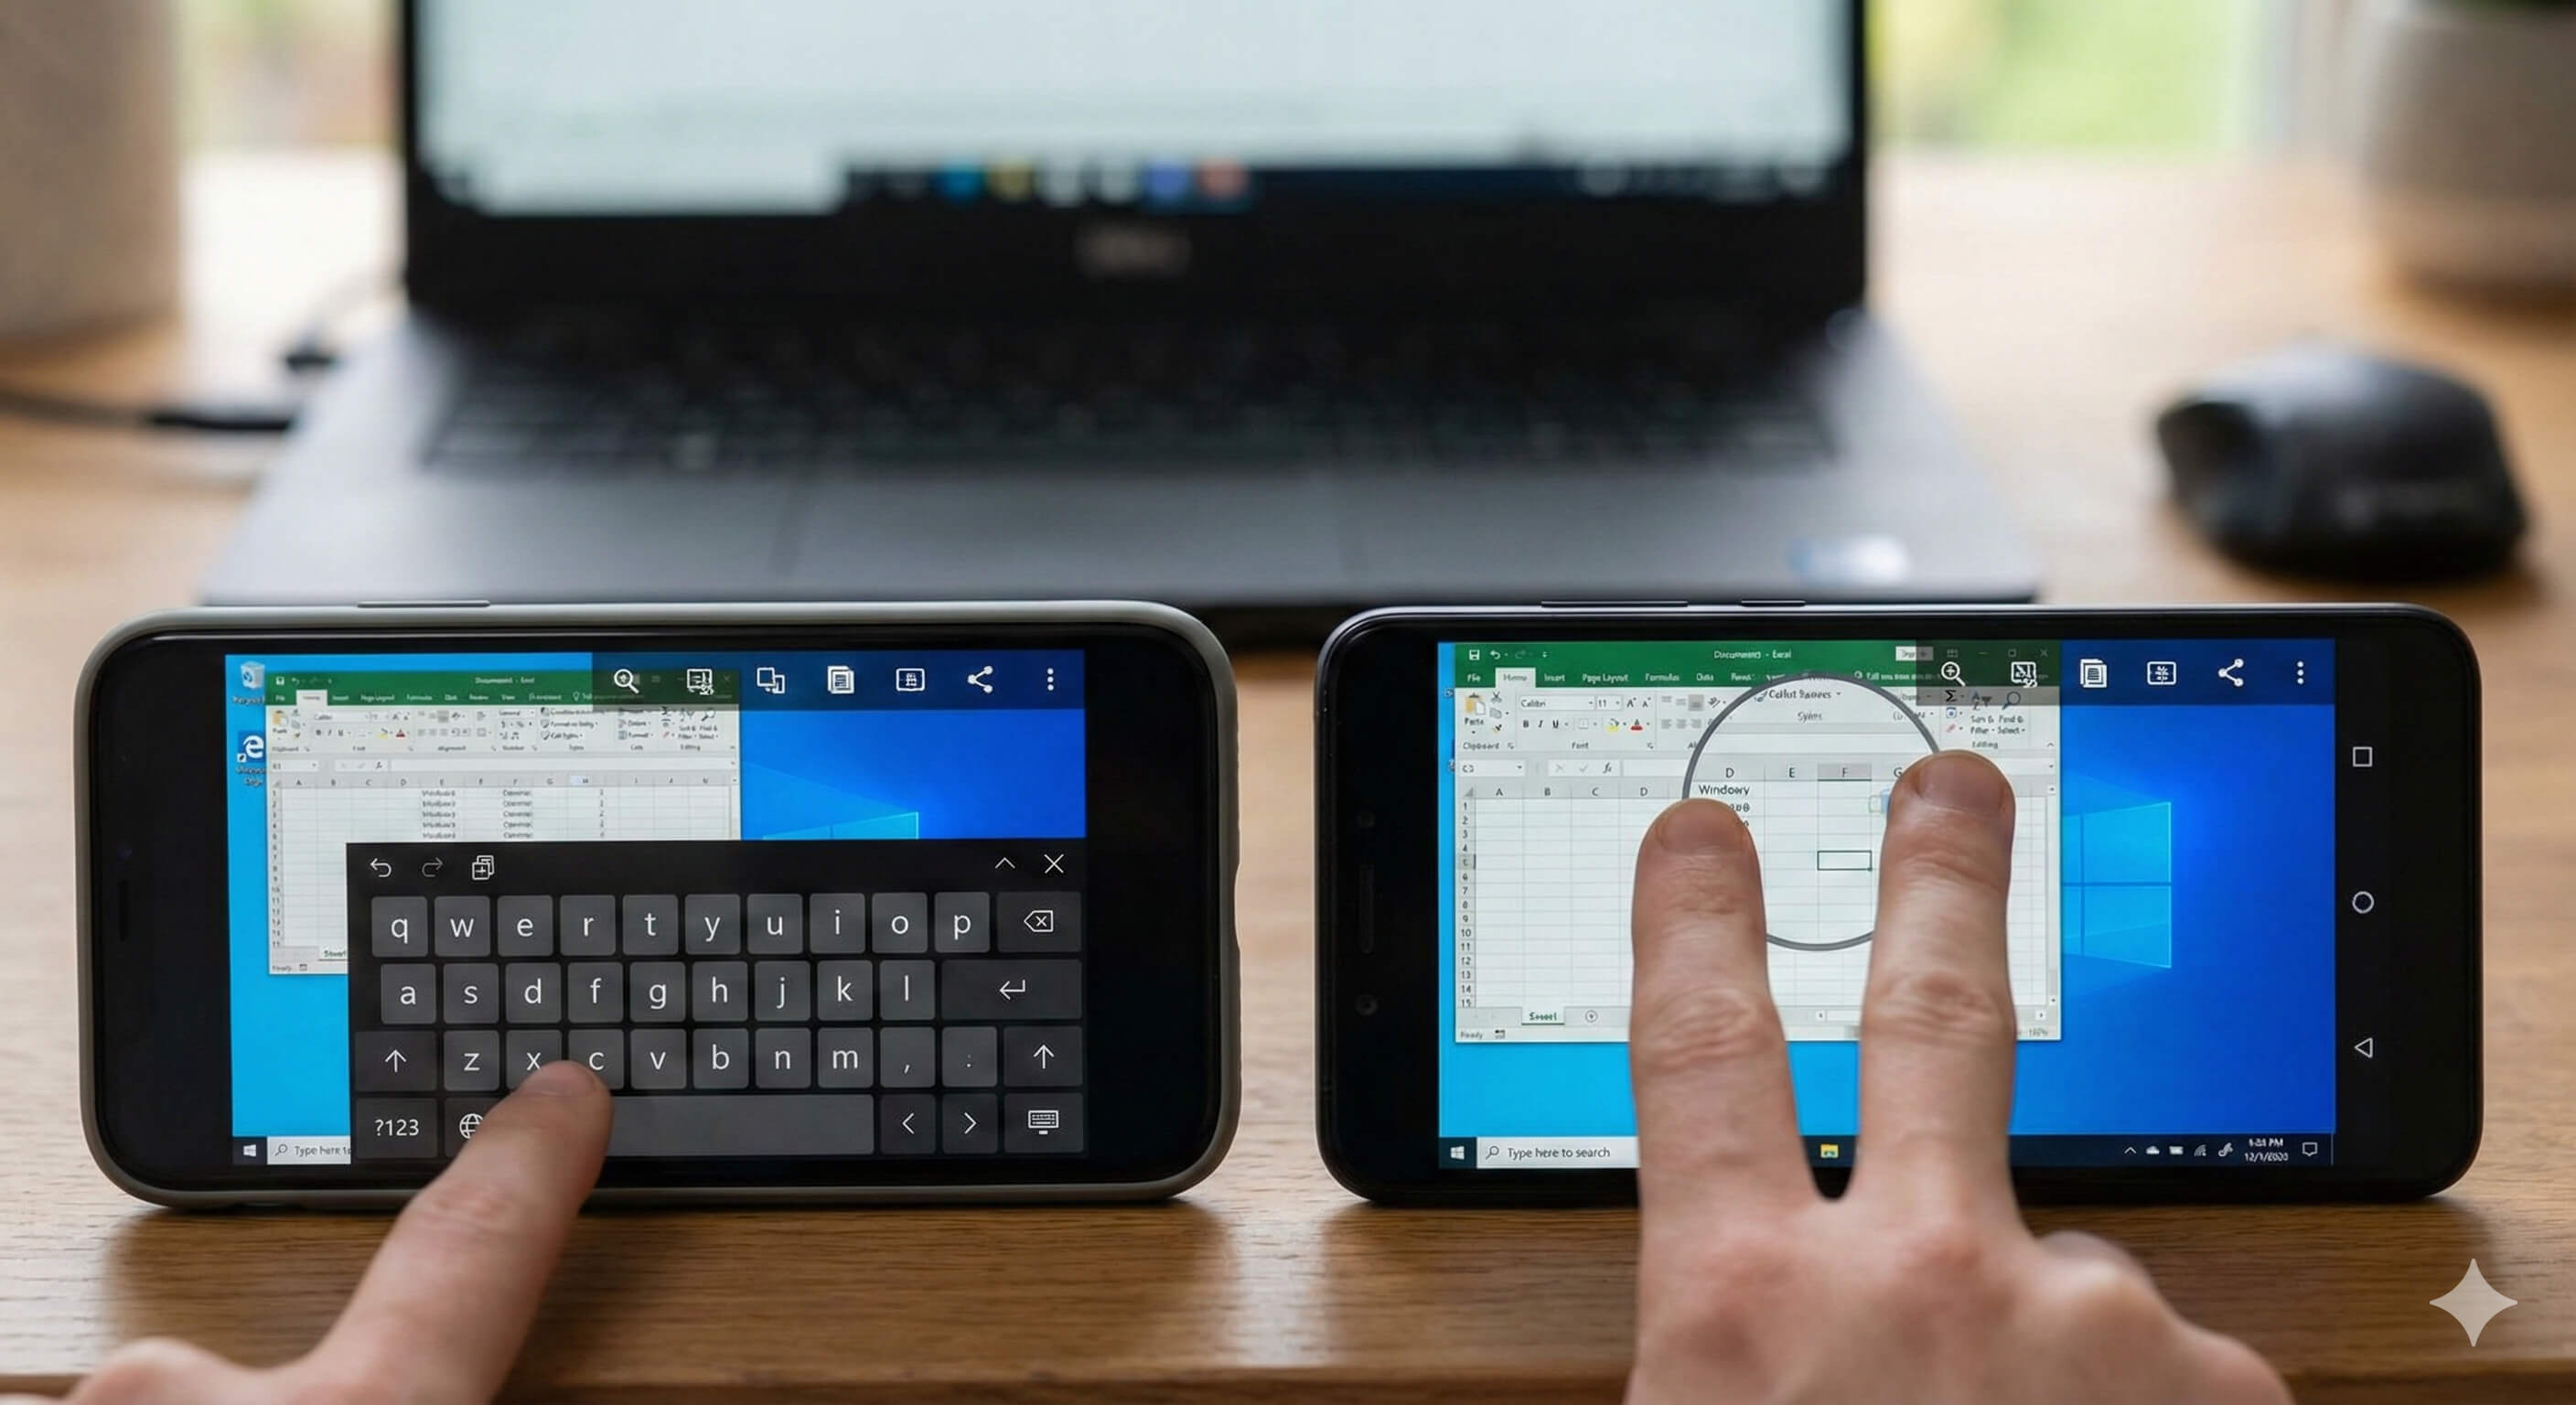
Ngayon ay 2026, at akalain mong magkakaroon na ng seamless na paglipat ng mga file sa pagitan ng mga device. Ngunit narito tayo: ang opisyal na Android File Transfer ng Google ay patuloy na nag-crash sa macOS Sequoia. Ang Quick Share ay natutukoy lamang ang mga device kalahati ng oras. At Bluetooth? Mas mabuting gamitin para sa isang contact card lamang—hindi para sa iyong 4GB na bakasyon na video.
Ang katotohanan ay ang software sa paglilipat ng file para sa Android ay nahati sa mga espesyal na tool. Ang ilan ay mahusay sa lokal na bilis. Ang iba ay nagbubukas ng remote access. Ang ilan ay nagpapahintulot na ma-access mo ang mga file sa isang computer mula sa Android habang ikaw ay 3,000 milya ang layo.
Maaaring gusto mo rin:
Overview ng Mga App sa Android File Transfer
Kagamitan | Pinakamainam Para sa | Mga Plataporma | Koneksyon | Presyo |
|---|---|---|---|---|
DeskIn
| Remote na access sa file at cross‑platform na pamamahala | Win, Mac, iOS, Android, Web | P2P / Relay | Libreng / Bayad |
MobiKin Assistant para sa Android | Backup ng data ng Android at paglilipat (mga contact, file, atbp.) | Win, Mac ↔ Android | USB / Wi‑Fi | Freemium |
Quick Share | Instant na malapit na pagbabahagi (Android ↔ Win) | Android, Win, ChromeOS | Wi‑Fi Direct + BT | Libre |
Send Anywhere | Pagpapadala ng malalaking file sa pamamagitan ng 6‑digit na code | Lahat ng pangunahing OS | Wi‑Fi / Cellular | Libre / Bayad |
MacDroid
| Maaasahang Android ↔ Mac USB / Wi‑Fi | Mac ↔ Android | USB / Wi‑Fi | Freemium |
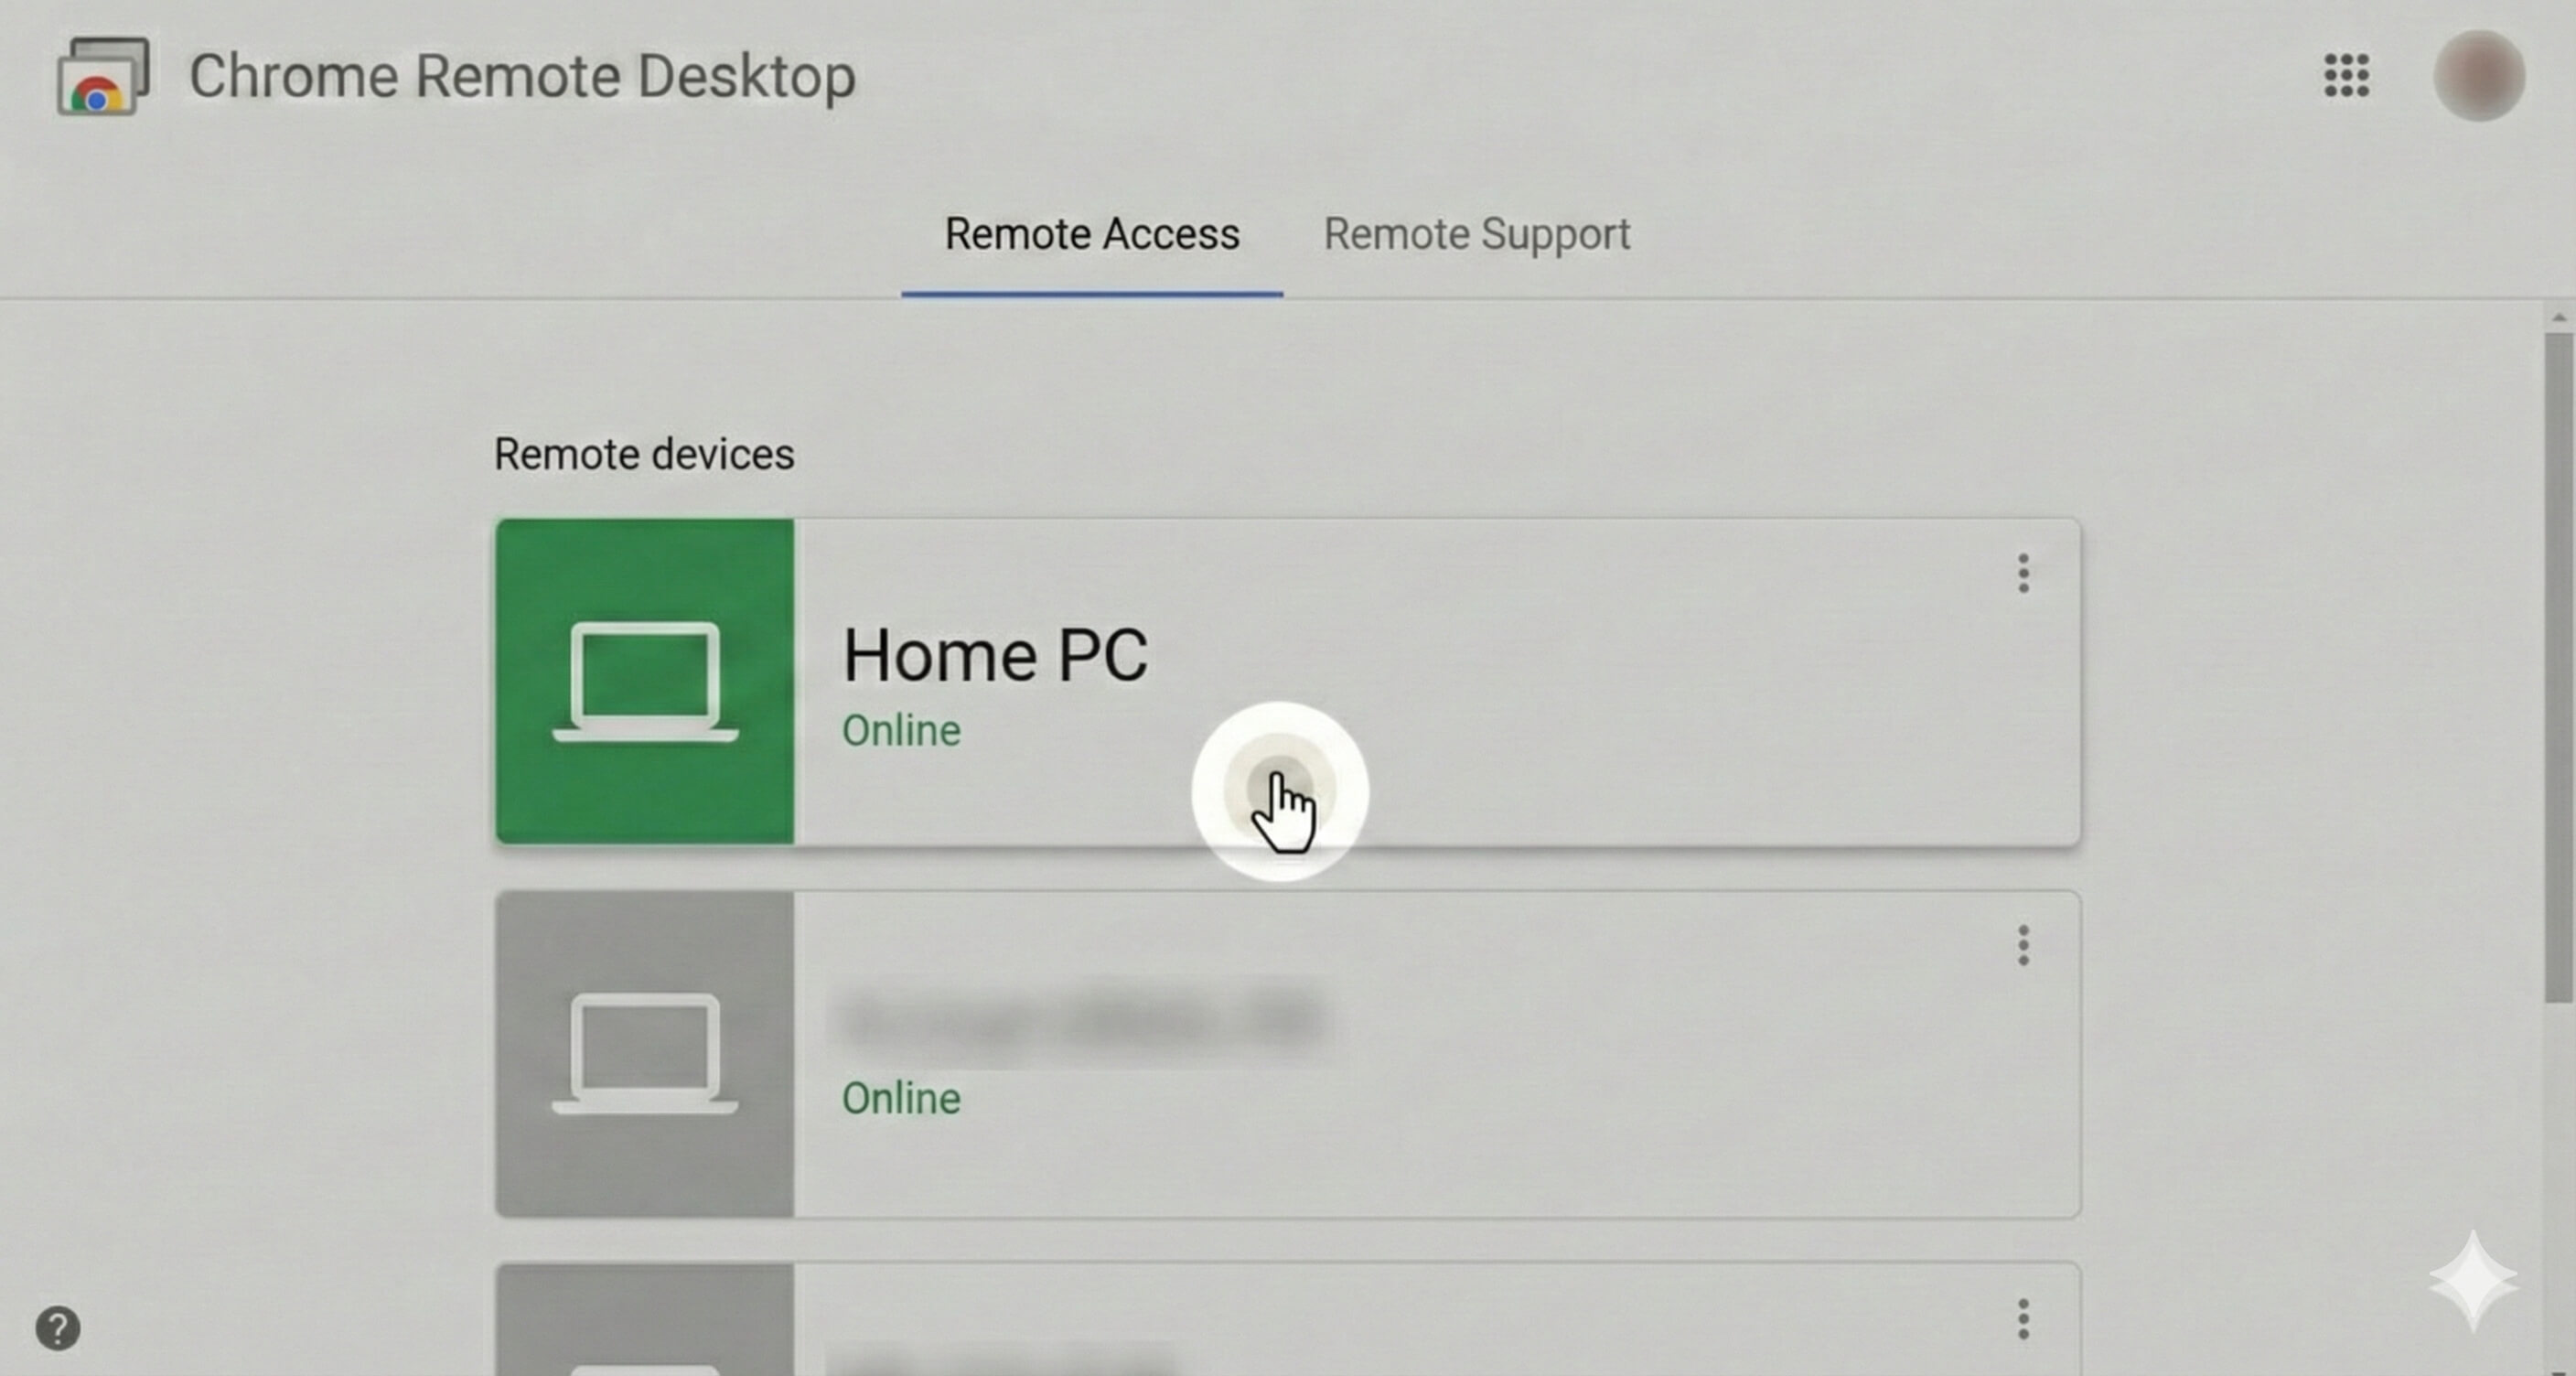
AirDroid | Remote na pamamahala at kontrol ng Android | Web, Win, Mac, Android | Wi‑Fi / Remote | Freemium |
Phone Link | Madaling pagsasama ng Windows-Android | Win, Android | Wi‑Fi / BT | Libre |
Smart Switch | Migrasyon ng device ng Samsung | Samsung, iOS, Android | USB / Wi‑Fi | Libre |
LocalSend | Privacy-friendly na mga lokal na network na paglilipat | Lahat ng pangunahing OS | LAN (Wi‑Fi) | Libre (Open source) |
iReaShare Android Manager | Kompletong pamamahala ng data ng Android | Win, Mac ↔ Android | USB / Wi‑Fi | Freemium |
Narito ang detalyadong pagsusuri para sa 10 pinakamahusay na aplikasyon sa paglilipat ng file ng Android.
1. DeskIn: Pinakamainam para sa Remote File Access at Cross‑Platform Management

Mga Kalamangan
Hindi inaalintana ang remote access sa mga PC files mula sa anumang device (Android, iOS, Web)
High‑speed na P2P file transfer (hanggang 12MB/s) na may auto‑resume
Cross‑platform: control ng Windows/Mac mula sa Android, paglilipat ng mga file sa pagitan ng Android at Windows PC nang wireless
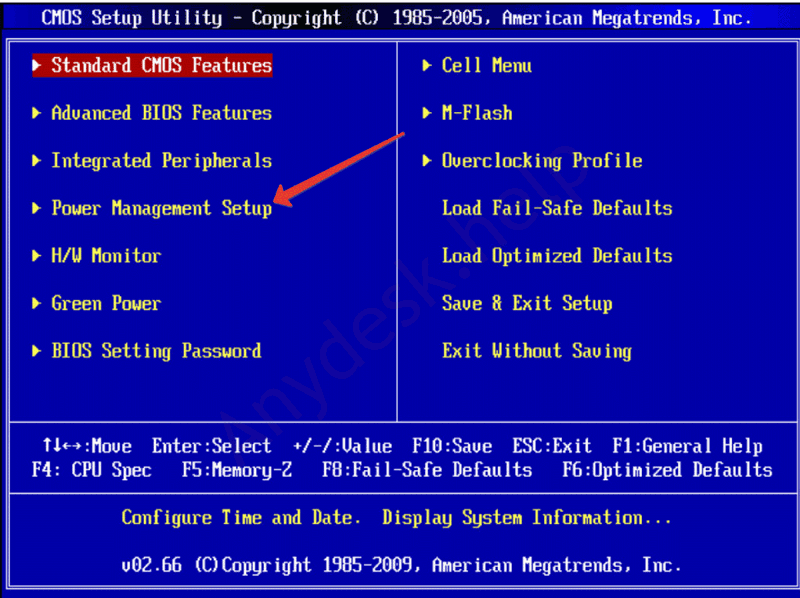
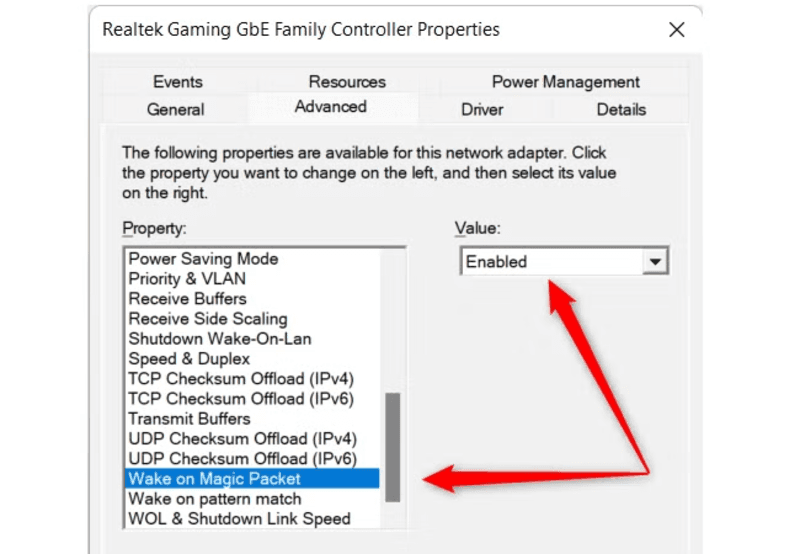
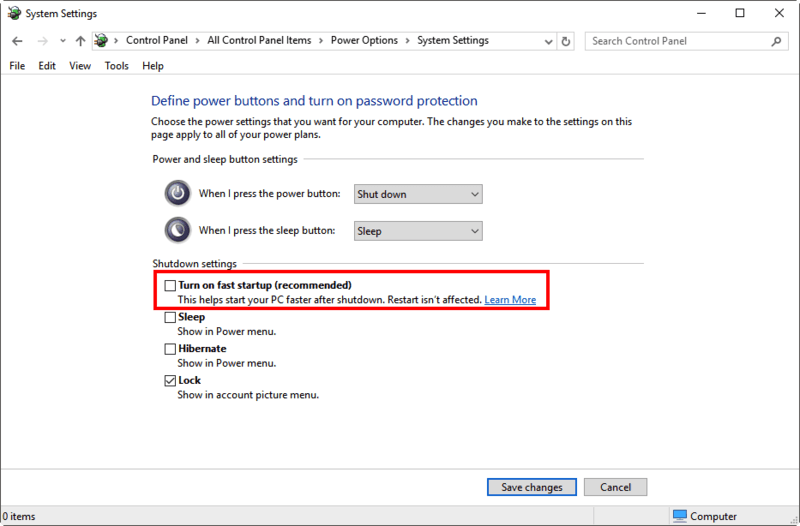
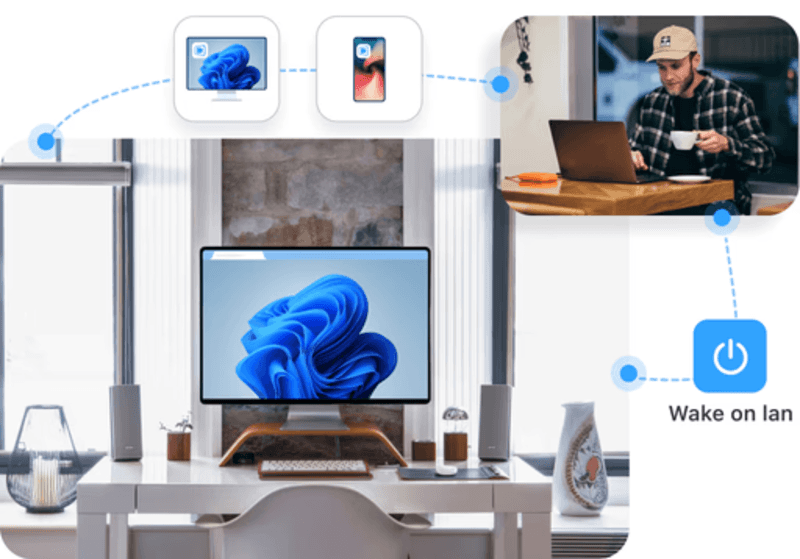
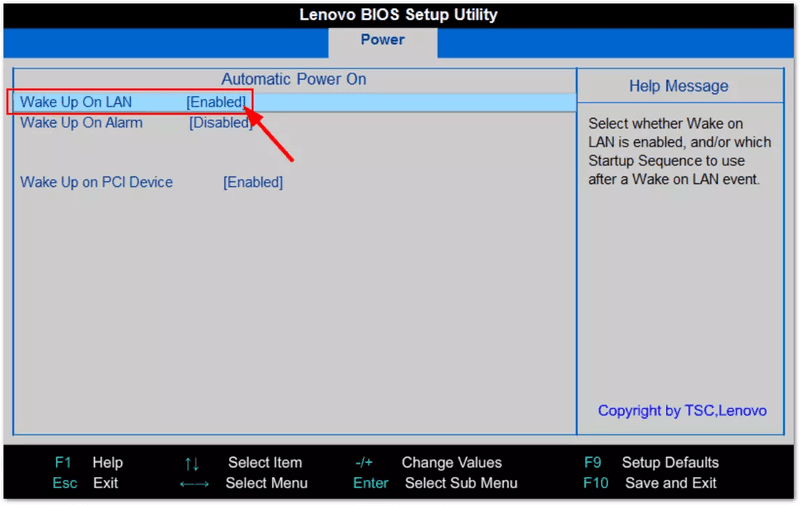
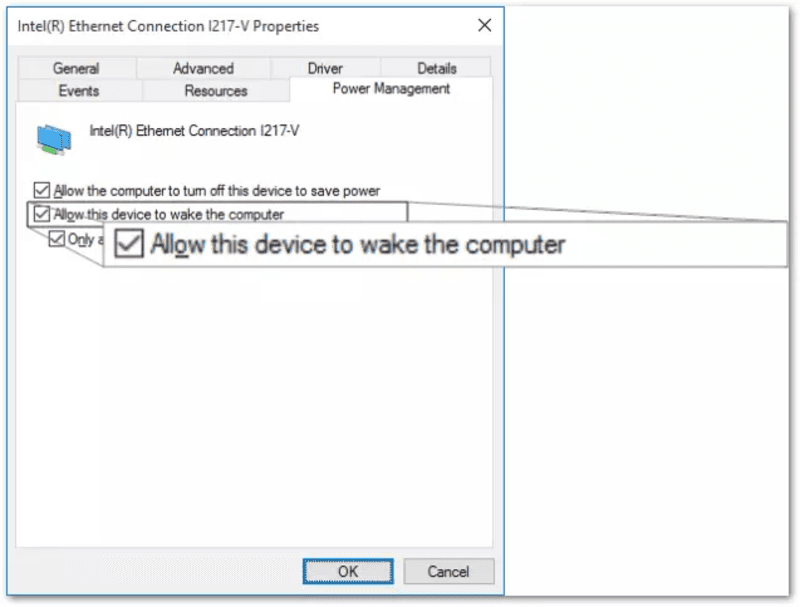
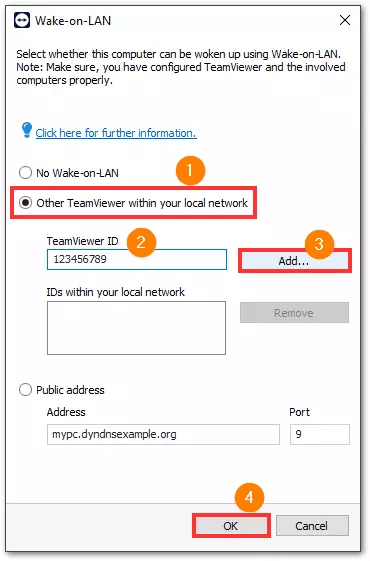
Built‑in Wake‑on‑LAN – i-on ang remote PC mula sa telepono
Sinusuportahan ng libre ang 3 device, wala nang limitasyon sa laki ng file
Mga Kahinaan
Nangangailangan ng pag-install ng app sa parehong dulo
Ang DeskIn ay naka-highlight mula sa iba pang software sa paglilipat ng file para sa mga tool ng Android sa pamamagitan ng pagpapahintulot sa iyo na ma-access ang mga file sa iyong PC mula sa iyong Android phone kahit na ikaw ay malayo. Pinapayagan ka rin ng DeskIn na ma-access ang mga file sa iyong computer mula sa Android kahit na ikaw ay milya ang layo.
Kailangan mo ba ng kontrata mula sa iyong office PC habang nasa paliparan? Simple lang, buksan ang DeskIn sa iyong Android, mag-browse sa remote desktop, at i-drag ang file sa iyong telepono. Ang koneksyon ay secure gamit ang AES‑256 + TLS 1.3, at ang mga transfer ay awtomatikong magpapatuloy kung bumagsak ang network.
Sa kabila ng mga one-off transfers, mahusay ang DeskIn para sa paglilipat ng mga file sa pagitan ng Android at Windows PC araw-araw. Maaari mong itulak ang mga screenshot mula sa iyong Android sa iyong Windows desktop gamit ang isang click, o hilahin ang mga design asset mula sa iyong Mac patungong iyong Android tablet. Para sa mga gumagamit na nagbabalibol ng maraming plataporma at nangangailangan ng parehong software sa paglilipat ng file ng Android para sa Windows at Mac, ang DeskIn ang tanging tool na gumagana sa lahat ng iyong device at plataporma.
2. Pinakamainam para sa mga Gumagamit ng Mac na Kailangan ng Maaasahang Android File Transfer Tool: MobiKin Assistant para sa Android
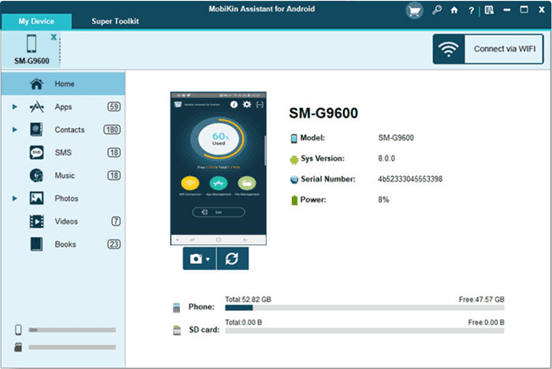
Mga Kalamangan
Native support para sa parehong Windows at macOS
USB at Wi-Fi na mga pagpipilian sa paglilipat
Two-way transfers – Android to Mac at Mac to Android
Pinangangasiwaan ang mga contact, SMS, apps, mga larawan, mga video, at higit pa
One-click na backup at ibalik
Mga Kahinaan
Bayad na software – buong bersyon mula sa $29.95
May mga limitasyon ang libreng pagsubok
Nangangailangan ng paghahanda ng USB debugging
Kung ikaw ay isang Mac user na naiinip sa iniwang Android File Transfer ng Google para sa Mac, na patuloy na nag-crash at hindi na-update sa loob ng maraming taon, ang MobiKin Assistant para sa Android ang maaasahang kapalit na kailangan mo. Ito ay nag-mount ng iyong Android device para sa mabilis na mga USB transfer, ngunit nagdaragdag din ito ng koneksyon ng Wi-Fi, two-way na paglilipat ng file, at malalim na pamamahala ng data.
Maaari mong i-export ang mga thread ng SMS, i-edit ang mga contact nang maramihan, mag-install ng mga app, at lumikha ng buong backups ng device na may isang click. Walang cloud, walang mga alalahanin sa privacy, walang mga pagkaputol sa koneksyon.
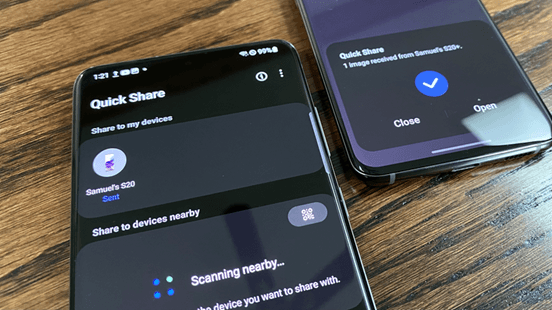
3. Pinakamainam para sa Instant Wireless Sharing sa Pagitan ng Android at Windows - Quick Share
Mga Kalamangan
Pre‑installed sa karamihan ng mga Android phone (Android 6+)
Gumagamit ng Wi‑Fi Direct + Bluetooth – walang mobile data
May Windows app para sa cross‑platform
Mga Kahinaan
Nangangailangan ng 64‑bit Windows 10/11 ang bersyon ng Windows
Maaaring kulangin ang suporta ng mga lumang Android device
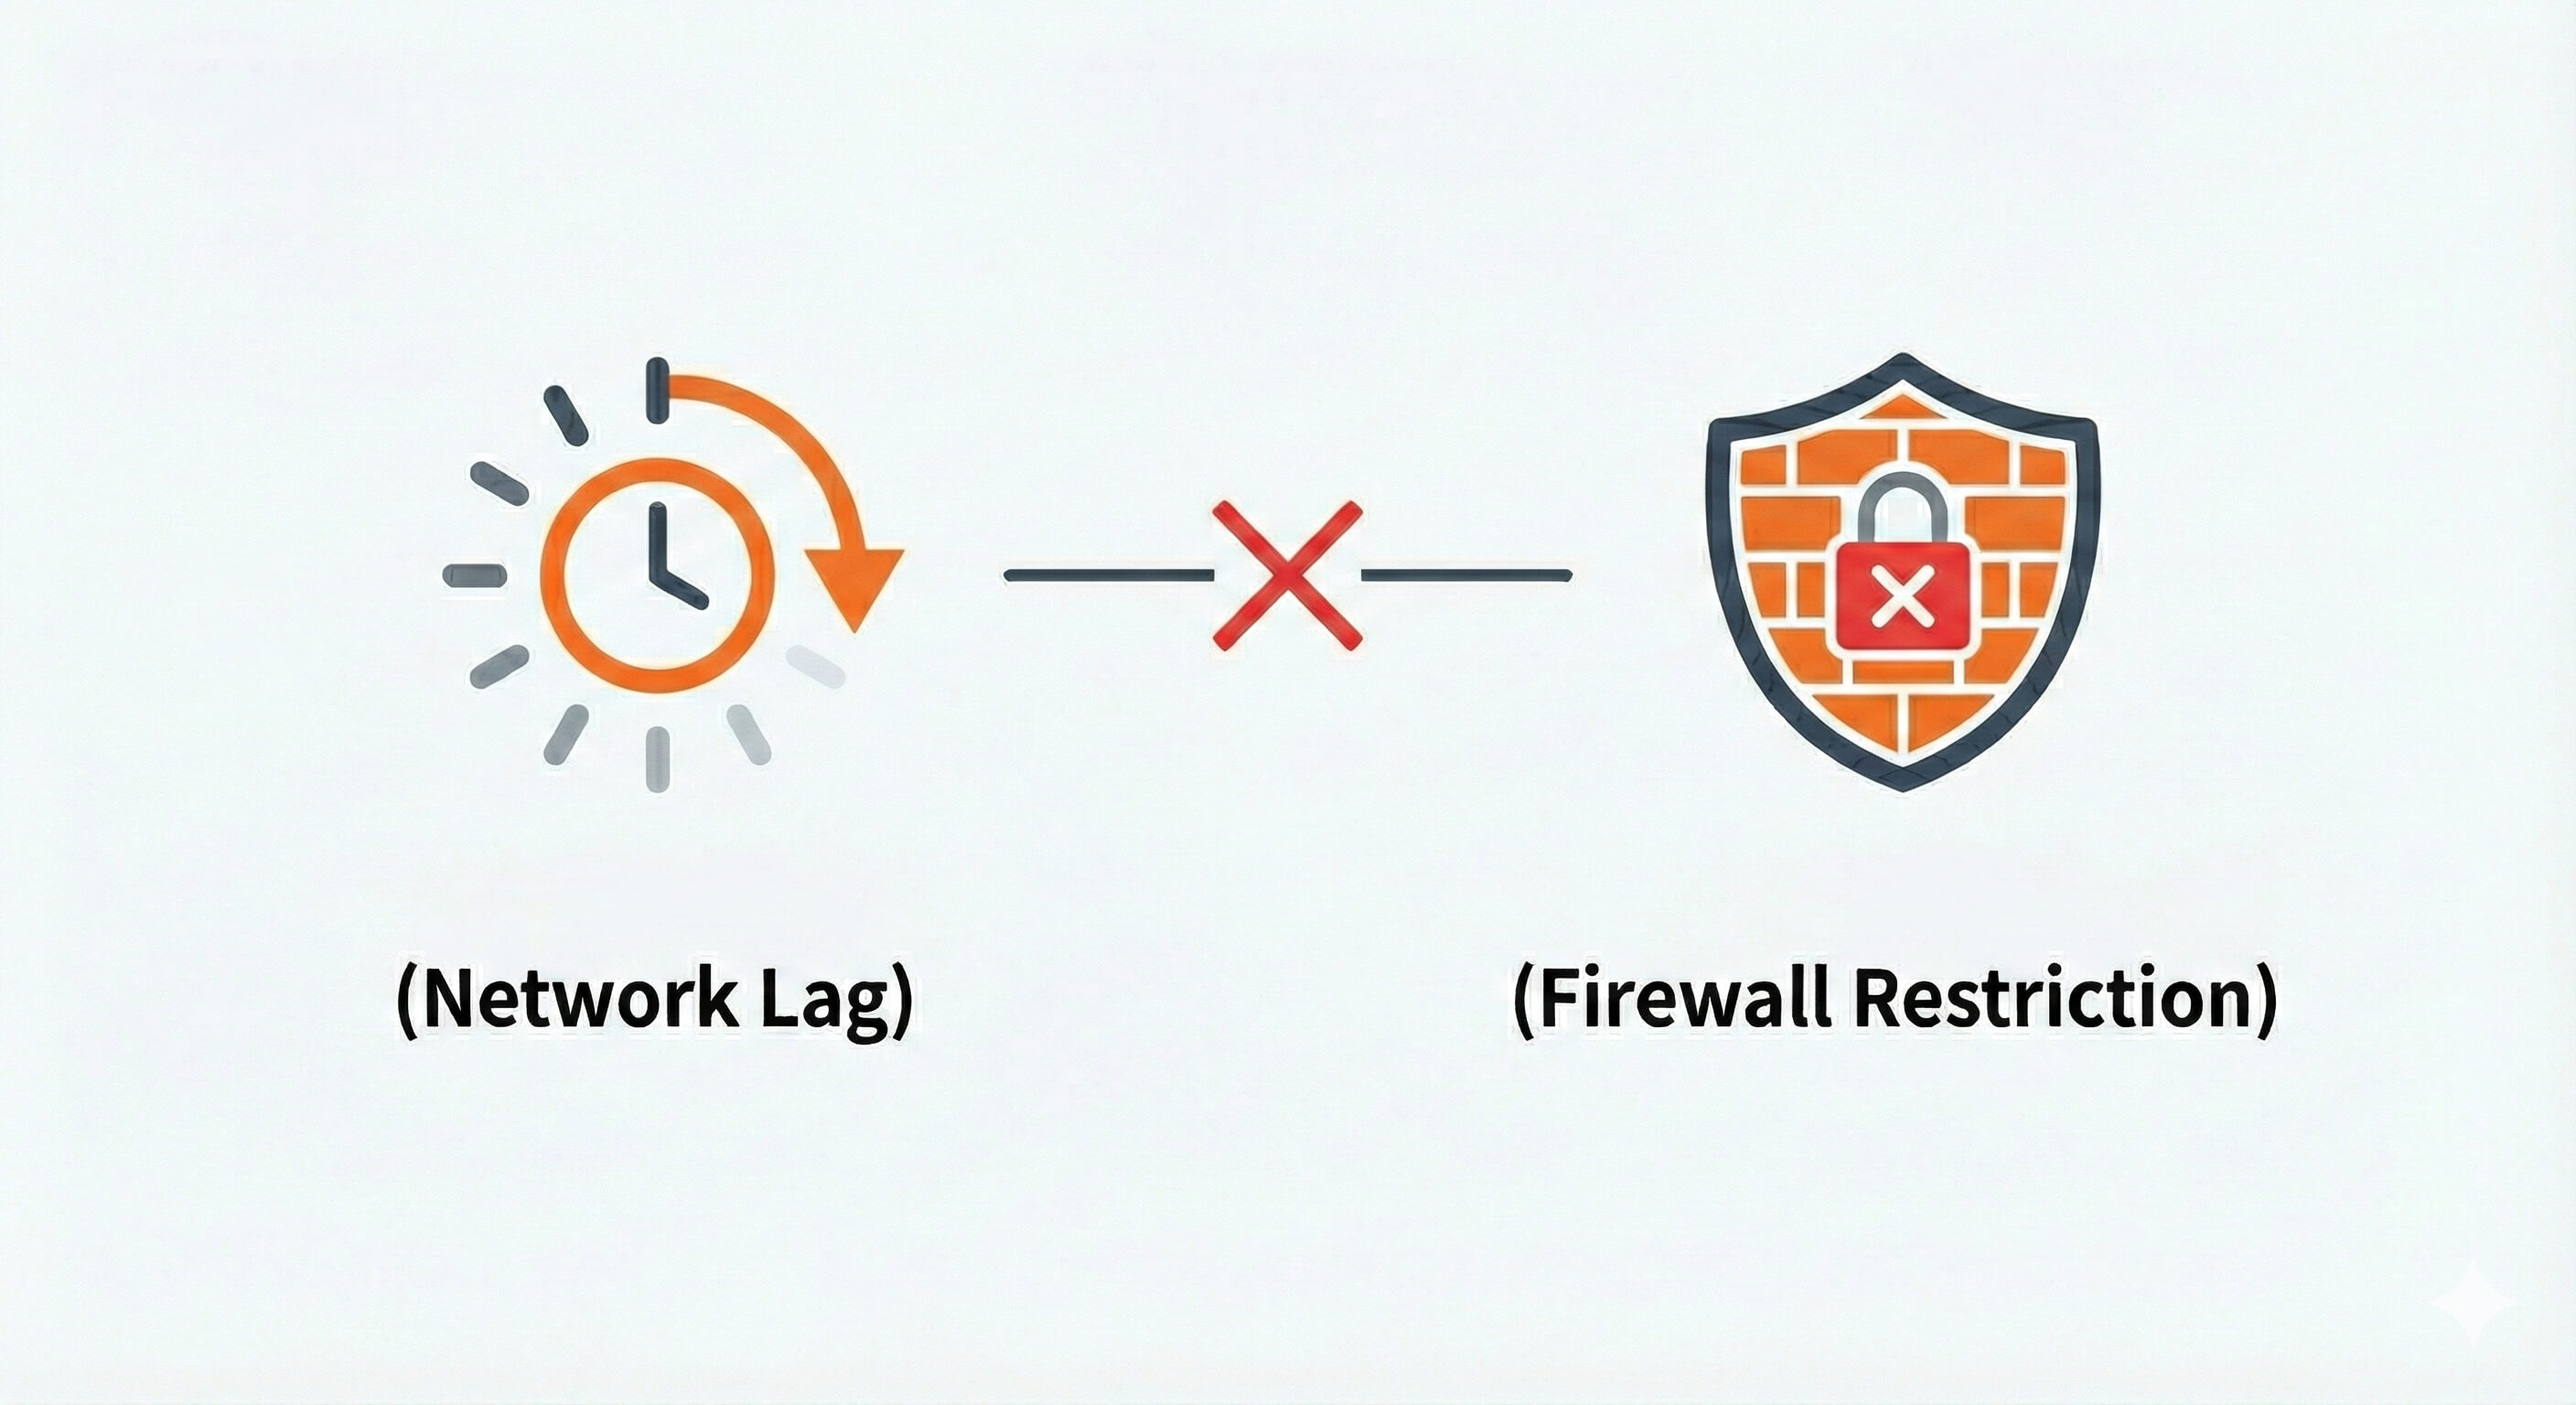
Ang Quick Share ang sagot ng Google sa AirDrop, at ito ay gumagana nang nakakagulat na mahusay para sa mga lokal na transfer. Kung naghahanap ka ng epektibong software sa paglilipat ng Bluetooth para sa Android, ang Quick Share ay awtomatikong nag-switch sa pagitan ng Bluetooth (para sa pagtukoy ng device) at Wi‑Fi Direct (para sa mataas na bilis ng data). Ang pagpapadala ng 4K video sa isang malapit na Windows laptop ay tumatagal ng ilang segundo, nang walang mga cable o mga cloud upload.
Ang Windows client (available mula sa Samsung o sa site ng Google) ay ginagawang isang viable option ang Quick Share para sa paglilipat ng mga file sa pagitan ng Android at Windows PC nang walang anumang dongles. Ito ay perpekto para sa mabilis, on-the-spot sharing sa bahay o sa opisina. Ang pangunahing limitasyon ay saklaw: ang parehong device ay dapat nasa loob ng saklaw ng Bluetooth (~10m). Para sa remote access, kakailanganin mo pa rin ang tool tulad ng DeskIn.
4. Pinakamainam para sa Pagpapadala ng Malalaking File sa pamamagitan ng Temporary Code: Send Anywhere
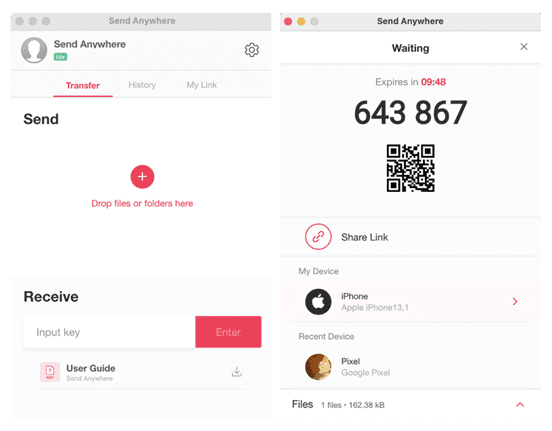
Mga Kalamangan
Walang limitasyon sa laki ng file
6‑digit key system – walang account na kinakailangan
Talagang cross‑platform: Android, iOS, Windows, Mac, Linux, Web
Mga Kahinaan
Ang mga key ay nag-e-expire sa loob ng 10 minuto – nakaka-stress para sa mga mabagal na tumatanggap
Ang mga bilis ay nakasalalay sa server relay
Ang Send Anywhere ay namumukod-tangi para sa mga kabatiran: pinipili mo ang isang file, ang app ay bumubuo ng 6‑digit na code, at ang tatanggap ay nag-input nito sa anumang device upang i-download. Wala itong pakialam kung sila ay nasa Android, iPhone, o Windows PC – ang file ay dumadaan sa mga server ng Send Anywhere (encrypted) at pagkatapos ay tinatanggal. Ito ay perpekto para sa paglilipat ng mga larawan mula sa Android patungo sa iPhone kapag lumilipat ng mga ecosystem, o para sa pagpapadala ng malaking video sa isang kliyente na hindi tech-savvy.
Dahil walang limitasyon sa laki ng file, maaari ka ring magpadala ng 100GB+ na mga file (bagaman ang mga bilis ay maaaring mag-iba). Ang libreng bersyon ay ganap na functional; ang bayad na plano ay nagdadala ng cloud storage at control ng link. Gayunpaman, nangangailangan ito ng koneksyon sa internet sa parehong panig, at ang 10-minutong expiry ay maaaring maging problema.
Para sa mataas na bilis ng paglilipat sa pagitan ng iyong mga device (mga telepono, tablet, at laptop) nang walang koneksyon sa internet, ang LocalSend ang mas magandang pagpipilian. Ang Quick Share ay mahusay para sa Android-to-Android transfers, ngunit nangangailangan ng koneksyon sa internet kapag nagbabahagi sa iPhones.
5. Pinakamainam para sa Maaasahang Android ↔ Mac USB/Wireless Transfers: MacDroid
Mga Kalamangan
Mounter – nagmummount ng Android bilang isang native na macOS volume
Sumusuporta sa parehong USB at Wi‑Fi
Direktang mag-edit ng mga file sa Android device
Mga Kahinaan
Sa libreng bersyon, pinapayagan lamang ang Android → Mac transfers
Ang pro version ay nakabatay sa subscription
Ang MacDroid ay sumasagot sa pinakamalaking frustrasyon ng Android-on-Mac: hindi maaasahang mga koneksyon sa MTP. Ipinapakita nito ang iyong Android device bilang isang karaniwang disk drive sa Finder, kaya maaari mong ilipat ang mga file sa parehong paraan, i-renaming ang mga folder, o kahit na magbukas ng mga dokumento nang direkta mula sa iyong telepono. Ang bilis ng USB transfer ay matatag at mas mabilis kaysa sa Android File Transfer. Kung madalas kang naglilipat ng malalaking video file sa pagitan ng iyong Android phone at MacBook, ang MacDroid ang pinakamahusay na pagpipilian.
Ang wireless mode ay gumagana sa lokal na network, na nagbibigay sa iyo ng kaginhawaan na walang cable sa bahay. Gayunpaman, ang libreng bersyon ay labis na naglilimita sa mga outgoing transfer, na nagtutulak sa iyo patungo sa isang $19.99/year subscription. Para sa mga gumagamit na talagang kailangan lamang ng paminsang software sa paglilipat ng file ng Android para sa Mac, maaaring sapat na ang Android File Transfer (libre). Ngunit kung kailangan mo ng higit sa mga pangunahing paglilipat ng larawan—tulad ng pag-access sa mga system files o drag-and-drop management—ang MacDroid ay nagkakahalaga ng pamumuhunan. Bilang alternatibo, ang DeskIn ay nag-aalok ng remote transfer nang walang anumang device‑side mounting issues.
6. Pinakamainam para sa Remote Android Management at Paglilipat ng File: AirDroid
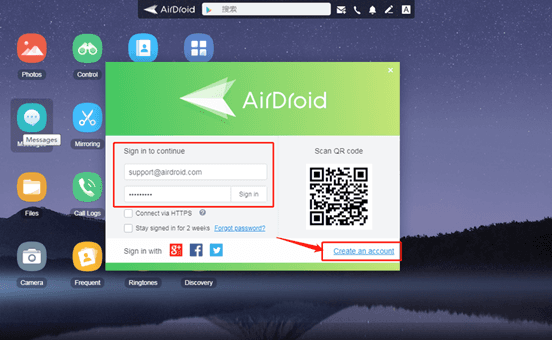
Mga Kalamangan
Wireless na paglilipat ng file sa pamamagitan ng web browser o desktop client
Remote control ng screen ng Android (para sa suporta)
SMS, notification mirroring
Mga Kahinaan
Mga alalahanin sa privacy; ang data ay dumadaan sa mga server ng AirDroid
May mga limitasyon ang libreng bersyon sa paglilipat
Ang AirDroid ay higit pa sa isang app sa paglilipat ng file. Ito ay isang kumpletong remote management suite. Maaari mong ma-access ang mga file ng iyong Android phone mula sa anumang web browser, maglipat ng mga larawan nang wireless, at kahit na magpadala ng SMS mula sa iyong PC. Ginagawa nitong isang makapangyarihang tool para sa pag-access ng mga file sa isang computer mula sa Android sa kabaligtaran: maaari mong itulak ang mga file mula sa iyong PC patungo sa iyong telepono sa pamamagitan lamang ng pag-drag ng mga ito sa window ng browser.
Ang downside ay karamihan sa mga tampok ay umaasa sa mga cloud server ng AirDroid, na nagdudulot ng mga tanong sa privacy at maaaring magpabagal sa malalaking paglilipat. Ang libreng tier ay naglilimita ng data sa 200MB/buwan.
Bumabaling ang AirDroid sa mga sikat sa mga IT support technicians na nangangailangan ng i-troubleshoot ang mga device ng mga kapamilya, ngunit para sa purong paglilipat ng file, DeskIn o LocalSend ay mas tuwid at pribado.
7. Pinakamainam para sa Seamless Windows‑Android Integration: Phone Link
Mga Kalamangan
Built-in sa Windows 10/11
Drag‑and‑drop na paglilipat ng larawan
Tumingin ng mga notification, tumawag
Mga Kahinaan
Tanging mga larawan ang naililipat (walang mga dokumento, musika, atbp.)
Nangangailangan ng Microsoft account at ang Link sa Windows app
Ang Phone Link (dating Your Phone) ay opisyal na solusyon ng Microsoft upang ikonekta ang Android at Windows. Magaling ito sa pagsasama ng mga tampok ng komunikasyon ng iyong telepono – mga mensahe, tawag, mga notification – nang direkta sa iyong PC. Para sa paglilipat ng file, gayunpaman, ito ay striktong nilimita sa mga larawan. Maaari mong i-drag ang mga larawan mula sa iyong Android gallery patungo sa isang folder ng Windows, ngunit hindi mo maililipat ang mga PDF, APK, musika, o anumang iba pang uri ng file.
Kung ang iyong pangunahing pangangailangan ay paano maglipat ng mga file mula sa pc patungo sa pc, ang Phone Link ay hindi makakatulong; ito ay phone‑to‑PC lamang. Para sa mga gumagamit ng Android na pangunahing gustong i-backup ang mga kuha mula sa kanilang Windows computer, ito ay maginhawa at pre‑installed. Ngunit ang sinumang nangangailangan ng unibersal na software sa paglilipat ng file para sa Android ay mabilis na makakaranas ng hadlang. I-pair ito sa DeskIn para sa buong access sa dokumento.
8. Pinakamainam para sa mga Gumagamit ng Samsung na Lumilipat ng Data: Samsung Smart Switch
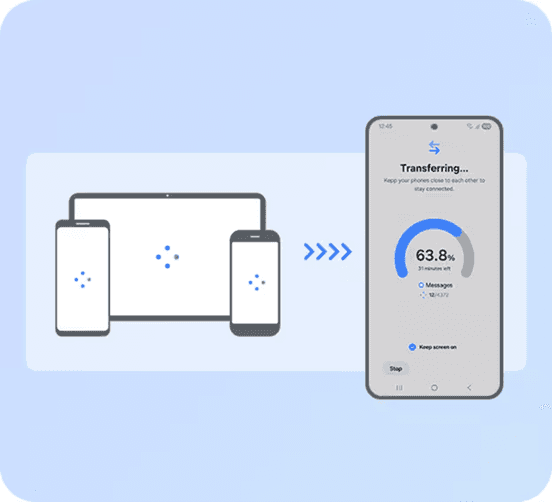
Mga Kalamangan
All-in‑one na migrasyon ng data (mga contact, mensahe, apps, mga larawan)
Gumagana rin sa iOS (cable o wireless)
Libreng at maaasahan
Mga Kahinaan
Pangunahing para sa setup ng device, hindi para sa araw-araw na paglilipat
Ang Smart Switch ay opisyal na tool ng Samsung upang ilipat ang data mula sa isang lumang telepono (Android o iPhone) patungo sa isang bagong Samsung Galaxy device. Ito ay hindi dinisenyo para sa araw-araw na paglipat ng file, ngunit ang isa ay gumaganap ng isang gawain nang lubos na mahusay: kumpletong migrasyon ng telepono. Maaari mong gamitin ang isang USB‑C sa USB‑C na cable para sa 20‑minutong buong restore, o gumamit ng wireless kung wala kang cable.
Para sa mga devoted na Samsung user, ang Smart Switch ay hindi matatawaran. Nililipat nito halos lahat, kasama ang mga WhatsApp chats (mula sa Android) at kasaysayan ng iMessage (mula sa iPhone). Gayunpaman, ito ay hindi isang pangkalahatang layunin na software sa paglilipat ng file ng Android para sa Windows – hindi mo maaring piliin ang isang solong dokumento upang kopyahin sa iyong PC. Ito ang lugar kung saan pumapasok ang mga tool tulad ng DeskIn o iReaShare.
9. Pinakamainam para sa Mga Privacy-Focused Local Network Transfers: LocalSend
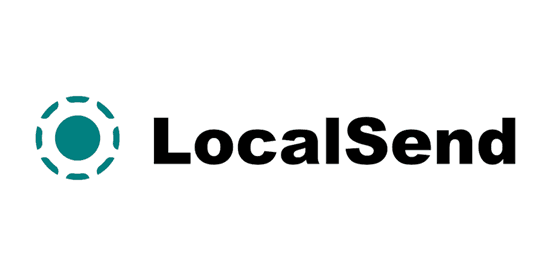
Mga Kalamangan
Open source, walang mga server, walang tracking
Gumagana sa lahat ng platform: Android, iOS, Windows, Mac, Linux
Walang kinakailangang internet – gumamit ng LAN
Mga Kahinaan
Ang parehong device ay dapat nasa parehong Wi‑Fi
Ang interface ay basic at walang advanced features
Si LocalSend ay nakakuha ng napakalaking katanyagan sa Reddit bilang anti-"spyware" na alternatibo sa SHAREit at Xender. Ito ay ganap na open source, nagpadala ng mga file nang diretso sa iyong lokal na network (walang cloud servers), at hindi nangangailangan ng account o koneksyon sa internet. Para sa mga gumagamit ng may pag-alala sa privacy, ito ang ginintuang pamantayan para sa paglilipat ng mga file sa pagitan ng Android at Windows PC kapag ang dalawa ay nasa bahay.
Bagaman kulang ito sa remote access (dapat kang nasa parehong Wi‑Fi), ang LocalSend ay talagang mabilis at maaasahan. Gumagana rin ito offline, na ginagawang perpekto para sa mga kapaligiran ng campus o opisina na may limitadong internet. Ang app ay libre na walang mga ad o bayad na tier. Kung kailangan mong maglipat ng mga larawan mula sa Android patungo sa iPhone sa parehong network, ginagawa ito kaagad nang walang pag-compress ng kalidad.
10. Pinakamainam para sa Komprehensibong Android Data Management: iReaShare Android Manager
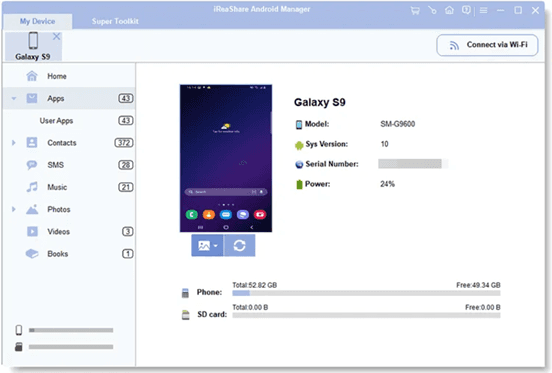
Mga Kalamangan
Kumpletong pamamahala: mga contact, mensahe, apps, mga larawan, mga video
High‑speed USB at Wi‑Fi transfer
Backup at restore functionality
Mga Kahinaan
Limitado ang libreng pagsubok; bayad ang buong bersyon
Windows/Mac lamang – walang mobile app para sa pagtanggap
Ang iReaShare Android Manager ay isang desktop‑based na app na nagbibigay sa iyo ng buong kontrol ng iyong Android device mula sa iyong computer. Hindi tulad ng simpleng mga app sa paglilipat, pinapayagan ka nitong tingnan, i-edit, idagdag, at tanggalin ang mga contact, magpadala/tumanggap ng SMS mula sa iyong PC, mag-install/mag-uninstall ng mga app nang maramihan, at, siyempre, maglipat ng anumang media file. Sinusuportahan nito ang parehong USB at Wi‑Fi na koneksyon, at ang bilis ng transfer ay palaging mataas – hanggang 12MB/s.
Ang software ay partikular na kapaki-pakinabang para sa mga gumagamit na gustong ma-access ang mga file sa isang computer mula sa Android sa kabaligtaran: maaari mong itulak ang mga file mula sa iyong PC patungo sa iyong telepono nang kasing ganda ng pag-pull ng mga ito. Ang libreng bersyon ay nagbibigay-daan sa iyo upang subukan ang mga tampok, ngunit ang mga advanced na function ay nangangailangan ng lisensya. Para sa mga gumagamit na regular na namamahala ng malalaking library ng larawan o kailangang i-backup ang mga text messages, ang iReaShare ay isang may kakayahan, all-in-one na alternatibo sa mga built-in na tool ng Google.
FAQs
1. Ano ang pinakamabilis na paraan upang maglipat ng mga file mula Android patungo sa PC?
Ang mga wired USB 3.0 connections ay nananatiling nagwagi para sa purong bilis, ngunit ang DeskIn ay nagbigay ng pinakamahusay na balanse ng kaginhawaan at pagganap, lalo na kapag hindi ka malapit sa iyong computer. Ang bilis ng paglilipat ng mga file hanggang 12MB/s sa anumang distansya, na may automatic resume para sa hindi matatag na koneksyon. Para sa lokal na wireless speed, ang LocalSend ay pumapansin sa iyong Wi-Fi speed.
2. Paano ko maililipat ang mga larawan mula sa Android patungo sa iPhone nang wireless?
Ang Send Anywhere ang pinakasimpleng: bumuo ng isang 6‑digit na code sa Android, i-input ito sa iPhone, at ilipat ang mga larawan nang walang pagkawala ng kalidad. Ang DeskIn ay gumagana rin para sa cross‑platform na paglilipat ng file.
3. Maaari ba akong makakses sa mga file sa aking computer mula sa Android kapag ako ay wala?
Siyempre. Ang DeskIn ay ginawa para dito. Pinapayagan ka nitong gisingin ang natutulog na PC nang remote, mag-browse ng mga folder, at mag-download ng mga file nang direkta sa iyong telepono. Walang kinakailangang configuration ng router. Ang AirDroid ay nag-aalok ng katulad na remote access ngunit may mga cap sa paglilipat sa libreng tier.
Konklusyon – Una ang DeskIn, Iba pa ay Pangalawa
Walang solong software para sa paglilipat ng file ng Android ang nakakapag-ayos ng lahat. Ngunit ang isa ay kumikilos sa pinakamarami. Ang DeskIn ang tanging tool na nagpapahintulot sa iyo na ma-access ang mga file sa isang computer mula sa Android remotely, maglipat ng cross-platform, at kahit na matutunan kung paano maglipat ng mga file mula sa pc patungo sa pc—lahat ng ito ay may AES‑256 + TLS 1.3 encryption. Panatilihing LocalSend para sa pribadong lokal na pagbabahagi at Send Anywhere para sa mga emergency.
Ngunit simulan sa DeskIn. Itigil ang paghahanap para sa software sa paglilipat ng file ng Android para sa Windows o Mac. Isang app. Lahat ng iyong device.

Ngayon ay 2026, at akalain mong magkakaroon na ng seamless na paglipat ng mga file sa pagitan ng mga device. Ngunit narito tayo: ang opisyal na Android File Transfer ng Google ay patuloy na nag-crash sa macOS Sequoia. Ang Quick Share ay natutukoy lamang ang mga device kalahati ng oras. At Bluetooth? Mas mabuting gamitin para sa isang contact card lamang—hindi para sa iyong 4GB na bakasyon na video.
Ang katotohanan ay ang software sa paglilipat ng file para sa Android ay nahati sa mga espesyal na tool. Ang ilan ay mahusay sa lokal na bilis. Ang iba ay nagbubukas ng remote access. Ang ilan ay nagpapahintulot na ma-access mo ang mga file sa isang computer mula sa Android habang ikaw ay 3,000 milya ang layo.
Maaaring gusto mo rin:
Overview ng Mga App sa Android File Transfer
Kagamitan | Pinakamainam Para sa | Mga Plataporma | Koneksyon | Presyo |
|---|---|---|---|---|
DeskIn
| Remote na access sa file at cross‑platform na pamamahala | Win, Mac, iOS, Android, Web | P2P / Relay | Libreng / Bayad |
MobiKin Assistant para sa Android | Backup ng data ng Android at paglilipat (mga contact, file, atbp.) | Win, Mac ↔ Android | USB / Wi‑Fi | Freemium |
Quick Share | Instant na malapit na pagbabahagi (Android ↔ Win) | Android, Win, ChromeOS | Wi‑Fi Direct + BT | Libre |
Send Anywhere | Pagpapadala ng malalaking file sa pamamagitan ng 6‑digit na code | Lahat ng pangunahing OS | Wi‑Fi / Cellular | Libre / Bayad |
MacDroid
| Maaasahang Android ↔ Mac USB / Wi‑Fi | Mac ↔ Android | USB / Wi‑Fi | Freemium |
AirDroid | Remote na pamamahala at kontrol ng Android | Web, Win, Mac, Android | Wi‑Fi / Remote | Freemium |
Phone Link | Madaling pagsasama ng Windows-Android | Win, Android | Wi‑Fi / BT | Libre |
Smart Switch | Migrasyon ng device ng Samsung | Samsung, iOS, Android | USB / Wi‑Fi | Libre |
LocalSend | Privacy-friendly na mga lokal na network na paglilipat | Lahat ng pangunahing OS | LAN (Wi‑Fi) | Libre (Open source) |
iReaShare Android Manager | Kompletong pamamahala ng data ng Android | Win, Mac ↔ Android | USB / Wi‑Fi | Freemium |
Narito ang detalyadong pagsusuri para sa 10 pinakamahusay na aplikasyon sa paglilipat ng file ng Android.
1. DeskIn: Pinakamainam para sa Remote File Access at Cross‑Platform Management
Mga Kalamangan
Hindi inaalintana ang remote access sa mga PC files mula sa anumang device (Android, iOS, Web)
High‑speed na P2P file transfer (hanggang 12MB/s) na may auto‑resume
Cross‑platform: control ng Windows/Mac mula sa Android, paglilipat ng mga file sa pagitan ng Android at Windows PC nang wireless
Built‑in Wake‑on‑LAN – i-on ang remote PC mula sa telepono
Sinusuportahan ng libre ang 3 device, wala nang limitasyon sa laki ng file
Mga Kahinaan
Nangangailangan ng pag-install ng app sa parehong dulo
Ang DeskIn ay naka-highlight mula sa iba pang software sa paglilipat ng file para sa mga tool ng Android sa pamamagitan ng pagpapahintulot sa iyo na ma-access ang mga file sa iyong PC mula sa iyong Android phone kahit na ikaw ay malayo. Pinapayagan ka rin ng DeskIn na ma-access ang mga file sa iyong computer mula sa Android kahit na ikaw ay milya ang layo.
Kailangan mo ba ng kontrata mula sa iyong office PC habang nasa paliparan? Simple lang, buksan ang DeskIn sa iyong Android, mag-browse sa remote desktop, at i-drag ang file sa iyong telepono. Ang koneksyon ay secure gamit ang AES‑256 + TLS 1.3, at ang mga transfer ay awtomatikong magpapatuloy kung bumagsak ang network.
Sa kabila ng mga one-off transfers, mahusay ang DeskIn para sa paglilipat ng mga file sa pagitan ng Android at Windows PC araw-araw. Maaari mong itulak ang mga screenshot mula sa iyong Android sa iyong Windows desktop gamit ang isang click, o hilahin ang mga design asset mula sa iyong Mac patungong iyong Android tablet. Para sa mga gumagamit na nagbabalibol ng maraming plataporma at nangangailangan ng parehong software sa paglilipat ng file ng Android para sa Windows at Mac, ang DeskIn ang tanging tool na gumagana sa lahat ng iyong device at plataporma.
2. Pinakamainam para sa mga Gumagamit ng Mac na Kailangan ng Maaasahang Android File Transfer Tool: MobiKin Assistant para sa Android
Mga Kalamangan
Native support para sa parehong Windows at macOS
USB at Wi-Fi na mga pagpipilian sa paglilipat
Two-way transfers – Android to Mac at Mac to Android
Pinangangasiwaan ang mga contact, SMS, apps, mga larawan, mga video, at higit pa
One-click na backup at ibalik
Mga Kahinaan
Bayad na software – buong bersyon mula sa $29.95
May mga limitasyon ang libreng pagsubok
Nangangailangan ng paghahanda ng USB debugging
Kung ikaw ay isang Mac user na naiinip sa iniwang Android File Transfer ng Google para sa Mac, na patuloy na nag-crash at hindi na-update sa loob ng maraming taon, ang MobiKin Assistant para sa Android ang maaasahang kapalit na kailangan mo. Ito ay nag-mount ng iyong Android device para sa mabilis na mga USB transfer, ngunit nagdaragdag din ito ng koneksyon ng Wi-Fi, two-way na paglilipat ng file, at malalim na pamamahala ng data.
Maaari mong i-export ang mga thread ng SMS, i-edit ang mga contact nang maramihan, mag-install ng mga app, at lumikha ng buong backups ng device na may isang click. Walang cloud, walang mga alalahanin sa privacy, walang mga pagkaputol sa koneksyon.
3. Pinakamainam para sa Instant Wireless Sharing sa Pagitan ng Android at Windows - Quick Share
Mga Kalamangan
Pre‑installed sa karamihan ng mga Android phone (Android 6+)
Gumagamit ng Wi‑Fi Direct + Bluetooth – walang mobile data
May Windows app para sa cross‑platform
Mga Kahinaan
Nangangailangan ng 64‑bit Windows 10/11 ang bersyon ng Windows
Maaaring kulangin ang suporta ng mga lumang Android device
Ang Quick Share ang sagot ng Google sa AirDrop, at ito ay gumagana nang nakakagulat na mahusay para sa mga lokal na transfer. Kung naghahanap ka ng epektibong software sa paglilipat ng Bluetooth para sa Android, ang Quick Share ay awtomatikong nag-switch sa pagitan ng Bluetooth (para sa pagtukoy ng device) at Wi‑Fi Direct (para sa mataas na bilis ng data). Ang pagpapadala ng 4K video sa isang malapit na Windows laptop ay tumatagal ng ilang segundo, nang walang mga cable o mga cloud upload.
Ang Windows client (available mula sa Samsung o sa site ng Google) ay ginagawang isang viable option ang Quick Share para sa paglilipat ng mga file sa pagitan ng Android at Windows PC nang walang anumang dongles. Ito ay perpekto para sa mabilis, on-the-spot sharing sa bahay o sa opisina. Ang pangunahing limitasyon ay saklaw: ang parehong device ay dapat nasa loob ng saklaw ng Bluetooth (~10m). Para sa remote access, kakailanganin mo pa rin ang tool tulad ng DeskIn.
4. Pinakamainam para sa Pagpapadala ng Malalaking File sa pamamagitan ng Temporary Code: Send Anywhere
Mga Kalamangan
Walang limitasyon sa laki ng file
6‑digit key system – walang account na kinakailangan
Talagang cross‑platform: Android, iOS, Windows, Mac, Linux, Web
Mga Kahinaan
Ang mga key ay nag-e-expire sa loob ng 10 minuto – nakaka-stress para sa mga mabagal na tumatanggap
Ang mga bilis ay nakasalalay sa server relay
Ang Send Anywhere ay namumukod-tangi para sa mga kabatiran: pinipili mo ang isang file, ang app ay bumubuo ng 6‑digit na code, at ang tatanggap ay nag-input nito sa anumang device upang i-download. Wala itong pakialam kung sila ay nasa Android, iPhone, o Windows PC – ang file ay dumadaan sa mga server ng Send Anywhere (encrypted) at pagkatapos ay tinatanggal. Ito ay perpekto para sa paglilipat ng mga larawan mula sa Android patungo sa iPhone kapag lumilipat ng mga ecosystem, o para sa pagpapadala ng malaking video sa isang kliyente na hindi tech-savvy.
Dahil walang limitasyon sa laki ng file, maaari ka ring magpadala ng 100GB+ na mga file (bagaman ang mga bilis ay maaaring mag-iba). Ang libreng bersyon ay ganap na functional; ang bayad na plano ay nagdadala ng cloud storage at control ng link. Gayunpaman, nangangailangan ito ng koneksyon sa internet sa parehong panig, at ang 10-minutong expiry ay maaaring maging problema.
Para sa mataas na bilis ng paglilipat sa pagitan ng iyong mga device (mga telepono, tablet, at laptop) nang walang koneksyon sa internet, ang LocalSend ang mas magandang pagpipilian. Ang Quick Share ay mahusay para sa Android-to-Android transfers, ngunit nangangailangan ng koneksyon sa internet kapag nagbabahagi sa iPhones.
5. Pinakamainam para sa Maaasahang Android ↔ Mac USB/Wireless Transfers: MacDroid
Mga Kalamangan
Mounter – nagmummount ng Android bilang isang native na macOS volume
Sumusuporta sa parehong USB at Wi‑Fi
Direktang mag-edit ng mga file sa Android device
Mga Kahinaan
Sa libreng bersyon, pinapayagan lamang ang Android → Mac transfers
Ang pro version ay nakabatay sa subscription
Ang MacDroid ay sumasagot sa pinakamalaking frustrasyon ng Android-on-Mac: hindi maaasahang mga koneksyon sa MTP. Ipinapakita nito ang iyong Android device bilang isang karaniwang disk drive sa Finder, kaya maaari mong ilipat ang mga file sa parehong paraan, i-renaming ang mga folder, o kahit na magbukas ng mga dokumento nang direkta mula sa iyong telepono. Ang bilis ng USB transfer ay matatag at mas mabilis kaysa sa Android File Transfer. Kung madalas kang naglilipat ng malalaking video file sa pagitan ng iyong Android phone at MacBook, ang MacDroid ang pinakamahusay na pagpipilian.
Ang wireless mode ay gumagana sa lokal na network, na nagbibigay sa iyo ng kaginhawaan na walang cable sa bahay. Gayunpaman, ang libreng bersyon ay labis na naglilimita sa mga outgoing transfer, na nagtutulak sa iyo patungo sa isang $19.99/year subscription. Para sa mga gumagamit na talagang kailangan lamang ng paminsang software sa paglilipat ng file ng Android para sa Mac, maaaring sapat na ang Android File Transfer (libre). Ngunit kung kailangan mo ng higit sa mga pangunahing paglilipat ng larawan—tulad ng pag-access sa mga system files o drag-and-drop management—ang MacDroid ay nagkakahalaga ng pamumuhunan. Bilang alternatibo, ang DeskIn ay nag-aalok ng remote transfer nang walang anumang device‑side mounting issues.
6. Pinakamainam para sa Remote Android Management at Paglilipat ng File: AirDroid
Mga Kalamangan
Wireless na paglilipat ng file sa pamamagitan ng web browser o desktop client
Remote control ng screen ng Android (para sa suporta)
SMS, notification mirroring
Mga Kahinaan
Mga alalahanin sa privacy; ang data ay dumadaan sa mga server ng AirDroid
May mga limitasyon ang libreng bersyon sa paglilipat
Ang AirDroid ay higit pa sa isang app sa paglilipat ng file. Ito ay isang kumpletong remote management suite. Maaari mong ma-access ang mga file ng iyong Android phone mula sa anumang web browser, maglipat ng mga larawan nang wireless, at kahit na magpadala ng SMS mula sa iyong PC. Ginagawa nitong isang makapangyarihang tool para sa pag-access ng mga file sa isang computer mula sa Android sa kabaligtaran: maaari mong itulak ang mga file mula sa iyong PC patungo sa iyong telepono sa pamamagitan lamang ng pag-drag ng mga ito sa window ng browser.
Ang downside ay karamihan sa mga tampok ay umaasa sa mga cloud server ng AirDroid, na nagdudulot ng mga tanong sa privacy at maaaring magpabagal sa malalaking paglilipat. Ang libreng tier ay naglilimita ng data sa 200MB/buwan.
Bumabaling ang AirDroid sa mga sikat sa mga IT support technicians na nangangailangan ng i-troubleshoot ang mga device ng mga kapamilya, ngunit para sa purong paglilipat ng file, DeskIn o LocalSend ay mas tuwid at pribado.
7. Pinakamainam para sa Seamless Windows‑Android Integration: Phone Link
Mga Kalamangan
Built-in sa Windows 10/11
Drag‑and‑drop na paglilipat ng larawan
Tumingin ng mga notification, tumawag
Mga Kahinaan
Tanging mga larawan ang naililipat (walang mga dokumento, musika, atbp.)
Nangangailangan ng Microsoft account at ang Link sa Windows app
Ang Phone Link (dating Your Phone) ay opisyal na solusyon ng Microsoft upang ikonekta ang Android at Windows. Magaling ito sa pagsasama ng mga tampok ng komunikasyon ng iyong telepono – mga mensahe, tawag, mga notification – nang direkta sa iyong PC. Para sa paglilipat ng file, gayunpaman, ito ay striktong nilimita sa mga larawan. Maaari mong i-drag ang mga larawan mula sa iyong Android gallery patungo sa isang folder ng Windows, ngunit hindi mo maililipat ang mga PDF, APK, musika, o anumang iba pang uri ng file.
Kung ang iyong pangunahing pangangailangan ay paano maglipat ng mga file mula sa pc patungo sa pc, ang Phone Link ay hindi makakatulong; ito ay phone‑to‑PC lamang. Para sa mga gumagamit ng Android na pangunahing gustong i-backup ang mga kuha mula sa kanilang Windows computer, ito ay maginhawa at pre‑installed. Ngunit ang sinumang nangangailangan ng unibersal na software sa paglilipat ng file para sa Android ay mabilis na makakaranas ng hadlang. I-pair ito sa DeskIn para sa buong access sa dokumento.
8. Pinakamainam para sa mga Gumagamit ng Samsung na Lumilipat ng Data: Samsung Smart Switch
Mga Kalamangan
All-in‑one na migrasyon ng data (mga contact, mensahe, apps, mga larawan)
Gumagana rin sa iOS (cable o wireless)
Libreng at maaasahan
Mga Kahinaan
Pangunahing para sa setup ng device, hindi para sa araw-araw na paglilipat
Ang Smart Switch ay opisyal na tool ng Samsung upang ilipat ang data mula sa isang lumang telepono (Android o iPhone) patungo sa isang bagong Samsung Galaxy device. Ito ay hindi dinisenyo para sa araw-araw na paglipat ng file, ngunit ang isa ay gumaganap ng isang gawain nang lubos na mahusay: kumpletong migrasyon ng telepono. Maaari mong gamitin ang isang USB‑C sa USB‑C na cable para sa 20‑minutong buong restore, o gumamit ng wireless kung wala kang cable.
Para sa mga devoted na Samsung user, ang Smart Switch ay hindi matatawaran. Nililipat nito halos lahat, kasama ang mga WhatsApp chats (mula sa Android) at kasaysayan ng iMessage (mula sa iPhone). Gayunpaman, ito ay hindi isang pangkalahatang layunin na software sa paglilipat ng file ng Android para sa Windows – hindi mo maaring piliin ang isang solong dokumento upang kopyahin sa iyong PC. Ito ang lugar kung saan pumapasok ang mga tool tulad ng DeskIn o iReaShare.
9. Pinakamainam para sa Mga Privacy-Focused Local Network Transfers: LocalSend
Mga Kalamangan
Open source, walang mga server, walang tracking
Gumagana sa lahat ng platform: Android, iOS, Windows, Mac, Linux
Walang kinakailangang internet – gumamit ng LAN
Mga Kahinaan
Ang parehong device ay dapat nasa parehong Wi‑Fi
Ang interface ay basic at walang advanced features
Si LocalSend ay nakakuha ng napakalaking katanyagan sa Reddit bilang anti-"spyware" na alternatibo sa SHAREit at Xender. Ito ay ganap na open source, nagpadala ng mga file nang diretso sa iyong lokal na network (walang cloud servers), at hindi nangangailangan ng account o koneksyon sa internet. Para sa mga gumagamit ng may pag-alala sa privacy, ito ang ginintuang pamantayan para sa paglilipat ng mga file sa pagitan ng Android at Windows PC kapag ang dalawa ay nasa bahay.
Bagaman kulang ito sa remote access (dapat kang nasa parehong Wi‑Fi), ang LocalSend ay talagang mabilis at maaasahan. Gumagana rin ito offline, na ginagawang perpekto para sa mga kapaligiran ng campus o opisina na may limitadong internet. Ang app ay libre na walang mga ad o bayad na tier. Kung kailangan mong maglipat ng mga larawan mula sa Android patungo sa iPhone sa parehong network, ginagawa ito kaagad nang walang pag-compress ng kalidad.
10. Pinakamainam para sa Komprehensibong Android Data Management: iReaShare Android Manager
Mga Kalamangan
Kumpletong pamamahala: mga contact, mensahe, apps, mga larawan, mga video
High‑speed USB at Wi‑Fi transfer
Backup at restore functionality
Mga Kahinaan
Limitado ang libreng pagsubok; bayad ang buong bersyon
Windows/Mac lamang – walang mobile app para sa pagtanggap
Ang iReaShare Android Manager ay isang desktop‑based na app na nagbibigay sa iyo ng buong kontrol ng iyong Android device mula sa iyong computer. Hindi tulad ng simpleng mga app sa paglilipat, pinapayagan ka nitong tingnan, i-edit, idagdag, at tanggalin ang mga contact, magpadala/tumanggap ng SMS mula sa iyong PC, mag-install/mag-uninstall ng mga app nang maramihan, at, siyempre, maglipat ng anumang media file. Sinusuportahan nito ang parehong USB at Wi‑Fi na koneksyon, at ang bilis ng transfer ay palaging mataas – hanggang 12MB/s.
Ang software ay partikular na kapaki-pakinabang para sa mga gumagamit na gustong ma-access ang mga file sa isang computer mula sa Android sa kabaligtaran: maaari mong itulak ang mga file mula sa iyong PC patungo sa iyong telepono nang kasing ganda ng pag-pull ng mga ito. Ang libreng bersyon ay nagbibigay-daan sa iyo upang subukan ang mga tampok, ngunit ang mga advanced na function ay nangangailangan ng lisensya. Para sa mga gumagamit na regular na namamahala ng malalaking library ng larawan o kailangang i-backup ang mga text messages, ang iReaShare ay isang may kakayahan, all-in-one na alternatibo sa mga built-in na tool ng Google.
FAQs
1. Ano ang pinakamabilis na paraan upang maglipat ng mga file mula Android patungo sa PC?
Ang mga wired USB 3.0 connections ay nananatiling nagwagi para sa purong bilis, ngunit ang DeskIn ay nagbigay ng pinakamahusay na balanse ng kaginhawaan at pagganap, lalo na kapag hindi ka malapit sa iyong computer. Ang bilis ng paglilipat ng mga file hanggang 12MB/s sa anumang distansya, na may automatic resume para sa hindi matatag na koneksyon. Para sa lokal na wireless speed, ang LocalSend ay pumapansin sa iyong Wi-Fi speed.
2. Paano ko maililipat ang mga larawan mula sa Android patungo sa iPhone nang wireless?
Ang Send Anywhere ang pinakasimpleng: bumuo ng isang 6‑digit na code sa Android, i-input ito sa iPhone, at ilipat ang mga larawan nang walang pagkawala ng kalidad. Ang DeskIn ay gumagana rin para sa cross‑platform na paglilipat ng file.
3. Maaari ba akong makakses sa mga file sa aking computer mula sa Android kapag ako ay wala?
Siyempre. Ang DeskIn ay ginawa para dito. Pinapayagan ka nitong gisingin ang natutulog na PC nang remote, mag-browse ng mga folder, at mag-download ng mga file nang direkta sa iyong telepono. Walang kinakailangang configuration ng router. Ang AirDroid ay nag-aalok ng katulad na remote access ngunit may mga cap sa paglilipat sa libreng tier.
Konklusyon – Una ang DeskIn, Iba pa ay Pangalawa
Walang solong software para sa paglilipat ng file ng Android ang nakakapag-ayos ng lahat. Ngunit ang isa ay kumikilos sa pinakamarami. Ang DeskIn ang tanging tool na nagpapahintulot sa iyo na ma-access ang mga file sa isang computer mula sa Android remotely, maglipat ng cross-platform, at kahit na matutunan kung paano maglipat ng mga file mula sa pc patungo sa pc—lahat ng ito ay may AES‑256 + TLS 1.3 encryption. Panatilihing LocalSend para sa pribadong lokal na pagbabahagi at Send Anywhere para sa mga emergency.
Ngunit simulan sa DeskIn. Itigil ang paghahanap para sa software sa paglilipat ng file ng Android para sa Windows o Mac. Isang app. Lahat ng iyong device.