Pagiging produktibo
Pagiging produktibo
/
3 minuto
/
3 minuto
Karly
Na-update
Na-update
Na-update
Ang pagkopya ng Android sa PC ay maaaring maging lubhang kapaki-pakinabang sa pang-araw-araw at mga propesyonal na sitwasyon. Kung ikaw man ay nagpapakita mula sa iyong Android mobile patungo sa PC, upang mag-browse, manood ng mga video, at maglaro ng mga mobile games sa isang mas malaking screen, o nagpapakita ng screen sa panahon ng isang pulong, pagtugon sa mga mensahe habang nagtatrabaho, nag-aalok ang screen mirroring ng parehong kaginhawahan at pinahusay na pagiging produktibo.
Sa artikulong ito, susuriin natin ang 4 maaasahang pamamaraan upang sa halip na pagbabahagi ng screen sa pamamagitan ng USB, at i-mirror ang iyong Android screen sa isang PC nang walang wires. Ang mga pagpipilian na ito ay nagkakaiba sa pagiging kumplikado at functionality, na nagbibigay-daan sa iyo upang piliin ang lapit na pinakaangkop sa iyong mga pangangailangan. Handa na bang magsimula? Magpatuloy tayo at hanapin ang pinakamahusay na paraan!
Kaugnay na Pagbasa:
5 Pinakamahusay na Mirror Screen Apps para sa Android (Tuklasin ang Pinakamahusay na mga Opsyon)
Paano Magmirror Screen ng Android sa iPhone/TV/Ibang mga Device
Para sa makinis, bihirang nagkakamali, at maaasahang karanasan sa screen mirroring, inirerekomenda ang paggamit ng isang propesyonal na mirror screen app tulad ng DeskIn. Sinusuportahan nito ang malawak na hanay ng mga operating system, kabilang ang Android at Windows, mula sa iba't ibang bersyon, na ginagawa itong isang versatile na tool para sa iba't ibang mga gumagamit.
Ang pinakamahusay na app para sa screen mirroring na ito ay nagpapahintulot ding wireless na i-mirror ang iyong Android phone sa isang mas malaking screen, na tumutulong sa iyong magtrabaho, magpresenta, o maglaro nang mas epektibo. Sa hanggang 4K kalidad ng imahe at ultra-low latency na mas mababa sa 40 ms, ang karanasan ay maaaring maging makinis at tumutugon.


🏆 Mga Pangunahing Tampok ng DeskIn
4K Ultra HD + Mababang Latency (<40ms): Perpekto para sa paglalaro at mga presentasyon.
Bihirang Error: Kailangan ng tuloy-tuloy na operasyon at bihirang nagkakamali habang nagbabahagi ng screen.
Multi-OS Suporta: Gumagana sa iba't ibang bersyon ng Android at Windows.
User-Friendly na Interface: Simple para sa mga nagsisimula, makapangyarihan para sa mga propesyonal.
One-Click Wireless Connection: Walang mga kable, walang kumplikadong setup.
Secure Remote Access: 256-bit encrypted connections para sa kaligtasan.
Kabuuang Mga Tool: Nag-aalok ng iba pang mga tampok tulad ng remote control, virtual screens, access sa remote camera, at multi-screen expansion.
Sa isang intuitive na interface, madali lang i-set up ang DeskIn. Simple lang ang mag-scan ng QR code o i-tap para kumonekta nang wireless, walang kakailanganing technical skills. Tingnan natin kung paano ito gumagana.
Hakbang 1. I-download at I-install ang DeskIn
Bisitahin ang opisyal na website ng DeskIn sa iyong Android device at PC. I-download ang tamang bersyon para sa bawat device at sundin ang mga hakbang upang i-install ang DeskIn.
Hakbang 2. Lumikha at Mag-log in sa Iyong DeskIn Account
Mag-log in sa parehong account sa parehong devices. Kung ikaw ay bago sa DeskIn, lumikha lamang ng isang account. Pagkatapos ay kumpletuhin ang proseso ng pag-log in.
Hakbang 3. I-mirror ang Android sa PC
Simulan ang DeskIn sa parehong iyong Android at PC. Pagkatapos ay maaari mong piliin na i-scan ang QR code o i-tap upang i-mirror ang iyong Android sa PC.
Mag-scan ng QR code: Sa iyong PC, pumunta sa "Screen Mgt". Sa iyong Android phone, i-click ang "scan" na button sa itaas na kanang bahagi, pagkatapos ay i-scan ang QR code sa iyong DeskIn PC.
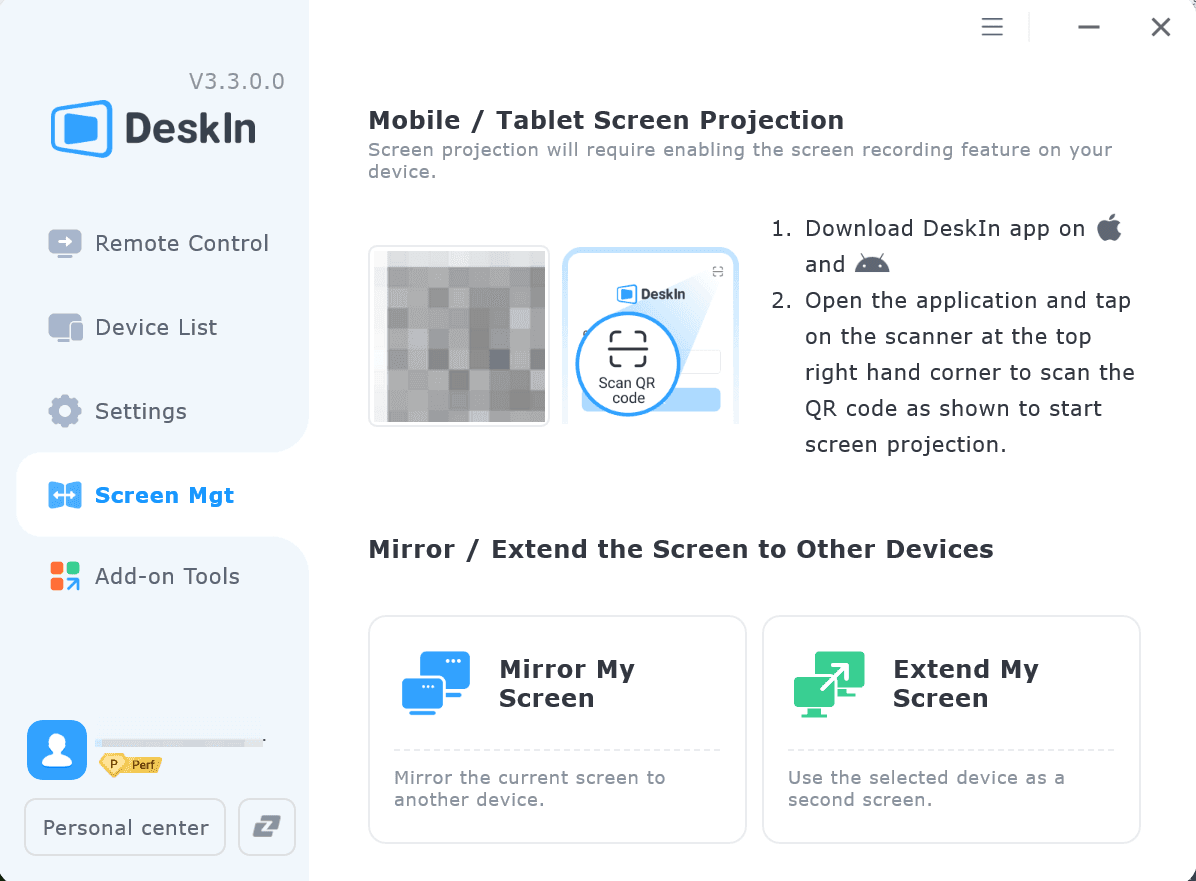
Gumamit ng Tap: Sa iyong Android phone, pumunta sa "Remote Control". Piliin ang "Screen Mirroring" at kumpirmahin. Maghintay lang ng sandali, awtomatikong i-cast ng DeskIn ang iyong Android sa PC.

Maaaring Kailanganin Mo Rin:
Kung ikaw ay isang Windows 11 (bersyon 22H2 o mas bago) na gumagamit, maaari mong i-cast ang iyong Android sa Windows laptop wirelessly gamit ang binuong Wireless Display feature. Ang libre at solusyong ito ay nagbibigay-daan sa iyo na i-project nang direkta ang display ng iyong Android phone sa iyong PC.
Habang ang "Projecting to this PC" Feature ay maginhawa, nagtataglay ito ng ilang mga limitasyon, tulad ng paminsang lag at mga isyu ng compatibility sa mga mas lumang device. Kung ang bersyon ng iyong Windows ay luma, tulad ng Windows 7, dapat mong isaalang-alang ang unang pamamaraan, DeskIn, na sumusuporta sa lahat ng bersyon.
Kung nais mong subukan ito, bago ka magsimula, siguraduhin na nasa parehong Wi-Fi network ang iyong Android device at PC. Pagkatapos ay sundin ang mga tagubilin sa ibaba upang i-mirror ang Android sa PC.
Hakbang 1. I-enable ang Wireless Display Feature
Sa iyong PC, pumunta sa "Start" > "Settings" > "System" > "Projecting to this PC".
Piliin ang "Optional features" sa ilalim ng Idagdag ang "Wireless Display" optional feature upang i-project sa PC na ito.
Mag-click sa "View Features". Pagkatapos ay hanapin ang "wireless display".
Lagyan ng tsek ang kahon sa tabi ng "Wireless display". Pagkatapos ay mag-click sa "Next" > "Install".
Kapag tapos na, bumalik sa pahina ng "Projecting to this PC" sa mga setting.
Hakbang 2. I-configure ang Mga Setting
Sa pahina ng "Projecting to this PC", ayusin ang mga setting tulad ng nasa larawan sa ibaba.

Hakbang 3. I-cast ang Android sa PC
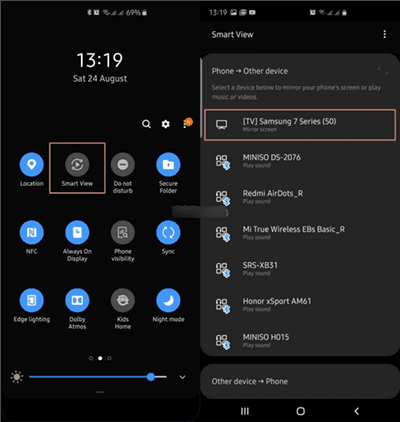
Sa iyong Android device, pumunta sa Quick Settings". Pagkatapos ay hanapin ang mga setting tulad ng "Cast Screen", "Smart View", o "Mirroring" (maaaring mag-iba ang mga setting dahil sa iba't ibang bersyon)
I-tap ang setting. Pagkatapos ay makikita mo ang pangalan ng iyong PC sa listahan.
Piliin ang pangalan ng PC. Pagkatapos ay aprubahan ang koneksyon sa iyong PC.
Marami pang Dapat Tuklasin:
Ang built-in na "Link to Windows" app ng Samsung ay walang putol na nag-iintegrate ng iyong Galaxy phone sa iyong PC. Maaari tayong magmirror ng screen ng telepono, tingnan ang mga notification, maglipat ng mga file/media, tumugon sa mga mensahe/tawag, gumamit ng mga mobile app nang direkta sa ating PC, i-sync ang mga file sa pagitan ng mga device, at pagsamahin ang mga kalendaryo—lahat habang tumatakbo ng hanggang 5 apps nang sabay-sabay.
Upang i-mirror ang telepono sa laptop gamit ang "Link to Windows":
HAKBANG 1: I-download at buksan ang "Phone Link" app sa iyong Windows PC (Preinstalled sa Windows 11 o sa pamamagitan ng Microsoft Store).

HAKBANG 2: Piliin ang "Buksan ang screen ng telepono" sa Phone Link, pagkatapos ay i-tap ang "Start Now" sa iyong Samsung phone upang bigyan ng pahintulot sa screen-sharing.
HAKBANG 3: Ngayon, ang iyong Android screen ay nag-mirror sa iyong PC—mag-browse ng mga app, ayusin ang mga setting, at mag-drag ng mga file sa pagitan ng mga device.
Nota: Sa ilang mga device, ang opsyon na "Buksan ang screen ng telepono" ay maaaring lumitaw bilang "Phone Screen".
Para sa mga tech-savvy na gumagamit, ang Scrcpy ay isang mahusay na open-source na solusyon. Hindi tulad ng karamihan sa mga app, ito ay gumagana sa pamamagitan ng ADB (Android Debug Bridge), na nagbibigay-daan sa parehong USB at wireless na mga koneksyon nang hindi kinakailangang mag-root access o mag-install ng kahit ano sa iyong telepono.
Angkop para sa Windows, macOS, at Linux, ang Scrcpy ay naghatid ng malinaw na 1080p mirroring na may lubos na mababang latency (35~70ms). Ito ay perpekto para sa makinis na paglalaro o panonood ng pelikula. Gayunpaman, ang setup ay may kasamang pag-enable ng USB debugging at pagpapatakbo ng mga command, na maaaring maging mahirap para sa mga baguhan.
Kung komportable ka sa mga developer tools, nag-aalok ang Scrcpy ng libre, mataas na pagganap na mirroring nang walang mga ad o lag. Pero kung gusto mo ng mas simpleng solusyon, tingnan ang ibang mga solusyon.
HAKBANG 1: I-download ang scrcpy mula sa GitHub at i-extract ang folder sa iyong computer.
HAKBANG 2: Sa iyong Android, pumunta sa "Settings" > "About phone", i-tap ang "Build number" ng 7 beses upang i-unlock ang Developer Options. Pagkatapos ay pumunta sa "Developer Options" at i-on ang "USB debugging".

HAKBANG 3: Gamitin ang isang USB cable upang ikonekta ang iyong Android sa PC. Kung hinihiling, pahintulutan ang pahintulot sa USB debugging sa iyong telepono.
HAKBANG 4: Sa iyong PC, buksan ang scrcpy folder at i-double click ang "scrcpy.exe". Awtomatikong makikilala ng Scrcpy ang iyong device, na nagbibigay-daan sa iyo upang simulan ang pag-mirror ng iyong Android screen sa iyong PC kaagad.
Matapos ipakita ang nangungunang 4 na Android casting tools, kung kailangan mo pa ng mga alternatibo, naghanda kami ng 5 pang mga opsyon sa ibaba—mula sa mga libreng utility hanggang sa mga premium na solusyon na may mga advanced na tampok. Habang nag-aalok ang mga ito ng kakayahang umangkop, mariing inirerekomenda naming bumalik sa DeskIn bilang iyong pangunahing pagpipilian: Nagbibigay ito ng high-definition mirroring, ultra-low latency, zero lag, at bihirang kabiguan sa koneksyon, na ginagawang pinakamahusay na app upang maibahagi ang telepono sa pc nang maaasahan.

Parsec
Nag-aalok ito ng libre bersyon na may 60FPS ultra-HD streaming, na nagbibigay-daan sa iyo upang maglaro ng mga laro nang walang kabagalan o latency, na ginagawang pinakamahusay na pagpipilian para sa mirroring ng mga laro dahil sa peer-to-peer na arkitektura nito at near-real-time na responsiveness.
LetsView
Ito ay isang libre, ad-free na tool na nagsasama ng screen recording habang nagmumirror at pinadali ang mga koneksyon sa pamamagitan ng direktang pairing, QR codes, o passkeys, na sumusuporta sa cross-platform use sa pagitan ng Android, iOS, Windows, at Mac para sa mga presentasyon o libangan.
AirDroid
Nagbibigay ito ng libre na screen sharing sa pamamagitan ng WiFi o cellular networks na may mababang latency, kahit na ang proseso ng pagpaparehistro nito ay maaaring maging mahirap. Pinapayagan din nito ang remote control ng mga Android/iOS device mula sa isang PC ngunit nililimitahan ang mga advanced na tampok (tulad ng touch control) sa kanyang bayad na antas.
Para sa mga gumagamit na naghahangad na i-screen mirror ang Android sa PC nang libre, nagbibigay ang mga tool na ito ng mga flexible na opsyon na nakatugon sa mga pangangailangan sa paglalaro, pagiging produktibo, o kaswal na paggamit.

Miracast
Nagbibigay ito ng mataas na kalidad na video at audio streaming na may suporta para sa mga surround sound format, nag-aalok ng buong HD resolution (at kahit 4K UHD sa tiyak na mga sitwasyon), at nagpapahintulot sa maraming device na kumonekta nang sabay-sabay sa parehong display para sa sama-samang panonood o mga presentasyon, na gumagamit ng mga katutubong wireless protocols nang walang mga kable.
AirServer
Nagbibigay ito ng high-definition, 60 FPS mirroring na may ultra-low latency, wala nang kinakailangang third-party apps sa client devices dahil ang lahat ng mga kinakailangang tampok ay nakabuhos sa software ng receiver nito, at sinusuportahan ang sabay-sabay na mga session ng mirroring mula sa maraming kliyente sa pamamagitan ng matalinong pag-scale at pagsasaayos ng bawat feed upang mabawasan ang hindi nagagamit na espasyo sa screen ("black bars").
Maaari mong i-mirror ang iyong telepono sa iyong laptop nang walang Wi-Fi gamit ang isang USB cable:
Scrcpy (Libre):
Open-source tool para sa Windows/macOS/Linux. Isaksak sa pamamagitan ng USB, i-enable ang USB debugging, at i-mirror kaagad na may near-zero latency.
Vysor (Freemium):
USB-tether para sa screen mirroring sa anumang OS. Ang libreng bersyon ay gumagana sa pamamagitan ng USB. Ang bersyon ng Pro ay nag-aunlock ng wireless at HD.
Daan 1: Tiyakin na ang "Wireless Display" ay nakabukas sa Windows Settings > System > Projecting to this PC.
Daan 2: Kumpirmahin na ang parehong device ay nasa parehong WiFi network.
Daan 3: Siguraduhin na ang bersyon ng iyong Windows ay sumusuporta sa "Connect to a wireless display".
Daan 4: Patakbuhin ang Windows Troubleshooter (Settings > Update & Security > Troubleshoot).
Daan 5: I-restart ang iyong PC at Android device.
Daan 6: I-update ang iyong mga display driver sa pamamagitan ng Device Manager.
Ang pag-mirror ng iyong Android sa isang PC ay nagbubukas ng mga bagong posibilidad, maging ito man para sa trabaho, paglalaro, o libangan. Habang ang mga built-in na opsyon tulad ng Wireless Display ay maginhawa para sa mga gumagamit ng Windows at nag-aalok ang Scrcpy ng makapangyarihang kontrol, ang pinaka-simple at maaasahang solusyon ay isang propesyonal na app tulad ng DeskIn.
Sa cross-platform support (Android, Windows, macOS, iOS), 4K kalidad, at near-zero latency, DeskIn ay ginagawang madali ang screen mirroring. Gayundin, kinakailangan lamang ng 3 hakbang upang ma-set up ang mirroring, na ginagawa ang proseso ng setup na madali at mahusay. Handa ka na bang mag-enjoy sa seamless na karanasan sa malaking screen? Subukan ang DeskIn ngayon at i-cast ang iyong Android sa PC sa loob ng ilang segundo!
Ang pagkopya ng Android sa PC ay maaaring maging lubhang kapaki-pakinabang sa pang-araw-araw at mga propesyonal na sitwasyon. Kung ikaw man ay nagpapakita mula sa iyong Android mobile patungo sa PC, upang mag-browse, manood ng mga video, at maglaro ng mga mobile games sa isang mas malaking screen, o nagpapakita ng screen sa panahon ng isang pulong, pagtugon sa mga mensahe habang nagtatrabaho, nag-aalok ang screen mirroring ng parehong kaginhawahan at pinahusay na pagiging produktibo.
Sa artikulong ito, susuriin natin ang 4 maaasahang pamamaraan upang sa halip na pagbabahagi ng screen sa pamamagitan ng USB, at i-mirror ang iyong Android screen sa isang PC nang walang wires. Ang mga pagpipilian na ito ay nagkakaiba sa pagiging kumplikado at functionality, na nagbibigay-daan sa iyo upang piliin ang lapit na pinakaangkop sa iyong mga pangangailangan. Handa na bang magsimula? Magpatuloy tayo at hanapin ang pinakamahusay na paraan!
Kaugnay na Pagbasa:
5 Pinakamahusay na Mirror Screen Apps para sa Android (Tuklasin ang Pinakamahusay na mga Opsyon)
Paano Magmirror Screen ng Android sa iPhone/TV/Ibang mga Device
Para sa makinis, bihirang nagkakamali, at maaasahang karanasan sa screen mirroring, inirerekomenda ang paggamit ng isang propesyonal na mirror screen app tulad ng DeskIn. Sinusuportahan nito ang malawak na hanay ng mga operating system, kabilang ang Android at Windows, mula sa iba't ibang bersyon, na ginagawa itong isang versatile na tool para sa iba't ibang mga gumagamit.
Ang pinakamahusay na app para sa screen mirroring na ito ay nagpapahintulot ding wireless na i-mirror ang iyong Android phone sa isang mas malaking screen, na tumutulong sa iyong magtrabaho, magpresenta, o maglaro nang mas epektibo. Sa hanggang 4K kalidad ng imahe at ultra-low latency na mas mababa sa 40 ms, ang karanasan ay maaaring maging makinis at tumutugon.
🏆 Mga Pangunahing Tampok ng DeskIn
4K Ultra HD + Mababang Latency (<40ms): Perpekto para sa paglalaro at mga presentasyon.
Bihirang Error: Kailangan ng tuloy-tuloy na operasyon at bihirang nagkakamali habang nagbabahagi ng screen.
Multi-OS Suporta: Gumagana sa iba't ibang bersyon ng Android at Windows.
User-Friendly na Interface: Simple para sa mga nagsisimula, makapangyarihan para sa mga propesyonal.
One-Click Wireless Connection: Walang mga kable, walang kumplikadong setup.
Secure Remote Access: 256-bit encrypted connections para sa kaligtasan.
Kabuuang Mga Tool: Nag-aalok ng iba pang mga tampok tulad ng remote control, virtual screens, access sa remote camera, at multi-screen expansion.
Sa isang intuitive na interface, madali lang i-set up ang DeskIn. Simple lang ang mag-scan ng QR code o i-tap para kumonekta nang wireless, walang kakailanganing technical skills. Tingnan natin kung paano ito gumagana.
Hakbang 1. I-download at I-install ang DeskIn
Bisitahin ang opisyal na website ng DeskIn sa iyong Android device at PC. I-download ang tamang bersyon para sa bawat device at sundin ang mga hakbang upang i-install ang DeskIn.
Hakbang 2. Lumikha at Mag-log in sa Iyong DeskIn Account
Mag-log in sa parehong account sa parehong devices. Kung ikaw ay bago sa DeskIn, lumikha lamang ng isang account. Pagkatapos ay kumpletuhin ang proseso ng pag-log in.
Hakbang 3. I-mirror ang Android sa PC
Simulan ang DeskIn sa parehong iyong Android at PC. Pagkatapos ay maaari mong piliin na i-scan ang QR code o i-tap upang i-mirror ang iyong Android sa PC.
Mag-scan ng QR code: Sa iyong PC, pumunta sa "Screen Mgt". Sa iyong Android phone, i-click ang "scan" na button sa itaas na kanang bahagi, pagkatapos ay i-scan ang QR code sa iyong DeskIn PC.
Gumamit ng Tap: Sa iyong Android phone, pumunta sa "Remote Control". Piliin ang "Screen Mirroring" at kumpirmahin. Maghintay lang ng sandali, awtomatikong i-cast ng DeskIn ang iyong Android sa PC.
Maaaring Kailanganin Mo Rin:
Kung ikaw ay isang Windows 11 (bersyon 22H2 o mas bago) na gumagamit, maaari mong i-cast ang iyong Android sa Windows laptop wirelessly gamit ang binuong Wireless Display feature. Ang libre at solusyong ito ay nagbibigay-daan sa iyo na i-project nang direkta ang display ng iyong Android phone sa iyong PC.
Habang ang "Projecting to this PC" Feature ay maginhawa, nagtataglay ito ng ilang mga limitasyon, tulad ng paminsang lag at mga isyu ng compatibility sa mga mas lumang device. Kung ang bersyon ng iyong Windows ay luma, tulad ng Windows 7, dapat mong isaalang-alang ang unang pamamaraan, DeskIn, na sumusuporta sa lahat ng bersyon.
Kung nais mong subukan ito, bago ka magsimula, siguraduhin na nasa parehong Wi-Fi network ang iyong Android device at PC. Pagkatapos ay sundin ang mga tagubilin sa ibaba upang i-mirror ang Android sa PC.
Hakbang 1. I-enable ang Wireless Display Feature
Sa iyong PC, pumunta sa "Start" > "Settings" > "System" > "Projecting to this PC".
Piliin ang "Optional features" sa ilalim ng Idagdag ang "Wireless Display" optional feature upang i-project sa PC na ito.
Mag-click sa "View Features". Pagkatapos ay hanapin ang "wireless display".
Lagyan ng tsek ang kahon sa tabi ng "Wireless display". Pagkatapos ay mag-click sa "Next" > "Install".
Kapag tapos na, bumalik sa pahina ng "Projecting to this PC" sa mga setting.
Hakbang 2. I-configure ang Mga Setting
Sa pahina ng "Projecting to this PC", ayusin ang mga setting tulad ng nasa larawan sa ibaba.
Hakbang 3. I-cast ang Android sa PC
Sa iyong Android device, pumunta sa Quick Settings". Pagkatapos ay hanapin ang mga setting tulad ng "Cast Screen", "Smart View", o "Mirroring" (maaaring mag-iba ang mga setting dahil sa iba't ibang bersyon)
I-tap ang setting. Pagkatapos ay makikita mo ang pangalan ng iyong PC sa listahan.
Piliin ang pangalan ng PC. Pagkatapos ay aprubahan ang koneksyon sa iyong PC.
Marami pang Dapat Tuklasin:
Ang built-in na "Link to Windows" app ng Samsung ay walang putol na nag-iintegrate ng iyong Galaxy phone sa iyong PC. Maaari tayong magmirror ng screen ng telepono, tingnan ang mga notification, maglipat ng mga file/media, tumugon sa mga mensahe/tawag, gumamit ng mga mobile app nang direkta sa ating PC, i-sync ang mga file sa pagitan ng mga device, at pagsamahin ang mga kalendaryo—lahat habang tumatakbo ng hanggang 5 apps nang sabay-sabay.
Upang i-mirror ang telepono sa laptop gamit ang "Link to Windows":
HAKBANG 1: I-download at buksan ang "Phone Link" app sa iyong Windows PC (Preinstalled sa Windows 11 o sa pamamagitan ng Microsoft Store).
HAKBANG 2: Piliin ang "Buksan ang screen ng telepono" sa Phone Link, pagkatapos ay i-tap ang "Start Now" sa iyong Samsung phone upang bigyan ng pahintulot sa screen-sharing.
HAKBANG 3: Ngayon, ang iyong Android screen ay nag-mirror sa iyong PC—mag-browse ng mga app, ayusin ang mga setting, at mag-drag ng mga file sa pagitan ng mga device.
Nota: Sa ilang mga device, ang opsyon na "Buksan ang screen ng telepono" ay maaaring lumitaw bilang "Phone Screen".
Para sa mga tech-savvy na gumagamit, ang Scrcpy ay isang mahusay na open-source na solusyon. Hindi tulad ng karamihan sa mga app, ito ay gumagana sa pamamagitan ng ADB (Android Debug Bridge), na nagbibigay-daan sa parehong USB at wireless na mga koneksyon nang hindi kinakailangang mag-root access o mag-install ng kahit ano sa iyong telepono.
Angkop para sa Windows, macOS, at Linux, ang Scrcpy ay naghatid ng malinaw na 1080p mirroring na may lubos na mababang latency (35~70ms). Ito ay perpekto para sa makinis na paglalaro o panonood ng pelikula. Gayunpaman, ang setup ay may kasamang pag-enable ng USB debugging at pagpapatakbo ng mga command, na maaaring maging mahirap para sa mga baguhan.
Kung komportable ka sa mga developer tools, nag-aalok ang Scrcpy ng libre, mataas na pagganap na mirroring nang walang mga ad o lag. Pero kung gusto mo ng mas simpleng solusyon, tingnan ang ibang mga solusyon.
HAKBANG 1: I-download ang scrcpy mula sa GitHub at i-extract ang folder sa iyong computer.
HAKBANG 2: Sa iyong Android, pumunta sa "Settings" > "About phone", i-tap ang "Build number" ng 7 beses upang i-unlock ang Developer Options. Pagkatapos ay pumunta sa "Developer Options" at i-on ang "USB debugging".
HAKBANG 3: Gamitin ang isang USB cable upang ikonekta ang iyong Android sa PC. Kung hinihiling, pahintulutan ang pahintulot sa USB debugging sa iyong telepono.
HAKBANG 4: Sa iyong PC, buksan ang scrcpy folder at i-double click ang "scrcpy.exe". Awtomatikong makikilala ng Scrcpy ang iyong device, na nagbibigay-daan sa iyo upang simulan ang pag-mirror ng iyong Android screen sa iyong PC kaagad.
Matapos ipakita ang nangungunang 4 na Android casting tools, kung kailangan mo pa ng mga alternatibo, naghanda kami ng 5 pang mga opsyon sa ibaba—mula sa mga libreng utility hanggang sa mga premium na solusyon na may mga advanced na tampok. Habang nag-aalok ang mga ito ng kakayahang umangkop, mariing inirerekomenda naming bumalik sa DeskIn bilang iyong pangunahing pagpipilian: Nagbibigay ito ng high-definition mirroring, ultra-low latency, zero lag, at bihirang kabiguan sa koneksyon, na ginagawang pinakamahusay na app upang maibahagi ang telepono sa pc nang maaasahan.
Parsec
Nag-aalok ito ng libre bersyon na may 60FPS ultra-HD streaming, na nagbibigay-daan sa iyo upang maglaro ng mga laro nang walang kabagalan o latency, na ginagawang pinakamahusay na pagpipilian para sa mirroring ng mga laro dahil sa peer-to-peer na arkitektura nito at near-real-time na responsiveness.
LetsView
Ito ay isang libre, ad-free na tool na nagsasama ng screen recording habang nagmumirror at pinadali ang mga koneksyon sa pamamagitan ng direktang pairing, QR codes, o passkeys, na sumusuporta sa cross-platform use sa pagitan ng Android, iOS, Windows, at Mac para sa mga presentasyon o libangan.
AirDroid
Nagbibigay ito ng libre na screen sharing sa pamamagitan ng WiFi o cellular networks na may mababang latency, kahit na ang proseso ng pagpaparehistro nito ay maaaring maging mahirap. Pinapayagan din nito ang remote control ng mga Android/iOS device mula sa isang PC ngunit nililimitahan ang mga advanced na tampok (tulad ng touch control) sa kanyang bayad na antas.
Para sa mga gumagamit na naghahangad na i-screen mirror ang Android sa PC nang libre, nagbibigay ang mga tool na ito ng mga flexible na opsyon na nakatugon sa mga pangangailangan sa paglalaro, pagiging produktibo, o kaswal na paggamit.
Miracast
Nagbibigay ito ng mataas na kalidad na video at audio streaming na may suporta para sa mga surround sound format, nag-aalok ng buong HD resolution (at kahit 4K UHD sa tiyak na mga sitwasyon), at nagpapahintulot sa maraming device na kumonekta nang sabay-sabay sa parehong display para sa sama-samang panonood o mga presentasyon, na gumagamit ng mga katutubong wireless protocols nang walang mga kable.
AirServer
Nagbibigay ito ng high-definition, 60 FPS mirroring na may ultra-low latency, wala nang kinakailangang third-party apps sa client devices dahil ang lahat ng mga kinakailangang tampok ay nakabuhos sa software ng receiver nito, at sinusuportahan ang sabay-sabay na mga session ng mirroring mula sa maraming kliyente sa pamamagitan ng matalinong pag-scale at pagsasaayos ng bawat feed upang mabawasan ang hindi nagagamit na espasyo sa screen ("black bars").
Maaari mong i-mirror ang iyong telepono sa iyong laptop nang walang Wi-Fi gamit ang isang USB cable:
Scrcpy (Libre):
Open-source tool para sa Windows/macOS/Linux. Isaksak sa pamamagitan ng USB, i-enable ang USB debugging, at i-mirror kaagad na may near-zero latency.
Vysor (Freemium):
USB-tether para sa screen mirroring sa anumang OS. Ang libreng bersyon ay gumagana sa pamamagitan ng USB. Ang bersyon ng Pro ay nag-aunlock ng wireless at HD.
Daan 1: Tiyakin na ang "Wireless Display" ay nakabukas sa Windows Settings > System > Projecting to this PC.
Daan 2: Kumpirmahin na ang parehong device ay nasa parehong WiFi network.
Daan 3: Siguraduhin na ang bersyon ng iyong Windows ay sumusuporta sa "Connect to a wireless display".
Daan 4: Patakbuhin ang Windows Troubleshooter (Settings > Update & Security > Troubleshoot).
Daan 5: I-restart ang iyong PC at Android device.
Daan 6: I-update ang iyong mga display driver sa pamamagitan ng Device Manager.
Ang pag-mirror ng iyong Android sa isang PC ay nagbubukas ng mga bagong posibilidad, maging ito man para sa trabaho, paglalaro, o libangan. Habang ang mga built-in na opsyon tulad ng Wireless Display ay maginhawa para sa mga gumagamit ng Windows at nag-aalok ang Scrcpy ng makapangyarihang kontrol, ang pinaka-simple at maaasahang solusyon ay isang propesyonal na app tulad ng DeskIn.
Sa cross-platform support (Android, Windows, macOS, iOS), 4K kalidad, at near-zero latency, DeskIn ay ginagawang madali ang screen mirroring. Gayundin, kinakailangan lamang ng 3 hakbang upang ma-set up ang mirroring, na ginagawa ang proseso ng setup na madali at mahusay. Handa ka na bang mag-enjoy sa seamless na karanasan sa malaking screen? Subukan ang DeskIn ngayon at i-cast ang iyong Android sa PC sa loob ng ilang segundo!


DeskIn vs Chrome Remote Desktop: Which One Fits Your Workflow Best?
When it comes to remote access tools, the comparison between DeskIn and Chrome Remote Desktop often comes down to one simple question: do you just need quick access, or do you need performance and control?
Both tools are reliable, secure, and widely used. But they are built for very different types of users. Chrome Remote Desktop focuses on simplicity and accessibility, while DeskIn is designed for users who need high performance, stability, and advanced features across multiple devices.
If you're deciding between the two, this guide breaks down not just what they offer, but which one actually fits your workflow.
Feature | DeskIn | Chrome Remote Desktop |
|---|---|---|
Performance | Up to 4K 60FPS/2K 240FPS, low latency | Standard performance |
Ease of Use | Requires app installation | Browser-based, very simple |
Device Support | Windows, macOS, iOS, Android | Works via Chrome browser |
File Transfer | Fast and stable | Limited |
Multi-device Management | Yes | No |
Mobile Experience | Optimized for iPad & iPhone | Basic |
Security | Privacy screens and granular black/whitelists | Basic |
Price | Free + paid plans | Completely free |
In short, Chrome Remote Desktop is great for quick, lightweight access, while DeskIn is built for users who expect more from their remote desktop experience.

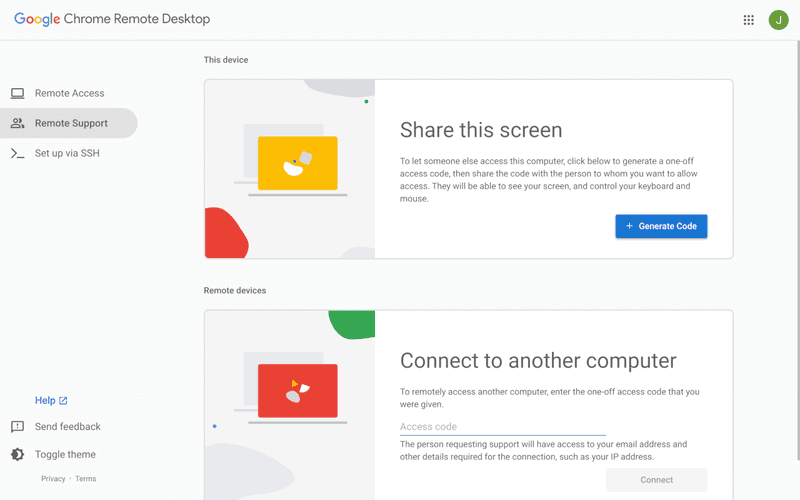
Chrome Remote Desktop is one of the simplest remote access tools available. It runs directly through the Chrome browser and requires only a Google account to get started. This makes it especially popular among casual users and those already working within the Google ecosystem.
It works particularly well on devices like Chromebooks, where everything is already browser-based. It's also accessible across platforms, including mobile devices like iPhone and iPad, though the experience on mobile can feel limited compared to desktop use.
If you're wondering how to use Chrome Remote Desktop, the process is straightforward. You install the Chrome extension, sign in with your Google account, set up a PIN on the host device, and then connect from another device using the same account. The entire setup usually takes just a few minutes.
That said, simplicity comes with trade-offs. Chrome Remote Desktop lacks advanced features like high frame rate streaming, multi-monitor control, or professional-grade file transfer. For occasional access, it works well. But for more demanding tasks, users often start to feel its limitations.
👀You may also be interested in:
If Chrome Remote Desktop is a lightweight sketch, DeskIn is a full workstation painted in high resolution. DeskIn focuses on performance, stability, and flexibility. It supports up to 4K 60FPS streaming, making it suitable for tasks where visual clarity and responsiveness matter, such as design work, video editing, or even gaming.
As a Chrome remote desktop alternative, unlike browser-based tools, DeskIn is a dedicated remote desktop application. While this requires installation, it unlocks a much more stable and feature-rich experience. Users can manage multiple devices, transfer large files efficiently, and enjoy smoother control across different platforms.
DeskIn is also optimized for mobile workflows. Whether you're using an iPad or smartphone, the interaction feels more responsive and closer to a desktop experience, rather than a simplified viewer. For users who find Chrome Remote Desktop "good enough" at first but limiting over time, DeskIn often becomes the natural upgrade path.
The real difference between these two tools becomes clear when you look at how they perform in everyday scenarios.
If you only need to check files on your home computer or help a friend troubleshoot something quickly, Chrome Remote Desktop is more than enough. It's free, easy to set up, and doesn't require installing extra software beyond Chrome. In this case, DeskIn may feel like overkill.
For professionals working remotely on a daily basis, stability and efficiency matter much more. This is where DeskIn starts to stand out.
Tasks like editing documents, managing multiple screens, or transferring files between devices become smoother and faster. Chrome Remote Desktop can handle basic workflows, but it often struggles with responsiveness and lacks the tools needed for a seamless work environment.
This is where the gap becomes impossible to ignore. DeskIn's support for high resolution and high frame rates makes it suitable for visually demanding work. Whether you're editing videos, working with design software, or running simulations, performance consistency is critical. Chrome Remote Desktop, on the other hand, is not designed for these scenarios. It works, but not comfortably.
If you rely heavily on Google services or use a Chromebook, Chrome Remote Desktop integrates naturally into your workflow. It's lightweight, requires no additional setup, and feels like an extension of the browser itself. In this scenario, it remains a very practical choice.
Mobile usage highlights another important difference. While remote desktop Chrome iPhone, and Chrome Remote Desktop iPad are functional, they often feel like simplified versions of the desktop experience. Controls can be less intuitive, and performance may vary depending on the connection.
DeskIn, by contrast, is designed with cross-device interaction in mind, offering a smoother and more responsive mobile experience.
👀 You may also be interested in:
Yes. Tools like DeskIn offer better performance, more features, and improved stability, especially for professional use cases.
No, Chrome Remote Desktop is still actively maintained by Google. It continues to receive security updates and remains available for users needing simple, free remote access.
Yes, DeskIn is a legitimate remote desktop solution. It uses encryption to secure connections and provides access controls, making it safe for both personal and professional use.
When comparing DeskIn vs Chrome Remote Desktop, the choice depends on how demanding your remote access needs are. Chrome Remote Desktop is simple, free, and ideal for occasional use, especially if you just need quick access to a device without extra setup.
As your workflow becomes more intensive, the limitations start to surface. DeskIn offers a smoother, more stable experience with better performance and control, making it a strong long-term Chrome remote desktop alternative for users who rely on remote access every day.

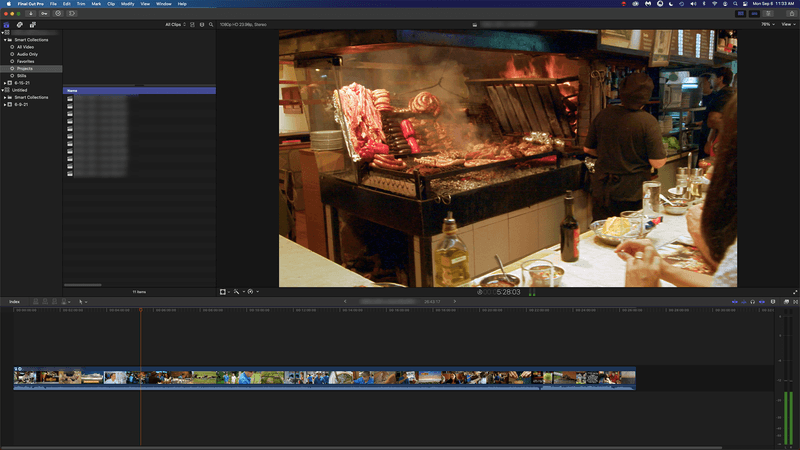
8 Best Remote Desktops for Video Editing in 2026
Remote video editing is no longer a compromise; it's a workflow upgrade. Whether you're working in Adobe Premiere Pro, After Effects, or DaVinci Resolve, the right remote desktop can turn your laptop into a high-performance editing station.
But not all tools are built for remote video editing collaboration. Lag, poor color accuracy, and unstable connections can ruin productivity. In this guide, we'll break down the best remote desktop for video editing tools so that you can edit smoothly from anywhere.
Modern creators are no longer tied to a single workstation. With remote work software, you can access your powerful desktop from anywhere without investing in an expensive laptop. For many editors, especially freelancers and small teams, this solves a real problem: you already have a high-performance PC, but mobility is limited. Instead of duplicating hardware, video editing remote desktop tools let you stream your workflow in real time.
Another key benefit is remote collaboration. Teams can work on the same project across different locations, review edits instantly, and avoid large file transfers via remote collaboration tools. However, this only works if your remote desktop software supports high frame rates, low latency, and stable connections. Otherwise, editing becomes frustrating.
Here's a quick overview of the best tools and who they're for:
DeskIn – Best overall for performance + affordability + multi-device workflows
Parsec – Best for ultra-low latency editing
Splashtop – Best for high-resolution streaming
HP Anyware – Best for enterprise-level workflows
Jump Desktop – Best for Mac users
AnyDesk – Best lightweight remote access
Chrome Remote Desktop – Best free basic option
RustDesk – Best open-source alternative
Up to 4K 60FPS / 2K 240FPS performance
Ultra-low latency for smooth editing timelines
Multi-device support (PC, Mac, iPad, Android)
Affordable pricing with free plan available
Smaller brand awareness compared to legacy tools
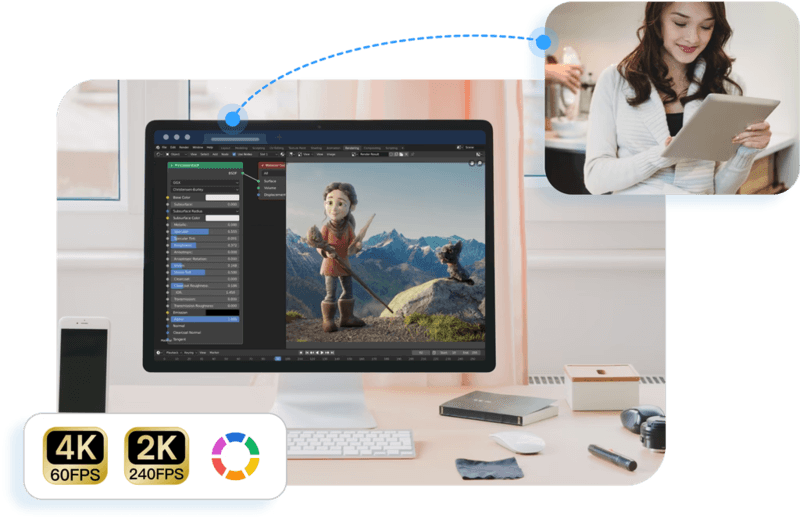
DeskIn stands out as the best remote desktop for video editing by balancing performance, stability, and accessibility. Unlike many traditional remote support tools, it is designed for high-frame-rate tasks, making timeline scrubbing, preview playback, and effects editing feel responsive and fluid.
For creators working across devices, DeskIn enables seamless remote video editing collaboration. You can access your main editing PC from a laptop, tablet, or even a secondary workstation without noticeable lag. Compared to tools like Chrome Remote Desktop, which struggle with video-heavy workloads, DeskIn maintains consistent quality and responsiveness—making it a practical choice for both solo editors and distributed teams.
Extremely low latency
High frame rate streaming
Popular among creative professionals
Limited collaboration features
Setup can be complex for beginners
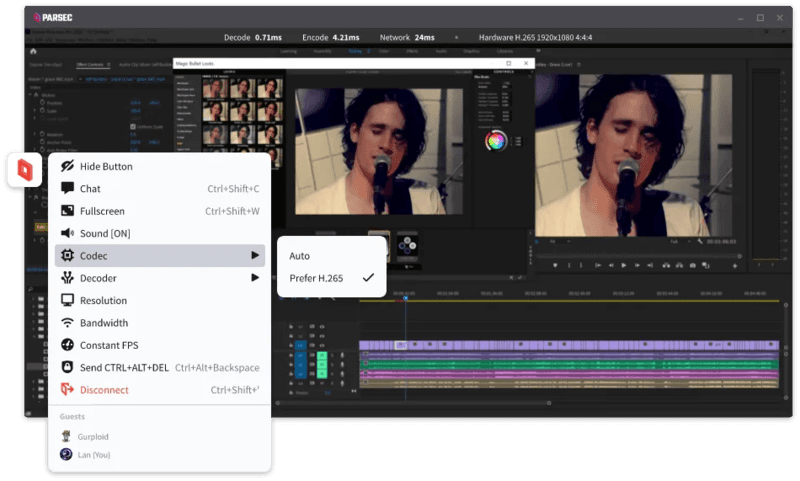
Parsec is widely recognized as a top choice for remote video editing, especially when latency is your biggest concern. Its streaming technology is optimized for real-time responsiveness, which makes it ideal for tasks like timeline scrubbing and motion graphics work in After Effects.
However, while Parsec excels in performance, it lacks some features needed for full remote video editing collaboration. Multi-user workflows and advanced access control are not as robust as some newer tools. For users who need both performance and flexibility, alternatives like DeskIn may provide a more balanced solution.
Supports 4K streaming
Strong color accuracy
Reliable for creative tasks
Higher cost for advanced features
Can experience latency over long distances
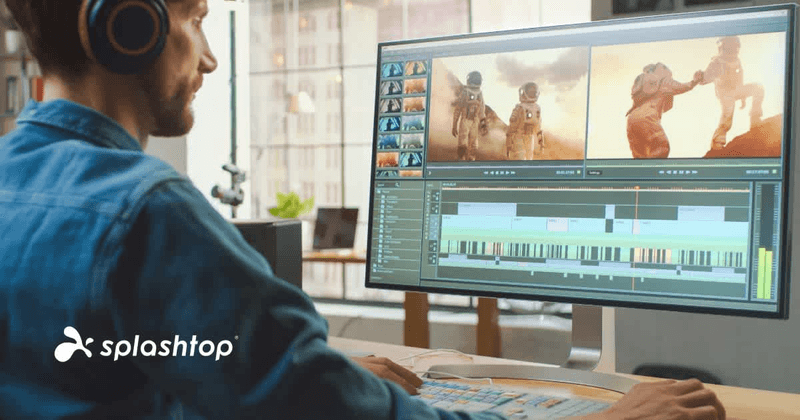
Splashtop is a solid option for editors who prioritize visual fidelity. Its support for high-resolution streaming and 4:4:4 color makes it suitable for color grading and detailed editing work.
That said, performance consistency can vary depending on network conditions. Some users report lag when working outside local networks. Compared to more optimized remote work software like DeskIn, Splashtop may require a stronger connection to maintain the same level of smoothness.
Industry-grade performance
Secure and scalable
Used in professional studios
Expensive
Complex setup
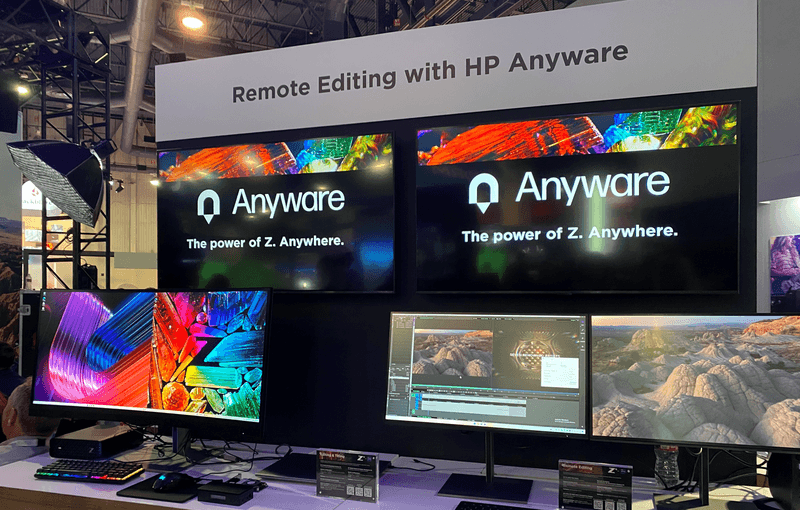
HP Anyware (formerly Teradici) is designed for high-end production environments. It uses advanced protocols to deliver excellent performance and security, making it a common choice in the media and entertainment industries.
However, for small teams or individual creators, it may be overkill. The cost and setup complexity make it less accessible compared to modern remote desktops for video editing tools that offer similar performance with easier deployment. The high cost and technical complexity create barriers that modern remote desktop solutions have eliminated, like DeskIn, offering comparable performance with far simpler deployment.
Great macOS integration
Smooth performance
Easy to use
Limited advanced features
Not ideal for heavy collaboration
Jump Desktop has earned a loyal following among Mac users seeking a straightforward, efficient remote desktop for video editing. Its Fluid Remote Desktop protocol provides smooth, responsive performance for most editing tasks without unnecessary complexity.
Where it falls short is in collaboration. Jump Desktop is built for individual use, lacking the team-oriented features that creative groups need. For solo professionals, it works well, but teams will quickly miss real-time collaboration tools found on other platforms.
Pros
Fast and lightweight
Easy to set up
Works on multiple devices
Cons
Limited performance for video editing
Lower visual quality

AnyDesk has built its reputation on lightweight design and remarkable ease of use for general remote access. It handles everyday tasks competently, connecting quickly and running smoothly on modest hardware.
The limitations become apparent with demanding creative work. Remote video editing requires consistent frame rates and crystal-clear visuals—areas where AnyDesk struggles. For professional editors who need precision, the performance gap becomes impossible to ignore.
Completely free
Easy browser-based setup
Works on any device
Poor performance for editing
Limited features
Chrome Remote Desktop is one of the most accessible remote support tools, offering a simple way to access your computer from anywhere. It's free, requires almost no setup, and lets you access your computer from anywhere with just a browser. For basic technical support or quick file grabs, it gets the job done.
However, it is not built for remote video editing. Users often experience lag, compression artifacts, and low frame rates. If you're working on professional projects, upgrading to a more capable solution is highly recommended.
Open-source
Self-hosting available
Free to use
Requires technical setup
Performance can vary
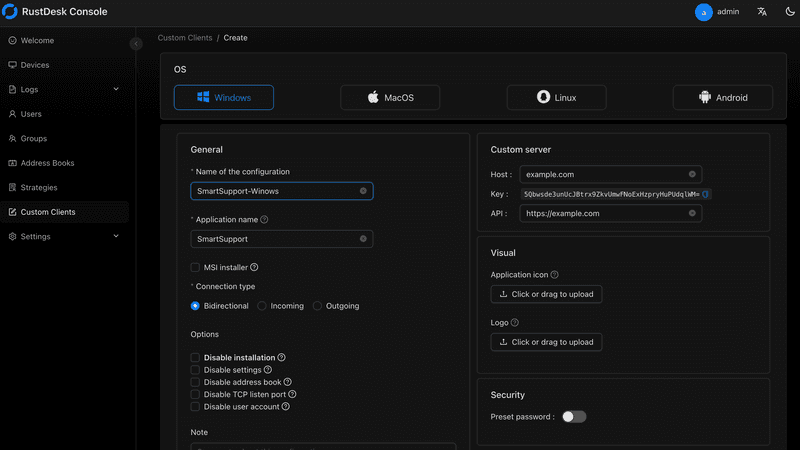
RustDesk appeals to users who prioritize open-source philosophy and want complete control over their remote access infrastructure. The flexibility to self-host and customize is genuinely valuable for privacy-conscious users. RustDesk is an interesting option for users who prefer open-source remote desktop not working alternatives or want full control over their infrastructure.
Performance, however, depends entirely on your configuration skills. Without technical expertise, achieving the smooth, low-latency experience required for professional editing is challenging. It's powerful for those who know how to tune it, but not plug-and-play.
Yes, with the right remote desktop for video editing, you can edit videos smoothly from anywhere. Tools like DeskIn and Parsec provide low latency and high frame rates for professional workflows.
Free options like Chrome Remote Desktop exist, but they lack performance. DeskIn offers a free plan with better performance, making it a stronger choice for real editing work.
Yes, Parsec is excellent for low-latency editing. However, it may lack collaboration features needed for team workflows.
Common issues include poor network connection, low bandwidth, or software limitations. Choosing optimized remote work software like DeskIn can significantly improve performance.
Choosing the best remote desktop for video editing depends on your workflow, budget, and performance needs. While tools like Parsec and Splashtop excel in specific areas, many solutions struggle to balance performance, stability, and usability.
If you're looking for a well-rounded solution, DeskIn offers a strong combination of high performance, smooth streaming, and cross-device flexibility. Whether you're working solo or collaborating remotely, it provides a reliable foundation for modern remote video editing workflows.

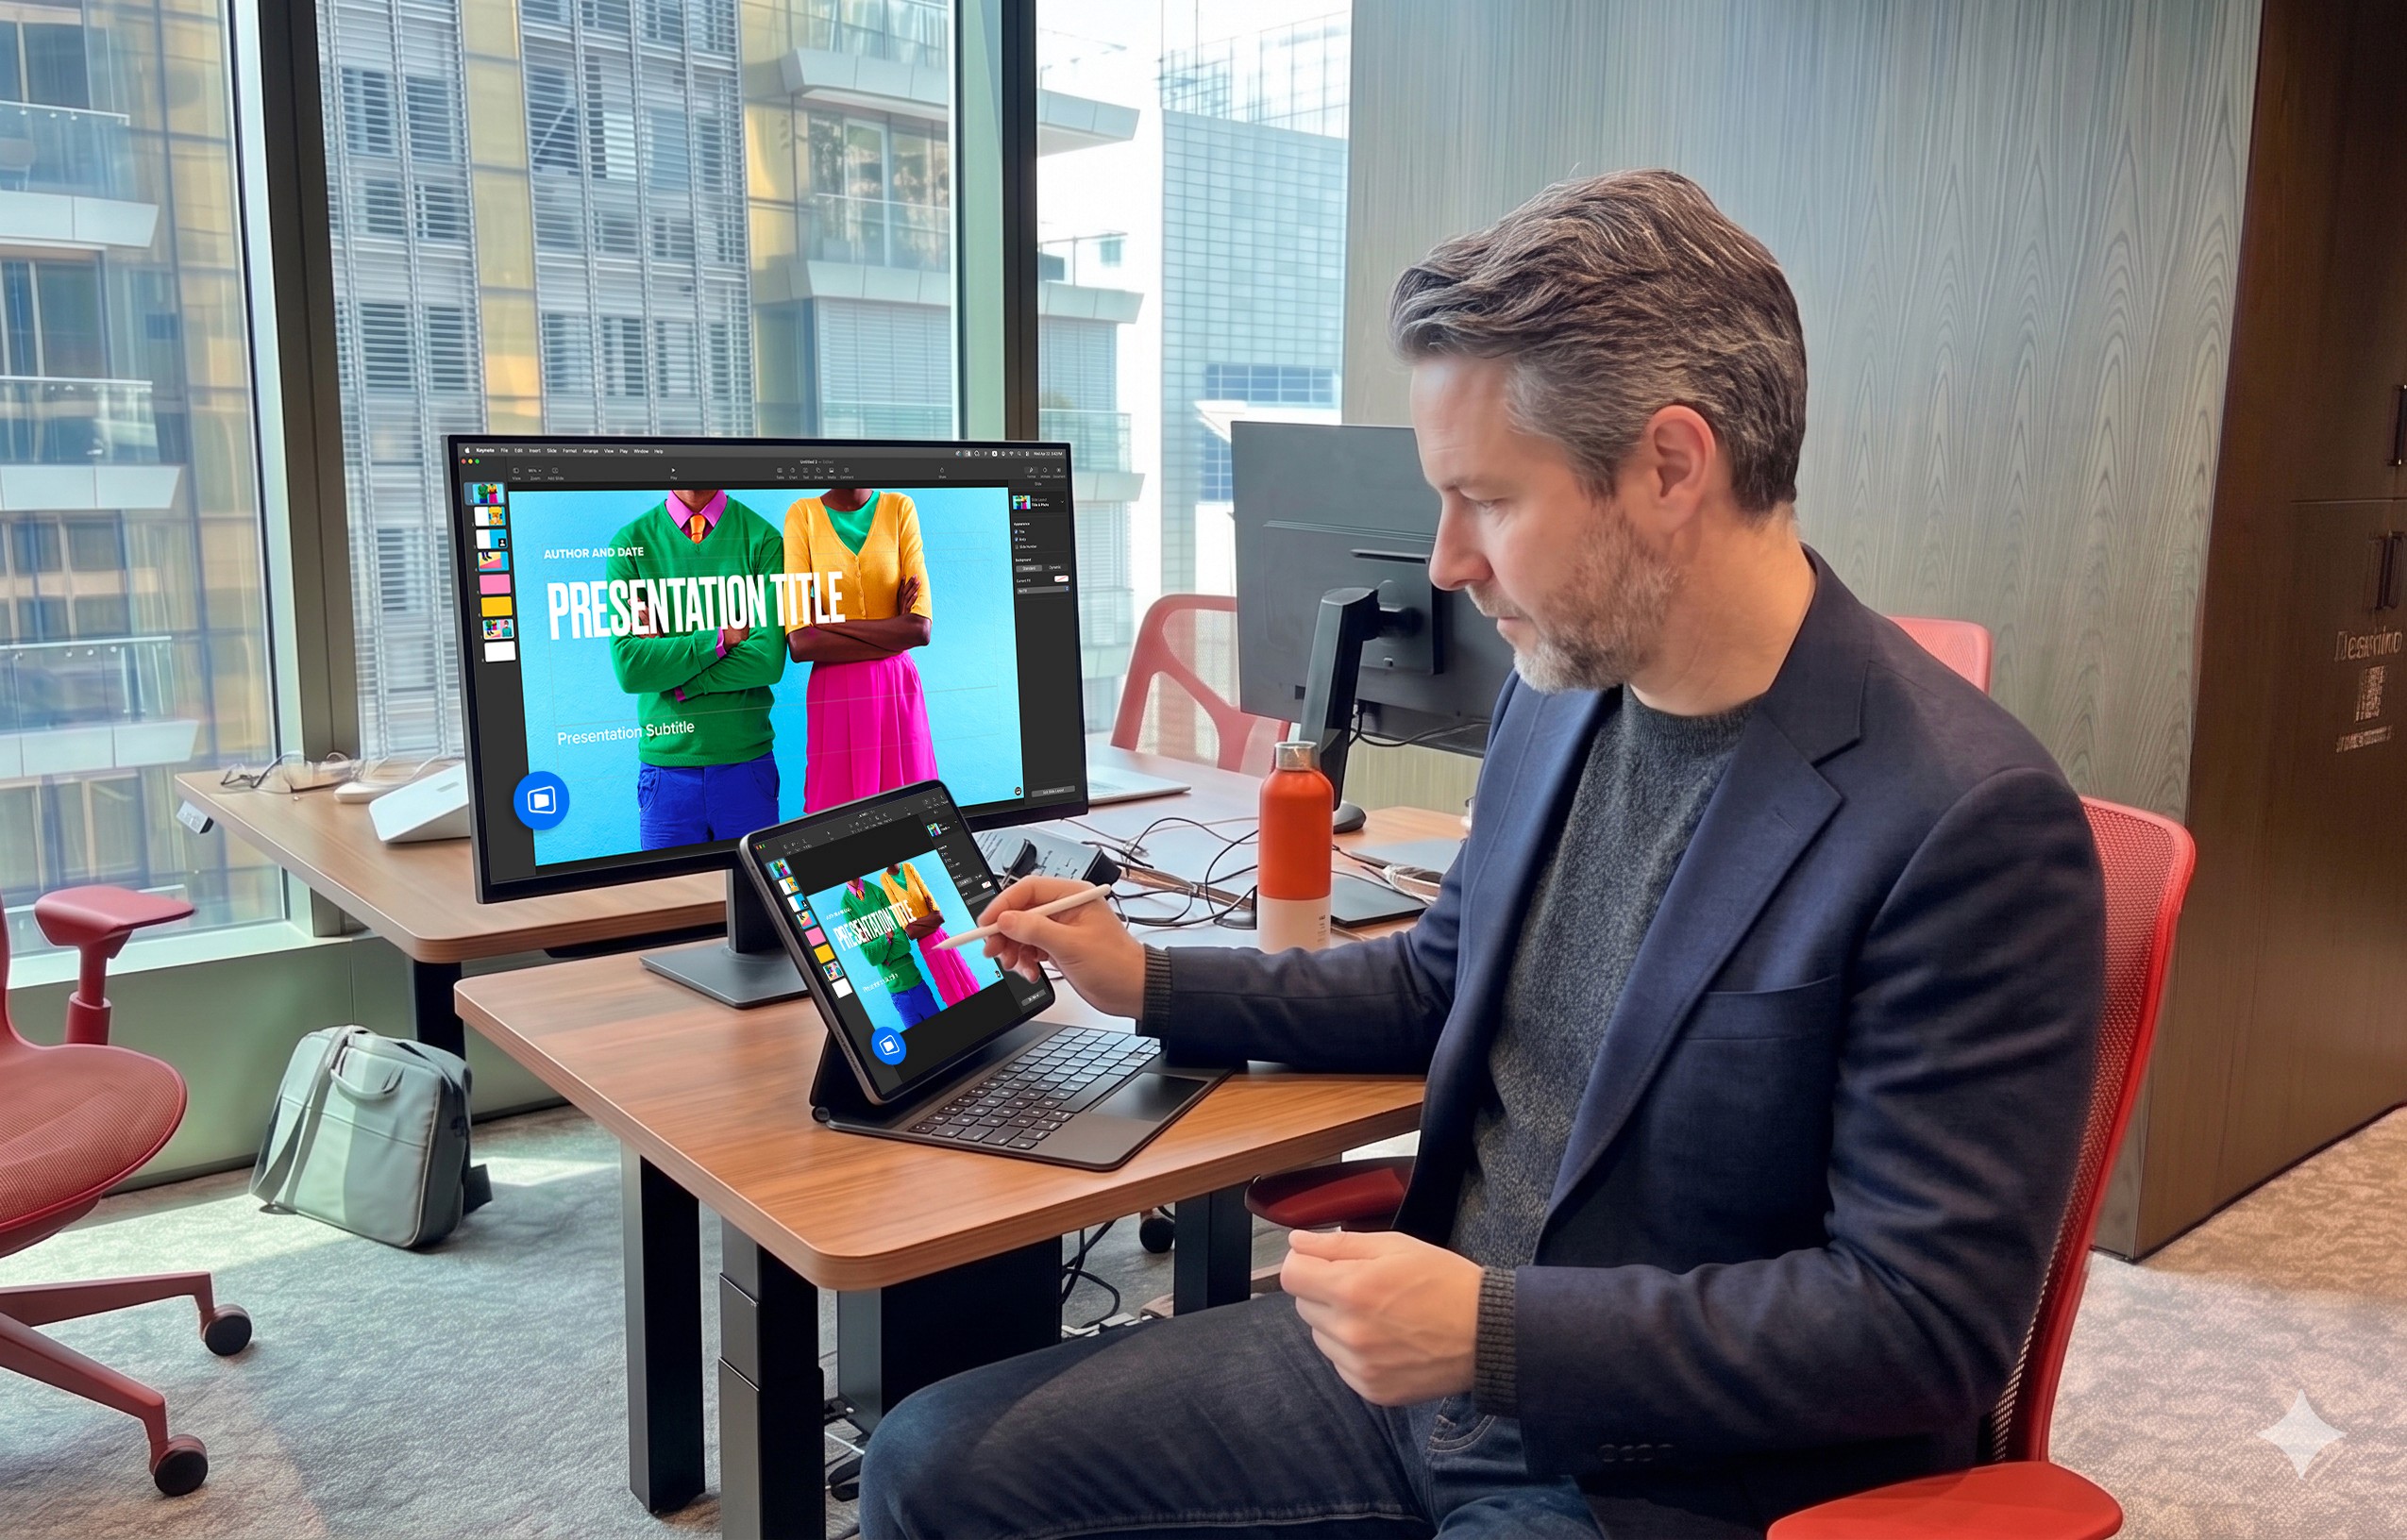
Unlocking the Ultimate Remote Work Setup: Deskimo Meets DeskIn
Remote work promised freedom, but for many professionals it quietly delivered a new kind of friction. The apartment is too noisy. The café Wi-Fi is patchy. The laptop bag gets heavier every month as cables, chargers, and a second monitor piles on. Somewhere along the way, "working from anywhere" started to feel a lot like hauling your office everywhere.
The fix is to pair two tools that solve opposite halves of the same problem. Deskimo, a coworking space platform, gives you on-demand access to workspaces by the minute. DeskIn, a remote desktop software, gives you access to your home or office computer from any device. Put them together and you get a workflow that removes hardware limits, keeps your data on your home machine, and lets you walk into any city with nothing but a tablet.
Working from home sounds ideal until your partner takes a call in the shared study. Or when the neighbour upstairs starts drilling at 9 a.m. Most work requires deep engagement and intense focus, free from distractions. Most homes were not designed to provide these on demand.
Coworking spaces fill this gap in three ways. Firstly, they set a physical boundary between personal life and work. Research suggests coworking setup is linked to higher productivity than working from home. Secondly, they offer amenities that are difficult to replicate at home: strong Wi-Fi, ergonomic chairs, private meeting rooms and quiet zones. Thirdly, individual workstations, open-plan workspaces foster a professional presence. You are most likely surrounded by people who are also there to work, and this social context encourages you to do the same.
The downside of most coworking spaces is the commitment. Monthly memberships and yearly office leases assume you need a desk every day, but most remote workers don't. Deskimo removes that friction: book a desk or meeting room by the hour, only when you need it, at hundreds of locations across cities.
Once you start working outside of home regularly, the first thing you'll notice is the bag. A full laptop setup - machine, charger, mouse, maybe a portable monitor - adds up fast, especially if you're commuting by train or bike.
The fix is simple: leave your powerful machine at home. Carry only a lightweight tablet or thin laptop. DeskIn bridges the gap: open the app on your tablet, connect to your home workstation, and your full desktop environment streams to your screen. CAD software, video editing timelines, 40-tab research sessions. Everything runs on your hardware at home while you sit at a Deskimo desk across town.
A typical morning might start with email and focused work at a café-style hot desk over coffee. After lunch, you book a Deskimo private meeting room, connect to your home workstation through DeskIn, and tackle the heavy rendering or design work. Your bag weighs less than a paperback. Your output doesn't change.
Working on public Wi-Fi has always been a quiet risk. When you open sensitive files on a portable device at a hot desk, those files are now physically travelling with you on a drive that could be stolen or compromised.
DeskIn's architecture sidesteps this. Your work runs on your home or office machine; the actual files never leave your network. Your device becomes a window: it displays pixels, sends back your clicks and keystrokes, and stores nothing from the session. Combined with DeskIn's end-to-end encryption and Privacy Mode (which blanks the host screen so no passerby sees what you're working on), the setup is arguably safer than carrying a laptop.
This matters most for teams working with regulated data - legal, healthcare, finance. Now you can offer staff the freedom to work from any Deskimo location without stretching your security perimeter to every space they visit.
One of the underrated benefits of coworking spaces is that they often provide equipment that you wouldn't buy. Many Deskimo locations have meeting rooms equipped with external monitors, smart TVs or dual-display desks. Check the amenities at your chosen location and ask the staff if this is important for your session.
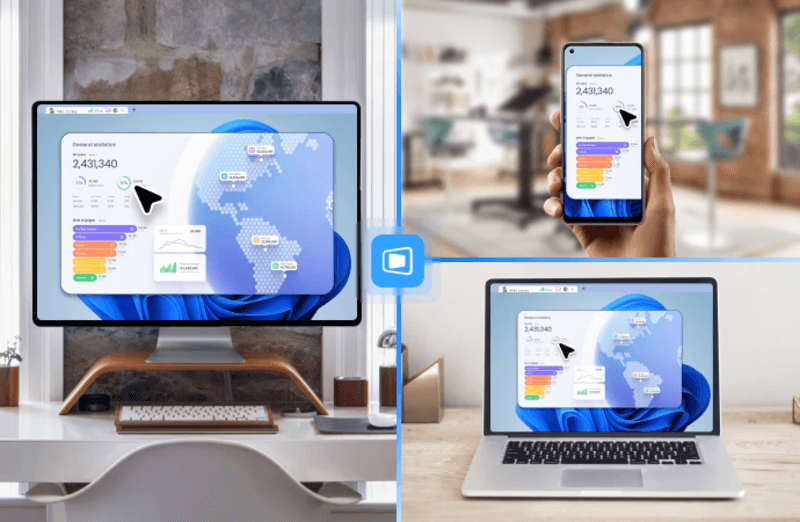
DeskIn's screen management feature allows you to make the most of these setups without the need for additional cables or adapters. You can wirelessly extend your remote desktop across multiple displays, which is a great upgrade for anyone working with spreadsheets, design files or code. For example, you could put financial models on one screen, reference documents on another, communication on a third; all without buying a single monitor.
The idea is appealing, but the practical question is where to begin. Here are a few guidelines:
If focusing at home has been a struggle, book a few Deskimo sessions across different locations and see what clicks. Some people thrive in café energy; others need a silent private booth. Once you know where you work best, install DeskIn on both your desktop and your portable device. Spend a session fine-tuning the connection before you depend on it for work.
Open coworking areas suit light communication and email. Quiet zones are better for focused writing or deep analysis. Private meeting rooms belong to client calls and heavy multi-screen work. With Deskimo's pay-per-minute pricing, you only pay for the room type you actually need; no overspending on a meeting room when a hot desk will do.
A permanent private office in a major city can run from several hundred to several thousand dollars a month. A combined Deskimo and DeskIn setup, used a few days a week, typically costs at a fraction of that, before you even count the hardware you no longer need to buy. Ask the Deskimo staff about location pricing and team plans, as costs vary by city and space type.
Coworking spaces are not a perfect substitute for a dedicated office. Availability fluctuates, noise levels vary, and long sessions on pay-per-minute pricing is costly. The fix is simple: book ahead for important sessions, have an alternative location in mind, and use Deskimo day passes or bundles when you know you'll be there all day.
If you are using remote desktop software to work but struggle with noisy home environments, a coworking space could be the missing piece. Try booking a workspace on Deskimo app using the referral code DESKIN to get for $10 off (new users only). Setting up a new Deskimo Business account? Use referral code DESKBIZ for 60% off your first credit package. If you already have a Deskimo membership but find yourself hauling heavy gears to every session, DeskIn could change that. Download the app, connect to your desktop in minutes. Use promo code DESKIMO for 50% off DeskIn for the first month (or 20% off on annual plans). This promotion is valid until 31 July 2026. Terms and conditions apply.
The best remote setup isn't about buying more gear. It's about showing up anywhere with almost nothing, and still doing your best work.
Deskimo is an on-demand workspace platform that gives professionals pay-per-minute access to coworking spaces, private offices, and meeting rooms. No long-term leases. No monthly subscriptions. Book a space when you need it and only pay for the time you use.
DeskIn is remote desktop software that delivers low-latency access to your personal and enterprise computers from any device. With end-to-end encryption, multi-screen management, and fast data transmission, it's made for professionals who need all the power of a desktop computer without having to carry the hardware.
DeskIn vs Chrome Remote Desktop: Which One Fits Your Workflow Best?
When it comes to remote access tools, the comparison between DeskIn and Chrome Remote Desktop often comes down to one simple question: do you just need quick access, or do you need performance and control?
Both tools are reliable, secure, and widely used. But they are built for very different types of users. Chrome Remote Desktop focuses on simplicity and accessibility, while DeskIn is designed for users who need high performance, stability, and advanced features across multiple devices.
If you're deciding between the two, this guide breaks down not just what they offer, but which one actually fits your workflow.
Feature | DeskIn | Chrome Remote Desktop |
|---|---|---|
Performance | Up to 4K 60FPS/2K 240FPS, low latency | Standard performance |
Ease of Use | Requires app installation | Browser-based, very simple |
Device Support | Windows, macOS, iOS, Android | Works via Chrome browser |
File Transfer | Fast and stable | Limited |
Multi-device Management | Yes | No |
Mobile Experience | Optimized for iPad & iPhone | Basic |
Security | Privacy screens and granular black/whitelists | Basic |
Price | Free + paid plans | Completely free |
In short, Chrome Remote Desktop is great for quick, lightweight access, while DeskIn is built for users who expect more from their remote desktop experience.
Chrome Remote Desktop is one of the simplest remote access tools available. It runs directly through the Chrome browser and requires only a Google account to get started. This makes it especially popular among casual users and those already working within the Google ecosystem.
It works particularly well on devices like Chromebooks, where everything is already browser-based. It's also accessible across platforms, including mobile devices like iPhone and iPad, though the experience on mobile can feel limited compared to desktop use.
If you're wondering how to use Chrome Remote Desktop, the process is straightforward. You install the Chrome extension, sign in with your Google account, set up a PIN on the host device, and then connect from another device using the same account. The entire setup usually takes just a few minutes.
That said, simplicity comes with trade-offs. Chrome Remote Desktop lacks advanced features like high frame rate streaming, multi-monitor control, or professional-grade file transfer. For occasional access, it works well. But for more demanding tasks, users often start to feel its limitations.
👀You may also be interested in:
If Chrome Remote Desktop is a lightweight sketch, DeskIn is a full workstation painted in high resolution. DeskIn focuses on performance, stability, and flexibility. It supports up to 4K 60FPS streaming, making it suitable for tasks where visual clarity and responsiveness matter, such as design work, video editing, or even gaming.
As a Chrome remote desktop alternative, unlike browser-based tools, DeskIn is a dedicated remote desktop application. While this requires installation, it unlocks a much more stable and feature-rich experience. Users can manage multiple devices, transfer large files efficiently, and enjoy smoother control across different platforms.
DeskIn is also optimized for mobile workflows. Whether you're using an iPad or smartphone, the interaction feels more responsive and closer to a desktop experience, rather than a simplified viewer. For users who find Chrome Remote Desktop "good enough" at first but limiting over time, DeskIn often becomes the natural upgrade path.
The real difference between these two tools becomes clear when you look at how they perform in everyday scenarios.
If you only need to check files on your home computer or help a friend troubleshoot something quickly, Chrome Remote Desktop is more than enough. It's free, easy to set up, and doesn't require installing extra software beyond Chrome. In this case, DeskIn may feel like overkill.
For professionals working remotely on a daily basis, stability and efficiency matter much more. This is where DeskIn starts to stand out.
Tasks like editing documents, managing multiple screens, or transferring files between devices become smoother and faster. Chrome Remote Desktop can handle basic workflows, but it often struggles with responsiveness and lacks the tools needed for a seamless work environment.
This is where the gap becomes impossible to ignore. DeskIn's support for high resolution and high frame rates makes it suitable for visually demanding work. Whether you're editing videos, working with design software, or running simulations, performance consistency is critical. Chrome Remote Desktop, on the other hand, is not designed for these scenarios. It works, but not comfortably.
If you rely heavily on Google services or use a Chromebook, Chrome Remote Desktop integrates naturally into your workflow. It's lightweight, requires no additional setup, and feels like an extension of the browser itself. In this scenario, it remains a very practical choice.
Mobile usage highlights another important difference. While remote desktop Chrome iPhone, and Chrome Remote Desktop iPad are functional, they often feel like simplified versions of the desktop experience. Controls can be less intuitive, and performance may vary depending on the connection.
DeskIn, by contrast, is designed with cross-device interaction in mind, offering a smoother and more responsive mobile experience.
👀 You may also be interested in:
Yes. Tools like DeskIn offer better performance, more features, and improved stability, especially for professional use cases.
No, Chrome Remote Desktop is still actively maintained by Google. It continues to receive security updates and remains available for users needing simple, free remote access.
Yes, DeskIn is a legitimate remote desktop solution. It uses encryption to secure connections and provides access controls, making it safe for both personal and professional use.
When comparing DeskIn vs Chrome Remote Desktop, the choice depends on how demanding your remote access needs are. Chrome Remote Desktop is simple, free, and ideal for occasional use, especially if you just need quick access to a device without extra setup.
As your workflow becomes more intensive, the limitations start to surface. DeskIn offers a smoother, more stable experience with better performance and control, making it a strong long-term Chrome remote desktop alternative for users who rely on remote access every day.
8 Best Remote Desktops for Video Editing in 2026
Remote video editing is no longer a compromise; it's a workflow upgrade. Whether you're working in Adobe Premiere Pro, After Effects, or DaVinci Resolve, the right remote desktop can turn your laptop into a high-performance editing station.
But not all tools are built for remote video editing collaboration. Lag, poor color accuracy, and unstable connections can ruin productivity. In this guide, we'll break down the best remote desktop for video editing tools so that you can edit smoothly from anywhere.
Modern creators are no longer tied to a single workstation. With remote work software, you can access your powerful desktop from anywhere without investing in an expensive laptop. For many editors, especially freelancers and small teams, this solves a real problem: you already have a high-performance PC, but mobility is limited. Instead of duplicating hardware, video editing remote desktop tools let you stream your workflow in real time.
Another key benefit is remote collaboration. Teams can work on the same project across different locations, review edits instantly, and avoid large file transfers via remote collaboration tools. However, this only works if your remote desktop software supports high frame rates, low latency, and stable connections. Otherwise, editing becomes frustrating.
Here's a quick overview of the best tools and who they're for:
DeskIn – Best overall for performance + affordability + multi-device workflows
Parsec – Best for ultra-low latency editing
Splashtop – Best for high-resolution streaming
HP Anyware – Best for enterprise-level workflows
Jump Desktop – Best for Mac users
AnyDesk – Best lightweight remote access
Chrome Remote Desktop – Best free basic option
RustDesk – Best open-source alternative
Up to 4K 60FPS / 2K 240FPS performance
Ultra-low latency for smooth editing timelines
Multi-device support (PC, Mac, iPad, Android)
Affordable pricing with free plan available
Smaller brand awareness compared to legacy tools
DeskIn stands out as the best remote desktop for video editing by balancing performance, stability, and accessibility. Unlike many traditional remote support tools, it is designed for high-frame-rate tasks, making timeline scrubbing, preview playback, and effects editing feel responsive and fluid.
For creators working across devices, DeskIn enables seamless remote video editing collaboration. You can access your main editing PC from a laptop, tablet, or even a secondary workstation without noticeable lag. Compared to tools like Chrome Remote Desktop, which struggle with video-heavy workloads, DeskIn maintains consistent quality and responsiveness—making it a practical choice for both solo editors and distributed teams.
Extremely low latency
High frame rate streaming
Popular among creative professionals
Limited collaboration features
Setup can be complex for beginners
Parsec is widely recognized as a top choice for remote video editing, especially when latency is your biggest concern. Its streaming technology is optimized for real-time responsiveness, which makes it ideal for tasks like timeline scrubbing and motion graphics work in After Effects.
However, while Parsec excels in performance, it lacks some features needed for full remote video editing collaboration. Multi-user workflows and advanced access control are not as robust as some newer tools. For users who need both performance and flexibility, alternatives like DeskIn may provide a more balanced solution.
Supports 4K streaming
Strong color accuracy
Reliable for creative tasks
Higher cost for advanced features
Can experience latency over long distances
Splashtop is a solid option for editors who prioritize visual fidelity. Its support for high-resolution streaming and 4:4:4 color makes it suitable for color grading and detailed editing work.
That said, performance consistency can vary depending on network conditions. Some users report lag when working outside local networks. Compared to more optimized remote work software like DeskIn, Splashtop may require a stronger connection to maintain the same level of smoothness.
Industry-grade performance
Secure and scalable
Used in professional studios
Expensive
Complex setup
HP Anyware (formerly Teradici) is designed for high-end production environments. It uses advanced protocols to deliver excellent performance and security, making it a common choice in the media and entertainment industries.
However, for small teams or individual creators, it may be overkill. The cost and setup complexity make it less accessible compared to modern remote desktops for video editing tools that offer similar performance with easier deployment. The high cost and technical complexity create barriers that modern remote desktop solutions have eliminated, like DeskIn, offering comparable performance with far simpler deployment.
Great macOS integration
Smooth performance
Easy to use
Limited advanced features
Not ideal for heavy collaboration
Jump Desktop has earned a loyal following among Mac users seeking a straightforward, efficient remote desktop for video editing. Its Fluid Remote Desktop protocol provides smooth, responsive performance for most editing tasks without unnecessary complexity.
Where it falls short is in collaboration. Jump Desktop is built for individual use, lacking the team-oriented features that creative groups need. For solo professionals, it works well, but teams will quickly miss real-time collaboration tools found on other platforms.
Pros
Fast and lightweight
Easy to set up
Works on multiple devices
Cons
Limited performance for video editing
Lower visual quality
AnyDesk has built its reputation on lightweight design and remarkable ease of use for general remote access. It handles everyday tasks competently, connecting quickly and running smoothly on modest hardware.
The limitations become apparent with demanding creative work. Remote video editing requires consistent frame rates and crystal-clear visuals—areas where AnyDesk struggles. For professional editors who need precision, the performance gap becomes impossible to ignore.
Completely free
Easy browser-based setup
Works on any device
Poor performance for editing
Limited features
Chrome Remote Desktop is one of the most accessible remote support tools, offering a simple way to access your computer from anywhere. It's free, requires almost no setup, and lets you access your computer from anywhere with just a browser. For basic technical support or quick file grabs, it gets the job done.
However, it is not built for remote video editing. Users often experience lag, compression artifacts, and low frame rates. If you're working on professional projects, upgrading to a more capable solution is highly recommended.
Open-source
Self-hosting available
Free to use
Requires technical setup
Performance can vary
RustDesk appeals to users who prioritize open-source philosophy and want complete control over their remote access infrastructure. The flexibility to self-host and customize is genuinely valuable for privacy-conscious users. RustDesk is an interesting option for users who prefer open-source remote desktop not working alternatives or want full control over their infrastructure.
Performance, however, depends entirely on your configuration skills. Without technical expertise, achieving the smooth, low-latency experience required for professional editing is challenging. It's powerful for those who know how to tune it, but not plug-and-play.
Yes, with the right remote desktop for video editing, you can edit videos smoothly from anywhere. Tools like DeskIn and Parsec provide low latency and high frame rates for professional workflows.
Free options like Chrome Remote Desktop exist, but they lack performance. DeskIn offers a free plan with better performance, making it a stronger choice for real editing work.
Yes, Parsec is excellent for low-latency editing. However, it may lack collaboration features needed for team workflows.
Common issues include poor network connection, low bandwidth, or software limitations. Choosing optimized remote work software like DeskIn can significantly improve performance.
Choosing the best remote desktop for video editing depends on your workflow, budget, and performance needs. While tools like Parsec and Splashtop excel in specific areas, many solutions struggle to balance performance, stability, and usability.
If you're looking for a well-rounded solution, DeskIn offers a strong combination of high performance, smooth streaming, and cross-device flexibility. Whether you're working solo or collaborating remotely, it provides a reliable foundation for modern remote video editing workflows.
Products
Download
Resources
Contact Us
Email: support@deskin.io
Office: 991D Alexandra Road #02-17, Singapore 119972
Copyright © 2026 Zuler Technology PTE. LTD. All rights reserved.
Contact Us
Email: support@deskin.io
Office: 991D Alexandra Road #02-17, Singapore 119972
Products
Download
Resources
Copyright © 2026 Zuler Technology PTE. LTD. All rights reserved.
Products
Download
Resources
Contact Us
support@deskin.io
991D Alexandra Road #02-17
Singapore 119972
Copyright © 2026 Zuler Technology PTE. LTD. All rights reserved.

