生産性
生産性
/
10分
/
10分
W. ティング
更新済み
更新済み
更新済み
リモートワークをする社員にとって、適切なリモートワークツールを活用することは、場所を問わずつながりを保ち、整理された状態で生産的に働くために役立ちます。適切なリモートワーク用ソフトウェアを選ぶことは、仕事の成果を大きく左右します。プロジェクトの管理、チームメンバーとのコミュニケーション、あるいはリモートシステムの操作など、使用するツールによって生産性は大きく変わります。
このブログポストでは、どこからでも効率的に作業するための最適なリモートコントロールソフトウェア、プロジェクト管理ツール、コミュニケーションアプリをご紹介します。どれがあなたに最適ですか?どれが必須でしょうか?一緒に探ってみましょう。
リモートワークに万能な解決策はありません。最適なリモートワークツールは、チームの特定のニーズに応じて異なります。効率的なワークフローを構築するためには、コミュニケーション、タスク管理、監視、セキュアアクセスをカバーする異なるソフトウェアタイプを組み合わせることが重要です。
カテゴリーごとにグループ化された、チームの生産性向上に最も効果的なツールを以下に示します。
ベストリモートアクセスソフトウェア – DeskIn
この種のソフトウェアを使用すると、リンク先に誰もいなくても< a id="2">自宅から仕事のコンピュータにリモートアクセス<この種のソフトウェアを使用すると、リンク先に誰もいなくても>できます。DeskInは、無人のリモートアクセスと高速な接続を提供する高評価の選択です。コンピュータ画面のミラーリングやリモートでのファイル転送も可能で、セキュアなアクセスやリモートファイル管理に理想的です。
ベストリモートワーカーモニタリングプログラム – ActivTrak
ActivTrakのようなツールは、チームが仕事の時間の使い方を理解するのに役立ちます。生産性レベルを追跡し、ボトルネックを検出し、詳細なレポートを生成します。これらのインサイトは、分散チーム全体のアカウンタビリティと成果を向上させたいマネージャーにとって特に貴重です。
ベストプロジェクト管理ツール – Toggl
この種のリモートワークソフトウェアには、タスクプランニング、進捗追跡、チームカレンダーなどの機能が含まれます。Togglは、大きなプロジェクトを分かりやすいステップに分解し、責任を割り当て、皆が一貫した作業を行うのを容易にします。
ベストコミュニケーション&コラボレーションソフトウェア – Microsoft Teams
リモート環境では、コミュニケーションが鍵となります。Microsoft Teamsは、ビデオ会議、グループチャット、共有ファイル、アプリの統合をすべて1つの場所で提供します。これにより、リモートチームがリアルタイムで協力し、遅延や誤解を減らすことができます。
各カテゴリから適切なツールを選ぶことで、リモートチームはどこにいようと、つながりを持ち、セキュアで、高い生産性を維持できます。
どこからでも作業環境にアクセスするためには、信頼性のあるリモートワークアプリが必要です。このセクションでは、オフィス機器を制御し、ファイルを取得し、どこにいても生産性を最大限に発揮できるベストリモートアクセスソフトウェア3選をご紹介します。
ベスト用途: 複数デバイスにアクセスする必要のあるリモートプロフェッショナル、ビジュアルプロジェクトで協力する分散チーム、様々な場所で働くデジタルノマド
DeskInは、自宅からリモートで作業するための強力なソフトウェアで、フル機能のリモートデスクトップと仮想ワークスペースを提供します。DeskInを使用すると、2台のコンピュータを接続してリモートデバイスに楽にアクセスできます。
基本的な制御を超えて、DeskInはリモートチームのコラボレーションを目的に構築されています。画面拡張、画面投影、クリップボード共有、音声通話、注釈、組み込みホワイトボードなどの機能が含まれており、リアルタイムのブレーンストーミングやビジュアルなチームワークが可能で、ハイブリッドまたは分散チームに最適です。
リモート従業員の PC セットアップ ソリューションとして、DeskIn は Android、Windows、macOS、iOS をサポートしており、クロスプラットフォームのアクセスをシームレスに実現します。200 以上のグローバル ノードに支えられており、表示品質は最大 4K で、レイテンシーは 40ms 以下で、高速で応答性のあるエクスペリエンスを提供します。
また、セキュリティも最上級で、DeskIn はAES-256 暗号化を使用し、パスワード保護されたワイヤレスアクセスを可能にし、スクリーンロック機能を提供して、セッションをプライベートで安全に保ちます。分散チームを管理している場合でも、自宅で単独作業を行っている場合でも、DeskIn は接続と生産性を維持するためのベストなリモートワークソフトウェアの一つです。
関連:
ベスト用途: クライアントをリモートでサポートする IT サポートエージェント、自宅のノートパソコンで作業するフリーランサー、デバイス間のファイル転送が迅速な小規模チーム
TeamViewerは、ユーザーが別のPCにリモート接続できるようにする信頼性のあるリモート ワーク生産性ツールです。すべての主要プラットフォームをサポートし、アカウントがなくても動作するため、技術に詳しくないユーザーのサポートに最適です。際立った機能はファイル転送です。サイズ制限なしで複数の大きなファイル (2 ~ 5 GB) をドラッグ アンド ドロップしたり、高速 (最大 20 MB/s) で転送したり、切断された場合は自動再開できます。
ただし、ビジネス価格が障害になる可能性があり、使用頻度が少ないスタートアップや非営利団体、小規模チームにとっては、DeskIn などの代替手段の方が実用的です。
ベスト用途: Microsoft Teams を使用するスタートアップ、教育者、一時的にリモートアクセスが必要な短期コラボレーター

Chrome Remote Desktopは、基本的なリモート制御に必要なワークフローム ホーム ソフトウェアであり、高度なコラボレーションなしで使用するユーザーに最適です。 Google のリモートワーク技術スイートの一部として、Windows、macOS、Linux、ChromeOS、Android、iOS で動作します。セットアップは簡単で、ホストデバイスに Chrome 拡張機能をインストールするだけで、BYOD 環境で安定したクロス プラットフォーム アクセスがサポートされます。
ただし、組み込みチャットやドラッグアンドドロップによるファイル転送がないため、リッチなインタラクションを必要とするチームには適していません。頻繁にファイル共有やマルチデバイスの制御が必要な場合は、より完全なソリューションであるDeskInのようなものが適しています。
リモートアクセスツール以外にも、チームにはリモート従業員管理ソフトウェアが必要です。これは、生産性を追跡し、説明責任を確保し、パフォーマンスレビューをサポートするためです。次に、チームの効果的なリモート従業員管理を可能にする強力なソフトウェアをご紹介します。
ベスト用途: 生産性を定量化し、侵入監視をせずに時間管理を改善したいリモートまたはハイブリッド チームを監督するチーム リーダーおよび HR

ActivTrak はリモート ワークフォース管理ソフトウェアであり、リモート チームを管理するために強力です。Microsoft Teams を使用するチーム向けに、従業員の時間使用、ツールの好み、集中度を深く把握する必要があります。マネージャーがデータ駆動型分析を通じて効率の低いプロジェクトやチームメンバーを特定するのに役立ち、単純なモニタリングではなく、リソースの最適化と従業員のコーチングを可能にします。Windows、macOS に対応しており、Chrome 拡張機能としても利用可能で、現代のリモートワーク環境に適しています。
その直感的なインターフェイスと簡単な導入により、ActivTrak は自宅からの仕事を追跡するための優れたソフトウェアであり、生産性の追跡と従業員のプライバシーを両立します。最初の設定が多少必要ですが、生産性メトリクスを定義し、スクリーンショットがOCRをサポートしない欠点もありますが、取得したインサイトを効果的に使いたいマネージャー向けに最適な選択肢です。
リモートワークの生産性を高めるには、タスクの整理とチームの活動を整えるための適切なプロジェクト管理ツールが必要です。次に、在宅での企業シナリオで優れた成果を上げるためのソリューション 3 つを紹介します。
ベスト用途: フリーランサー向けの請求可能な時間の追跡、リモート チームの生産性分析、または非生産的なタスクに費やす時間を削減したい人向け

時間を直感的に追跡したい場合は、Togglがお勧めです。デスクトップ、モバイル、ブラウザーで動作するので、デスクで作業しているときでも外出中でも、時間を簡単に記録できます。ワンクリック タイマーにより、注意をそらすことなくタスクを簡単に開始および停止できるため、フリーランスのプロジェクトの追跡に最適です。
Toggl が際立っているのは、追跡された時間を明確なレポートに変えることができる点です。これは、生産性の向上やクライアントへの正確な請求に役立ちます。また、Asana や Trello などのツールと統合できるため、タイムログを簡単にプロジェクト管理ワークフローと同期できます。
生産性を向上させ、精神的な明瞭さを保つため、Toggl はポモドーロ テクニックもサポートしています。作業セッション中に集中力を維持し、定期的な休憩を十分に楽しむことができます。
ベスト用途: 柔軟なプロジェクトビューを必要とするリモートチーム、請求可能な時間を追跡するフリーランサー
Hiveは、リモートチームのための柔軟なプロジェクト管理ツールです。基本的なToDoアプリとは異なり、複数のビュー (カンバンボード、ガントチャート、タイムライン、テーブル、カレンダーなど) を提供します。自分好みの方法で作業を管理できます。アプリを切り替えることなく時間を記録するのに役立つ組み込みタイマーもあり、作業効率を確認し、クライアントレポート作成にかかる時間を削減します。
さらに、ワークフローを合理化するための多くのアドオンが利用可能です。アナリティクスアドオンは進行状況の傾向を示し、Hive で行われた作業からの情報を提供し、ボトルネックを特定するのに特に役立ちます。さらに、このリモートワークソフトウェアは GitHub、Microsoft Teams、Zoom などの多くのツールと統合されており、これにより、タスクから直接会議を開始したり、別のタスクを開始したりすることが簡単になります。Hive はベストリモート IT サポートソフトウェアの一つです。
ベスト用途: 明確なプロジェクトのマイルストーン
、協力的なワークフローに依頼するプロダクト、オペレーション、マーケティング チーム。タスクを効率的に割り当て、追跡する必要がある中小企業のプロジェクト マネージャー。統一されたビジュアル ワークスペースを求めている部門横断的なグループ

Asanaは在宅勤務のタスクおよびプロジェクト管理の合理化を目的とした多用途のリモートワーク生産性トラッカーです。クリーンなインターフェイスと直感的なデザインにより、プロジェクト管理の背景を持たずとも素早くタスクを整理し、進捗を監視できます。プラットフォームは Windows、macOS、およびモバイルデバイスをサポートし、Microsoft Teams、Slack、Gmail、Outlook との連携がスムーズにでき、ツール間の協力が促進されます。
リスト、ボード、タイムラインなどの柔軟なタスク ビューを使用して、Asana はチームのワークフローやプロジェクトの複雑さに適応いたします。高度なプロジェクト計画のための自動化と依存性設定を提供し、サードパーティの統合も豊富で、作業ループを閉じることができます。ただし、組み込みの時間追跡がないため外部プラグインが必要で、無料版では一部の機能が制限されています。新規ユーザーにとっては多少の複雑さがあることを除けば、Asana はリモートチームのコーディネーションを強化するためのトップチョイスであり続けます。
効果的なコミュニケーションは、成功するリモートチームの基盤です。このセクションでは、チームが連携し、生産性を保つために必要な3つの基本的なコミュニケーションおよびコラボレーションソフトウェアを紹介します。日常的なチェックインやエンタープライズレベルの調整に最適です。
ベスト用途: 複数のチームで複雑なプロジェクトを管理する場合、ドキュメントを多く扱うチームに最適

Microsoft Teams は単なるメッセージングアプリではありません。コミュニケーションが自然にコラボレーションに移行するデジタルオフィスです。インスタントメッセージングがスムーズに行えます。同僚への素早いアップデートやプロジェクトファイルの共有などが可能です。デバイスからWindowsをリモートアクセスも可能です。注目すべき点は、ビデオ会議が文書コラボレーションにスムーズに移行することです。通話を始めて、資料をレビューしてから、一緒に同じPowerPoint デッキをライブ編集にすぐ移行することができます。
Microsoft 365 との深い統合により、チーム ワークが向上します。リモートのチームメートと一緒に Word ドキュメントや Excel シートをリアルタイムで共同編集できます。カーソルや変更が即座に表示されます。また、Dropbox ファイルや Salesforce データを取り込むことで、他のツールとも接続できます。この統合により、アプリ間の切り替えやファイルの検索の手間が省けます。
ベスト用途: 大規模なウェビナー、インタラクティブワークショップ、チームのクイックチェックイン

Zoomは、リモートチーム用の人気のビデオ会議ツールです。リアルタイムのコミュニケーションを容易にします。会議をスケジュールしてカレンダーに追加することができます。ワンクリックで瞬間会議を開始できます。通話中に画面を共有しチャットしたり、ブレイクアウトルームで小規模な議論を行ったりすることが可能です。Zoom を使用すると、画面を拡張することもできます。
Zoom はまた、投票や分析を提供しているので、公式に関与させ、洞察を追跡します。クイックな < strong > 1対1通話や大規模なウェビナーが必要ですか?Zoom はあなたのニーズに合わせて柔軟に対応します。多くの参加者がいる場合でも、Zoomは安定したパフォーマンスを提供し、明晰な音声とビデオをサポートします。
✏️ ベスト用途: 大きなファイルを共有するリモートチーム、デバイス間でアクセスが必要なフリーランサー、または整理され、安全なドキュメントストレージを望む人々。

Dropbox はクラウド ストレージ ツールであり、リモート ファイル共有を簡単にします。ドキュメント、スプレッドシート、その他のファイルをアップロードし、あらゆるデバイスからアクセスできます。チームメンバーとのコラボレーションに役立つツールです。設計ファイルをメールでバージョンを送り合わずに編集することが可能です。
Dropbox を使用すると、ファイルがデバイス間で自動的に同期され、常に最新の状態を維持できます。デスクトップにファイルをバックアップすることで、モバイル アプリで表示できるようになります。さらに、ファイルのセキュリティを保つために、Dropbox は業界をリードする暗号化を採用しており、閲覧専用または編集権限付きのリンクを送信するように選択できます。Dropbox はベストなセキュアリモートデスクトップの一つです。
最適なリモートワークソフトは、チームのニーズによって異なります。安全なリモートアクセスには、DeskIn がスムーズなクロスプラットフォーム制御と組み込みのコラボレーション機能で際立っています。チームのパフォーマンスを把握するには、ActivTrak が詳細なアクティビティ分析を提供します。タスクや期限の管理には、Toggl が直感的なプロジェクト追跡を可能にします。会議や日々の情報共有には、Microsoft Teams が強力なコミュニケーション機能を備えています。
1Password は代表的なパスワードマネージャーで、リモートチームがログイン認証情報、クレジットカード、機密メモを安全に保管・共有できるようにします。さまざまなツールでのアクセス管理を簡素化しつつ、エンドツーエンド暗号化を採用しているため、機密情報を扱うリモート社員にとって欠かせないセキュリティレイヤーです。
アクセスやコミュニケーションを超えて、リモートチームにはコラボレーションやアイデア創出のためのツールも有効です。Google Drive はリアルタイムでのドキュメント編集、クラウドストレージ、シームレスなファイル共有を可能にします。視覚的なコラボレーションには Miro が仮想ホワイトボードを提供し、ブレインストーミング、ワークフローのマッピング、魅力的なリモート会議の実施に最適です。
適切なリモートワークソフトの選択は、生産性・コラボレーション・可視性を分散型チームで維持するための鍵となります。リモートアクセスツール、社員モニタリングプログラム、プロジェクト管理プラットフォーム、コミュニケーションアプリなど、それぞれが在宅勤務を効率的に支える特定の役割を担っています。チームのニーズ――セキュアアクセス、パフォーマンス追跡、タスク調整、バーチャル会議――を理解することで、信頼できるリモート環境を構築できます。
今回紹介したツールの中でも DeskIn は、基本的なアクセス以上を求めるチームに特におすすめです。安全なデバイスのリモート制御やファイル転送に加え、画面拡張、画面キャスト、ホワイトボード、音声通話、注釈、クリップボード共有などをすべて一つのプラットフォームで提供します。トラブルシューティング、コラボレーション、プロジェクト管理まで、DeskIn は現代のリモートチームに包括的で使いやすいソリューションを提供します。
👉 今すぐ DeskIn をダウンロードして、ワークフローをもっとシンプルに!
リモートワークをする社員にとって、適切なリモートワークツールを活用することは、場所を問わずつながりを保ち、整理された状態で生産的に働くために役立ちます。適切なリモートワーク用ソフトウェアを選ぶことは、仕事の成果を大きく左右します。プロジェクトの管理、チームメンバーとのコミュニケーション、あるいはリモートシステムの操作など、使用するツールによって生産性は大きく変わります。
このブログポストでは、どこからでも効率的に作業するための最適なリモートコントロールソフトウェア、プロジェクト管理ツール、コミュニケーションアプリをご紹介します。どれがあなたに最適ですか?どれが必須でしょうか?一緒に探ってみましょう。
リモートワークに万能な解決策はありません。最適なリモートワークツールは、チームの特定のニーズに応じて異なります。効率的なワークフローを構築するためには、コミュニケーション、タスク管理、監視、セキュアアクセスをカバーする異なるソフトウェアタイプを組み合わせることが重要です。
カテゴリーごとにグループ化された、チームの生産性向上に最も効果的なツールを以下に示します。
ベストリモートアクセスソフトウェア – DeskIn
この種のソフトウェアを使用すると、リンク先に誰もいなくても< a id="2">自宅から仕事のコンピュータにリモートアクセス<この種のソフトウェアを使用すると、リンク先に誰もいなくても>できます。DeskInは、無人のリモートアクセスと高速な接続を提供する高評価の選択です。コンピュータ画面のミラーリングやリモートでのファイル転送も可能で、セキュアなアクセスやリモートファイル管理に理想的です。
ベストリモートワーカーモニタリングプログラム – ActivTrak
ActivTrakのようなツールは、チームが仕事の時間の使い方を理解するのに役立ちます。生産性レベルを追跡し、ボトルネックを検出し、詳細なレポートを生成します。これらのインサイトは、分散チーム全体のアカウンタビリティと成果を向上させたいマネージャーにとって特に貴重です。
ベストプロジェクト管理ツール – Toggl
この種のリモートワークソフトウェアには、タスクプランニング、進捗追跡、チームカレンダーなどの機能が含まれます。Togglは、大きなプロジェクトを分かりやすいステップに分解し、責任を割り当て、皆が一貫した作業を行うのを容易にします。
ベストコミュニケーション&コラボレーションソフトウェア – Microsoft Teams
リモート環境では、コミュニケーションが鍵となります。Microsoft Teamsは、ビデオ会議、グループチャット、共有ファイル、アプリの統合をすべて1つの場所で提供します。これにより、リモートチームがリアルタイムで協力し、遅延や誤解を減らすことができます。
各カテゴリから適切なツールを選ぶことで、リモートチームはどこにいようと、つながりを持ち、セキュアで、高い生産性を維持できます。
どこからでも作業環境にアクセスするためには、信頼性のあるリモートワークアプリが必要です。このセクションでは、オフィス機器を制御し、ファイルを取得し、どこにいても生産性を最大限に発揮できるベストリモートアクセスソフトウェア3選をご紹介します。
ベスト用途: 複数デバイスにアクセスする必要のあるリモートプロフェッショナル、ビジュアルプロジェクトで協力する分散チーム、様々な場所で働くデジタルノマド
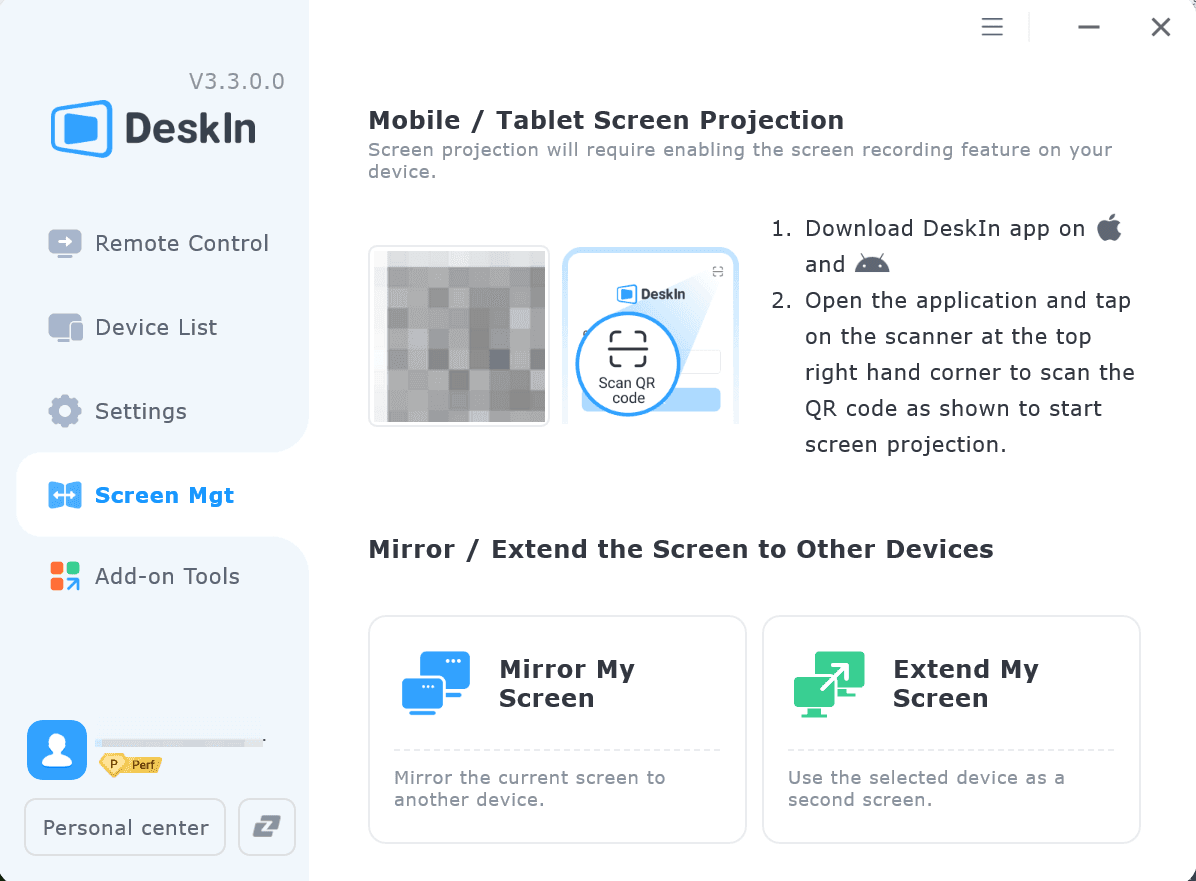
DeskInは、自宅からリモートで作業するための強力なソフトウェアで、フル機能のリモートデスクトップと仮想ワークスペースを提供します。DeskInを使用すると、2台のコンピュータを接続してリモートデバイスに楽にアクセスできます。
基本的な制御を超えて、DeskInはリモートチームのコラボレーションを目的に構築されています。画面拡張、画面投影、クリップボード共有、音声通話、注釈、組み込みホワイトボードなどの機能が含まれており、リアルタイムのブレーンストーミングやビジュアルなチームワークが可能で、ハイブリッドまたは分散チームに最適です。
リモート従業員の PC セットアップ ソリューションとして、DeskIn は Android、Windows、macOS、iOS をサポートしており、クロスプラットフォームのアクセスをシームレスに実現します。200 以上のグローバル ノードに支えられており、表示品質は最大 4K で、レイテンシーは 40ms 以下で、高速で応答性のあるエクスペリエンスを提供します。
また、セキュリティも最上級で、DeskIn はAES-256 暗号化を使用し、パスワード保護されたワイヤレスアクセスを可能にし、スクリーンロック機能を提供して、セッションをプライベートで安全に保ちます。分散チームを管理している場合でも、自宅で単独作業を行っている場合でも、DeskIn は接続と生産性を維持するためのベストなリモートワークソフトウェアの一つです。
関連:
ベスト用途: クライアントをリモートでサポートする IT サポートエージェント、自宅のノートパソコンで作業するフリーランサー、デバイス間のファイル転送が迅速な小規模チーム
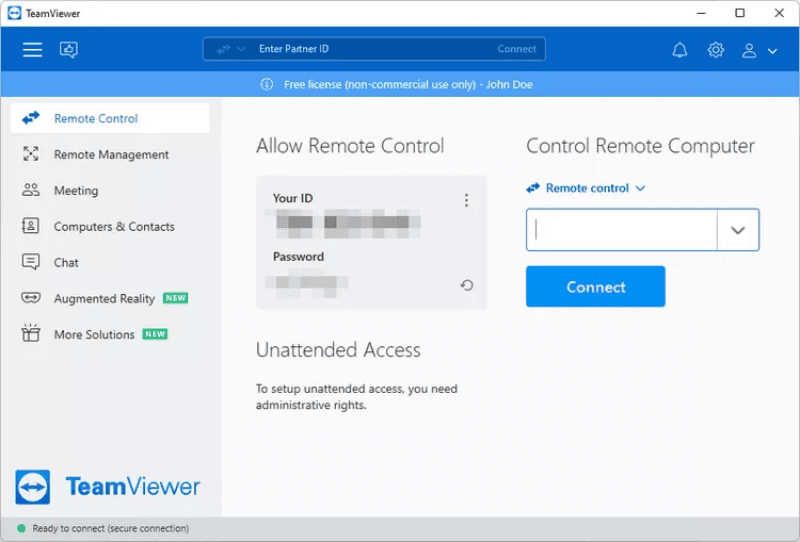
TeamViewerは、ユーザーが別のPCにリモート接続できるようにする信頼性のあるリモート ワーク生産性ツールです。すべての主要プラットフォームをサポートし、アカウントがなくても動作するため、技術に詳しくないユーザーのサポートに最適です。際立った機能はファイル転送です。サイズ制限なしで複数の大きなファイル (2 ~ 5 GB) をドラッグ アンド ドロップしたり、高速 (最大 20 MB/s) で転送したり、切断された場合は自動再開できます。
ただし、ビジネス価格が障害になる可能性があり、使用頻度が少ないスタートアップや非営利団体、小規模チームにとっては、DeskIn などの代替手段の方が実用的です。
ベスト用途: Microsoft Teams を使用するスタートアップ、教育者、一時的にリモートアクセスが必要な短期コラボレーター
Chrome Remote Desktopは、基本的なリモート制御に必要なワークフローム ホーム ソフトウェアであり、高度なコラボレーションなしで使用するユーザーに最適です。 Google のリモートワーク技術スイートの一部として、Windows、macOS、Linux、ChromeOS、Android、iOS で動作します。セットアップは簡単で、ホストデバイスに Chrome 拡張機能をインストールするだけで、BYOD 環境で安定したクロス プラットフォーム アクセスがサポートされます。
ただし、組み込みチャットやドラッグアンドドロップによるファイル転送がないため、リッチなインタラクションを必要とするチームには適していません。頻繁にファイル共有やマルチデバイスの制御が必要な場合は、より完全なソリューションであるDeskInのようなものが適しています。
リモートアクセスツール以外にも、チームにはリモート従業員管理ソフトウェアが必要です。これは、生産性を追跡し、説明責任を確保し、パフォーマンスレビューをサポートするためです。次に、チームの効果的なリモート従業員管理を可能にする強力なソフトウェアをご紹介します。
ベスト用途: 生産性を定量化し、侵入監視をせずに時間管理を改善したいリモートまたはハイブリッド チームを監督するチーム リーダーおよび HR
ActivTrak はリモート ワークフォース管理ソフトウェアであり、リモート チームを管理するために強力です。Microsoft Teams を使用するチーム向けに、従業員の時間使用、ツールの好み、集中度を深く把握する必要があります。マネージャーがデータ駆動型分析を通じて効率の低いプロジェクトやチームメンバーを特定するのに役立ち、単純なモニタリングではなく、リソースの最適化と従業員のコーチングを可能にします。Windows、macOS に対応しており、Chrome 拡張機能としても利用可能で、現代のリモートワーク環境に適しています。
その直感的なインターフェイスと簡単な導入により、ActivTrak は自宅からの仕事を追跡するための優れたソフトウェアであり、生産性の追跡と従業員のプライバシーを両立します。最初の設定が多少必要ですが、生産性メトリクスを定義し、スクリーンショットがOCRをサポートしない欠点もありますが、取得したインサイトを効果的に使いたいマネージャー向けに最適な選択肢です。
リモートワークの生産性を高めるには、タスクの整理とチームの活動を整えるための適切なプロジェクト管理ツールが必要です。次に、在宅での企業シナリオで優れた成果を上げるためのソリューション 3 つを紹介します。
ベスト用途: フリーランサー向けの請求可能な時間の追跡、リモート チームの生産性分析、または非生産的なタスクに費やす時間を削減したい人向け
時間を直感的に追跡したい場合は、Togglがお勧めです。デスクトップ、モバイル、ブラウザーで動作するので、デスクで作業しているときでも外出中でも、時間を簡単に記録できます。ワンクリック タイマーにより、注意をそらすことなくタスクを簡単に開始および停止できるため、フリーランスのプロジェクトの追跡に最適です。
Toggl が際立っているのは、追跡された時間を明確なレポートに変えることができる点です。これは、生産性の向上やクライアントへの正確な請求に役立ちます。また、Asana や Trello などのツールと統合できるため、タイムログを簡単にプロジェクト管理ワークフローと同期できます。
生産性を向上させ、精神的な明瞭さを保つため、Toggl はポモドーロ テクニックもサポートしています。作業セッション中に集中力を維持し、定期的な休憩を十分に楽しむことができます。
ベスト用途: 柔軟なプロジェクトビューを必要とするリモートチーム、請求可能な時間を追跡するフリーランサー
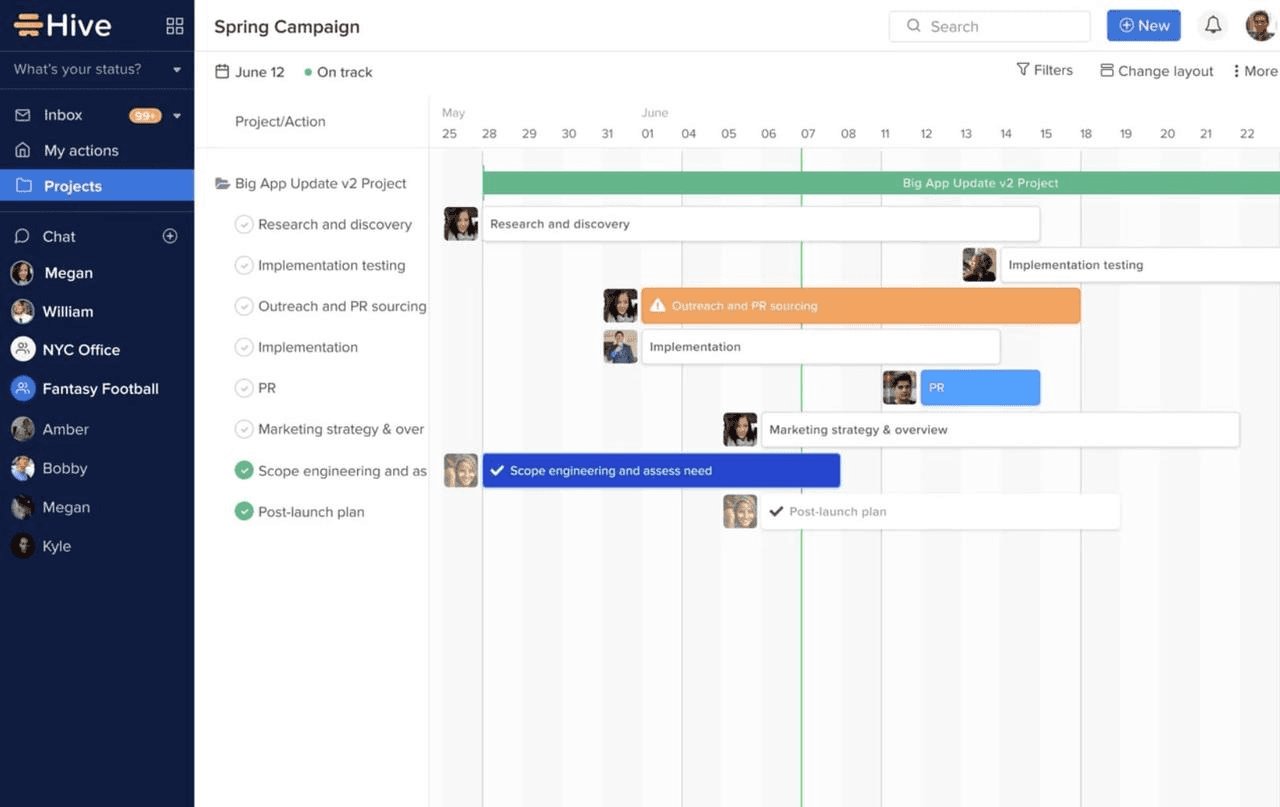
Hiveは、リモートチームのための柔軟なプロジェクト管理ツールです。基本的なToDoアプリとは異なり、複数のビュー (カンバンボード、ガントチャート、タイムライン、テーブル、カレンダーなど) を提供します。自分好みの方法で作業を管理できます。アプリを切り替えることなく時間を記録するのに役立つ組み込みタイマーもあり、作業効率を確認し、クライアントレポート作成にかかる時間を削減します。
さらに、ワークフローを合理化するための多くのアドオンが利用可能です。アナリティクスアドオンは進行状況の傾向を示し、Hive で行われた作業からの情報を提供し、ボトルネックを特定するのに特に役立ちます。さらに、このリモートワークソフトウェアは GitHub、Microsoft Teams、Zoom などの多くのツールと統合されており、これにより、タスクから直接会議を開始したり、別のタスクを開始したりすることが簡単になります。Hive はベストリモート IT サポートソフトウェアの一つです。
ベスト用途: 明確なプロジェクトのマイルストーン
、協力的なワークフローに依頼するプロダクト、オペレーション、マーケティング チーム。タスクを効率的に割り当て、追跡する必要がある中小企業のプロジェクト マネージャー。統一されたビジュアル ワークスペースを求めている部門横断的なグループ
Asanaは在宅勤務のタスクおよびプロジェクト管理の合理化を目的とした多用途のリモートワーク生産性トラッカーです。クリーンなインターフェイスと直感的なデザインにより、プロジェクト管理の背景を持たずとも素早くタスクを整理し、進捗を監視できます。プラットフォームは Windows、macOS、およびモバイルデバイスをサポートし、Microsoft Teams、Slack、Gmail、Outlook との連携がスムーズにでき、ツール間の協力が促進されます。
リスト、ボード、タイムラインなどの柔軟なタスク ビューを使用して、Asana はチームのワークフローやプロジェクトの複雑さに適応いたします。高度なプロジェクト計画のための自動化と依存性設定を提供し、サードパーティの統合も豊富で、作業ループを閉じることができます。ただし、組み込みの時間追跡がないため外部プラグインが必要で、無料版では一部の機能が制限されています。新規ユーザーにとっては多少の複雑さがあることを除けば、Asana はリモートチームのコーディネーションを強化するためのトップチョイスであり続けます。
効果的なコミュニケーションは、成功するリモートチームの基盤です。このセクションでは、チームが連携し、生産性を保つために必要な3つの基本的なコミュニケーションおよびコラボレーションソフトウェアを紹介します。日常的なチェックインやエンタープライズレベルの調整に最適です。
ベスト用途: 複数のチームで複雑なプロジェクトを管理する場合、ドキュメントを多く扱うチームに最適
Microsoft Teams は単なるメッセージングアプリではありません。コミュニケーションが自然にコラボレーションに移行するデジタルオフィスです。インスタントメッセージングがスムーズに行えます。同僚への素早いアップデートやプロジェクトファイルの共有などが可能です。デバイスからWindowsをリモートアクセスも可能です。注目すべき点は、ビデオ会議が文書コラボレーションにスムーズに移行することです。通話を始めて、資料をレビューしてから、一緒に同じPowerPoint デッキをライブ編集にすぐ移行することができます。
Microsoft 365 との深い統合により、チーム ワークが向上します。リモートのチームメートと一緒に Word ドキュメントや Excel シートをリアルタイムで共同編集できます。カーソルや変更が即座に表示されます。また、Dropbox ファイルや Salesforce データを取り込むことで、他のツールとも接続できます。この統合により、アプリ間の切り替えやファイルの検索の手間が省けます。
ベスト用途: 大規模なウェビナー、インタラクティブワークショップ、チームのクイックチェックイン
Zoomは、リモートチーム用の人気のビデオ会議ツールです。リアルタイムのコミュニケーションを容易にします。会議をスケジュールしてカレンダーに追加することができます。ワンクリックで瞬間会議を開始できます。通話中に画面を共有しチャットしたり、ブレイクアウトルームで小規模な議論を行ったりすることが可能です。Zoom を使用すると、画面を拡張することもできます。
Zoom はまた、投票や分析を提供しているので、公式に関与させ、洞察を追跡します。クイックな < strong > 1対1通話や大規模なウェビナーが必要ですか?Zoom はあなたのニーズに合わせて柔軟に対応します。多くの参加者がいる場合でも、Zoomは安定したパフォーマンスを提供し、明晰な音声とビデオをサポートします。
✏️ ベスト用途: 大きなファイルを共有するリモートチーム、デバイス間でアクセスが必要なフリーランサー、または整理され、安全なドキュメントストレージを望む人々。
Dropbox はクラウド ストレージ ツールであり、リモート ファイル共有を簡単にします。ドキュメント、スプレッドシート、その他のファイルをアップロードし、あらゆるデバイスからアクセスできます。チームメンバーとのコラボレーションに役立つツールです。設計ファイルをメールでバージョンを送り合わずに編集することが可能です。
Dropbox を使用すると、ファイルがデバイス間で自動的に同期され、常に最新の状態を維持できます。デスクトップにファイルをバックアップすることで、モバイル アプリで表示できるようになります。さらに、ファイルのセキュリティを保つために、Dropbox は業界をリードする暗号化を採用しており、閲覧専用または編集権限付きのリンクを送信するように選択できます。Dropbox はベストなセキュアリモートデスクトップの一つです。
最適なリモートワークソフトは、チームのニーズによって異なります。安全なリモートアクセスには、DeskIn がスムーズなクロスプラットフォーム制御と組み込みのコラボレーション機能で際立っています。チームのパフォーマンスを把握するには、ActivTrak が詳細なアクティビティ分析を提供します。タスクや期限の管理には、Toggl が直感的なプロジェクト追跡を可能にします。会議や日々の情報共有には、Microsoft Teams が強力なコミュニケーション機能を備えています。
1Password は代表的なパスワードマネージャーで、リモートチームがログイン認証情報、クレジットカード、機密メモを安全に保管・共有できるようにします。さまざまなツールでのアクセス管理を簡素化しつつ、エンドツーエンド暗号化を採用しているため、機密情報を扱うリモート社員にとって欠かせないセキュリティレイヤーです。
アクセスやコミュニケーションを超えて、リモートチームにはコラボレーションやアイデア創出のためのツールも有効です。Google Drive はリアルタイムでのドキュメント編集、クラウドストレージ、シームレスなファイル共有を可能にします。視覚的なコラボレーションには Miro が仮想ホワイトボードを提供し、ブレインストーミング、ワークフローのマッピング、魅力的なリモート会議の実施に最適です。
適切なリモートワークソフトの選択は、生産性・コラボレーション・可視性を分散型チームで維持するための鍵となります。リモートアクセスツール、社員モニタリングプログラム、プロジェクト管理プラットフォーム、コミュニケーションアプリなど、それぞれが在宅勤務を効率的に支える特定の役割を担っています。チームのニーズ――セキュアアクセス、パフォーマンス追跡、タスク調整、バーチャル会議――を理解することで、信頼できるリモート環境を構築できます。
今回紹介したツールの中でも DeskIn は、基本的なアクセス以上を求めるチームに特におすすめです。安全なデバイスのリモート制御やファイル転送に加え、画面拡張、画面キャスト、ホワイトボード、音声通話、注釈、クリップボード共有などをすべて一つのプラットフォームで提供します。トラブルシューティング、コラボレーション、プロジェクト管理まで、DeskIn は現代のリモートチームに包括的で使いやすいソリューションを提供します。
👉 今すぐ DeskIn をダウンロードして、ワークフローをもっとシンプルに!


WindowsとMacコンピュータをiPadでセカンドモニターに!
マルチタスクをこなすにとっ社員にとって、セカンドモニターを使用することは生産性を大幅に向上させることができます。ホームオフィスの方やデュアルスクリーンを持っていない学生の方へ。使用していないiPadを簡単にコンピュータのセカンドモニターに変える方法をご紹介します。
1. 画面スペースを増やして同時により多く表示できます。マルチタスクユーザーは、ウィンドウの切り替えを避けることで時間を節約できます。
2. 各画面が独立して動作するため、作業スペースがより整理されます。
ビデオ編集では、一つの画面を編集に、もう一つの画面を素材置き場に。論文を書く場合、片方の画面で執筆、もう片方で情報を検索などです。
3. iPadの画面サイズは十分大きく、表示品質も非常に良好です。デザイン作業のニーズがあるユーザーやMacBookユーザーにとって、追加のスクリーンを購入するよりもコスト効率が高く、色差の問題もありません。
4. 多くの人が家にiPadを持っています。この手持ちのデバイスをデュアルスクリーンとして使用することで、別のスクリーンを購入するコストや置くスペースを節約できます。
Appleのネイティブ機能であるApple Sidecarを使用すると、iPadをMacBookやiMacの外部ディスプレイとして使用できます。簡単な設定を行うだけで、iPadとコンピュータ間のシームレスな接続が可能です。
注意:Apple Sidecarを使用するには、2台のデバイスが同じApple IDにログインしているか、同じネットワークに接続していることが必要です。両方のデバイスにBluetooth、Wi-Fiがオンになっており、距離は10メートル以内である必要があります。
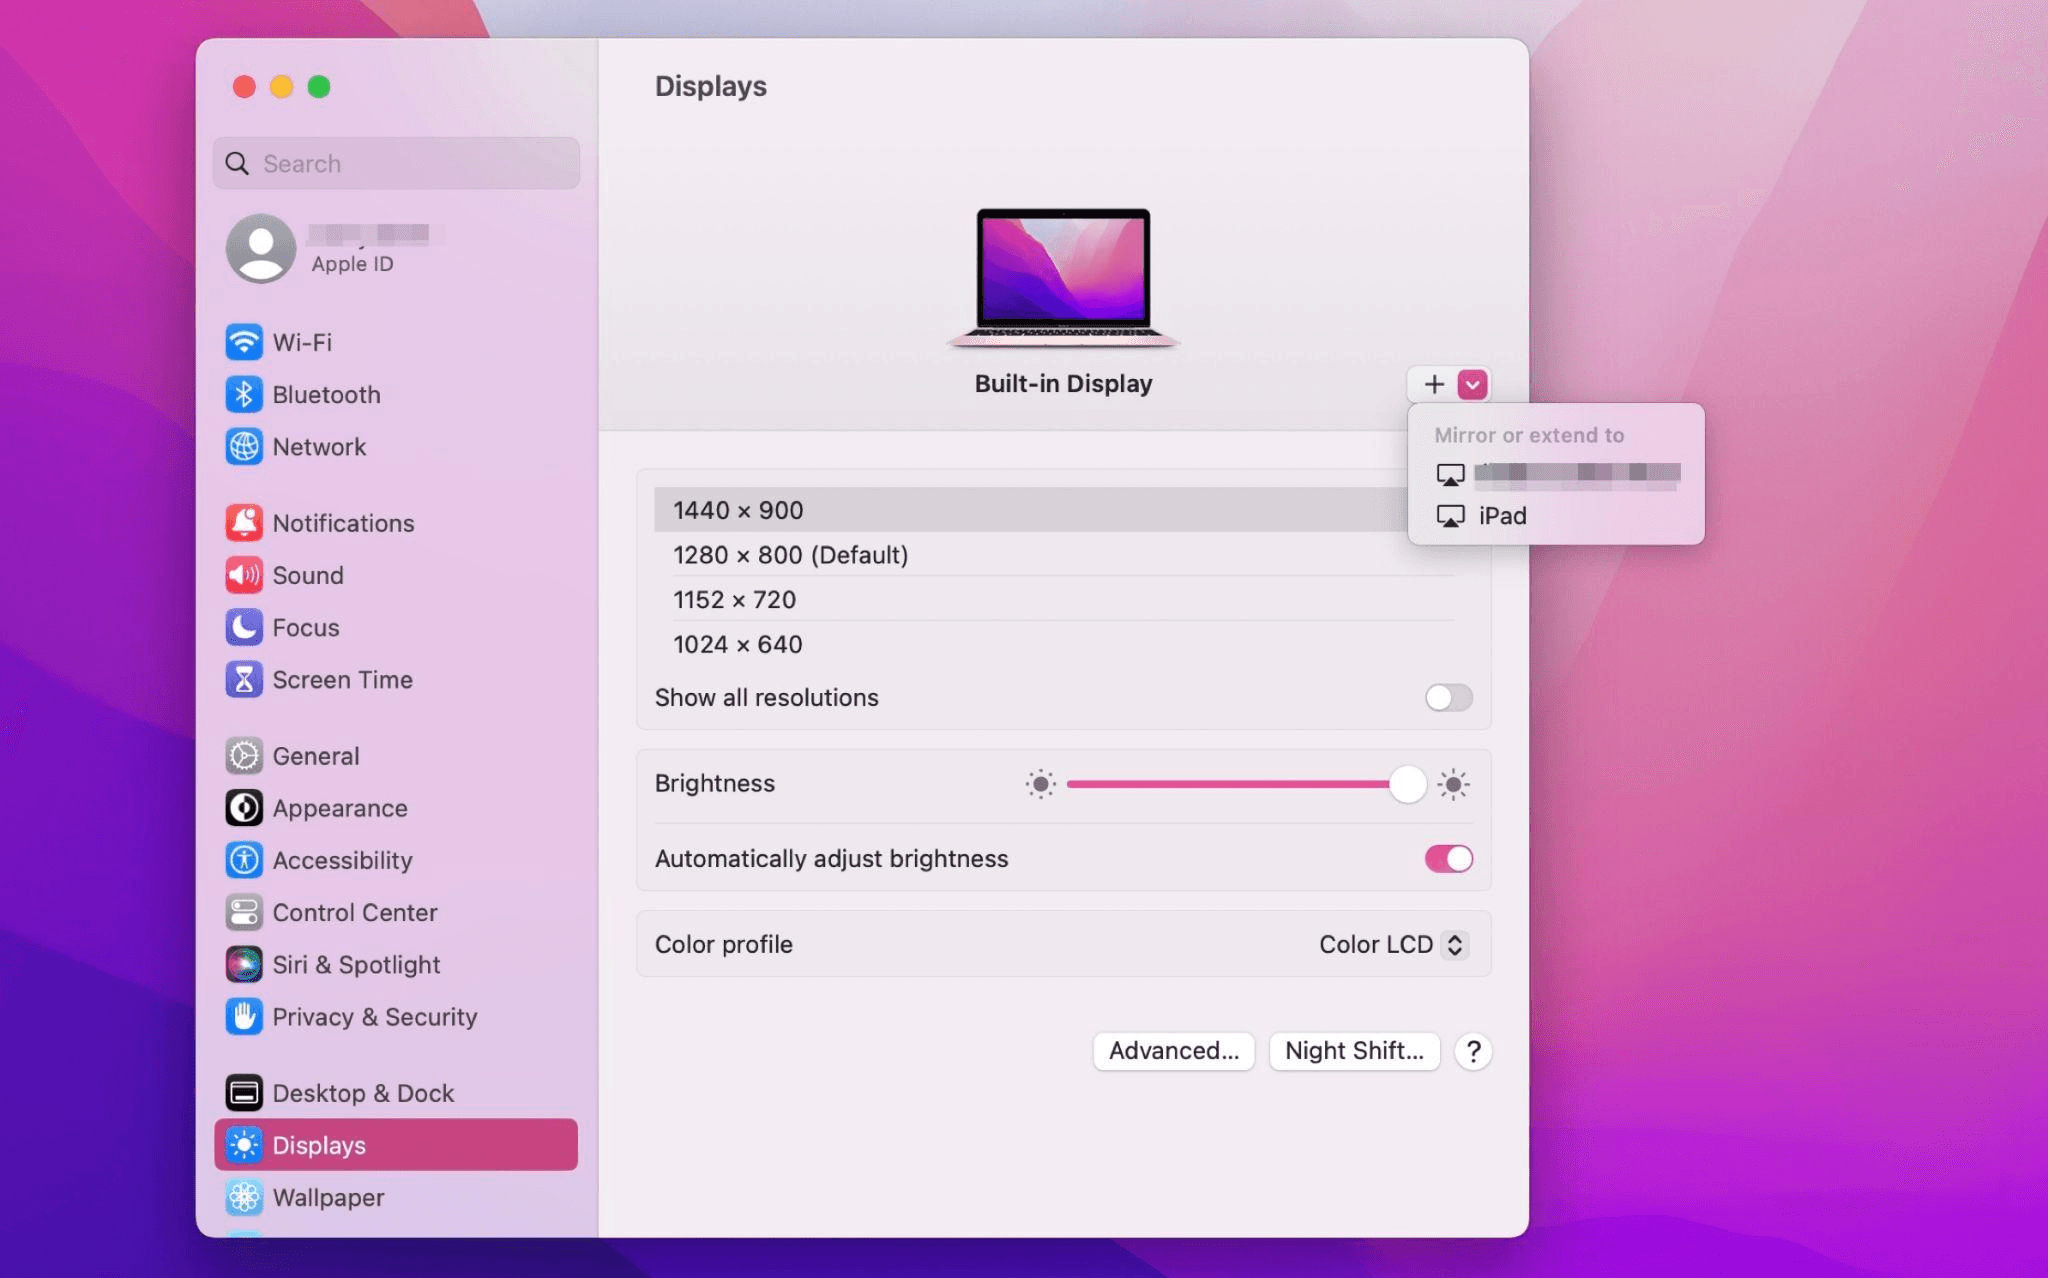
Macシステム設定を開き、サイドバーの「ディスプレイ」クリック >> 右側の「+」ポップアップメニューをクリックし、iPadを選択します。
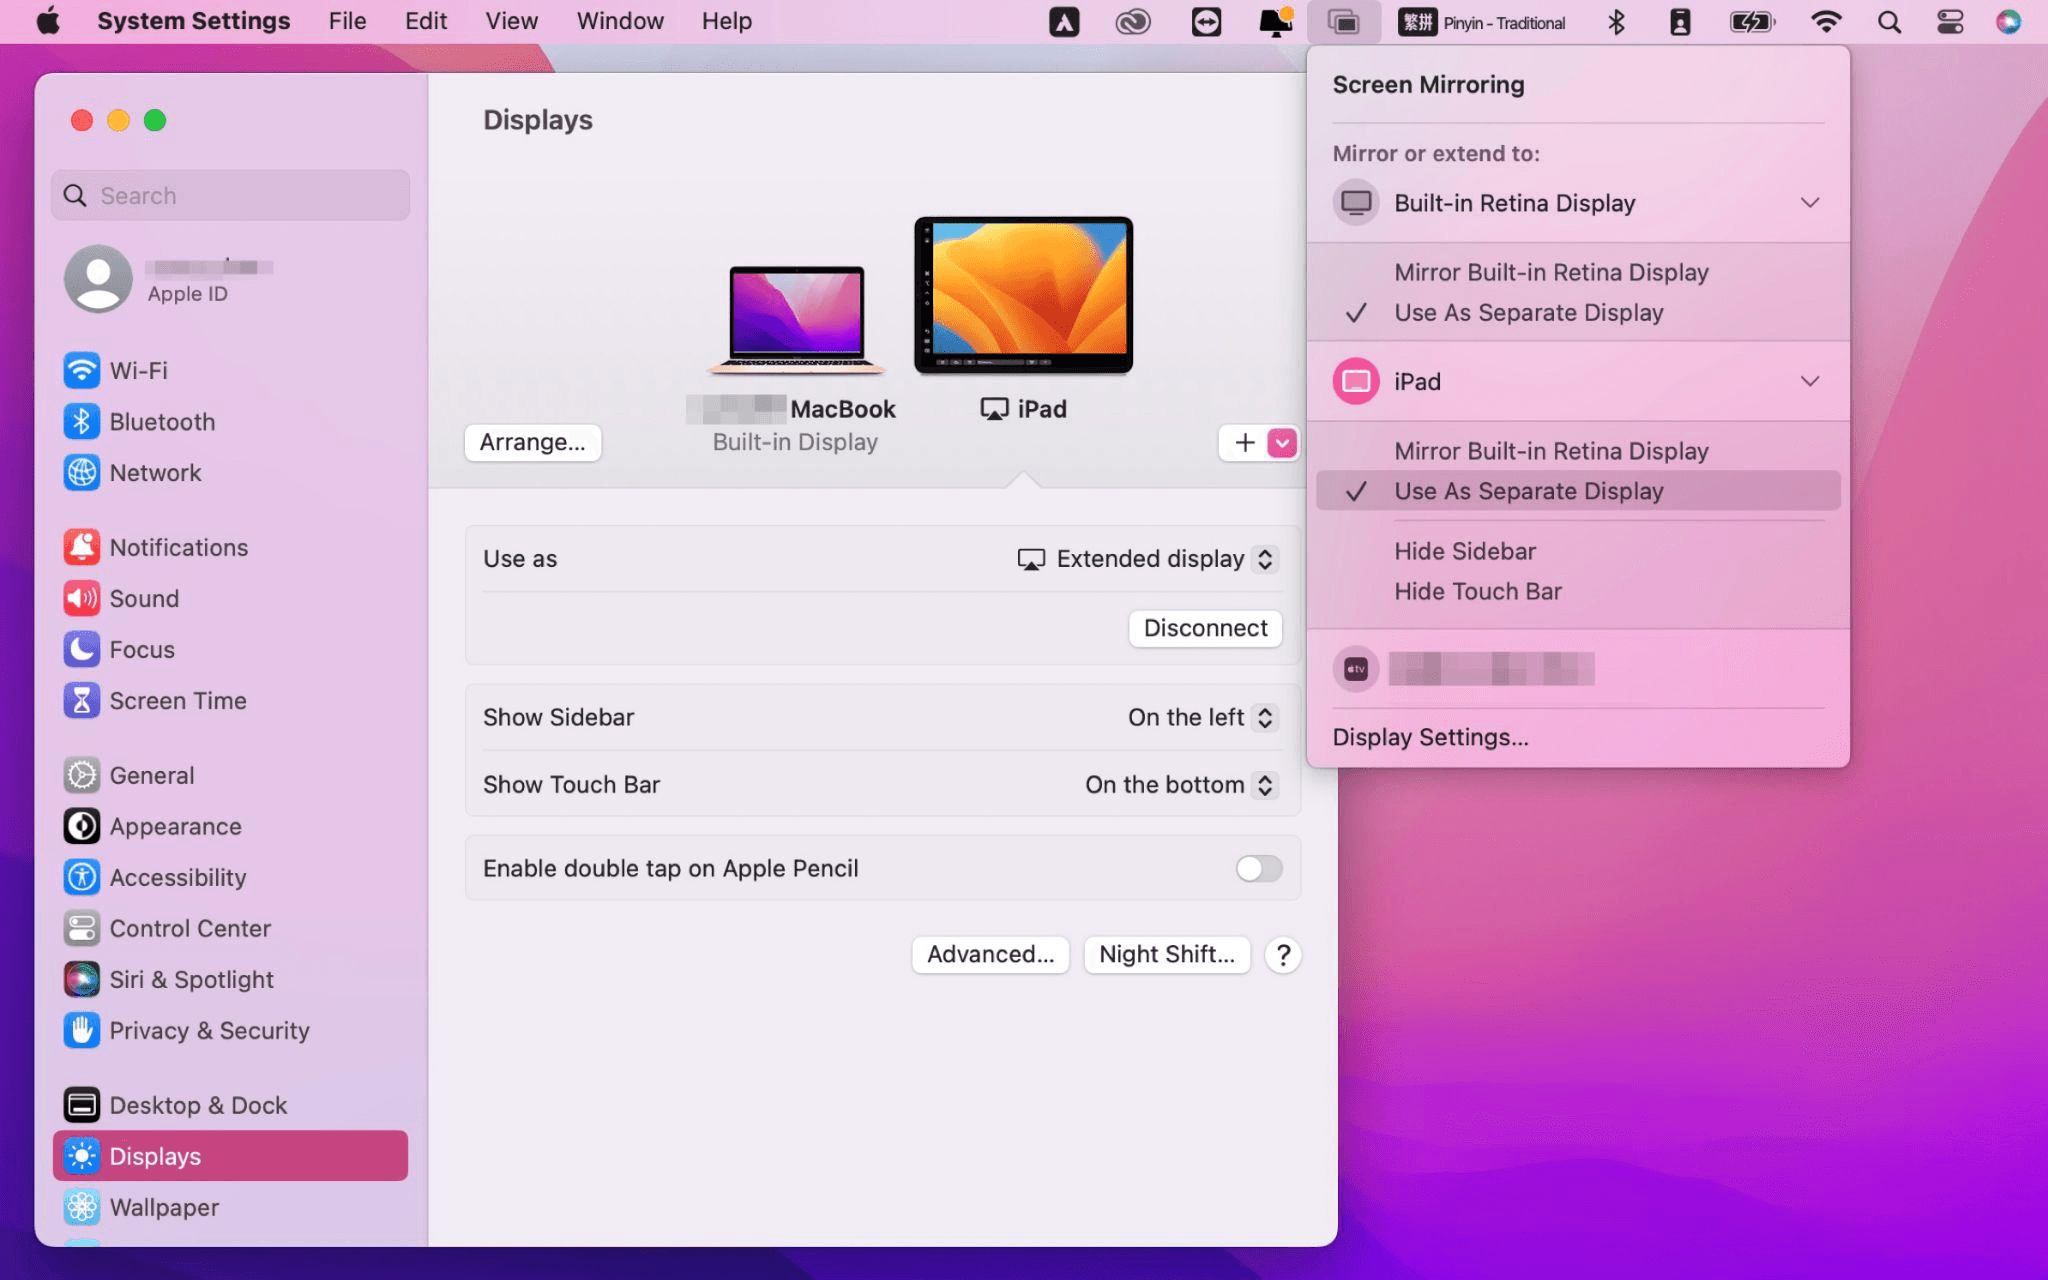
iPadを選択し、使用設定を「拡張ディスプレイ」に変更します。Macの上部ツールバーのAirplay設定を確認し、iPadを「別のディスプレイとして使用」に設定します。
設定が完了すると、iPadがMacのセカンドディスプレイとなります。MacからiPadにウィンドウをスムーズにドラッグすることができます。また、iPadのサイドバーを使用したり、システムディスプレイ設定でサイドバーの位置を変更したりできます。
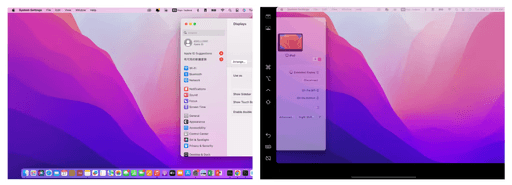
MacBookスクリーン(左)とiPadスクリーン(右)
Apple Sidecarは、2016年以降に発売されたMacとiPadOS13以上のみをサポートします。古いAppleデバイスやWindowsデバイスを使用している場合でも、DeskInリモートソフトウェアを利用して画面拡張を行うことができます。iPadをMacやWindowsのセカンドディスプレイとして使用でき、その滑らかさはSidecarに劣りません。
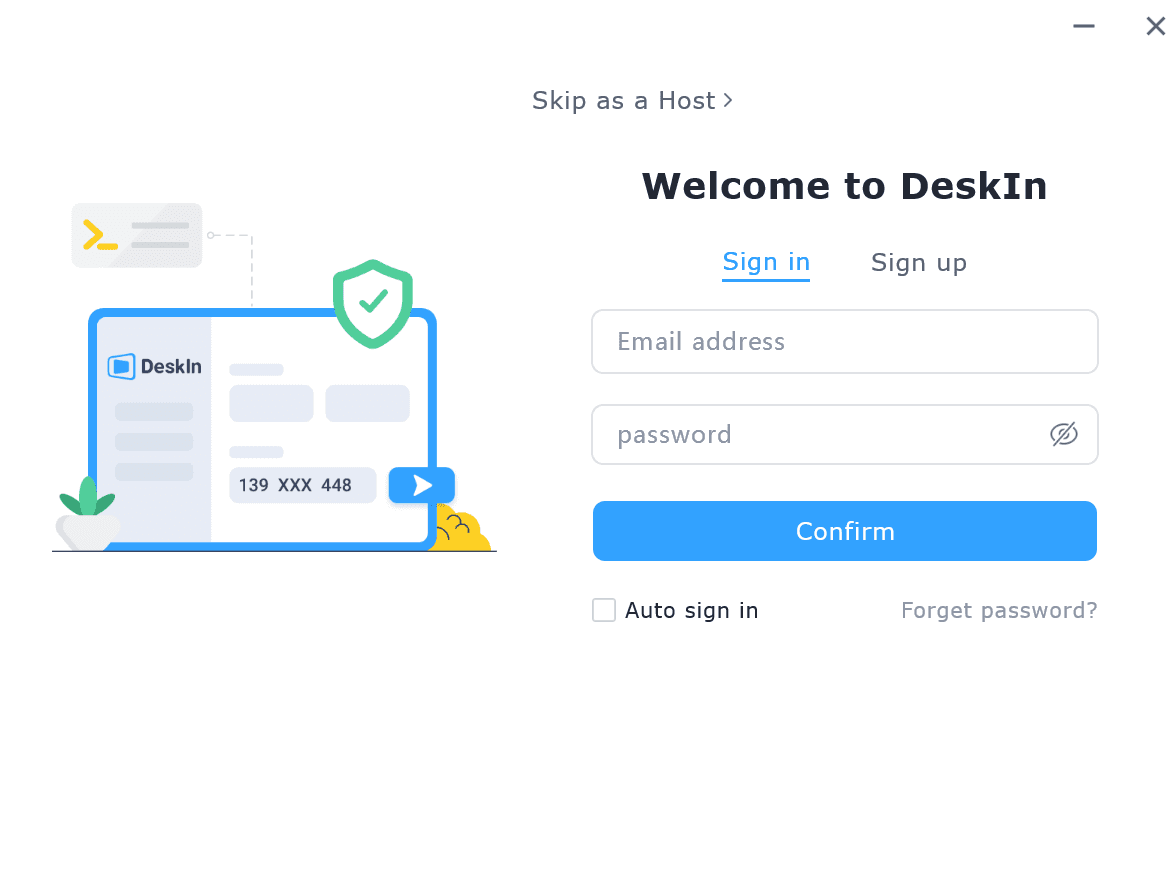
コンピューターとiPadにDeskInをダウンロードし、無料アカウントを登録して別々にログインします。
注意: 新しいデバイスに初めてログインする際には、アカウントのセキュリティを保護するためにメール認証を完了する必要があります。
Windows/MacコンピュータでDeskInアプリを開き、「スクリーン管理」タブに行き、「画面を拡張する」をクリックします。
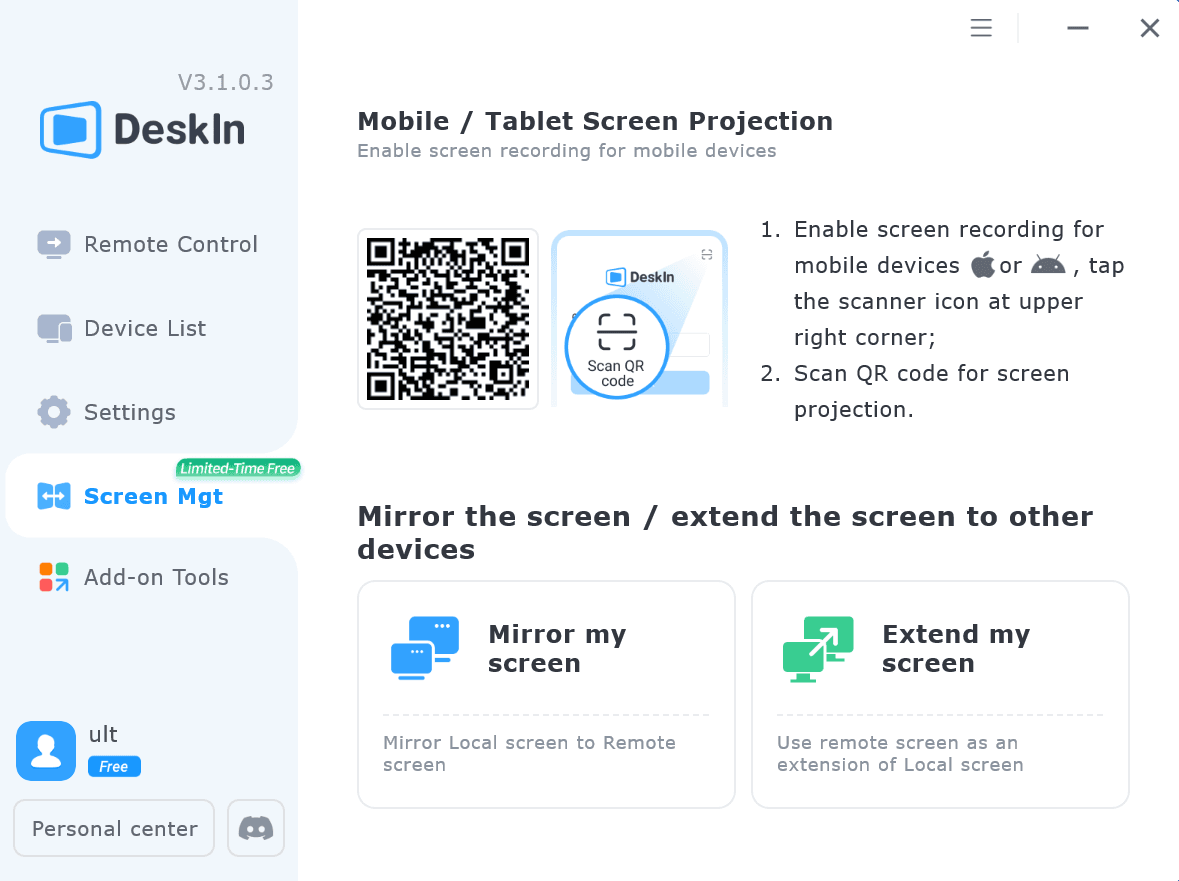
iPadを選択し、「拡張を開始」をクリックします。接続が完了すると、iPadはWindows/Macコンピューターのセカンドディスプレイとなり、2つのスクリーンを1つのもののようにウィンドウを移動できます。
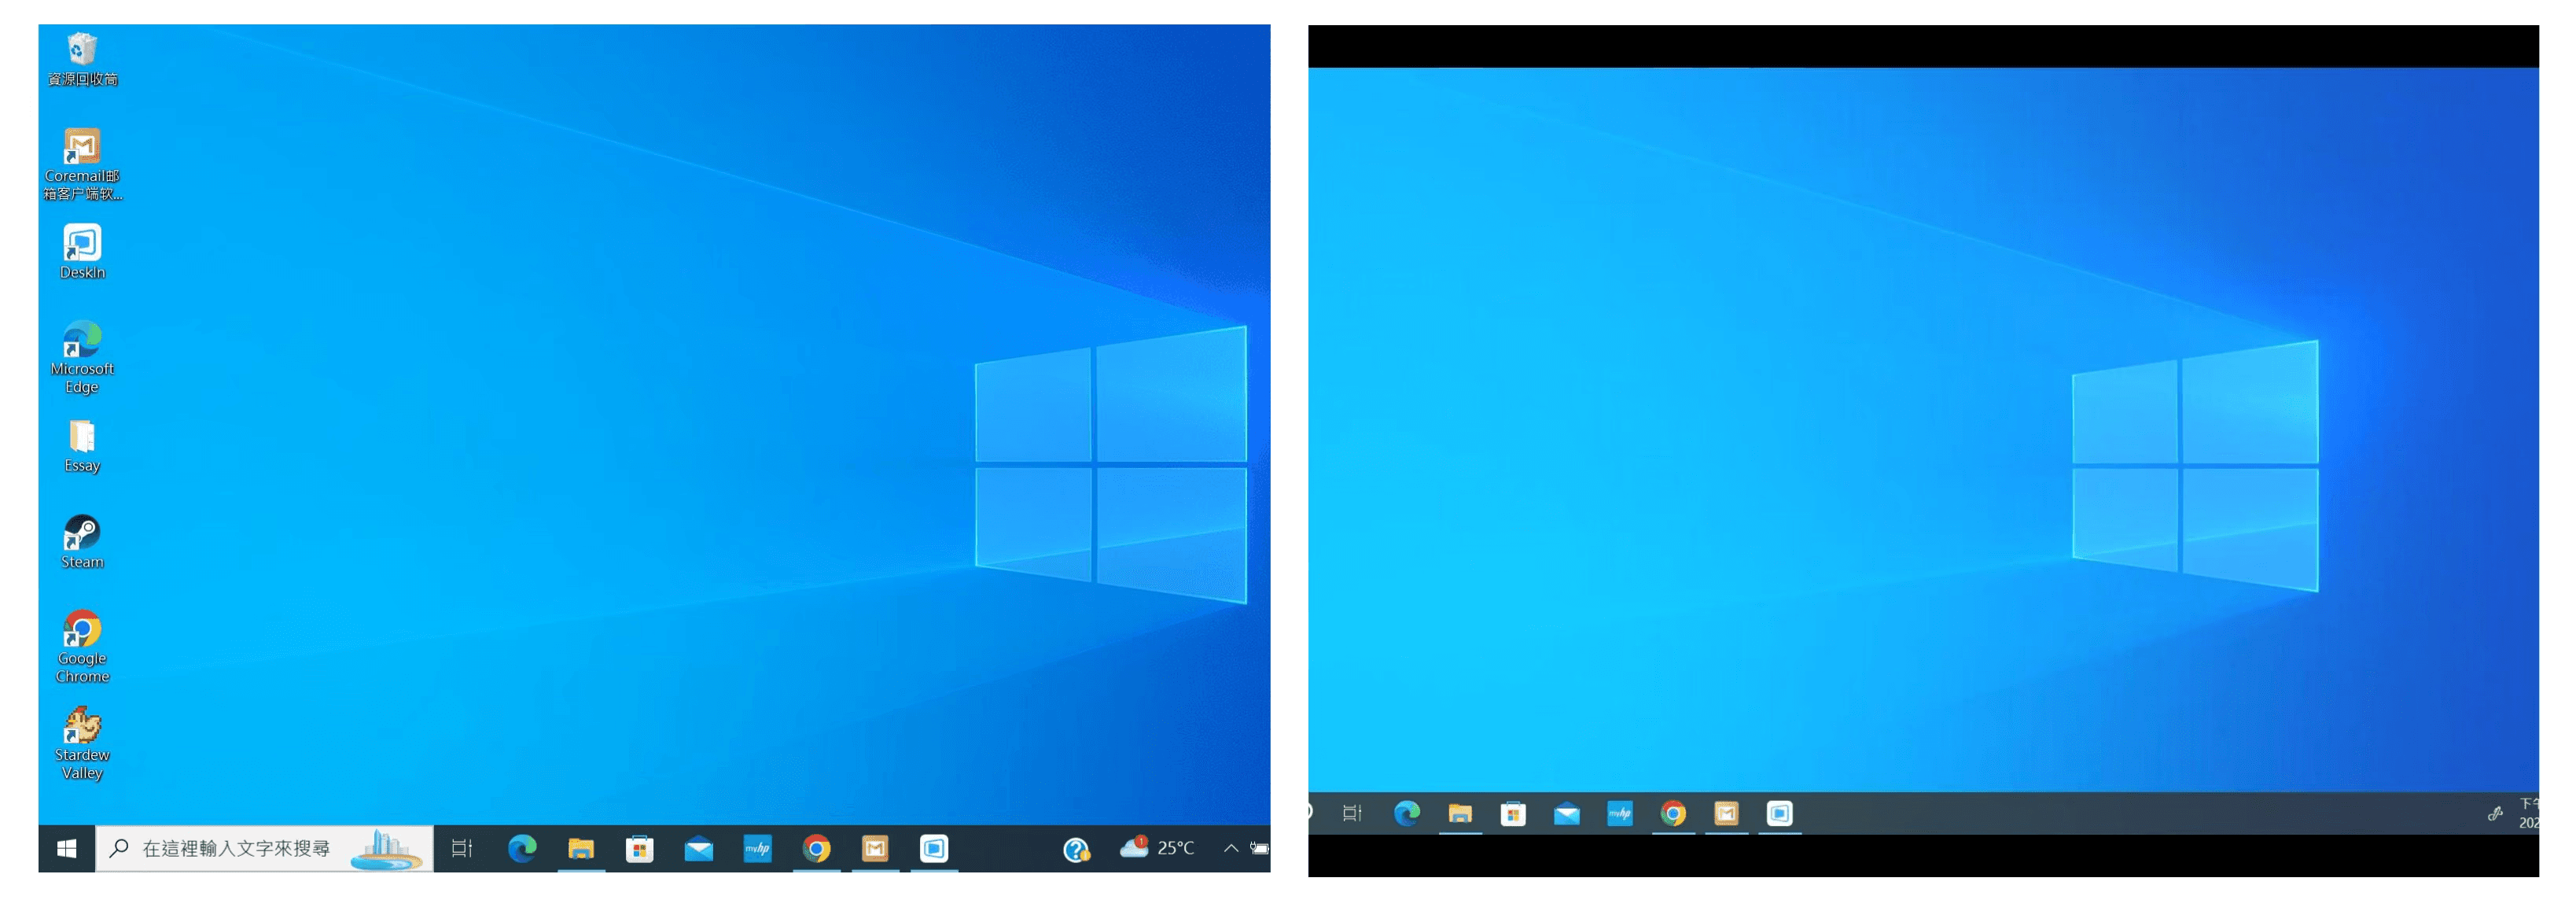
コンピュータスクリーン(左)とiPadスクリーン(右)
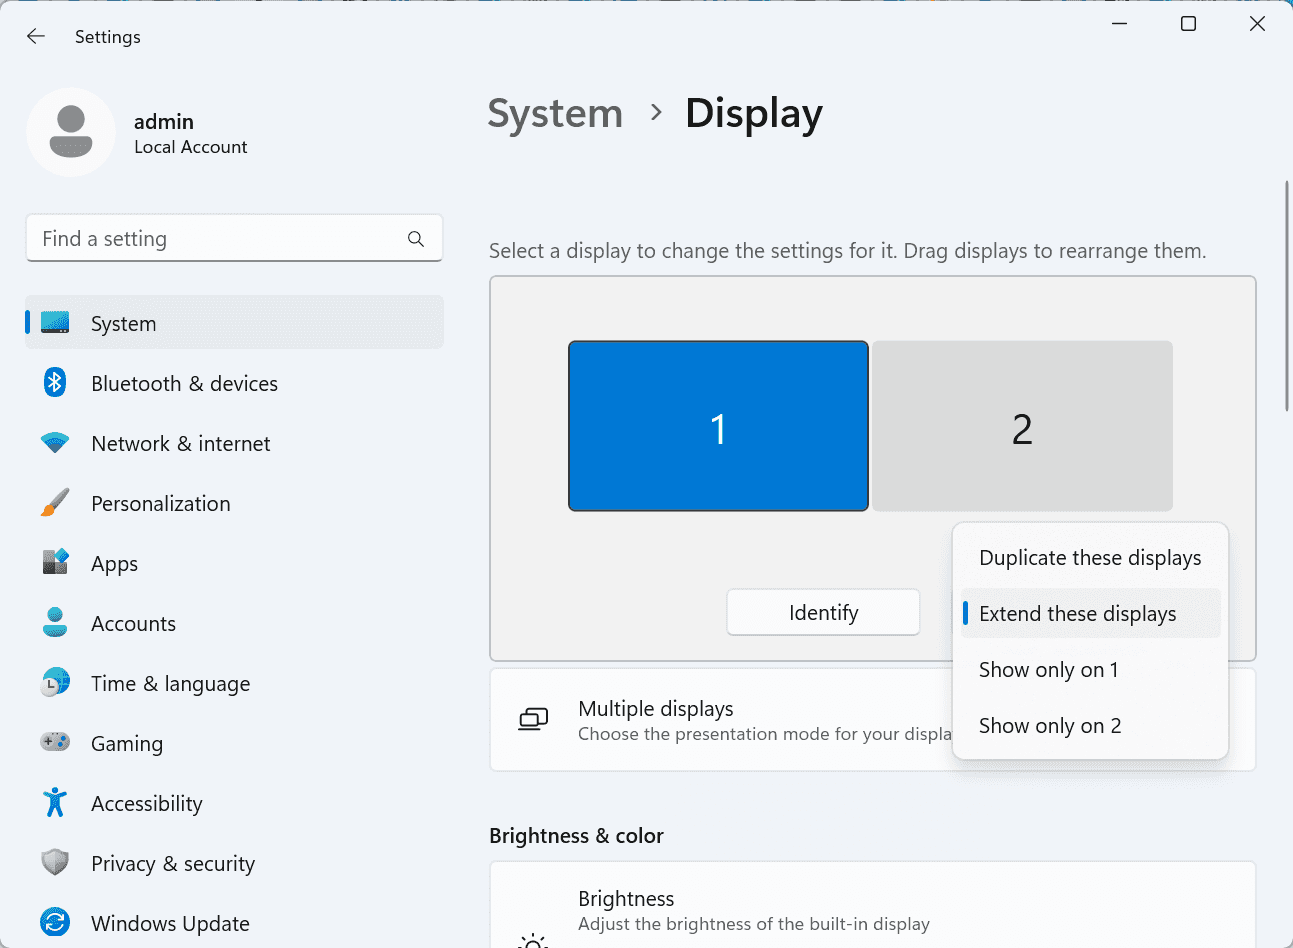
拡張後、iPadがコンピュータ画面の内容をミラーリングしているだけの場合はWindowsシステム設定 >>ディスプレイ設定に行き、「これらのディスプレイを拡張」を選択してください。2つの画面をドラッグして画面の位置を変更することもできます。
この記事では、DeskInリモートデスクトップソフトウェアを使用してiPadをMacおよびWindowsコンピューターの「セカンドスクリーン」にする方法を紹介します。これは、同時に複数のタスクを処理し、生産性を向上させたい方に特に有用です。MacBook、iPad、Androidタブレット、およびWindows PCで動作する画面拡張ツールを探している場合、DeskInリモートデスクトップは最適なソリューションです。DeskInをダウンロードして、ぜひお試しください!

Top 6 RustDesk Alternative Tools for Faster, Easier Remote Access
Remote access should feel like flipping a light switch, not decoding a control panel. Yet many users exploring RustDesk eventually run into friction: connection IDs, server setup, or occasional lag. While RustDesk is powerful, it’s not always the easiest or smoothest option, especially for non-technical users.
That’s why more people are actively searching for a reliable RustDesk alternative that combines performance, simplicity, and flexibility. Whether you want a plug-and-play solution or something more advanced, this guide will help you find the best fit.
RustDesk stands out as a privacy-friendly, self-hosted remote desktop tool. However, real-world usage reveals a few common challenges:
Complicated setup for the RustDesk self-hosted environments
Manual connection steps requiring IDs and passwords
Occasional latency or unstable connections
Limited user-friendly features out of the box
For many users, especially those helping family or managing multiple devices, simplicity matters just as much as control.
When evaluating a RustDesk alternative, focus on these key factors:
Ease of use: Quick setup without technical overhead
Performance: Smooth, low-latency remote sessions
Compatibility: Support for Windows, macOS, Linux, and mobile
Security: Strong encryption and access controls
Flexibility: Options ranging from cloud-based to open source
The ideal tool strikes a balance between power and convenience, something many modern solutions now deliver better than traditional setups.
Here’s a quick breakdown of the top tools and where they shine:
DeskIn – Best all-in-one RustDesk alternative for performance and ease of use
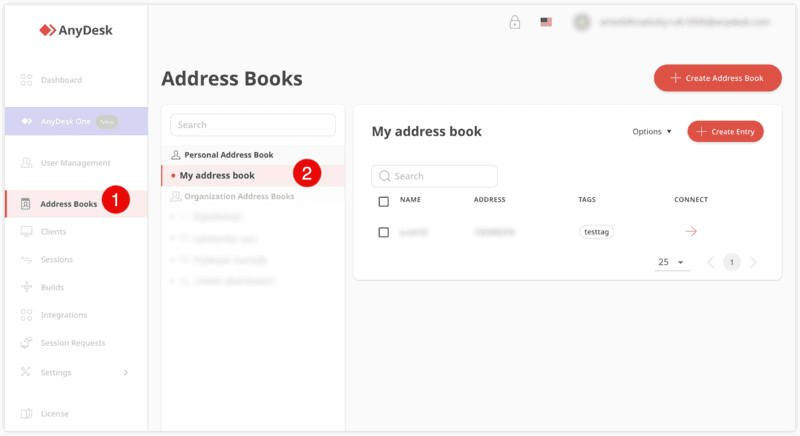
AnyDesk – Best lightweight tool for fast connections
TeamViewer – Best for enterprise-grade remote support
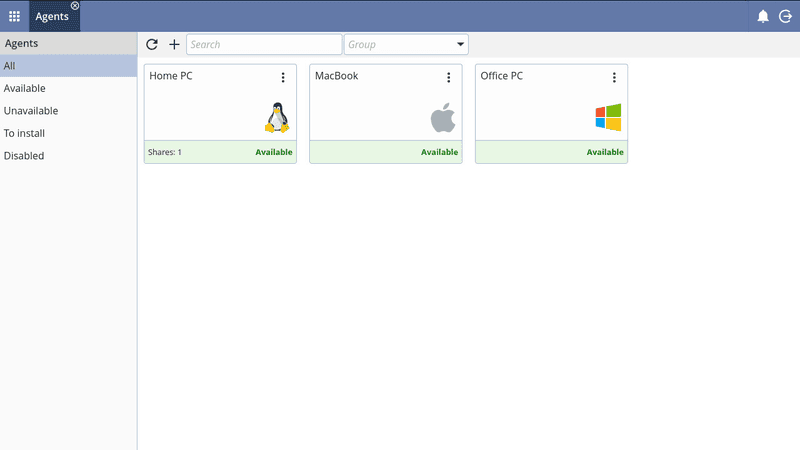
MeshCentral – Best open-source and self-hosted solution
DWService – Best free browser-based tool
Chrome Remote Desktop – Best simple, no-frills option
Ultra-low latency with smooth high-frame-rate streaming
No complex setup or server deployment required
Cross-platform including Rustdesk alternative for Android
Secure with encryption and device control features
Built-in file transfer and multi-device management
Smaller awareness than legacy competitors
Best for: Users who want a powerful yet simple remote desktop solution
DeskIn removes the friction that often comes with remote access tools. Instead of relying on IDs or manual configurations, it offers a streamlined connection experience that works right out of the box. This makes it especially valuable for users supporting non-technical family members or managing multiple remote devices.
Performance is where DeskIn truly distinguishes itself. Compared to RustDesk, which can sometimes struggle with latency, DeskIn delivers consistently smooth sessions with minimal lag. It also eliminates the need for self-hosting, making it a strong free RustDesk alternative option for users who want powerful features without the complexity.
For those exploring options beyond the RustDesk alternative GitHub projects, DeskIn provides a polished, ready-to-use experience that balances simplicity with professional-grade performance.
Lightweight and fast installation
Good performance on low bandwidth
Cross-platform support
Easy-to-use interface
Performance may drop during long sessions
File transfer can be inconsistent
Best for: Users needing quick and simple remote access
AnyDesk is often considered a natural step up from RustDesk for users who want something easier to deploy. It offers a lightweight application that connects quickly and performs well under normal conditions. This makes it suitable for quick troubleshooting or occasional remote access.
However, performance consistency can be an issue. Users frequently report lag or instability during extended sessions or when handling more demanding tasks. While AnyDesk is a solid option for basic needs, it may not fully satisfy users looking for a more robust, all-in-one solution.
👀 You may also be interested in: |
|---|
Enterprise-grade security with encryption and 2FA
Stable performance across global networks
Rich features like file transfer and session recording
Broad device compatibility
Expensive for commercial use
Free version has limitations
Heavier resource usage on some systems
Best for: Businesses and IT teams managing multiple endpoints
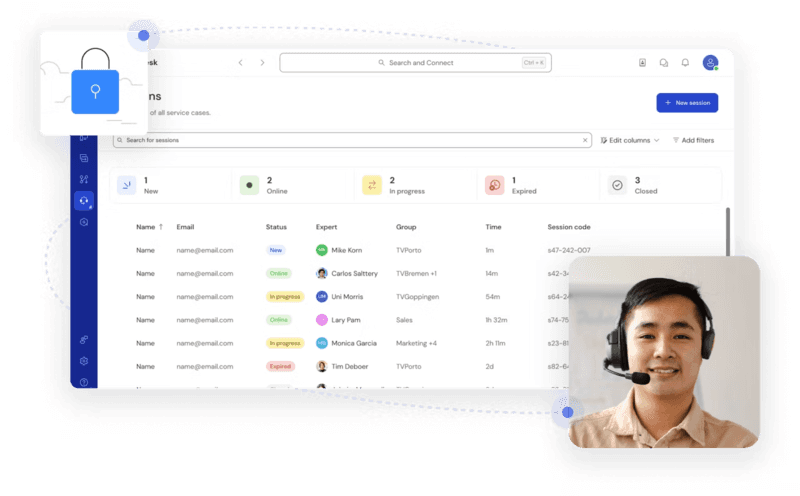
TeamViewer has long been a dominant player in the remote desktop space, offering a comprehensive suite of features designed for enterprise environments. It excels in reliability and global connectivity, making it a popular choice for IT support teams.
That said, its pricing model is a major drawback for many users. Frequent users may quickly encounter licensing restrictions, and costs can escalate for businesses. Additionally, its heavier footprint can impact performance on lower-end devices. DeskIn offers a more modern alternative by delivering similar performance and essential features without the same cost barriers. For users who want enterprise-level capabilities with better efficiency, it presents a compelling option.
👀 You may also be interested in: |
|---|
Fully RustDesk alternative open source solution
Web-based management dashboard
Supports multi-device environments
Strong customization and control
Complex setup and maintenance
Requires technical expertise
Best for: Advanced users needing a Rustdesk alternative self-hosted
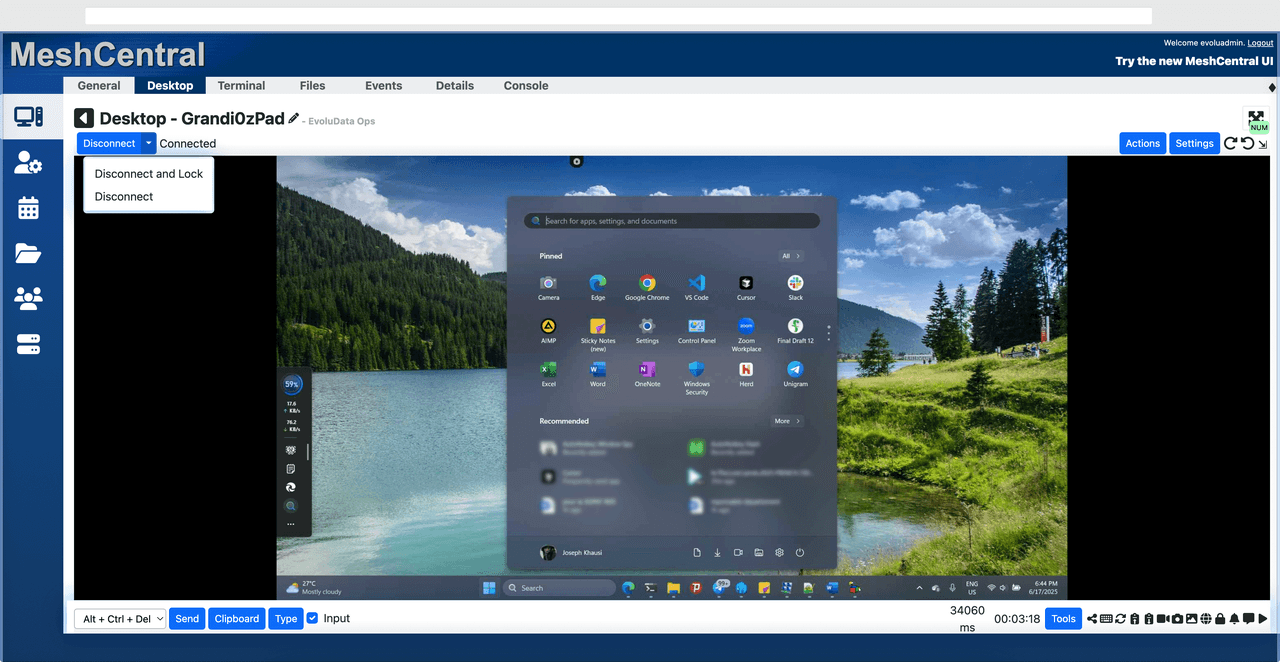
MeshCentral is a powerful open-source platform designed for users who want full control over their remote access infrastructure. It supports multiple devices and provides a centralized dashboard for management, making it attractive for IT professionals.
However, this flexibility comes with complexity. Setting up and maintaining a MeshCentral server requires technical knowledge, which can be a barrier for many users. Compared to this, DeskIn offers a much simpler deployment process while still delivering strong performance and security. For users who prioritize ease of use over full control, modern solutions like DeskIn provide a more accessible alternative.
Completely free
Browser-based access
Open-source foundation
Simple setup
Limited performance
Basic feature set
Best for: Users looking for a simple, free RustDesk alternative
DWService offers a browser-based approach to remote access with no heavy installation, making it convenient for quick connections in restricted environments. It supports both desktop access and file management across major platforms.
However, performance often feels sluggish, especially on demanding tasks, and features remain basic; lacking session recording, smooth multi-monitor support, or advanced security controls. While suitable for occasional personal use, it falls short for professional or high-performance scenarios.
Free and easy to use
Browser-based setup
Cross-platform compatibility
Very limited features
No advanced management or collaboration tools
Best for: Casual users needing basic remote access

Chrome Remote Desktop is one of the simplest remote access tools available. It’s easy to set up and works across devices, making it a convenient choice for occasional use.
However, it lacks many essential features such as file transfer, session management, and advanced security controls. For users with more demanding needs, it quickly becomes insufficient. Compared to Chrome Remote Desktop, DeskIn provides a much more complete experience without sacrificing ease of use, making it a better long-term solution.
👀 You may also be interested in: |
|---|
RustDesk is powerful but can be difficult to set up and manage, especially with self-hosting. Many users prefer tools that offer similar performance without technical complexity. DeskIn simplifies remote access while maintaining strong performance and security.
Several tools qualify as a free RustDesk alternative, including DWService and Chrome Remote Desktop. However, DeskIn stands out by offering better performance and usability even in its free version.
Yes, tools like MeshCentral and DWService are considered RustDesk alternative open source options. They provide flexibility and control but often require technical expertise to set up and maintain.
Beginners should choose tools with a simple setup and intuitive interfaces. DeskIn is an excellent option because it removes the need for manual configuration while still delivering advanced features.
RustDesk is a powerful starting point, but it’s not always the easiest or most efficient tool for everyday use. From setup complexity to performance limitations, many users eventually look for a better RustDesk alternative.
Among all the options, DeskIn stands out as the most balanced solution. It combines speed, simplicity, and cross-platform support into one seamless experience. If you’re ready to move beyond technical friction and enjoy truly smooth remote access, DeskIn is a choice that simply works.

Top 7 RDP Alternative Tools for Faster, Safer Remote Access
Remote desktop access used to feel like a solid bridge. Now, for many users, traditional RDP feels more like a creaky rope ladder. With performance issues, security concerns, and limited cross-platform support, it's no surprise that more people are actively searching for a better RDP alternative that actually keeps up with modern workflows.
If you're managing multiple servers, working across devices, or just tired of unstable connections, this guide will walk you through the best tools worth switching to.
RDP (Remote Desktop Protocol) is a proprietary protocol developed by Microsoft that allows users to connect to another computer over a network. It's widely used for accessing Windows servers, virtual machines, and remote workstations.
While powerful in controlled environments, RDP is often tied to Windows systems and requires configuration like port forwarding or VPNs. Compared to newer tools, it can feel rigid and outdated.
You may also be interested in: |
|---|
RDP still works, but it comes with trade-offs that many users find frustrating:
Security risks if not properly configured
Complex setup for remote or external access
Limited cross-platform compatibility
Performance issues over unstable networks
Many IT teams are now actively replacing it, especially when looking for a Windows RDP client alternative or something that works seamlessly across macOS, Linux, and mobile devices. That's where modern Remote Desktop alternatives shine.
Choosing the right tool is like picking the right vehicle. Some are built for speed, others for heavy-duty enterprise work. Here's a quick snapshot:
DeskIn – Best all-in-one RDP alternative for performance and cross-platform use
TeamViewer – Best for enterprise remote support
AnyDesk – Best lightweight option for fast connections
RustDesk – Best Windows RDP alternative open-source solution
Remmina – Best RDP alternative for Linux users
Chrome Remote Desktop – Best simple browser-based tool
Splashtop – Best for high-performance business environments
Ultra-low latency with smooth high-frame-rate streaming
Works across Windows, macOS, Linux, iOS, and Android
Strong encryption and secure access controls
Built-in file transfer and multi-session support
Newer compared to legacy brands
Best for: Users who want a powerful, flexible RDP alternative

DeskIn feels less like remote access and more like teleportation for your desktop. Whether you're managing servers, supporting clients, or working remotely, it delivers consistently smooth performance without the usual lag spikes seen in traditional RDP setups.
Unlike many tools, DeskIn eliminates the need for complex configurations. You don't need to wrestle with firewalls or VPNs just to connect. It also works seamlessly across platforms, making it a strong alternative to Microsoft Remote Desktop for Mac and mobile users alike.
For teams juggling multiple systems, DeskIn provides a unified experience that replaces fragmented workflows. It's also a strong free RDP alternative option with premium-level capabilities, making it ideal for both individuals and businesses.
Enterprise-grade security and compliance
Extensive feature set including collaboration tools
Cross-platform compatibility
Reliable global performance
Expensive licensing
Can be overkill for individuals
Best for: Enterprises needing secure and scalable remote access
TeamViewer is a comprehensive remote desktop platform widely adopted by IT teams, support professionals, and enterprises. Its feature set extends far beyond simple screen sharing—it includes robust device management, remote printing, file transfer, session recording, and even augmented reality support for field service. TeamViewer's security architecture relies on AES‑256 encryption, two‑factor authentication, and whitelisting, making it suitable for organizations with strict compliance requirements. It runs on virtually every operating system and mobile platform.
The main trade‑off is its pricing: licenses are subscription‑based and can become expensive for small teams or individual users, especially as TeamViewer aggressively flags personal use as commercial, leading to session restrictions.
Fast and responsive
Lightweight installation
Works well on low bandwidth
Easy to use
File transfer can be inconsistent
Lag during longer sessions
Best for: Users needing quick, simple remote access
AnyDesk is a lightweight remote desktop application prized for its speed and efficiency, often recommended as a fast alternative to Microsoft's native Remote Desktop on Windows 10 and Android. It uses a proprietary video codec, DeskRT, to achieve low latency even on limited bandwidth, making it ideal for quick support sessions and accessing devices over mobile networks. The interface is clean and minimalist, with features like address book management, file transfer, and session recording available.
However, users frequently report instability during extended sessions; performance can degrade over time, and file transfers may slow considerably compared to competitors. While its free version is generous for personal use, professional users often find the performance ceiling limits its suitability for continuous, demanding workloads. DeskIn, by contrast, maintains consistent performance even during extended use, making it better suited for professional workloads.
You may also be interested in: |
|---|
Free and open-source
Self-hosting for full control
Strong privacy protection
Active community
Technical setup required
Limited user-friendly features
Best for: Developers and privacy-focused users
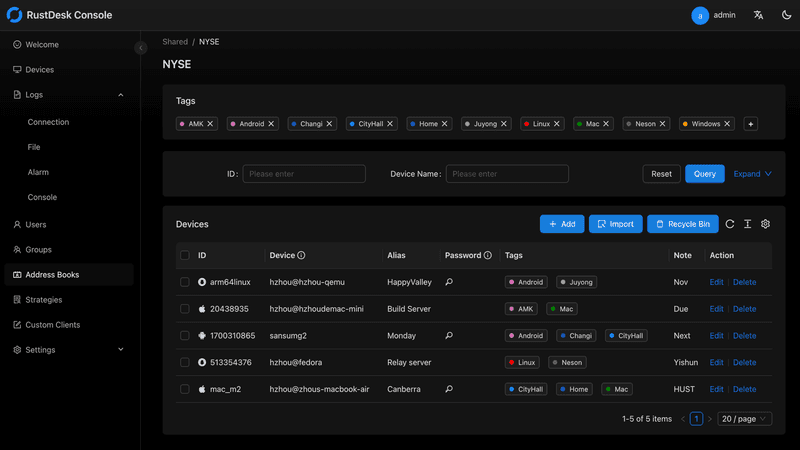
RustDesk has emerged as a leading open‑source remote desktop alternative, appealing to developers and organizations that require full control over their data. It allows users to self‑host the relay and rendezvous servers, meaning no third‑party infrastructure handles connection metadata. Built with Rust, it offers a modern codebase with cross‑platform clients (Windows, macOS, Linux, Android, iOS) and supports essential features such as file transfer, TCP tunneling, and customizable address books.
The major barrier is its complexity: deploying a self‑hosted environment requires technical expertise to configure firewalls, SSL certificates, and ongoing server maintenance. For those using the public relay, performance can be inconsistent depending on server load and geographic proximity.
You may also be interested in: Top RustDesk Alternatives for Better Performance, Security & Ease of Use |
|---|
Open-source and free
Supports multiple protocols including RDP and VNC
Lightweight and flexible
Native to Linux environments
Limited features compared to modern tools
UI can feel outdated
Best for: Linux users looking for a traditional RDP alternative Linux
Remmina is a beloved open‑source remote desktop client for Linux, supporting multiple protocols (RDP, VNC, SSH, SPICE, and others) in a single unified interface. It is frequently chosen by system administrators and Linux enthusiasts who need a flexible, lightweight tool to manage diverse environments. Remmina offers tabbed sessions, quick‑connect profiles, and a plugin system that extends its capabilities.
However, its strength - protocol flexibility, also highlights its limitations. As a frontend client rather than a full remote access solution, it lacks features like unattended access, centralized account management, or robust session recording out of the box. Performance can vary by protocol, and the user experience lags behind more polished commercial tools, particularly for users seeking a plug‑and‑play setup.
Free and easy to use
Browser-based setup
Cross-platform access
Very limited features
No advanced management tools
Best for: Casual users needing basic remote access
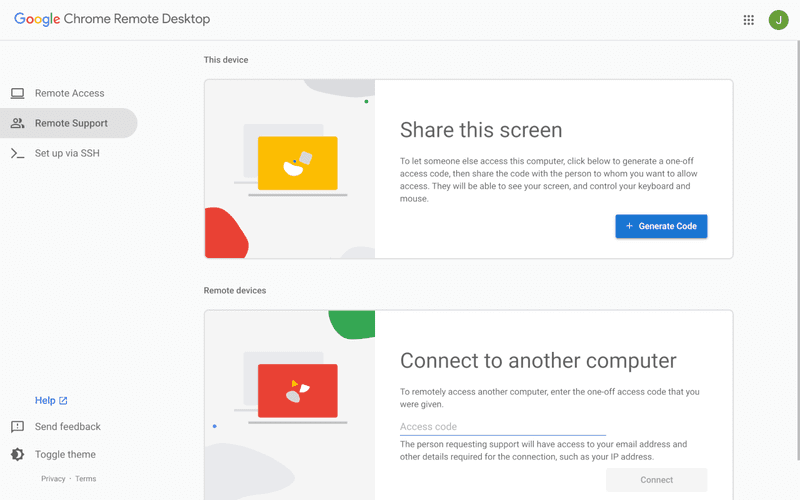
Chrome Remote Desktop is a free, browser‑based remote access tool from Google that requires nothing more than a Chrome browser and a Google account. It excels in simplicity: installation takes seconds, and connections are mediated through Google's infrastructure, eliminating complex firewall configurations. For occasional use—such as helping a family member or quickly accessing a home computer—it works reliably across Windows, macOS, Linux, and even ChromeOS.
The trade‑off is its minimal feature set. There is no native file transfer, multi‑session management, remote printing, or granular permission controls. Collaboration tools are absent, and the reliance on a Google account for authentication can be a limitation in professional environments. It remains a convenient entry‑level tool but struggles to meet the needs of power users or IT teams.
You may also be interested in: |
|---|
High-quality streaming performance
Strong security features
Good for business environments
Reliable connections
Subscription-based pricing
Limited free version
Best for: Businesses needing performance-focused remote access
Splashtop is a high‑performance remote desktop solution frequently adopted by creative professionals, educational institutions, and enterprises that prioritize fluid interaction. It delivers low‑latency streaming with support for high‑frame‑rate displays, making it suitable for video editing, CAD work, and other graphics‑intensive tasks. Splashtop offers a range of editions—from Business Access to SOS for on‑demand support—all of which include robust security (AES‑256, device authentication) and features like file transfer, remote printing, and multi‑monitor navigation. Its performance over local networks and the internet is consistently praised.
The primary drawback is cost: while competitive, the subscription model can accumulate quickly for users needing access to multiple devices or advanced features, especially when compared to similarly capable tools with more flexible pricing structures. DeskIn offers similar performance benefits with a more flexible pricing structure, making it a compelling alternative.
You may also be interested in: |
|---|
RDP can be difficult to configure, less secure if exposed, and limited outside Windows environments. Modern tools like DeskIn provide better performance, security, and ease of use.
The best RDP alternative depends on your needs, but DeskIn stands out for its balance of speed, security, and cross-platform compatibility.
Yes, several tools qualify as an RDP alternative free, including RustDesk and Chrome Remote Desktop. DeskIn also offers a free tier with advanced capabilities.
Microsoft is evolving its remote desktop ecosystem, but traditional RDP isn't disappearing overnight. However, many users are already transitioning to more modern solutions like DeskIn for better reliability and flexibility.
RDP has served its purpose, but the digital world has outgrown its limitations. Whether you need better performance, stronger security, or true cross-platform access, switching to a modern RDP alternative is no longer optional, it's inevitable.
Among all the options, DeskIn stands out as a future-ready solution. It combines speed, simplicity, and power into one seamless experience, helping you leave behind the friction of traditional remote desktop tools and step into something far more efficient.
WindowsとMacコンピュータをiPadでセカンドモニターに!
マルチタスクをこなすにとっ社員にとって、セカンドモニターを使用することは生産性を大幅に向上させることができます。ホームオフィスの方やデュアルスクリーンを持っていない学生の方へ。使用していないiPadを簡単にコンピュータのセカンドモニターに変える方法をご紹介します。
1. 画面スペースを増やして同時により多く表示できます。マルチタスクユーザーは、ウィンドウの切り替えを避けることで時間を節約できます。
2. 各画面が独立して動作するため、作業スペースがより整理されます。
ビデオ編集では、一つの画面を編集に、もう一つの画面を素材置き場に。論文を書く場合、片方の画面で執筆、もう片方で情報を検索などです。
3. iPadの画面サイズは十分大きく、表示品質も非常に良好です。デザイン作業のニーズがあるユーザーやMacBookユーザーにとって、追加のスクリーンを購入するよりもコスト効率が高く、色差の問題もありません。
4. 多くの人が家にiPadを持っています。この手持ちのデバイスをデュアルスクリーンとして使用することで、別のスクリーンを購入するコストや置くスペースを節約できます。
Appleのネイティブ機能であるApple Sidecarを使用すると、iPadをMacBookやiMacの外部ディスプレイとして使用できます。簡単な設定を行うだけで、iPadとコンピュータ間のシームレスな接続が可能です。
注意:Apple Sidecarを使用するには、2台のデバイスが同じApple IDにログインしているか、同じネットワークに接続していることが必要です。両方のデバイスにBluetooth、Wi-Fiがオンになっており、距離は10メートル以内である必要があります。
Macシステム設定を開き、サイドバーの「ディスプレイ」クリック >> 右側の「+」ポップアップメニューをクリックし、iPadを選択します。
iPadを選択し、使用設定を「拡張ディスプレイ」に変更します。Macの上部ツールバーのAirplay設定を確認し、iPadを「別のディスプレイとして使用」に設定します。
設定が完了すると、iPadがMacのセカンドディスプレイとなります。MacからiPadにウィンドウをスムーズにドラッグすることができます。また、iPadのサイドバーを使用したり、システムディスプレイ設定でサイドバーの位置を変更したりできます。
MacBookスクリーン(左)とiPadスクリーン(右)
Apple Sidecarは、2016年以降に発売されたMacとiPadOS13以上のみをサポートします。古いAppleデバイスやWindowsデバイスを使用している場合でも、DeskInリモートソフトウェアを利用して画面拡張を行うことができます。iPadをMacやWindowsのセカンドディスプレイとして使用でき、その滑らかさはSidecarに劣りません。
コンピューターとiPadにDeskInをダウンロードし、無料アカウントを登録して別々にログインします。
注意: 新しいデバイスに初めてログインする際には、アカウントのセキュリティを保護するためにメール認証を完了する必要があります。
Windows/MacコンピュータでDeskInアプリを開き、「スクリーン管理」タブに行き、「画面を拡張する」をクリックします。
iPadを選択し、「拡張を開始」をクリックします。接続が完了すると、iPadはWindows/Macコンピューターのセカンドディスプレイとなり、2つのスクリーンを1つのもののようにウィンドウを移動できます。
コンピュータスクリーン(左)とiPadスクリーン(右)
拡張後、iPadがコンピュータ画面の内容をミラーリングしているだけの場合はWindowsシステム設定 >>ディスプレイ設定に行き、「これらのディスプレイを拡張」を選択してください。2つの画面をドラッグして画面の位置を変更することもできます。
この記事では、DeskInリモートデスクトップソフトウェアを使用してiPadをMacおよびWindowsコンピューターの「セカンドスクリーン」にする方法を紹介します。これは、同時に複数のタスクを処理し、生産性を向上させたい方に特に有用です。MacBook、iPad、Androidタブレット、およびWindows PCで動作する画面拡張ツールを探している場合、DeskInリモートデスクトップは最適なソリューションです。DeskInをダウンロードして、ぜひお試しください!
Top 6 RustDesk Alternative Tools for Faster, Easier Remote Access
Remote access should feel like flipping a light switch, not decoding a control panel. Yet many users exploring RustDesk eventually run into friction: connection IDs, server setup, or occasional lag. While RustDesk is powerful, it’s not always the easiest or smoothest option, especially for non-technical users.
That’s why more people are actively searching for a reliable RustDesk alternative that combines performance, simplicity, and flexibility. Whether you want a plug-and-play solution or something more advanced, this guide will help you find the best fit.
RustDesk stands out as a privacy-friendly, self-hosted remote desktop tool. However, real-world usage reveals a few common challenges:
Complicated setup for the RustDesk self-hosted environments
Manual connection steps requiring IDs and passwords
Occasional latency or unstable connections
Limited user-friendly features out of the box
For many users, especially those helping family or managing multiple devices, simplicity matters just as much as control.
When evaluating a RustDesk alternative, focus on these key factors:
Ease of use: Quick setup without technical overhead
Performance: Smooth, low-latency remote sessions
Compatibility: Support for Windows, macOS, Linux, and mobile
Security: Strong encryption and access controls
Flexibility: Options ranging from cloud-based to open source
The ideal tool strikes a balance between power and convenience, something many modern solutions now deliver better than traditional setups.
Here’s a quick breakdown of the top tools and where they shine:
DeskIn – Best all-in-one RustDesk alternative for performance and ease of use
AnyDesk – Best lightweight tool for fast connections
TeamViewer – Best for enterprise-grade remote support
MeshCentral – Best open-source and self-hosted solution
DWService – Best free browser-based tool
Chrome Remote Desktop – Best simple, no-frills option
Ultra-low latency with smooth high-frame-rate streaming
No complex setup or server deployment required
Cross-platform including Rustdesk alternative for Android
Secure with encryption and device control features
Built-in file transfer and multi-device management
Smaller awareness than legacy competitors
Best for: Users who want a powerful yet simple remote desktop solution
DeskIn removes the friction that often comes with remote access tools. Instead of relying on IDs or manual configurations, it offers a streamlined connection experience that works right out of the box. This makes it especially valuable for users supporting non-technical family members or managing multiple remote devices.
Performance is where DeskIn truly distinguishes itself. Compared to RustDesk, which can sometimes struggle with latency, DeskIn delivers consistently smooth sessions with minimal lag. It also eliminates the need for self-hosting, making it a strong free RustDesk alternative option for users who want powerful features without the complexity.
For those exploring options beyond the RustDesk alternative GitHub projects, DeskIn provides a polished, ready-to-use experience that balances simplicity with professional-grade performance.
Lightweight and fast installation
Good performance on low bandwidth
Cross-platform support
Easy-to-use interface
Performance may drop during long sessions
File transfer can be inconsistent
Best for: Users needing quick and simple remote access
AnyDesk is often considered a natural step up from RustDesk for users who want something easier to deploy. It offers a lightweight application that connects quickly and performs well under normal conditions. This makes it suitable for quick troubleshooting or occasional remote access.
However, performance consistency can be an issue. Users frequently report lag or instability during extended sessions or when handling more demanding tasks. While AnyDesk is a solid option for basic needs, it may not fully satisfy users looking for a more robust, all-in-one solution.
👀 You may also be interested in: |
|---|
Enterprise-grade security with encryption and 2FA
Stable performance across global networks
Rich features like file transfer and session recording
Broad device compatibility
Expensive for commercial use
Free version has limitations
Heavier resource usage on some systems
Best for: Businesses and IT teams managing multiple endpoints
TeamViewer has long been a dominant player in the remote desktop space, offering a comprehensive suite of features designed for enterprise environments. It excels in reliability and global connectivity, making it a popular choice for IT support teams.
That said, its pricing model is a major drawback for many users. Frequent users may quickly encounter licensing restrictions, and costs can escalate for businesses. Additionally, its heavier footprint can impact performance on lower-end devices. DeskIn offers a more modern alternative by delivering similar performance and essential features without the same cost barriers. For users who want enterprise-level capabilities with better efficiency, it presents a compelling option.
👀 You may also be interested in: |
|---|
Fully RustDesk alternative open source solution
Web-based management dashboard
Supports multi-device environments
Strong customization and control
Complex setup and maintenance
Requires technical expertise
Best for: Advanced users needing a Rustdesk alternative self-hosted
MeshCentral is a powerful open-source platform designed for users who want full control over their remote access infrastructure. It supports multiple devices and provides a centralized dashboard for management, making it attractive for IT professionals.
However, this flexibility comes with complexity. Setting up and maintaining a MeshCentral server requires technical knowledge, which can be a barrier for many users. Compared to this, DeskIn offers a much simpler deployment process while still delivering strong performance and security. For users who prioritize ease of use over full control, modern solutions like DeskIn provide a more accessible alternative.
Completely free
Browser-based access
Open-source foundation
Simple setup
Limited performance
Basic feature set
Best for: Users looking for a simple, free RustDesk alternative
DWService offers a browser-based approach to remote access with no heavy installation, making it convenient for quick connections in restricted environments. It supports both desktop access and file management across major platforms.
However, performance often feels sluggish, especially on demanding tasks, and features remain basic; lacking session recording, smooth multi-monitor support, or advanced security controls. While suitable for occasional personal use, it falls short for professional or high-performance scenarios.
Free and easy to use
Browser-based setup
Cross-platform compatibility
Very limited features
No advanced management or collaboration tools
Best for: Casual users needing basic remote access
Chrome Remote Desktop is one of the simplest remote access tools available. It’s easy to set up and works across devices, making it a convenient choice for occasional use.
However, it lacks many essential features such as file transfer, session management, and advanced security controls. For users with more demanding needs, it quickly becomes insufficient. Compared to Chrome Remote Desktop, DeskIn provides a much more complete experience without sacrificing ease of use, making it a better long-term solution.
👀 You may also be interested in: |
|---|
RustDesk is powerful but can be difficult to set up and manage, especially with self-hosting. Many users prefer tools that offer similar performance without technical complexity. DeskIn simplifies remote access while maintaining strong performance and security.
Several tools qualify as a free RustDesk alternative, including DWService and Chrome Remote Desktop. However, DeskIn stands out by offering better performance and usability even in its free version.
Yes, tools like MeshCentral and DWService are considered RustDesk alternative open source options. They provide flexibility and control but often require technical expertise to set up and maintain.
Beginners should choose tools with a simple setup and intuitive interfaces. DeskIn is an excellent option because it removes the need for manual configuration while still delivering advanced features.
RustDesk is a powerful starting point, but it’s not always the easiest or most efficient tool for everyday use. From setup complexity to performance limitations, many users eventually look for a better RustDesk alternative.
Among all the options, DeskIn stands out as the most balanced solution. It combines speed, simplicity, and cross-platform support into one seamless experience. If you’re ready to move beyond technical friction and enjoy truly smooth remote access, DeskIn is a choice that simply works.
連絡先
メール: support@deskin.io
オフィスの住所:
991D Alexandra Road #02-17
シンガポール 119972
著作権 © 2026 Zuler Technology PTE. LTD. 無断複写・転載を禁じます。
お問い合わせ
Eメール: support@deskin.io
本社: 991D Alexandra Road #02-17, シンガポール 119972
著作権 © 2026 Zuler Technology PTE. LTD. 無断複写・転載を禁じます。
連絡先
support@deskin.io
991D Alexandra Road #02-17
シンガポール 119972
著作権 © 2026 Zuler Technology PTE. LTD. 無断複写・転載を禁じます。

