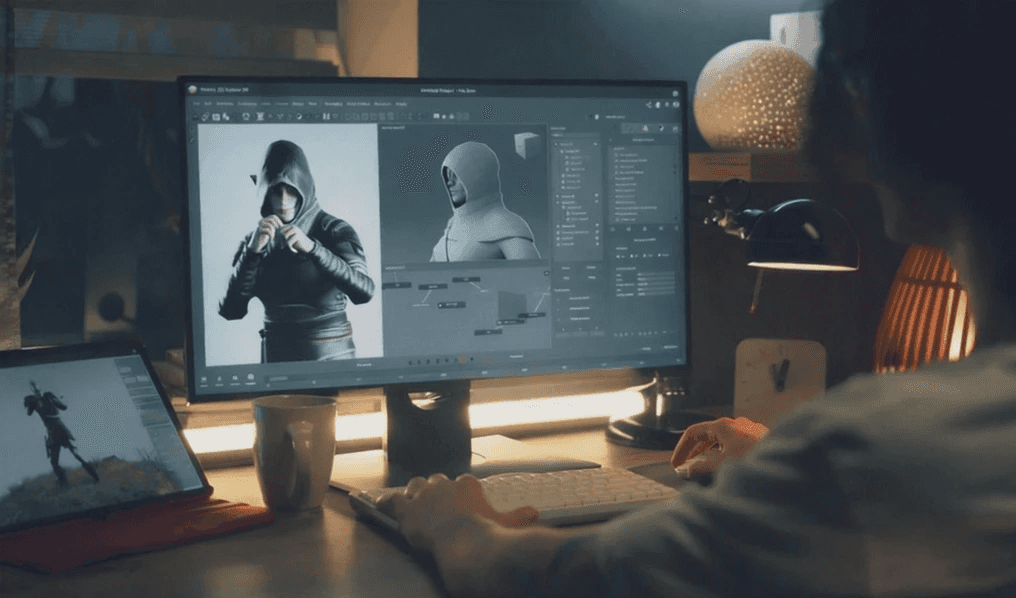
With the rise of remote work and content creation, the need to share one screen between two computers has become increasingly common. Whether you’re setting up a dual-monitor workstation, connecting your laptop to a desktop, or want a flexible screen-sharing setup, there are easy ways to make it happen.
When rendering or running simulations on one PC, you can easily switch to another for gaming or chatting—no more constant plugging and unplugging cables.
This guide introduces four of the most practical solutions: the DeskIn remote desktop software, KVM switch, Microsoft Quick Assist, and Windows Miracast wireless projection. Whether you’re connecting Windows-to-Windows, setting up Mac-to-Windows remote access, or creating a stable extended monitor setup, you’ll find the best method here.
Why Share Screen With Another Computers?
In the era of hybrid work and creative workflows, sharing one screen between two computers is a practical need for many professionals. For example, while rendering videos, 3D modeling, or coding, one computer can handle processing while the other is used for meetings, research, or entertainment. This setup saves desk space and enhances multitasking efficiency.
Main Benefits
Extend your laptop screen: External monitor displays and operates in sync.
Flexible dual-screen setup: Easily switch or divide display tasks.
Show two windows simultaneously: Perfect for comparison or multitasking.
Different wallpapers for each screen: Maintain independent environments.
Quick and convenient: No cables or compatibility worries.
Unlike “one computer with two monitors,” this setup allows two separate systems to share one display, switching seamlessly through software or hardware for a smoother, more flexible workflow.
Method 1: Use DeskIn Remote Desktop Software — The Easiest Way to Share Screen With Another Computer

If you want to switch or share screens between different computers without buying extra hardware, DeskIn is the most intuitive and versatile choice. Designed for remote access and cross-device screen sharing, it lets you easily connect your laptop and desktop—even when they’re not on the same network.
Ideal For
Remote work, team collaboration, and cross-device control (laptop + desktop)
Users who want to save hardware costs (no KVM switch needed)
Those who need to access another device from a different location or network
Key Advantages
High-quality, low-latency performance: Supports up to 4K resolution with latency <40ms for clear and precise visuals.
Real-time responsiveness: Smooth cursor and click response—perfect for design review, teaching, or code inspection.
Built-in collaboration tools: Includes voice chat and whiteboard annotation for live teaching or team discussions.
Cross-platform compatibility: Works seamlessly across Windows, Mac, and mobile devices for multi-device synchronization.
Multi-display mirroring: Mirror one computer to multiple screens—ideal for presentations or remote meetings.
Free and beginner-friendly: Easy setup with a modern, intuitive interface.
💡 Note: You’ll need to install DeskIn on both devices first—but setup only takes a few minutes.
If you’d like to explore similar tools, check out:
DeskIn Setup Tutorial | How to Share Screen With Another Computer
Follow these simple steps to use DeskIn for screen sharing or extending your laptop display:
1. Download and Sign In
Go to the DeskIn website and install the app on both computers. Log in with the same account to enable remote connection and screen sharing.


2. Choose Mirroring or Extension Mode
Click “Mirror/Extend Screen” from the sidebar. Then select “Start Mirroring” or “Start Extending” to share one screen between two computers.

3. Start Sharing or End Connection
Once connected, you can transfer files, chat via voice, and share screens instantly. When done, click “Exit Remote Control” to secure your privacy.

More recommended reads:
Method 2: Use a KVM Switch — A Hardware Solution to Share One Monitor Between Two PCs

If you want both PCs to share one monitor and use the same keyboard and mouse, consider a KVM (Keyboard Video Mouse) switch. This hardware device connects two computers via HDMI or USB, allowing you to switch displays instantly—no need to unplug cables or sign in/out of accounts.
Ideal For
Users who want to control two PCs using one monitor, keyboard, and mouse
Those switching frequently between work and gaming PCs
Users who prefer a stable, zero-latency hardware setup
Pros
Simple plug-and-play setup
Near-zero latency, ideal for gaming and media use
No software installation required
Cons
Requires separate hardware purchase
Some models have limited support for 4K / 144Hz monitors
If your laptop supports HDMI input, it can directly switch between dual-display modes. However, most laptops only support output, not input. To bypass this limitation, use DeskIn for software-based multi-PC control—no cables needed.
See also:
KVM Setup Guide | Quickly Switch Between Two Computers Sharing One Screen
To set up a KVM switch:
Connect Devices
Plug the monitor, keyboard, and mouse into the KVM switch.
Connect each PC to the KVM using HDMI/USB cables.

Switch Between Computers
Panel Button: Press the physical button on the switch to toggle between computers.
Keyboard Shortcut: Double-tap Scroll Lock + number key to switch inputs.
OSD Menu: Some models provide an on-screen menu for switching.
Mouse Gesture Switching: Advanced models allow mouse-based switching.
This setup enables quick, cable-free switching between systems for efficient multi-PC workflows.
Method 3: Use Microsoft Quick Assist to Share Screens Between Two Windows Computers

Microsoft Quick Assist is a built-in Windows remote control tool that lets two computers share screens securely—no third-party software needed. Both users simply open Quick Assist and connect using a temporary security code.
This is especially useful for Windows-to-Windows setups—ideal for remote teaching, IT support, or quick collaboration.
Pros
Completely free: Pre-installed on Windows.
Secure connections: Uses one-time verification codes.
Simple interface: Intuitive and beginner-friendly.
Supports mouse/keyboard control: Great for guidance or troubleshooting.
Cons
Windows-only: No Mac or Linux support.
Dependent on internet speed: May lag on slow networks.
If you’re on Mac, try DeskIn for multi-platform screen sharing without compatibility issues. See also: How to Use Microsoft Remote Desktop on Mac [Full Guide]
Quick Assist Setup Guide | Share or Extend Laptop Screens on Windows
To share screens between two Windows laptops using Quick Assist:
Launch the App
Press Win + S, search for “Quick Assist,” and open it.Select Assistance Mode
On the main (control) PC, click “Assist another person.”Sign In
Log in with your Microsoft account to generate a security code.Enter Security Code
On the other laptop, enter the code under “Get assistance” and submit.
Note: Security code expires in 10 minutes.Allow Screen Sharing
Click “Allow” on the receiving PC.Start Remote Control
Choose between “View screen” or “Take full control.”
During control, use the toolbar to restart, open Task Manager, or send messages. When finished, simply end the session. A new code is needed for the next connection.
Method 4: Use Windows Miracast Wireless Display

If you want to extend or mirror screens wirelessly between two laptops without HDMI cables, Windows Miracast is a convenient built-in solution. It allows wireless projection and display sharing over the same Wi-Fi network.
Ideal Use Cases
Create a wireless dual-monitor setup
Project one laptop to another for meetings or demos
Quickly share visuals during presentations
Pros
No software installation required
Supports “Duplicate” or “Extend” display modes
Fast and stable connection
Check compatibility first: press Win + P. If you see “Connect to a wireless display,” your device supports Miracast.
Cons
Both devices must support Miracast
Quality and latency depend on Wi-Fi stability
If your devices are on different platforms (e.g., Mac + Windows), use DeskIn for smoother cross-system sharing.
Miracast Setup Guide | Extend Laptop Display or Share Screens Wirelessly
Open the Connection Panel
Click the Notification Center icon or press Win + K to open “Connect.”
Find Available Devices
Select your target device from the list of nearby Miracast-enabled PCs.
Enable Input Control
Check “Allow input from a connected device” to enable keyboard and mouse control.
Once connected, your two laptops can display mirrored or extended screens wirelessly—ideal for mobile and clutter-free dual-screen setups.
FAQ | Troubleshooting and Common Questions
How to Set Up a Wireless Dual-Screen with Two Windows 11 Laptops?
Use Miracast or DeskIn to connect wirelessly. You can extend your display without cables—perfect for multitasking or remote collaboration.
How to Synchronize Two Computers?
In display settings, choose Extend or Duplicate mode. Adjust the monitor arrangement and resolution for smooth dual-display performance.
Why Can’t My Mouse Move Across Screens?
Check your display alignment under Settings → System → Display. Adjust screen order to match the physical layout.
What’s the Shortcut for Switching Displays?
Press Windows + P to open the projection menu. Choose among “Duplicate,” “Extend,” or “Second screen only.”
Conclusion: Which Method Is Best for Sharing One Screen Between Two Computers?
Here’s a quick summary of all four methods:
DeskIn: The most flexible and complete option—cross-network, multi-device, with screen extension and collaboration tools.
KVM Switch: Ideal for gamers or professionals who prefer hardware-based, zero-latency control.
Microsoft Quick Assist: Great free tool for Windows-only setups.
Miracast: Best for wireless, cable-free environments.
Overall, DeskIn stands out as the most comprehensive and user-friendly solution, offering excellent performance, cross-platform support, and remote access convenience—all in one tool.
👉 Download DeskIn now and start sharing screens between two computers effortlessly.

With the rise of remote work and content creation, the need to share one screen between two computers has become increasingly common. Whether you’re setting up a dual-monitor workstation, connecting your laptop to a desktop, or want a flexible screen-sharing setup, there are easy ways to make it happen.
When rendering or running simulations on one PC, you can easily switch to another for gaming or chatting—no more constant plugging and unplugging cables.
This guide introduces four of the most practical solutions: the DeskIn remote desktop software, KVM switch, Microsoft Quick Assist, and Windows Miracast wireless projection. Whether you’re connecting Windows-to-Windows, setting up Mac-to-Windows remote access, or creating a stable extended monitor setup, you’ll find the best method here.
Why Share Screen With Another Computers?
In the era of hybrid work and creative workflows, sharing one screen between two computers is a practical need for many professionals. For example, while rendering videos, 3D modeling, or coding, one computer can handle processing while the other is used for meetings, research, or entertainment. This setup saves desk space and enhances multitasking efficiency.
Main Benefits
Extend your laptop screen: External monitor displays and operates in sync.
Flexible dual-screen setup: Easily switch or divide display tasks.
Show two windows simultaneously: Perfect for comparison or multitasking.
Different wallpapers for each screen: Maintain independent environments.
Quick and convenient: No cables or compatibility worries.
Unlike “one computer with two monitors,” this setup allows two separate systems to share one display, switching seamlessly through software or hardware for a smoother, more flexible workflow.
Method 1: Use DeskIn Remote Desktop Software — The Easiest Way to Share Screen With Another Computer

If you want to switch or share screens between different computers without buying extra hardware, DeskIn is the most intuitive and versatile choice. Designed for remote access and cross-device screen sharing, it lets you easily connect your laptop and desktop—even when they’re not on the same network.
Ideal For
Remote work, team collaboration, and cross-device control (laptop + desktop)
Users who want to save hardware costs (no KVM switch needed)
Those who need to access another device from a different location or network
Key Advantages
High-quality, low-latency performance: Supports up to 4K resolution with latency <40ms for clear and precise visuals.
Real-time responsiveness: Smooth cursor and click response—perfect for design review, teaching, or code inspection.
Built-in collaboration tools: Includes voice chat and whiteboard annotation for live teaching or team discussions.
Cross-platform compatibility: Works seamlessly across Windows, Mac, and mobile devices for multi-device synchronization.
Multi-display mirroring: Mirror one computer to multiple screens—ideal for presentations or remote meetings.
Free and beginner-friendly: Easy setup with a modern, intuitive interface.
💡 Note: You’ll need to install DeskIn on both devices first—but setup only takes a few minutes.
If you’d like to explore similar tools, check out:
DeskIn Setup Tutorial | How to Share Screen With Another Computer
Follow these simple steps to use DeskIn for screen sharing or extending your laptop display:
1. Download and Sign In
Go to the DeskIn website and install the app on both computers. Log in with the same account to enable remote connection and screen sharing.


2. Choose Mirroring or Extension Mode
Click “Mirror/Extend Screen” from the sidebar. Then select “Start Mirroring” or “Start Extending” to share one screen between two computers.

3. Start Sharing or End Connection
Once connected, you can transfer files, chat via voice, and share screens instantly. When done, click “Exit Remote Control” to secure your privacy.

More recommended reads:
Method 2: Use a KVM Switch — A Hardware Solution to Share One Monitor Between Two PCs

If you want both PCs to share one monitor and use the same keyboard and mouse, consider a KVM (Keyboard Video Mouse) switch. This hardware device connects two computers via HDMI or USB, allowing you to switch displays instantly—no need to unplug cables or sign in/out of accounts.
Ideal For
Users who want to control two PCs using one monitor, keyboard, and mouse
Those switching frequently between work and gaming PCs
Users who prefer a stable, zero-latency hardware setup
Pros
Simple plug-and-play setup
Near-zero latency, ideal for gaming and media use
No software installation required
Cons
Requires separate hardware purchase
Some models have limited support for 4K / 144Hz monitors
If your laptop supports HDMI input, it can directly switch between dual-display modes. However, most laptops only support output, not input. To bypass this limitation, use DeskIn for software-based multi-PC control—no cables needed.
See also:
KVM Setup Guide | Quickly Switch Between Two Computers Sharing One Screen
To set up a KVM switch:
Connect Devices
Plug the monitor, keyboard, and mouse into the KVM switch.
Connect each PC to the KVM using HDMI/USB cables.

Switch Between Computers
Panel Button: Press the physical button on the switch to toggle between computers.
Keyboard Shortcut: Double-tap Scroll Lock + number key to switch inputs.
OSD Menu: Some models provide an on-screen menu for switching.
Mouse Gesture Switching: Advanced models allow mouse-based switching.
This setup enables quick, cable-free switching between systems for efficient multi-PC workflows.
Method 3: Use Microsoft Quick Assist to Share Screens Between Two Windows Computers

Microsoft Quick Assist is a built-in Windows remote control tool that lets two computers share screens securely—no third-party software needed. Both users simply open Quick Assist and connect using a temporary security code.
This is especially useful for Windows-to-Windows setups—ideal for remote teaching, IT support, or quick collaboration.
Pros
Completely free: Pre-installed on Windows.
Secure connections: Uses one-time verification codes.
Simple interface: Intuitive and beginner-friendly.
Supports mouse/keyboard control: Great for guidance or troubleshooting.
Cons
Windows-only: No Mac or Linux support.
Dependent on internet speed: May lag on slow networks.
If you’re on Mac, try DeskIn for multi-platform screen sharing without compatibility issues. See also: How to Use Microsoft Remote Desktop on Mac [Full Guide]
Quick Assist Setup Guide | Share or Extend Laptop Screens on Windows
To share screens between two Windows laptops using Quick Assist:
Launch the App
Press Win + S, search for “Quick Assist,” and open it.Select Assistance Mode
On the main (control) PC, click “Assist another person.”Sign In
Log in with your Microsoft account to generate a security code.Enter Security Code
On the other laptop, enter the code under “Get assistance” and submit.
Note: Security code expires in 10 minutes.Allow Screen Sharing
Click “Allow” on the receiving PC.Start Remote Control
Choose between “View screen” or “Take full control.”
During control, use the toolbar to restart, open Task Manager, or send messages. When finished, simply end the session. A new code is needed for the next connection.
Method 4: Use Windows Miracast Wireless Display

If you want to extend or mirror screens wirelessly between two laptops without HDMI cables, Windows Miracast is a convenient built-in solution. It allows wireless projection and display sharing over the same Wi-Fi network.
Ideal Use Cases
Create a wireless dual-monitor setup
Project one laptop to another for meetings or demos
Quickly share visuals during presentations
Pros
No software installation required
Supports “Duplicate” or “Extend” display modes
Fast and stable connection
Check compatibility first: press Win + P. If you see “Connect to a wireless display,” your device supports Miracast.
Cons
Both devices must support Miracast
Quality and latency depend on Wi-Fi stability
If your devices are on different platforms (e.g., Mac + Windows), use DeskIn for smoother cross-system sharing.
Miracast Setup Guide | Extend Laptop Display or Share Screens Wirelessly
Open the Connection Panel
Click the Notification Center icon or press Win + K to open “Connect.”
Find Available Devices
Select your target device from the list of nearby Miracast-enabled PCs.
Enable Input Control
Check “Allow input from a connected device” to enable keyboard and mouse control.
Once connected, your two laptops can display mirrored or extended screens wirelessly—ideal for mobile and clutter-free dual-screen setups.
FAQ | Troubleshooting and Common Questions
How to Set Up a Wireless Dual-Screen with Two Windows 11 Laptops?
Use Miracast or DeskIn to connect wirelessly. You can extend your display without cables—perfect for multitasking or remote collaboration.
How to Synchronize Two Computers?
In display settings, choose Extend or Duplicate mode. Adjust the monitor arrangement and resolution for smooth dual-display performance.
Why Can’t My Mouse Move Across Screens?
Check your display alignment under Settings → System → Display. Adjust screen order to match the physical layout.
What’s the Shortcut for Switching Displays?
Press Windows + P to open the projection menu. Choose among “Duplicate,” “Extend,” or “Second screen only.”
Conclusion: Which Method Is Best for Sharing One Screen Between Two Computers?
Here’s a quick summary of all four methods:
DeskIn: The most flexible and complete option—cross-network, multi-device, with screen extension and collaboration tools.
KVM Switch: Ideal for gamers or professionals who prefer hardware-based, zero-latency control.
Microsoft Quick Assist: Great free tool for Windows-only setups.
Miracast: Best for wireless, cable-free environments.
Overall, DeskIn stands out as the most comprehensive and user-friendly solution, offering excellent performance, cross-platform support, and remote access convenience—all in one tool.
👉 Download DeskIn now and start sharing screens between two computers effortlessly.


