Pagsusuri ng mga problema
Pagsusuri ng mga problema
/
10 minuto
/
10 minuto
W. Ting
Na-update
Na-update
Na-update
Magagamit mo ba ang Microsoft Remote Desktop upang kumonekta sa iyong MacBook o iMac? Ang sagot ay mas kumplikado kaysa sa simpleng oo o hindi. Habang ang remote desktop solution ng Microsoft (na na-update at pinalitan ang pangalan bilang Windows App) ay hindi sumusuporta sa remote control ng Mac mula sa ibang device, pinapayagan nito na kontrolin ang isang Windows PC mula sa iyong Mac, at iyon ang sinusubukan ng karamihan sa inyo na gawin.
Kahit na nagtatrabaho ka mula sa bahay, sumusuporta sa isang remote client, o simpleng sinusubukang mag-log in sa iyong office PC mula sa isang MacBook, ang remote desktop tool ng Microsoft ay nananatiling isa sa pinakastable at secure na mga opsyon. Sa gabay na ito, ipapakita namin sa iyo kung paano gamitin ang Microsoft Remote Desktop sa isang Mac, tutulungan kang matukoy kung ito ang tamang solusyon para sa iyong mga pangangailangan sa remote access, at ipakilala ang isang mahusay na alternatibo, DeskIn, kung naghahanap ka ng higit na flexibility o mga tampok. Maaari mong gamitin ang DeskIn upang malayuang kontrolin ang isang Mac sa loob ng mas mababa sa 3 minuto.
👀 Tandaan: Kung interesado ka sa paglipat mula sa Microsoft Remote Desktop patungo sa Windows app, basahin ang mga sumusunod na artikulo para sa karagdagang impormasyon.
Microsoft Remote Desktop connection para sa Mac ng bagong Windows App, na sumusuporta sa mga serbisyo tulad ng Windows 365, Azure Virtual Desktop, at RemoteApp. Kung ginagamit mo pa rin ang mas lumang bersyon, inirerekomenda na mag-upgrade para sa patuloy na suporta at pinabuting mga tampok upang kontrolin ang iyong Windows PC mula sa iyong Mac nang madali.
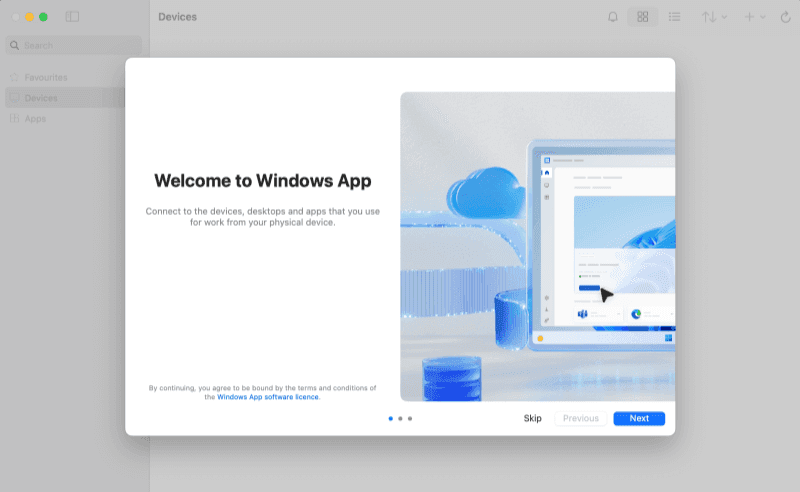
Kasalukuyan, maaari mo lamang i-download ang Windows App sa pamamagitan ng Mac App Store. Sa kasamaang palad, walang offline installer, ni maaari mong direktang i-download ang app sa pamamagitan ng isang browser. Narito kung paano madaling i-download at itakda ang Windows App ng Microsoft para sa macOS mula sa App Store:
Buksan ang Mac App Store.
Sa search bar, i-type ang "Microsoft Remote Desktop" o "Windows App".
I-click ang tamang listing at i-download ang pinakabagong bersyon ng app.
Sa sandaling ma-download at ma-install ang app, buksan ito mula sa iyong Applications folder upang simulan ang proseso ng setup.
Sa iyong Windows PC, pumunta sa "System Settings > Remote Desktop".
I-toggle ang opsyon upang payagan ang remote connections.
Siguraduhin na ang PC ay nananatiling naka-on at nakakonekta sa internet.
Dapat manatiling accessible ang iyong Windows PC para sa mga remote sessions, kaya kumpirmahin na hindi ito nakatakdang awtomatikong matulog o patayin.
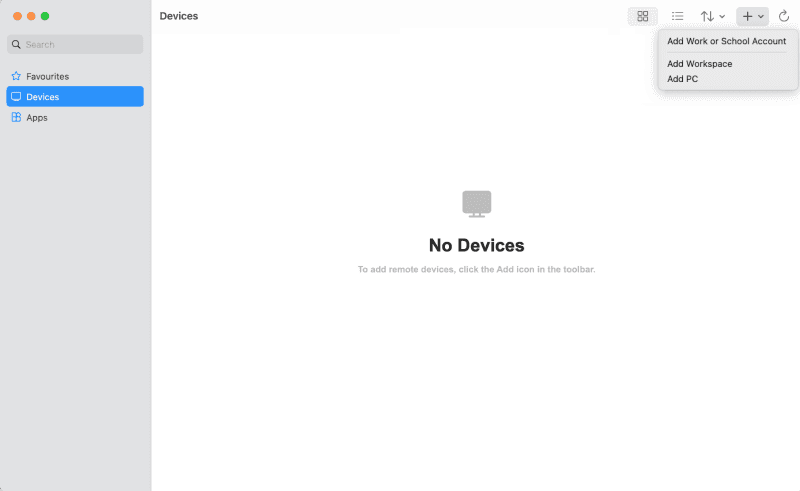
Sa iyong Mac, buksan ang Windows App (Microsoft Remote Desktop).
I-click ang "+ Idagdag PC" na button.
I-enter ang pangalan ng PC (pangalan ng device) o IP address ng Windows PC na nais mong kumonekta. Matatagpuan mo ang impormasyong ito sa Windows PC sa pamamagitan ng pagpunta sa "Settings > System > About" o sa pamamagitan ng pagtakbo ng "ipconfig" sa "Command Prompt".
I-enter ang "Windows account credentials" (username at password) na ginamit sa target PC.
Masyadong kumplikado ba ang mga hakbang? Marahil ay dapat mong subukan ang DeskIn—walang kumplikadong setup, at i-click lamang ang download button dito upang makapagsimula!

Bago kumonekta, maaari mong i-configure ang iba't ibang mga setting upang mapabuti ang karanasan:
Mga setting ng display: Ayusin ang resolution upang tumugma sa iyong sukat ng screen.
Audio redirection: Magpasya kung nais mong marinig ang tunog mula sa iyong Windows PC sa pamamagitan ng iyong Mac.
Clipboard sharing: I-enable ang copy/paste sa pagitan ng iyong Mac at Windows PC.
Local resources: I-share ang mga local folder at printer, kung kinakailangan.
Tiyaking i-tune ang mga preference na ito batay sa iyong bilis ng koneksyon at tiyak na gamit (mga gawain sa trabaho, gaming, remote support, atbp.). Ang pag-optimize sa mga setting na ito ay maaaring makagawa ng makabuluhang pagkakaiba sa kalidad ng iyong remote session.
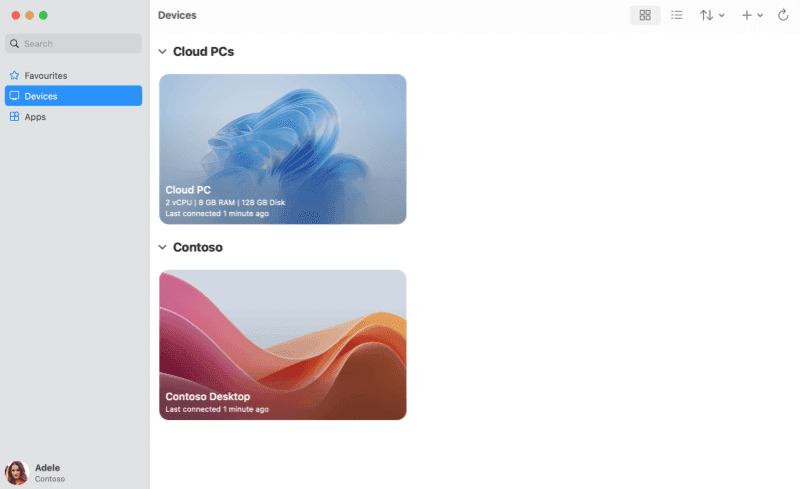
Kapag na-configure mo na ang lahat ng iyong preferences, i-click ang "Kumonekta" na button. Pagkatapos ng isang maikling loading period, lilitaw ang buong Windows desktop environment sa iyong Mac, na nagbibigay sa iyo ng buong kontrol na parang ikaw ay nakaupo mismo sa harap ng PC. Ngayon, maaari mong gamitin ang iyong Windows PC nang malayuan mula sa iyong Mac nang tuluy-tuloy!
Kapag gumagamit ng Microsoft Remote Desktop upang kontrolin ang iyong Mac mula sa Windows o kabaligtaran, ang pag-optimize ng parehong setup at kalidad ng koneksyon ay maaaring makabuluhang mapabuti ang iyong karanasan sa remote access. Narito ang ilang mga tip upang matiyak ang isang maayos at tuluy-tuloy na sesyon.
Panatilihing Naka-On ang Iyong Windows PC o I-enable ang Wake-on-LAN. Tiyaking ang iyong Windows PC ay nananatiling naka-on o nag-enable ng Wake-on-LAN. Ang feature na ito ay nagbibigay-daan sa iyong PC na ma-remotely awakened mula sa sleep o hibernation. Kung wala ito, hindi ka makakabuo ng koneksyon kung naka-off ang PC.
Pag-optimize ng Iyong Koneksyon sa Network Para sa pinakamahusay na karanasan.
Wired Ethernet: Nagbibigay ng pinaka-stable at pinakamabilis na koneksyon, pinabababa ang latency.
5GHz Wi-Fi: Nag-aalok ng mas mabilis na speed at mas kaunting interference kumpara sa 2.4GHz, pinapabuti ang pangkalahatang performance.
Gamitin ang Parehong Network (Kung Possible) Para sa mas mahusay na bilis at responsibilidad, tiyaking ang iyong Windows PC at Mac ay nakakonekta sa parehong local network (Wi-Fi o Ethernet).
Gamitin ang Maramihang Monitor. Kung mayroon kang maraming display, maaaring palawakin ng Microsoft Remote Desktop ang iyong desktop. Ang feature na ito ay kapaki-pakinabang para sa multitasking, kaya i-configure ang iyong mga setting ng display nang naaayon.
💥 Microsoft Remote Desktop – Mahalagang Mga Kahinaan:
Kailangan ng Windows Pro: Hindi sinusuportahan sa mga edisyon ng Windows Home.
Kumplikadong setup para sa remote access: Kinakailangan ang port forwarding o VPN para sa mga panlabas na koneksyon.
Isang user session lamang: Hindi sinusuportahan ang maraming sabay-sabay na user.
Mga isyu sa performance sa mahihinang network: laggy sa mababang bandwidth o mataas na latency.
Limitadong mobile experience: Ang mga mobile app ay basic at hindi touch-optimized.
Habang ang Microsoft Remote Desktop ay nagbibigay ng mahusay na mga kakayahan para sa remote access, maaaring hindi ito palaging matugunan ang mga pangangailangan ng bawat user, lalo na kung naghahanap ka ng mas magaan, versatile, o nakaangkop sa mga kapaligiran ng negosyo. Kung naghahanap ka ng alternatibo para sa remote desktop control, DeskIn ay namumukod-tangi bilang isa sa pinakamahusay na mga opsyon na available.
Ang DeskIn ay isang makapangyarihang, user-friendly na remote control tool na dinisenyo para sa parehong personal at pang-negosyo na paggamit. Sinusuportahan nito ang Mac, Windows, iOS, at Android na mga device, na ginagawang isang versatile solution para sa anumang platform. Sa DeskIn, madali mong ma-access ang iyong Windows PC mula sa iyong Mac, o kontrolin ang iba pang mga device, tulad ng mga mobile phone at tablet. Kaya ito ay itinuturing na ang pinakamahusay na remote access software.
👍 Mahahalagang Tampok ng DeskIn:
Cross-Platform Support: Kumonekta mula sa Mac patungong Windows, o kahit sa pagitan ng Android at iOS na mga device.
High-Performance Remote Control: Perpekto para sa mga pangangailangan ng negosyo, nag-aalok ng makinis, responsive na koneksyon.
File Transfer & Collaboration: Walang hirap na maglipat ng mga file at makipagtulungan sa iyong team.
Low Latency & High Security: Tinitiyak ang mabilis, encrypted na mga koneksyon para sa ligtas na remote work.
Magaan & Madaling Gamitin: Mabilis na setup, perpekto para sa mga casual at business users.
Ngayon, suriin natin kung paano gamitin ang DeskIn upang malayuang kontrolin ang iyong Windows PC mula sa iyong MacBook o iMac.
Hakbang 1. Bisitahin ang website ng DeskIn o ang iyong app store upang i-download ang app. I-install ito sa parehong iyong Mac at Windows PC (o anumang iba pang device na nais mong kontrolin). I-click dito upang i-download.
Hakbang 2. Buksan ang DeskIn sa parehong mga device. Mag-sign up para sa isang DeskIn account kung wala ka pa nito, o mag-log in kung mayroon ka nang account.

Hakbang 3. Sa iyong Mac, i-click ang "Add Device" at ilagay ang ID o mga detalye ng Windows PC (o iba pang device) na nais mong kontrolin. Tanggapin ang kahilingan sa koneksyon sa target device upang mag-establish ng secure na koneksyon.
Hakbang 4. Kapag nakakonekta na, makikita mo ang screen ng iyong Windows PC sa iyong Mac. Maaari mo nang kontrolin ang PC nang malayuan, maglipat ng mga file, at makipagtulungan na parang nakaupo ka mismo sa harap nito.
Simulan sa free version — gumagana ang DeskIn agad-agad para sa karamihan ng mga gamit sa bahay at trabaho! I-click dito upang i-download.
Oo. Sinusuportahan ng Windows App (dating Microsoft Remote Desktop) para sa Mac ang maraming monitor kapag kumokonekta sa isang Windows PC. Maaari mong i-enable ang feature na ito sa pamamagitan ng pagpunta sa display settings ng iyong PC sa app at pagpili ng opsyon na "Gamitin ang lahat ng monitor." Ito ay partikular na kapaki-pakinabang para sa multitasking o pinalawak na mga workspace setups.
Oo, ngunit may mga limitasyon. Habang hindi sinusuportahan ng Microsoft Remote Desktop ang direktang drag-and-drop file transfers sa pagitan ng Mac at Windows, maaari mong i-share ang mga local folder ng Mac sa remote Windows session. Simple lang i-configure ang folder redirection sa settings ng koneksyon ng PC sa ilalim ng "Folders" tab bago kumonekta.
Kung masyado itong limitado o mabagal, DeskIn ay nagbibigay-daan sa mataas na bilis na paglipat ng file gamit ang buong drag-and-drop — walang folder mapping o advanced configuration na kinakailangan.
Gumagana ito sa parehong paraan. Maaari mong ma-access ang iyong Windows PC mula sa iyong Mac sa pamamagitan ng internet hangga't ang PC ay nakatakdang maayos, may pampublikong IP address o VPN access, at naka-enable ang Remote Desktop. Para sa pinakamahusay na performance, tiyaking ang parehong device ay may matatag na koneksyon sa internet.
Hindi. Sa kasalukuyan, hindi sinusuportahan ng Microsoft Remote Desktop ang remote control ng isang Mac mula sa isang Windows PC. Pinapayagan lamang nito na kontrolin ang isang Windows PC mula sa isang Mac. Kung kailangan mong malayuang kontrolin ang isang Mac mula sa Windows, kakailanganin mong gumamit ng third-party na solusyon tulad ng DeskIn.
Ang pagkonekta ng iyong Mac sa Microsoft Remote Desktop ay isang maaasahang paraan upang ma-access ang iyong Windows PC nang malayuan, na mainam para sa personal na paggamit o pagtatrabaho sa iba't ibang platform. Sa kabila ng ilang mga hakbang sa setup, pag-download ng Windows App mula sa Mac App Store, pag-enable sa Remote Desktop sa iyong Windows PC, at pag-configure ng iyong koneksyon, maaari mong tamasahin ang buong kontrol ng iyong Windows desktop mula sa macOS.
Para sa simple, araw-araw na gamit, nag-aalok ang Microsoft Remote Desktop ng isang solid at secure na solusyon. Ngunit kung naghahanap ka ng mas mabilis, mas magaan na karanasan o kailangan ng mga propesyonal na tampok tulad ng paglipat ng mga file at mga tool para sa pakikipagtulungan, DeskIn ay isang makapangyarihang alternatibo na dapat isaalang-alang. Piliin ang tool na pinaka-akma sa iyong mga pangangailangan sa remote access, at simulan ang pagkonekta ngayon. Ito ay lalong kapaki-pakinabang kung ikaw ay may kinalaman sa mga cross-platform workflows, kailangan ng real-time collaboration, o nais na iwasan ang kumplikadong setup ng RDP/VPN. Subukan ito ngayon — mabilis, libre, at secure!
Magagamit mo ba ang Microsoft Remote Desktop upang kumonekta sa iyong MacBook o iMac? Ang sagot ay mas kumplikado kaysa sa simpleng oo o hindi. Habang ang remote desktop solution ng Microsoft (na na-update at pinalitan ang pangalan bilang Windows App) ay hindi sumusuporta sa remote control ng Mac mula sa ibang device, pinapayagan nito na kontrolin ang isang Windows PC mula sa iyong Mac, at iyon ang sinusubukan ng karamihan sa inyo na gawin.
Kahit na nagtatrabaho ka mula sa bahay, sumusuporta sa isang remote client, o simpleng sinusubukang mag-log in sa iyong office PC mula sa isang MacBook, ang remote desktop tool ng Microsoft ay nananatiling isa sa pinakastable at secure na mga opsyon. Sa gabay na ito, ipapakita namin sa iyo kung paano gamitin ang Microsoft Remote Desktop sa isang Mac, tutulungan kang matukoy kung ito ang tamang solusyon para sa iyong mga pangangailangan sa remote access, at ipakilala ang isang mahusay na alternatibo, DeskIn, kung naghahanap ka ng higit na flexibility o mga tampok. Maaari mong gamitin ang DeskIn upang malayuang kontrolin ang isang Mac sa loob ng mas mababa sa 3 minuto.
👀 Tandaan: Kung interesado ka sa paglipat mula sa Microsoft Remote Desktop patungo sa Windows app, basahin ang mga sumusunod na artikulo para sa karagdagang impormasyon.
Microsoft Remote Desktop connection para sa Mac ng bagong Windows App, na sumusuporta sa mga serbisyo tulad ng Windows 365, Azure Virtual Desktop, at RemoteApp. Kung ginagamit mo pa rin ang mas lumang bersyon, inirerekomenda na mag-upgrade para sa patuloy na suporta at pinabuting mga tampok upang kontrolin ang iyong Windows PC mula sa iyong Mac nang madali.
Kasalukuyan, maaari mo lamang i-download ang Windows App sa pamamagitan ng Mac App Store. Sa kasamaang palad, walang offline installer, ni maaari mong direktang i-download ang app sa pamamagitan ng isang browser. Narito kung paano madaling i-download at itakda ang Windows App ng Microsoft para sa macOS mula sa App Store:
Buksan ang Mac App Store.
Sa search bar, i-type ang "Microsoft Remote Desktop" o "Windows App".
I-click ang tamang listing at i-download ang pinakabagong bersyon ng app.
Sa sandaling ma-download at ma-install ang app, buksan ito mula sa iyong Applications folder upang simulan ang proseso ng setup.
Sa iyong Windows PC, pumunta sa "System Settings > Remote Desktop".
I-toggle ang opsyon upang payagan ang remote connections.
Siguraduhin na ang PC ay nananatiling naka-on at nakakonekta sa internet.
Dapat manatiling accessible ang iyong Windows PC para sa mga remote sessions, kaya kumpirmahin na hindi ito nakatakdang awtomatikong matulog o patayin.
Sa iyong Mac, buksan ang Windows App (Microsoft Remote Desktop).
I-click ang "+ Idagdag PC" na button.
I-enter ang pangalan ng PC (pangalan ng device) o IP address ng Windows PC na nais mong kumonekta. Matatagpuan mo ang impormasyong ito sa Windows PC sa pamamagitan ng pagpunta sa "Settings > System > About" o sa pamamagitan ng pagtakbo ng "ipconfig" sa "Command Prompt".
I-enter ang "Windows account credentials" (username at password) na ginamit sa target PC.
Masyadong kumplikado ba ang mga hakbang? Marahil ay dapat mong subukan ang DeskIn—walang kumplikadong setup, at i-click lamang ang download button dito upang makapagsimula!
Bago kumonekta, maaari mong i-configure ang iba't ibang mga setting upang mapabuti ang karanasan:
Mga setting ng display: Ayusin ang resolution upang tumugma sa iyong sukat ng screen.
Audio redirection: Magpasya kung nais mong marinig ang tunog mula sa iyong Windows PC sa pamamagitan ng iyong Mac.
Clipboard sharing: I-enable ang copy/paste sa pagitan ng iyong Mac at Windows PC.
Local resources: I-share ang mga local folder at printer, kung kinakailangan.
Tiyaking i-tune ang mga preference na ito batay sa iyong bilis ng koneksyon at tiyak na gamit (mga gawain sa trabaho, gaming, remote support, atbp.). Ang pag-optimize sa mga setting na ito ay maaaring makagawa ng makabuluhang pagkakaiba sa kalidad ng iyong remote session.
Kapag na-configure mo na ang lahat ng iyong preferences, i-click ang "Kumonekta" na button. Pagkatapos ng isang maikling loading period, lilitaw ang buong Windows desktop environment sa iyong Mac, na nagbibigay sa iyo ng buong kontrol na parang ikaw ay nakaupo mismo sa harap ng PC. Ngayon, maaari mong gamitin ang iyong Windows PC nang malayuan mula sa iyong Mac nang tuluy-tuloy!
Kapag gumagamit ng Microsoft Remote Desktop upang kontrolin ang iyong Mac mula sa Windows o kabaligtaran, ang pag-optimize ng parehong setup at kalidad ng koneksyon ay maaaring makabuluhang mapabuti ang iyong karanasan sa remote access. Narito ang ilang mga tip upang matiyak ang isang maayos at tuluy-tuloy na sesyon.
Panatilihing Naka-On ang Iyong Windows PC o I-enable ang Wake-on-LAN. Tiyaking ang iyong Windows PC ay nananatiling naka-on o nag-enable ng Wake-on-LAN. Ang feature na ito ay nagbibigay-daan sa iyong PC na ma-remotely awakened mula sa sleep o hibernation. Kung wala ito, hindi ka makakabuo ng koneksyon kung naka-off ang PC.
Pag-optimize ng Iyong Koneksyon sa Network Para sa pinakamahusay na karanasan.
Wired Ethernet: Nagbibigay ng pinaka-stable at pinakamabilis na koneksyon, pinabababa ang latency.
5GHz Wi-Fi: Nag-aalok ng mas mabilis na speed at mas kaunting interference kumpara sa 2.4GHz, pinapabuti ang pangkalahatang performance.
Gamitin ang Parehong Network (Kung Possible) Para sa mas mahusay na bilis at responsibilidad, tiyaking ang iyong Windows PC at Mac ay nakakonekta sa parehong local network (Wi-Fi o Ethernet).
Gamitin ang Maramihang Monitor. Kung mayroon kang maraming display, maaaring palawakin ng Microsoft Remote Desktop ang iyong desktop. Ang feature na ito ay kapaki-pakinabang para sa multitasking, kaya i-configure ang iyong mga setting ng display nang naaayon.
💥 Microsoft Remote Desktop – Mahalagang Mga Kahinaan:
Kailangan ng Windows Pro: Hindi sinusuportahan sa mga edisyon ng Windows Home.
Kumplikadong setup para sa remote access: Kinakailangan ang port forwarding o VPN para sa mga panlabas na koneksyon.
Isang user session lamang: Hindi sinusuportahan ang maraming sabay-sabay na user.
Mga isyu sa performance sa mahihinang network: laggy sa mababang bandwidth o mataas na latency.
Limitadong mobile experience: Ang mga mobile app ay basic at hindi touch-optimized.
Habang ang Microsoft Remote Desktop ay nagbibigay ng mahusay na mga kakayahan para sa remote access, maaaring hindi ito palaging matugunan ang mga pangangailangan ng bawat user, lalo na kung naghahanap ka ng mas magaan, versatile, o nakaangkop sa mga kapaligiran ng negosyo. Kung naghahanap ka ng alternatibo para sa remote desktop control, DeskIn ay namumukod-tangi bilang isa sa pinakamahusay na mga opsyon na available.
Ang DeskIn ay isang makapangyarihang, user-friendly na remote control tool na dinisenyo para sa parehong personal at pang-negosyo na paggamit. Sinusuportahan nito ang Mac, Windows, iOS, at Android na mga device, na ginagawang isang versatile solution para sa anumang platform. Sa DeskIn, madali mong ma-access ang iyong Windows PC mula sa iyong Mac, o kontrolin ang iba pang mga device, tulad ng mga mobile phone at tablet. Kaya ito ay itinuturing na ang pinakamahusay na remote access software.
👍 Mahahalagang Tampok ng DeskIn:
Cross-Platform Support: Kumonekta mula sa Mac patungong Windows, o kahit sa pagitan ng Android at iOS na mga device.
High-Performance Remote Control: Perpekto para sa mga pangangailangan ng negosyo, nag-aalok ng makinis, responsive na koneksyon.
File Transfer & Collaboration: Walang hirap na maglipat ng mga file at makipagtulungan sa iyong team.
Low Latency & High Security: Tinitiyak ang mabilis, encrypted na mga koneksyon para sa ligtas na remote work.
Magaan & Madaling Gamitin: Mabilis na setup, perpekto para sa mga casual at business users.
Ngayon, suriin natin kung paano gamitin ang DeskIn upang malayuang kontrolin ang iyong Windows PC mula sa iyong MacBook o iMac.
Hakbang 1. Bisitahin ang website ng DeskIn o ang iyong app store upang i-download ang app. I-install ito sa parehong iyong Mac at Windows PC (o anumang iba pang device na nais mong kontrolin). I-click dito upang i-download.
Hakbang 2. Buksan ang DeskIn sa parehong mga device. Mag-sign up para sa isang DeskIn account kung wala ka pa nito, o mag-log in kung mayroon ka nang account.
Hakbang 3. Sa iyong Mac, i-click ang "Add Device" at ilagay ang ID o mga detalye ng Windows PC (o iba pang device) na nais mong kontrolin. Tanggapin ang kahilingan sa koneksyon sa target device upang mag-establish ng secure na koneksyon.
Hakbang 4. Kapag nakakonekta na, makikita mo ang screen ng iyong Windows PC sa iyong Mac. Maaari mo nang kontrolin ang PC nang malayuan, maglipat ng mga file, at makipagtulungan na parang nakaupo ka mismo sa harap nito.
Simulan sa free version — gumagana ang DeskIn agad-agad para sa karamihan ng mga gamit sa bahay at trabaho! I-click dito upang i-download.
Oo. Sinusuportahan ng Windows App (dating Microsoft Remote Desktop) para sa Mac ang maraming monitor kapag kumokonekta sa isang Windows PC. Maaari mong i-enable ang feature na ito sa pamamagitan ng pagpunta sa display settings ng iyong PC sa app at pagpili ng opsyon na "Gamitin ang lahat ng monitor." Ito ay partikular na kapaki-pakinabang para sa multitasking o pinalawak na mga workspace setups.
Oo, ngunit may mga limitasyon. Habang hindi sinusuportahan ng Microsoft Remote Desktop ang direktang drag-and-drop file transfers sa pagitan ng Mac at Windows, maaari mong i-share ang mga local folder ng Mac sa remote Windows session. Simple lang i-configure ang folder redirection sa settings ng koneksyon ng PC sa ilalim ng "Folders" tab bago kumonekta.
Kung masyado itong limitado o mabagal, DeskIn ay nagbibigay-daan sa mataas na bilis na paglipat ng file gamit ang buong drag-and-drop — walang folder mapping o advanced configuration na kinakailangan.
Gumagana ito sa parehong paraan. Maaari mong ma-access ang iyong Windows PC mula sa iyong Mac sa pamamagitan ng internet hangga't ang PC ay nakatakdang maayos, may pampublikong IP address o VPN access, at naka-enable ang Remote Desktop. Para sa pinakamahusay na performance, tiyaking ang parehong device ay may matatag na koneksyon sa internet.
Hindi. Sa kasalukuyan, hindi sinusuportahan ng Microsoft Remote Desktop ang remote control ng isang Mac mula sa isang Windows PC. Pinapayagan lamang nito na kontrolin ang isang Windows PC mula sa isang Mac. Kung kailangan mong malayuang kontrolin ang isang Mac mula sa Windows, kakailanganin mong gumamit ng third-party na solusyon tulad ng DeskIn.
Ang pagkonekta ng iyong Mac sa Microsoft Remote Desktop ay isang maaasahang paraan upang ma-access ang iyong Windows PC nang malayuan, na mainam para sa personal na paggamit o pagtatrabaho sa iba't ibang platform. Sa kabila ng ilang mga hakbang sa setup, pag-download ng Windows App mula sa Mac App Store, pag-enable sa Remote Desktop sa iyong Windows PC, at pag-configure ng iyong koneksyon, maaari mong tamasahin ang buong kontrol ng iyong Windows desktop mula sa macOS.
Para sa simple, araw-araw na gamit, nag-aalok ang Microsoft Remote Desktop ng isang solid at secure na solusyon. Ngunit kung naghahanap ka ng mas mabilis, mas magaan na karanasan o kailangan ng mga propesyonal na tampok tulad ng paglipat ng mga file at mga tool para sa pakikipagtulungan, DeskIn ay isang makapangyarihang alternatibo na dapat isaalang-alang. Piliin ang tool na pinaka-akma sa iyong mga pangangailangan sa remote access, at simulan ang pagkonekta ngayon. Ito ay lalong kapaki-pakinabang kung ikaw ay may kinalaman sa mga cross-platform workflows, kailangan ng real-time collaboration, o nais na iwasan ang kumplikadong setup ng RDP/VPN. Subukan ito ngayon — mabilis, libre, at secure!


Gawing Pangalawang Monitor ang iPad Para sa Windows at Mac Computers
Para sa mga multitasking na manggagawa, ang pagkakaroon ng pangalawang monitor ay maaaring greatly increase ng productivity. Kung ikaw ay isang tao sa home office o isang estudyante na walang dual screen. Narito kung paano mo madaling gawing pangalawang monitor ang iyong idle iPad para sa iyong computer.
1. Taasan ang espasyo ng screen upang ipakita ang higit pa sa parehong oras. Para sa mga multi-task users, maiiwasan nilang magpalipat-lipat ng mga bintana, na nakakatipid ng oras.
2. Ang bawat screen ay gumagana nang hiwalay, ginagawang mas organisado ang workspace.
Kapag nag-e-edit ng mga video, isang screen ang ginagamit para sa pag-e-edit at ang isa para sa paglalagay ng mga materyales. Kapag sumusulat ng papel, isang screen para sa pagsusulat, ang isa para sa paghahanap ng impormasyon atbp.
3. Ang laki ng screen ng iPad ay sapat na malaki, at ang kalidad ng display ay medyo maganda. Para sa mga gumagamit na may mga pangangailangan sa disenyo o gumagamit ng MacBook, mas nagiging cost-effective ito kaysa sa pagbili ng karagdagang screen, at wala nang problema sa pagkakaiba ng kulay.
4. Maraming tao ang may mga iPad sa bahay. Sa pamamagitan ng paggamit ng device na mayroon ka bilang isang dual screen, nakakatipid ka sa gastos ng pagbili ng isa pang screen at ng espasyong ilalagay ito.
Ang sariling tampok ng Apple na Apple Sidecar ay nagbibigay-daan sa iyo na gamitin ang iPad bilang isang external display para sa MacBook at iMac. Gumawa lamang ng ilang simpleng setting at maaari mong makamit ang seamless connection sa pagitan ng iyong iPad at computer.
Paalala: Upang magamit ang Apple Sidecar, ang dalawang device ay dapat nakalog sa parehong Apple ID o nasa parehong network. Dapat i-on ang Bluetooth at Wi-Fi sa parehong device, at hindi dapat lumagpas ang distansya ng 10 meters (tungkol sa 10 meters).
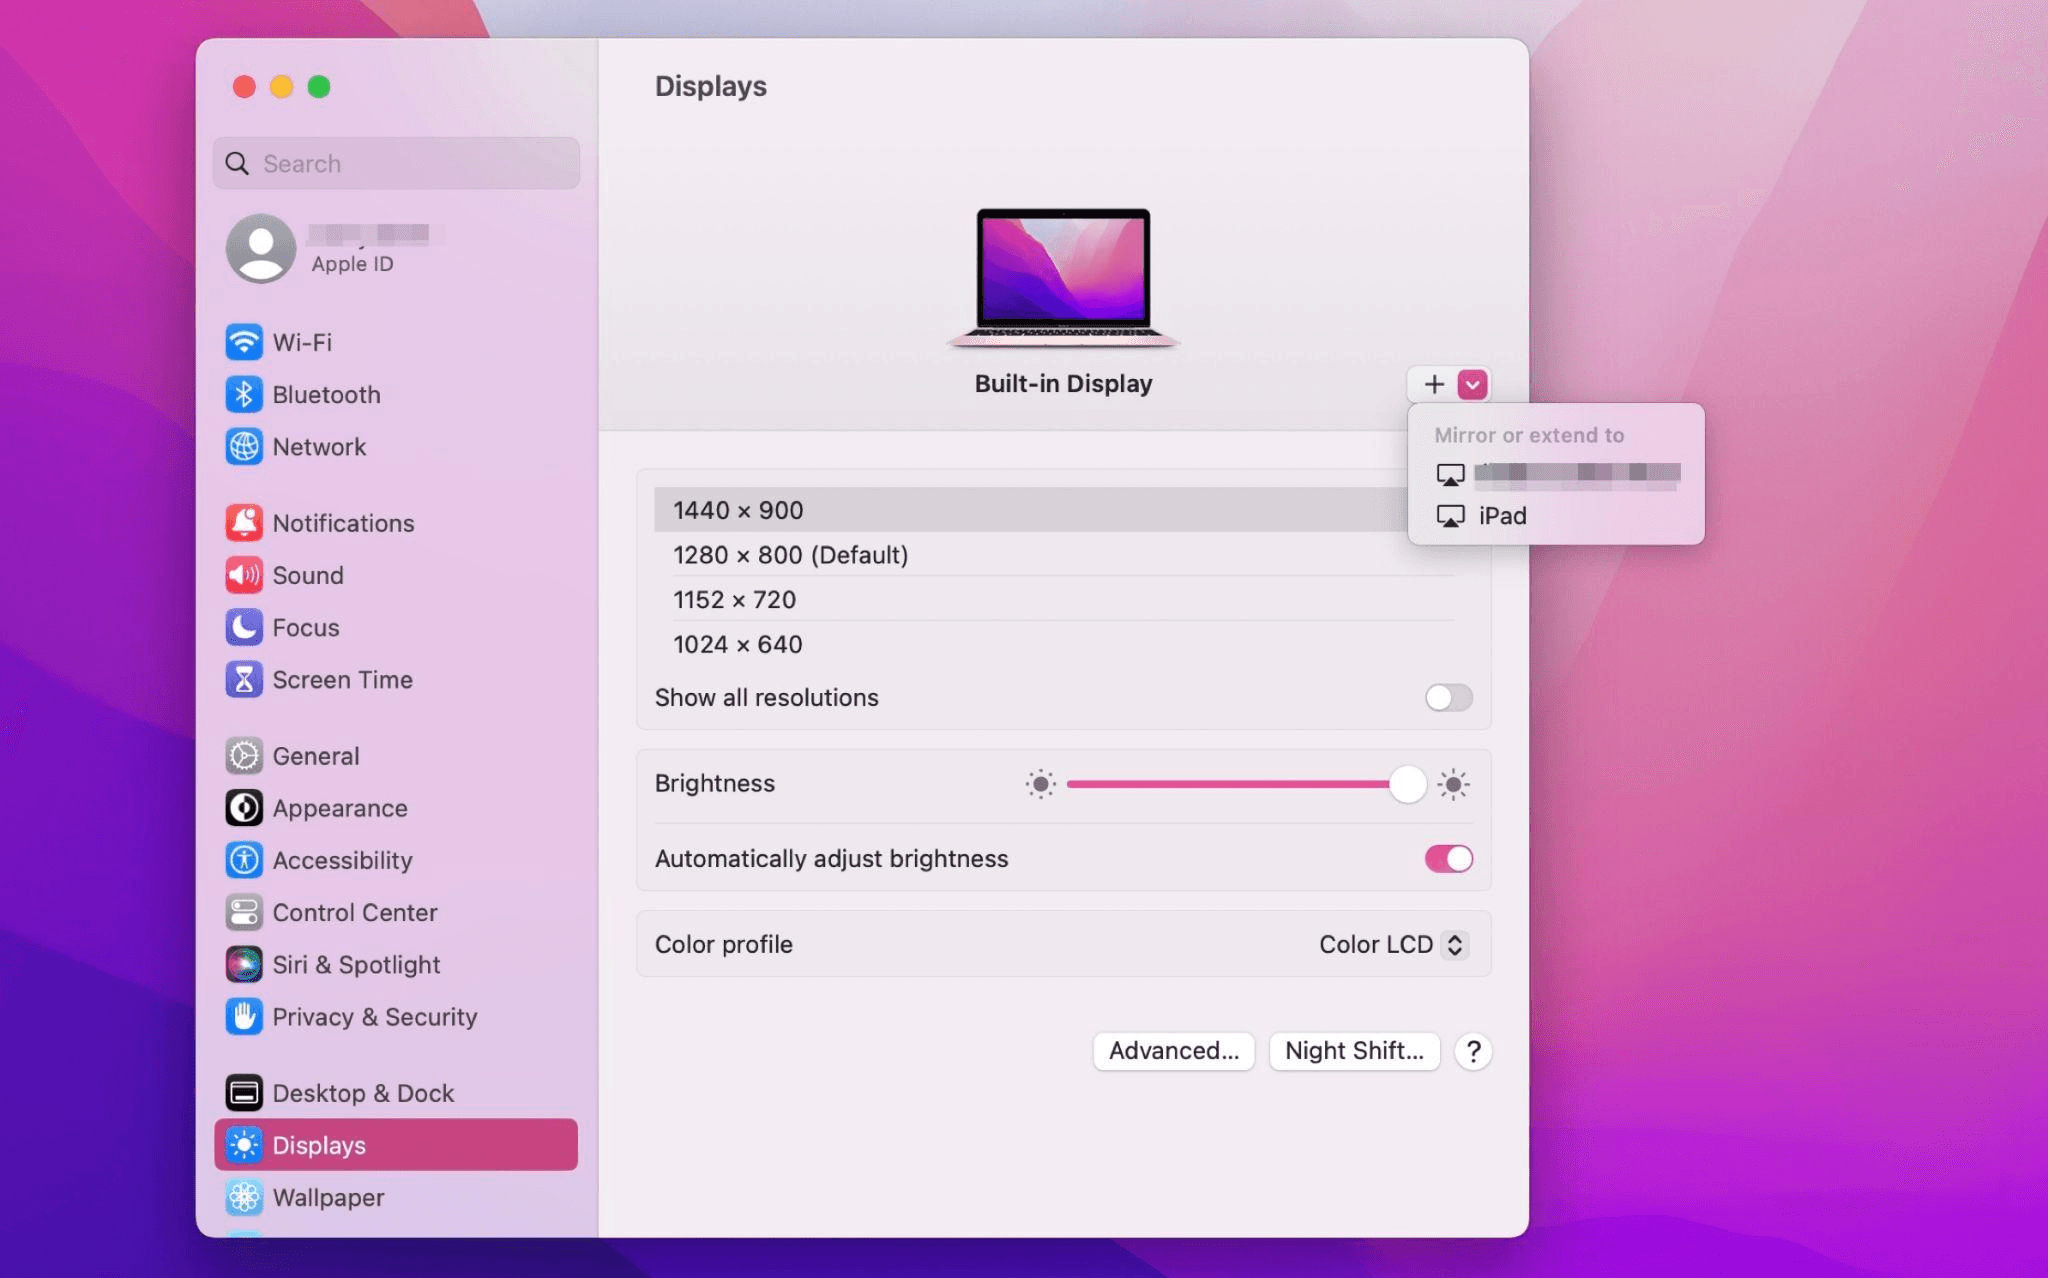
Buksan ang Mac System Settings >> I-click ang "Display" sa sidebar >> I-click ang "+" pop up menu sa kanan at piliin ang iyong iPad.
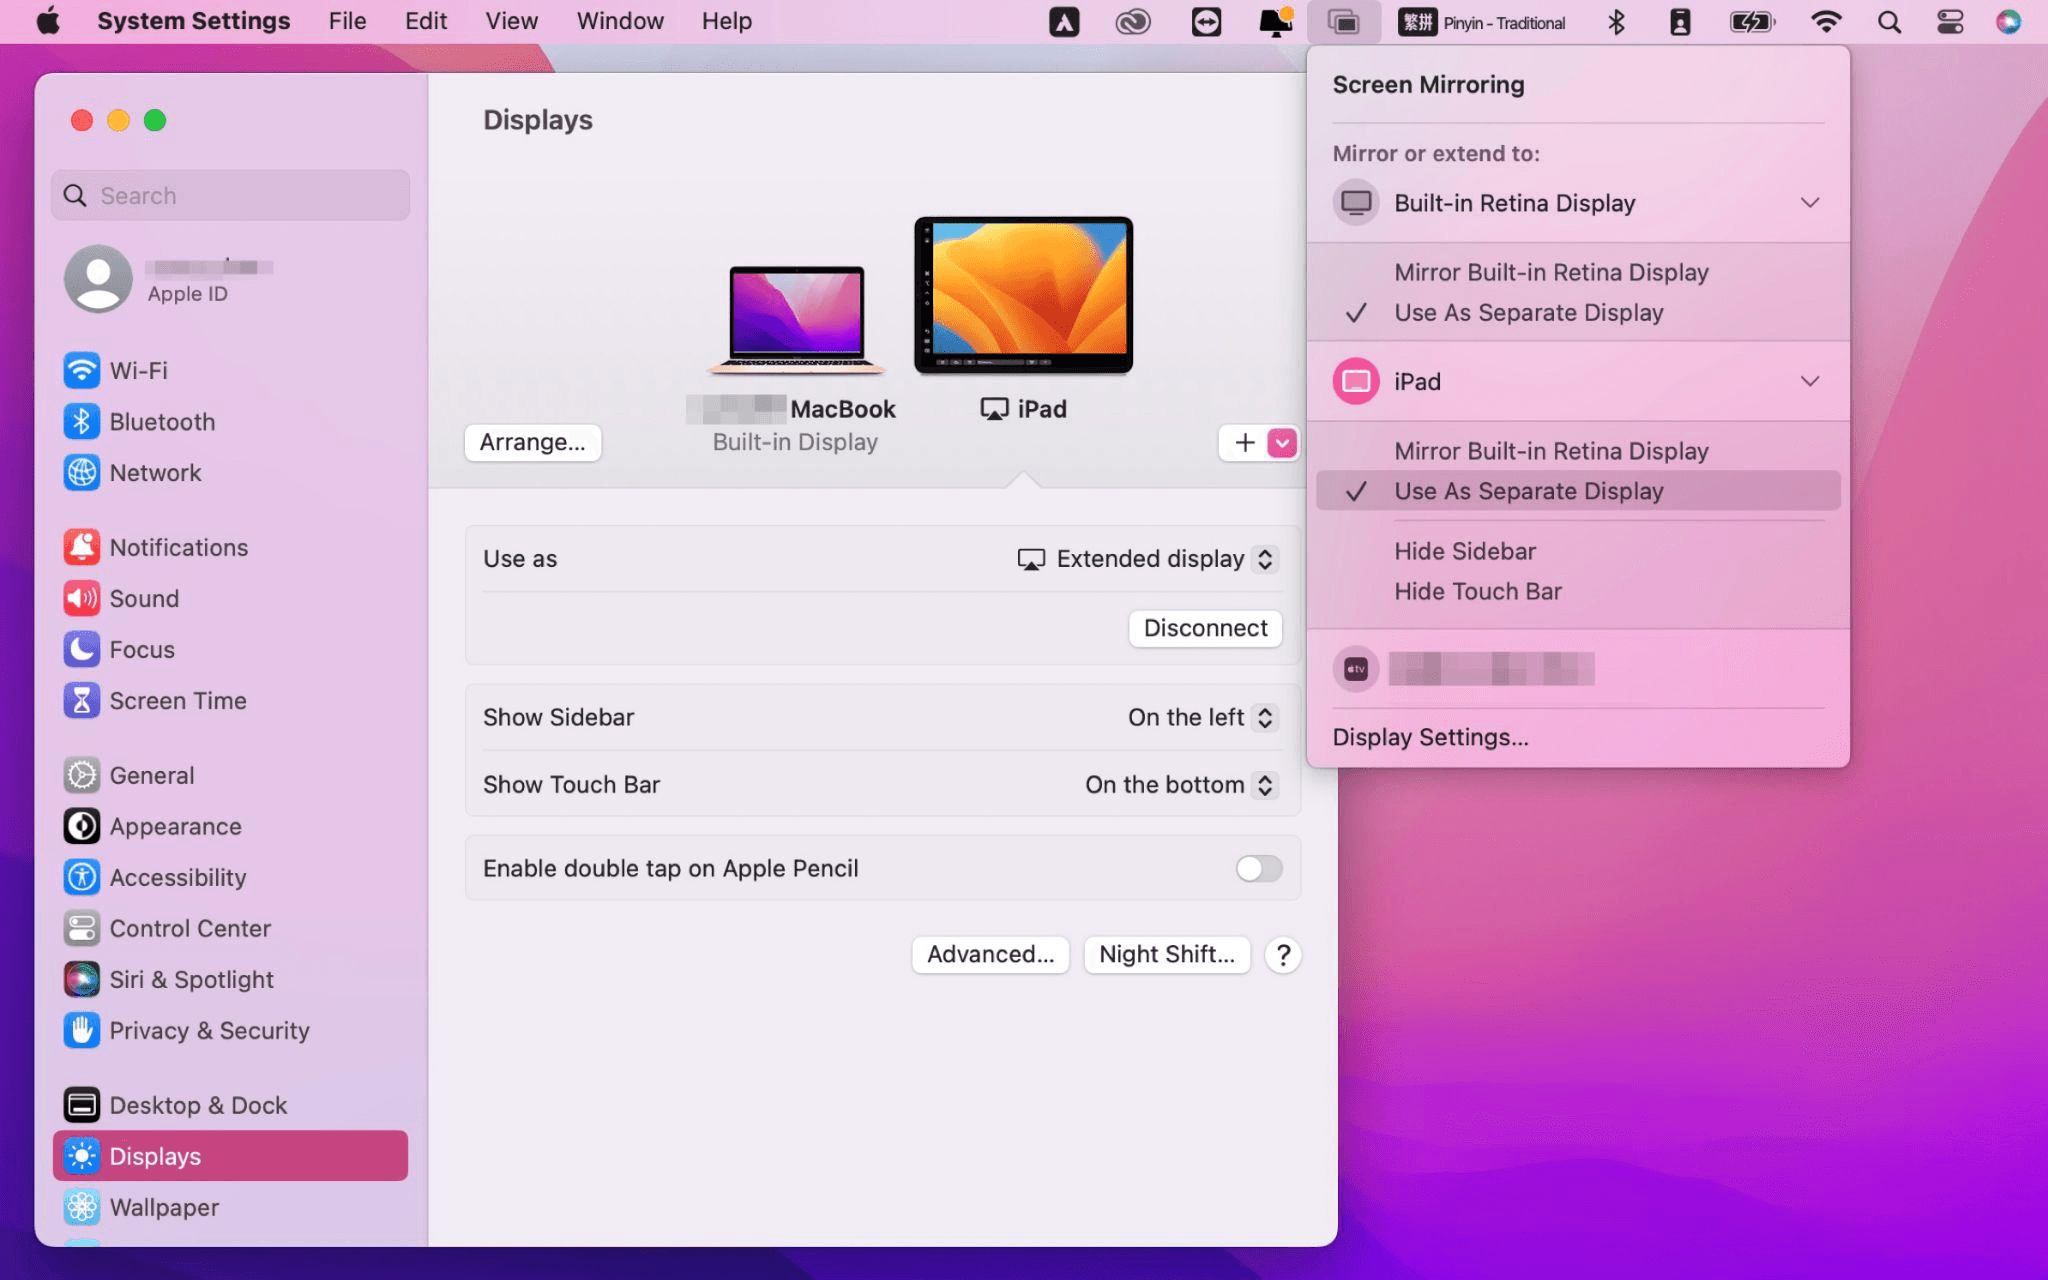
Piliin ang iPad, baguhin ang Use as settings sa "Extended Display". Suriin ang Airplay settings sa itaas na toolbar ng Mac at itakda ang iPad bilang "Use As Separate Display".
Matapos makumpleto ang mga setting, ang iyong iPad ay magiging pangalawang display para sa iyong Mac. Maaari mong ilipat ang mga bintana mula sa iyong Mac papunta sa iyong iPad nang maayos. Maaari mo ring gamitin ang sidebar sa iPad o baguhin ang posisyon ng sidebar sa system display settings.
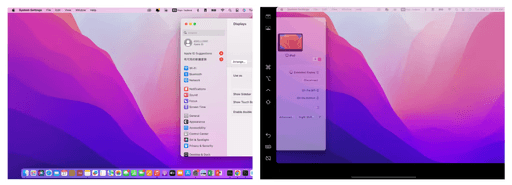
MacBook Screen (Kaliwa) at iPad Screen (Kanan)
Ang Apple Sidecar ay sumusuporta lamang sa mga Mac na inilabas pagkatapos ng 2016 at iPadOS13 o bago. Kung gumagamit ka ng lumang Apple device o Windows device, maaari mo pa ring gamitin ang DeskIn remote software upang gawin ang screen extension. Sinusuportahan nito ang paggamit ng iPad bilang pangalawang display para sa Mac at Windows, at ang smoothness ay hindi mas mababa sa sidecar.
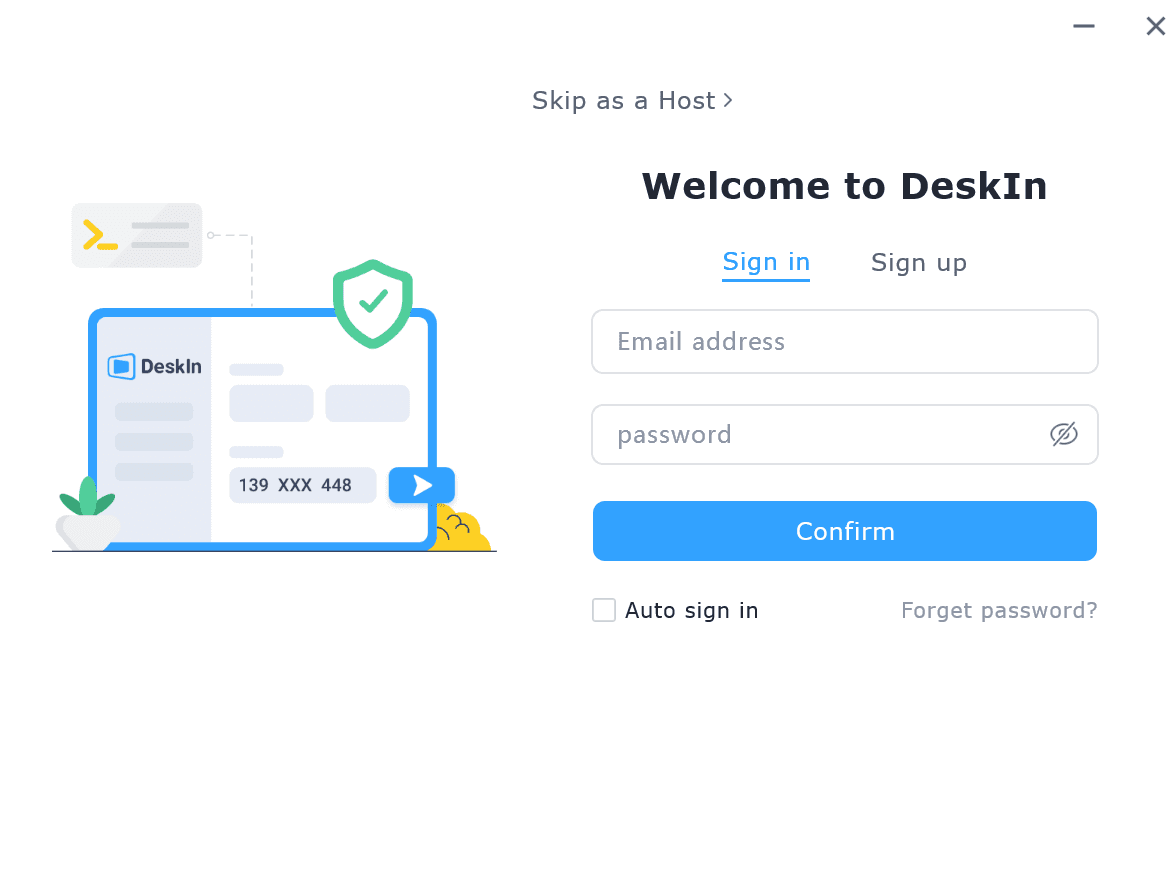
I-download ang DeskIn sa iyong computer at iPad, magrehistro para sa isang libreng account at mag-log in nang hiwalay.
Paalala: Sa iyong unang pag-log in sa isang bagong device, kailangan mong kumpletuhin ang email verification, na naglalayong protektahan ang seguridad ng iyong account.
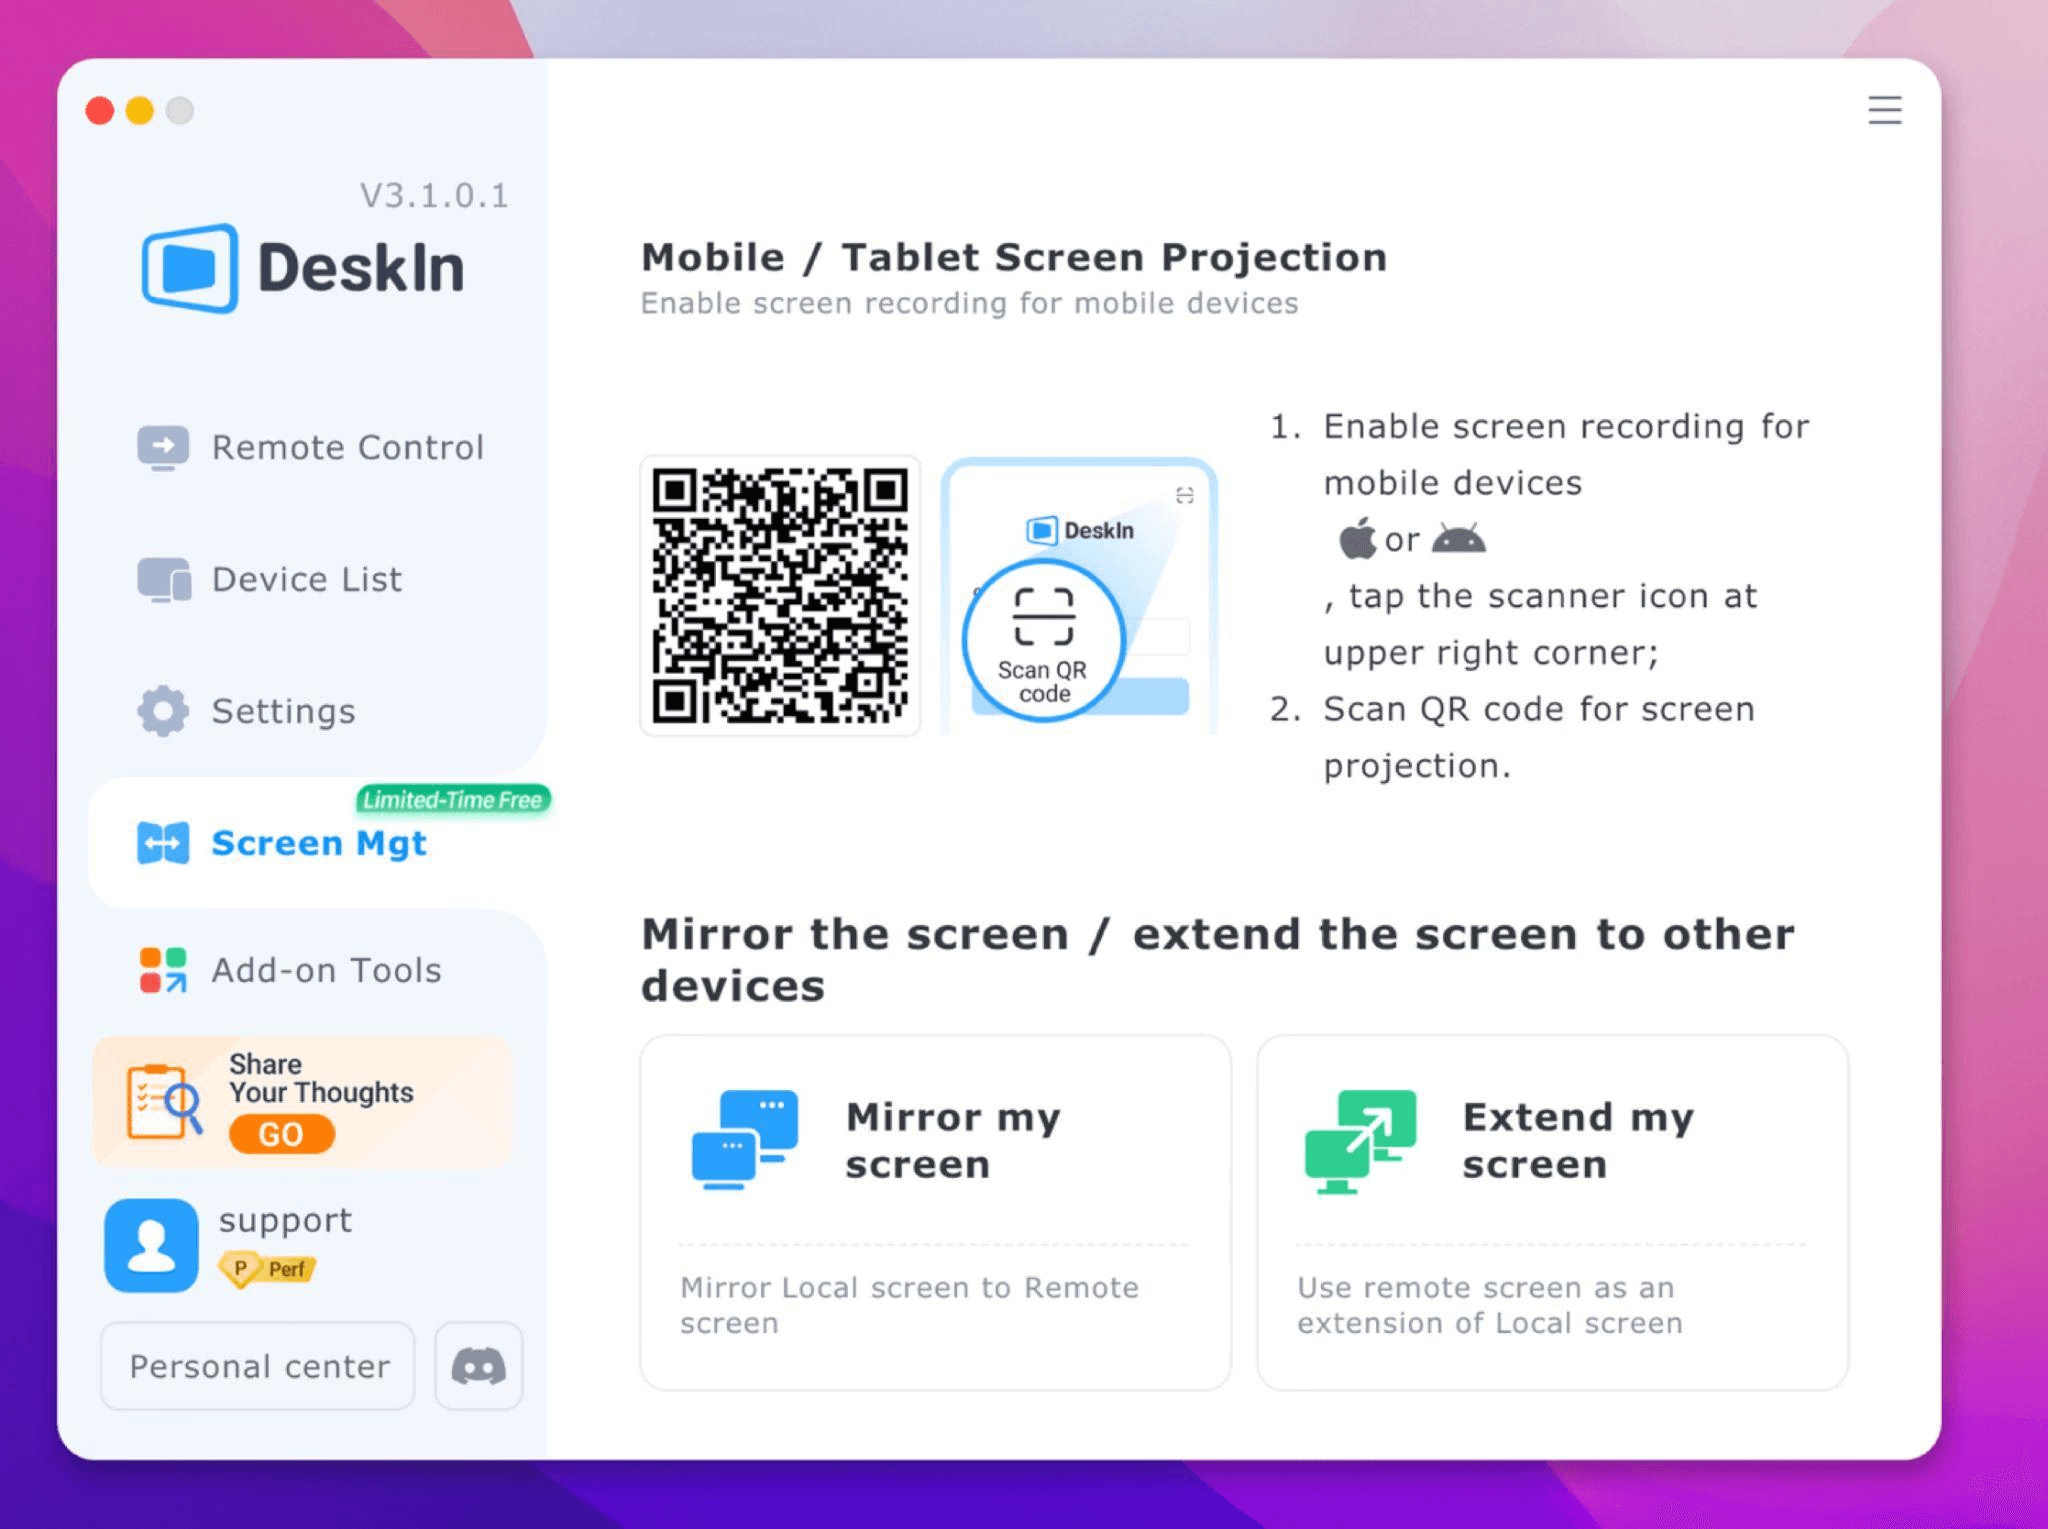
Buksan ang DeskIn app sa iyong Windows/Mac computer >> Pumunta sa "Screen Mgt" Tab >> I-click ang "Extend my screen"
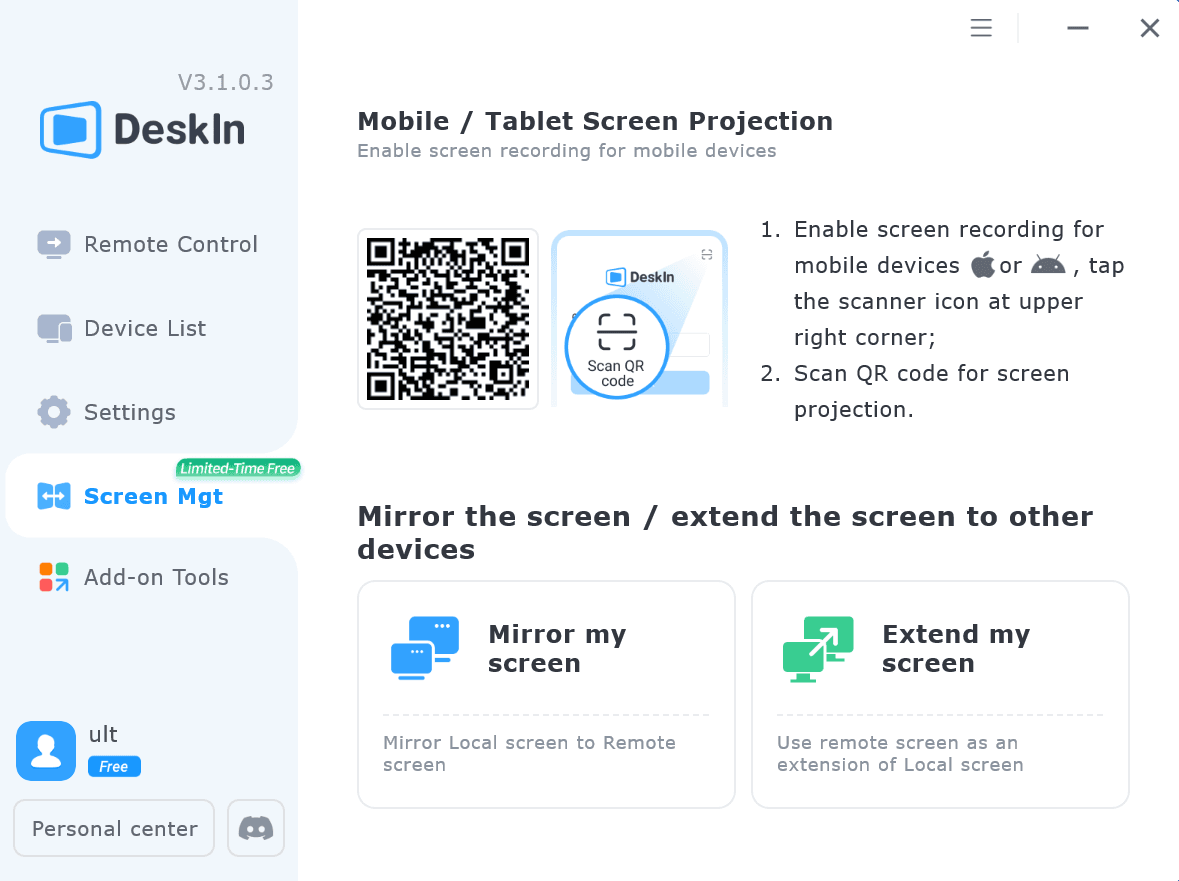
Piliin ang iyong iPad, at i-click ang "Start Extending". Kapag nakakonekta, ang iyong iPad ay magiging pangalawang display ng iyong Windows/Mac computer, maaari mong ilipat ang mga bintana sa pagitan ng dalawang screen na para bang nasa isa lamang ito.
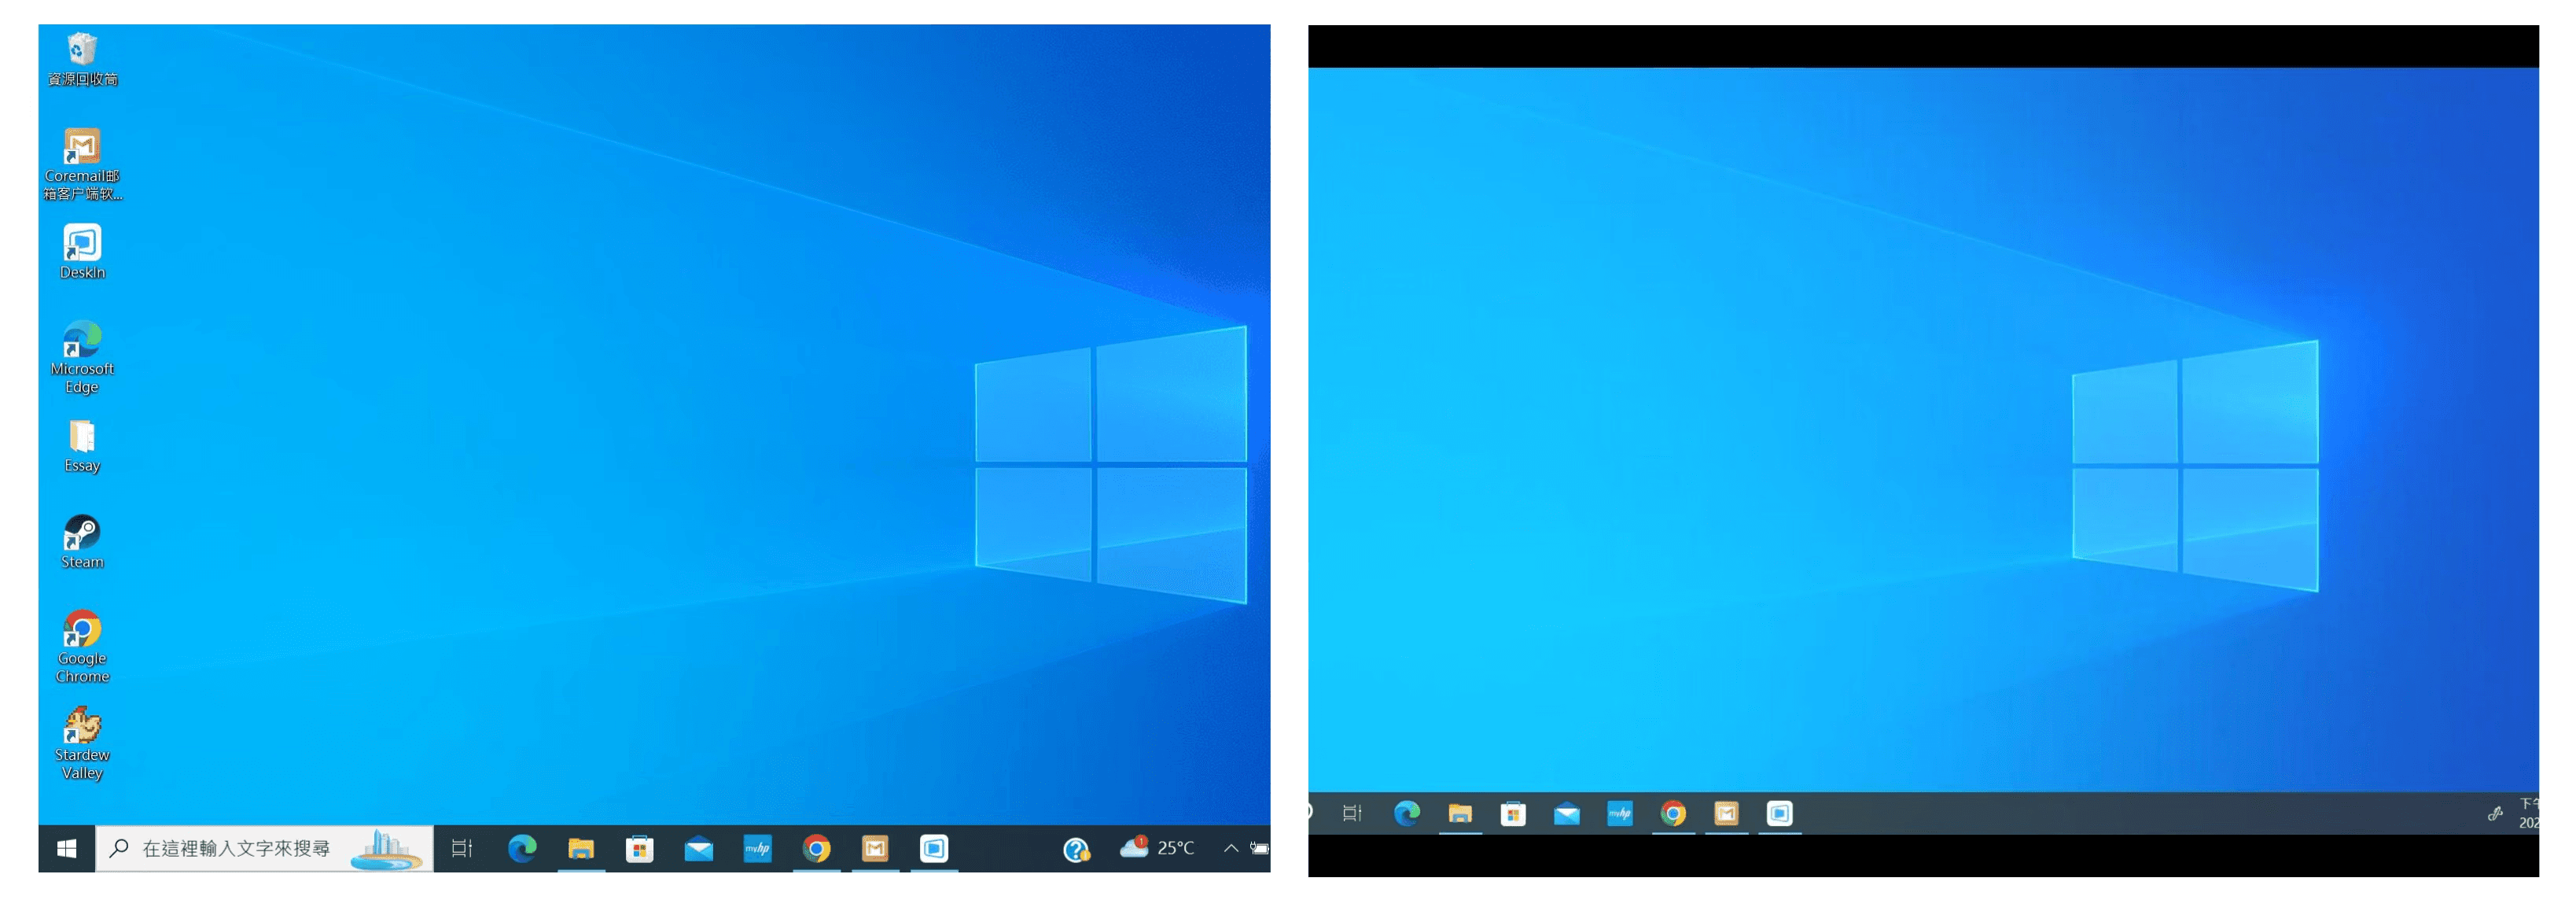
Computer Screen (Kaliwa) at iPad Screen (Kanan)
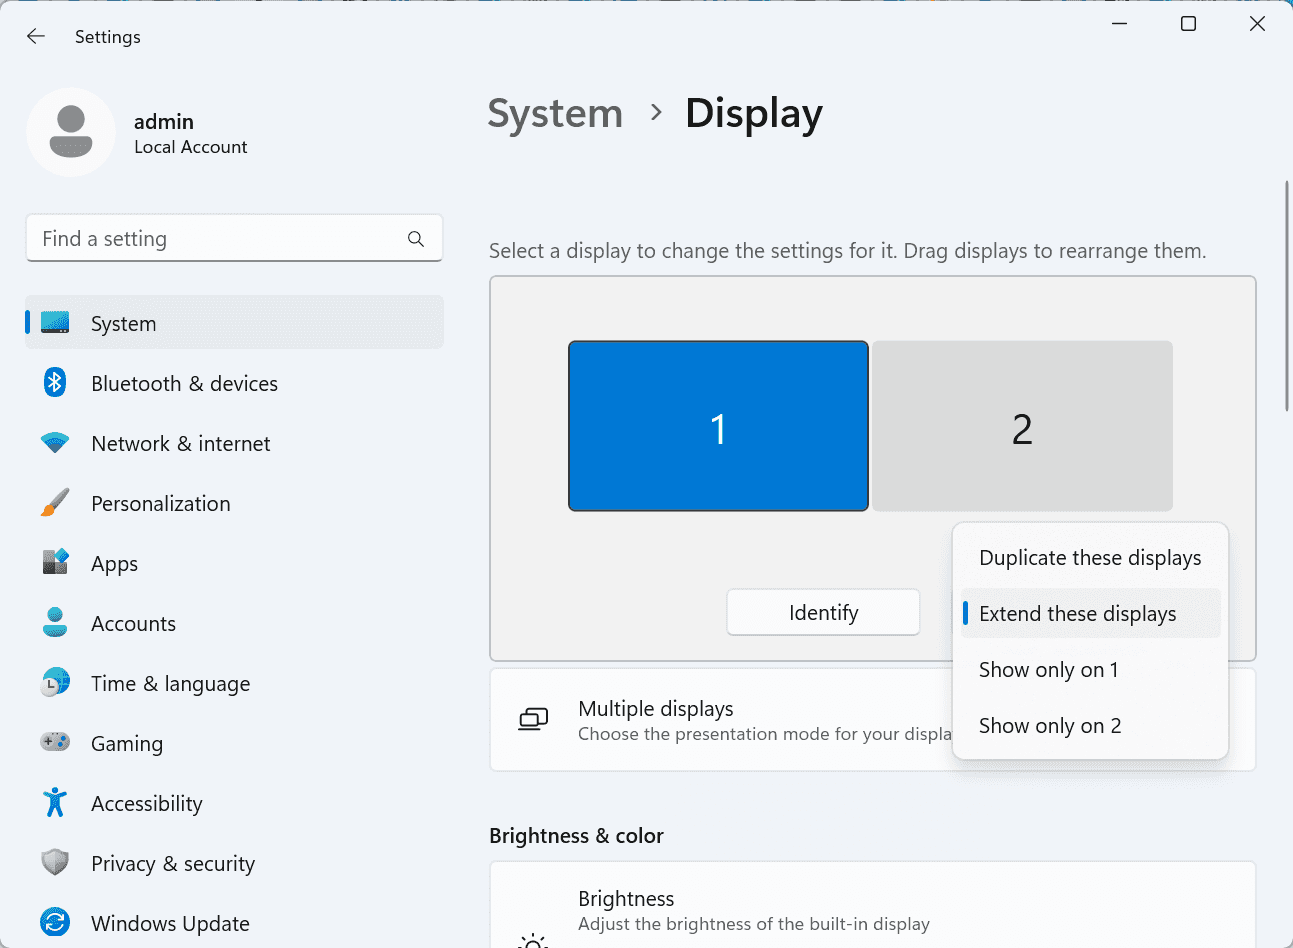
Matapos ang extension, kung napansin mong ang iyong iPad ay nagmi-mirror lamang ng nilalaman sa iyong computer screen, mangyaring pumunta sa Windows System Settings >> Display Settings at baguhin ang screen option sa "Extend these displays". Maaari mo ring baguhin ang posisyon ng screen sa pamamagitan ng pag-drag ng 2 screens.
Ang artikulong ito ay nagpapakita kung paano gamitin ang DeskIn remote desktop software upang gawing "pangalawang screen" ang isang iPad para sa Mac at Windows computers. Ito ay lalong kapaki-pakinabang para sa mga tao na kailangang hawakan ang maraming gawain nang sabay-sabay at nais na mapabuti ang productivity. Kung naghahanap ka ng screen extension tool na gumagana sa iyong MacBook, iPad, Android Tablet at Windows PC, ang DeskIn remote desktop ay ang pinakamainam na solusyon para sa iyo. I-download ang DeskIn at subukan ito ngayon!

Top 6 RustDesk Alternative Tools for Faster, Easier Remote Access
Remote access should feel like flipping a light switch, not decoding a control panel. Yet many users exploring RustDesk eventually run into friction: connection IDs, server setup, or occasional lag. While RustDesk is powerful, it’s not always the easiest or smoothest option, especially for non-technical users.
That’s why more people are actively searching for a reliable RustDesk alternative that combines performance, simplicity, and flexibility. Whether you want a plug-and-play solution or something more advanced, this guide will help you find the best fit.
RustDesk stands out as a privacy-friendly, self-hosted remote desktop tool. However, real-world usage reveals a few common challenges:
Complicated setup for the RustDesk self-hosted environments
Manual connection steps requiring IDs and passwords
Occasional latency or unstable connections
Limited user-friendly features out of the box
For many users, especially those helping family or managing multiple devices, simplicity matters just as much as control.
When evaluating a RustDesk alternative, focus on these key factors:
Ease of use: Quick setup without technical overhead
Performance: Smooth, low-latency remote sessions
Compatibility: Support for Windows, macOS, Linux, and mobile
Security: Strong encryption and access controls
Flexibility: Options ranging from cloud-based to open source
The ideal tool strikes a balance between power and convenience, something many modern solutions now deliver better than traditional setups.
Here’s a quick breakdown of the top tools and where they shine:
DeskIn – Best all-in-one RustDesk alternative for performance and ease of use
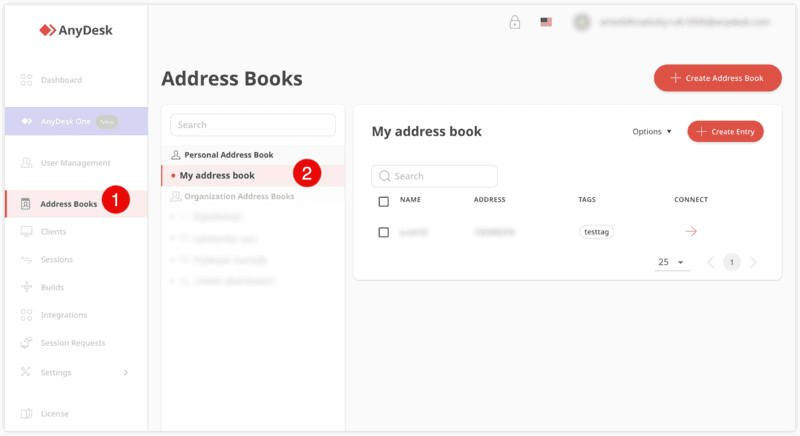
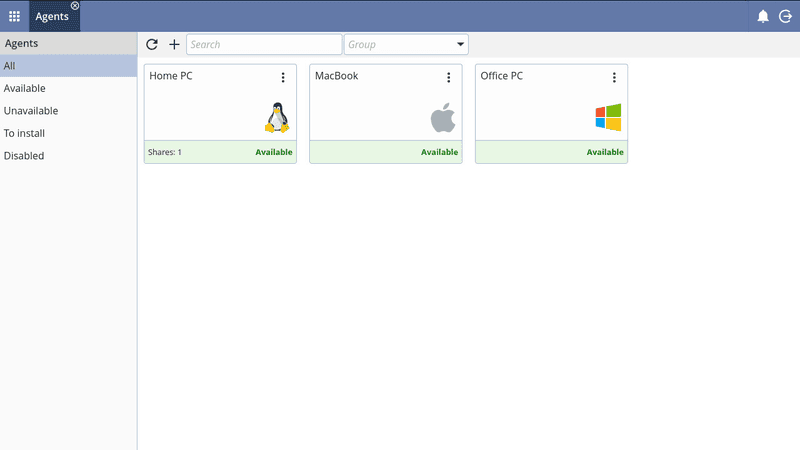
AnyDesk – Best lightweight tool for fast connections
TeamViewer – Best for enterprise-grade remote support
MeshCentral – Best open-source and self-hosted solution
DWService – Best free browser-based tool
Chrome Remote Desktop – Best simple, no-frills option
Ultra-low latency with smooth high-frame-rate streaming
No complex setup or server deployment required
Cross-platform including Rustdesk alternative for Android
Secure with encryption and device control features
Built-in file transfer and multi-device management
Smaller awareness than legacy competitors
Best for: Users who want a powerful yet simple remote desktop solution
DeskIn removes the friction that often comes with remote access tools. Instead of relying on IDs or manual configurations, it offers a streamlined connection experience that works right out of the box. This makes it especially valuable for users supporting non-technical family members or managing multiple remote devices.
Performance is where DeskIn truly distinguishes itself. Compared to RustDesk, which can sometimes struggle with latency, DeskIn delivers consistently smooth sessions with minimal lag. It also eliminates the need for self-hosting, making it a strong free RustDesk alternative option for users who want powerful features without the complexity.
For those exploring options beyond the RustDesk alternative GitHub projects, DeskIn provides a polished, ready-to-use experience that balances simplicity with professional-grade performance.
Lightweight and fast installation
Good performance on low bandwidth
Cross-platform support
Easy-to-use interface
Performance may drop during long sessions
File transfer can be inconsistent
Best for: Users needing quick and simple remote access
AnyDesk is often considered a natural step up from RustDesk for users who want something easier to deploy. It offers a lightweight application that connects quickly and performs well under normal conditions. This makes it suitable for quick troubleshooting or occasional remote access.
However, performance consistency can be an issue. Users frequently report lag or instability during extended sessions or when handling more demanding tasks. While AnyDesk is a solid option for basic needs, it may not fully satisfy users looking for a more robust, all-in-one solution.
👀 You may also be interested in: |
|---|
Enterprise-grade security with encryption and 2FA
Stable performance across global networks
Rich features like file transfer and session recording
Broad device compatibility
Expensive for commercial use
Free version has limitations
Heavier resource usage on some systems
Best for: Businesses and IT teams managing multiple endpoints
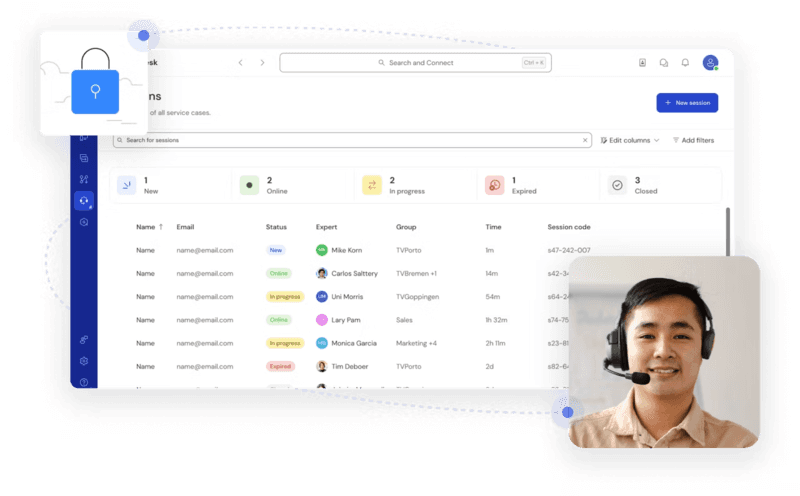
TeamViewer has long been a dominant player in the remote desktop space, offering a comprehensive suite of features designed for enterprise environments. It excels in reliability and global connectivity, making it a popular choice for IT support teams.
That said, its pricing model is a major drawback for many users. Frequent users may quickly encounter licensing restrictions, and costs can escalate for businesses. Additionally, its heavier footprint can impact performance on lower-end devices. DeskIn offers a more modern alternative by delivering similar performance and essential features without the same cost barriers. For users who want enterprise-level capabilities with better efficiency, it presents a compelling option.
👀 You may also be interested in: |
|---|
Fully RustDesk alternative open source solution
Web-based management dashboard
Supports multi-device environments
Strong customization and control
Complex setup and maintenance
Requires technical expertise
Best for: Advanced users needing a Rustdesk alternative self-hosted
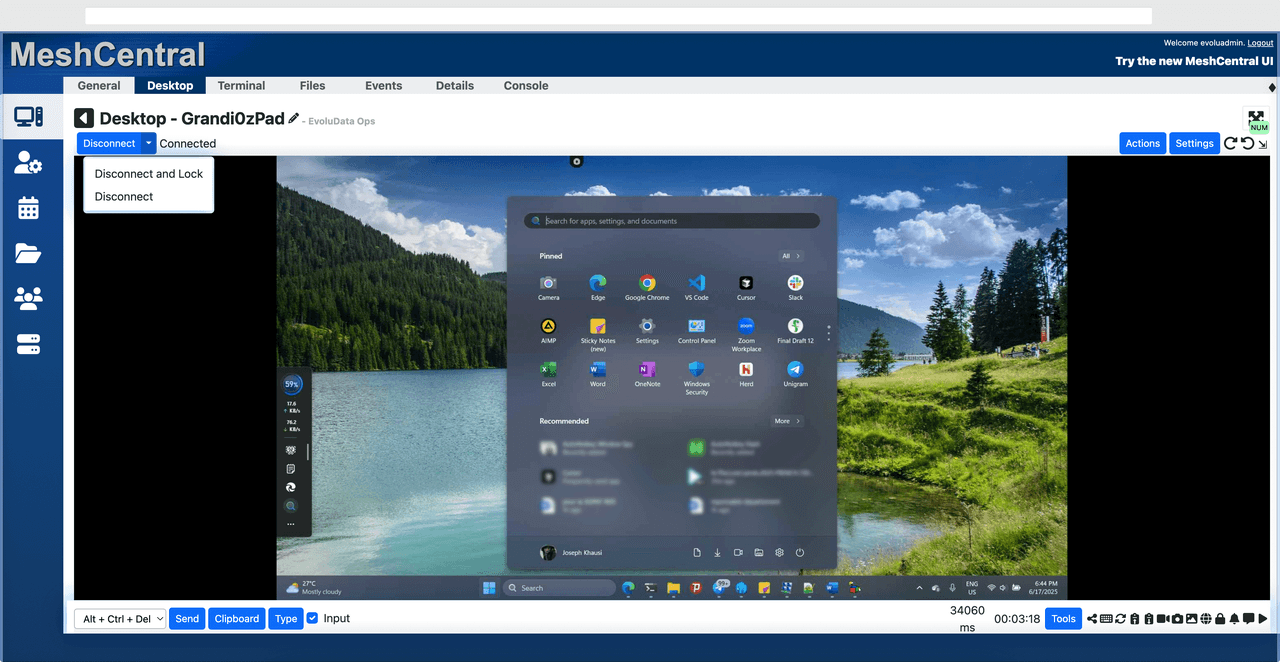
MeshCentral is a powerful open-source platform designed for users who want full control over their remote access infrastructure. It supports multiple devices and provides a centralized dashboard for management, making it attractive for IT professionals.
However, this flexibility comes with complexity. Setting up and maintaining a MeshCentral server requires technical knowledge, which can be a barrier for many users. Compared to this, DeskIn offers a much simpler deployment process while still delivering strong performance and security. For users who prioritize ease of use over full control, modern solutions like DeskIn provide a more accessible alternative.
Completely free
Browser-based access
Open-source foundation
Simple setup
Limited performance
Basic feature set
Best for: Users looking for a simple, free RustDesk alternative
DWService offers a browser-based approach to remote access with no heavy installation, making it convenient for quick connections in restricted environments. It supports both desktop access and file management across major platforms.
However, performance often feels sluggish, especially on demanding tasks, and features remain basic; lacking session recording, smooth multi-monitor support, or advanced security controls. While suitable for occasional personal use, it falls short for professional or high-performance scenarios.
Free and easy to use
Browser-based setup
Cross-platform compatibility
Very limited features
No advanced management or collaboration tools
Best for: Casual users needing basic remote access

Chrome Remote Desktop is one of the simplest remote access tools available. It’s easy to set up and works across devices, making it a convenient choice for occasional use.
However, it lacks many essential features such as file transfer, session management, and advanced security controls. For users with more demanding needs, it quickly becomes insufficient. Compared to Chrome Remote Desktop, DeskIn provides a much more complete experience without sacrificing ease of use, making it a better long-term solution.
👀 You may also be interested in: |
|---|
RustDesk is powerful but can be difficult to set up and manage, especially with self-hosting. Many users prefer tools that offer similar performance without technical complexity. DeskIn simplifies remote access while maintaining strong performance and security.
Several tools qualify as a free RustDesk alternative, including DWService and Chrome Remote Desktop. However, DeskIn stands out by offering better performance and usability even in its free version.
Yes, tools like MeshCentral and DWService are considered RustDesk alternative open source options. They provide flexibility and control but often require technical expertise to set up and maintain.
Beginners should choose tools with a simple setup and intuitive interfaces. DeskIn is an excellent option because it removes the need for manual configuration while still delivering advanced features.
RustDesk is a powerful starting point, but it’s not always the easiest or most efficient tool for everyday use. From setup complexity to performance limitations, many users eventually look for a better RustDesk alternative.
Among all the options, DeskIn stands out as the most balanced solution. It combines speed, simplicity, and cross-platform support into one seamless experience. If you’re ready to move beyond technical friction and enjoy truly smooth remote access, DeskIn is a choice that simply works.

Top 7 RDP Alternative Tools for Faster, Safer Remote Access
Remote desktop access used to feel like a solid bridge. Now, for many users, traditional RDP feels more like a creaky rope ladder. With performance issues, security concerns, and limited cross-platform support, it's no surprise that more people are actively searching for a better RDP alternative that actually keeps up with modern workflows.
If you're managing multiple servers, working across devices, or just tired of unstable connections, this guide will walk you through the best tools worth switching to.
RDP (Remote Desktop Protocol) is a proprietary protocol developed by Microsoft that allows users to connect to another computer over a network. It's widely used for accessing Windows servers, virtual machines, and remote workstations.
While powerful in controlled environments, RDP is often tied to Windows systems and requires configuration like port forwarding or VPNs. Compared to newer tools, it can feel rigid and outdated.
You may also be interested in: |
|---|
RDP still works, but it comes with trade-offs that many users find frustrating:
Security risks if not properly configured
Complex setup for remote or external access
Limited cross-platform compatibility
Performance issues over unstable networks
Many IT teams are now actively replacing it, especially when looking for a Windows RDP client alternative or something that works seamlessly across macOS, Linux, and mobile devices. That's where modern Remote Desktop alternatives shine.
Choosing the right tool is like picking the right vehicle. Some are built for speed, others for heavy-duty enterprise work. Here's a quick snapshot:
DeskIn – Best all-in-one RDP alternative for performance and cross-platform use
TeamViewer – Best for enterprise remote support
AnyDesk – Best lightweight option for fast connections
RustDesk – Best Windows RDP alternative open-source solution
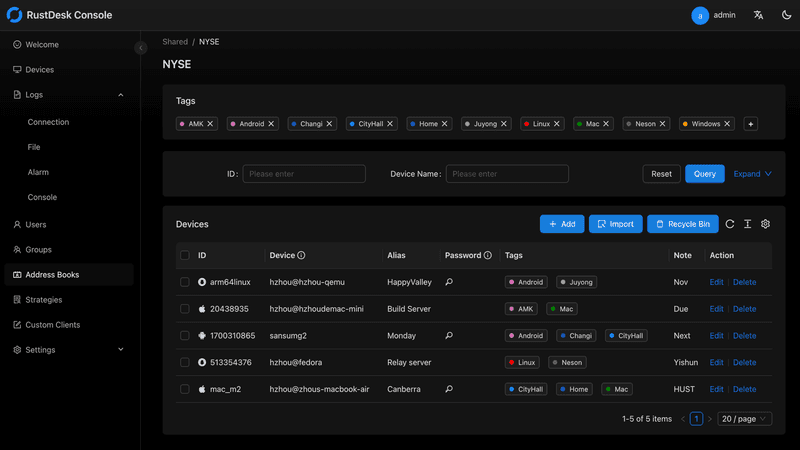
Remmina – Best RDP alternative for Linux users
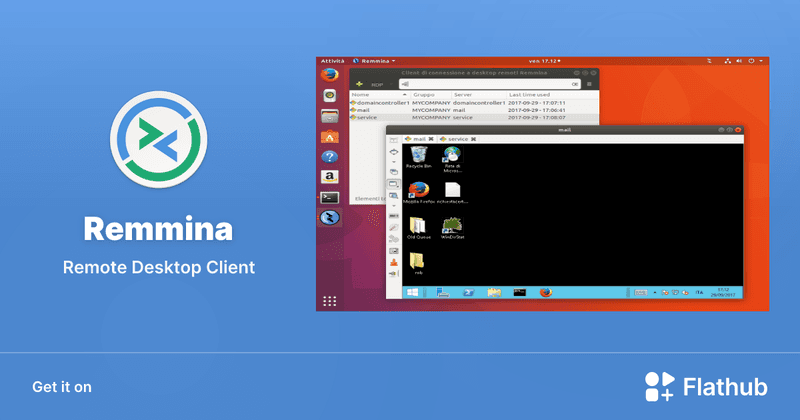
Chrome Remote Desktop – Best simple browser-based tool
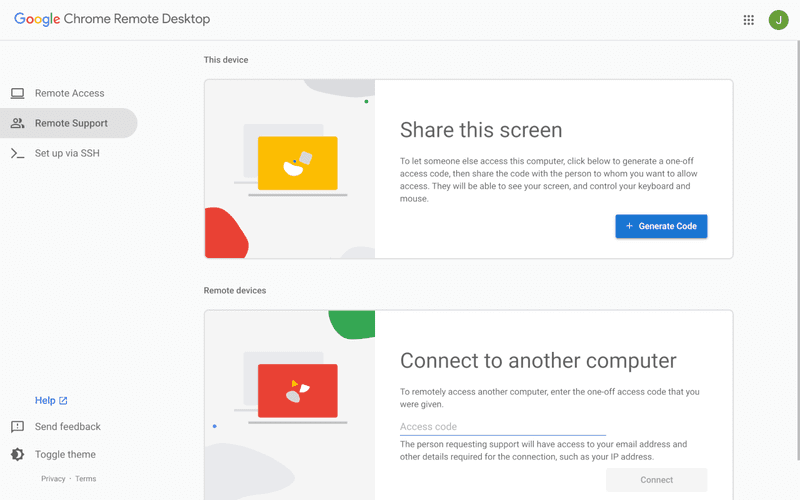
Splashtop – Best for high-performance business environments
Ultra-low latency with smooth high-frame-rate streaming
Works across Windows, macOS, Linux, iOS, and Android
Strong encryption and secure access controls
Built-in file transfer and multi-session support
Newer compared to legacy brands
Best for: Users who want a powerful, flexible RDP alternative

DeskIn feels less like remote access and more like teleportation for your desktop. Whether you're managing servers, supporting clients, or working remotely, it delivers consistently smooth performance without the usual lag spikes seen in traditional RDP setups.
Unlike many tools, DeskIn eliminates the need for complex configurations. You don't need to wrestle with firewalls or VPNs just to connect. It also works seamlessly across platforms, making it a strong alternative to Microsoft Remote Desktop for Mac and mobile users alike.
For teams juggling multiple systems, DeskIn provides a unified experience that replaces fragmented workflows. It's also a strong free RDP alternative option with premium-level capabilities, making it ideal for both individuals and businesses.
Enterprise-grade security and compliance
Extensive feature set including collaboration tools
Cross-platform compatibility
Reliable global performance
Expensive licensing
Can be overkill for individuals
Best for: Enterprises needing secure and scalable remote access
TeamViewer is a comprehensive remote desktop platform widely adopted by IT teams, support professionals, and enterprises. Its feature set extends far beyond simple screen sharing—it includes robust device management, remote printing, file transfer, session recording, and even augmented reality support for field service. TeamViewer's security architecture relies on AES‑256 encryption, two‑factor authentication, and whitelisting, making it suitable for organizations with strict compliance requirements. It runs on virtually every operating system and mobile platform.
The main trade‑off is its pricing: licenses are subscription‑based and can become expensive for small teams or individual users, especially as TeamViewer aggressively flags personal use as commercial, leading to session restrictions.
Fast and responsive
Lightweight installation
Works well on low bandwidth
Easy to use
File transfer can be inconsistent
Lag during longer sessions
Best for: Users needing quick, simple remote access
AnyDesk is a lightweight remote desktop application prized for its speed and efficiency, often recommended as a fast alternative to Microsoft's native Remote Desktop on Windows 10 and Android. It uses a proprietary video codec, DeskRT, to achieve low latency even on limited bandwidth, making it ideal for quick support sessions and accessing devices over mobile networks. The interface is clean and minimalist, with features like address book management, file transfer, and session recording available.
However, users frequently report instability during extended sessions; performance can degrade over time, and file transfers may slow considerably compared to competitors. While its free version is generous for personal use, professional users often find the performance ceiling limits its suitability for continuous, demanding workloads. DeskIn, by contrast, maintains consistent performance even during extended use, making it better suited for professional workloads.
You may also be interested in: |
|---|
Free and open-source
Self-hosting for full control
Strong privacy protection
Active community
Technical setup required
Limited user-friendly features
Best for: Developers and privacy-focused users
RustDesk has emerged as a leading open‑source remote desktop alternative, appealing to developers and organizations that require full control over their data. It allows users to self‑host the relay and rendezvous servers, meaning no third‑party infrastructure handles connection metadata. Built with Rust, it offers a modern codebase with cross‑platform clients (Windows, macOS, Linux, Android, iOS) and supports essential features such as file transfer, TCP tunneling, and customizable address books.
The major barrier is its complexity: deploying a self‑hosted environment requires technical expertise to configure firewalls, SSL certificates, and ongoing server maintenance. For those using the public relay, performance can be inconsistent depending on server load and geographic proximity.
You may also be interested in: Top RustDesk Alternatives for Better Performance, Security & Ease of Use |
|---|
Open-source and free
Supports multiple protocols including RDP and VNC
Lightweight and flexible
Native to Linux environments
Limited features compared to modern tools
UI can feel outdated
Best for: Linux users looking for a traditional RDP alternative Linux
Remmina is a beloved open‑source remote desktop client for Linux, supporting multiple protocols (RDP, VNC, SSH, SPICE, and others) in a single unified interface. It is frequently chosen by system administrators and Linux enthusiasts who need a flexible, lightweight tool to manage diverse environments. Remmina offers tabbed sessions, quick‑connect profiles, and a plugin system that extends its capabilities.
However, its strength - protocol flexibility, also highlights its limitations. As a frontend client rather than a full remote access solution, it lacks features like unattended access, centralized account management, or robust session recording out of the box. Performance can vary by protocol, and the user experience lags behind more polished commercial tools, particularly for users seeking a plug‑and‑play setup.
Free and easy to use
Browser-based setup
Cross-platform access
Very limited features
No advanced management tools
Best for: Casual users needing basic remote access
Chrome Remote Desktop is a free, browser‑based remote access tool from Google that requires nothing more than a Chrome browser and a Google account. It excels in simplicity: installation takes seconds, and connections are mediated through Google's infrastructure, eliminating complex firewall configurations. For occasional use—such as helping a family member or quickly accessing a home computer—it works reliably across Windows, macOS, Linux, and even ChromeOS.
The trade‑off is its minimal feature set. There is no native file transfer, multi‑session management, remote printing, or granular permission controls. Collaboration tools are absent, and the reliance on a Google account for authentication can be a limitation in professional environments. It remains a convenient entry‑level tool but struggles to meet the needs of power users or IT teams.
You may also be interested in: |
|---|
High-quality streaming performance
Strong security features
Good for business environments
Reliable connections
Subscription-based pricing
Limited free version
Best for: Businesses needing performance-focused remote access
Splashtop is a high‑performance remote desktop solution frequently adopted by creative professionals, educational institutions, and enterprises that prioritize fluid interaction. It delivers low‑latency streaming with support for high‑frame‑rate displays, making it suitable for video editing, CAD work, and other graphics‑intensive tasks. Splashtop offers a range of editions—from Business Access to SOS for on‑demand support—all of which include robust security (AES‑256, device authentication) and features like file transfer, remote printing, and multi‑monitor navigation. Its performance over local networks and the internet is consistently praised.
The primary drawback is cost: while competitive, the subscription model can accumulate quickly for users needing access to multiple devices or advanced features, especially when compared to similarly capable tools with more flexible pricing structures. DeskIn offers similar performance benefits with a more flexible pricing structure, making it a compelling alternative.
You may also be interested in: |
|---|
RDP can be difficult to configure, less secure if exposed, and limited outside Windows environments. Modern tools like DeskIn provide better performance, security, and ease of use.
The best RDP alternative depends on your needs, but DeskIn stands out for its balance of speed, security, and cross-platform compatibility.
Yes, several tools qualify as an RDP alternative free, including RustDesk and Chrome Remote Desktop. DeskIn also offers a free tier with advanced capabilities.
Microsoft is evolving its remote desktop ecosystem, but traditional RDP isn't disappearing overnight. However, many users are already transitioning to more modern solutions like DeskIn for better reliability and flexibility.
RDP has served its purpose, but the digital world has outgrown its limitations. Whether you need better performance, stronger security, or true cross-platform access, switching to a modern RDP alternative is no longer optional, it's inevitable.
Among all the options, DeskIn stands out as a future-ready solution. It combines speed, simplicity, and power into one seamless experience, helping you leave behind the friction of traditional remote desktop tools and step into something far more efficient.
Gawing Pangalawang Monitor ang iPad Para sa Windows at Mac Computers
Para sa mga multitasking na manggagawa, ang pagkakaroon ng pangalawang monitor ay maaaring greatly increase ng productivity. Kung ikaw ay isang tao sa home office o isang estudyante na walang dual screen. Narito kung paano mo madaling gawing pangalawang monitor ang iyong idle iPad para sa iyong computer.
1. Taasan ang espasyo ng screen upang ipakita ang higit pa sa parehong oras. Para sa mga multi-task users, maiiwasan nilang magpalipat-lipat ng mga bintana, na nakakatipid ng oras.
2. Ang bawat screen ay gumagana nang hiwalay, ginagawang mas organisado ang workspace.
Kapag nag-e-edit ng mga video, isang screen ang ginagamit para sa pag-e-edit at ang isa para sa paglalagay ng mga materyales. Kapag sumusulat ng papel, isang screen para sa pagsusulat, ang isa para sa paghahanap ng impormasyon atbp.
3. Ang laki ng screen ng iPad ay sapat na malaki, at ang kalidad ng display ay medyo maganda. Para sa mga gumagamit na may mga pangangailangan sa disenyo o gumagamit ng MacBook, mas nagiging cost-effective ito kaysa sa pagbili ng karagdagang screen, at wala nang problema sa pagkakaiba ng kulay.
4. Maraming tao ang may mga iPad sa bahay. Sa pamamagitan ng paggamit ng device na mayroon ka bilang isang dual screen, nakakatipid ka sa gastos ng pagbili ng isa pang screen at ng espasyong ilalagay ito.
Ang sariling tampok ng Apple na Apple Sidecar ay nagbibigay-daan sa iyo na gamitin ang iPad bilang isang external display para sa MacBook at iMac. Gumawa lamang ng ilang simpleng setting at maaari mong makamit ang seamless connection sa pagitan ng iyong iPad at computer.
Paalala: Upang magamit ang Apple Sidecar, ang dalawang device ay dapat nakalog sa parehong Apple ID o nasa parehong network. Dapat i-on ang Bluetooth at Wi-Fi sa parehong device, at hindi dapat lumagpas ang distansya ng 10 meters (tungkol sa 10 meters).
Buksan ang Mac System Settings >> I-click ang "Display" sa sidebar >> I-click ang "+" pop up menu sa kanan at piliin ang iyong iPad.
Piliin ang iPad, baguhin ang Use as settings sa "Extended Display". Suriin ang Airplay settings sa itaas na toolbar ng Mac at itakda ang iPad bilang "Use As Separate Display".
Matapos makumpleto ang mga setting, ang iyong iPad ay magiging pangalawang display para sa iyong Mac. Maaari mong ilipat ang mga bintana mula sa iyong Mac papunta sa iyong iPad nang maayos. Maaari mo ring gamitin ang sidebar sa iPad o baguhin ang posisyon ng sidebar sa system display settings.
MacBook Screen (Kaliwa) at iPad Screen (Kanan)
Ang Apple Sidecar ay sumusuporta lamang sa mga Mac na inilabas pagkatapos ng 2016 at iPadOS13 o bago. Kung gumagamit ka ng lumang Apple device o Windows device, maaari mo pa ring gamitin ang DeskIn remote software upang gawin ang screen extension. Sinusuportahan nito ang paggamit ng iPad bilang pangalawang display para sa Mac at Windows, at ang smoothness ay hindi mas mababa sa sidecar.
I-download ang DeskIn sa iyong computer at iPad, magrehistro para sa isang libreng account at mag-log in nang hiwalay.
Paalala: Sa iyong unang pag-log in sa isang bagong device, kailangan mong kumpletuhin ang email verification, na naglalayong protektahan ang seguridad ng iyong account.
Buksan ang DeskIn app sa iyong Windows/Mac computer >> Pumunta sa "Screen Mgt" Tab >> I-click ang "Extend my screen"
Piliin ang iyong iPad, at i-click ang "Start Extending". Kapag nakakonekta, ang iyong iPad ay magiging pangalawang display ng iyong Windows/Mac computer, maaari mong ilipat ang mga bintana sa pagitan ng dalawang screen na para bang nasa isa lamang ito.
Computer Screen (Kaliwa) at iPad Screen (Kanan)
Matapos ang extension, kung napansin mong ang iyong iPad ay nagmi-mirror lamang ng nilalaman sa iyong computer screen, mangyaring pumunta sa Windows System Settings >> Display Settings at baguhin ang screen option sa "Extend these displays". Maaari mo ring baguhin ang posisyon ng screen sa pamamagitan ng pag-drag ng 2 screens.
Ang artikulong ito ay nagpapakita kung paano gamitin ang DeskIn remote desktop software upang gawing "pangalawang screen" ang isang iPad para sa Mac at Windows computers. Ito ay lalong kapaki-pakinabang para sa mga tao na kailangang hawakan ang maraming gawain nang sabay-sabay at nais na mapabuti ang productivity. Kung naghahanap ka ng screen extension tool na gumagana sa iyong MacBook, iPad, Android Tablet at Windows PC, ang DeskIn remote desktop ay ang pinakamainam na solusyon para sa iyo. I-download ang DeskIn at subukan ito ngayon!
Top 6 RustDesk Alternative Tools for Faster, Easier Remote Access
Remote access should feel like flipping a light switch, not decoding a control panel. Yet many users exploring RustDesk eventually run into friction: connection IDs, server setup, or occasional lag. While RustDesk is powerful, it’s not always the easiest or smoothest option, especially for non-technical users.
That’s why more people are actively searching for a reliable RustDesk alternative that combines performance, simplicity, and flexibility. Whether you want a plug-and-play solution or something more advanced, this guide will help you find the best fit.
RustDesk stands out as a privacy-friendly, self-hosted remote desktop tool. However, real-world usage reveals a few common challenges:
Complicated setup for the RustDesk self-hosted environments
Manual connection steps requiring IDs and passwords
Occasional latency or unstable connections
Limited user-friendly features out of the box
For many users, especially those helping family or managing multiple devices, simplicity matters just as much as control.
When evaluating a RustDesk alternative, focus on these key factors:
Ease of use: Quick setup without technical overhead
Performance: Smooth, low-latency remote sessions
Compatibility: Support for Windows, macOS, Linux, and mobile
Security: Strong encryption and access controls
Flexibility: Options ranging from cloud-based to open source
The ideal tool strikes a balance between power and convenience, something many modern solutions now deliver better than traditional setups.
Here’s a quick breakdown of the top tools and where they shine:
DeskIn – Best all-in-one RustDesk alternative for performance and ease of use
AnyDesk – Best lightweight tool for fast connections
TeamViewer – Best for enterprise-grade remote support
MeshCentral – Best open-source and self-hosted solution
DWService – Best free browser-based tool
Chrome Remote Desktop – Best simple, no-frills option
Ultra-low latency with smooth high-frame-rate streaming
No complex setup or server deployment required
Cross-platform including Rustdesk alternative for Android
Secure with encryption and device control features
Built-in file transfer and multi-device management
Smaller awareness than legacy competitors
Best for: Users who want a powerful yet simple remote desktop solution
DeskIn removes the friction that often comes with remote access tools. Instead of relying on IDs or manual configurations, it offers a streamlined connection experience that works right out of the box. This makes it especially valuable for users supporting non-technical family members or managing multiple remote devices.
Performance is where DeskIn truly distinguishes itself. Compared to RustDesk, which can sometimes struggle with latency, DeskIn delivers consistently smooth sessions with minimal lag. It also eliminates the need for self-hosting, making it a strong free RustDesk alternative option for users who want powerful features without the complexity.
For those exploring options beyond the RustDesk alternative GitHub projects, DeskIn provides a polished, ready-to-use experience that balances simplicity with professional-grade performance.
Lightweight and fast installation
Good performance on low bandwidth
Cross-platform support
Easy-to-use interface
Performance may drop during long sessions
File transfer can be inconsistent
Best for: Users needing quick and simple remote access
AnyDesk is often considered a natural step up from RustDesk for users who want something easier to deploy. It offers a lightweight application that connects quickly and performs well under normal conditions. This makes it suitable for quick troubleshooting or occasional remote access.
However, performance consistency can be an issue. Users frequently report lag or instability during extended sessions or when handling more demanding tasks. While AnyDesk is a solid option for basic needs, it may not fully satisfy users looking for a more robust, all-in-one solution.
👀 You may also be interested in: |
|---|
Enterprise-grade security with encryption and 2FA
Stable performance across global networks
Rich features like file transfer and session recording
Broad device compatibility
Expensive for commercial use
Free version has limitations
Heavier resource usage on some systems
Best for: Businesses and IT teams managing multiple endpoints
TeamViewer has long been a dominant player in the remote desktop space, offering a comprehensive suite of features designed for enterprise environments. It excels in reliability and global connectivity, making it a popular choice for IT support teams.
That said, its pricing model is a major drawback for many users. Frequent users may quickly encounter licensing restrictions, and costs can escalate for businesses. Additionally, its heavier footprint can impact performance on lower-end devices. DeskIn offers a more modern alternative by delivering similar performance and essential features without the same cost barriers. For users who want enterprise-level capabilities with better efficiency, it presents a compelling option.
👀 You may also be interested in: |
|---|
Fully RustDesk alternative open source solution
Web-based management dashboard
Supports multi-device environments
Strong customization and control
Complex setup and maintenance
Requires technical expertise
Best for: Advanced users needing a Rustdesk alternative self-hosted
MeshCentral is a powerful open-source platform designed for users who want full control over their remote access infrastructure. It supports multiple devices and provides a centralized dashboard for management, making it attractive for IT professionals.
However, this flexibility comes with complexity. Setting up and maintaining a MeshCentral server requires technical knowledge, which can be a barrier for many users. Compared to this, DeskIn offers a much simpler deployment process while still delivering strong performance and security. For users who prioritize ease of use over full control, modern solutions like DeskIn provide a more accessible alternative.
Completely free
Browser-based access
Open-source foundation
Simple setup
Limited performance
Basic feature set
Best for: Users looking for a simple, free RustDesk alternative
DWService offers a browser-based approach to remote access with no heavy installation, making it convenient for quick connections in restricted environments. It supports both desktop access and file management across major platforms.
However, performance often feels sluggish, especially on demanding tasks, and features remain basic; lacking session recording, smooth multi-monitor support, or advanced security controls. While suitable for occasional personal use, it falls short for professional or high-performance scenarios.
Free and easy to use
Browser-based setup
Cross-platform compatibility
Very limited features
No advanced management or collaboration tools
Best for: Casual users needing basic remote access
Chrome Remote Desktop is one of the simplest remote access tools available. It’s easy to set up and works across devices, making it a convenient choice for occasional use.
However, it lacks many essential features such as file transfer, session management, and advanced security controls. For users with more demanding needs, it quickly becomes insufficient. Compared to Chrome Remote Desktop, DeskIn provides a much more complete experience without sacrificing ease of use, making it a better long-term solution.
👀 You may also be interested in: |
|---|
RustDesk is powerful but can be difficult to set up and manage, especially with self-hosting. Many users prefer tools that offer similar performance without technical complexity. DeskIn simplifies remote access while maintaining strong performance and security.
Several tools qualify as a free RustDesk alternative, including DWService and Chrome Remote Desktop. However, DeskIn stands out by offering better performance and usability even in its free version.
Yes, tools like MeshCentral and DWService are considered RustDesk alternative open source options. They provide flexibility and control but often require technical expertise to set up and maintain.
Beginners should choose tools with a simple setup and intuitive interfaces. DeskIn is an excellent option because it removes the need for manual configuration while still delivering advanced features.
RustDesk is a powerful starting point, but it’s not always the easiest or most efficient tool for everyday use. From setup complexity to performance limitations, many users eventually look for a better RustDesk alternative.
Among all the options, DeskIn stands out as the most balanced solution. It combines speed, simplicity, and cross-platform support into one seamless experience. If you’re ready to move beyond technical friction and enjoy truly smooth remote access, DeskIn is a choice that simply works.
Products
Download
Resources
Contact Us
Email: support@deskin.io
Office: 991D Alexandra Road #02-17, Singapore 119972
Copyright © 2026 Zuler Technology PTE. LTD. All rights reserved.
Contact Us
Email: support@deskin.io
Office: 991D Alexandra Road #02-17, Singapore 119972
Products
Download
Resources
Copyright © 2026 Zuler Technology PTE. LTD. All rights reserved.
Products
Download
Resources
Contact Us
support@deskin.io
991D Alexandra Road #02-17
Singapore 119972
Copyright © 2026 Zuler Technology PTE. LTD. All rights reserved.
【New User Special Offer】
Save
Extra 20%
on your first order|4K60FPS
Extra
20% Off
|For
New Users
【New User Special Offer】
Save
Extra 20%
on first order

