10
/
/
Pagiging produktibo
/
/
Na-update
Na-update
Ang Ennead Architectural Design firm (dating kilala bilang Polshek Partnership) ay isang kumpanya ng arkitektura sa New York na nag-specialize sa paggawa ng makabago at napapanatiling mga disenyo para sa iba't ibang uri ng proyekto, kabilang ang mga institusyong pangkultura, pang-edukasyon, at pang-agham.
Itinatag ang kumpanya noong 1963 at nakatapos na ng maraming kilalang proyekto sa mga nakaraang taon, kabilang ang Rose Center for Earth and Space sa American Museum of Natural History sa New York, ang Natural History Museum ng Utah, at ang Standard Hotel sa Meatpacking District ng New York.
Ang Ennead Architectural Design ay nakilahok din sa ilang mga kilalang proyekto ng pagsasaayos at pagbabagong-buhay, kabilang ang pagsasaayos ng Carnegie Hall at ang pagbabagong-buhay ng Louis Gallery sa Yale University Art Museum.
Mayroon ang Ennead Architectural Design ng matibay na pangako sa paglikha ng mga gusaling arkitektural na mahalaga at may panlipunang epekto sa buong mundo.
Ang paglipat sa remote work sa panahon at pagkatapos ng pandemya
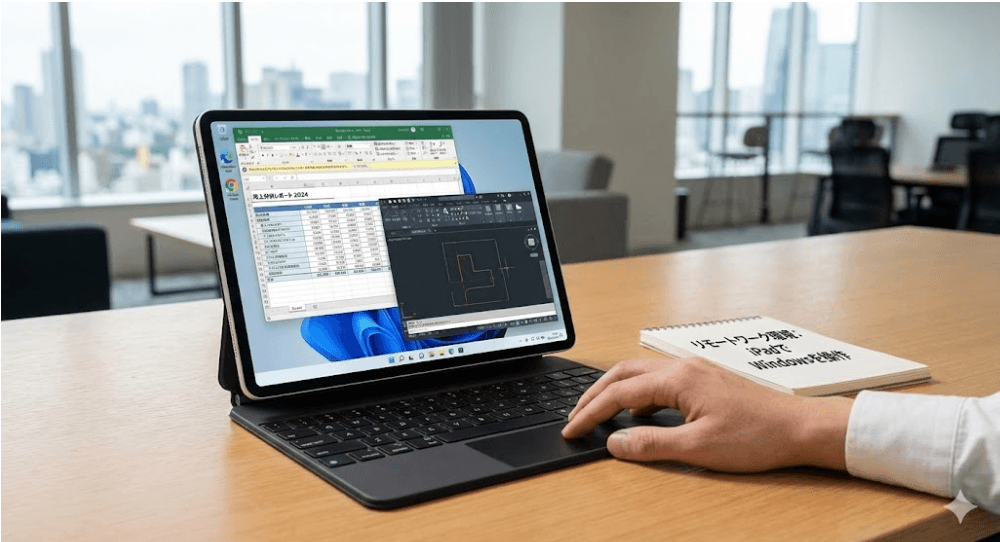
Tulad ng maraming ibang kumpanya sa industriya ng arkitektura at disenyo, naapektuhan ang Ennead ng COVID-19 pandemya at ang mga resulting restrictions sa personal na trabaho. Ang paglipat sa remote work ay naging mas hamon para sa mga tauhan ng Ennead na makipagtulungan nang epektibo at makakuha ng access sa mataas na pagganap na computer office at mga kasangkapan sa pagguhit ng kumpanya.
Sa kabila ng mga hamon, ipinakita ng Ennead ang kanilang katatagan at kakayahang umangkop sa harap ng pandemya. Gumamit ang Ennead ng DeskIn Enterprise Edition upang matulungan silang makumpleto ang mga remote design drawings at simulations sa panahon ng pandemya.
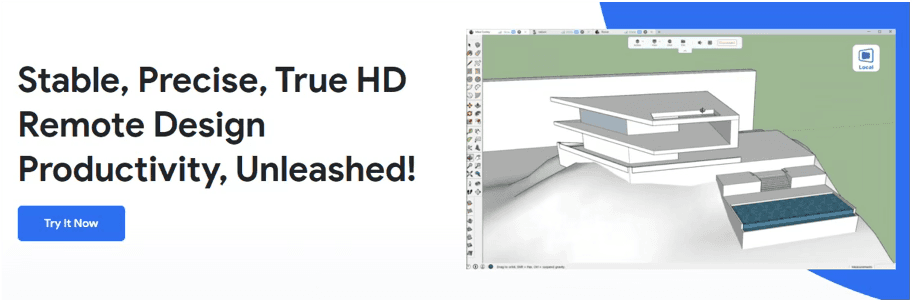
Ang DeskIn ay isang cloud-based platform na nagbibigay-daan sa remote access sa mga high-performance na computer at aplikasyon, na partikular na kapaki-pakinabang para sa mga industriya tulad ng arkitektura at disenyo kung saan madalas na kinakailangan ang high-performance computing.
Sa pamamagitan ng paggamit ng DeskIn, nagawa ng Ennead na bigyan ang kanilang mga tauhan ng remote access sa mataas na pagganap na computer office at mga kasangkapan sa pagguhit ng kumpanya, na nagbibigay-daan sa kanila na magtrabaho sa mga design drawings at simulations mula sa kahit saan na may matatag, mataas na definition, at maayos na karanasan.
Ito ay magbibigay-daan sa kanila na ipagpatuloy ang pagtatrabaho sa mga proyekto nang walang mga limitasyon ng tradisyunal na remote access methods tulad ng VPNs, at upang patuloy na mag-deliver ng makabago at may epekto na mga proyekto sa kabila ng mga hadlang na dulot ng pandemya.
Ginamit ng Ennead ang DeskIn hindi lamang para sa remote access sa mataas na pagganap na computing, kundi pati na rin upang isama at i-optimize ang kanilang mga proseso sa negosyo, pati na rin ang mahusay na pamahalaan ang off-site na trabaho sa panahon ng pandemya.
Mga Hadlang na Naranasan ng Ennead Team Habang Nagtatrabaho Sa Iba't Ibang Lokasyon
Ang mga koponan ng Ennead ay umaasa lalo na sa mataas na pagganap na computing at mga specialized software applications. Karaniwan para sa mga kumpanya ng arkitektura at disenyo na bigyan ng propesyonal na workstations ang kanilang mga production teams, na makapagbigay ng kinakailangang pagganap at kapangyarihan upang patakbuhin ang mga specialized design, 3D, at special effects applications.
Gayunpaman, kapag ang mga empleyado ay nagtatrabaho mula sa bahay sa panahon ng pandemya, ang kanilang mga personal na computer ay maaaring hindi magkaroon ng kinakailangang pagganap upang epektibong patakbuhin ang mga aplikasyon. Ang pagkalat na dulot ng pagtatrabaho mula sa bahay ay maaari ring maging mahirap upang pamahalaan at i-monitor ang mga workstation ng mga empleyado, na higit pang nagpapalubha sa sitwasyon.
Pakikipagtulungan sa DeskIn
Ang deployment ng DeskIn sa Ennead ay nagkaroon ng positibong epekto sa kakayahan ng kumpanya para sa remote work at nakatulong upang malampasan ang mga hamon ng pagtatrabaho sa panahon ng pandemya. Bilang karagdagan sa pagbibigay ng remote access sa mataas na pagganap na workstations at mga specialized applications, ang DeskIn ay naging kapaki-pakinabang din para sa seguridad ng data ng proyekto, pakikipagtulungan sa proseso, pagpapaunlad ng teknolohiya, at iba pang mga lugar.
Ang tagumpay ng DeskIn sa Ennead ay nagdala sa kumpanya na patuloy na gamitin ang platform kahit pagkatapos ng pag-alis ng epidemya. Ang kaginhawaan ng pagtatrabaho anumang oras, kahit saan, ay naging malaking benepisyo para sa mga empleyado ng Ennead, at nakita ng kumpanya ang halaga ng remote work at pakikipagtulungan.
Sa pamamagitan ng pagpapalawak ng sukat ng paggamit ng DeskIn, lalo pang mapapataas ng Ennead ang mga kakayahan nito para sa remote work at pakikipagtulungan.
Mabilis na Deployment upang Walang Putol na Lumipat sa Remote Work
Kapag bumili ang Ennead ng DeskIn Enterprise, ilang empleyado ay nasa home isolation na, na nag-iwan sa kumpanya ng napakakaunting oras upang i-load ang produkto.
Sa tampok na bulk deployment ng DeskIn Enterprise, maaaring i-install at i-configure ng mga IT administrator ang lahat ng corporate devices sa loob ng isang oras. Ang product-specific deployment code ay maaari ring magdala ng impormasyon ng device group, na nag-aalis ng pangangailangan para sa mga administrator na manu-manong pamahalaan ang mga device groups, at awtomatikong iugnay ang mga workstations sa mga katumbas na departamento sa pamamagitan lamang ng command line.
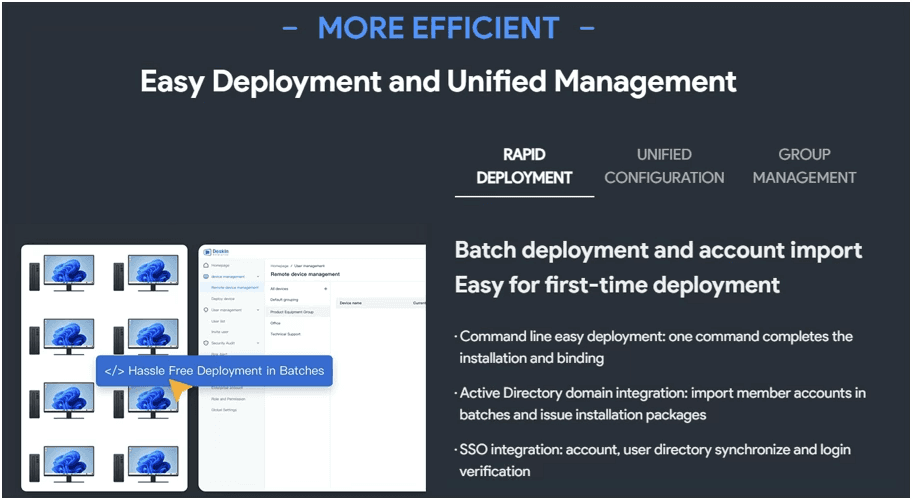
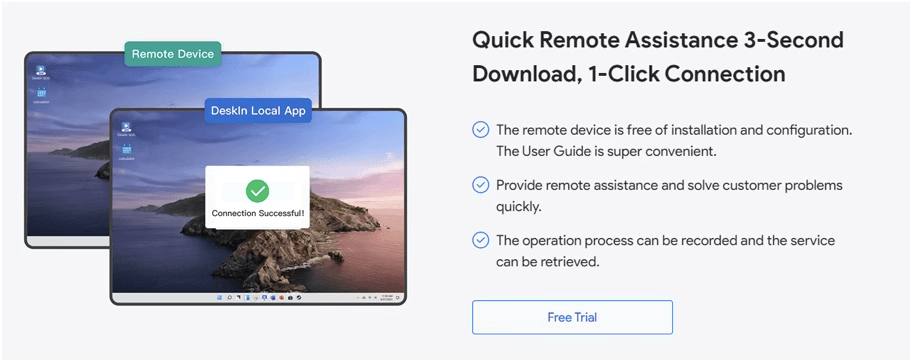
Ito ay nangangahulugan na para sa mga empleyado, kailangan nilang i-download ang DeskIn app, mag-log in, pagkatapos ay maaari nilang makita ang kagamitan ng kanilang kumpanya sa listahan ng device. Sa sandaling ilunsad nila ang remote connection, maaari silang walang putol na ma-access ang remote workstation, at ang karanasan ay hindi naiiba mula sa pagtatrabaho sa site. Magagamit nila ang workstation na parang pisikal silang nasa opisina, na walang makabuluhang pagkakaiba sa pagganap o responsiveness.
Ang pagiging simple at kadalian ng paggamit ng DeskIn ay mga pangunahing tampok na ginagawang kaakit-akit na platform para sa mga empleyado ng Ennead. Tinatanggal ng platform ang pangangailangan para sa kumplikadong configuration o setup, na nagbibigay-daan sa mga empleyado na tumutok sa kanilang trabaho at maging produktibo mula sa anumang lokasyon.
Sa DeskIn, maaari silang walang putol na lumipat sa pagitan ng remote office at remote drawing nang walang karagdagang configuration, na higit pang nagpapataas ng kanilang produktibidad at kahusayan.
Magdisenyo ng Remote sa Iba't Ibang Espasyo at Dagdagan ang Kahusayan ng Pakikipagtulungan
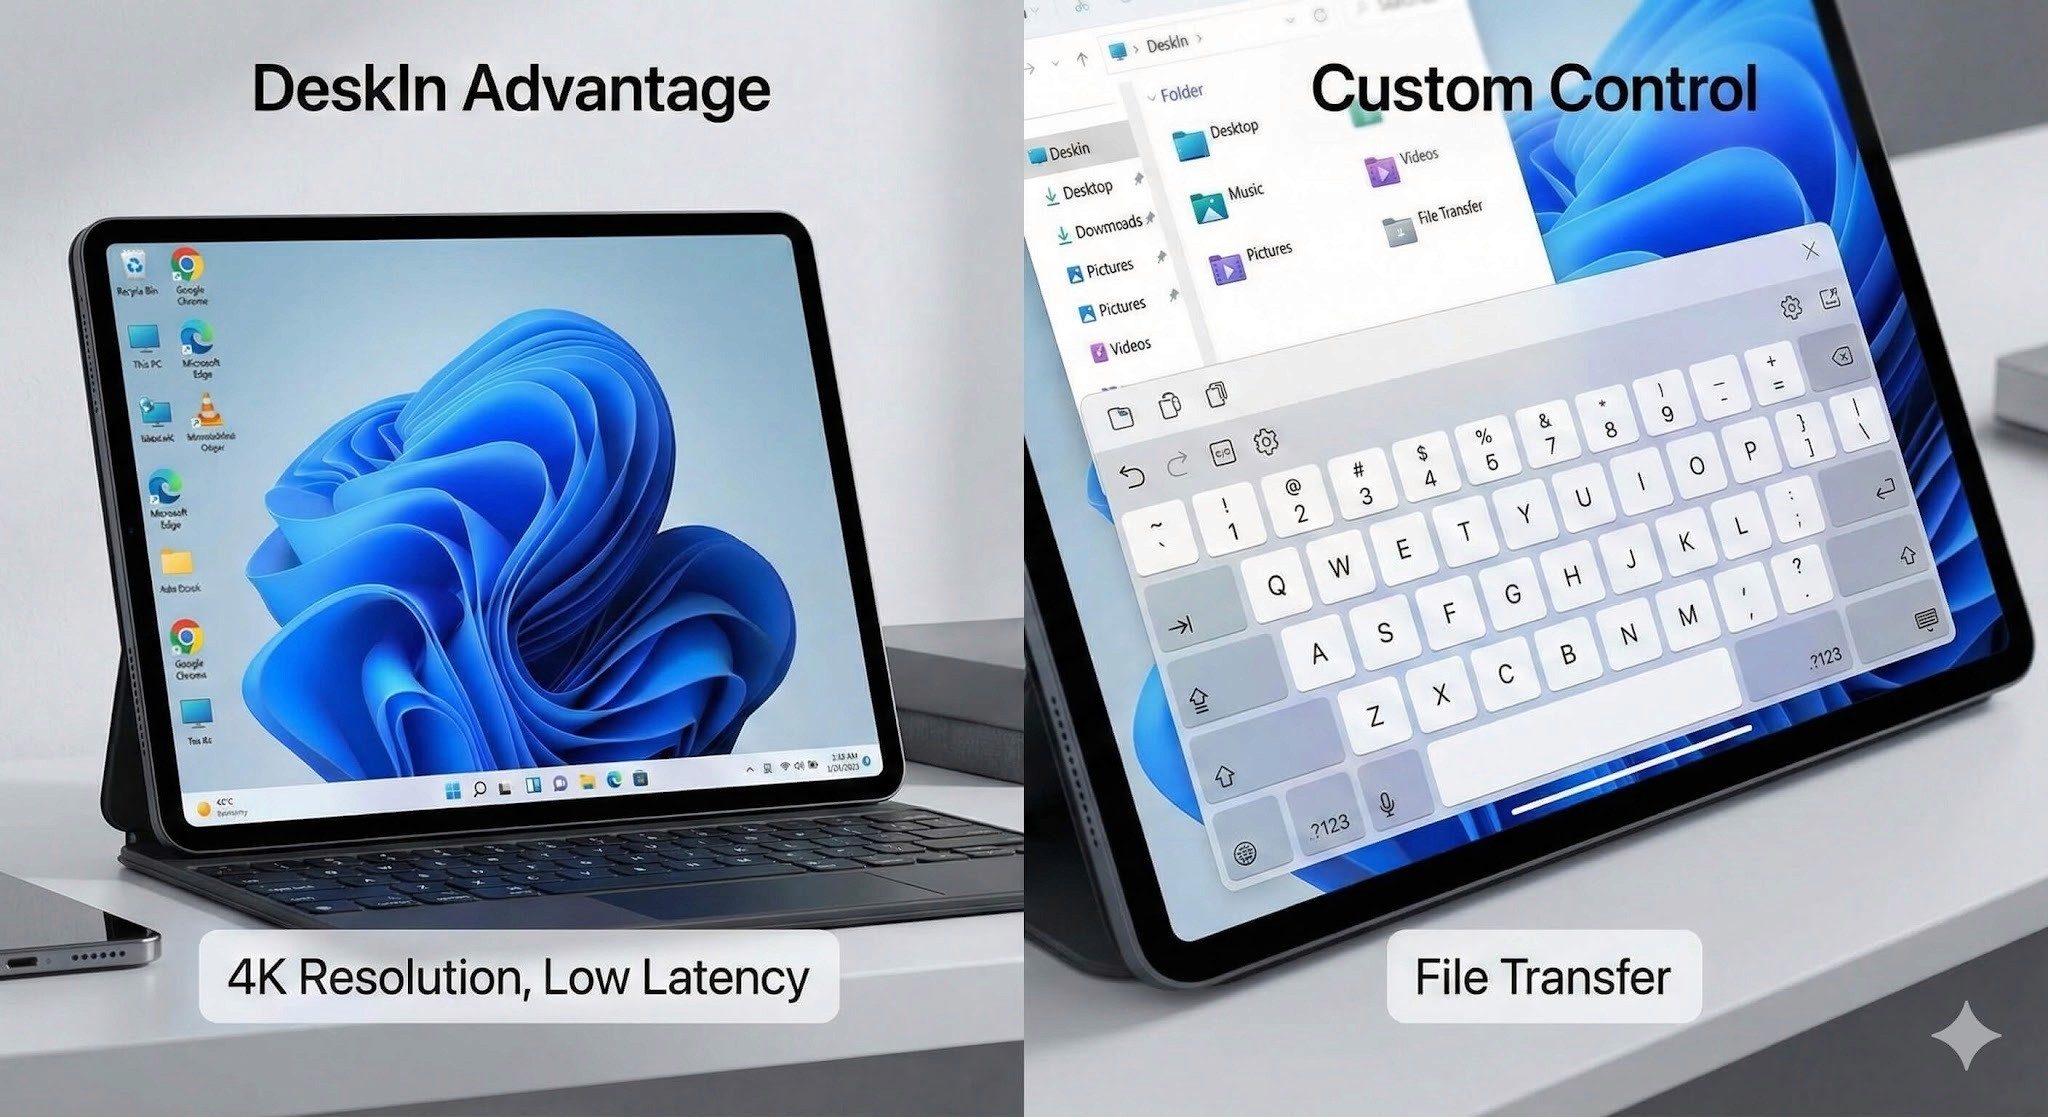
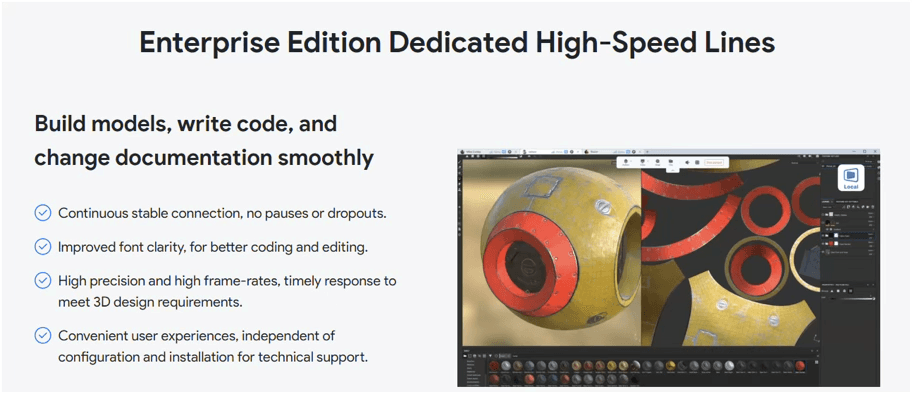
Upang mas mahusay na matugunan ang mga propesyonal na pangangailangan ng team ng designer, ang DeskIn ay nilagyan ng iba't ibang mayaman at praktikal na mga remote control functions. Bilang karagdagan sa mga pangunahing remote function tulad ng file transfer, online communication ng whiteboard, remote screen projection, remote camera, remote printing, mouse at keyboard mapping, pagsasaayos ng light at dark watermarks, atbp., ang DeskIn ay espesyal na nakabuo ng mga propesyonal na plug-in functions tulad ng pen tablet, tunay na kulay na mode, mataas na pagganap na mode, at multi-screen operation.
Maaaring kontrolin ng mga arkitekto at designer ang mataas na configuration na computer ng kumpanya para sa ultra-clear design processing sa pamamagitan ng panlabas na pen tablet/hand-drawn board sa tamang oras, na may mataas na pagganap at tunay na kulay na mode ng hanggang 4K60 frames, at tamasahin ang high-definition graphics at high-smoothness na remote control experience.
Pagsusuri sa Remote na Pina-enable ng Multi-Control Function ng DeskIn
1. Ang malaking artwork ay madalas na hindi madaling ipasa, ang remote operation ay hindi kailangang maglipat ng compression, hindi lamang nakakatipid ito ng maraming oras ng pagkopya at paghihintay sa pagpapadala, kundi nag-block din sa peligro ng pagtagas ng file mula sa pinagmulan.
2. Kapag ang designer, draftsman at project leader ay nakakonekta sa computer kung saan matatagpuan ang proyekto ng file sa parehong oras, maaari nilang tingnan at baguhin habang nakikipag-usap, na tinatanggal ang information gap sa remote work.
Sa kaso ng pag-finalize ng plano at iba pang mga senaryo kung saan kinakailangan ang paglilipat ng mga file, nagbibigay din ang DeskIn Enterprise Edition ng isang napaka-secure na paraan ng paglilipat ng file: ang mga file ay maaari lamang ilipat sa computer ng kumpanya sa listahan ng device, lahat ng transfer records ay pinanatili nang detalyado, at ang buong proseso ay maaaring kontrolin at subaybayan, na tinitiyak na ang mga enterprise managers at empleyado ay maaaring gumamit nang komportable at may katiyakan.
Ang Ennead Architectural Design firm (dating kilala bilang Polshek Partnership) ay isang kumpanya ng arkitektura sa New York na nag-specialize sa paggawa ng makabago at napapanatiling mga disenyo para sa iba't ibang uri ng proyekto, kabilang ang mga institusyong pangkultura, pang-edukasyon, at pang-agham.
Itinatag ang kumpanya noong 1963 at nakatapos na ng maraming kilalang proyekto sa mga nakaraang taon, kabilang ang Rose Center for Earth and Space sa American Museum of Natural History sa New York, ang Natural History Museum ng Utah, at ang Standard Hotel sa Meatpacking District ng New York.
Ang Ennead Architectural Design ay nakilahok din sa ilang mga kilalang proyekto ng pagsasaayos at pagbabagong-buhay, kabilang ang pagsasaayos ng Carnegie Hall at ang pagbabagong-buhay ng Louis Gallery sa Yale University Art Museum.
Mayroon ang Ennead Architectural Design ng matibay na pangako sa paglikha ng mga gusaling arkitektural na mahalaga at may panlipunang epekto sa buong mundo.
Ang paglipat sa remote work sa panahon at pagkatapos ng pandemya
Tulad ng maraming ibang kumpanya sa industriya ng arkitektura at disenyo, naapektuhan ang Ennead ng COVID-19 pandemya at ang mga resulting restrictions sa personal na trabaho. Ang paglipat sa remote work ay naging mas hamon para sa mga tauhan ng Ennead na makipagtulungan nang epektibo at makakuha ng access sa mataas na pagganap na computer office at mga kasangkapan sa pagguhit ng kumpanya.
Sa kabila ng mga hamon, ipinakita ng Ennead ang kanilang katatagan at kakayahang umangkop sa harap ng pandemya. Gumamit ang Ennead ng DeskIn Enterprise Edition upang matulungan silang makumpleto ang mga remote design drawings at simulations sa panahon ng pandemya.
Ang DeskIn ay isang cloud-based platform na nagbibigay-daan sa remote access sa mga high-performance na computer at aplikasyon, na partikular na kapaki-pakinabang para sa mga industriya tulad ng arkitektura at disenyo kung saan madalas na kinakailangan ang high-performance computing.
Sa pamamagitan ng paggamit ng DeskIn, nagawa ng Ennead na bigyan ang kanilang mga tauhan ng remote access sa mataas na pagganap na computer office at mga kasangkapan sa pagguhit ng kumpanya, na nagbibigay-daan sa kanila na magtrabaho sa mga design drawings at simulations mula sa kahit saan na may matatag, mataas na definition, at maayos na karanasan.
Ito ay magbibigay-daan sa kanila na ipagpatuloy ang pagtatrabaho sa mga proyekto nang walang mga limitasyon ng tradisyunal na remote access methods tulad ng VPNs, at upang patuloy na mag-deliver ng makabago at may epekto na mga proyekto sa kabila ng mga hadlang na dulot ng pandemya.
Ginamit ng Ennead ang DeskIn hindi lamang para sa remote access sa mataas na pagganap na computing, kundi pati na rin upang isama at i-optimize ang kanilang mga proseso sa negosyo, pati na rin ang mahusay na pamahalaan ang off-site na trabaho sa panahon ng pandemya.
Mga Hadlang na Naranasan ng Ennead Team Habang Nagtatrabaho Sa Iba't Ibang Lokasyon
Ang mga koponan ng Ennead ay umaasa lalo na sa mataas na pagganap na computing at mga specialized software applications. Karaniwan para sa mga kumpanya ng arkitektura at disenyo na bigyan ng propesyonal na workstations ang kanilang mga production teams, na makapagbigay ng kinakailangang pagganap at kapangyarihan upang patakbuhin ang mga specialized design, 3D, at special effects applications.
Gayunpaman, kapag ang mga empleyado ay nagtatrabaho mula sa bahay sa panahon ng pandemya, ang kanilang mga personal na computer ay maaaring hindi magkaroon ng kinakailangang pagganap upang epektibong patakbuhin ang mga aplikasyon. Ang pagkalat na dulot ng pagtatrabaho mula sa bahay ay maaari ring maging mahirap upang pamahalaan at i-monitor ang mga workstation ng mga empleyado, na higit pang nagpapalubha sa sitwasyon.
Pakikipagtulungan sa DeskIn
Ang deployment ng DeskIn sa Ennead ay nagkaroon ng positibong epekto sa kakayahan ng kumpanya para sa remote work at nakatulong upang malampasan ang mga hamon ng pagtatrabaho sa panahon ng pandemya. Bilang karagdagan sa pagbibigay ng remote access sa mataas na pagganap na workstations at mga specialized applications, ang DeskIn ay naging kapaki-pakinabang din para sa seguridad ng data ng proyekto, pakikipagtulungan sa proseso, pagpapaunlad ng teknolohiya, at iba pang mga lugar.
Ang tagumpay ng DeskIn sa Ennead ay nagdala sa kumpanya na patuloy na gamitin ang platform kahit pagkatapos ng pag-alis ng epidemya. Ang kaginhawaan ng pagtatrabaho anumang oras, kahit saan, ay naging malaking benepisyo para sa mga empleyado ng Ennead, at nakita ng kumpanya ang halaga ng remote work at pakikipagtulungan.
Sa pamamagitan ng pagpapalawak ng sukat ng paggamit ng DeskIn, lalo pang mapapataas ng Ennead ang mga kakayahan nito para sa remote work at pakikipagtulungan.
Mabilis na Deployment upang Walang Putol na Lumipat sa Remote Work
Kapag bumili ang Ennead ng DeskIn Enterprise, ilang empleyado ay nasa home isolation na, na nag-iwan sa kumpanya ng napakakaunting oras upang i-load ang produkto.
Sa tampok na bulk deployment ng DeskIn Enterprise, maaaring i-install at i-configure ng mga IT administrator ang lahat ng corporate devices sa loob ng isang oras. Ang product-specific deployment code ay maaari ring magdala ng impormasyon ng device group, na nag-aalis ng pangangailangan para sa mga administrator na manu-manong pamahalaan ang mga device groups, at awtomatikong iugnay ang mga workstations sa mga katumbas na departamento sa pamamagitan lamang ng command line.
Ito ay nangangahulugan na para sa mga empleyado, kailangan nilang i-download ang DeskIn app, mag-log in, pagkatapos ay maaari nilang makita ang kagamitan ng kanilang kumpanya sa listahan ng device. Sa sandaling ilunsad nila ang remote connection, maaari silang walang putol na ma-access ang remote workstation, at ang karanasan ay hindi naiiba mula sa pagtatrabaho sa site. Magagamit nila ang workstation na parang pisikal silang nasa opisina, na walang makabuluhang pagkakaiba sa pagganap o responsiveness.
Ang pagiging simple at kadalian ng paggamit ng DeskIn ay mga pangunahing tampok na ginagawang kaakit-akit na platform para sa mga empleyado ng Ennead. Tinatanggal ng platform ang pangangailangan para sa kumplikadong configuration o setup, na nagbibigay-daan sa mga empleyado na tumutok sa kanilang trabaho at maging produktibo mula sa anumang lokasyon.
Sa DeskIn, maaari silang walang putol na lumipat sa pagitan ng remote office at remote drawing nang walang karagdagang configuration, na higit pang nagpapataas ng kanilang produktibidad at kahusayan.
Magdisenyo ng Remote sa Iba't Ibang Espasyo at Dagdagan ang Kahusayan ng Pakikipagtulungan
Upang mas mahusay na matugunan ang mga propesyonal na pangangailangan ng team ng designer, ang DeskIn ay nilagyan ng iba't ibang mayaman at praktikal na mga remote control functions. Bilang karagdagan sa mga pangunahing remote function tulad ng file transfer, online communication ng whiteboard, remote screen projection, remote camera, remote printing, mouse at keyboard mapping, pagsasaayos ng light at dark watermarks, atbp., ang DeskIn ay espesyal na nakabuo ng mga propesyonal na plug-in functions tulad ng pen tablet, tunay na kulay na mode, mataas na pagganap na mode, at multi-screen operation.
Maaaring kontrolin ng mga arkitekto at designer ang mataas na configuration na computer ng kumpanya para sa ultra-clear design processing sa pamamagitan ng panlabas na pen tablet/hand-drawn board sa tamang oras, na may mataas na pagganap at tunay na kulay na mode ng hanggang 4K60 frames, at tamasahin ang high-definition graphics at high-smoothness na remote control experience.
Pagsusuri sa Remote na Pina-enable ng Multi-Control Function ng DeskIn
1. Ang malaking artwork ay madalas na hindi madaling ipasa, ang remote operation ay hindi kailangang maglipat ng compression, hindi lamang nakakatipid ito ng maraming oras ng pagkopya at paghihintay sa pagpapadala, kundi nag-block din sa peligro ng pagtagas ng file mula sa pinagmulan.
2. Kapag ang designer, draftsman at project leader ay nakakonekta sa computer kung saan matatagpuan ang proyekto ng file sa parehong oras, maaari nilang tingnan at baguhin habang nakikipag-usap, na tinatanggal ang information gap sa remote work.
Sa kaso ng pag-finalize ng plano at iba pang mga senaryo kung saan kinakailangan ang paglilipat ng mga file, nagbibigay din ang DeskIn Enterprise Edition ng isang napaka-secure na paraan ng paglilipat ng file: ang mga file ay maaari lamang ilipat sa computer ng kumpanya sa listahan ng device, lahat ng transfer records ay pinanatili nang detalyado, at ang buong proseso ay maaaring kontrolin at subaybayan, na tinitiyak na ang mga enterprise managers at empleyado ay maaaring gumamit nang komportable at may katiyakan.