ทั้งหมด
ทั้งหมด
·
10 นาที
·
10 นาที
ดับเบิลยู ทิง
Published on
Updated on
Updated on
AirDroid เป็นแอปพลิเคชันอเนกประสงค์ที่รองรับการควบคุมระยะไกล การสะท้อนหน้าจอ และการควบคุมโดยพ่อแม่ ช่วยให้ผู้ใช้จัดการอุปกรณ์หลายเครื่องได้ง่าย โอนย้ายไฟล์ หรือเฝ้าติดตามกิจกรรมหน้าจอ อย่างไรก็ตาม ในการใช้งานจริง ผู้คนจำนวนมากมีความกังวลว่าเสถียรภาพ ความปลอดภัย และแผนการกำหนดราคาของ AirDroid คุ้มค่ากับการใช้งานในระยะยาวหรือไม่
บทความนี้จะให้รีวิวในหลายมุมมองอย่างครบถ้วนเกี่ยวกับ AirDroid วิเคราะห์ฟังก์ชันหลักและข้อจำกัด สุดท้ายจะแนะนำตัวเลือกที่มีเสถียรภาพและปลอดภัยกว่า — DeskIn — เพื่อช่วยคุณค้นหาเครื่องมือควบคุมระยะไกลที่เหมาะสมที่สุด
คุณอาจสนใจ:
AirDroid เป็นแอปพลิเคชันอเนกประสงค์ที่รวมการควบคุมระยะไกล การโอนย้ายไฟล์ และการสะท้อนหน้าจอไว้ในที่เดียว จุดประสงค์หลักคือเพื่อให้ผู้ใช้สามารถเชื่อมต่อระหว่างคอมพิวเตอร์และโทรศัพท์มือถืออย่างต่อเนื่องเพื่อบริหารจัดการอุปกรณ์ Android จากระยะไกล ไม่ว่าจะอยู่ที่บริษัท ที่บ้าน หรือออกไปข้างนอก ผู้ใช้สามารถใช้ AirDroid สำหรับการควบคุมอุปกรณ์ สำรองข้อมูล หรือการเฝ้าติดตามเรียลไทม์ได้ โดยจะช่วยเพิ่มความสามารถในการปฏิบัติการของอุปกรณ์มือถือ
ในระดับฟังก์ชัน AirDroid อนุญาตให้ผู้ใช้ควบคุมโทรศัพท์จากคอมพิวเตอร์ Windows หรือ Mac ได้จากระยะไกล รวมถึงดูการแจ้งเตือน ส่งข้อความ เปิดแอปพลิเคชัน และแม้กระทั่งการสะท้อนหน้าจอ นอกจากนี้ยังรองรับการโอนย้ายไฟล์ข้ามแพลตฟอร์ม ช่วยให้โอนย้ายรูปภาพ วิดีโอ เอกสาร และเนื้อหาอื่น ๆ ระหว่าง Android, iOS, และ PC ได้รวดเร็ว ขจัดปัญหาการเชื่อมต่อแบบใช้สาย ทำให้ AirDroid ไม่เพียงเป็นเครื่องมือการจัดการระยะไกลทั่วไปสำหรับคนทำงานเท่านั้น แต่ยังได้รับความนิยมในด้านการควบคุมโดยพ่อแม่และการจัดการอุปกรณ์ขององค์กร
ในด้านการรีวิวผู้ใช้ AirDroid ได้รับคำชมสำหรับอินเทอร์เฟซที่เรียบง่ายและใช้งานง่าย แต่ผู้ใช้บางรายยังรายงานประสบการณ์การหน่วงหรือการขาดการเชื่อมต่อระหว่างการใช้งานนานหรือการสะท้อนภาพความละเอียดสูง โดยรวม AirDroid เหมาะสมสำหรับผู้ใช้ที่ต้องการการซิงโครไนซ์ข้ามแพลตฟอร์ม การปฏิบัติการจากระยะไกล และการโอนย้ายแบบไร้สาย ทำให้เป็นเครื่องมือระยะไกลที่ค่อนข้างโตและเติบโตในระบบนิเวศ Android
คุณอาจสนใจ:
AirDroid คือเครื่องมืออเนกประสงค์ที่รวมการโอนย้ายไฟล์ การสะท้อนหน้าจอ การควบคุมระยะไกล และการซิงค์การแจ้งเตือน ผู้ใช้สามารถจัดการโทรศัพท์ Android ของพวกเขาได้ง่ายๆ ผ่านเว็บหรือไคลเอนต์เดสก์ท็อป และมันรองรับการปฏิบัติการข้ามแพลตฟอร์ม (Windows, Mac, iOS, Android) ตามรีวิวส่วนใหญ่ของ AirDroid รุ่นฟรีของซอฟต์แวร์รองรับเฉพาะการโอนย้ายไฟล์พื้นฐานและการสะท้อนหน้าจอระยะสั้น หากต้องการควบคุมระยะไกลที่เสถียรหรือการฉายภาพความละเอียดสูง จำเป็นต้องอัพเกรดเป็นแผนชำระเงิน
ปัจจุบัน AirDroid ใช้โมเดลการสมัครสมาชิก โดยแผนส่วนตัวมีค่าใช้จ่ายประมาณ $3.99 USD ต่อเดือน โดยมีส่วนลดสำหรับแผนรายปี เมื่อผู้ใช้จำนวนมากค้นหาว่า "AirDroid Cast ฟรีหรือไม่?" พวกเขากำลังเปรียบเทียบความแตกต่างระหว่างฟีเจอร์ฟรีและจ่ายเงิน: รุ่นฟรีเหมาะสำหรับการใช้งานเบาๆ ในขณะที่รุ่นจ่ายเงินมอบเสถียรภาพการเชื่อมต่อระยะยาวและความสามารถในการควบคุมระยะไกล มอบประสบการณ์ที่ราบรื่นโดยรวมมากยิ่งขึ้น
ประเภท | ชื่อโซลูชัน | ราคา (ชำระรายปี/รายเดือน) | เหมาะสมกับ | ฟังก์ชั่นหลัก | หมายเหตุ |
โซลูชันสำหรับองค์กร | AirDroid Business Basic Edition | ประมาณ $12 ต่อหน่วยต่อปี | องค์กรที่ต้องการจัดการอุปกรณ์หลายเครื่องจากระยะไกล | การเข้าถึงระยะไกล การติดตามอุปกรณ์ และการจัดการไฟล์ | รับส่วนลด 10% สำหรับการสั่งซื้อมากกว่า 100 หน่วย |
AirDroid Business Standard Edition | ประมาณ $21 ต่อหน่วยต่อปี | ทีมขนาดกลางและใหญ่ | การควบคุมระยะไกลที่ครอบคลุม การจัดการกลุ่มอุปกรณ์ และการวิเคราะห์รายงาน | จัดหาความสามารถในการควบคุมระดับสูงขึ้น | |
AirDroid Business Enterprise Edition | ประมาณ $33 ต่อหน่วยต่อปี | แผนก IT ขององค์กร | ระบบบริหารจัดการ MDM ที่สมบูรณ์ การปรับใช้แอปพลิเคชัน และการควบคุมนโยบาย | รองรับการติดตั้งในภาษาท้องถิ่น | |
เวอร์ชันการใช้งานติดตั้งในองค์กร | การกำหนดราคารายการธุรกิจต้องเจรจา | องค์กรที่ต้องการความปลอดภัยสูง | การติดตั้งในเครือข่ายภายใน ข้อมูลไม่รั่วไหลออกจากเซิร์ฟเวอร์ขององค์กร | โซลูชันการรักษาความปลอดภัยสูงสุด | |
การสนับสนุนองค์กร | AirDroid Remote Support (Enterprise Edition) | เวอร์ชันฟรี: $0 เวอร์ชันพื้นฐาน: ประมาณ $199/ปี เวอร์ชันมาตรฐาน: ประมาณ $599/ปี | ทีมงานด้านเทคนิค | การช่วยเหลือระยะไกล การแชร์หน้าจอ คำแนะนำด้วยเสียง | เวอร์ชันพรีเมียมที่กำลังจะมา |
ผู้ใช้ธรรมดา | AirDroid Personal Edition | $3.99/เดือน ($2.50/เดือนสำหรับการชำระรายปี) | ผู้ใช้ส่วนบุคคล/สำนักงานทั่วไป | การโอนย้ายไฟล์ การควบคุมระยะไกล การจัดการการโทร/ข้อความ การกล้องระยะไกล | แผนส่วนบุคคลยอดนิยมที่สุด |
การสะท้อนหน้าจอ | AirDroid Cast | $2.49/เดือน ($1.67/เดือนรายปี) | ผู้ใช้ที่ต้องการฉายหน้าจอโทรศัพท์ลงคอมพิวเตอร์ | การสะท้อนจาก Android/iOS → Windows/Mac/Web, การส่งผ่านระยะไกล, และการสนับสนุน AirPlay | - |
การควบคุมการใช้โดยพ่อแม่ | AirDroid Parental Control | $9.99/เดือน ($4.99/เดือนรายปี) | พ่อแม่ | การจำกัดเวลาการใช้, การบล็อกแอป, การติดตามตำแหน่ง, การสะท้อนหน้าจอ, รายงานกิจกรรม | - |
การช่วยเหลือระยะไกล | AirDroid Remote Support (Personal Version) | $2.49/เดือน ($1.58/เดือนรายปี) | การสนับสนุนเทคนิคส่วนบุคคลหรือการช่วยเหลือบ้าน | การควบคุมระยะไกล, การแชร์หน้าจอ, การโทรด้วยเสียง, คำแนะนำท่าทาง | รองรับอุปกรณ์ Android |
AirDroid แบ่งออกเป็นสามโมดูลหลักคือ AirDroid Cast, AirDroid Files, และ AirDroid Parental Control ที่แต่ละโมดูลรองรับการใช้งานที่ต่างกันตามความต้องการ
AirDroid Cast เป็นเครื่องมือสะท้อนหน้าจอและควบคุมที่ได้รับการยกย่องสูงสุด รองรับทั้งเวอร์ชันเดสก์ท็อปและเว็บ ผู้ใช้สามารถฉายหน้าจอ Android หรือ iPhone ของตนไปยัง Windows, Mac, หรือแม้กระทั่งสะท้อนผ่านเบราว์เซอร์ ตามหลายรีวิว AirDroid Cast ภาพและประสิทธิภาพการหน่วงเป็นไปอย่างเสถียร ทำให้เหมาะสมสำหรับการประชุมออนไลน์ การสอนระยะไกล หรือการส่งสัญญาณเกม
AirDroid Files เน้นที่การโอนย้ายไฟล์ข้ามแพลตฟอร์มและการจัดการระยะไกล ช่วยให้สามารถแชร์ข้อมูลอย่างรวดเร็วระหว่างอุปกรณ์ต่าง ๆ และการเชื่อมต่อระยะไกลปลอดภัยกับคอมพิวเตอร์อื่น
AirDroid Parental Control มอบโซลูชันการควบคุมพ่อแม่อย่างสมบูรณ์แบบ พร้อมฟีเจอร์การติดตามตำแหน่ง การตั้งขีดจำกัดการใช้แอปและหน้าจอ ซึ่งเป็นประเด็นยอดนิยมในการควบคุมโดยพ่อแม่ เหมาะสำหรับครอบครัวที่ต้องการปกป้องความปลอดภัยออนไลน์ของบุตรหลาน
ต้องการเข้าถึงทั้งการสะท้อนหน้าจอและการโอนย้ายไฟล์ที่มีคุณภาพในเครื่องมือเดี่ยว?
ลอง DeskIn! มันเหมือนกับการรวมฟังก์ชัน Cast และ Files ของ AirDroid พร้อมการสนับสนุนเพิ่มเติมสำหรับหลายจอคุณภาพ 4K เวลาหน่วงต่ำ และการควบคุมข้ามแพลตฟอร์ม เป็นโซลูชันครบวงจรสำหรับการใช้เดสก์ท็อประยะไกล!กลุ่มเป้าหมายและกรณีการใช้งาน: การควบคุมระยะไกล การสะท้อนหน้าจอ การควบคุมโดยพ่อแม่
จากหลายรีวิวของ AirDroid เครื่องมือนี้ตอบสนองความต้องการในสามสถานการณ์การใช้งานหลักดังนี้:
พนักงานระยะไกล
สามารถใช้ AirDroid ในการปฏิบัติการอุปกรณ์ข้ามแพลตฟอร์ม เช่น เชื่อมต่อจากระยะไกลกับคอมพิวเตอร์ Windows จาก Mac หรือ ใช้ iPhone เพื่อควบคุม Mac จากระยะไกล เพื่อให้ได้ความร่วมมือที่มีประสิทธิภาพและการจัดการไฟล์ระหว่างหลายอุปกรณ์
ผู้ใช้เพื่อการศึกษาและงานนำเสนอ
ใช้ AirDroid Cast สำหรับการสะท้อนหน้าจอเพื่อแชร์หน้าจออุปกรณ์มือถือได้แบบเรียลไทม์ในระหว่างการประชุม ชั้นเรียนออนไลน์ หรือการนำเสนอ รองรับการแสดงผลแบบความละเอียดสูงที่มีเวลาแฝงต่ำเพื่อการใช้งานอย่างเสถียร
กลุ่มการควบคุมโดยพ่อแม่
ด้วย AirDroid Parental Control พ่อแม่สามารถตั้งค่าเวลาการใช้งานจำกัด บล็อกแอปพลิเคชัน และติดตามตำแหน่งแบบเรียลไทม์เพื่อให้แน่ใจเรื่องความปลอดภัยขณะใช้ออนไลน์และอุปกรณ์
ต้องการเรียนรู้เพิ่มเติมเกี่ยวกับขั้นตอนการตั้งค่าการควบคุมโดยพ่อแม่และแผนการกำหนดราคา? อ่านต่อไปในส่วนถัดไปที่มีทั้งบทแนะนำสมบูรณ์และการวิเคราะห์ละเอียด
ในฐานะเครื่องมือการควบคุมโดยพ่อแม่ AirDroid Parental Control แก้ปัญหาสามเจ็บหลักของ "ต้องการตรวจสอบโทรศัพท์ของเด็กแต่กลัวการละเมิดความเป็นส่วนตัว" "ราคาคุ้มค่าหรือไม่" และ "ใช้งานยากหรือไม่" เริ่มต้นจากการตั้งค่า ผู้ใช้เพียงดาวน์โหลดแอป AirDroid Parental Control บนอุปกรณ์ของพ่อแม่ ลงชื่อเข้าใช้แล้วติดตั้งแอปคู่ขนานบนอุปกรณ์ของเด็กแล้วจับคู่ด้วยรหัสคำเชิญหรือ QR code เพื่อเปิดใช้งานโหมดตรวจสอบ
แผนมีฟังก์ชันอย่าง การจำกัดเวลาการใช้แอป การสะท้อนหน้าจอ การติดตามตำแหน่ง การตั้งขอบรั้วแจ้งเตือน และการบล็อกแอป พ่อแม่สามารถตั้งค่าการใช้งานโทรศัพท์ของลูกได้ว่าช่วงเวลาใด จำกัดแอปพลิเคชันที่เฉพาะเจาะจง ดูประวัติและเส้นทางตำแหน่ง และแม้กระทั่งสังเกตพฤติกรรมการใช้งานของลูกได้จากโทรศัพท์ของพ่อแม่
ในด้านราคาระบุว่าราคาอย่างเป็นทางการเริ่มต้นที่ประมาณ US $9.99/เดือน, US $19.99/ต่อไตรมาส (ประมาณ US $6.66/เดือน), หรือ US $59.99/ต่อปี (ประมาณ US $5.00/เดือน) รองรับการผูกกับอุปกรณ์ลูกได้หลายเครื่อง ผู้ใช้ใหม่ยังสามารถเพลิดเพลินกับการทดลองใช้ฟรีสามวันโดยปกติได้
เกี่ยวกับการรีวิวการใช้งานจริงของผู้ใช้ส่วนใหญ่พบว่าอินเทอร์เฟซใช้งานง่าย ฟังก์ชันครบถ้วน และคุ้มค่า อย่างไรก็ตามบางคนตระหนักถึงการขาดเจ้าที่ในแอพ social บางตัว การขาดการสนับสนุนฟีเจอร์บางอย่างในอุปกรณ์ iOS หรือความอาจจะสร้างปัญหาความไว้วางใจพ่อแม่กับลูกจากการตรวจสอบระยะยาว
หากคุณไม่แน่ใจเกี่ยวกับการอัพเกรดทันที ขอแนะนำให้ลองใช้คุณสมบัติหลักผ่านการทดลองใช้ฟรีก่อน แล้วค่อยตัดสินใจว่าจะจ่ายเพื่ออัพเกรด
การอ่านที่แนะนำ: หากคุณจำเป็นต้องทำให้อุปกรณ์มือถือใช้งานง่ายขึ้นสำหรับผู้ใหญ่ คุณสามารถอ้างอิงได้ที่ การทำให้ iPhone/Android ใช้งานง่ายขึ้น: มากกว่า "โหมดผู้สูงอายุ," การตั้งค่าเหล่านี้ช่วย! ทำให้เสร็จจากระยะไกลเพื่อขยายการจัดการอุปกรณ์สำหรับกลุ่มต่างๆ ในบ้าน
ก่อนที่คุณจะเริ่มต้น คุณจำเป็นต้องดำเนินการติดตั้งครั้งเดียวเพื่อเปิดใช้งานฟังก์ชันการตรวจสอบ ดังต่อไปนี้คือบทแนะนำการควบคุมโดยพ่อแม่ของ AirDroid (ใช้ Android เป็นตัวอย่าง) เพื่อช่วยพ่อแม่ติดตั้งและดำเนินการอนุญาตได้อย่างรวดเร็ว
ส่วนที่ 1: ตั้งค่าอุปกรณ์ของพ่อแม่
ดาวน์โหลดแอพ: เข้าไปใน Google Play หรือ App Store ค้นหา "AirDroid Parental Control" แล้วดาวน์โหลด ถ้าคุณไม่ต้องการติดตั้งแอพอีกหนึ่งแอพ สามารถใช้เวอร์ชันเว็บได้เช่นกัน
เข้าสู่ระบบบัญชีของคุณ: เปิดแอพและเข้าสู่ระบบบัญชี AirDroid ของคุณ ถ้าคุณยังไม่มีบัญชี กด "ลงทะเบียน" เพื่อสร้างบัญชีใหม่
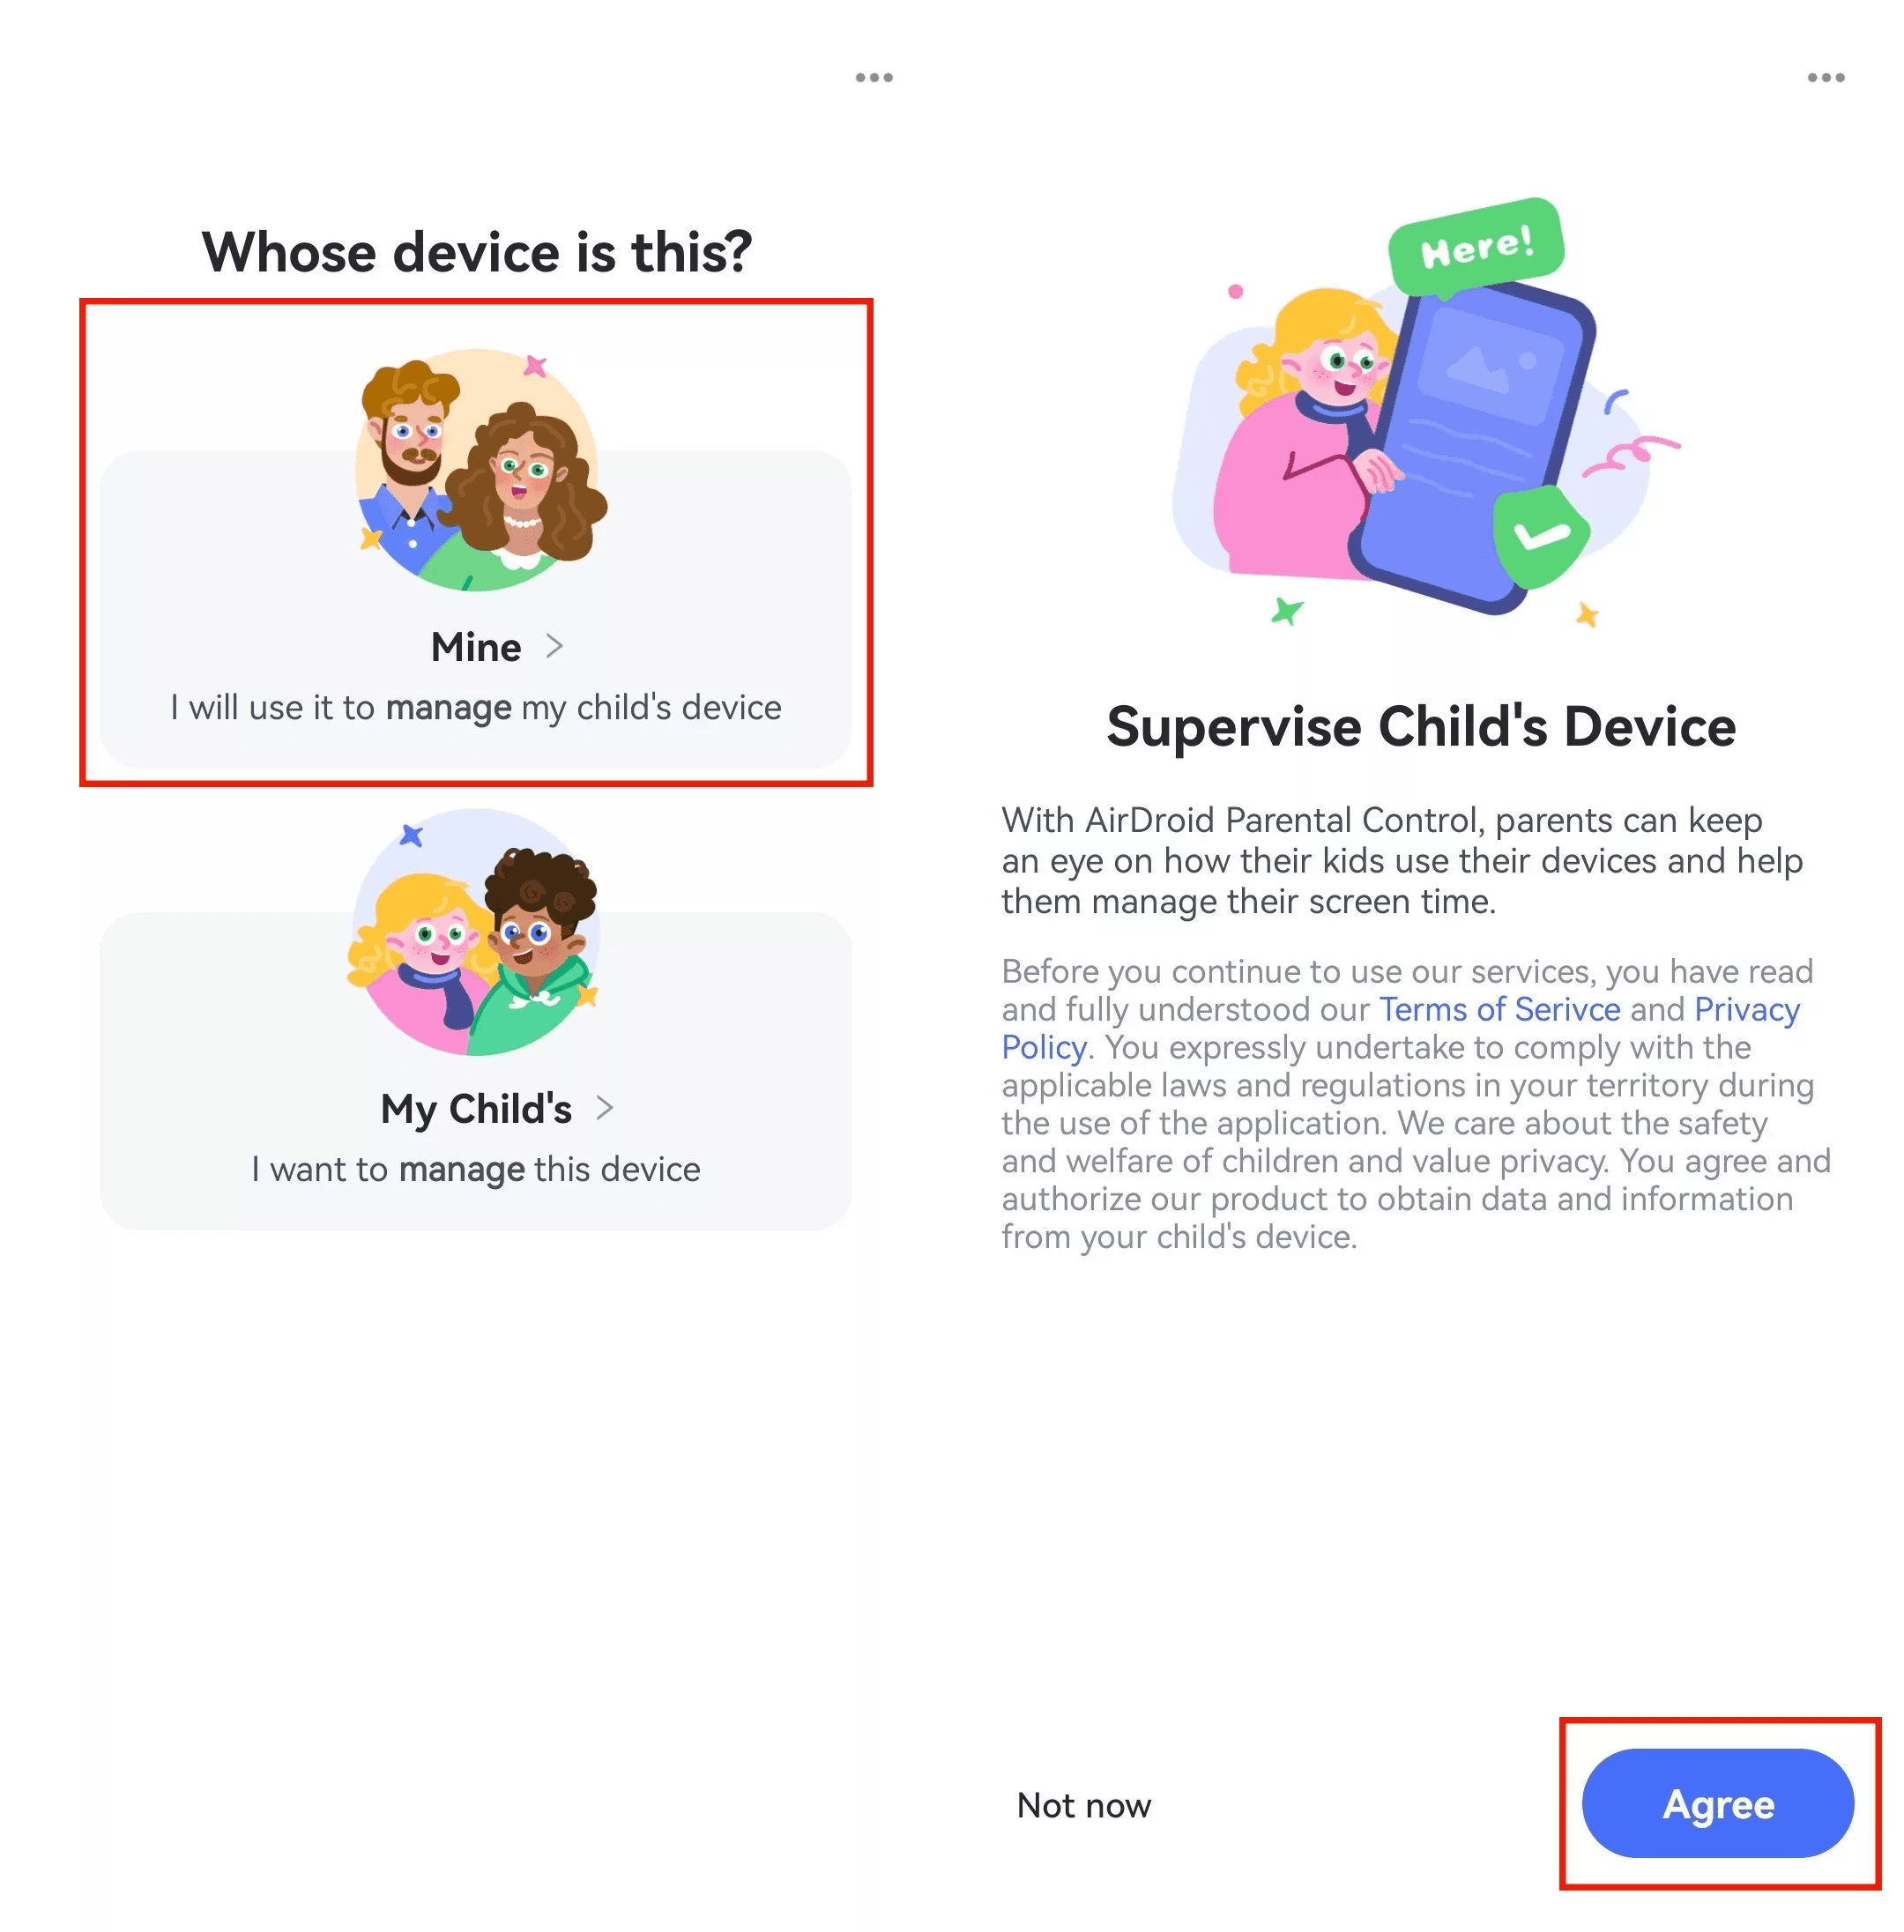
เลือกเจ้าของอุปกรณ์: ทำตามคำแนะนำบนหน้าจอ เลือก "อุปกรณ์ของฉัน" แล้วกด "ยอมรับ" เพื่อดำเนินการขั้นตอนการจับคู่
ส่วนที่ 2: ตั้งค่าอุปกรณ์ของเด็ก
ขั้นตอนที่ 1: ดาวน์โหลดและผูก AirDroid Kids
หลังจากติดตั้งและเข้าสู่ AirDroid Parental Control ในฝั่งพ่อแม่ ระบบจะแสดงหน้าจอการผูกกับ QR code และลิงก์ดาวน์โหลด ใช้โทรศัพท์ Android ของเด็กในการสแกน QR code หรือป้อน URL จากหน้าเว็บไปยังเบราว์เซอร์เพื่อไปยังหน้าดาวน์โหลด AirDroid Kids
ถ้าหน้าดาวน์โหลดไม่ปรากฏขึ้นอัตโนมัติ กรุณากดปุ่ม "คลิกเพื่อกลับลองใหม่" เพื่อโหลดซ้ำ
ถ้าอุปกรณ์ของคุณไม่สามารถติดตั้งผ่าน Google Play Store ได้ กรุณาทำตามคำแนะนำเพื่อเปิดใช้งานการตั้งค่า "อนุญาตจากแหล่งที่ไม่รู้จัก/แอป" AirDroid Kids Wizard เป็นแอปพลิเคชันอย่างเป็นทางการและปลอดภัยในการดาวน์โหลด หากระบบแสดงเตือนว่า "แอปที่ไม่รู้จัก" กรุณากด "การตั้งค่า" → เปิดใช้งาน "อนุญาตจากแสดงนี้"
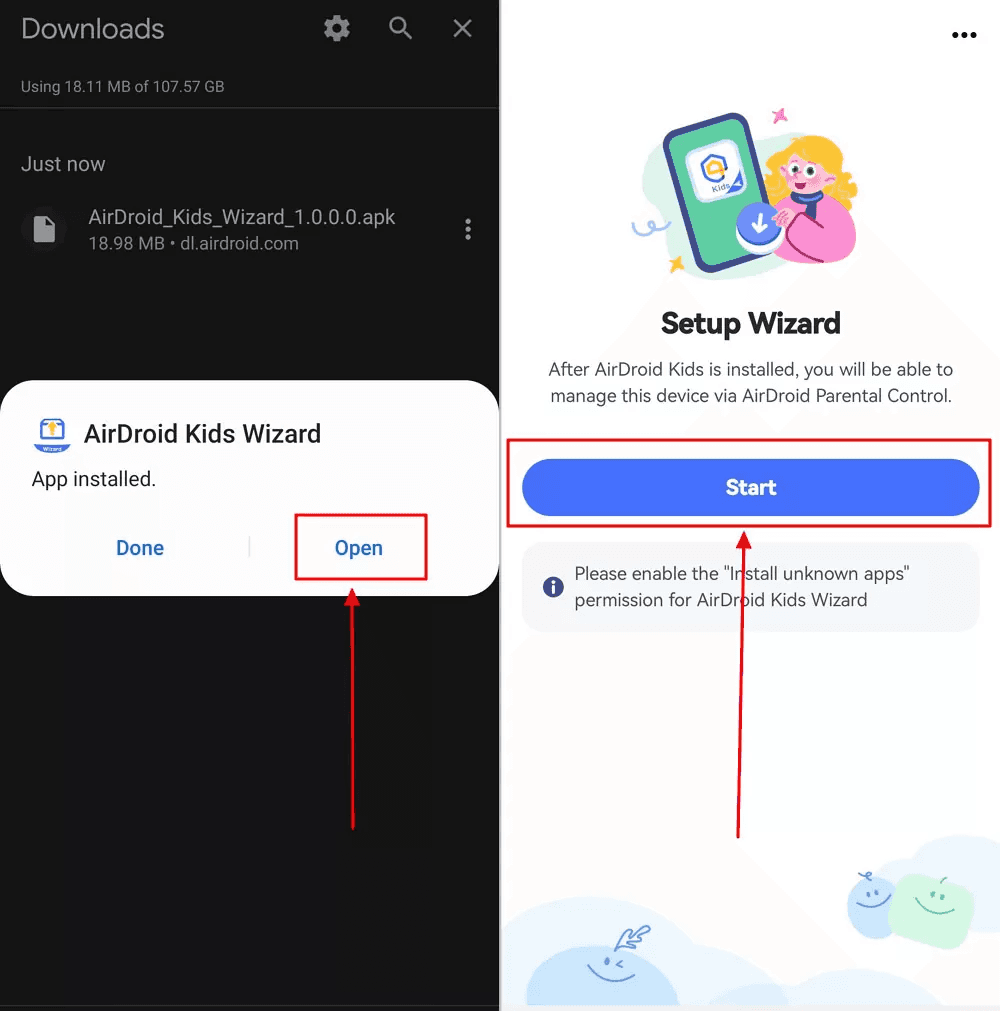
เมื่อการติดตั้งเสร็จสิ้น กด "เปิด" อีกครั้งเพื่อดูหน้าจอการตั้งค่า กดปุ่ม "เริ่ม" รอสักครู่แล้วหน้าจอจะให้คุณติดตั้งแอปพลิเคชันหลัก AirDroid Kids
ถ้าหน้าป๊อปอัพ "ติดตั้งแอปที่ไม่รู้จัก" ปรากฏออีกครั้ง กรุณาตรวจสอบให้แน่ใจว่าสวิตช์ "เปิดใช้งาน" แล้วกลับไปยังหน้าจอและกด "ติดตั้ง"
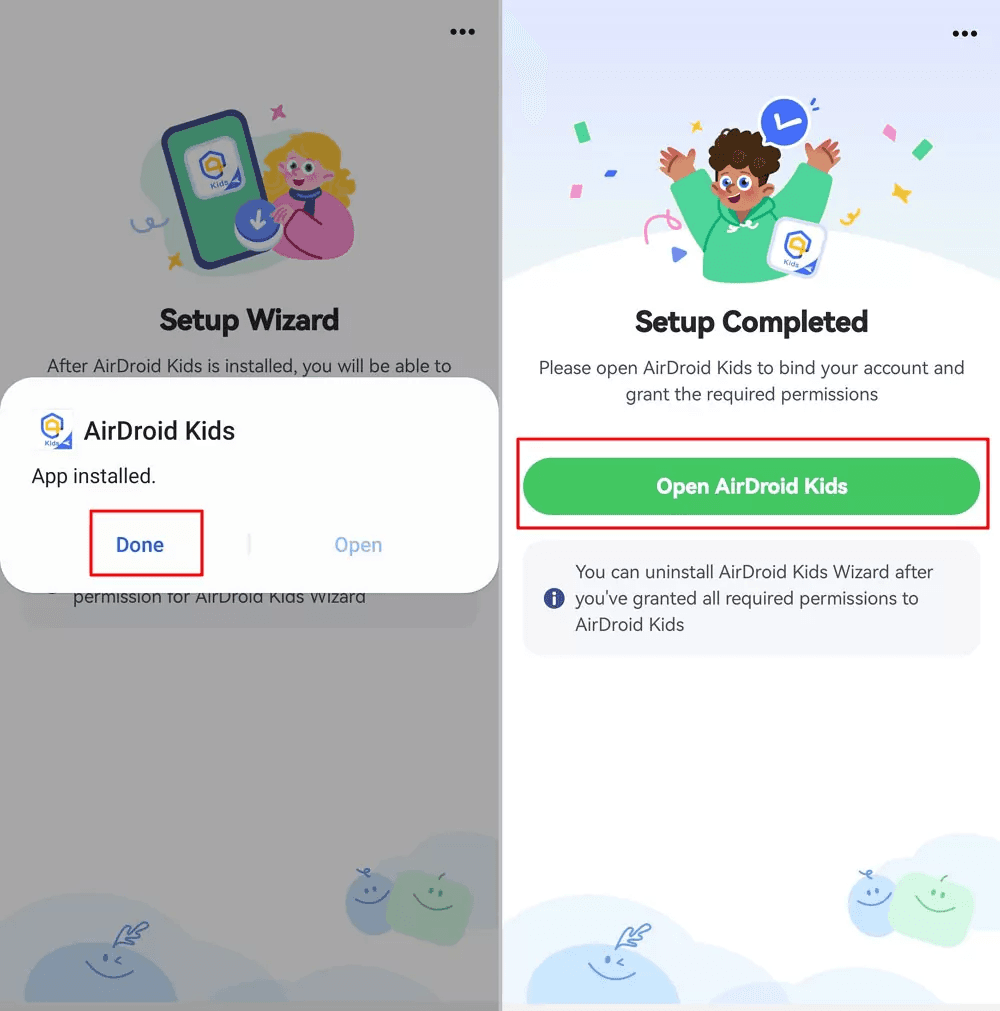
เมื่อ AirDroid Kids ติดตั้งเสร็จ กด "เสร็จสิ้น" และเปิดแอปเพื่อดำเนินการขั้นตอนถัดไป
ขั้นตอนที่ 2: ตั้งค่า AirDroid Kids
เปิด AirDroid Kids กด "ยอมรับ" เพื่อเข้าหน้าจอตั้งค่าข้อมูลเด็ก ใส่ชื่อหรือข้อมูลระบุอัตลักษณ์แล้วกด "เสร็จ" เมื่อเสร็จสิ้น
ระบบจะร้องขอการอนุญาตเป็นลำดับสำหรับสิทธิ์สำคัญบางประการ (เช่นตำแหน่ง การใช้งานหน้าจอประวัติ การเข้าถึงการแจ้งเตือน เป็นต้น) กรุณาอนุญาตตามที่แสดงบนหน้าจอเพื่อให้แน่ใจว่าฟังก์ชันตรวจสอบทำงานได้อย่างถูกต้อง
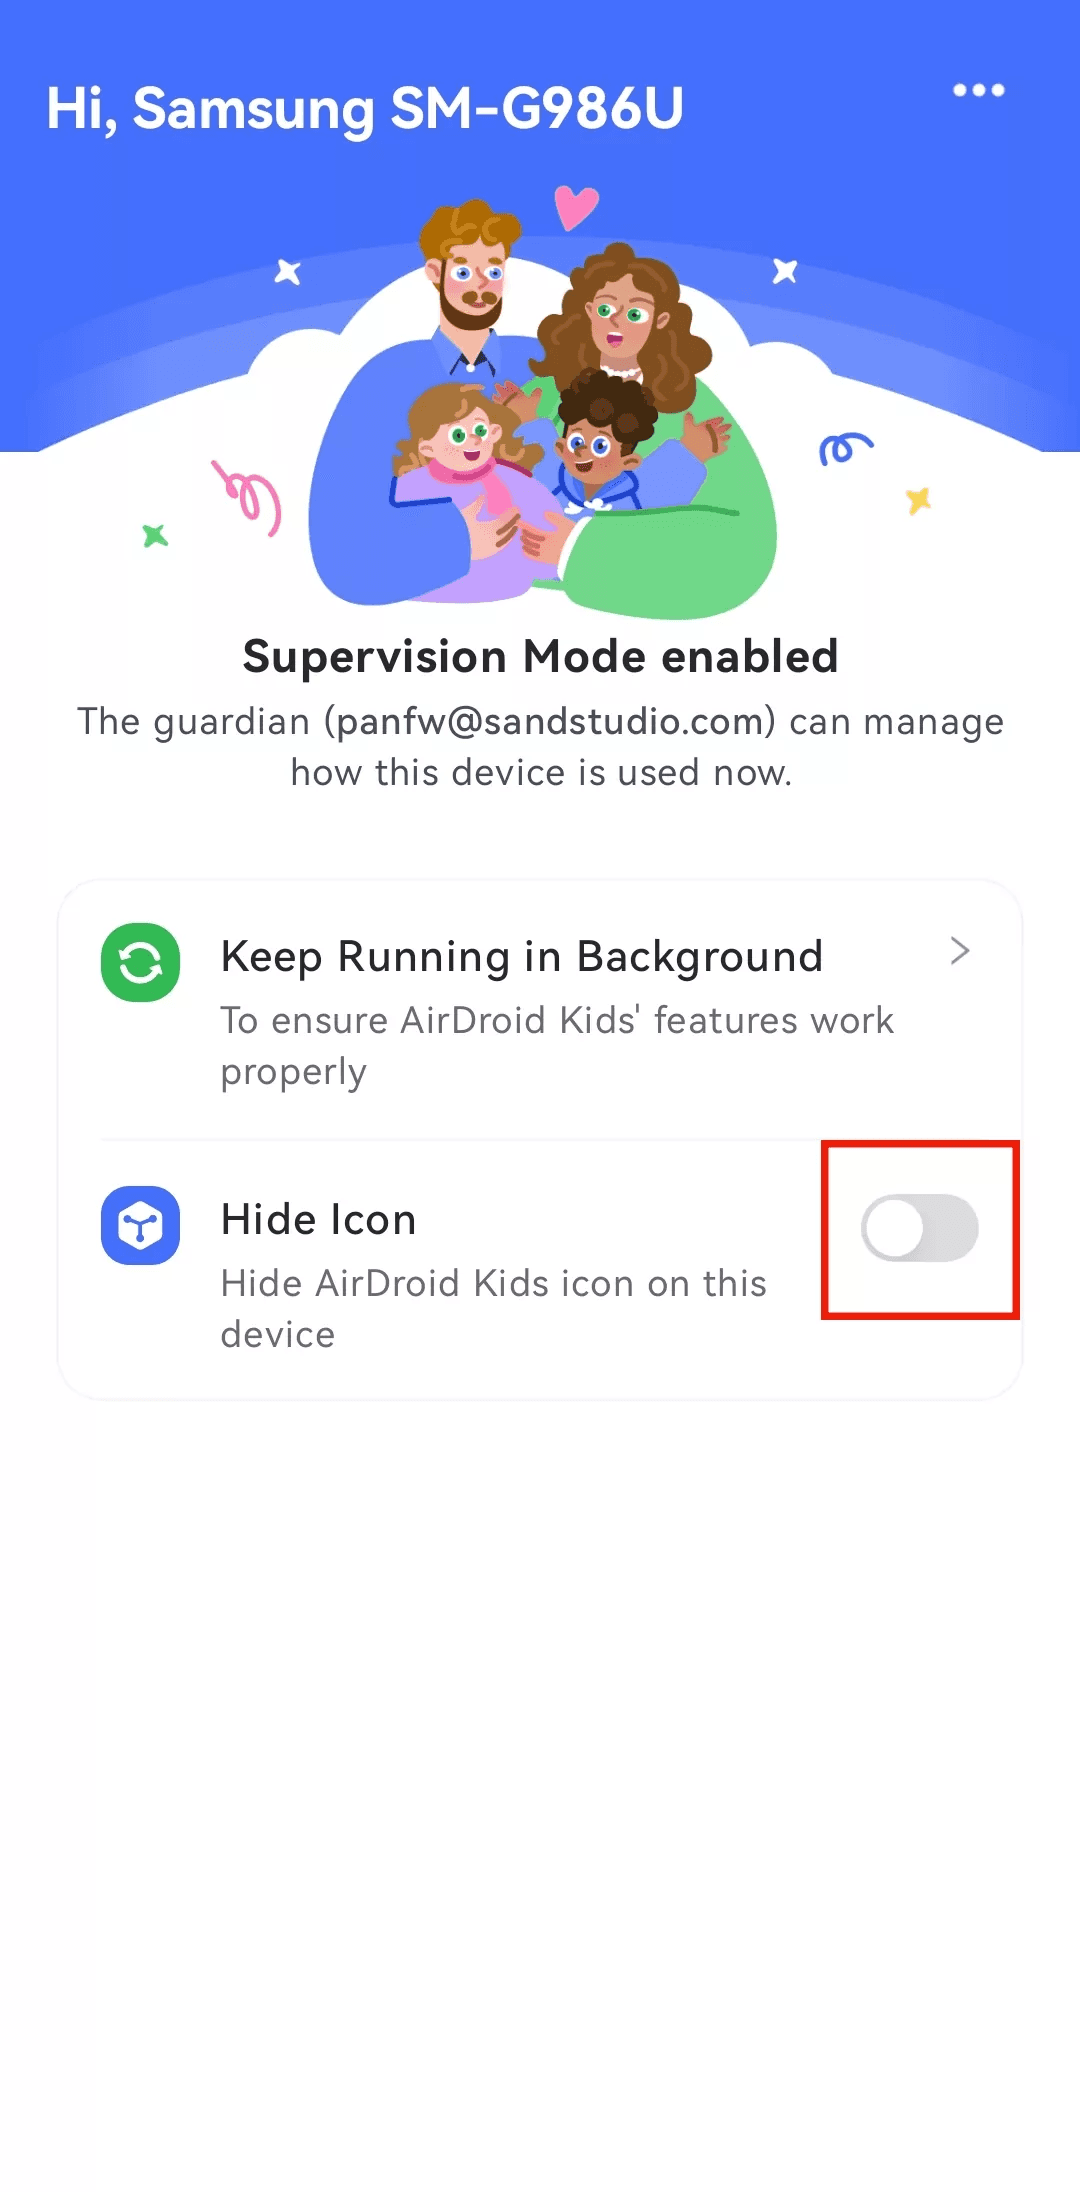
หลังจากอนุญาตเสร็จสิ้น อุปกรณ์ของเด็กจะถูกผูกสำเร็จอัตโนมัติด้วยอุปกรณ์ของพ่อแม่ คุณสามารถเลือก "ซ่อนไอคอนแอป" เพื่อป้องกันไม่ให้เด็กลบหรือปิดแอปตรวจสอบโดยไม่ตั้งใจ
โดยรวมแล้ว กระบวนการตั้งค่า AirDroid Parental Control ถือว่าค่อนข้างใช้งานง่าย การอนุญาตง่ายๆ บนทั้งสองฝ่ายถือว่าเพียงพอที่จะเสร็จสิ้นการเชื่อมต่อการตรวจสอบ คำเตือน: หากฟังก์ชันบางอย่าง (เช่นการเฝ้าตามทันเวลาหรือบล็อกแอป) ไม่ทำงานอย่างถูกต้อง กรุณายืนยันอีกครั้งว่าทั้งสองอุปกรณ์ได้ให้สิทธิ์ทั้งหมดเพื่อตรวจสอบให้ได้ผลสูงสุด
ในการใช้ AirDroid Parental Control ส่วนใหญ่ ฟังก์ชันที่พ่อแม่ใช้บ่อยที่สุดประกอบด้วย:
การจำกัดเวลาการใช้: กำหนดระยะเวลาการใช้งานประจำวันและช่วงเวลาเพื่อป้องกันเด็กจากการใช้งานเกินขอบเขต
การบล็อกแอปพลิเคชัน: จำกัดแอปที่เฉพาะเจาะจง (เช่นเกม สื่อสังคม) เพื่อรักษาความสมดุลระหว่างการเรียนและความบันเทิง
การติดตามตำแหน่งและกิจกรรม: รองรับการกำหนดตำแหน่ง GPS แบบเรียลไทม์และการดูเส้นทางประวัติ ทำให้พ่อแม่สามารถติดตามที่อยู่บุตรหลานได้
โดยรวมฟังก์ชันเหล่านี้ทำงานได้ดีในแง่ของการประยุกต์ใช้และเสถียรภาพ อย่างไรก็ตาม ผู้ใช้บน Reddit บางคนยังได้ชี้ให้เห็นว่า AirDroid ยังคือลัวควบคุมการ "ความสมชัวร์ของข้อมูลและการจัดเก็บบนคลาวด์" ดังนั้นแนะนำว่าผู้ปกครองควรประเมินขอบเขตการอนุญาตให้ดีดีก่อนใช้งาน
ตามข้อมูลทางการ AirDroid Parental Control มีค่าใช้จ่าย $9.99/เดือน (มีราคาลดจะเป็น $4.99/เดือนรายปี) และมีการทดลองใช้ฟรีสามวัน ขณะที่ทดลองใช้ฟรี คุณสามารถประสบการณ์ฟังก์ชันส่วนใหญ่เช่นการติดตามตำแหน่ง การบล็อกแอป และการสะท้อนหน้าจอแบบเรียลไทม์

จากรีวิว AirDroid มองว่าในช่วงราคากลางถึงราคาสูง แต่ยังคงมีความคุ้มค่าสำหรับพ่อแม่ที่ต้องการตรวจสอบอุปกรณ์หลายเครื่องหรือการติดตามระยะยาว อย่างไรก็ตามหากคุณต้องการเพียงการสะท้อนหน้าจอข้ามแพลตฟอร์มหรือการควบคุมระยะไกล DeskIn มีแผนฟรีที่สามารถทำงานแบบเดียวกันได้ ประหยัดแรงกดดันจากการสมัครสมาชิกและเป็นทางเลือกที่ยืดหยุ่นมากขึ้น
หลังจากที่เข้าใจฟีเจอร์และลักษณะของ AirDroid เราสามารถเปรียบเทียบมันโดยตรงกับ DeskIn เพื่อช่วยให้คุณตัดสินใจได้อย่างรวดเร็วว่าโซลูชันการควบคุมระยะไกลใดที่เหมาะกับคุณที่สุด ตารางต่อไปนี้จัดฟีเจอร์หลักๆ เช่น เสถียรภาพในการเชื่อมต่อ ประสิทธิภาพของภาพ การสนับสนุนหลายจอ การโอนไฟล์ และการป้องกันความปลอดภัย ช่วยให้คุณเห็นความแตกต่างระหว่างทั้งสองได้อย่างรวดเร็ว
การเปรียบเทียบฟังก์ชัน | AirDroid | |
คะแนนรวม | ⭐ 9.4 / 10 | ⭐ 8.2 / 10 |
เสถียรภาพในการเชื่อมต่อ | ยอดเยี่ยม รองรับการทำงานที่โอนิ่งได้ยาวนาน | เสถียร แต่มีการหน่วงค่อนข้างสูง |
ประสิทธิภาพคุณภาพของภาพ | รองรับสูงสุด 4K60FPS / 2K144FPS, True 4:4:4 | ไม่มีตัวเลือกการตั้งค่าคุณภาพสูง |
ประสิทธิภาพของเวลาแฝง | ต่ำกว่า 40ms, เพื่อให้มั่นใจว่าการดำเนินการแบบเรียลไทม์และราบรื่น | เวลาแฝงปานกลาง ขึ้นอยู่กับสภาพแวดล้อมเครือข่าย |
ความเข้ากับระบบ | Windows, Mac, iOS, Android, Web | Windows, Mac, Android (เน้นที่ Android) |
การขยายและการส่งต่อจอ | ✔ รองรับการขยายจอ การฉายภาพ และจอเสมือน | ✘ รองรับเฉพาะการสะท้อนหน้าจอ |
โหมดเกม | ✔ มีโหมดเกมที่หน่วงต่ำในตัวและคอนโทรลแป้นพิมพ์ | ✘ ไม่มีฟีเจอร์เกมส์เฉพาะ |
การโอนย้ายไฟล์ | ความเร็วสูง 12MB/s, ไม่มีข้อจำกัดเรื่องขนาดและรูปแบบ | ความเร็วการโอนย้ายปานกลาง รุ่นฟรีมีข้อจำกัด |
การควบคุมระยะไกล Android | ✔ รองรับการควบคุมระยะไกลและการควบคุมอุปกรณ์ Android | ✔ รองรับการควบคุมระยะไกล Android (ต้องการการอนุญาต) |
การป้องกันความปลอดภัย | เข้ารหัสแบบ end-to-end, รายชื่อขี้ดำและขี้ขาว, การยืนยันการเชื่อมต่อ และการควบคุมเข้าถึงหลายระดับ | เข้ารหัส AES และการเข้าสู่ระบบ MFA; ความปลอดภัยขั้นสูงจำเป็นต้องใช้เวอร์ชั่นชำระเงิน |
การจัดการอุปกรณ์ | รองรับการจัดการแบบรวมศูนย์และการควบคุมหลายเครื่อง (สามารถจัดการหลายร้อยหน่วยได้) | เวอร์ชันเชิงพาณิชย์รองรับการจัดการอุปกรณ์หลายเครื่อง |
การติดตั้งและการใช้งาน | ง่ายและรวดเร็ว สามารถติดตั้งได้โดยไม่จำเป็นต้องใช้ Microsoft Store | การติดตั้งง่าย แต่กระบวนการอนุญาตซับซ้อน |
สัญลักษณ์การสนับสนุน | การทำงานระยะไกล, การออกแบบ, การเล่นเกมส์, การบริหารจัดการองค์กร | การโอนไฟล์มือถือ, การซิงค์การแจ้งเตือน, และการบำรุงรักษามือถือ |
การสนับสนุนลูกค้า | ✔ บริการลูกค้าออนไลน์และการสนับสนุนด้านเทคนิคสำหรับองค์กร | ✘ เวอร์ชันฟรีไม่มีบริการลูกค้า |
ในชุมชนเช่น Reddit ผู้ใช้บางคนแสดงความห่วงใยเกี่ยวกับความปลอดภัยของ AirDroid เช่นความผิดพลาดในการสะกดคำในหน้าการชำระเงินและกระบวนการอนุญาตที่ซับซ้อนที่นำไปสู่ความกังวลเกี่ยวกับความเสี่ยงข้อมูลรั่วไหล หากคุณกำลังมองหาเครื่องมือควบคุมระยะไกลที่เสถียร ปลอดภัย และปลอดโฆษณามากขึ้น DeskIn เป็นทางเลือกที่ยอดเยี่ยม
DeskIn ใช้เทคโนโลยีการเข้ารหัสแบบ end-to-end ทุกการดำเนินการเสร็จสิ้นในสภาพแวดล้อมที่เข้ารหัสท้องถิ่น โดยไม่ต้องพึ่งพาเซิร์ฟเวอร์บุคคลที่สาม นอกจากนี้ยังรองรับการใช้งานหลายแพลตฟอร์ม ช่วยให้การเชื่อมต่อง่ายระหว่างคอมพิวเตอร์สองเครื่อง การสลับรวดเร็วระหว่าง Windows, macOS, iOS, และ Android และแม้กระทั่งเปลี่ยน iPad เป็นจอสอง สำหรับคอมพิวเตอร์ของคุณ มอบประสบการณ์มัลติทาสกิ้งที่ยืดหยุ่นยิ่งขึ้น
เมื่อเทียบกัน DeskIn ไม่เพียงแค่เป็นการปรับปรุงในด้านเสถียรภาพและการควบคุมเวลาแฝง แต่ยังขจัดปัญหาที่ต้องสมัครสมาชิกหรือแคร๊ก AirDroid ไม่ว่าจะเรื่องการทำงานระยะไกล การสอนสะท้อนจอ หรือการตรวจสอบบ้าน DeskIn สามารถตอบสนองความต้องการของคุณด้วยความปลอดภัยสูงกว่าและ-ประสิทธิภาพ
ลอง DeskIn ตอนนี้และสัมผัสมาตรฐานใหม่ของการควบคุมระยะไกลข้ามแพลตฟอร์มไม่มีเวลาแอบแฝง
ทำไมเลือก DeskIn เป็นทางเลือกแทน AirDroid
การสนับสนุนหลายแพลตฟอร์ม: รองรับ Windows, Mac, iOS, Android, และ Web
เวลาหน่วงต่ำเป็นพิเศษ: ค่าหน่วงต่ำกว่า 40ms เพื่อให้ได้ประสบการณ์การทำงานระยะไกลที่ราบรื่น
การสนับสนุนความละเอียดสูง: รองรับ 4K 60FPS และ 2K 144FPS ด้วยคุณภาพภาพที่คมชัดและปรับได้
การเข้าสู่ระบบหลายอุปกรณ์: ไม่มีขีดจำกัดจำนวนอุปกรณ์ช่วยให้ควบคุมระยะไกลได้ทุกที่ทุกเวลา
ฟีเจอร์ฟรี: การโทรด้วยเสียง การขยายจอ การโอนไฟล์ ล้วนเป็นห้องฟรี
การโอนย้ายไฟล์ด้วยความเร็วสูง: รองรับการโอนยาายความเร็วสูงได้ถึง 12MB/s ช่วยเพิ่มประสิทธิภาพในการทำงาน
ขั้นตอนที่ 1: ดาวน์โหลดและติดตั้ง DeskIn
ดาวน์โหลด ไฟล์ติดตั้ง DeskIn สำหรับระบบของคุณทั้งบนอุปกรณ์โฮสต์และอุปกรณ์ควบคุม กระบวนการติดตั้งใช้เวลาเพียง 1-2 นาที ไม่มีการตั้งค่าเพิ่มเติมที่จำเป็น
ขั้นตอนที่ 2: ลงทะเบียนหรือเข้าสู่ระบบบัญชีของคุณ
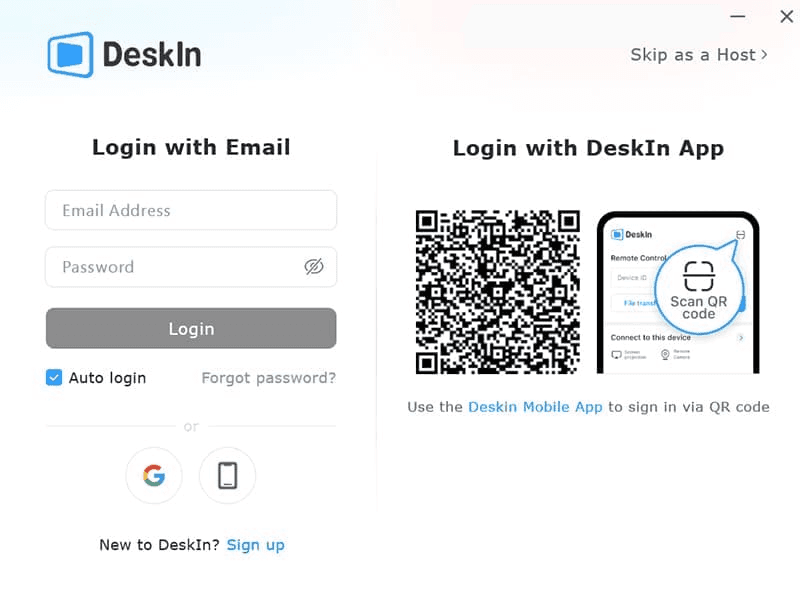
เปิดแอปพลิเคชัน DeskIn และใช้ที่อยู่อีเมลหรือบัญชี Google/Apple ของคุณในการลงทะเบียนอย่างรวดเร็ว หากคุณมีบัญชีอยู่แล้ว เพียงเข้าสู่ระบบ กระบวนการลงทะเบียนทั้งหมดกินเวลาต่ำกว่า 30 วินาที
ขั้นตอนที่ 3: รับรหัสอุปกรณ์และรหัสผ่านการเชื่อมต่อ
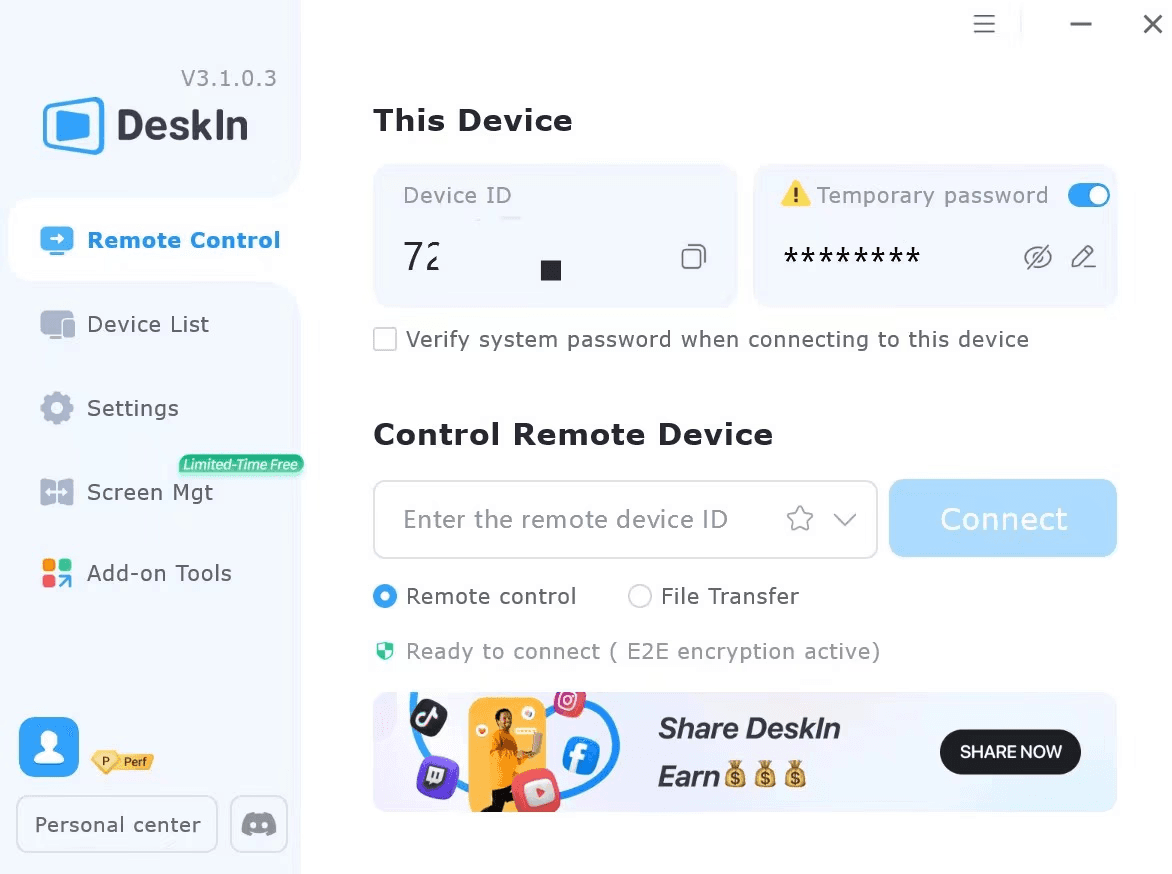
หลังจากเข้าสู่ระบบ DeskIn ทั้งสองอุปกรณ์ให้หาค้นหา "รหัสอุปกรณ์" และ "รหัสผ่านชั่วคราว" บนหน้าหลักของคอมพิวเตอร์ปลายทาง (เครื่องที่คุณต้องการควบคุมจากระยะไกล) คัดลอกข้อมูลสองชิ้นนี้ลงในฟิลด์การเชื่อมต่อบนอุปกรณ์ควบคุม
ขั้นตอนที่ 4: เริ่มการเข้าถึงคอมพิวเตอร์อื่นจากระยะไกล
บนอุปกรณ์ควบคุม กดปุ่ม "เชื่อมต่อ" การเชื่อมต่อจะเสร็จสิ้นในไม่กี่วินาที และคุณสามารถเริ่มทำการเข้าถึงคอมพิวเตอร์ระยะไกลได้แล้ว!
รุ่นฟรีของ AirDroid Cast ให้ฟังก์ชันสะท้อนหน้าจอพื้นฐาน ช่วยให้คุณสะท้อนหน้าจอโทรศัพท์ลงคอมพิวเตอร์หรืออุปกรณ์อื่น ๆ แต่จำกัดฟังก์ชันบางอย่าง (เช่นการเชื่อมต่อ USB และประสบการณ์ปราศจากโฆษณา) หากคุณต้องการฟังก์ชันที่ครบถ้วนขึ้นคุณจะต้องสมัครบอกรับเป็นสมาชิกเวอร์ชันชำระเงิน หากคุณกำลังมองหาการสะท้อนหน้าจอและการควบคุมระยะไกลข้ามแพลตฟอร์มโดยไม่มีค่าใช้จ่ายเพิ่มเติม DeskIn มีแผนฟรีที่เสถียรและปลอดภัย
ใช่, AirDroid สามารถใช้ข้ามหลายแพลตฟอร์มได้ รวมถึง Windows, Mac, Android, และ iOS ช่วยให้ผู้ใช้สามารถควบคุมระยะไกลและการสะท้อนหน้าจอระหว่างอุปกรณ์ต่าง ๆ อย่างไรก็ตามฟีเจอร์บางอย่าง (เช่นการสะท้อนคุณภาพสูงหรือการใช้งานที่ปราศจากโฆษณา) อาจต้องใช้เวอร์ชันชำระเงิน หากคุณต้องการสนับสนุนใช้งานข้ามแพลตฟอร์มที่เสถียรโดยไม่ต้องสมัครสมาชิก DeskIn รองรับหลายแพลตฟอร์มและให้ฟังก์ชันการควบคุมระยะไกลและการขยายจอที่แข็งเข้มแข็ง
ใช่, ฟังก์ชันควบคุมโดยพ่อแม่ของ AirDroid จำเป็นต้องบอกรับเป็นสมาชิกเพื่อใช้งาน โดยมีค่าใช้จ่ายพื้นฐาน $9.99/เดือน (หรือราคาแบบลดรายปี $4.99/เดือน) ระยะทดลองฟรีคือ 3 วัน ที่คุณสามารถประสบการณ์ฟังก์ชันพื้นฐาน หากคุณกำลังมองหาโซลูชันการตรวจสอบที่ยืดหยุ่นมากขึ้นโดยไม่มีค่าใช้จ่ายเพิ่มเติม DeskIn ให้การควบคุมระยะไกลฟรีและครอบคลุมโดยไม่มีค่าใช้จ่ายเพิ่มเติม
แม้ว่า AirDroid จะจัดหามาตรการความปลอดภัยบางอย่าง ผู้ใช้บางส่วนได้แสดงความกังวลเกี่ยวกับการรั่วไหลของข้อมูล โดยเฉพาะอย่างยิ่งรุ่นฟรีอาจมีช่องโหว่ การใช้เวอร์ชันแคร๊กมีความเสี่ยงสูงขึ้น ง่ายต่อการเปิดเผยข้อมูลของคุณกับผู้มาโจมตีที่ไม่หวังดี หากคุณกังวลเกี่ยวกับความปลอดภัยของข้อมูล DeskIn ให้การออกแบบการเข้ารหัส end-to-end เพื่อปกป้องความเป็นส่วนตัวและความปลอดภัยของข้อมูลของคุณ หลีกเลี่ยงความเสี่ยงของซอฟต์แวร์แคร๊ก
AirDroid ให้ฟังก์ชันหลากหลาย ตั้งแต่การควบคุมระยะไกลจนถึงการสะท้อนหน้าจอและการควบคุมโดยพ่อแม่ ทำให้เป็นเครื่องมือที่สะดวกสำหรับผู้ใช้บางคน อย่างไรก็ตามการรีวิว AirDroid ยังชี้ให้เห็นว่ามีการถกเถียงกันเกี่ยวกับความปลอดภัยและแผนการชำระเงินของมัน โดยเฉพาะความเสี่ยงของเวอร์ชันแคร๊กและข้อกำหนดเงินทุนที่ทำให้ผู้ใช้บางคนระมัดระวัง
หากคุณเพียงต้องการฟังก์ชันควบคุมระยะไกลพื้นฐาน สามารถทดลองใช้ AirDroid ได้ก่อนและใช้เวอร์ชันฟรีสำหรับการดำเนินงานพื้นฐาน อย่างไรก็ตามหากคุณให้ความสำคัญกับเสถียรภาพ ความปลอดภัย และการทำงานร่วมกันข้ามแพลตฟอร์มมากกว่า DeskIn ขอยิ้มแนะนำเป็นอย่างยิ่ง มันไม่เพียงให้การควบคุมระยะไกลที่มีประสิทธิภาพ แต่ยังรับประกันความปลอดภัยของข้อมูลของคุณ ไม่มีความกังวลเกี่ยวกับค่าใช้จ่ายในการสมัครสมาชิก
ลอง DeskIn วันนี้และลิ้มรสประสบการณ์การควบคุมระยะไกลที่ปลอดภัยและราบรื่นมากขึ้นที่ทำให้การทำงานและชีวิตของคุณมีประสิทธิภาพมากขึ้น!
AirDroid เป็นแอปพลิเคชันอเนกประสงค์ที่รองรับการควบคุมระยะไกล การสะท้อนหน้าจอ และการควบคุมโดยพ่อแม่ ช่วยให้ผู้ใช้จัดการอุปกรณ์หลายเครื่องได้ง่าย โอนย้ายไฟล์ หรือเฝ้าติดตามกิจกรรมหน้าจอ อย่างไรก็ตาม ในการใช้งานจริง ผู้คนจำนวนมากมีความกังวลว่าเสถียรภาพ ความปลอดภัย และแผนการกำหนดราคาของ AirDroid คุ้มค่ากับการใช้งานในระยะยาวหรือไม่
บทความนี้จะให้รีวิวในหลายมุมมองอย่างครบถ้วนเกี่ยวกับ AirDroid วิเคราะห์ฟังก์ชันหลักและข้อจำกัด สุดท้ายจะแนะนำตัวเลือกที่มีเสถียรภาพและปลอดภัยกว่า — DeskIn — เพื่อช่วยคุณค้นหาเครื่องมือควบคุมระยะไกลที่เหมาะสมที่สุด
คุณอาจสนใจ:
AirDroid เป็นแอปพลิเคชันอเนกประสงค์ที่รวมการควบคุมระยะไกล การโอนย้ายไฟล์ และการสะท้อนหน้าจอไว้ในที่เดียว จุดประสงค์หลักคือเพื่อให้ผู้ใช้สามารถเชื่อมต่อระหว่างคอมพิวเตอร์และโทรศัพท์มือถืออย่างต่อเนื่องเพื่อบริหารจัดการอุปกรณ์ Android จากระยะไกล ไม่ว่าจะอยู่ที่บริษัท ที่บ้าน หรือออกไปข้างนอก ผู้ใช้สามารถใช้ AirDroid สำหรับการควบคุมอุปกรณ์ สำรองข้อมูล หรือการเฝ้าติดตามเรียลไทม์ได้ โดยจะช่วยเพิ่มความสามารถในการปฏิบัติการของอุปกรณ์มือถือ
ในระดับฟังก์ชัน AirDroid อนุญาตให้ผู้ใช้ควบคุมโทรศัพท์จากคอมพิวเตอร์ Windows หรือ Mac ได้จากระยะไกล รวมถึงดูการแจ้งเตือน ส่งข้อความ เปิดแอปพลิเคชัน และแม้กระทั่งการสะท้อนหน้าจอ นอกจากนี้ยังรองรับการโอนย้ายไฟล์ข้ามแพลตฟอร์ม ช่วยให้โอนย้ายรูปภาพ วิดีโอ เอกสาร และเนื้อหาอื่น ๆ ระหว่าง Android, iOS, และ PC ได้รวดเร็ว ขจัดปัญหาการเชื่อมต่อแบบใช้สาย ทำให้ AirDroid ไม่เพียงเป็นเครื่องมือการจัดการระยะไกลทั่วไปสำหรับคนทำงานเท่านั้น แต่ยังได้รับความนิยมในด้านการควบคุมโดยพ่อแม่และการจัดการอุปกรณ์ขององค์กร
ในด้านการรีวิวผู้ใช้ AirDroid ได้รับคำชมสำหรับอินเทอร์เฟซที่เรียบง่ายและใช้งานง่าย แต่ผู้ใช้บางรายยังรายงานประสบการณ์การหน่วงหรือการขาดการเชื่อมต่อระหว่างการใช้งานนานหรือการสะท้อนภาพความละเอียดสูง โดยรวม AirDroid เหมาะสมสำหรับผู้ใช้ที่ต้องการการซิงโครไนซ์ข้ามแพลตฟอร์ม การปฏิบัติการจากระยะไกล และการโอนย้ายแบบไร้สาย ทำให้เป็นเครื่องมือระยะไกลที่ค่อนข้างโตและเติบโตในระบบนิเวศ Android
คุณอาจสนใจ:
AirDroid คือเครื่องมืออเนกประสงค์ที่รวมการโอนย้ายไฟล์ การสะท้อนหน้าจอ การควบคุมระยะไกล และการซิงค์การแจ้งเตือน ผู้ใช้สามารถจัดการโทรศัพท์ Android ของพวกเขาได้ง่ายๆ ผ่านเว็บหรือไคลเอนต์เดสก์ท็อป และมันรองรับการปฏิบัติการข้ามแพลตฟอร์ม (Windows, Mac, iOS, Android) ตามรีวิวส่วนใหญ่ของ AirDroid รุ่นฟรีของซอฟต์แวร์รองรับเฉพาะการโอนย้ายไฟล์พื้นฐานและการสะท้อนหน้าจอระยะสั้น หากต้องการควบคุมระยะไกลที่เสถียรหรือการฉายภาพความละเอียดสูง จำเป็นต้องอัพเกรดเป็นแผนชำระเงิน
ปัจจุบัน AirDroid ใช้โมเดลการสมัครสมาชิก โดยแผนส่วนตัวมีค่าใช้จ่ายประมาณ $3.99 USD ต่อเดือน โดยมีส่วนลดสำหรับแผนรายปี เมื่อผู้ใช้จำนวนมากค้นหาว่า "AirDroid Cast ฟรีหรือไม่?" พวกเขากำลังเปรียบเทียบความแตกต่างระหว่างฟีเจอร์ฟรีและจ่ายเงิน: รุ่นฟรีเหมาะสำหรับการใช้งานเบาๆ ในขณะที่รุ่นจ่ายเงินมอบเสถียรภาพการเชื่อมต่อระยะยาวและความสามารถในการควบคุมระยะไกล มอบประสบการณ์ที่ราบรื่นโดยรวมมากยิ่งขึ้น
ประเภท | ชื่อโซลูชัน | ราคา (ชำระรายปี/รายเดือน) | เหมาะสมกับ | ฟังก์ชั่นหลัก | หมายเหตุ |
โซลูชันสำหรับองค์กร | AirDroid Business Basic Edition | ประมาณ $12 ต่อหน่วยต่อปี | องค์กรที่ต้องการจัดการอุปกรณ์หลายเครื่องจากระยะไกล | การเข้าถึงระยะไกล การติดตามอุปกรณ์ และการจัดการไฟล์ | รับส่วนลด 10% สำหรับการสั่งซื้อมากกว่า 100 หน่วย |
AirDroid Business Standard Edition | ประมาณ $21 ต่อหน่วยต่อปี | ทีมขนาดกลางและใหญ่ | การควบคุมระยะไกลที่ครอบคลุม การจัดการกลุ่มอุปกรณ์ และการวิเคราะห์รายงาน | จัดหาความสามารถในการควบคุมระดับสูงขึ้น | |
AirDroid Business Enterprise Edition | ประมาณ $33 ต่อหน่วยต่อปี | แผนก IT ขององค์กร | ระบบบริหารจัดการ MDM ที่สมบูรณ์ การปรับใช้แอปพลิเคชัน และการควบคุมนโยบาย | รองรับการติดตั้งในภาษาท้องถิ่น | |
เวอร์ชันการใช้งานติดตั้งในองค์กร | การกำหนดราคารายการธุรกิจต้องเจรจา | องค์กรที่ต้องการความปลอดภัยสูง | การติดตั้งในเครือข่ายภายใน ข้อมูลไม่รั่วไหลออกจากเซิร์ฟเวอร์ขององค์กร | โซลูชันการรักษาความปลอดภัยสูงสุด | |
การสนับสนุนองค์กร | AirDroid Remote Support (Enterprise Edition) | เวอร์ชันฟรี: $0 เวอร์ชันพื้นฐาน: ประมาณ $199/ปี เวอร์ชันมาตรฐาน: ประมาณ $599/ปี | ทีมงานด้านเทคนิค | การช่วยเหลือระยะไกล การแชร์หน้าจอ คำแนะนำด้วยเสียง | เวอร์ชันพรีเมียมที่กำลังจะมา |
ผู้ใช้ธรรมดา | AirDroid Personal Edition | $3.99/เดือน ($2.50/เดือนสำหรับการชำระรายปี) | ผู้ใช้ส่วนบุคคล/สำนักงานทั่วไป | การโอนย้ายไฟล์ การควบคุมระยะไกล การจัดการการโทร/ข้อความ การกล้องระยะไกล | แผนส่วนบุคคลยอดนิยมที่สุด |
การสะท้อนหน้าจอ | AirDroid Cast | $2.49/เดือน ($1.67/เดือนรายปี) | ผู้ใช้ที่ต้องการฉายหน้าจอโทรศัพท์ลงคอมพิวเตอร์ | การสะท้อนจาก Android/iOS → Windows/Mac/Web, การส่งผ่านระยะไกล, และการสนับสนุน AirPlay | - |
การควบคุมการใช้โดยพ่อแม่ | AirDroid Parental Control | $9.99/เดือน ($4.99/เดือนรายปี) | พ่อแม่ | การจำกัดเวลาการใช้, การบล็อกแอป, การติดตามตำแหน่ง, การสะท้อนหน้าจอ, รายงานกิจกรรม | - |
การช่วยเหลือระยะไกล | AirDroid Remote Support (Personal Version) | $2.49/เดือน ($1.58/เดือนรายปี) | การสนับสนุนเทคนิคส่วนบุคคลหรือการช่วยเหลือบ้าน | การควบคุมระยะไกล, การแชร์หน้าจอ, การโทรด้วยเสียง, คำแนะนำท่าทาง | รองรับอุปกรณ์ Android |
AirDroid แบ่งออกเป็นสามโมดูลหลักคือ AirDroid Cast, AirDroid Files, และ AirDroid Parental Control ที่แต่ละโมดูลรองรับการใช้งานที่ต่างกันตามความต้องการ
AirDroid Cast เป็นเครื่องมือสะท้อนหน้าจอและควบคุมที่ได้รับการยกย่องสูงสุด รองรับทั้งเวอร์ชันเดสก์ท็อปและเว็บ ผู้ใช้สามารถฉายหน้าจอ Android หรือ iPhone ของตนไปยัง Windows, Mac, หรือแม้กระทั่งสะท้อนผ่านเบราว์เซอร์ ตามหลายรีวิว AirDroid Cast ภาพและประสิทธิภาพการหน่วงเป็นไปอย่างเสถียร ทำให้เหมาะสมสำหรับการประชุมออนไลน์ การสอนระยะไกล หรือการส่งสัญญาณเกม
AirDroid Files เน้นที่การโอนย้ายไฟล์ข้ามแพลตฟอร์มและการจัดการระยะไกล ช่วยให้สามารถแชร์ข้อมูลอย่างรวดเร็วระหว่างอุปกรณ์ต่าง ๆ และการเชื่อมต่อระยะไกลปลอดภัยกับคอมพิวเตอร์อื่น
AirDroid Parental Control มอบโซลูชันการควบคุมพ่อแม่อย่างสมบูรณ์แบบ พร้อมฟีเจอร์การติดตามตำแหน่ง การตั้งขีดจำกัดการใช้แอปและหน้าจอ ซึ่งเป็นประเด็นยอดนิยมในการควบคุมโดยพ่อแม่ เหมาะสำหรับครอบครัวที่ต้องการปกป้องความปลอดภัยออนไลน์ของบุตรหลาน
ต้องการเข้าถึงทั้งการสะท้อนหน้าจอและการโอนย้ายไฟล์ที่มีคุณภาพในเครื่องมือเดี่ยว?
ลอง DeskIn! มันเหมือนกับการรวมฟังก์ชัน Cast และ Files ของ AirDroid พร้อมการสนับสนุนเพิ่มเติมสำหรับหลายจอคุณภาพ 4K เวลาหน่วงต่ำ และการควบคุมข้ามแพลตฟอร์ม เป็นโซลูชันครบวงจรสำหรับการใช้เดสก์ท็อประยะไกล!กลุ่มเป้าหมายและกรณีการใช้งาน: การควบคุมระยะไกล การสะท้อนหน้าจอ การควบคุมโดยพ่อแม่
จากหลายรีวิวของ AirDroid เครื่องมือนี้ตอบสนองความต้องการในสามสถานการณ์การใช้งานหลักดังนี้:
พนักงานระยะไกล
สามารถใช้ AirDroid ในการปฏิบัติการอุปกรณ์ข้ามแพลตฟอร์ม เช่น เชื่อมต่อจากระยะไกลกับคอมพิวเตอร์ Windows จาก Mac หรือ ใช้ iPhone เพื่อควบคุม Mac จากระยะไกล เพื่อให้ได้ความร่วมมือที่มีประสิทธิภาพและการจัดการไฟล์ระหว่างหลายอุปกรณ์
ผู้ใช้เพื่อการศึกษาและงานนำเสนอ
ใช้ AirDroid Cast สำหรับการสะท้อนหน้าจอเพื่อแชร์หน้าจออุปกรณ์มือถือได้แบบเรียลไทม์ในระหว่างการประชุม ชั้นเรียนออนไลน์ หรือการนำเสนอ รองรับการแสดงผลแบบความละเอียดสูงที่มีเวลาแฝงต่ำเพื่อการใช้งานอย่างเสถียร
กลุ่มการควบคุมโดยพ่อแม่
ด้วย AirDroid Parental Control พ่อแม่สามารถตั้งค่าเวลาการใช้งานจำกัด บล็อกแอปพลิเคชัน และติดตามตำแหน่งแบบเรียลไทม์เพื่อให้แน่ใจเรื่องความปลอดภัยขณะใช้ออนไลน์และอุปกรณ์
ต้องการเรียนรู้เพิ่มเติมเกี่ยวกับขั้นตอนการตั้งค่าการควบคุมโดยพ่อแม่และแผนการกำหนดราคา? อ่านต่อไปในส่วนถัดไปที่มีทั้งบทแนะนำสมบูรณ์และการวิเคราะห์ละเอียด
ในฐานะเครื่องมือการควบคุมโดยพ่อแม่ AirDroid Parental Control แก้ปัญหาสามเจ็บหลักของ "ต้องการตรวจสอบโทรศัพท์ของเด็กแต่กลัวการละเมิดความเป็นส่วนตัว" "ราคาคุ้มค่าหรือไม่" และ "ใช้งานยากหรือไม่" เริ่มต้นจากการตั้งค่า ผู้ใช้เพียงดาวน์โหลดแอป AirDroid Parental Control บนอุปกรณ์ของพ่อแม่ ลงชื่อเข้าใช้แล้วติดตั้งแอปคู่ขนานบนอุปกรณ์ของเด็กแล้วจับคู่ด้วยรหัสคำเชิญหรือ QR code เพื่อเปิดใช้งานโหมดตรวจสอบ
แผนมีฟังก์ชันอย่าง การจำกัดเวลาการใช้แอป การสะท้อนหน้าจอ การติดตามตำแหน่ง การตั้งขอบรั้วแจ้งเตือน และการบล็อกแอป พ่อแม่สามารถตั้งค่าการใช้งานโทรศัพท์ของลูกได้ว่าช่วงเวลาใด จำกัดแอปพลิเคชันที่เฉพาะเจาะจง ดูประวัติและเส้นทางตำแหน่ง และแม้กระทั่งสังเกตพฤติกรรมการใช้งานของลูกได้จากโทรศัพท์ของพ่อแม่
ในด้านราคาระบุว่าราคาอย่างเป็นทางการเริ่มต้นที่ประมาณ US $9.99/เดือน, US $19.99/ต่อไตรมาส (ประมาณ US $6.66/เดือน), หรือ US $59.99/ต่อปี (ประมาณ US $5.00/เดือน) รองรับการผูกกับอุปกรณ์ลูกได้หลายเครื่อง ผู้ใช้ใหม่ยังสามารถเพลิดเพลินกับการทดลองใช้ฟรีสามวันโดยปกติได้
เกี่ยวกับการรีวิวการใช้งานจริงของผู้ใช้ส่วนใหญ่พบว่าอินเทอร์เฟซใช้งานง่าย ฟังก์ชันครบถ้วน และคุ้มค่า อย่างไรก็ตามบางคนตระหนักถึงการขาดเจ้าที่ในแอพ social บางตัว การขาดการสนับสนุนฟีเจอร์บางอย่างในอุปกรณ์ iOS หรือความอาจจะสร้างปัญหาความไว้วางใจพ่อแม่กับลูกจากการตรวจสอบระยะยาว
หากคุณไม่แน่ใจเกี่ยวกับการอัพเกรดทันที ขอแนะนำให้ลองใช้คุณสมบัติหลักผ่านการทดลองใช้ฟรีก่อน แล้วค่อยตัดสินใจว่าจะจ่ายเพื่ออัพเกรด
การอ่านที่แนะนำ: หากคุณจำเป็นต้องทำให้อุปกรณ์มือถือใช้งานง่ายขึ้นสำหรับผู้ใหญ่ คุณสามารถอ้างอิงได้ที่ การทำให้ iPhone/Android ใช้งานง่ายขึ้น: มากกว่า "โหมดผู้สูงอายุ," การตั้งค่าเหล่านี้ช่วย! ทำให้เสร็จจากระยะไกลเพื่อขยายการจัดการอุปกรณ์สำหรับกลุ่มต่างๆ ในบ้าน
ก่อนที่คุณจะเริ่มต้น คุณจำเป็นต้องดำเนินการติดตั้งครั้งเดียวเพื่อเปิดใช้งานฟังก์ชันการตรวจสอบ ดังต่อไปนี้คือบทแนะนำการควบคุมโดยพ่อแม่ของ AirDroid (ใช้ Android เป็นตัวอย่าง) เพื่อช่วยพ่อแม่ติดตั้งและดำเนินการอนุญาตได้อย่างรวดเร็ว
ส่วนที่ 1: ตั้งค่าอุปกรณ์ของพ่อแม่
ดาวน์โหลดแอพ: เข้าไปใน Google Play หรือ App Store ค้นหา "AirDroid Parental Control" แล้วดาวน์โหลด ถ้าคุณไม่ต้องการติดตั้งแอพอีกหนึ่งแอพ สามารถใช้เวอร์ชันเว็บได้เช่นกัน
เข้าสู่ระบบบัญชีของคุณ: เปิดแอพและเข้าสู่ระบบบัญชี AirDroid ของคุณ ถ้าคุณยังไม่มีบัญชี กด "ลงทะเบียน" เพื่อสร้างบัญชีใหม่
เลือกเจ้าของอุปกรณ์: ทำตามคำแนะนำบนหน้าจอ เลือก "อุปกรณ์ของฉัน" แล้วกด "ยอมรับ" เพื่อดำเนินการขั้นตอนการจับคู่
ส่วนที่ 2: ตั้งค่าอุปกรณ์ของเด็ก
ขั้นตอนที่ 1: ดาวน์โหลดและผูก AirDroid Kids
หลังจากติดตั้งและเข้าสู่ AirDroid Parental Control ในฝั่งพ่อแม่ ระบบจะแสดงหน้าจอการผูกกับ QR code และลิงก์ดาวน์โหลด ใช้โทรศัพท์ Android ของเด็กในการสแกน QR code หรือป้อน URL จากหน้าเว็บไปยังเบราว์เซอร์เพื่อไปยังหน้าดาวน์โหลด AirDroid Kids
ถ้าหน้าดาวน์โหลดไม่ปรากฏขึ้นอัตโนมัติ กรุณากดปุ่ม "คลิกเพื่อกลับลองใหม่" เพื่อโหลดซ้ำ
ถ้าอุปกรณ์ของคุณไม่สามารถติดตั้งผ่าน Google Play Store ได้ กรุณาทำตามคำแนะนำเพื่อเปิดใช้งานการตั้งค่า "อนุญาตจากแหล่งที่ไม่รู้จัก/แอป" AirDroid Kids Wizard เป็นแอปพลิเคชันอย่างเป็นทางการและปลอดภัยในการดาวน์โหลด หากระบบแสดงเตือนว่า "แอปที่ไม่รู้จัก" กรุณากด "การตั้งค่า" → เปิดใช้งาน "อนุญาตจากแสดงนี้"
เมื่อการติดตั้งเสร็จสิ้น กด "เปิด" อีกครั้งเพื่อดูหน้าจอการตั้งค่า กดปุ่ม "เริ่ม" รอสักครู่แล้วหน้าจอจะให้คุณติดตั้งแอปพลิเคชันหลัก AirDroid Kids
ถ้าหน้าป๊อปอัพ "ติดตั้งแอปที่ไม่รู้จัก" ปรากฏออีกครั้ง กรุณาตรวจสอบให้แน่ใจว่าสวิตช์ "เปิดใช้งาน" แล้วกลับไปยังหน้าจอและกด "ติดตั้ง"
เมื่อ AirDroid Kids ติดตั้งเสร็จ กด "เสร็จสิ้น" และเปิดแอปเพื่อดำเนินการขั้นตอนถัดไป
ขั้นตอนที่ 2: ตั้งค่า AirDroid Kids
เปิด AirDroid Kids กด "ยอมรับ" เพื่อเข้าหน้าจอตั้งค่าข้อมูลเด็ก ใส่ชื่อหรือข้อมูลระบุอัตลักษณ์แล้วกด "เสร็จ" เมื่อเสร็จสิ้น
ระบบจะร้องขอการอนุญาตเป็นลำดับสำหรับสิทธิ์สำคัญบางประการ (เช่นตำแหน่ง การใช้งานหน้าจอประวัติ การเข้าถึงการแจ้งเตือน เป็นต้น) กรุณาอนุญาตตามที่แสดงบนหน้าจอเพื่อให้แน่ใจว่าฟังก์ชันตรวจสอบทำงานได้อย่างถูกต้อง
หลังจากอนุญาตเสร็จสิ้น อุปกรณ์ของเด็กจะถูกผูกสำเร็จอัตโนมัติด้วยอุปกรณ์ของพ่อแม่ คุณสามารถเลือก "ซ่อนไอคอนแอป" เพื่อป้องกันไม่ให้เด็กลบหรือปิดแอปตรวจสอบโดยไม่ตั้งใจ
โดยรวมแล้ว กระบวนการตั้งค่า AirDroid Parental Control ถือว่าค่อนข้างใช้งานง่าย การอนุญาตง่ายๆ บนทั้งสองฝ่ายถือว่าเพียงพอที่จะเสร็จสิ้นการเชื่อมต่อการตรวจสอบ คำเตือน: หากฟังก์ชันบางอย่าง (เช่นการเฝ้าตามทันเวลาหรือบล็อกแอป) ไม่ทำงานอย่างถูกต้อง กรุณายืนยันอีกครั้งว่าทั้งสองอุปกรณ์ได้ให้สิทธิ์ทั้งหมดเพื่อตรวจสอบให้ได้ผลสูงสุด
ในการใช้ AirDroid Parental Control ส่วนใหญ่ ฟังก์ชันที่พ่อแม่ใช้บ่อยที่สุดประกอบด้วย:
การจำกัดเวลาการใช้: กำหนดระยะเวลาการใช้งานประจำวันและช่วงเวลาเพื่อป้องกันเด็กจากการใช้งานเกินขอบเขต
การบล็อกแอปพลิเคชัน: จำกัดแอปที่เฉพาะเจาะจง (เช่นเกม สื่อสังคม) เพื่อรักษาความสมดุลระหว่างการเรียนและความบันเทิง
การติดตามตำแหน่งและกิจกรรม: รองรับการกำหนดตำแหน่ง GPS แบบเรียลไทม์และการดูเส้นทางประวัติ ทำให้พ่อแม่สามารถติดตามที่อยู่บุตรหลานได้
โดยรวมฟังก์ชันเหล่านี้ทำงานได้ดีในแง่ของการประยุกต์ใช้และเสถียรภาพ อย่างไรก็ตาม ผู้ใช้บน Reddit บางคนยังได้ชี้ให้เห็นว่า AirDroid ยังคือลัวควบคุมการ "ความสมชัวร์ของข้อมูลและการจัดเก็บบนคลาวด์" ดังนั้นแนะนำว่าผู้ปกครองควรประเมินขอบเขตการอนุญาตให้ดีดีก่อนใช้งาน
ตามข้อมูลทางการ AirDroid Parental Control มีค่าใช้จ่าย $9.99/เดือน (มีราคาลดจะเป็น $4.99/เดือนรายปี) และมีการทดลองใช้ฟรีสามวัน ขณะที่ทดลองใช้ฟรี คุณสามารถประสบการณ์ฟังก์ชันส่วนใหญ่เช่นการติดตามตำแหน่ง การบล็อกแอป และการสะท้อนหน้าจอแบบเรียลไทม์
จากรีวิว AirDroid มองว่าในช่วงราคากลางถึงราคาสูง แต่ยังคงมีความคุ้มค่าสำหรับพ่อแม่ที่ต้องการตรวจสอบอุปกรณ์หลายเครื่องหรือการติดตามระยะยาว อย่างไรก็ตามหากคุณต้องการเพียงการสะท้อนหน้าจอข้ามแพลตฟอร์มหรือการควบคุมระยะไกล DeskIn มีแผนฟรีที่สามารถทำงานแบบเดียวกันได้ ประหยัดแรงกดดันจากการสมัครสมาชิกและเป็นทางเลือกที่ยืดหยุ่นมากขึ้น
หลังจากที่เข้าใจฟีเจอร์และลักษณะของ AirDroid เราสามารถเปรียบเทียบมันโดยตรงกับ DeskIn เพื่อช่วยให้คุณตัดสินใจได้อย่างรวดเร็วว่าโซลูชันการควบคุมระยะไกลใดที่เหมาะกับคุณที่สุด ตารางต่อไปนี้จัดฟีเจอร์หลักๆ เช่น เสถียรภาพในการเชื่อมต่อ ประสิทธิภาพของภาพ การสนับสนุนหลายจอ การโอนไฟล์ และการป้องกันความปลอดภัย ช่วยให้คุณเห็นความแตกต่างระหว่างทั้งสองได้อย่างรวดเร็ว
การเปรียบเทียบฟังก์ชัน | AirDroid | |
คะแนนรวม | ⭐ 9.4 / 10 | ⭐ 8.2 / 10 |
เสถียรภาพในการเชื่อมต่อ | ยอดเยี่ยม รองรับการทำงานที่โอนิ่งได้ยาวนาน | เสถียร แต่มีการหน่วงค่อนข้างสูง |
ประสิทธิภาพคุณภาพของภาพ | รองรับสูงสุด 4K60FPS / 2K144FPS, True 4:4:4 | ไม่มีตัวเลือกการตั้งค่าคุณภาพสูง |
ประสิทธิภาพของเวลาแฝง | ต่ำกว่า 40ms, เพื่อให้มั่นใจว่าการดำเนินการแบบเรียลไทม์และราบรื่น | เวลาแฝงปานกลาง ขึ้นอยู่กับสภาพแวดล้อมเครือข่าย |
ความเข้ากับระบบ | Windows, Mac, iOS, Android, Web | Windows, Mac, Android (เน้นที่ Android) |
การขยายและการส่งต่อจอ | ✔ รองรับการขยายจอ การฉายภาพ และจอเสมือน | ✘ รองรับเฉพาะการสะท้อนหน้าจอ |
โหมดเกม | ✔ มีโหมดเกมที่หน่วงต่ำในตัวและคอนโทรลแป้นพิมพ์ | ✘ ไม่มีฟีเจอร์เกมส์เฉพาะ |
การโอนย้ายไฟล์ | ความเร็วสูง 12MB/s, ไม่มีข้อจำกัดเรื่องขนาดและรูปแบบ | ความเร็วการโอนย้ายปานกลาง รุ่นฟรีมีข้อจำกัด |
การควบคุมระยะไกล Android | ✔ รองรับการควบคุมระยะไกลและการควบคุมอุปกรณ์ Android | ✔ รองรับการควบคุมระยะไกล Android (ต้องการการอนุญาต) |
การป้องกันความปลอดภัย | เข้ารหัสแบบ end-to-end, รายชื่อขี้ดำและขี้ขาว, การยืนยันการเชื่อมต่อ และการควบคุมเข้าถึงหลายระดับ | เข้ารหัส AES และการเข้าสู่ระบบ MFA; ความปลอดภัยขั้นสูงจำเป็นต้องใช้เวอร์ชั่นชำระเงิน |
การจัดการอุปกรณ์ | รองรับการจัดการแบบรวมศูนย์และการควบคุมหลายเครื่อง (สามารถจัดการหลายร้อยหน่วยได้) | เวอร์ชันเชิงพาณิชย์รองรับการจัดการอุปกรณ์หลายเครื่อง |
การติดตั้งและการใช้งาน | ง่ายและรวดเร็ว สามารถติดตั้งได้โดยไม่จำเป็นต้องใช้ Microsoft Store | การติดตั้งง่าย แต่กระบวนการอนุญาตซับซ้อน |
สัญลักษณ์การสนับสนุน | การทำงานระยะไกล, การออกแบบ, การเล่นเกมส์, การบริหารจัดการองค์กร | การโอนไฟล์มือถือ, การซิงค์การแจ้งเตือน, และการบำรุงรักษามือถือ |
การสนับสนุนลูกค้า | ✔ บริการลูกค้าออนไลน์และการสนับสนุนด้านเทคนิคสำหรับองค์กร | ✘ เวอร์ชันฟรีไม่มีบริการลูกค้า |
ในชุมชนเช่น Reddit ผู้ใช้บางคนแสดงความห่วงใยเกี่ยวกับความปลอดภัยของ AirDroid เช่นความผิดพลาดในการสะกดคำในหน้าการชำระเงินและกระบวนการอนุญาตที่ซับซ้อนที่นำไปสู่ความกังวลเกี่ยวกับความเสี่ยงข้อมูลรั่วไหล หากคุณกำลังมองหาเครื่องมือควบคุมระยะไกลที่เสถียร ปลอดภัย และปลอดโฆษณามากขึ้น DeskIn เป็นทางเลือกที่ยอดเยี่ยม
DeskIn ใช้เทคโนโลยีการเข้ารหัสแบบ end-to-end ทุกการดำเนินการเสร็จสิ้นในสภาพแวดล้อมที่เข้ารหัสท้องถิ่น โดยไม่ต้องพึ่งพาเซิร์ฟเวอร์บุคคลที่สาม นอกจากนี้ยังรองรับการใช้งานหลายแพลตฟอร์ม ช่วยให้การเชื่อมต่อง่ายระหว่างคอมพิวเตอร์สองเครื่อง การสลับรวดเร็วระหว่าง Windows, macOS, iOS, และ Android และแม้กระทั่งเปลี่ยน iPad เป็นจอสอง สำหรับคอมพิวเตอร์ของคุณ มอบประสบการณ์มัลติทาสกิ้งที่ยืดหยุ่นยิ่งขึ้น
เมื่อเทียบกัน DeskIn ไม่เพียงแค่เป็นการปรับปรุงในด้านเสถียรภาพและการควบคุมเวลาแฝง แต่ยังขจัดปัญหาที่ต้องสมัครสมาชิกหรือแคร๊ก AirDroid ไม่ว่าจะเรื่องการทำงานระยะไกล การสอนสะท้อนจอ หรือการตรวจสอบบ้าน DeskIn สามารถตอบสนองความต้องการของคุณด้วยความปลอดภัยสูงกว่าและ-ประสิทธิภาพ
ลอง DeskIn ตอนนี้และสัมผัสมาตรฐานใหม่ของการควบคุมระยะไกลข้ามแพลตฟอร์มไม่มีเวลาแอบแฝง
ทำไมเลือก DeskIn เป็นทางเลือกแทน AirDroid
การสนับสนุนหลายแพลตฟอร์ม: รองรับ Windows, Mac, iOS, Android, และ Web
เวลาหน่วงต่ำเป็นพิเศษ: ค่าหน่วงต่ำกว่า 40ms เพื่อให้ได้ประสบการณ์การทำงานระยะไกลที่ราบรื่น
การสนับสนุนความละเอียดสูง: รองรับ 4K 60FPS และ 2K 144FPS ด้วยคุณภาพภาพที่คมชัดและปรับได้
การเข้าสู่ระบบหลายอุปกรณ์: ไม่มีขีดจำกัดจำนวนอุปกรณ์ช่วยให้ควบคุมระยะไกลได้ทุกที่ทุกเวลา
ฟีเจอร์ฟรี: การโทรด้วยเสียง การขยายจอ การโอนไฟล์ ล้วนเป็นห้องฟรี
การโอนย้ายไฟล์ด้วยความเร็วสูง: รองรับการโอนยาายความเร็วสูงได้ถึง 12MB/s ช่วยเพิ่มประสิทธิภาพในการทำงาน
ขั้นตอนที่ 1: ดาวน์โหลดและติดตั้ง DeskIn
ดาวน์โหลด ไฟล์ติดตั้ง DeskIn สำหรับระบบของคุณทั้งบนอุปกรณ์โฮสต์และอุปกรณ์ควบคุม กระบวนการติดตั้งใช้เวลาเพียง 1-2 นาที ไม่มีการตั้งค่าเพิ่มเติมที่จำเป็น
ขั้นตอนที่ 2: ลงทะเบียนหรือเข้าสู่ระบบบัญชีของคุณ
เปิดแอปพลิเคชัน DeskIn และใช้ที่อยู่อีเมลหรือบัญชี Google/Apple ของคุณในการลงทะเบียนอย่างรวดเร็ว หากคุณมีบัญชีอยู่แล้ว เพียงเข้าสู่ระบบ กระบวนการลงทะเบียนทั้งหมดกินเวลาต่ำกว่า 30 วินาที
ขั้นตอนที่ 3: รับรหัสอุปกรณ์และรหัสผ่านการเชื่อมต่อ
หลังจากเข้าสู่ระบบ DeskIn ทั้งสองอุปกรณ์ให้หาค้นหา "รหัสอุปกรณ์" และ "รหัสผ่านชั่วคราว" บนหน้าหลักของคอมพิวเตอร์ปลายทาง (เครื่องที่คุณต้องการควบคุมจากระยะไกล) คัดลอกข้อมูลสองชิ้นนี้ลงในฟิลด์การเชื่อมต่อบนอุปกรณ์ควบคุม
ขั้นตอนที่ 4: เริ่มการเข้าถึงคอมพิวเตอร์อื่นจากระยะไกล
บนอุปกรณ์ควบคุม กดปุ่ม "เชื่อมต่อ" การเชื่อมต่อจะเสร็จสิ้นในไม่กี่วินาที และคุณสามารถเริ่มทำการเข้าถึงคอมพิวเตอร์ระยะไกลได้แล้ว!
รุ่นฟรีของ AirDroid Cast ให้ฟังก์ชันสะท้อนหน้าจอพื้นฐาน ช่วยให้คุณสะท้อนหน้าจอโทรศัพท์ลงคอมพิวเตอร์หรืออุปกรณ์อื่น ๆ แต่จำกัดฟังก์ชันบางอย่าง (เช่นการเชื่อมต่อ USB และประสบการณ์ปราศจากโฆษณา) หากคุณต้องการฟังก์ชันที่ครบถ้วนขึ้นคุณจะต้องสมัครบอกรับเป็นสมาชิกเวอร์ชันชำระเงิน หากคุณกำลังมองหาการสะท้อนหน้าจอและการควบคุมระยะไกลข้ามแพลตฟอร์มโดยไม่มีค่าใช้จ่ายเพิ่มเติม DeskIn มีแผนฟรีที่เสถียรและปลอดภัย
ใช่, AirDroid สามารถใช้ข้ามหลายแพลตฟอร์มได้ รวมถึง Windows, Mac, Android, และ iOS ช่วยให้ผู้ใช้สามารถควบคุมระยะไกลและการสะท้อนหน้าจอระหว่างอุปกรณ์ต่าง ๆ อย่างไรก็ตามฟีเจอร์บางอย่าง (เช่นการสะท้อนคุณภาพสูงหรือการใช้งานที่ปราศจากโฆษณา) อาจต้องใช้เวอร์ชันชำระเงิน หากคุณต้องการสนับสนุนใช้งานข้ามแพลตฟอร์มที่เสถียรโดยไม่ต้องสมัครสมาชิก DeskIn รองรับหลายแพลตฟอร์มและให้ฟังก์ชันการควบคุมระยะไกลและการขยายจอที่แข็งเข้มแข็ง
ใช่, ฟังก์ชันควบคุมโดยพ่อแม่ของ AirDroid จำเป็นต้องบอกรับเป็นสมาชิกเพื่อใช้งาน โดยมีค่าใช้จ่ายพื้นฐาน $9.99/เดือน (หรือราคาแบบลดรายปี $4.99/เดือน) ระยะทดลองฟรีคือ 3 วัน ที่คุณสามารถประสบการณ์ฟังก์ชันพื้นฐาน หากคุณกำลังมองหาโซลูชันการตรวจสอบที่ยืดหยุ่นมากขึ้นโดยไม่มีค่าใช้จ่ายเพิ่มเติม DeskIn ให้การควบคุมระยะไกลฟรีและครอบคลุมโดยไม่มีค่าใช้จ่ายเพิ่มเติม
แม้ว่า AirDroid จะจัดหามาตรการความปลอดภัยบางอย่าง ผู้ใช้บางส่วนได้แสดงความกังวลเกี่ยวกับการรั่วไหลของข้อมูล โดยเฉพาะอย่างยิ่งรุ่นฟรีอาจมีช่องโหว่ การใช้เวอร์ชันแคร๊กมีความเสี่ยงสูงขึ้น ง่ายต่อการเปิดเผยข้อมูลของคุณกับผู้มาโจมตีที่ไม่หวังดี หากคุณกังวลเกี่ยวกับความปลอดภัยของข้อมูล DeskIn ให้การออกแบบการเข้ารหัส end-to-end เพื่อปกป้องความเป็นส่วนตัวและความปลอดภัยของข้อมูลของคุณ หลีกเลี่ยงความเสี่ยงของซอฟต์แวร์แคร๊ก
AirDroid ให้ฟังก์ชันหลากหลาย ตั้งแต่การควบคุมระยะไกลจนถึงการสะท้อนหน้าจอและการควบคุมโดยพ่อแม่ ทำให้เป็นเครื่องมือที่สะดวกสำหรับผู้ใช้บางคน อย่างไรก็ตามการรีวิว AirDroid ยังชี้ให้เห็นว่ามีการถกเถียงกันเกี่ยวกับความปลอดภัยและแผนการชำระเงินของมัน โดยเฉพาะความเสี่ยงของเวอร์ชันแคร๊กและข้อกำหนดเงินทุนที่ทำให้ผู้ใช้บางคนระมัดระวัง
หากคุณเพียงต้องการฟังก์ชันควบคุมระยะไกลพื้นฐาน สามารถทดลองใช้ AirDroid ได้ก่อนและใช้เวอร์ชันฟรีสำหรับการดำเนินงานพื้นฐาน อย่างไรก็ตามหากคุณให้ความสำคัญกับเสถียรภาพ ความปลอดภัย และการทำงานร่วมกันข้ามแพลตฟอร์มมากกว่า DeskIn ขอยิ้มแนะนำเป็นอย่างยิ่ง มันไม่เพียงให้การควบคุมระยะไกลที่มีประสิทธิภาพ แต่ยังรับประกันความปลอดภัยของข้อมูลของคุณ ไม่มีความกังวลเกี่ยวกับค่าใช้จ่ายในการสมัครสมาชิก
ลอง DeskIn วันนี้และลิ้มรสประสบการณ์การควบคุมระยะไกลที่ปลอดภัยและราบรื่นมากขึ้นที่ทำให้การทำงานและชีวิตของคุณมีประสิทธิภาพมากขึ้น!


เปลี่ยน iPad ให้เป็นจอภาพที่สองสำหรับคอมพิวเตอร์ Windows และ Mac
A second monitor can make everyday work feel much easier, especially when you are switching between research, documents, meetings, design files, or dashboards. If you already own an iPad, you may be able to use it as an extra display instead of buying another monitor.
This guide explains how to use an iPad as a second monitor for Mac with Apple Sidecar, and how Windows or cross-platform users can use DeskIn screen extension on supported paid plans.
Increase screen space so you can view more content at the same time. This helps reduce constant window switching during multitasking.
Keep each screen focused on a different task. For example, you can edit a video on one screen and keep source materials on the other, or write a paper while browsing references side by side.
Use the iPad display you already have. For students, remote workers, and light creative work, an iPad can be a convenient and cost-effective second-screen option.
Save desk space and avoid carrying another external monitor when you work from home, travel, or move between rooms.
Apple Sidecar lets compatible iPads work as an external display for compatible MacBook and iMac devices. It is a good native option if both devices support Sidecar and are signed in with the same Apple ID.
Note: To use Apple Sidecar, your Mac and iPad should use the same Apple ID, have Bluetooth and Wi-Fi turned on, and stay within close wireless range. Sidecar availability depends on Apple device and operating system compatibility.
Open the Mac System Settings >> Click "Display" in the sidebar >> Click the "+" pop up menu on the right and choose your iPad.
Select the iPad, change the Use as settings to "Extended Display". Check the Airplay settings on the top toolbar of the mac and set iPad as "Use As Separate Display".
After completing the settings, your iPad will become the second display for your Mac. You can drag windows from your Mac to your iPad smoothly. You can also use the sidebar on the iPad or change the position of the sidebar on the system display settings.
MacBook Screen (Left) and iPad Screen (Right)
Apple Sidecar only supports mac released after 2016 and iPadOS13 or newer. If you are using an old Apple device or a Windows device, you can still use DeskIn remote software to do the screen extension. It supports using iPad as a second display for Mac and Windows, and the smoothness is no worse than sidecar.
Install DeskIn on both your computer and iPad. Sign in to your DeskIn account on each device. When you log in on a new device for the first time, you may need to complete email verification to help protect your account.
To use Screen Extension, you'll need to subscribe to any Premium plan. Click here to view DeskIn plans.
Open DeskIn on your Windows or Mac computer, go to the screen management area, and choose the screen extension option. Select your iPad as the target display and start extending.
Once connected, your iPad can work as an additional display, letting you move windows between your computer and iPad for a wider workspace.
Computer Screen (Left) and iPad Screen (Right)
After extension, if you find that your iPad is only mirroring the content on your computer screen, please go to Windows System Settings >> Display Settings and change the screen option to "Extend these displays". You can also modify the screen position by dragging the 2 screens.
Need | Best Option | Why |
Use iPad as a second monitor for a compatible Mac | Apple Sidecar | Built into Apple devices and easy to set up when both devices are compatible. |
Use iPad as a second monitor for Windows | DeskIn | Sidecar does not support Windows, while DeskIn supports cross-platform screen extension on eligible plans. |
Work across Windows, macOS, iPad, Android tablets, and mobile devices | DeskIn | Better suited for users who need cross-platform remote access and flexible device combinations. |
Yes. Windows does not support Apple Sidecar, but you can use DeskIn screen extension on a paid plan that includes this feature to turn your iPad into an additional display for a Windows computer.
DeskIn Screen Extension is included in all paid plans. After subscribing, you can use it across all supported systems with no restrictions.
Yes. DeskIn supports using an iPad as an additional screen with Windows and Mac computers when your plan includes screen mirroring or screen extension.
Using an iPad as a second monitor is a practical way to expand your workspace without buying another display. Mac users with compatible devices can use Apple Sidecar, while Windows and cross-platform users can use DeskIn screen extension on eligible paid plans.
If you want to work across Windows, macOS, iPad, and other devices, DeskIn gives you a flexible way to build a portable multi-screen workspace. Download DeskIn and choose the plan that fits your screen extension and remote access needs.

Top 6 RustDesk Alternative Tools for Faster, Easier Remote Access
Remote access should feel like flipping a light switch, not decoding a control panel. Yet many users exploring RustDesk eventually run into friction: connection IDs, server setup, or occasional lag. While RustDesk is powerful, it’s not always the easiest or smoothest option, especially for non-technical users.
That’s why more people are actively searching for a reliable RustDesk alternative that combines performance, simplicity, and flexibility. Whether you want a plug-and-play solution or something more advanced, this guide will help you find the best fit.
RustDesk stands out as a privacy-friendly, self-hosted remote desktop tool. However, real-world usage reveals a few common challenges:
Complicated setup for the RustDesk self-hosted environments
Manual connection steps requiring IDs and passwords
Occasional latency or unstable connections
Limited user-friendly features out of the box
For many users, especially those helping family or managing multiple devices, simplicity matters just as much as control.
When evaluating a RustDesk alternative, focus on these key factors:
Ease of use: Quick setup without technical overhead
Performance: Smooth, low-latency remote sessions
Compatibility: Support for Windows, macOS, Linux, and mobile
Security: Strong encryption and access controls
Flexibility: Options ranging from cloud-based to open source
The ideal tool strikes a balance between power and convenience, something many modern solutions now deliver better than traditional setups.
Here’s a quick breakdown of the top tools and where they shine:
DeskIn – Best all-in-one RustDesk alternative for performance and ease of use
AnyDesk – Best lightweight tool for fast connections
TeamViewer – Best for enterprise-grade remote support
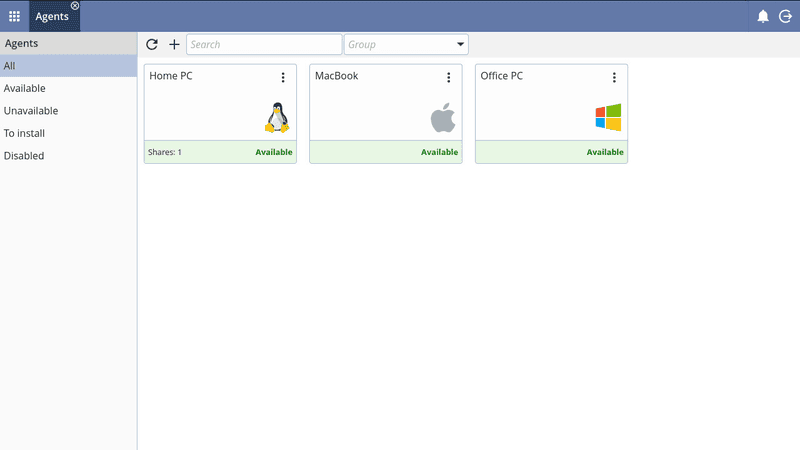
MeshCentral – Best open-source and self-hosted solution
DWService – Best free browser-based tool
Chrome Remote Desktop – Best simple, no-frills option
Ultra-low latency with smooth high-frame-rate streaming
No complex setup or server deployment required
Cross-platform including Rustdesk alternative for Android
Secure with encryption and device control features
Built-in file transfer and multi-device management
Smaller awareness than legacy competitors
Best for: Users who want a powerful yet simple remote desktop solution
DeskIn removes the friction that often comes with remote access tools. Instead of relying on IDs or manual configurations, it offers a streamlined connection experience that works right out of the box. This makes it especially valuable for users supporting non-technical family members or managing multiple remote devices.
Performance is where DeskIn truly distinguishes itself. Compared to RustDesk, which can sometimes struggle with latency, DeskIn delivers consistently smooth sessions with minimal lag. It also eliminates the need for self-hosting, making it a strong free RustDesk alternative option for users who want powerful features without the complexity.
For those exploring options beyond the RustDesk alternative GitHub projects, DeskIn provides a polished, ready-to-use experience that balances simplicity with professional-grade performance.
Lightweight and fast installation
Good performance on low bandwidth
Cross-platform support
Easy-to-use interface
Performance may drop during long sessions
File transfer can be inconsistent
Best for: Users needing quick and simple remote access
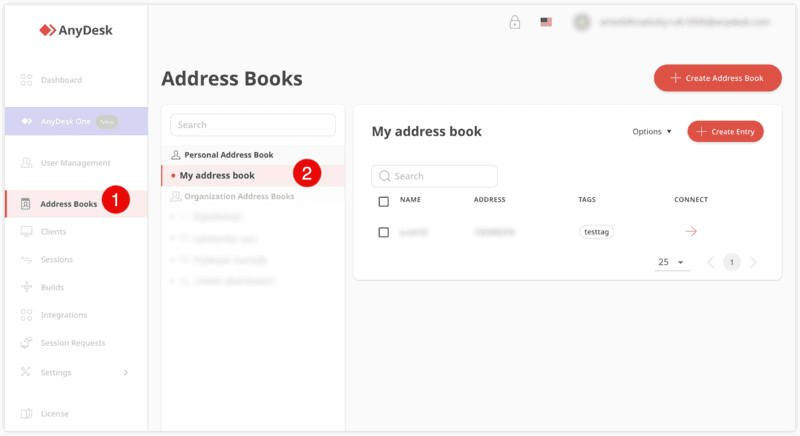
AnyDesk is often considered a natural step up from RustDesk for users who want something easier to deploy. It offers a lightweight application that connects quickly and performs well under normal conditions. This makes it suitable for quick troubleshooting or occasional remote access.
However, performance consistency can be an issue. Users frequently report lag or instability during extended sessions or when handling more demanding tasks. While AnyDesk is a solid option for basic needs, it may not fully satisfy users looking for a more robust, all-in-one solution.
👀 You may also be interested in: |
|---|
Enterprise-grade security with encryption and 2FA
Stable performance across global networks
Rich features like file transfer and session recording
Broad device compatibility
Expensive for commercial use
Free version has limitations
Heavier resource usage on some systems
Best for: Businesses and IT teams managing multiple endpoints
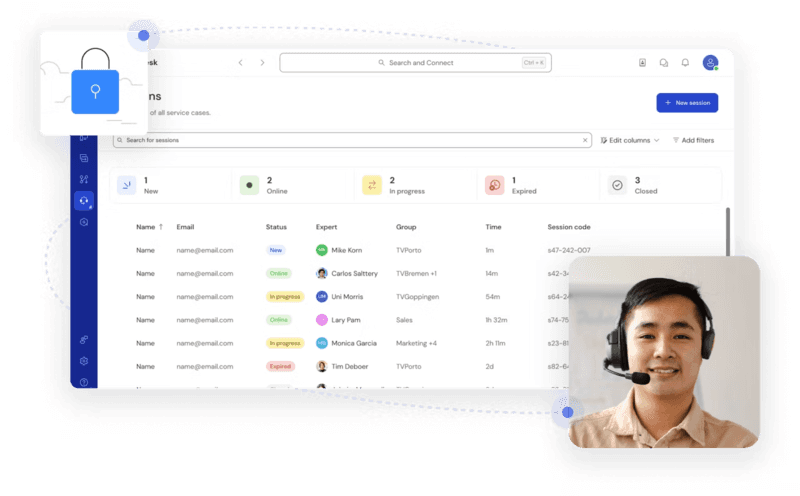
TeamViewer has long been a dominant player in the remote desktop space, offering a comprehensive suite of features designed for enterprise environments. It excels in reliability and global connectivity, making it a popular choice for IT support teams.
That said, its pricing model is a major drawback for many users. Frequent users may quickly encounter licensing restrictions, and costs can escalate for businesses. Additionally, its heavier footprint can impact performance on lower-end devices. DeskIn offers a more modern alternative by delivering similar performance and essential features without the same cost barriers. For users who want enterprise-level capabilities with better efficiency, it presents a compelling option.
👀 You may also be interested in: |
|---|
Fully RustDesk alternative open source solution
Web-based management dashboard
Supports multi-device environments
Strong customization and control
Complex setup and maintenance
Requires technical expertise
Best for: Advanced users needing a Rustdesk alternative self-hosted
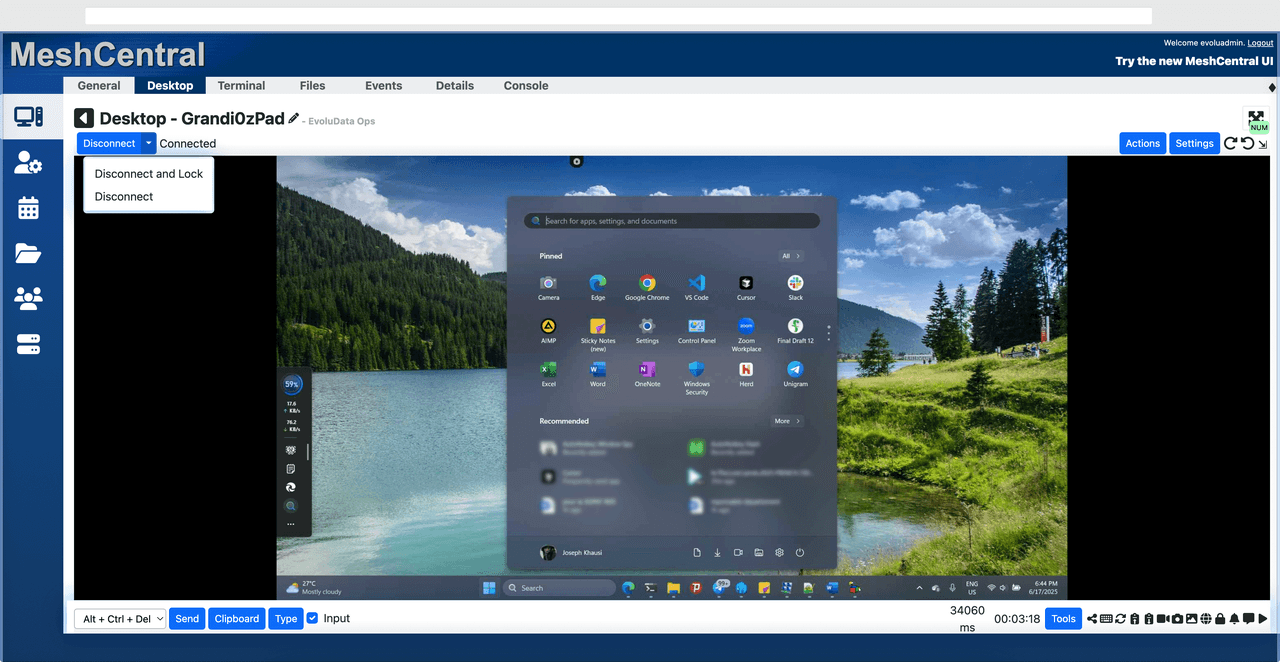
MeshCentral is a powerful open-source platform designed for users who want full control over their remote access infrastructure. It supports multiple devices and provides a centralized dashboard for management, making it attractive for IT professionals.
However, this flexibility comes with complexity. Setting up and maintaining a MeshCentral server requires technical knowledge, which can be a barrier for many users. Compared to this, DeskIn offers a much simpler deployment process while still delivering strong performance and security. For users who prioritize ease of use over full control, modern solutions like DeskIn provide a more accessible alternative.
Completely free
Browser-based access
Open-source foundation
Simple setup
Limited performance
Basic feature set
Best for: Users looking for a simple, free RustDesk alternative
DWService offers a browser-based approach to remote access with no heavy installation, making it convenient for quick connections in restricted environments. It supports both desktop access and file management across major platforms.
However, performance often feels sluggish, especially on demanding tasks, and features remain basic; lacking session recording, smooth multi-monitor support, or advanced security controls. While suitable for occasional personal use, it falls short for professional or high-performance scenarios.
Free and easy to use
Browser-based setup
Cross-platform compatibility
Very limited features
No advanced management or collaboration tools
Best for: Casual users needing basic remote access

Chrome Remote Desktop is one of the simplest remote access tools available. It’s easy to set up and works across devices, making it a convenient choice for occasional use.
However, it lacks many essential features such as file transfer, session management, and advanced security controls. For users with more demanding needs, it quickly becomes insufficient. Compared to Chrome Remote Desktop, DeskIn provides a much more complete experience without sacrificing ease of use, making it a better long-term solution.
👀 You may also be interested in: |
|---|
RustDesk is powerful but can be difficult to set up and manage, especially with self-hosting. Many users prefer tools that offer similar performance without technical complexity. DeskIn simplifies remote access while maintaining strong performance and security.
Several tools qualify as a free RustDesk alternative, including DWService and Chrome Remote Desktop. However, DeskIn stands out by offering better performance and usability even in its free version.
Yes, tools like MeshCentral and DWService are considered RustDesk alternative open source options. They provide flexibility and control but often require technical expertise to set up and maintain.
Beginners should choose tools with a simple setup and intuitive interfaces. DeskIn is an excellent option because it removes the need for manual configuration while still delivering advanced features.
RustDesk is a powerful starting point, but it’s not always the easiest or most efficient tool for everyday use. From setup complexity to performance limitations, many users eventually look for a better RustDesk alternative.
Among all the options, DeskIn stands out as the most balanced solution. It combines speed, simplicity, and cross-platform support into one seamless experience. If you’re ready to move beyond technical friction and enjoy truly smooth remote access, DeskIn is a choice that simply works.

Top 7 RDP Alternative Tools for Faster, Safer Remote Access
Remote desktop access used to feel like a solid bridge. Now, for many users, traditional RDP feels more like a creaky rope ladder. With performance issues, security concerns, and limited cross-platform support, it's no surprise that more people are actively searching for a better RDP alternative that actually keeps up with modern workflows.
If you're managing multiple servers, working across devices, or just tired of unstable connections, this guide will walk you through the best tools worth switching to.
RDP (Remote Desktop Protocol) is a proprietary protocol developed by Microsoft that allows users to connect to another computer over a network. It's widely used for accessing Windows servers, virtual machines, and remote workstations.
While powerful in controlled environments, RDP is often tied to Windows systems and requires configuration like port forwarding or VPNs. Compared to newer tools, it can feel rigid and outdated.
You may also be interested in: |
|---|
RDP still works, but it comes with trade-offs that many users find frustrating:
Security risks if not properly configured
Complex setup for remote or external access
Limited cross-platform compatibility
Performance issues over unstable networks
Many IT teams are now actively replacing it, especially when looking for a Windows RDP client alternative or something that works seamlessly across macOS, Linux, and mobile devices. That's where modern Remote Desktop alternatives shine.
Choosing the right tool is like picking the right vehicle. Some are built for speed, others for heavy-duty enterprise work. Here's a quick snapshot:
DeskIn – Best all-in-one RDP alternative for performance and cross-platform use
TeamViewer – Best for enterprise remote support
AnyDesk – Best lightweight option for fast connections
RustDesk – Best Windows RDP alternative open-source solution
Remmina – Best RDP alternative for Linux users
Chrome Remote Desktop – Best simple browser-based tool
Splashtop – Best for high-performance business environments
Ultra-low latency with smooth high-frame-rate streaming
Works across Windows, macOS, Linux, iOS, and Android
Strong encryption and secure access controls
Built-in file transfer and multi-session support
Newer compared to legacy brands
Best for: Users who want a powerful, flexible RDP alternative

DeskIn feels less like remote access and more like teleportation for your desktop. Whether you're managing servers, supporting clients, or working remotely, it delivers consistently smooth performance without the usual lag spikes seen in traditional RDP setups.
Unlike many tools, DeskIn eliminates the need for complex configurations. You don't need to wrestle with firewalls or VPNs just to connect. It also works seamlessly across platforms, making it a strong alternative to Microsoft Remote Desktop for Mac and mobile users alike.
For teams juggling multiple systems, DeskIn provides a unified experience that replaces fragmented workflows. It's also a strong free RDP alternative option with premium-level capabilities, making it ideal for both individuals and businesses.
Enterprise-grade security and compliance
Extensive feature set including collaboration tools
Cross-platform compatibility
Reliable global performance
Expensive licensing
Can be overkill for individuals
Best for: Enterprises needing secure and scalable remote access
TeamViewer is a comprehensive remote desktop platform widely adopted by IT teams, support professionals, and enterprises. Its feature set extends far beyond simple screen sharing—it includes robust device management, remote printing, file transfer, session recording, and even augmented reality support for field service. TeamViewer's security architecture relies on AES‑256 encryption, two‑factor authentication, and whitelisting, making it suitable for organizations with strict compliance requirements. It runs on virtually every operating system and mobile platform.
The main trade‑off is its pricing: licenses are subscription‑based and can become expensive for small teams or individual users, especially as TeamViewer aggressively flags personal use as commercial, leading to session restrictions.
Fast and responsive
Lightweight installation
Works well on low bandwidth
Easy to use
File transfer can be inconsistent
Lag during longer sessions
Best for: Users needing quick, simple remote access
AnyDesk is a lightweight remote desktop application prized for its speed and efficiency, often recommended as a fast alternative to Microsoft's native Remote Desktop on Windows 10 and Android. It uses a proprietary video codec, DeskRT, to achieve low latency even on limited bandwidth, making it ideal for quick support sessions and accessing devices over mobile networks. The interface is clean and minimalist, with features like address book management, file transfer, and session recording available.
However, users frequently report instability during extended sessions; performance can degrade over time, and file transfers may slow considerably compared to competitors. While its free version is generous for personal use, professional users often find the performance ceiling limits its suitability for continuous, demanding workloads. DeskIn, by contrast, maintains consistent performance even during extended use, making it better suited for professional workloads.
You may also be interested in: |
|---|
Free and open-source
Self-hosting for full control
Strong privacy protection
Active community
Technical setup required
Limited user-friendly features
Best for: Developers and privacy-focused users
RustDesk has emerged as a leading open‑source remote desktop alternative, appealing to developers and organizations that require full control over their data. It allows users to self‑host the relay and rendezvous servers, meaning no third‑party infrastructure handles connection metadata. Built with Rust, it offers a modern codebase with cross‑platform clients (Windows, macOS, Linux, Android, iOS) and supports essential features such as file transfer, TCP tunneling, and customizable address books.
The major barrier is its complexity: deploying a self‑hosted environment requires technical expertise to configure firewalls, SSL certificates, and ongoing server maintenance. For those using the public relay, performance can be inconsistent depending on server load and geographic proximity.
You may also be interested in: Top RustDesk Alternatives for Better Performance, Security & Ease of Use |
|---|
Open-source and free
Supports multiple protocols including RDP and VNC
Lightweight and flexible
Native to Linux environments
Limited features compared to modern tools
UI can feel outdated
Best for: Linux users looking for a traditional RDP alternative Linux
Remmina is a beloved open‑source remote desktop client for Linux, supporting multiple protocols (RDP, VNC, SSH, SPICE, and others) in a single unified interface. It is frequently chosen by system administrators and Linux enthusiasts who need a flexible, lightweight tool to manage diverse environments. Remmina offers tabbed sessions, quick‑connect profiles, and a plugin system that extends its capabilities.
However, its strength - protocol flexibility, also highlights its limitations. As a frontend client rather than a full remote access solution, it lacks features like unattended access, centralized account management, or robust session recording out of the box. Performance can vary by protocol, and the user experience lags behind more polished commercial tools, particularly for users seeking a plug‑and‑play setup.
Free and easy to use
Browser-based setup
Cross-platform access
Very limited features
No advanced management tools
Best for: Casual users needing basic remote access
Chrome Remote Desktop is a free, browser‑based remote access tool from Google that requires nothing more than a Chrome browser and a Google account. It excels in simplicity: installation takes seconds, and connections are mediated through Google's infrastructure, eliminating complex firewall configurations. For occasional use—such as helping a family member or quickly accessing a home computer—it works reliably across Windows, macOS, Linux, and even ChromeOS.
The trade‑off is its minimal feature set. There is no native file transfer, multi‑session management, remote printing, or granular permission controls. Collaboration tools are absent, and the reliance on a Google account for authentication can be a limitation in professional environments. It remains a convenient entry‑level tool but struggles to meet the needs of power users or IT teams.
You may also be interested in: |
|---|
High-quality streaming performance
Strong security features
Good for business environments
Reliable connections
Subscription-based pricing
Limited free version
Best for: Businesses needing performance-focused remote access
Splashtop is a high‑performance remote desktop solution frequently adopted by creative professionals, educational institutions, and enterprises that prioritize fluid interaction. It delivers low‑latency streaming with support for high‑frame‑rate displays, making it suitable for video editing, CAD work, and other graphics‑intensive tasks. Splashtop offers a range of editions—from Business Access to SOS for on‑demand support—all of which include robust security (AES‑256, device authentication) and features like file transfer, remote printing, and multi‑monitor navigation. Its performance over local networks and the internet is consistently praised.
The primary drawback is cost: while competitive, the subscription model can accumulate quickly for users needing access to multiple devices or advanced features, especially when compared to similarly capable tools with more flexible pricing structures. DeskIn offers similar performance benefits with a more flexible pricing structure, making it a compelling alternative.
You may also be interested in: |
|---|
RDP can be difficult to configure, less secure if exposed, and limited outside Windows environments. Modern tools like DeskIn provide better performance, security, and ease of use.
The best RDP alternative depends on your needs, but DeskIn stands out for its balance of speed, security, and cross-platform compatibility.
Yes, several tools qualify as an RDP alternative free, including RustDesk and Chrome Remote Desktop. DeskIn also offers a free tier with advanced capabilities.
Microsoft is evolving its remote desktop ecosystem, but traditional RDP isn't disappearing overnight. However, many users are already transitioning to more modern solutions like DeskIn for better reliability and flexibility.
RDP has served its purpose, but the digital world has outgrown its limitations. Whether you need better performance, stronger security, or true cross-platform access, switching to a modern RDP alternative is no longer optional, it's inevitable.
Among all the options, DeskIn stands out as a future-ready solution. It combines speed, simplicity, and power into one seamless experience, helping you leave behind the friction of traditional remote desktop tools and step into something far more efficient.
เปลี่ยน iPad ให้เป็นจอภาพที่สองสำหรับคอมพิวเตอร์ Windows และ Mac
A second monitor can make everyday work feel much easier, especially when you are switching between research, documents, meetings, design files, or dashboards. If you already own an iPad, you may be able to use it as an extra display instead of buying another monitor.
This guide explains how to use an iPad as a second monitor for Mac with Apple Sidecar, and how Windows or cross-platform users can use DeskIn screen extension on supported paid plans.
Increase screen space so you can view more content at the same time. This helps reduce constant window switching during multitasking.
Keep each screen focused on a different task. For example, you can edit a video on one screen and keep source materials on the other, or write a paper while browsing references side by side.
Use the iPad display you already have. For students, remote workers, and light creative work, an iPad can be a convenient and cost-effective second-screen option.
Save desk space and avoid carrying another external monitor when you work from home, travel, or move between rooms.
Apple Sidecar lets compatible iPads work as an external display for compatible MacBook and iMac devices. It is a good native option if both devices support Sidecar and are signed in with the same Apple ID.
Note: To use Apple Sidecar, your Mac and iPad should use the same Apple ID, have Bluetooth and Wi-Fi turned on, and stay within close wireless range. Sidecar availability depends on Apple device and operating system compatibility.
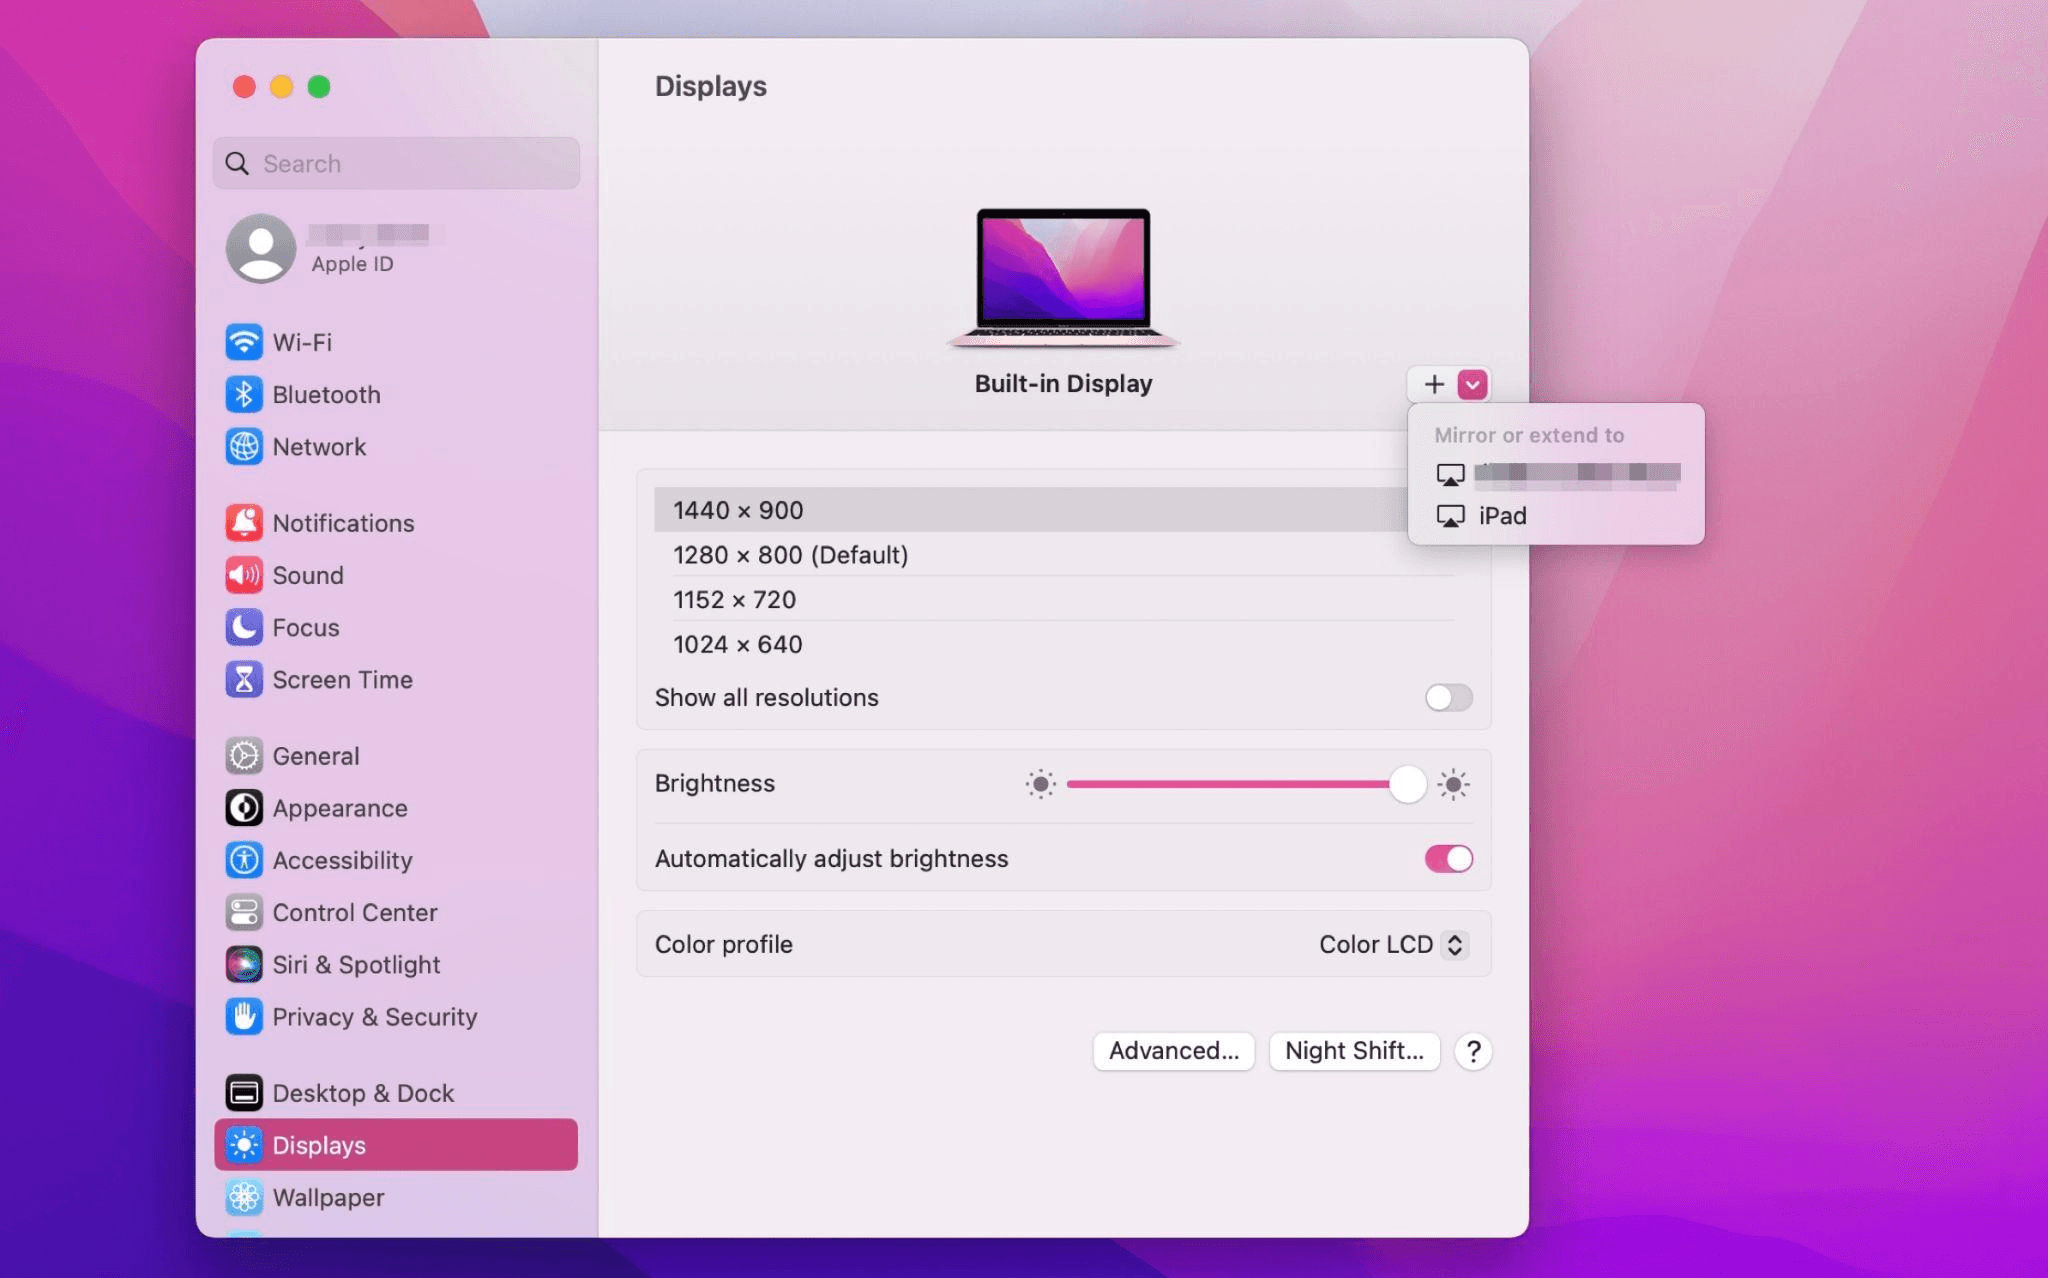
Open the Mac System Settings >> Click "Display" in the sidebar >> Click the "+" pop up menu on the right and choose your iPad.
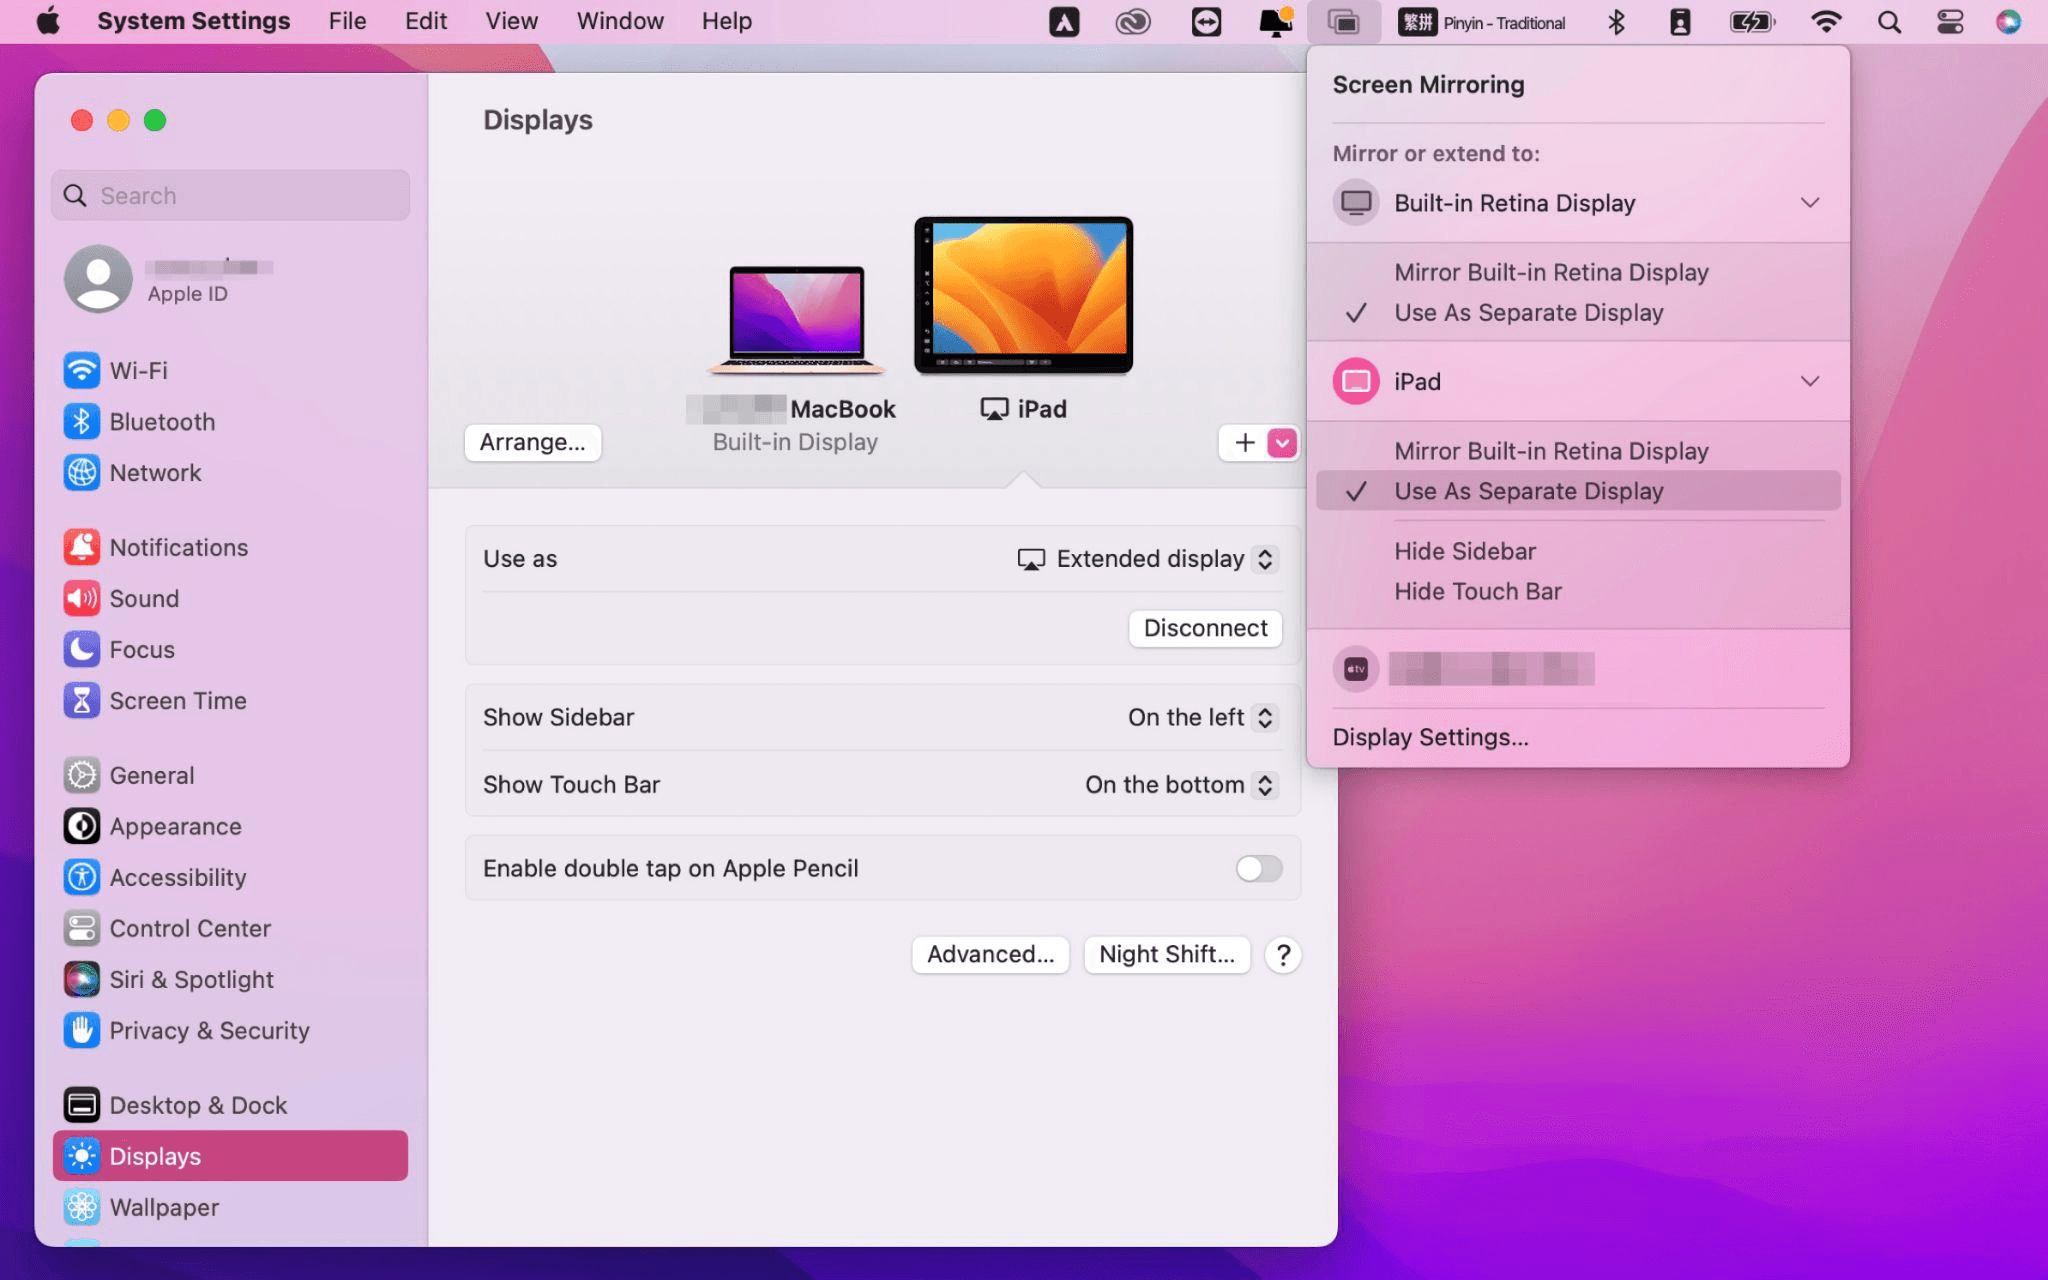
Select the iPad, change the Use as settings to "Extended Display". Check the Airplay settings on the top toolbar of the mac and set iPad as "Use As Separate Display".
After completing the settings, your iPad will become the second display for your Mac. You can drag windows from your Mac to your iPad smoothly. You can also use the sidebar on the iPad or change the position of the sidebar on the system display settings.
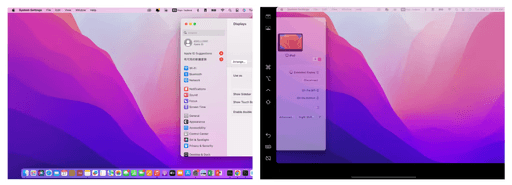
MacBook Screen (Left) and iPad Screen (Right)
Apple Sidecar only supports mac released after 2016 and iPadOS13 or newer. If you are using an old Apple device or a Windows device, you can still use DeskIn remote software to do the screen extension. It supports using iPad as a second display for Mac and Windows, and the smoothness is no worse than sidecar.
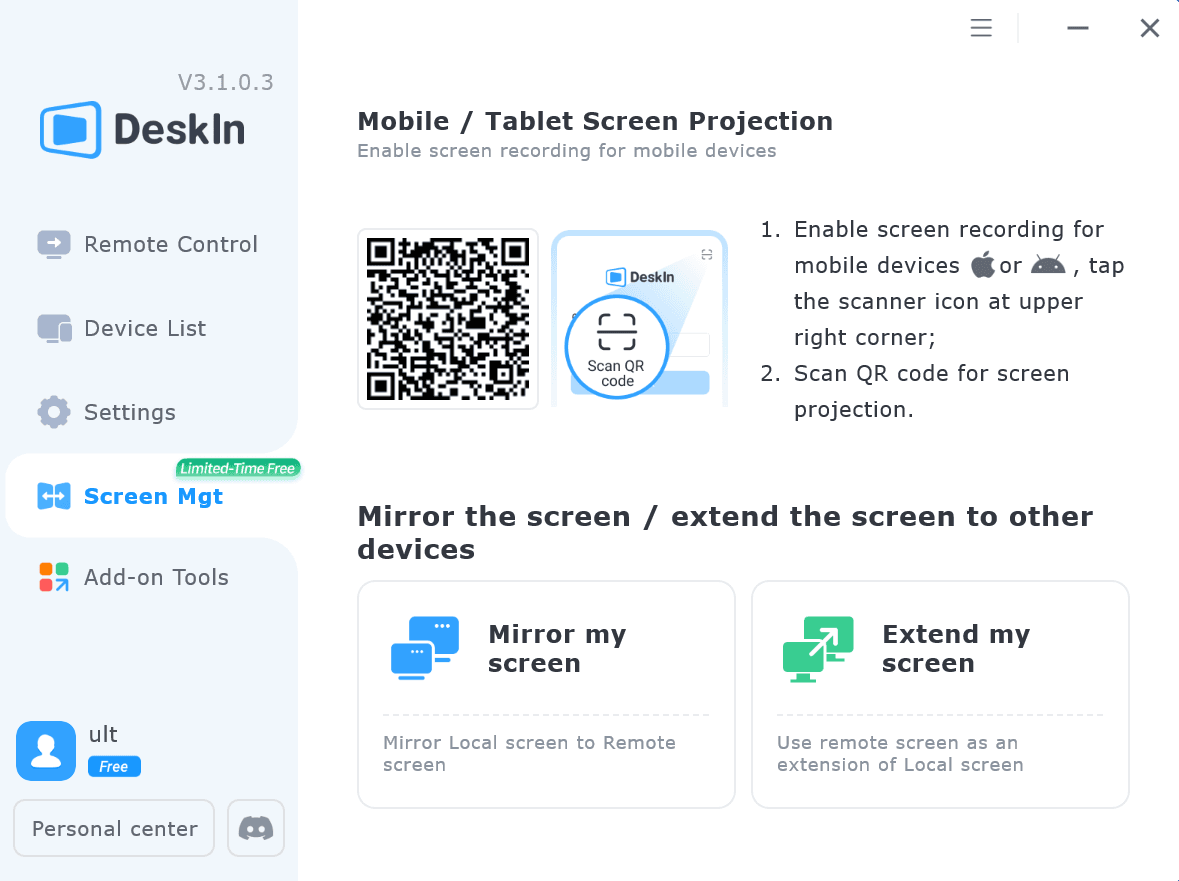
Install DeskIn on both your computer and iPad. Sign in to your DeskIn account on each device. When you log in on a new device for the first time, you may need to complete email verification to help protect your account.
To use Screen Extension, you'll need to subscribe to any Premium plan. Click here to view DeskIn plans.
Open DeskIn on your Windows or Mac computer, go to the screen management area, and choose the screen extension option. Select your iPad as the target display and start extending.
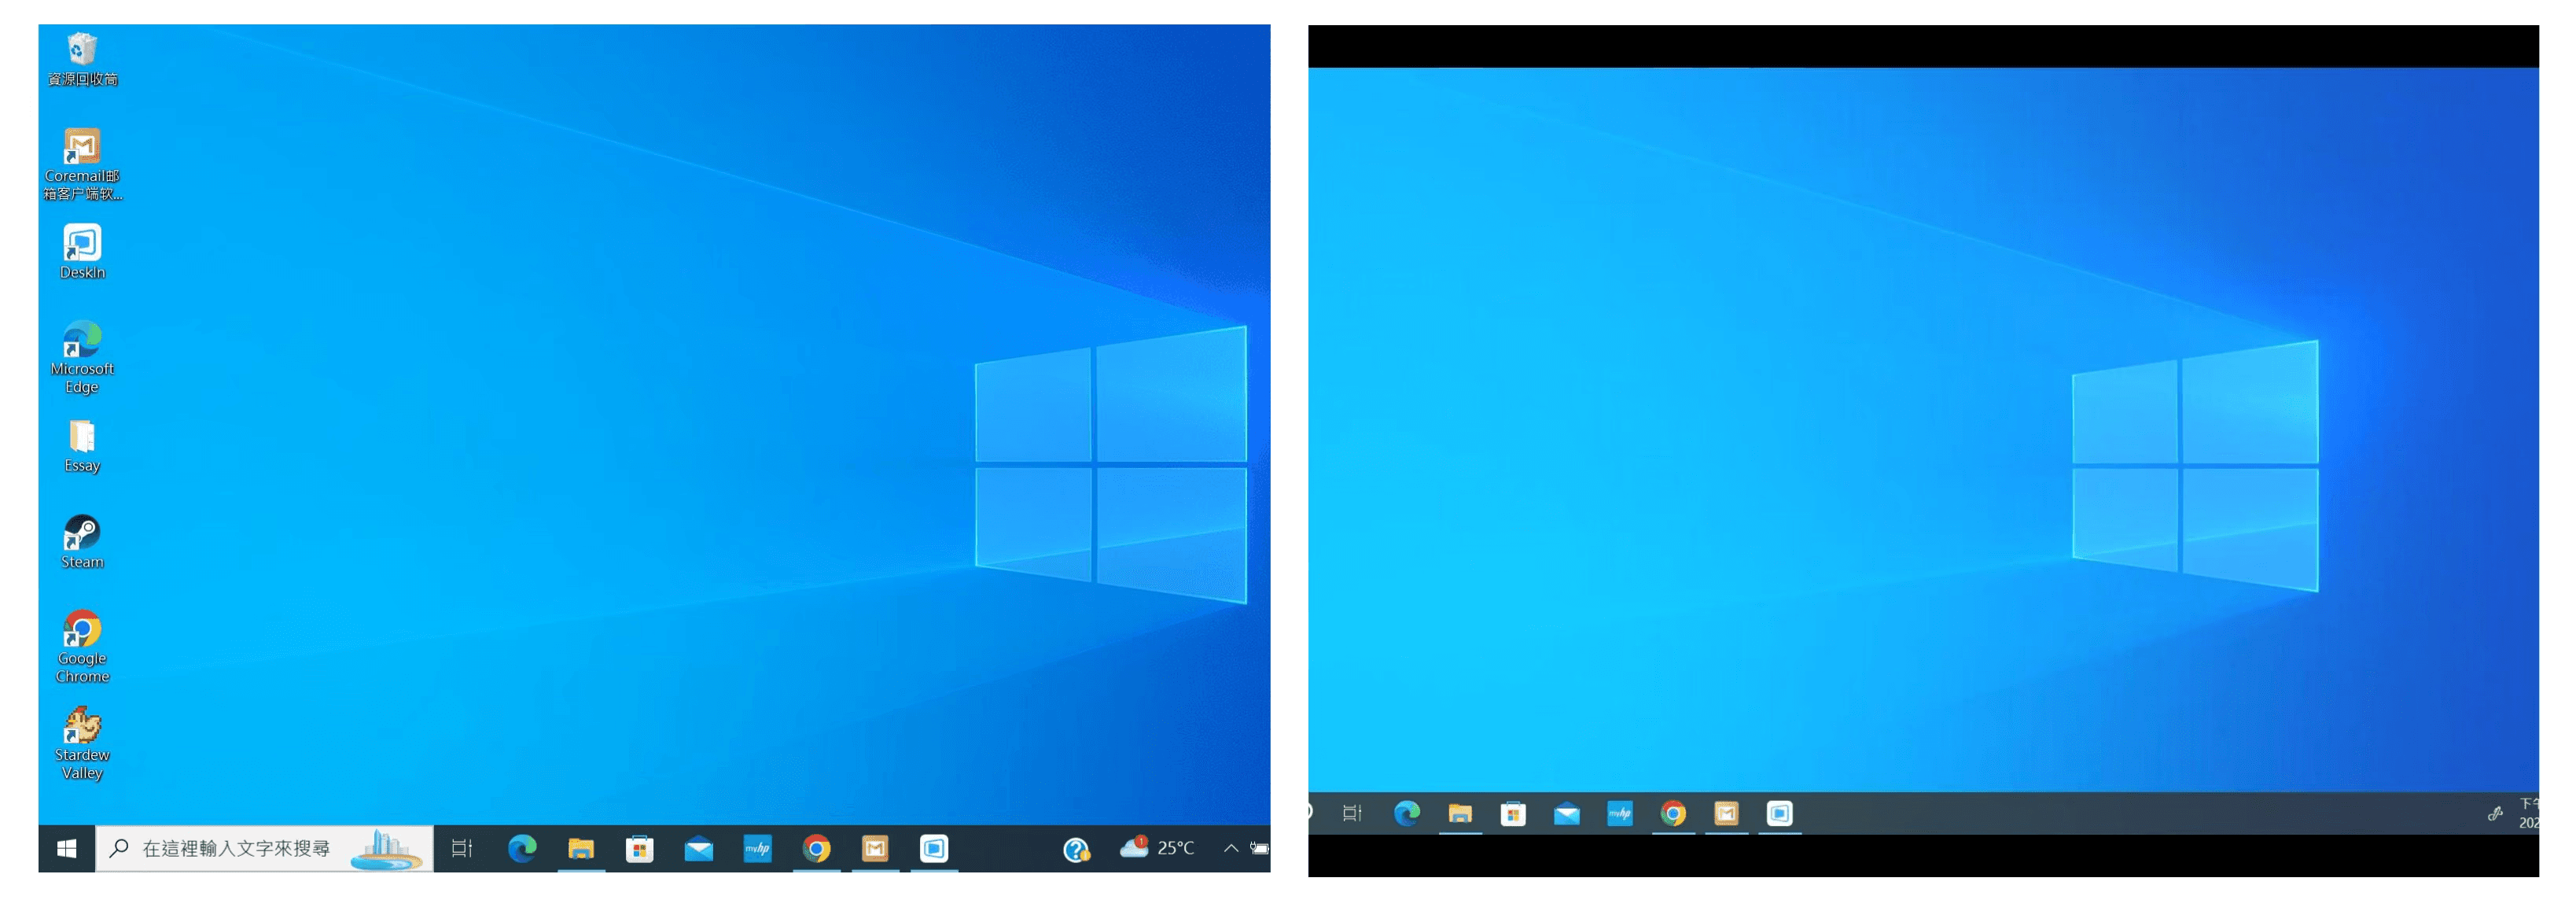
Once connected, your iPad can work as an additional display, letting you move windows between your computer and iPad for a wider workspace.
Computer Screen (Left) and iPad Screen (Right)
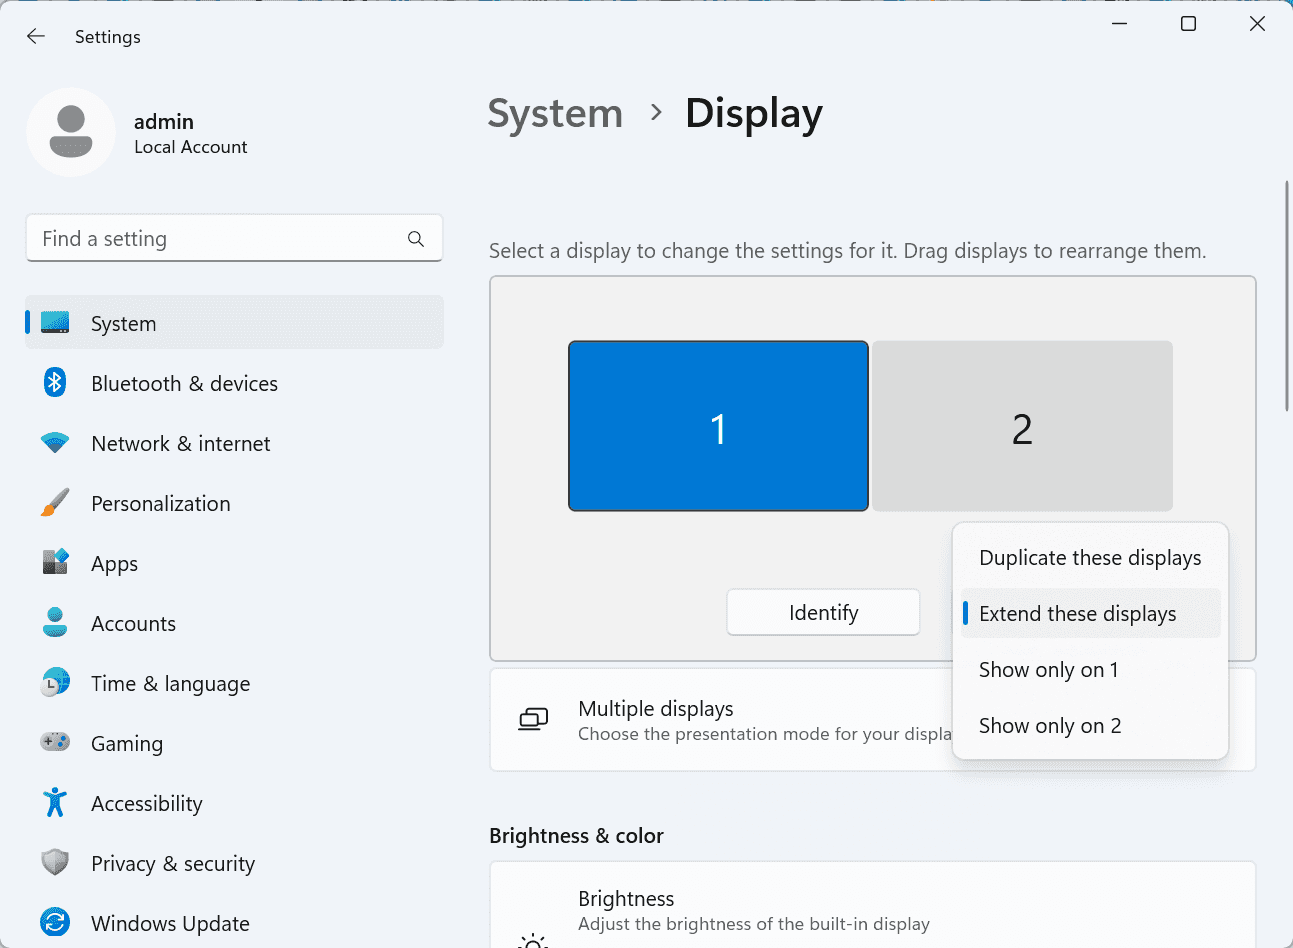
After extension, if you find that your iPad is only mirroring the content on your computer screen, please go to Windows System Settings >> Display Settings and change the screen option to "Extend these displays". You can also modify the screen position by dragging the 2 screens.
Need | Best Option | Why |
Use iPad as a second monitor for a compatible Mac | Apple Sidecar | Built into Apple devices and easy to set up when both devices are compatible. |
Use iPad as a second monitor for Windows | DeskIn | Sidecar does not support Windows, while DeskIn supports cross-platform screen extension on eligible plans. |
Work across Windows, macOS, iPad, Android tablets, and mobile devices | DeskIn | Better suited for users who need cross-platform remote access and flexible device combinations. |
Yes. Windows does not support Apple Sidecar, but you can use DeskIn screen extension on a paid plan that includes this feature to turn your iPad into an additional display for a Windows computer.
DeskIn Screen Extension is included in all paid plans. After subscribing, you can use it across all supported systems with no restrictions.
Yes. DeskIn supports using an iPad as an additional screen with Windows and Mac computers when your plan includes screen mirroring or screen extension.
Using an iPad as a second monitor is a practical way to expand your workspace without buying another display. Mac users with compatible devices can use Apple Sidecar, while Windows and cross-platform users can use DeskIn screen extension on eligible paid plans.
If you want to work across Windows, macOS, iPad, and other devices, DeskIn gives you a flexible way to build a portable multi-screen workspace. Download DeskIn and choose the plan that fits your screen extension and remote access needs.
Top 6 RustDesk Alternative Tools for Faster, Easier Remote Access
Remote access should feel like flipping a light switch, not decoding a control panel. Yet many users exploring RustDesk eventually run into friction: connection IDs, server setup, or occasional lag. While RustDesk is powerful, it’s not always the easiest or smoothest option, especially for non-technical users.
That’s why more people are actively searching for a reliable RustDesk alternative that combines performance, simplicity, and flexibility. Whether you want a plug-and-play solution or something more advanced, this guide will help you find the best fit.
RustDesk stands out as a privacy-friendly, self-hosted remote desktop tool. However, real-world usage reveals a few common challenges:
Complicated setup for the RustDesk self-hosted environments
Manual connection steps requiring IDs and passwords
Occasional latency or unstable connections
Limited user-friendly features out of the box
For many users, especially those helping family or managing multiple devices, simplicity matters just as much as control.
When evaluating a RustDesk alternative, focus on these key factors:
Ease of use: Quick setup without technical overhead
Performance: Smooth, low-latency remote sessions
Compatibility: Support for Windows, macOS, Linux, and mobile
Security: Strong encryption and access controls
Flexibility: Options ranging from cloud-based to open source
The ideal tool strikes a balance between power and convenience, something many modern solutions now deliver better than traditional setups.
Here’s a quick breakdown of the top tools and where they shine:
DeskIn – Best all-in-one RustDesk alternative for performance and ease of use
AnyDesk – Best lightweight tool for fast connections
TeamViewer – Best for enterprise-grade remote support
MeshCentral – Best open-source and self-hosted solution
DWService – Best free browser-based tool
Chrome Remote Desktop – Best simple, no-frills option
Ultra-low latency with smooth high-frame-rate streaming
No complex setup or server deployment required
Cross-platform including Rustdesk alternative for Android
Secure with encryption and device control features
Built-in file transfer and multi-device management
Smaller awareness than legacy competitors
Best for: Users who want a powerful yet simple remote desktop solution
DeskIn removes the friction that often comes with remote access tools. Instead of relying on IDs or manual configurations, it offers a streamlined connection experience that works right out of the box. This makes it especially valuable for users supporting non-technical family members or managing multiple remote devices.
Performance is where DeskIn truly distinguishes itself. Compared to RustDesk, which can sometimes struggle with latency, DeskIn delivers consistently smooth sessions with minimal lag. It also eliminates the need for self-hosting, making it a strong free RustDesk alternative option for users who want powerful features without the complexity.
For those exploring options beyond the RustDesk alternative GitHub projects, DeskIn provides a polished, ready-to-use experience that balances simplicity with professional-grade performance.
Lightweight and fast installation
Good performance on low bandwidth
Cross-platform support
Easy-to-use interface
Performance may drop during long sessions
File transfer can be inconsistent
Best for: Users needing quick and simple remote access
AnyDesk is often considered a natural step up from RustDesk for users who want something easier to deploy. It offers a lightweight application that connects quickly and performs well under normal conditions. This makes it suitable for quick troubleshooting or occasional remote access.
However, performance consistency can be an issue. Users frequently report lag or instability during extended sessions or when handling more demanding tasks. While AnyDesk is a solid option for basic needs, it may not fully satisfy users looking for a more robust, all-in-one solution.
👀 You may also be interested in: |
|---|
Enterprise-grade security with encryption and 2FA
Stable performance across global networks
Rich features like file transfer and session recording
Broad device compatibility
Expensive for commercial use
Free version has limitations
Heavier resource usage on some systems
Best for: Businesses and IT teams managing multiple endpoints
TeamViewer has long been a dominant player in the remote desktop space, offering a comprehensive suite of features designed for enterprise environments. It excels in reliability and global connectivity, making it a popular choice for IT support teams.
That said, its pricing model is a major drawback for many users. Frequent users may quickly encounter licensing restrictions, and costs can escalate for businesses. Additionally, its heavier footprint can impact performance on lower-end devices. DeskIn offers a more modern alternative by delivering similar performance and essential features without the same cost barriers. For users who want enterprise-level capabilities with better efficiency, it presents a compelling option.
👀 You may also be interested in: |
|---|
Fully RustDesk alternative open source solution
Web-based management dashboard
Supports multi-device environments
Strong customization and control
Complex setup and maintenance
Requires technical expertise
Best for: Advanced users needing a Rustdesk alternative self-hosted
MeshCentral is a powerful open-source platform designed for users who want full control over their remote access infrastructure. It supports multiple devices and provides a centralized dashboard for management, making it attractive for IT professionals.
However, this flexibility comes with complexity. Setting up and maintaining a MeshCentral server requires technical knowledge, which can be a barrier for many users. Compared to this, DeskIn offers a much simpler deployment process while still delivering strong performance and security. For users who prioritize ease of use over full control, modern solutions like DeskIn provide a more accessible alternative.
Completely free
Browser-based access
Open-source foundation
Simple setup
Limited performance
Basic feature set
Best for: Users looking for a simple, free RustDesk alternative
DWService offers a browser-based approach to remote access with no heavy installation, making it convenient for quick connections in restricted environments. It supports both desktop access and file management across major platforms.
However, performance often feels sluggish, especially on demanding tasks, and features remain basic; lacking session recording, smooth multi-monitor support, or advanced security controls. While suitable for occasional personal use, it falls short for professional or high-performance scenarios.
Free and easy to use
Browser-based setup
Cross-platform compatibility
Very limited features
No advanced management or collaboration tools
Best for: Casual users needing basic remote access
Chrome Remote Desktop is one of the simplest remote access tools available. It’s easy to set up and works across devices, making it a convenient choice for occasional use.
However, it lacks many essential features such as file transfer, session management, and advanced security controls. For users with more demanding needs, it quickly becomes insufficient. Compared to Chrome Remote Desktop, DeskIn provides a much more complete experience without sacrificing ease of use, making it a better long-term solution.
👀 You may also be interested in: |
|---|
RustDesk is powerful but can be difficult to set up and manage, especially with self-hosting. Many users prefer tools that offer similar performance without technical complexity. DeskIn simplifies remote access while maintaining strong performance and security.
Several tools qualify as a free RustDesk alternative, including DWService and Chrome Remote Desktop. However, DeskIn stands out by offering better performance and usability even in its free version.
Yes, tools like MeshCentral and DWService are considered RustDesk alternative open source options. They provide flexibility and control but often require technical expertise to set up and maintain.
Beginners should choose tools with a simple setup and intuitive interfaces. DeskIn is an excellent option because it removes the need for manual configuration while still delivering advanced features.
RustDesk is a powerful starting point, but it’s not always the easiest or most efficient tool for everyday use. From setup complexity to performance limitations, many users eventually look for a better RustDesk alternative.
Among all the options, DeskIn stands out as the most balanced solution. It combines speed, simplicity, and cross-platform support into one seamless experience. If you’re ready to move beyond technical friction and enjoy truly smooth remote access, DeskIn is a choice that simply works.
Products
ดาวน์โหลด
Resources
ติดต่อเรา
Email: support@deskin.io
Office: 991D Alexandra Road #02-17, Singapore 119972
Copyright © 2026 Zuler Technology PTE. LTD. All rights reserved.
ติดต่อเรา
Email: support@deskin.io
Office: 991D Alexandra Road #02-17, Singapore 119972
Products
ดาวน์โหลด
Resources
Copyright © 2026 Zuler Technology PTE. LTD. All rights reserved.
Products
ดาวน์โหลด
Resources
ติดต่อเรา
support@deskin.io
991D Alexandra Road #02-17
Singapore 119972
Copyright © 2026 Zuler Technology PTE. LTD. All rights reserved.
【New User Special Offer】
Save
Extra 20%
on your first order|4K60FPS
Extra
20% Off
|For
New Users
【New User Special Offer】
Save
Extra 20%
on first order

