Search Docs…
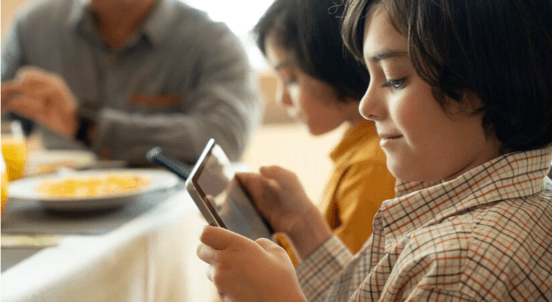
Nhiều trẻ em ngày càng sở hữu điện thoại thông minh riêng. Trong khi mang lại sự tiện lợi trong giao tiếp, nó cũng khiến chúng phải đối mặt với nhiều nguy hiểm hơn. Xuất phát từ mối lo ngại về sự an toàn của con cái và thời gian sử dụng điện thoại quá mức, một số bậc phụ huynh sử dụng phần mềm ứng dụng kiểm soát phụ huynh để theo dõi điện thoại của trẻ. Các bậc phụ huynh nên chú ý đến điều gì khi sử dụng ứng dụng của họ? Bài viết này cung cấp cho bạn 4 mẹo và giới thiệu 4 phần mềm kiểm soát phụ huynh tốt nhất. Hãy kiểm tra nó.
Tại sao các bậc phụ huynh nên theo dõi điện thoại của trẻ?
1. Quản lý thời gian sử dụng điện thoại
Trẻ em có thể bị nghiện game, video ngắn, mạng xã hội và sử dụng điện thoại một cách không kiểm soát. Lúc này, bằng cách theo dõi thời gian sử dụng điện thoại của con cái và quản lý thời gian sử dụng ứng dụng, các bậc phụ huynh có thể hướng dẫn con cái sống một cuộc sống lành mạnh hơn, có thời gian được quản lý tốt hơn.
2. Phát hiện tin nhắn và chương trình có hại
Trẻ em có thể không phân biệt được thông tin độc hại và có hại trên Internet ở độ tuổi còn nhỏ. Việc thường xuyên kiểm tra tin nhắn văn bản di động, lịch sử duyệt web và mạng xã hội của trẻ có thể ngăn chặn chúng bị ảnh hưởng xấu từ nội dung liên quan đến tình dục, bạo lực, cờ bạc, lừa đảo và ma túy. Đồng thời, bạn có thể hướng dẫn chúng sử dụng Internet một cách đúng đắn.
3. Tránh thanh toán vô tình
Hiện nay, quá trình xác minh thanh toán trên điện thoại đang ngày càng trở nên đơn giản hơn, điều này mang lại sự tiện lợi nhưng cũng ẩn chứa nhiều nguy hiểm. Trẻ em có thể mua vật phẩm trong trò chơi, quyên góp cho người phát trực tiếp, hoặc vô tình đăng ký một ứng dụng. Nếu không phát hiện kịp thời, điều này có thể gây ra thiệt hại lớn.
4. Giữ đôi mắt trên trẻ và ngăn ngừa nguy hiểm
Các bậc phụ huynh không thể ở bên cạnh con cái mọi lúc và không thể 100% nhận thức được những gì xảy ra ở trường hoặc với bạn bè. Bằng cách theo dõi tin nhắn văn bản hoặc lịch sử trò chuyện của điện thoại di động của trẻ, họ có thể biết ngay khi có xung đột với bạn học, bị bắt nạt ở trường (bị bắt nạt hoặc bắt nạt), bạo lực, v.v. Một số chương trình theo dõi cũng có thể theo dõi vị trí của điện thoại trẻ, vì vậy khi trẻ gặp nguy hiểm, phụ huynh có thể đến ngay lập tức.
5. Khắc phục sự cố công nghệ
Khi trẻ gặp sự cố kỹ thuật với điện thoại của mình, chẳng hạn như cài đặt, sự cố sao lưu, tải tệp, v.v., các bậc phụ huynh có thể sử dụng các chương trình điều khiển từ xa để kiểm soát điện thoại di động của con cái và giúp khắc phục.
4 điều cần chú ý trước khi theo dõi điện thoại của trẻ
1. Tôn trọng trẻ em
Mặc dù chúng ta hiểu rằng các bậc phụ huynh theo dõi điện thoại của con cái vì lo lắng. Nhưng xin hãy nhớ rằng trẻ cũng có những ý tưởng, bí mật và sự riêng tư của riêng mình. Xin hãy nhớ điều này trước khi sử dụng một chương trình theo dõi: luôn tôn trọng con mình và những ý kiến của chúng. Đừng đi quá xa hoặc bạn có thể làm tổn hại đến mối quan hệ.
2. Giao tiếp với con cái của bạn
Nói về suy nghĩ và lý do của bạn với con trước khi theo dõi điện thoại của chúng. Đồng thời, lắng nghe chúng, giao tiếp để đạt được sự đồng thuận. Đảm bảo rằng bạn có sự đồng ý của con trước khi tải xuống và sử dụng một chương trình theo dõi điện thoại. Nếu chúng phản đối mạnh mẽ ý tưởng này, hãy giao tiếp và tìm ra những cách khác.
3. Lập một thỏa thuận và tuân thủ nó
Lập một thỏa thuận với con bạn về thời gian bạn có thể theo dõi điện thoại của chúng, những ứng dụng nào bạn có thể theo dõi và không theo dõi, và tuân theo nó. Hãy nhớ rằng, sự tin tưởng và giao tiếp quan trọng hơn bất cứ điều gì khác.
4. Chọn phần mềm theo dõi an toàn
Khi bạn quyết định sử dụng một chương trình theo dõi, hãy nhớ chọn một chương trình có mức độ bảo mật cao. Vì những chương trình này có quyền truy cập vào hầu hết các quyền của điện thoại của bạn, việc sử dụng các chương trình không an toàn có thể dẫn đến nguy cơ rò rỉ thông tin. Trong những trường hợp nghiêm trọng, nó cũng có thể đe dọa đến sự an toàn của trẻ em.
4 phần mềm kiểm soát phụ huynh tốt nhất 2024
DeskIn
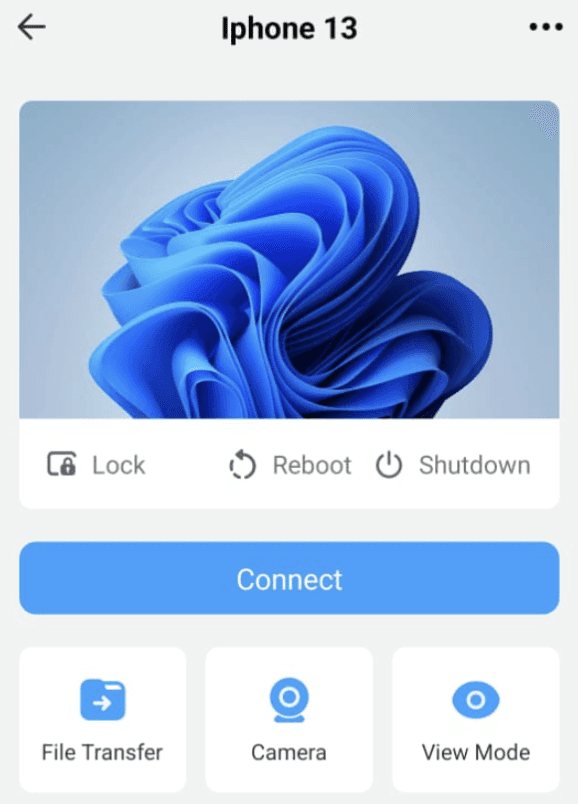
DeskIn là phần mềm máy tính để bàn từ xa phù hợp cho web, Android, iOS, Windows và MacBook. Điều này có nghĩa là bạn có thể không chỉ sử dụng điện thoại của mình, mà còn có thể sử dụng máy tính để điều khiển từ xa điện thoại di động của con bạn. Bạn có thể xóa những tin nhắn rủi ro, kiểm tra thời gian sử dụng điện thoại, chặn các ứng dụng bằng cách truy cập từ xa điện thoại của trẻ. So với các chương trình khác, DeskIn sẽ không ghi lại lịch sử duyệt web, theo dõi vị trí của điện thoại từ xa. Bạn chỉ có thể xem và điều khiển điện thoại từ xa với sự cho phép của nó. Điều này tạo không gian cho sự riêng tư của trẻ và khiến trẻ dễ chấp nhận hơn.
Ưu điểm:
Bảo mật: DeskIn chỉ cho phép các thiết bị cùng tài khoản điều khiển từ xa điện thoại, điều này có thể ngăn điện thoại trẻ bị theo dõi bởi những kẻ lạ.
Tương thích đa hệ thống: DeskIn có phiên bản cho Android, iOS, Windows và MacBook. Bạn có thể sử dụng máy tính để theo dõi từ xa điện thoại của con, hoặc bạn có thể sử dụng điện thoại để theo dõi từ xa máy tính của con mình.
Có thể gọi điện thoại: DeskIn cho phép bạn thực hiện cuộc gọi khi truy cập vào điện thoại của con. Khi bạn phát hiện ra một số ứng dụng hoặc tin nhắn độc hại, ngay cả khi trẻ không có mặt, bạn có thể hỏi con của mình để biết thêm chi tiết và hướng dẫn chúng. Bạn cũng có thể tiến hành giảng dạy đồng bộ khi giúp chúng khắc phục các vấn đề kỹ thuật.
Sử dụng camera từ xa: Bạn cũng có thể sử dụng DeskIn để truy cập camera trước và sau của điện thoại của trẻ. Khi con bạn gặp nguy hiểm, bạn có thể biết chúng ở đâu và có chuyện gì đang xảy ra.
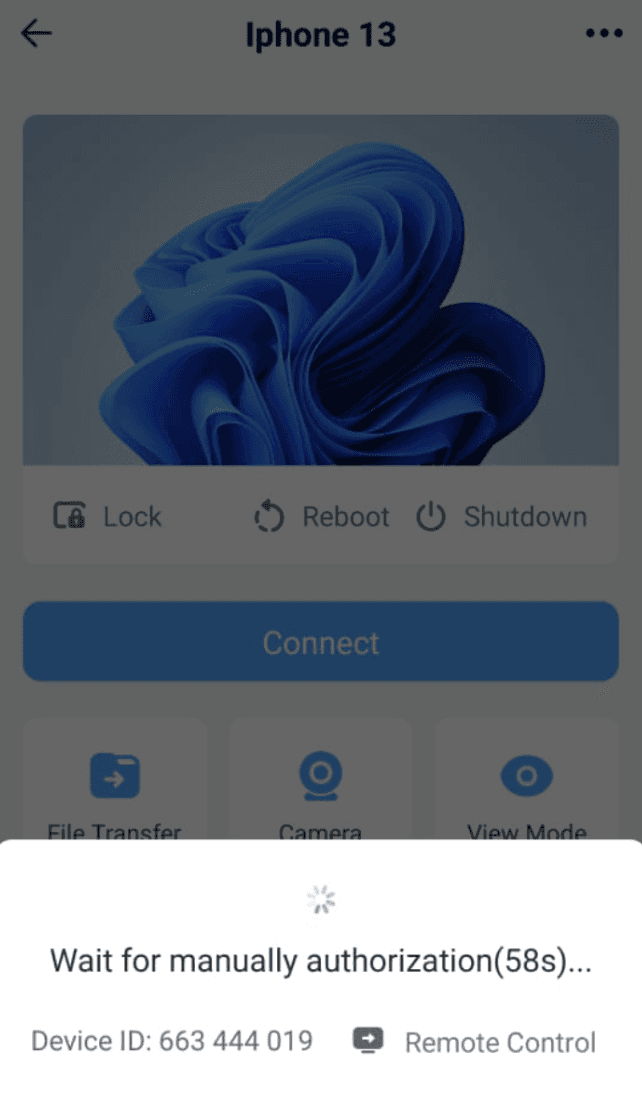
Các phương thức kết nối linh hoạt: DeskIn cho phép hai phương thức kết nối, xác minh thủ công và kết nối bằng mật khẩu không giám sát, điều này khiến nó dễ chấp nhận hơn cho trẻ em. Trong trường hợp bình thường, bạn có thể yêu cầu trẻ thực hiện xác minh thủ công khi theo dõi điện thoại của chúng, chỉ để thông báo cho chúng. Trong trường hợp khẩn cấp, bạn vẫn có thể sử dụng mật khẩu để thực hiện kết nối không giám sát.
Nhược điểm:
Không thể theo dõi vị trí của điện thoại của trẻ.
Family Link
Family Link là một phần mềm kiểm soát phụ huynh được phát triển bởi Google cho phép người dùng quản lý điện thoại Android. Nó chủ yếu quản lý điện thoại của trẻ bằng cách quản lý tài khoản Google của chúng. Nó có thể chặn hoặc cho phép các ứng dụng riêng lẻ, ẩn ứng dụng, tìm thiết bị, đặt thời gian ngủ và đặt giới hạn ứng dụng. Nhưng nó cũng có những lỗ hổng mà khi sử dụng trình duyệt ẩn danh, trẻ có thể vượt qua các hạn chế duyệt web. Một số người dùng trên mạng cũng đã báo cáo rằng chức năng giới hạn thời gian của nó dễ dàng bị trẻ em bỏ qua.
Ưu điểm:
Đặt giới hạn thời gian: Bạn có thể đặt thời gian ngừng hoạt động cho thiết bị của trẻ và giới hạn thời gian cho các ứng dụng.
Chặn phần mềm hoặc trang web: Bạn có thể quản lý quyền của ứng dụng và quyền duyệt web của điện thoại của trẻ. Giới hạn việc hiển thị nội dung người lớn hoặc thậm chí chỉ cho phép chúng xem một số trang web nhất định.
Bạn có thể phê duyệt hoặc chặn các ứng dụng mà trẻ tải xuống từ Playstore.
Theo dõi vị trí của trẻ: Bạn có thể sử dụng bản đồ để theo dõi vị trí thực tế của trẻ, hoặc bạn có thể thiết lập để nhận thông báo khi trẻ đến một vị trí nhất định.
Nhược điểm:
Chỉ có thể quản lý điện thoại Android
Không hỗ trợ điều khiển từ xa điện thoại di động
Hạn chế duyệt web và kiểm soát thời gian có thể bị trẻ em vượt qua
KidsGuard
KidsGuard chủ yếu là một loại "phần mềm gián điệp", nó có thể theo dõi tất cả các hoạt động của điện thoại di động, thu thập tất cả các tệp trên điện thoại và ghi lại tin nhắn trò chuyện. Về cơ bản, tất cả thông tin sử dụng của điện thoại được gán sẽ được quét và ghi lại. Tuy nhiên, nó không có nhiều chức năng hoạt động, chẳng hạn như đặt giới hạn thời gian sử dụng, hạn chế các trang web có thể duyệt, v.v.
Ưu điểm:
Màn hình trình diễn mô phỏng miễn phí được cung cấp. Bạn có thể mô phỏng trước và sau đó quyết định có nên thanh toán hay không.
Có thể theo dõi iPhone qua iCloud, nhận và quản lý email, xem danh bạ, ảnh, nhắc nhở, v.v.
Theo dõi tin nhắn trên mạng xã hội bằng cách sử dụng từ khóa: Bạn có thể tìm kiếm tin nhắn bằng cách sử dụng từ khóa.
Theo dõi thanh toán: có thể ghi lại mức tiêu thụ đăng ký của trẻ trong cửa hàng ứng dụng
Bạn có thể xem tất cả tình trạng sử dụng và báo cáo của điện thoại di động từ xa qua bảng điều khiển web: thời gian sử dụng, tệp điện thoại, lịch sử duyệt web, lịch sử trò chuyện, v.v.
Nhược điểm:
Bạn cần phải trả tiền để mở khóa các tính năng nâng cao
Điện thoại không thể được kiểm soát và thiết lập trực tiếp.
Việc thu thập quá nhiều quyền trên điện thoại và ghi lại quá nhiều nội dung có thể dễ dàng dẫn đến rò rỉ quyền riêng tư.
Airdroid
Airdroid là một ứng dụng điều khiển toàn diện cho phép bạn điều khiển các thiết bị với AirDroid Kids thông qua ứng dụng AirDroid Parental Control. Hỗ trợ theo dõi các thiết bị di động từ xa bằng điện thoại di động hoặc trang web. Sau khi thanh toán, nó hỗ trợ quản lý lên đến 10 thiết bị.
Ưu điểm:
Bạn có thể sử dụng camera và microphone của điện thoại Android của trẻ để xem và nghe môi trường và âm thanh xung quanh con bạn.
Nhanh chóng nhận thông báo từ các ứng dụng trên điện thoại Android của trẻ, chẳng hạn như Line và Facebook.
Bạn có thể nhận báo cáo hàng ngày/hàng tuần về thời gian sử dụng điện thoại của trẻ qua bảng báo cáo.
Bạn có thể quản lý và hạn chế thời gian sử dụng hoặc quyền hạn của điện thoại, phần mềm và trang web.
Phát hiện từ khóa: Tiến hành phát hiện từ khóa trên phần mềm xã hội để xác định nội dung độc hại hoặc các vấn đề bắt nạt tiềm ẩn.
Theo dõi vị trí của điện thoại di động.
Nhược điểm:
Không có phiên bản miễn phí, bạn cần trả tiền để mở khóa tất cả các tính năng
Việc thu thập quá nhiều quyền trên điện thoại và ghi lại quá nhiều nội dung có thể dễ dàng dẫn đến rò rỉ quyền riêng tư.
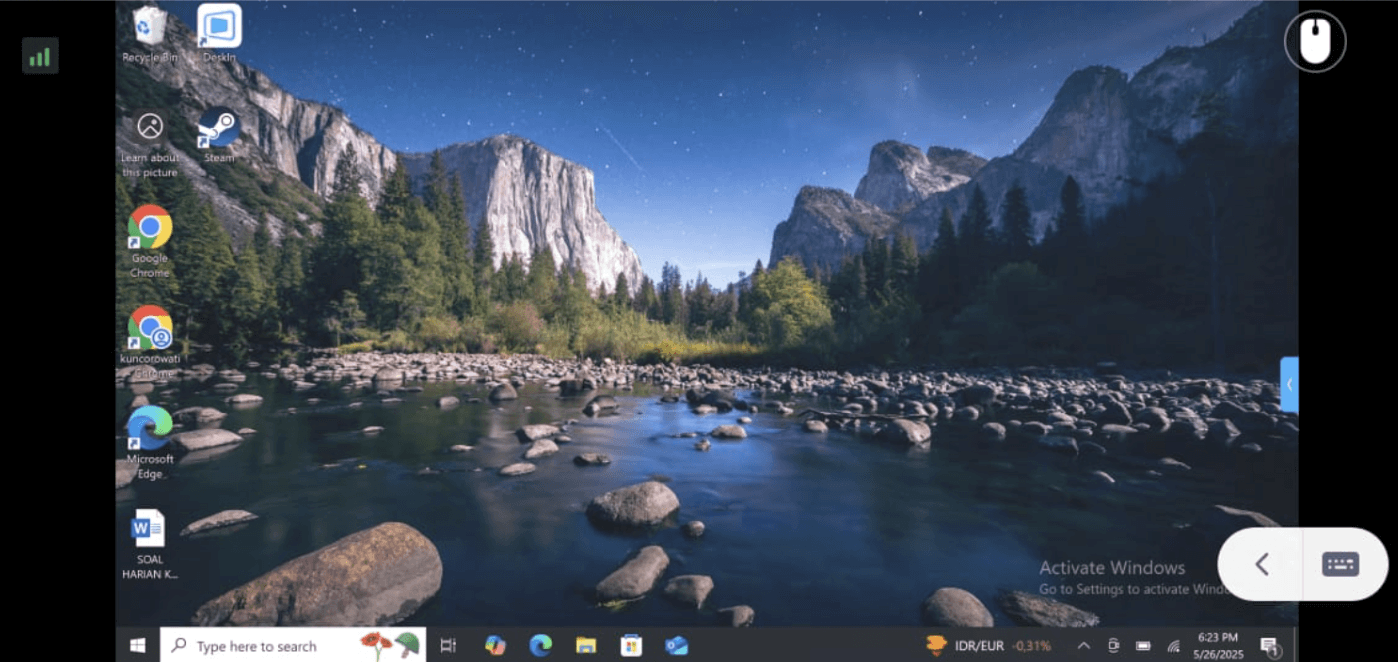
Cách sử dụng DeskIn để truy cập điện thoại của con bạn
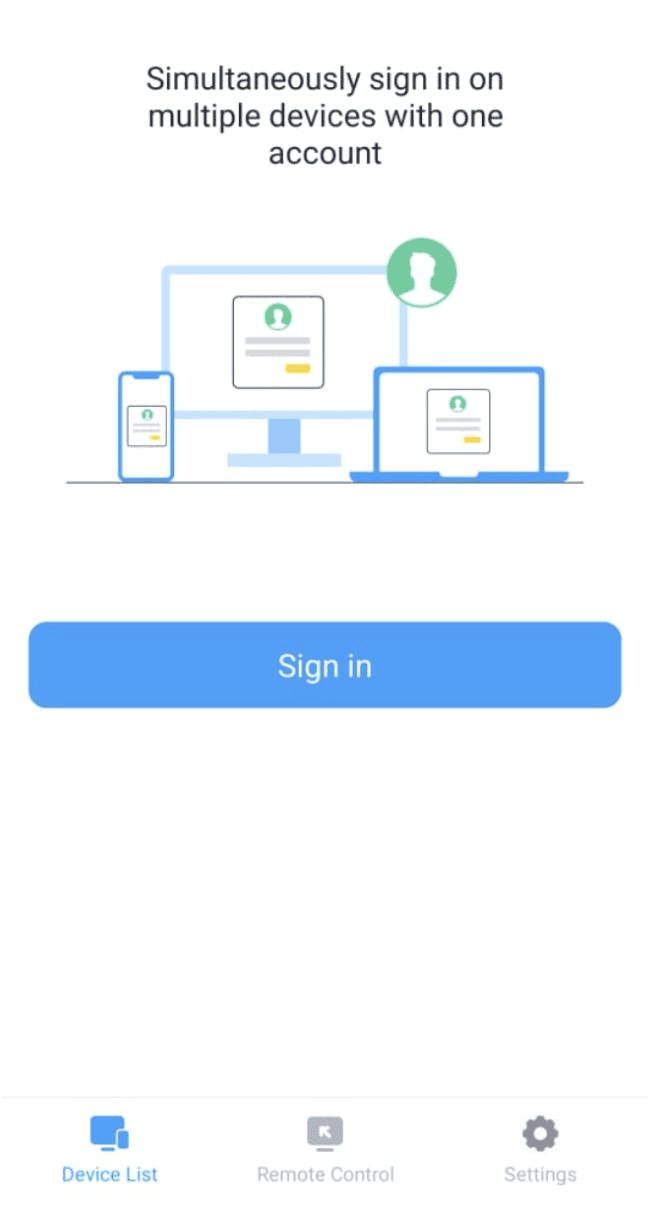
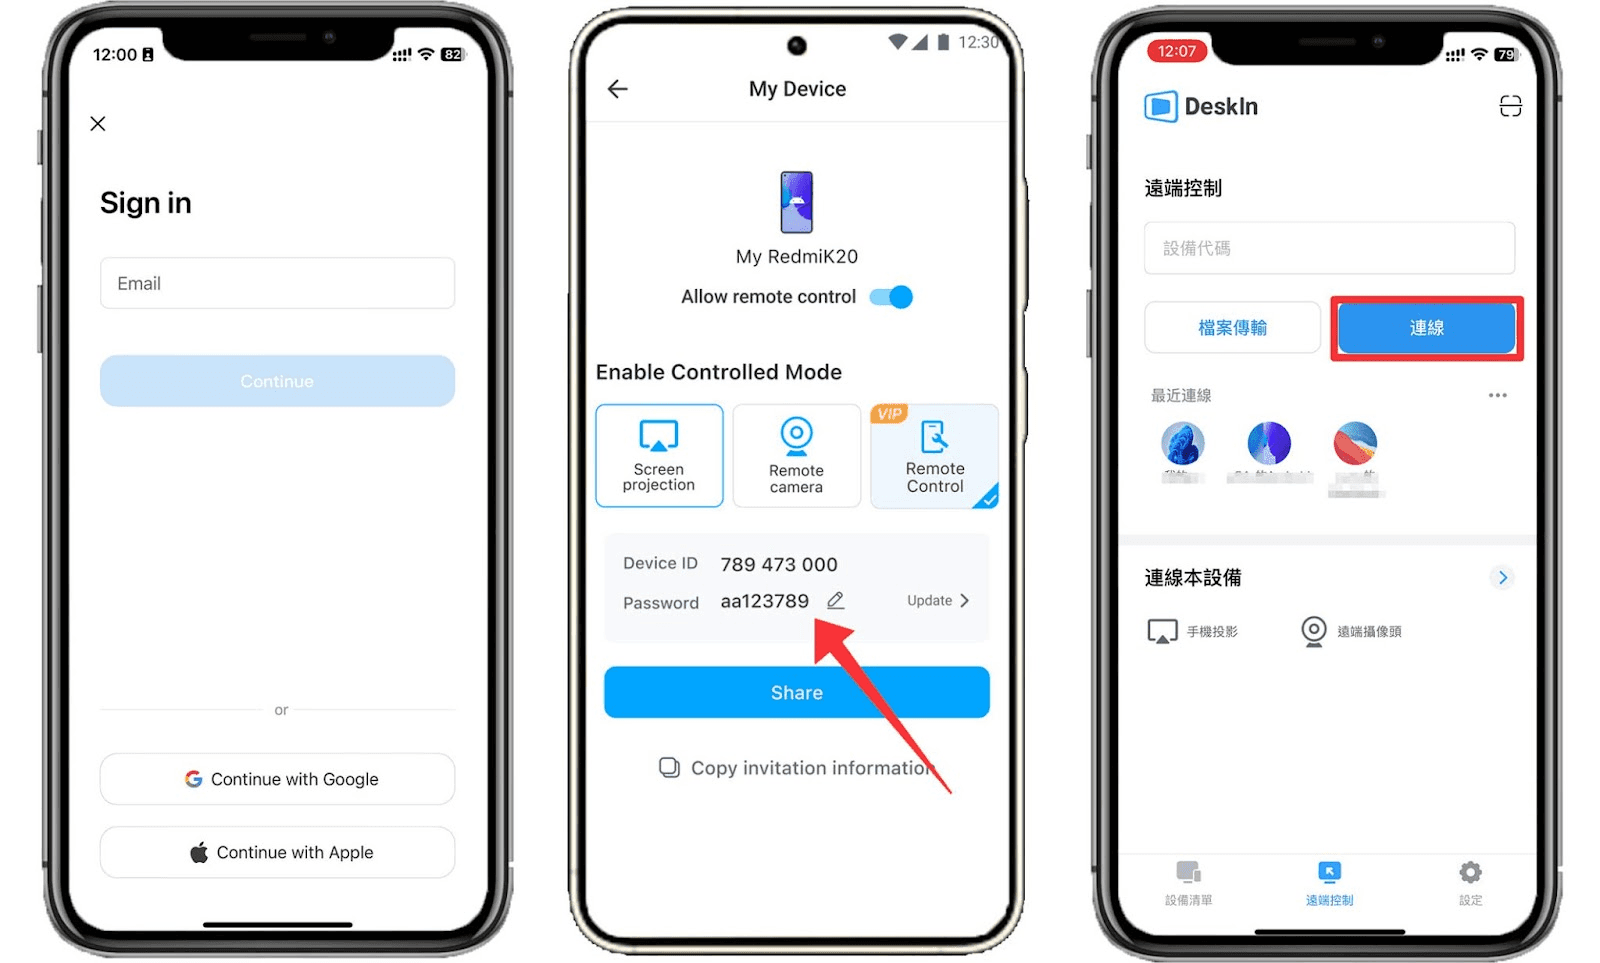
Bước 1: Cài đặt DeskIn trên thiết bị của bạn và điện thoại của con bạn, đăng ký và đăng nhập vào cùng một tài khoản DeskIn.
Bước 2: Yêu cầu con bạn mở DeskIn, bật nút "Cho phép điều khiển từ xa" để cho phép truy cập, và đặt mật khẩu kết nối.
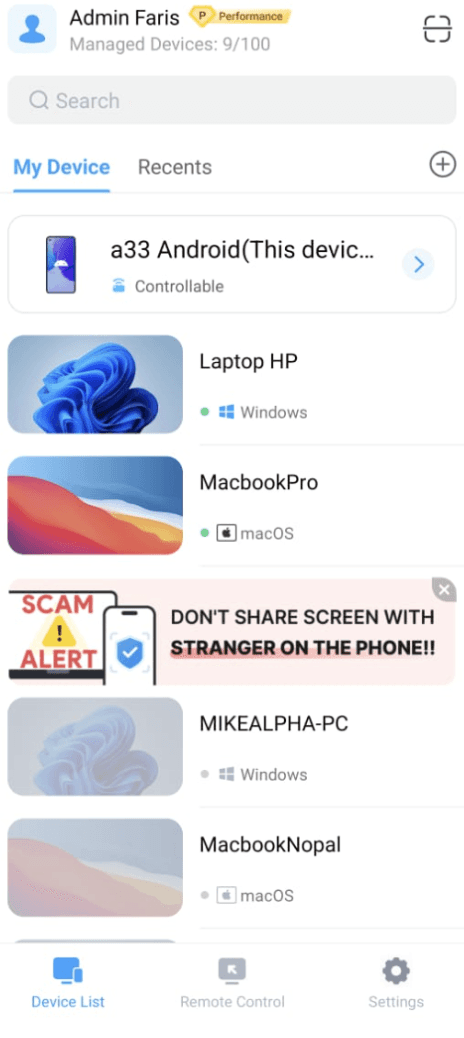
Bước 3: Sau đó bạn có thể tìm điện thoại của con trong danh sách thiết bị hoặc sử dụng ID thiết bị để truy cập vào điện thoại của chúng. Con bạn có thể thực hiện xác minh thủ công, hoặc bạn có thể sử dụng mật khẩu để thực hiện kết nối không giám sát.
Kết luận
Bài viết này giới thiệu 4 phần mềm kiểm soát phụ huynh để giúp các bậc phụ huynh theo dõi điện thoại di động của trẻ. Mỗi phần mềm đều có ưu và nhược điểm, và bạn có thể chọn theo nhu cầu của mình. Trong số bốn phần mềm, DeskIn có thể kiểm soát hoàn toàn điện thoại di động của trẻ và yêu cầu ít quyền hơn, khiến trẻ dễ dàng chấp nhận hơn. Mặc dù các bậc phụ huynh có ý định tốt khi theo dõi điện thoại của trẻ, nhưng các bậc phụ huynh không nên đi quá xa và hãy để trẻ có không gian và tôn trọng quyền riêng tư của chúng. Điều quan trọng trong mối quan hệ giữa cha mẹ và con cái là sự tin tưởng lẫn nhau.
Nhiều trẻ em ngày càng sở hữu điện thoại thông minh riêng. Trong khi mang lại sự tiện lợi trong giao tiếp, nó cũng khiến chúng phải đối mặt với nhiều nguy hiểm hơn. Xuất phát từ mối lo ngại về sự an toàn của con cái và thời gian sử dụng điện thoại quá mức, một số bậc phụ huynh sử dụng phần mềm ứng dụng kiểm soát phụ huynh để theo dõi điện thoại của trẻ. Các bậc phụ huynh nên chú ý đến điều gì khi sử dụng ứng dụng của họ? Bài viết này cung cấp cho bạn 4 mẹo và giới thiệu 4 phần mềm kiểm soát phụ huynh tốt nhất. Hãy kiểm tra nó.
Tại sao các bậc phụ huynh nên theo dõi điện thoại của trẻ?
1. Quản lý thời gian sử dụng điện thoại
Trẻ em có thể bị nghiện game, video ngắn, mạng xã hội và sử dụng điện thoại một cách không kiểm soát. Lúc này, bằng cách theo dõi thời gian sử dụng điện thoại của con cái và quản lý thời gian sử dụng ứng dụng, các bậc phụ huynh có thể hướng dẫn con cái sống một cuộc sống lành mạnh hơn, có thời gian được quản lý tốt hơn.
2. Phát hiện tin nhắn và chương trình có hại
Trẻ em có thể không phân biệt được thông tin độc hại và có hại trên Internet ở độ tuổi còn nhỏ. Việc thường xuyên kiểm tra tin nhắn văn bản di động, lịch sử duyệt web và mạng xã hội của trẻ có thể ngăn chặn chúng bị ảnh hưởng xấu từ nội dung liên quan đến tình dục, bạo lực, cờ bạc, lừa đảo và ma túy. Đồng thời, bạn có thể hướng dẫn chúng sử dụng Internet một cách đúng đắn.
3. Tránh thanh toán vô tình
Hiện nay, quá trình xác minh thanh toán trên điện thoại đang ngày càng trở nên đơn giản hơn, điều này mang lại sự tiện lợi nhưng cũng ẩn chứa nhiều nguy hiểm. Trẻ em có thể mua vật phẩm trong trò chơi, quyên góp cho người phát trực tiếp, hoặc vô tình đăng ký một ứng dụng. Nếu không phát hiện kịp thời, điều này có thể gây ra thiệt hại lớn.
4. Giữ đôi mắt trên trẻ và ngăn ngừa nguy hiểm
Các bậc phụ huynh không thể ở bên cạnh con cái mọi lúc và không thể 100% nhận thức được những gì xảy ra ở trường hoặc với bạn bè. Bằng cách theo dõi tin nhắn văn bản hoặc lịch sử trò chuyện của điện thoại di động của trẻ, họ có thể biết ngay khi có xung đột với bạn học, bị bắt nạt ở trường (bị bắt nạt hoặc bắt nạt), bạo lực, v.v. Một số chương trình theo dõi cũng có thể theo dõi vị trí của điện thoại trẻ, vì vậy khi trẻ gặp nguy hiểm, phụ huynh có thể đến ngay lập tức.
5. Khắc phục sự cố công nghệ
Khi trẻ gặp sự cố kỹ thuật với điện thoại của mình, chẳng hạn như cài đặt, sự cố sao lưu, tải tệp, v.v., các bậc phụ huynh có thể sử dụng các chương trình điều khiển từ xa để kiểm soát điện thoại di động của con cái và giúp khắc phục.
4 điều cần chú ý trước khi theo dõi điện thoại của trẻ
1. Tôn trọng trẻ em
Mặc dù chúng ta hiểu rằng các bậc phụ huynh theo dõi điện thoại của con cái vì lo lắng. Nhưng xin hãy nhớ rằng trẻ cũng có những ý tưởng, bí mật và sự riêng tư của riêng mình. Xin hãy nhớ điều này trước khi sử dụng một chương trình theo dõi: luôn tôn trọng con mình và những ý kiến của chúng. Đừng đi quá xa hoặc bạn có thể làm tổn hại đến mối quan hệ.
2. Giao tiếp với con cái của bạn
Nói về suy nghĩ và lý do của bạn với con trước khi theo dõi điện thoại của chúng. Đồng thời, lắng nghe chúng, giao tiếp để đạt được sự đồng thuận. Đảm bảo rằng bạn có sự đồng ý của con trước khi tải xuống và sử dụng một chương trình theo dõi điện thoại. Nếu chúng phản đối mạnh mẽ ý tưởng này, hãy giao tiếp và tìm ra những cách khác.
3. Lập một thỏa thuận và tuân thủ nó
Lập một thỏa thuận với con bạn về thời gian bạn có thể theo dõi điện thoại của chúng, những ứng dụng nào bạn có thể theo dõi và không theo dõi, và tuân theo nó. Hãy nhớ rằng, sự tin tưởng và giao tiếp quan trọng hơn bất cứ điều gì khác.
4. Chọn phần mềm theo dõi an toàn
Khi bạn quyết định sử dụng một chương trình theo dõi, hãy nhớ chọn một chương trình có mức độ bảo mật cao. Vì những chương trình này có quyền truy cập vào hầu hết các quyền của điện thoại của bạn, việc sử dụng các chương trình không an toàn có thể dẫn đến nguy cơ rò rỉ thông tin. Trong những trường hợp nghiêm trọng, nó cũng có thể đe dọa đến sự an toàn của trẻ em.
4 phần mềm kiểm soát phụ huynh tốt nhất 2024
DeskIn
DeskIn là phần mềm máy tính để bàn từ xa phù hợp cho web, Android, iOS, Windows và MacBook. Điều này có nghĩa là bạn có thể không chỉ sử dụng điện thoại của mình, mà còn có thể sử dụng máy tính để điều khiển từ xa điện thoại di động của con bạn. Bạn có thể xóa những tin nhắn rủi ro, kiểm tra thời gian sử dụng điện thoại, chặn các ứng dụng bằng cách truy cập từ xa điện thoại của trẻ. So với các chương trình khác, DeskIn sẽ không ghi lại lịch sử duyệt web, theo dõi vị trí của điện thoại từ xa. Bạn chỉ có thể xem và điều khiển điện thoại từ xa với sự cho phép của nó. Điều này tạo không gian cho sự riêng tư của trẻ và khiến trẻ dễ chấp nhận hơn.
Ưu điểm:
Bảo mật: DeskIn chỉ cho phép các thiết bị cùng tài khoản điều khiển từ xa điện thoại, điều này có thể ngăn điện thoại trẻ bị theo dõi bởi những kẻ lạ.
Tương thích đa hệ thống: DeskIn có phiên bản cho Android, iOS, Windows và MacBook. Bạn có thể sử dụng máy tính để theo dõi từ xa điện thoại của con, hoặc bạn có thể sử dụng điện thoại để theo dõi từ xa máy tính của con mình.
Có thể gọi điện thoại: DeskIn cho phép bạn thực hiện cuộc gọi khi truy cập vào điện thoại của con. Khi bạn phát hiện ra một số ứng dụng hoặc tin nhắn độc hại, ngay cả khi trẻ không có mặt, bạn có thể hỏi con của mình để biết thêm chi tiết và hướng dẫn chúng. Bạn cũng có thể tiến hành giảng dạy đồng bộ khi giúp chúng khắc phục các vấn đề kỹ thuật.
Sử dụng camera từ xa: Bạn cũng có thể sử dụng DeskIn để truy cập camera trước và sau của điện thoại của trẻ. Khi con bạn gặp nguy hiểm, bạn có thể biết chúng ở đâu và có chuyện gì đang xảy ra.
Các phương thức kết nối linh hoạt: DeskIn cho phép hai phương thức kết nối, xác minh thủ công và kết nối bằng mật khẩu không giám sát, điều này khiến nó dễ chấp nhận hơn cho trẻ em. Trong trường hợp bình thường, bạn có thể yêu cầu trẻ thực hiện xác minh thủ công khi theo dõi điện thoại của chúng, chỉ để thông báo cho chúng. Trong trường hợp khẩn cấp, bạn vẫn có thể sử dụng mật khẩu để thực hiện kết nối không giám sát.
Nhược điểm:
Không thể theo dõi vị trí của điện thoại của trẻ.
Family Link
Family Link là một phần mềm kiểm soát phụ huynh được phát triển bởi Google cho phép người dùng quản lý điện thoại Android. Nó chủ yếu quản lý điện thoại của trẻ bằng cách quản lý tài khoản Google của chúng. Nó có thể chặn hoặc cho phép các ứng dụng riêng lẻ, ẩn ứng dụng, tìm thiết bị, đặt thời gian ngủ và đặt giới hạn ứng dụng. Nhưng nó cũng có những lỗ hổng mà khi sử dụng trình duyệt ẩn danh, trẻ có thể vượt qua các hạn chế duyệt web. Một số người dùng trên mạng cũng đã báo cáo rằng chức năng giới hạn thời gian của nó dễ dàng bị trẻ em bỏ qua.
Ưu điểm:
Đặt giới hạn thời gian: Bạn có thể đặt thời gian ngừng hoạt động cho thiết bị của trẻ và giới hạn thời gian cho các ứng dụng.
Chặn phần mềm hoặc trang web: Bạn có thể quản lý quyền của ứng dụng và quyền duyệt web của điện thoại của trẻ. Giới hạn việc hiển thị nội dung người lớn hoặc thậm chí chỉ cho phép chúng xem một số trang web nhất định.
Bạn có thể phê duyệt hoặc chặn các ứng dụng mà trẻ tải xuống từ Playstore.
Theo dõi vị trí của trẻ: Bạn có thể sử dụng bản đồ để theo dõi vị trí thực tế của trẻ, hoặc bạn có thể thiết lập để nhận thông báo khi trẻ đến một vị trí nhất định.
Nhược điểm:
Chỉ có thể quản lý điện thoại Android
Không hỗ trợ điều khiển từ xa điện thoại di động
Hạn chế duyệt web và kiểm soát thời gian có thể bị trẻ em vượt qua
KidsGuard
KidsGuard chủ yếu là một loại "phần mềm gián điệp", nó có thể theo dõi tất cả các hoạt động của điện thoại di động, thu thập tất cả các tệp trên điện thoại và ghi lại tin nhắn trò chuyện. Về cơ bản, tất cả thông tin sử dụng của điện thoại được gán sẽ được quét và ghi lại. Tuy nhiên, nó không có nhiều chức năng hoạt động, chẳng hạn như đặt giới hạn thời gian sử dụng, hạn chế các trang web có thể duyệt, v.v.
Ưu điểm:
Màn hình trình diễn mô phỏng miễn phí được cung cấp. Bạn có thể mô phỏng trước và sau đó quyết định có nên thanh toán hay không.
Có thể theo dõi iPhone qua iCloud, nhận và quản lý email, xem danh bạ, ảnh, nhắc nhở, v.v.
Theo dõi tin nhắn trên mạng xã hội bằng cách sử dụng từ khóa: Bạn có thể tìm kiếm tin nhắn bằng cách sử dụng từ khóa.
Theo dõi thanh toán: có thể ghi lại mức tiêu thụ đăng ký của trẻ trong cửa hàng ứng dụng
Bạn có thể xem tất cả tình trạng sử dụng và báo cáo của điện thoại di động từ xa qua bảng điều khiển web: thời gian sử dụng, tệp điện thoại, lịch sử duyệt web, lịch sử trò chuyện, v.v.
Nhược điểm:
Bạn cần phải trả tiền để mở khóa các tính năng nâng cao
Điện thoại không thể được kiểm soát và thiết lập trực tiếp.
Việc thu thập quá nhiều quyền trên điện thoại và ghi lại quá nhiều nội dung có thể dễ dàng dẫn đến rò rỉ quyền riêng tư.
Airdroid
Airdroid là một ứng dụng điều khiển toàn diện cho phép bạn điều khiển các thiết bị với AirDroid Kids thông qua ứng dụng AirDroid Parental Control. Hỗ trợ theo dõi các thiết bị di động từ xa bằng điện thoại di động hoặc trang web. Sau khi thanh toán, nó hỗ trợ quản lý lên đến 10 thiết bị.
Ưu điểm:
Bạn có thể sử dụng camera và microphone của điện thoại Android của trẻ để xem và nghe môi trường và âm thanh xung quanh con bạn.
Nhanh chóng nhận thông báo từ các ứng dụng trên điện thoại Android của trẻ, chẳng hạn như Line và Facebook.
Bạn có thể nhận báo cáo hàng ngày/hàng tuần về thời gian sử dụng điện thoại của trẻ qua bảng báo cáo.
Bạn có thể quản lý và hạn chế thời gian sử dụng hoặc quyền hạn của điện thoại, phần mềm và trang web.
Phát hiện từ khóa: Tiến hành phát hiện từ khóa trên phần mềm xã hội để xác định nội dung độc hại hoặc các vấn đề bắt nạt tiềm ẩn.
Theo dõi vị trí của điện thoại di động.
Nhược điểm:
Không có phiên bản miễn phí, bạn cần trả tiền để mở khóa tất cả các tính năng
Việc thu thập quá nhiều quyền trên điện thoại và ghi lại quá nhiều nội dung có thể dễ dàng dẫn đến rò rỉ quyền riêng tư.
Cách sử dụng DeskIn để truy cập điện thoại của con bạn
Bước 1: Cài đặt DeskIn trên thiết bị của bạn và điện thoại của con bạn, đăng ký và đăng nhập vào cùng một tài khoản DeskIn.
Bước 2: Yêu cầu con bạn mở DeskIn, bật nút "Cho phép điều khiển từ xa" để cho phép truy cập, và đặt mật khẩu kết nối.
Bước 3: Sau đó bạn có thể tìm điện thoại của con trong danh sách thiết bị hoặc sử dụng ID thiết bị để truy cập vào điện thoại của chúng. Con bạn có thể thực hiện xác minh thủ công, hoặc bạn có thể sử dụng mật khẩu để thực hiện kết nối không giám sát.
Kết luận
Bài viết này giới thiệu 4 phần mềm kiểm soát phụ huynh để giúp các bậc phụ huynh theo dõi điện thoại di động của trẻ. Mỗi phần mềm đều có ưu và nhược điểm, và bạn có thể chọn theo nhu cầu của mình. Trong số bốn phần mềm, DeskIn có thể kiểm soát hoàn toàn điện thoại di động của trẻ và yêu cầu ít quyền hơn, khiến trẻ dễ dàng chấp nhận hơn. Mặc dù các bậc phụ huynh có ý định tốt khi theo dõi điện thoại của trẻ, nhưng các bậc phụ huynh không nên đi quá xa và hãy để trẻ có không gian và tôn trọng quyền riêng tư của chúng. Điều quan trọng trong mối quan hệ giữa cha mẹ và con cái là sự tin tưởng lẫn nhau.