Search Docs…
Bạn có muốn chia sẻ màn hình máy tính của mình với các đồng nghiệp trong một cuộc họp hoặc phát video/hình ảnh dự án lên màn hình lớn hơn? Bài viết này sẽ giới thiệu hai phương pháp đơn giản để phát màn hình máy tính Windows 10/11 của bạn.
Phương pháp 1: Sử dụng ứng dụng máy chiếu chuyên nghiệp DeskIn để chia sẻ màn hình
Ưu điểm của việc sử dụng DeskIn như một máy tính từ xa cho việc chiếu:
Hỗ trợ đa nền tảng: DeskIn hỗ trợ chia sẻ màn hình giữa các hệ thống iOS, Windows, Android và macOS.
Không cần cùng môi trường mạng: DeskIn cho phép chiếu ngay cả khi các thiết bị không ở cùng một mạng, cho phép chia sẻ màn hình qua khoảng cách xa.
Thích ứng màn hình: Bạn có thể điều chỉnh độ phân giải, tần suất khung hình và các cài đặt khác để phù hợp hơn với màn hình từ xa.
Bảo mật: DeskIn sử dụng mã hóa 256-bit để đảm bảo rằng nội dung được chiếu của bạn vẫn riêng tư và an toàn.
Dễ sử dụng: Không cần thiết lập phức tạp.
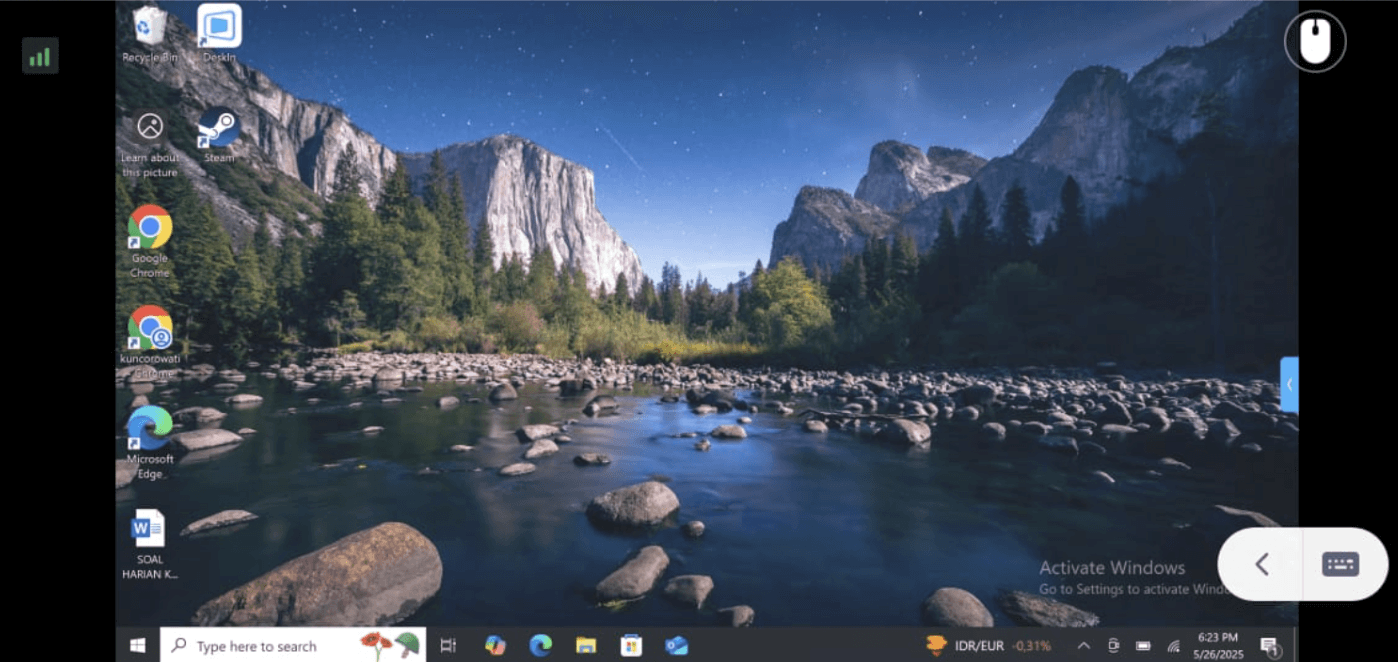
Bước 1: Cài đặt DeskIn trên cả máy tính của bạn và thiết bị mà bạn muốn chia sẻ màn hình.
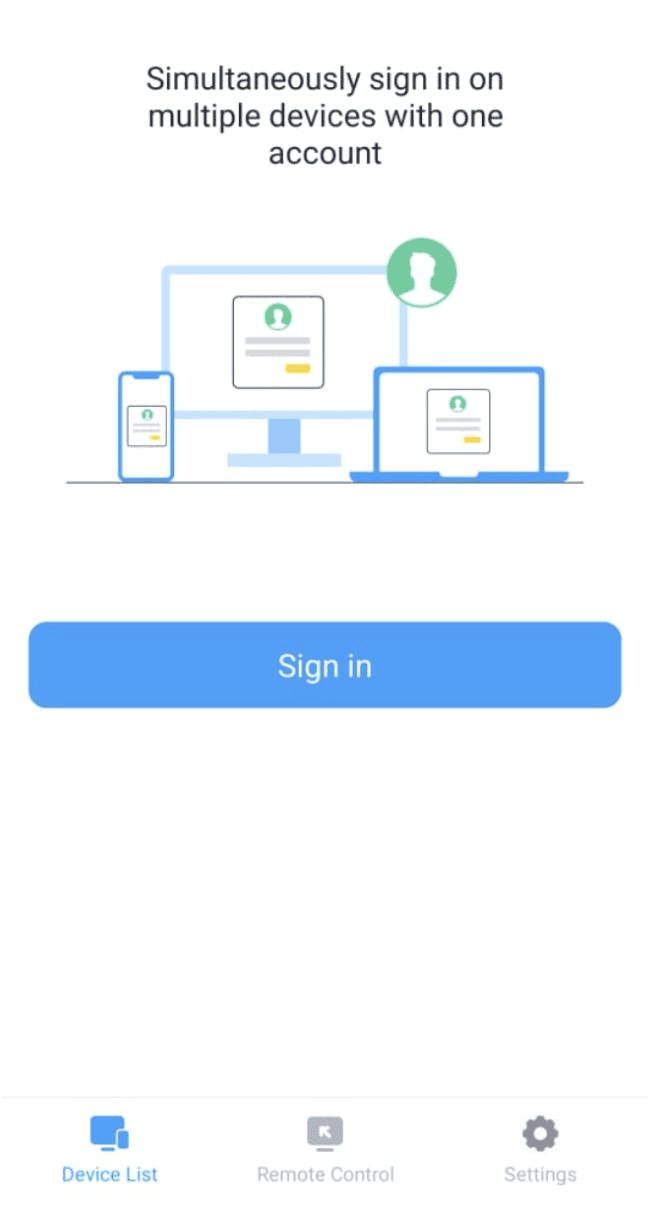
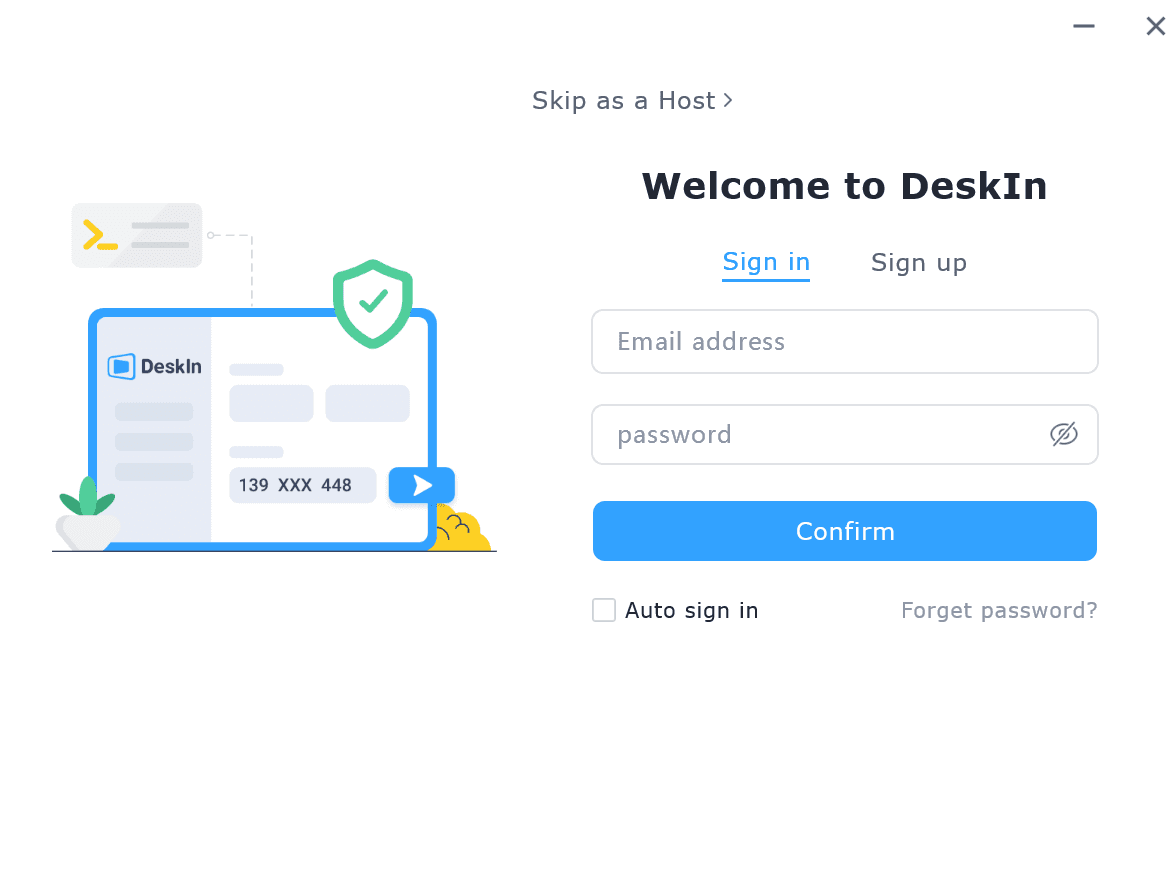
Đăng ký một tài khoản miễn phí và đăng nhập.
Chú ý: Khi bạn đăng nhập lần đầu vào một thiết bị mới, bạn sẽ cần hoàn tất xác minh email để bảo vệ an toàn cho tài khoản của bạn.
Bước 2: Kéo dài màn hình của bạn
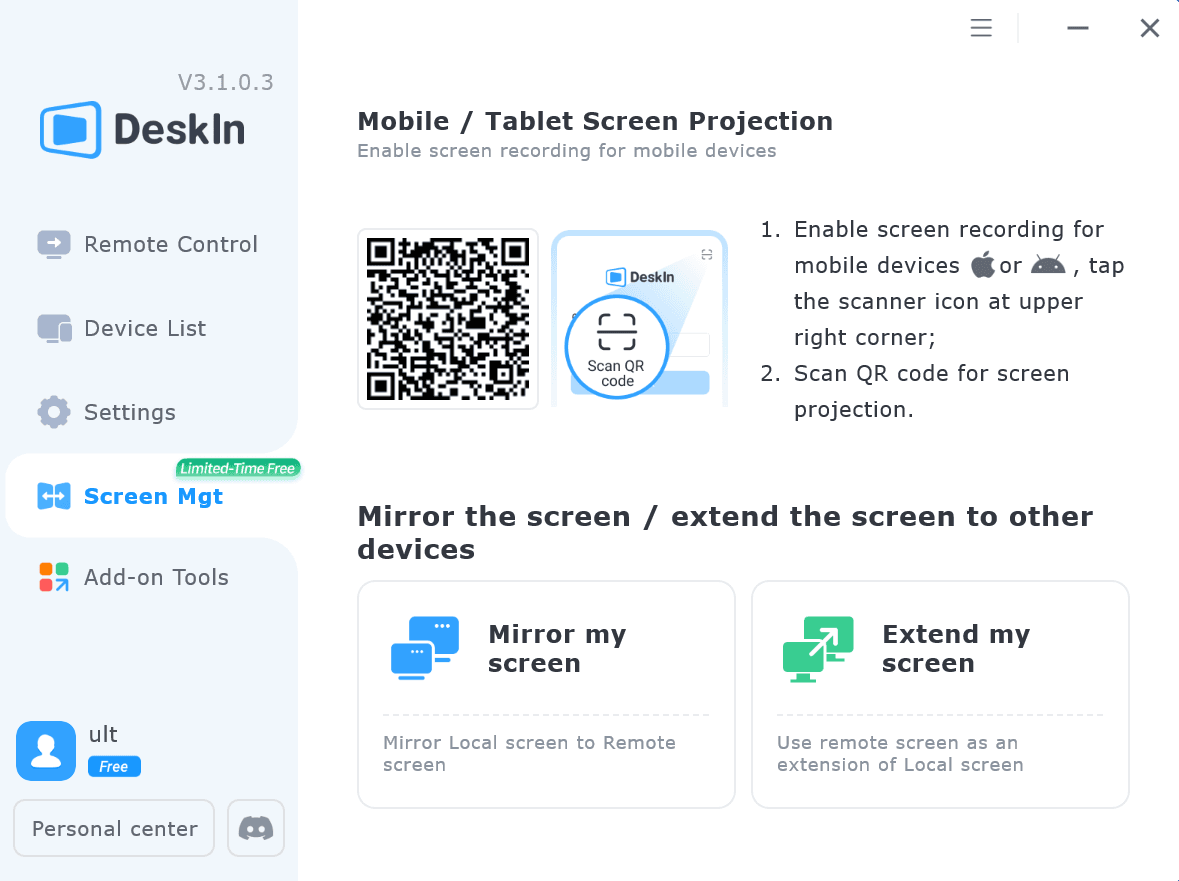
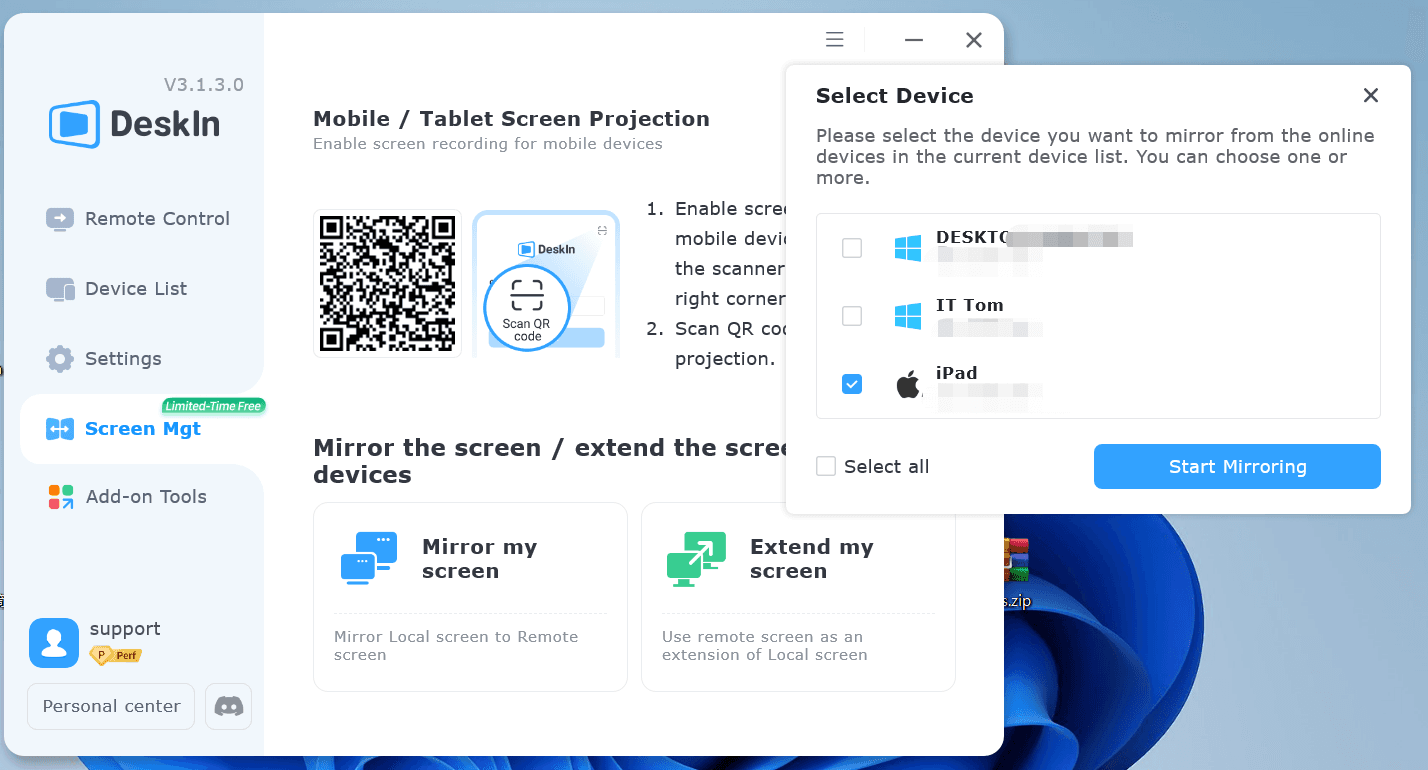
Mở ứng dụng DeskIn trên máy tính Windows/Mac của bạn >> Đi tới tab "Quản lý Màn hình" >> Nhấp vào “Gương màn hình của tôi."
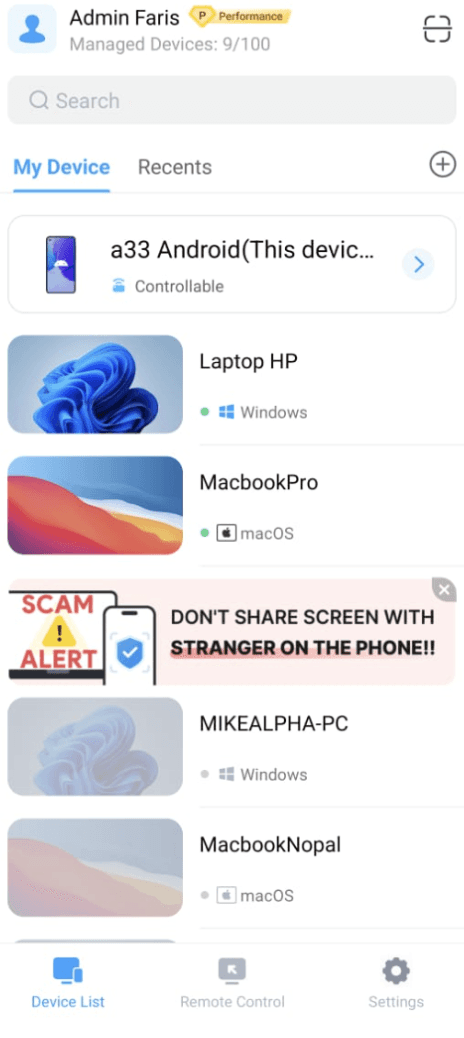
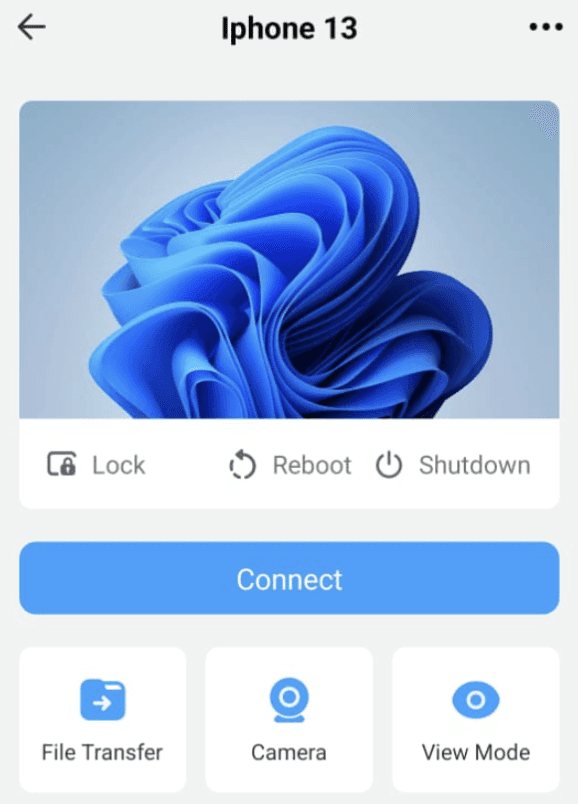
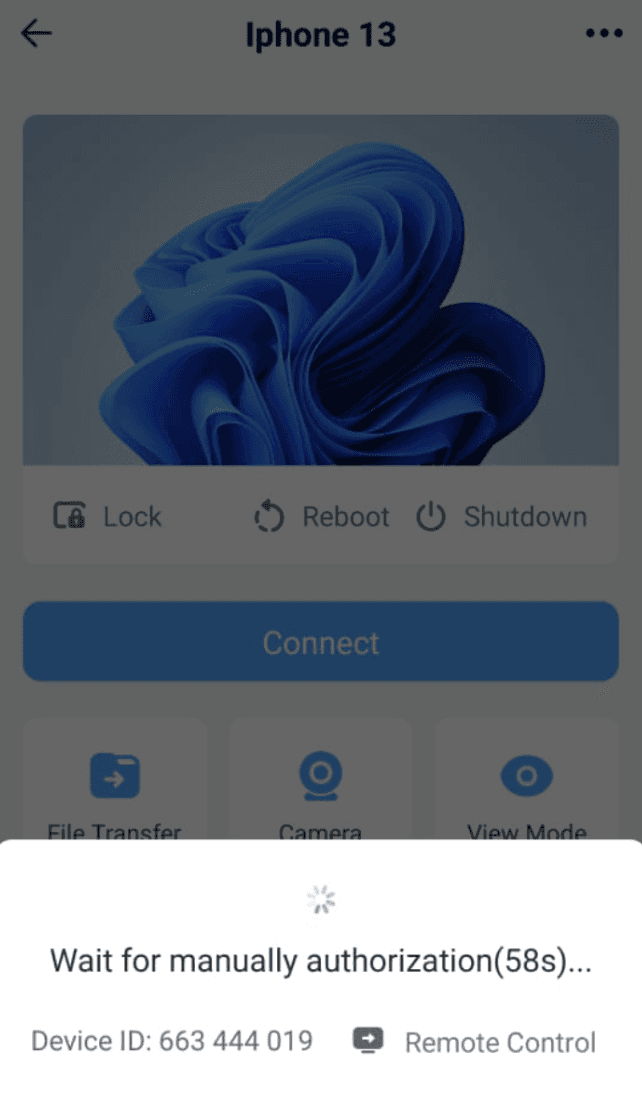
Bước 3: Chọn thiết bị mà bạn muốn chia sẻ màn hình với và nhấp vào "Bắt đầu Gương hóa."
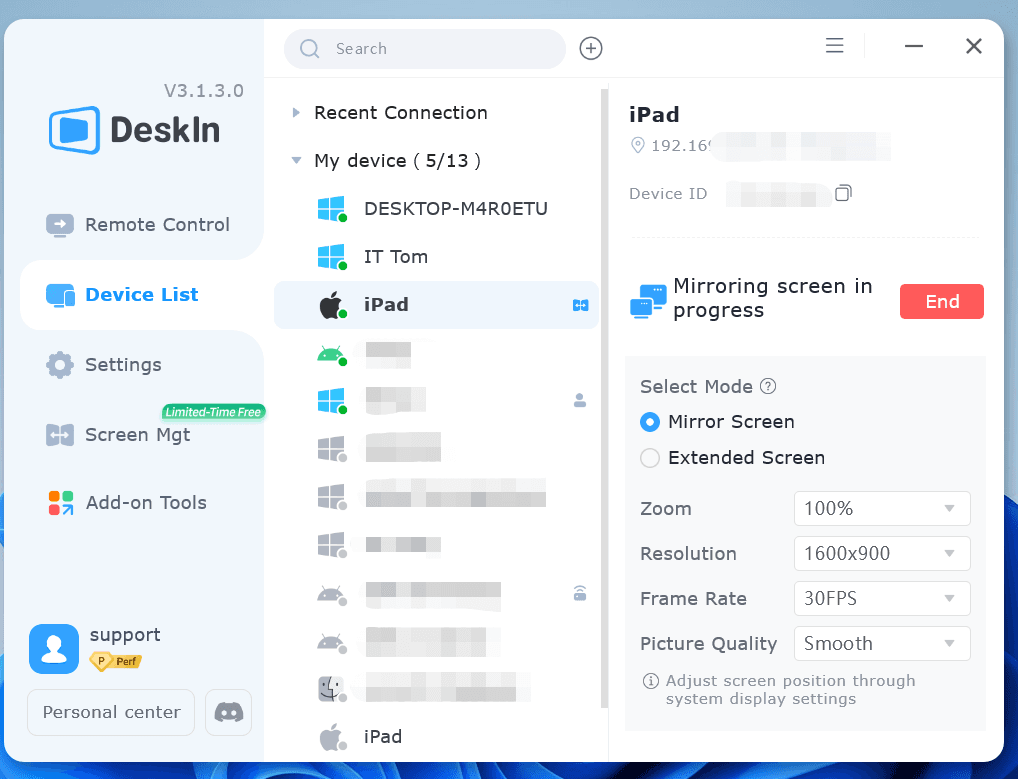
Bước 4: Bạn có thể tìm thấy thiết bị mà bạn đang chia sẻ màn hình ở「Danh sách thiết bị」và điều chỉnh độ phân giải, tần suất khung hình và các cài đặt khác theo nhu cầu.
Phương pháp 2: Sử dụng Công cụ tích hợp sẵn của Windows "Wireless Display" để chiếu màn hình máy tính của bạn
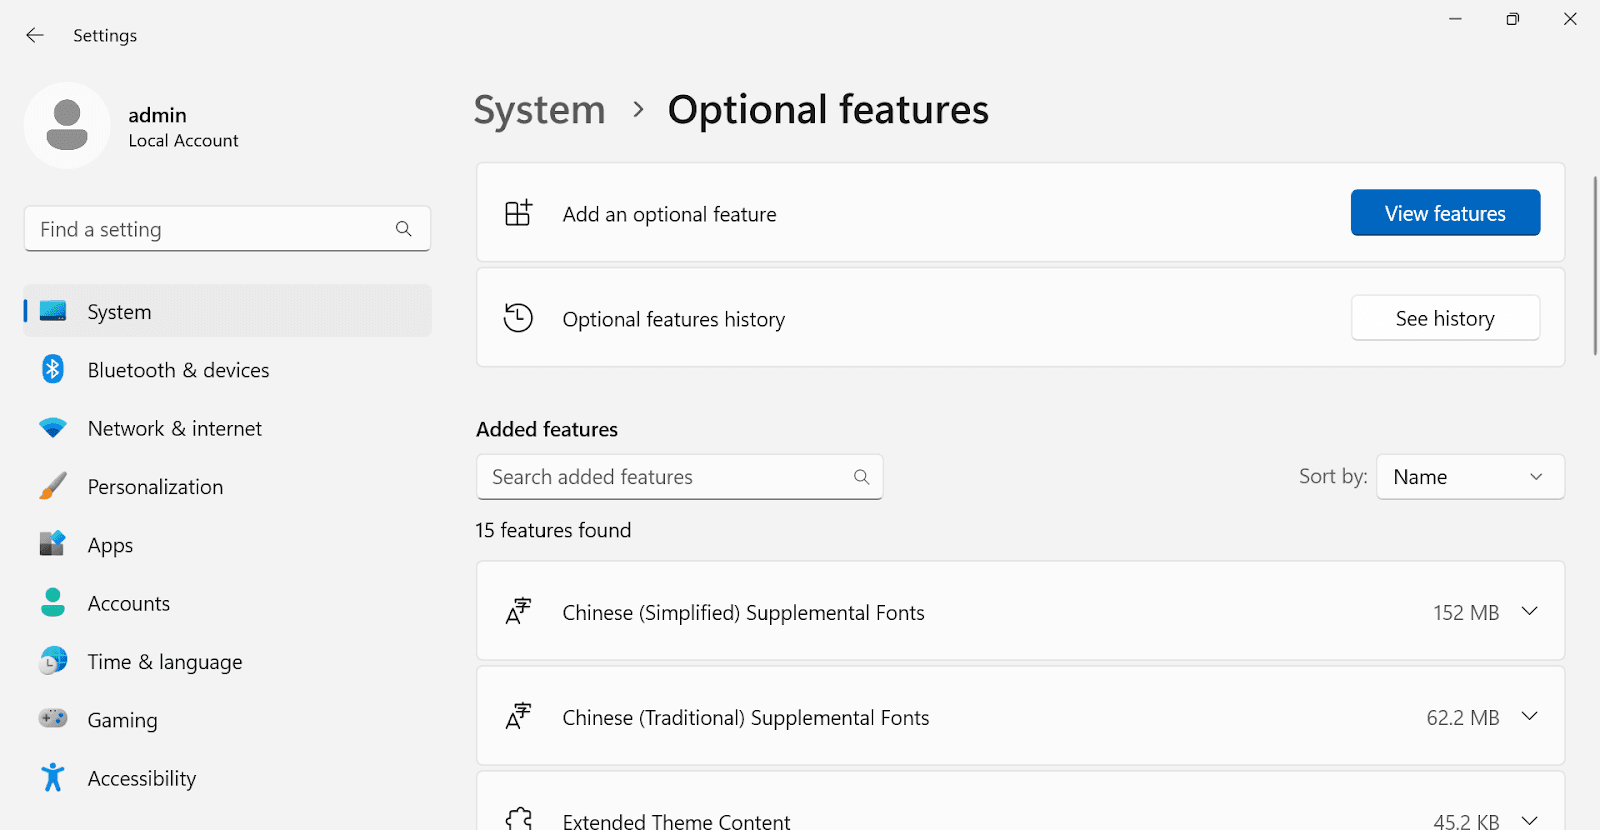
Bước 1: Trên cả hai máy tính - máy tính bạn muốn chia sẻ màn hình từ và máy tính bạn muốn chia sẻ đến, chọn "Windows Start" >> "Cài đặt" >> "Hệ thống" >> "Tính năng tùy chọn".
Bước 2: Trên trang "Tính năng tùy chọn", nhấp vào "Xem Tính năng" bên cạnh "Thêm một tính năng tùy chọn.” Tìm kiếm "Wireless Display," sau đó nhấp và cài đặt nó.
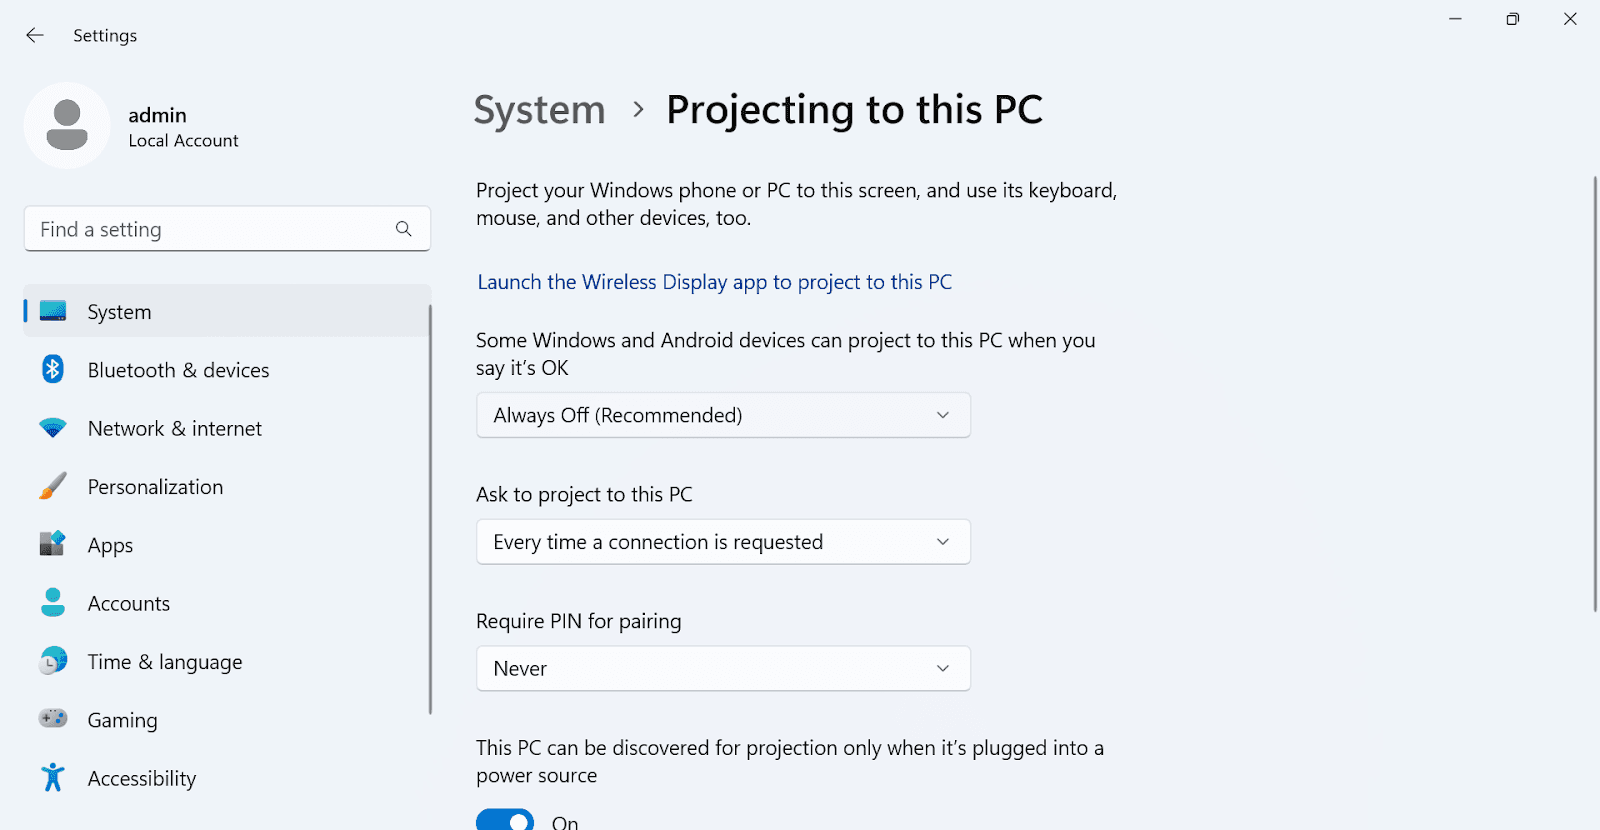
Bước 3: Sau khi cài đặt xong, quay lại "Cài đặt" >> "Hệ thống" >> "Chiếu đến PC này" để quản lý sở thích chiếu của bạn.
Bước 4: Trên máy tính mà bạn muốn chia sẻ màn hình đến, tìm kiếm "Wireless Display" trong ô tìm kiếm thanh tác vụ và khởi động ứng dụng. Thiết bị giờ sẽ có thể phát hiện và sẵn sàng nhận nội dung được chiếu.

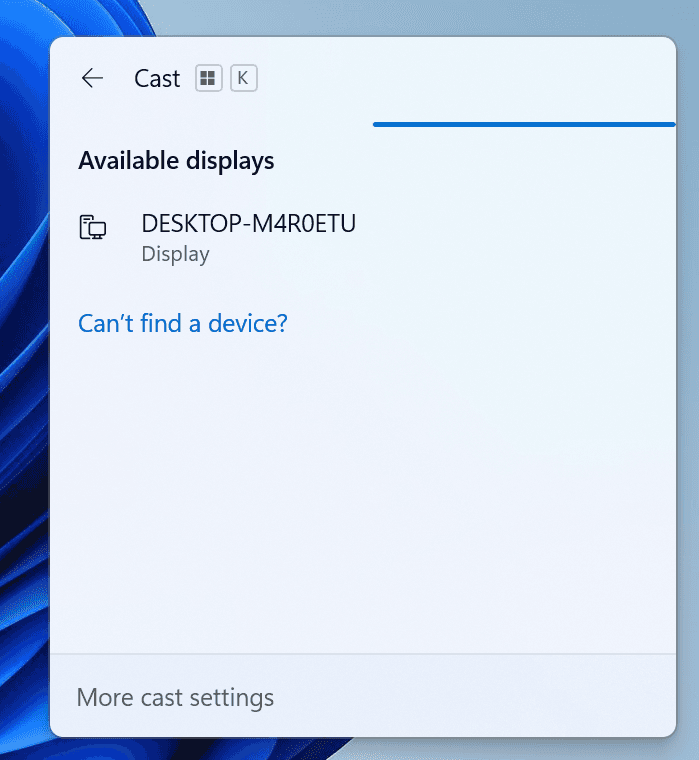
Bước 5: Nhấn "Windows+K" trên máy tính mà bạn muốn chia sẻ màn hình từ, chọn thiết bị mà bạn muốn chia sẻ màn hình đến trong danh sách thiết bị xuất hiện.
Bạn cũng có thể chiếu màn hình máy tính của mình lên TV, máy chiếu hoặc loại màn hình bên ngoài nào khác hỗ trợ Miracast.
Kết luận
Bài viết này đã giới thiệu hai phương pháp đơn giản để chiếu và chia sẻ màn hình của bạn trên Windows 10/11. Trong khi Phương pháp 2 sử dụng các công cụ tích hợp sẵn của Windows, quy trình thiết lập tương đối phức tạp và chỉ áp dụng cho các hệ thống Windows hoặc các màn hình hỗ trợ Miracast. Nếu bạn muốn chiếu màn hình máy tính Windows của mình lên bất kỳ thiết bị nào chạy macOS, iOS, Android hoặc Windows, chúng tôi khuyên bạn nên sử dụng phần mềm từ xa DeskIn. Nó không bị ràng buộc bởi hệ điều hành và không yêu cầu thiết bị phải ở cùng một mạng, làm cho nó trở thành một giải pháp linh hoạt cho tất cả nhu cầu chiếu của bạn.
Bạn có muốn chia sẻ màn hình máy tính của mình với các đồng nghiệp trong một cuộc họp hoặc phát video/hình ảnh dự án lên màn hình lớn hơn? Bài viết này sẽ giới thiệu hai phương pháp đơn giản để phát màn hình máy tính Windows 10/11 của bạn.
Phương pháp 1: Sử dụng ứng dụng máy chiếu chuyên nghiệp DeskIn để chia sẻ màn hình
Ưu điểm của việc sử dụng DeskIn như một máy tính từ xa cho việc chiếu:
Hỗ trợ đa nền tảng: DeskIn hỗ trợ chia sẻ màn hình giữa các hệ thống iOS, Windows, Android và macOS.
Không cần cùng môi trường mạng: DeskIn cho phép chiếu ngay cả khi các thiết bị không ở cùng một mạng, cho phép chia sẻ màn hình qua khoảng cách xa.
Thích ứng màn hình: Bạn có thể điều chỉnh độ phân giải, tần suất khung hình và các cài đặt khác để phù hợp hơn với màn hình từ xa.
Bảo mật: DeskIn sử dụng mã hóa 256-bit để đảm bảo rằng nội dung được chiếu của bạn vẫn riêng tư và an toàn.
Dễ sử dụng: Không cần thiết lập phức tạp.
Bước 1: Cài đặt DeskIn trên cả máy tính của bạn và thiết bị mà bạn muốn chia sẻ màn hình.
Đăng ký một tài khoản miễn phí và đăng nhập.
Chú ý: Khi bạn đăng nhập lần đầu vào một thiết bị mới, bạn sẽ cần hoàn tất xác minh email để bảo vệ an toàn cho tài khoản của bạn.
Bước 2: Kéo dài màn hình của bạn
Mở ứng dụng DeskIn trên máy tính Windows/Mac của bạn >> Đi tới tab "Quản lý Màn hình" >> Nhấp vào “Gương màn hình của tôi."
Bước 3: Chọn thiết bị mà bạn muốn chia sẻ màn hình với và nhấp vào "Bắt đầu Gương hóa."
Bước 4: Bạn có thể tìm thấy thiết bị mà bạn đang chia sẻ màn hình ở「Danh sách thiết bị」và điều chỉnh độ phân giải, tần suất khung hình và các cài đặt khác theo nhu cầu.
Phương pháp 2: Sử dụng Công cụ tích hợp sẵn của Windows "Wireless Display" để chiếu màn hình máy tính của bạn
Bước 1: Trên cả hai máy tính - máy tính bạn muốn chia sẻ màn hình từ và máy tính bạn muốn chia sẻ đến, chọn "Windows Start" >> "Cài đặt" >> "Hệ thống" >> "Tính năng tùy chọn".
Bước 2: Trên trang "Tính năng tùy chọn", nhấp vào "Xem Tính năng" bên cạnh "Thêm một tính năng tùy chọn.” Tìm kiếm "Wireless Display," sau đó nhấp và cài đặt nó.
Bước 3: Sau khi cài đặt xong, quay lại "Cài đặt" >> "Hệ thống" >> "Chiếu đến PC này" để quản lý sở thích chiếu của bạn.
Bước 4: Trên máy tính mà bạn muốn chia sẻ màn hình đến, tìm kiếm "Wireless Display" trong ô tìm kiếm thanh tác vụ và khởi động ứng dụng. Thiết bị giờ sẽ có thể phát hiện và sẵn sàng nhận nội dung được chiếu.
Bước 5: Nhấn "Windows+K" trên máy tính mà bạn muốn chia sẻ màn hình từ, chọn thiết bị mà bạn muốn chia sẻ màn hình đến trong danh sách thiết bị xuất hiện.
Bạn cũng có thể chiếu màn hình máy tính của mình lên TV, máy chiếu hoặc loại màn hình bên ngoài nào khác hỗ trợ Miracast.
Kết luận
Bài viết này đã giới thiệu hai phương pháp đơn giản để chiếu và chia sẻ màn hình của bạn trên Windows 10/11. Trong khi Phương pháp 2 sử dụng các công cụ tích hợp sẵn của Windows, quy trình thiết lập tương đối phức tạp và chỉ áp dụng cho các hệ thống Windows hoặc các màn hình hỗ trợ Miracast. Nếu bạn muốn chiếu màn hình máy tính Windows của mình lên bất kỳ thiết bị nào chạy macOS, iOS, Android hoặc Windows, chúng tôi khuyên bạn nên sử dụng phần mềm từ xa DeskIn. Nó không bị ràng buộc bởi hệ điều hành và không yêu cầu thiết bị phải ở cùng một mạng, làm cho nó trở thành một giải pháp linh hoạt cho tất cả nhu cầu chiếu của bạn.