Search Docs…
Mac như một màn hình thứ hai cho PC: Hướng dẫn hoàn chỉnh
Trong kỷ nguyên làm việc từ xa và đa nhiệm, việc có nhiều không gian màn hình không còn là một sự sang trọng mà là một nguồn lực tăng năng suất. Nếu bạn từng hỏi, "Tôi có thể sử dụng Mac của tôi như một màn hình thứ hai cho PC không?" câu trả lời là có. Và điều đó dễ hơn bạn nghĩ.
Dù bạn đang phủi bụi một chiếc MacBook cũ hay tái sử dụng iMac của bạn, việc biến Mac của bạn thành một màn hình thứ hai có thể giúp bạn tiết kiệm tiền và tối ưu hóa không gian làm việc của bạn. Là người quản lý nhiều dự án hàng ngày, tôi đã trải nghiệm trực tiếp cách mà thiết lập này có thể biến đổi quy trình làm việc của bạn.
Phương pháp 1: Cách dễ nhất — Sử dụng DeskIn
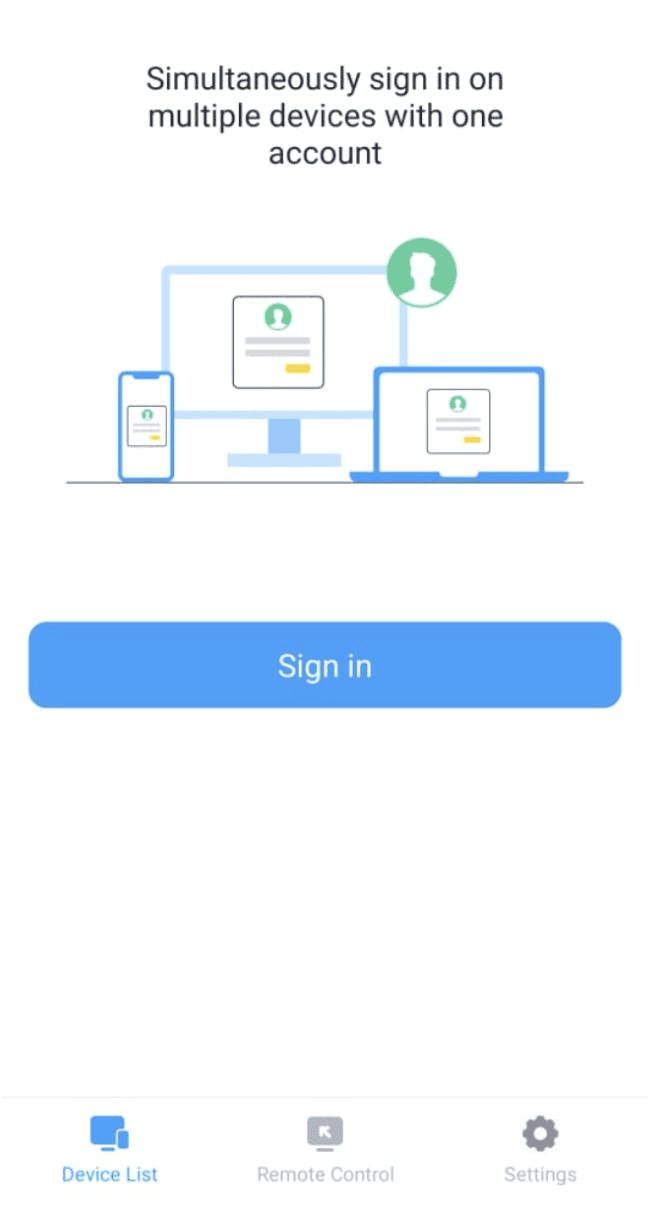
Nếu bạn đang tìm kiếm một giải pháp cắm và chạy, DeskIn là lựa chọn tốt nhất của bạn. Đây là một ứng dụng đa nền tảng cho phép bạn mở rộng hoặc phản chiếu màn hình PC của bạn lên Mac của bạn một cách không dây — với độ trễ gần như không có.
👍 Tại sao DeskIn là một sự đột phá:
✅ Đa nền tảng: Hoạt động liền mạch giữa Windows và macOS
✅ Không dây: Không cần cáp — chỉ cần kết nối cả hai thiết bị vào cùng một mạng
✅ Độ trễ thấp: Trải nghiệm mượt mà, phản hồi nhanh với sự trễ tối thiểu
Một nghiên cứu năm 2023 cho thấy rằng các thiết lập màn hình đôi có thể tăng năng suất lên tới 42%. DeskIn cho phép bạn mở khóa những lợi ích đó — mà không cần mua thêm phần cứng.
Cách sử dụng DeskIn: Hướng dẫn từng bước
Bước 1: Cài đặt DeskIn trên cả hai thiết bị
Trên PC của bạn:
Nhấp vào đây để tải xuống DeskIn , hãy chắc chắn bạn chọn phiên bản Windows
Thực hiện theo trình hướng dẫn cài đặt
Khởi động DeskIn và đăng nhập hoặc tạo tài khoản miễn phí
Trên Mac của bạn:
Tải xuống phiên bản Mac của DeskIn từ cùng một trang web
Cài đặt và mở ứng dụng
Đăng nhập bằng cùng một tài khoản
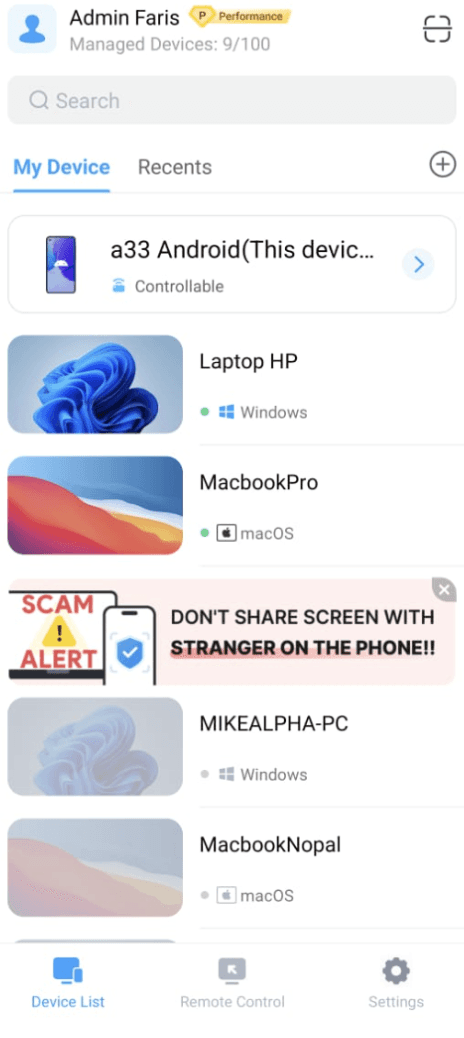
Bước 2: Kết nối các thiết bị của bạn
Đảm bảo cả hai thiết bị đều được kết nối với internet
Trên Mac của bạn, đi đến "Quản lý Màn hình" trong DeskIn
Nhấp vào phản chiếu màn hình của tôi hoặc mở rộng màn hình của tôi
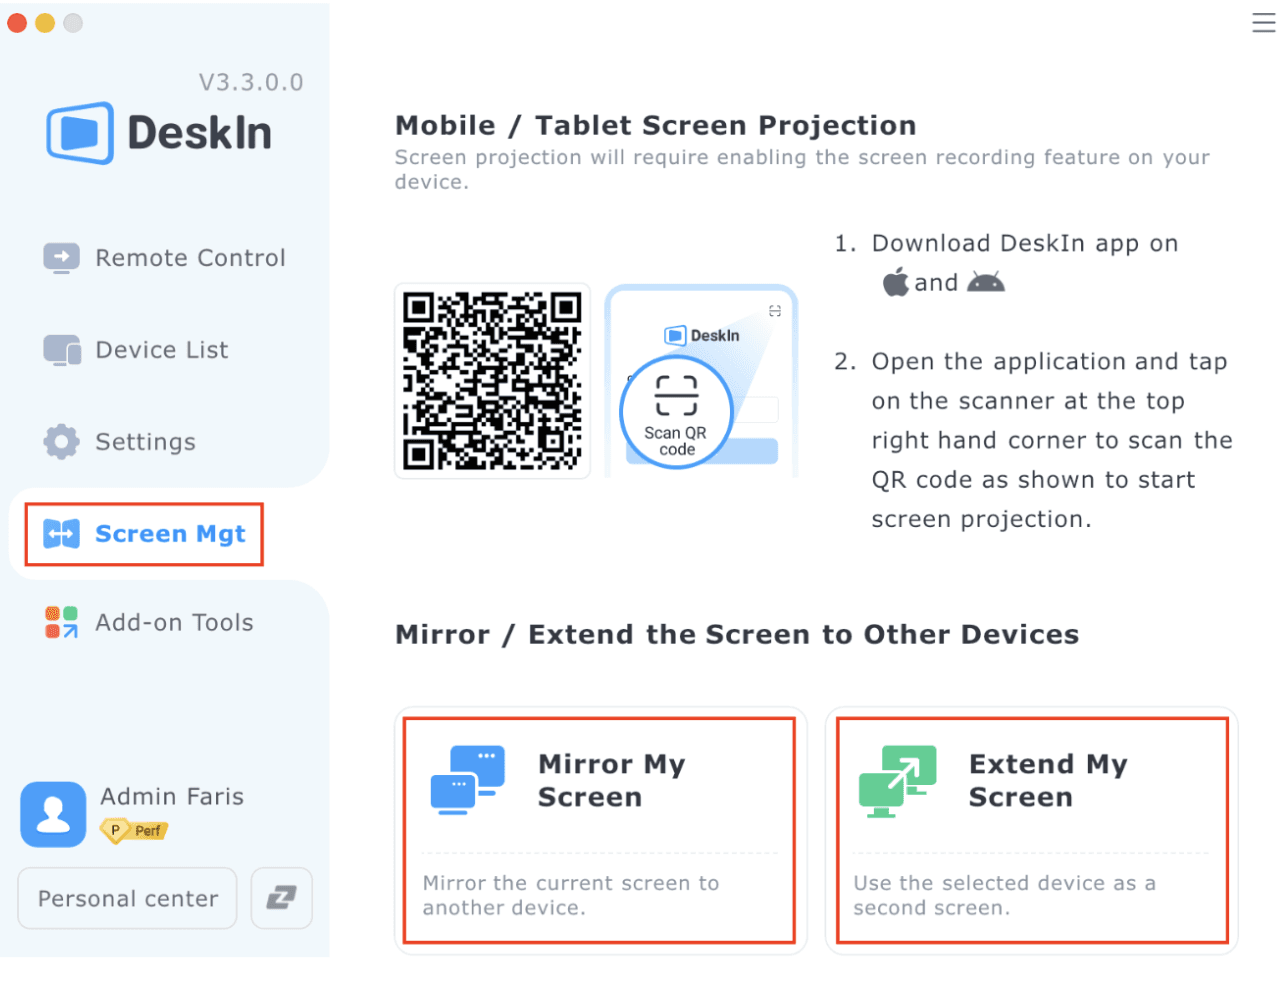
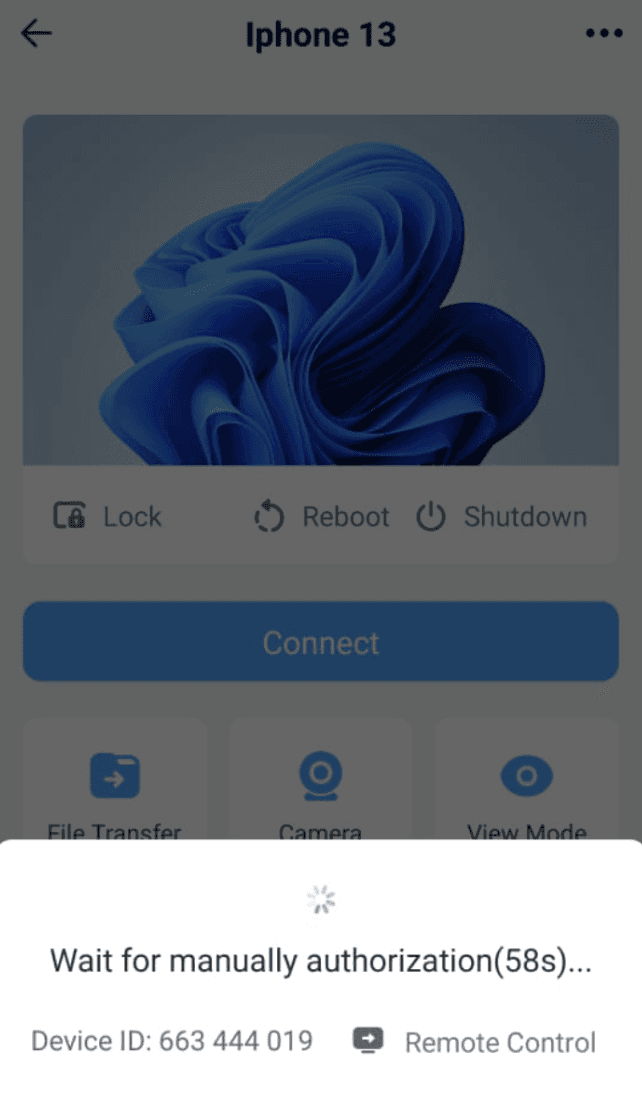
PC của bạn sẽ xuất hiện trong danh sách — nhấp để kết nối
Chấp nhận yêu cầu kết nối trên Mac của bạn
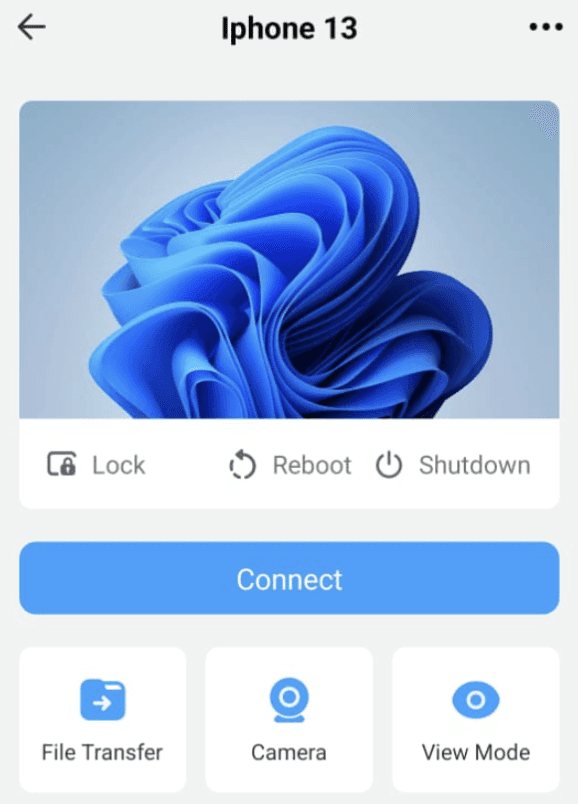
Bước 3: Cấu hình Cài đặt Hiển thị
Chọn giữa "Phản chiếu Màn hình" hoặc "Mở rộng Màn hình"
Chọn kích thước màn hình, độ phân giải và tốc độ khung hình của bạn
Điều chỉnh chất lượng hình ảnh theo nhu cầu

👀 Bạn cũng có thể thích đọc:
Phương pháp 2: Kết nối có dây (HDMI/Giải pháp Bộ chuyển đổi)
Thích kết nối vật lý? Trong khi hầu hết các Mac đều không hỗ trợ đầu vào HDMI trực tiếp, vẫn có những cách giải quyết bằng cách sử dụng các bộ chuyển đổi như USB-C sang HDMI hoặc VGA sang HDMI.
Trước khi bạn bắt đầu:
Xác định các cổng trên Mac và PC của bạn
Use bộ chuyển đổi phù hợp (MacBook có thể cần Bộ chuyển đổi Đa cổng USB-C Digital AV)
👉 Cách thiết lập:
Cắm HDMI/bộ chuyển đổi vào PC của bạn
Kết nối đầu kia với MacBook của bạn
Bật chia sẻ màn hình trên PC Windows của bạn
Chú ý: Không phải tất cả các Mac đều hỗ trợ đầu vào HDMI, vì vậy phương pháp này có thể bị giới hạn dựa trên mẫu của bạn. Nó khả thi nhất với Mac Mini, và khó khăn hơn với MacBook hoặc iMac mà không có phần mềm bên thứ ba.
Khắc phục sự cố Thông thường
Ngay cả với những công cụ tốt nhất, sự cố có thể xảy ra. Dưới đây là cách khắc phục những vấn đề phổ biến nhất:
Không thể kết nối?
Kiểm tra lại kết nối Wi-Fi trên cả hai thiết bị
Tạm thời vô hiệu hóa tường lửa hoặc phần mềm diệt virus
Khởi động lại cả ứng dụng DeskIn và các thiết bị của bạn
Đảm bảo DeskIn đang được cập nhật
Độ trễ hoặc chậm?
Đảm bảo tín hiệu Wi-Fi mạnh
Đóng các ứng dụng chiếm băng thông lớn như gọi video hoặc tải xuống
Giảm cài đặt chất lượng hiển thị trong DeskIn
Xem xét chuyển sang kết nối có dây
Hiển thị trông không ổn?
Kiểm tra độ phân giải gốc của Mac của bạn
Điều chỉnh tỷ lệ trong cả DeskIn và cài đặt hiển thị Windows
Thử sử dụng Mac trong chế độ gập (nắp MacBook đóng với bàn phím/mouse bên ngoài)
Kết luận: Tăng năng suất với thiết lập mà bạn đã có

Biến Mac của bạn thành một màn hình thứ hai cho PC của bạn không chỉ là một cách giải quyết thông minh. Đó là một cách thực tế và tiết kiệm để tăng năng suất và tận dụng tối đa những thiết bị mà bạn đã có. Với các công cụ như DeskIn, việc thiết lập một không gian làm việc với màn hình đôi trở nên nhanh chóng và dễ dàng, ngay cả đối với những người có kinh nghiệm kỹ thuật tối thiểu.
Dù bạn đang làm việc trên các dự án sáng tạo, quản lý bảng tính, hoặc chỉ đơn giản là cố gắng giảm mệt mỏi khi chuyển đổi giữa các cửa sổ, việc mở rộng màn hình của bạn có thể cải thiện đáng kể quy trình làm việc của bạn. Vì vậy, thay vì để cho chiếc Mac đó phủ bụi, hãy biến nó thành một phần mở rộng mạnh mẽ của không gian làm việc của bạn và tận hưởng một thói quen hàng ngày mượt mà và hiệu quả hơn.
Hành động ngay bây giờ: Hãy đến DeskIn.io, tải xuống ứng dụng và trang bị cho không gian làm việc của bạn nâng cấp màn hình đôi mà nó xứng đáng. Bản thân bạn trong tương lai sẽ cảm ơn bạn.
Mac như một màn hình thứ hai cho PC: Hướng dẫn hoàn chỉnh
Trong kỷ nguyên làm việc từ xa và đa nhiệm, việc có nhiều không gian màn hình không còn là một sự sang trọng mà là một nguồn lực tăng năng suất. Nếu bạn từng hỏi, "Tôi có thể sử dụng Mac của tôi như một màn hình thứ hai cho PC không?" câu trả lời là có. Và điều đó dễ hơn bạn nghĩ.
Dù bạn đang phủi bụi một chiếc MacBook cũ hay tái sử dụng iMac của bạn, việc biến Mac của bạn thành một màn hình thứ hai có thể giúp bạn tiết kiệm tiền và tối ưu hóa không gian làm việc của bạn. Là người quản lý nhiều dự án hàng ngày, tôi đã trải nghiệm trực tiếp cách mà thiết lập này có thể biến đổi quy trình làm việc của bạn.
Phương pháp 1: Cách dễ nhất — Sử dụng DeskIn
Nếu bạn đang tìm kiếm một giải pháp cắm và chạy, DeskIn là lựa chọn tốt nhất của bạn. Đây là một ứng dụng đa nền tảng cho phép bạn mở rộng hoặc phản chiếu màn hình PC của bạn lên Mac của bạn một cách không dây — với độ trễ gần như không có.
👍 Tại sao DeskIn là một sự đột phá:
✅ Đa nền tảng: Hoạt động liền mạch giữa Windows và macOS
✅ Không dây: Không cần cáp — chỉ cần kết nối cả hai thiết bị vào cùng một mạng
✅ Độ trễ thấp: Trải nghiệm mượt mà, phản hồi nhanh với sự trễ tối thiểu
Một nghiên cứu năm 2023 cho thấy rằng các thiết lập màn hình đôi có thể tăng năng suất lên tới 42%. DeskIn cho phép bạn mở khóa những lợi ích đó — mà không cần mua thêm phần cứng.
Cách sử dụng DeskIn: Hướng dẫn từng bước
Bước 1: Cài đặt DeskIn trên cả hai thiết bị
Trên PC của bạn:
Nhấp vào đây để tải xuống DeskIn , hãy chắc chắn bạn chọn phiên bản Windows
Thực hiện theo trình hướng dẫn cài đặt
Khởi động DeskIn và đăng nhập hoặc tạo tài khoản miễn phí
Trên Mac của bạn:
Tải xuống phiên bản Mac của DeskIn từ cùng một trang web
Cài đặt và mở ứng dụng
Đăng nhập bằng cùng một tài khoản
Bước 2: Kết nối các thiết bị của bạn
Đảm bảo cả hai thiết bị đều được kết nối với internet
Trên Mac của bạn, đi đến "Quản lý Màn hình" trong DeskIn
Nhấp vào phản chiếu màn hình của tôi hoặc mở rộng màn hình của tôi
PC của bạn sẽ xuất hiện trong danh sách — nhấp để kết nối
Chấp nhận yêu cầu kết nối trên Mac của bạn
Bước 3: Cấu hình Cài đặt Hiển thị
Chọn giữa "Phản chiếu Màn hình" hoặc "Mở rộng Màn hình"
Chọn kích thước màn hình, độ phân giải và tốc độ khung hình của bạn
Điều chỉnh chất lượng hình ảnh theo nhu cầu
👀 Bạn cũng có thể thích đọc:
Phương pháp 2: Kết nối có dây (HDMI/Giải pháp Bộ chuyển đổi)
Thích kết nối vật lý? Trong khi hầu hết các Mac đều không hỗ trợ đầu vào HDMI trực tiếp, vẫn có những cách giải quyết bằng cách sử dụng các bộ chuyển đổi như USB-C sang HDMI hoặc VGA sang HDMI.
Trước khi bạn bắt đầu:
Xác định các cổng trên Mac và PC của bạn
Use bộ chuyển đổi phù hợp (MacBook có thể cần Bộ chuyển đổi Đa cổng USB-C Digital AV)
👉 Cách thiết lập:
Cắm HDMI/bộ chuyển đổi vào PC của bạn
Kết nối đầu kia với MacBook của bạn
Bật chia sẻ màn hình trên PC Windows của bạn
Chú ý: Không phải tất cả các Mac đều hỗ trợ đầu vào HDMI, vì vậy phương pháp này có thể bị giới hạn dựa trên mẫu của bạn. Nó khả thi nhất với Mac Mini, và khó khăn hơn với MacBook hoặc iMac mà không có phần mềm bên thứ ba.
Khắc phục sự cố Thông thường
Ngay cả với những công cụ tốt nhất, sự cố có thể xảy ra. Dưới đây là cách khắc phục những vấn đề phổ biến nhất:
Không thể kết nối?
Kiểm tra lại kết nối Wi-Fi trên cả hai thiết bị
Tạm thời vô hiệu hóa tường lửa hoặc phần mềm diệt virus
Khởi động lại cả ứng dụng DeskIn và các thiết bị của bạn
Đảm bảo DeskIn đang được cập nhật
Độ trễ hoặc chậm?
Đảm bảo tín hiệu Wi-Fi mạnh
Đóng các ứng dụng chiếm băng thông lớn như gọi video hoặc tải xuống
Giảm cài đặt chất lượng hiển thị trong DeskIn
Xem xét chuyển sang kết nối có dây
Hiển thị trông không ổn?
Kiểm tra độ phân giải gốc của Mac của bạn
Điều chỉnh tỷ lệ trong cả DeskIn và cài đặt hiển thị Windows
Thử sử dụng Mac trong chế độ gập (nắp MacBook đóng với bàn phím/mouse bên ngoài)
Kết luận: Tăng năng suất với thiết lập mà bạn đã có
Biến Mac của bạn thành một màn hình thứ hai cho PC của bạn không chỉ là một cách giải quyết thông minh. Đó là một cách thực tế và tiết kiệm để tăng năng suất và tận dụng tối đa những thiết bị mà bạn đã có. Với các công cụ như DeskIn, việc thiết lập một không gian làm việc với màn hình đôi trở nên nhanh chóng và dễ dàng, ngay cả đối với những người có kinh nghiệm kỹ thuật tối thiểu.
Dù bạn đang làm việc trên các dự án sáng tạo, quản lý bảng tính, hoặc chỉ đơn giản là cố gắng giảm mệt mỏi khi chuyển đổi giữa các cửa sổ, việc mở rộng màn hình của bạn có thể cải thiện đáng kể quy trình làm việc của bạn. Vì vậy, thay vì để cho chiếc Mac đó phủ bụi, hãy biến nó thành một phần mở rộng mạnh mẽ của không gian làm việc của bạn và tận hưởng một thói quen hàng ngày mượt mà và hiệu quả hơn.
Hành động ngay bây giờ: Hãy đến DeskIn.io, tải xuống ứng dụng và trang bị cho không gian làm việc của bạn nâng cấp màn hình đôi mà nó xứng đáng. Bản thân bạn trong tương lai sẽ cảm ơn bạn.