![Cách bật Remote Desktop trên Windows 10 [Hướng dẫn tốt nhất]](https://framerusercontent.com/images/wvCxagFfY3QnxmgJz9jAzhO2E.jpg)
Search Docs…
Cách Kích Hoạt Remote Desktop Windows 10: Hướng Dẫn Dễ Dàng & Cách Khắc Phục Lỗi
Bạn muốn kích hoạt Remote Desktop trên Windows 10 nhưng không tìm thấy tùy chọn hoặc gặp vấn đề kết nối? Bạn không đơn độc. Nhiều người dùng gặp khó khăn vì Remote Desktop không có trên tất cả các phiên bản Windows 10, hoặc họ bỏ lỡ một vài bước cài đặt quan trọng.
Trong hướng dẫn này, chúng tôi sẽ hướng dẫn bạn cách nhanh chóng kích hoạt Remote Desktop trên Windows 10, giải thích các yêu cầu hệ thống bạn cần đáp ứng và giúp bạn khắc phục những vấn đề thường gặp. Đọc tiếp để kích hoạt Remote Desktop một cách suôn sẻ và bắt đầu điều khiển PC của bạn từ xa!
Các yêu cầu hệ thống để cho phép Remote Desktop trên Windows 10
Trước khi kích hoạt Remote Desktop trên PC Windows 10 của bạn, điều quan trọng là phải đảm bảo rằng hệ thống của bạn đáp ứng các yêu cầu. Những yêu cầu này đảm bảo rằng Remote Desktop có thể hoạt động đúng cách và cho phép kết nối từ xa mượt mà. Dưới đây là những yếu tố chính bạn cần xem xét.
Phiên bản Windows 10 Pro, Enterprise hoặc Education: Remote Desktop không được hỗ trợ trên Windows 10 Home. Nếu bạn đang sử dụng phiên bản Home, bạn sẽ cần nâng cấp lên Windows 10 Pro, Enterprise hoặc Education để kích hoạt tính năng này.
Kết nối mạng ổn định: Để Remote Desktop hoạt động đúng cách, cả PC cục bộ và từ xa phải được kết nối với một mạng ổn định và đáng tin cậy. Một kết nối internet kém hoặc không ổn định có thể dẫn đến phiên bị ngắt quãng hoặc hiệu suất kém.
Quyền Quản Trị Viên: Để kích hoạt Remote Desktop trên Windows 10, bạn cần có quyền quản trị trên PC. Tài khoản bạn đang sử dụng phải có quyền để thực hiện các thay đổi hệ thống, bao gồm cả việc kích hoạt Remote Desktop.
PC phải được bật và kết nối internet trong các phiên sử dụng từ xa: Để truy cập từ xa hoạt động, PC mục tiêu phải được bật và kết nối với internet. Nếu PC ở chế độ ngủ hoặc tắt, kết nối từ xa sẽ không thành công.
Bằng cách đảm bảo hệ thống của bạn đáp ứng những yêu cầu này, bạn có thể tránh được những vấn đề tiềm ẩn khi thiết lập Remote Desktop. Ở phần tiếp theo, chúng tôi sẽ hướng dẫn bạn qua các bước để kích hoạt Remote Desktop trên Windows 10.
Các bước chi tiết để kích hoạt Remote Desktop trên PC Windows 10
Kích hoạt Remote Desktop trên Windows 10 cho phép bạn truy cập PC từ xa từ một thiết bị khác, giúp bạn dễ dàng làm việc hoặc khắc phục sự cố từ xa. Hãy làm theo các bước dưới đây để thiết lập Remote Desktop trên thiết bị Windows 10 của bạn.
Bước 1. Mở Cài Đặt (Win + I > Hệ Thống)
Nhấn "phím Windows + I" để mở ứng dụng Cài Đặt.
Trong cửa sổ Cài đặt, nhấp vào tùy chọn "Hệ Thống" để tiếp tục.
Bước 2. Tìm và Bật Remote Desktop
Cuộn xuống trong phần "Hệ Thống" cho đến khi bạn tìm thấy Remote Desktop.
Chuyển công tắc sang "Bật" để kích hoạt tính năng.
Bạn sẽ thấy một thông báo xác nhận; nhấp "Xác nhận" để kích hoạt Remote Desktop.
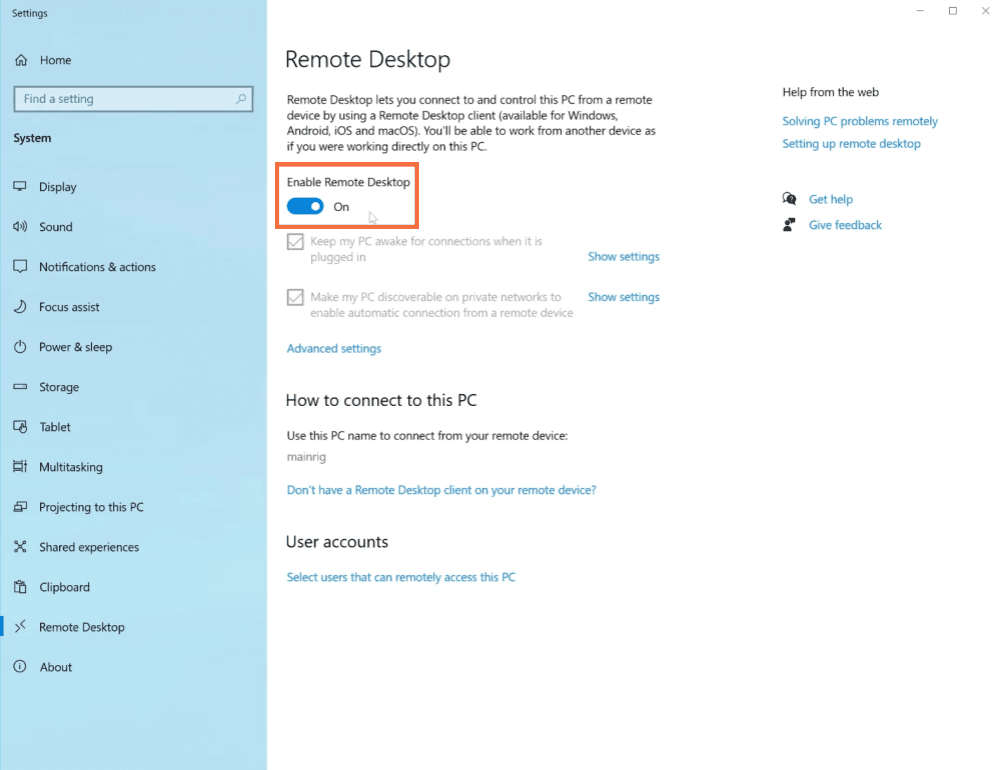
Bước 3. Xác Nhận và Cho Phép Truy Cập
Ngay khi Remote Desktop được bật, bạn sẽ cần xác nhận rằng PC của bạn có thể truy cập từ xa.
Windows sẽ hiển thị tên PC, mà bạn sẽ cần để kết nối từ thiết bị khác.
Đảm bảo rằng tính năng Remote Desktop được bật cho việc truy cập từ xa.
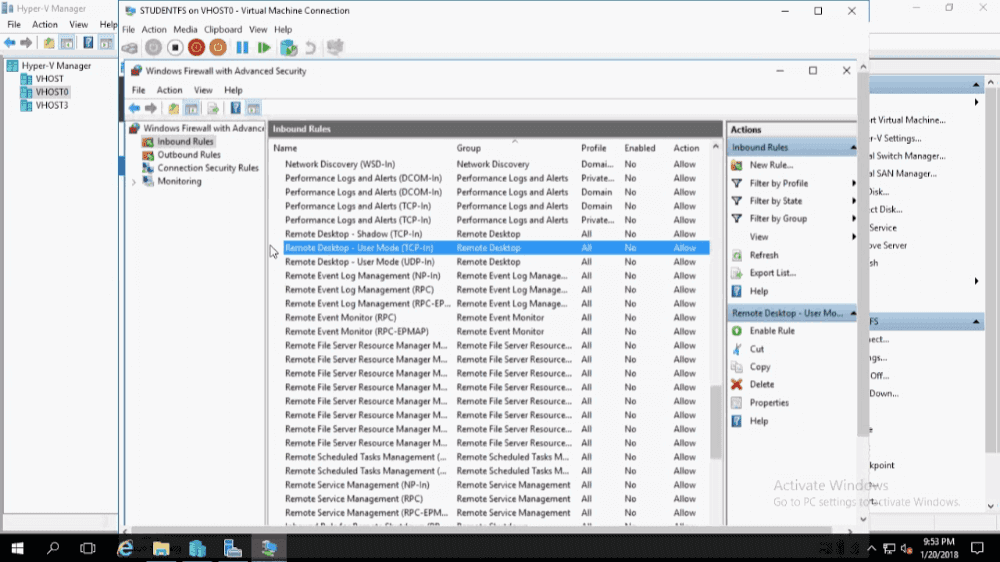
Bước 4. Điều Chỉnh Cài Đặt Tường Lửa
Để đảm bảo PC của bạn có thể chấp nhận các kết nối từ xa, bạn cần cho phép lưu lượng Remote Desktop qua tường lửa. Làm theo các bước sau:
Mở "Control Panel" bằng cách nhấn "Win + R", gõ "control", và nhấn "Enter".
Đi tới "Hệ Thống và Bảo Mật", và sau đó chọn "Windows Defender Firewall".
Trong menu bên trái, nhấp vào "Cho phép một ứng dụng hoặc tính năng qua Windows Defender Firewall".
Đảm bảo rằng Remote Desktop được chọn cho cả hai hồ sơ mạng "Riêng tư" và "Công cộng".
Bước 5. Thêm Người Dùng Khác nếu Cần
Mặc định, chỉ có người dùng có quyền quản trị mới có thể truy cập PC từ xa. Nếu bạn muốn cấp quyền truy cập cho người dùng khác, hãy làm theo các bước sau:
Trong cài đặt Remote Desktop, nhấp vào "Chọn người dùng có thể truy cập PC này từ xa".
Bạn sẽ được yêu cầu thêm tên người dùng mà bạn muốn cấp quyền truy cập. Nhập tên của người dùng và nhấp "Thêm".
Các người dùng này giờ đây sẽ có thể kết nối từ xa đến PC của bạn, miễn là họ có thông tin đăng nhập đúng.
Làm thế nào để tìm Tên Máy tính Windows 10 hoặc Địa chỉ IP của bạn
Sau khi kích hoạt Remote Desktop, bạn sẽ cần tên máy tính hoặc địa chỉ IP của mình để thiết lập một kết nối thành công từ thiết bị khác. Đây là cách nhanh chóng để tìm thông tin này trên Windows 10.
Tìm Tên Máy Tính của bạn
Nhấn "Win + I" để mở ứng dụng Cài Đặt.
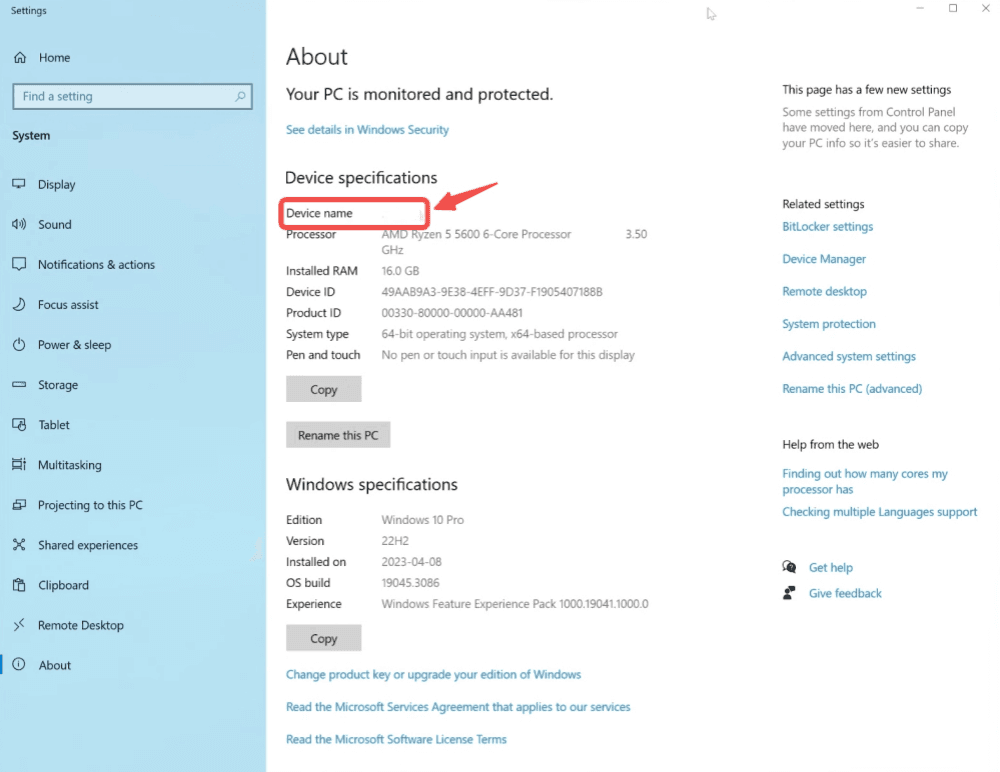
Đi tới "Hệ Thống > Giới thiệu".
Trong phần "Thông số thiết bị", tìm Tên thiết bị — đây là tên máy tính của bạn, mà bạn sẽ sử dụng cho các kết nối Remote Desktop.
Tìm Địa Chỉ IP của bạn
Nhấn "Win + R", gõ "cmd", và nhấn "Enter" để mở Dấu Nhắc Lệnh.
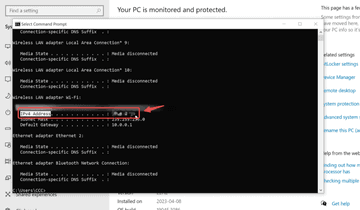
Trong cửa sổ Dấu Nhắc Lệnh, gõ "ipconfig" và nhấn "Enter".
Tìm Địa chỉ IPv4 dưới kết nối mạng đang hoạt động của bạn. Đây là địa chỉ IP của PC của bạn.
Sau khi bạn đã có tất cả thông tin cần thiết, bạn có thể bắt đầu kết nối bằng Remote Desktop Connection để dễ dàng truy cập từ xa vào một máy tính Windows khác!
👀 Mẹo:
Nếu bạn đang kết nối trong cùng một mạng cục bộ (LAN), việc sử dụng Tên thiết bị thường là đủ.
Đối với các kết nối qua internet, bạn có thể cần địa chỉ IP công cộng và cấu hình các cài đặt của bộ định tuyến như chuyển tiếp cổng.
Các cách khắc phục thường gặp về kích hoạt Remote Desktop Windows 10
Ngay cả sau khi thực hiện các bước thiết lập, bạn có thể gặp phải vấn đề khi cố gắng kích hoạt hoặc sử dụng Remote Desktop trên Windows 10. Dưới đây là câu trả lời và giải pháp cho một số vấn đề phổ biến nhất.
Không tìm thấy Remote Desktop Connection trên Windows 10?
Nếu bạn không thể tìm thấy cài đặt hoặc ứng dụng Remote Desktop trên thiết bị Windows 10 của bạn, có thể do một trong những lý do sau:
Phiên bản Windows 10 Home: Remote Desktop không có trên Windows 10 Home. Bạn sẽ cần nâng cấp lên Windows 10 Pro, Enterprise, hoặc Education để truy cập tính năng này.
Tính năng không được kích hoạt: Ngay cả trên các phiên bản hỗ trợ, Remote Desktop có thể không được bật mặc định. Hãy làm theo các bước đã được mô tả trước đó để kích hoạt nó.
Cài đặt ẩn: Đôi khi, các bản cập nhật hệ thống hoặc chính sách CNTT có thể ẩn cài đặt Remote Desktop. Đảm bảo rằng cài đặt Windows 10 của bạn được cập nhật và kiểm tra với quản trị viên hệ thống nếu cần thiết.
Không thể sử dụng Remote Desktop Connection trên Windows 10?
Nếu bạn đã kích hoạt Remote Desktop nhưng vẫn không thể kết nối, hãy kiểm tra các điều sau:
Cài đặt Tường Lửa: Đảm bảo rằng Remote Desktop được cho phép qua Windows Defender Firewall. Đi tới "Control Panel > Windows Defender Firewall > Cho phép một ứng dụng hoặc tính năng qua Windows Defender Firewall", và đảm bảo Remote Desktop được kích hoạt cho cả mạng riêng và công cộng.
Cấu hình Mạng: Remote Desktop yêu cầu kết nối mạng ổn định. Nếu bạn đang kết nối qua internet, bạn có thể cần cấu hình chuyển tiếp cổng (TCP 3389) trên bộ định tuyến của bạn.
Quyền Truy Cập Người Dùng: Mặc định, chỉ có các tài khoản quản trị mới được phép kết nối từ xa. Đảm bảo rằng tài khoản người dùng mà bạn đang cố gắng sử dụng có quyền truy cập từ xa. Bạn có thể thêm người dùng trong "Cài Đặt > Hệ Thống > Remote Desktop > Chọn người dùng có thể truy cập PC này từ xa".
Remote Desktop Connection có đi kèm với Windows 10 không?
Remote Desktop Connection có trong một số phiên bản nhất định của Windows 10, nhưng không phải tất cả:
Có sẵn: Các phiên bản Windows 10 Pro, Enterprise và Education đi kèm với chức năng Remote Desktop tích hợp sẵn.
Không có sẵn: Phiên bản Windows 10 Home không hỗ trợ việc lưu trữ Remote Desktop (chỉ có thể kết nối với các PC khác).
Nếu bạn sử dụng Windows 10 Home và muốn kích hoạt dịch vụ lưu trữ Remote Desktop, bạn sẽ cần phải nâng cấp lên phiên bản Pro hoặc khám phá các phần mềm Remote Desktop thay thế của bên thứ ba.
Bonus: Một Giải Pháp Đơn Giản Hơn cho Remote Desktop - Ứng Dụng DeskIn
Khi Remote Desktop tích hợp sẵn của Windows 10 rất mạnh mẽ, nhưng đôi khi có thể khó thiết lập, đặc biệt nếu bạn đang sử dụng phiên bản Home, gặp phải các cấu hình mạng hoặc gặp hạn chế từ tường lửa. Nếu bạn đang tìm kiếm một cách nhanh hơn, dễ dàng hơn, và linh hoạt hơn để truy cập PC của mình từ xa, DeskIn là một giải pháp thay thế được đề xuất cao.
Nhấp vào đây để tải xuống DeskIn
👀 DeskIn cung cấp:
Không có giới hạn phiên bản: Hoạt động trên Windows 10 Home, Pro và các phiên bản khác.
Cài đặt đơn giản: Không cần cấu hình tường lửa hoặc cổng.
Truy cập đa nền tảng: Kết nối từ Windows, macOS, Android, iOS, và cả các trình duyệt Web.
Hiệu suất cao: Tối ưu hóa cho các phiên làm việc từ xa mượt mà, ngay cả khi băng thông thấp.
Với DeskIn, bạn có thể bắt đầu điều khiển từ xa chỉ trong vài cú nhấp chuột, không cần thiết lập hệ thống phức tạp. Dưới đây là các bước ngắn gọn để bạn sử dụng nó.
Tải xuống và cài đặt DeskIn trên cả hai thiết bị cục bộ và từ xa.
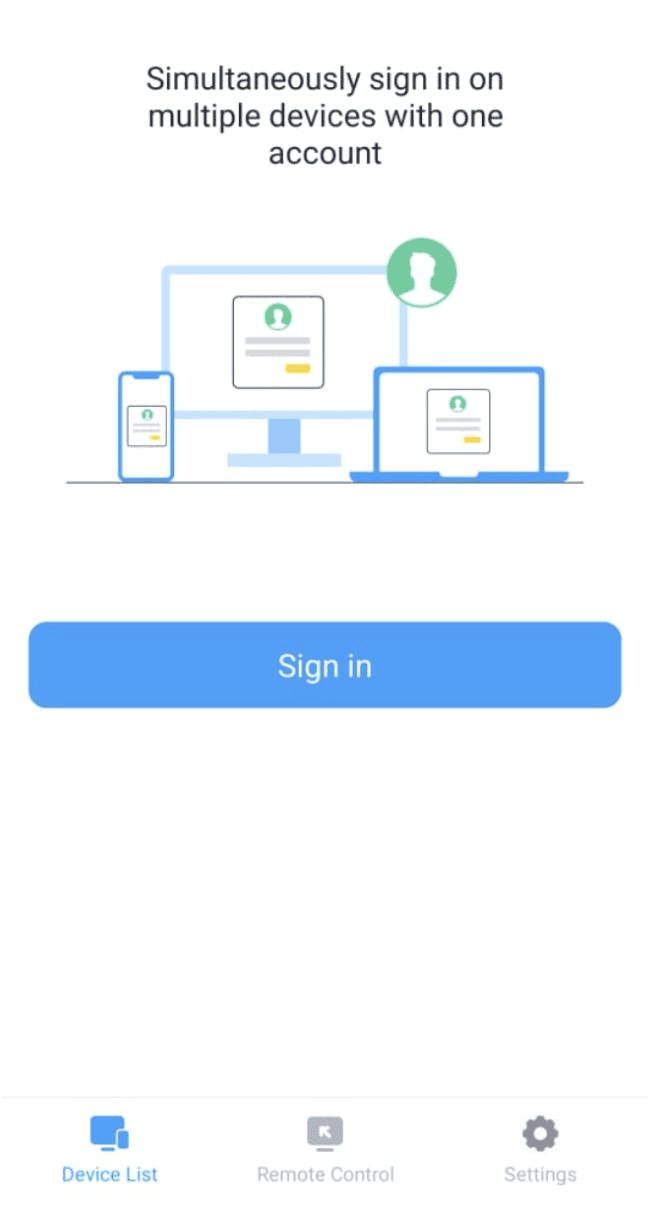
Đăng ký và đăng nhập bằng cùng một tài khoản DeskIn trên cả hai thiết bị.
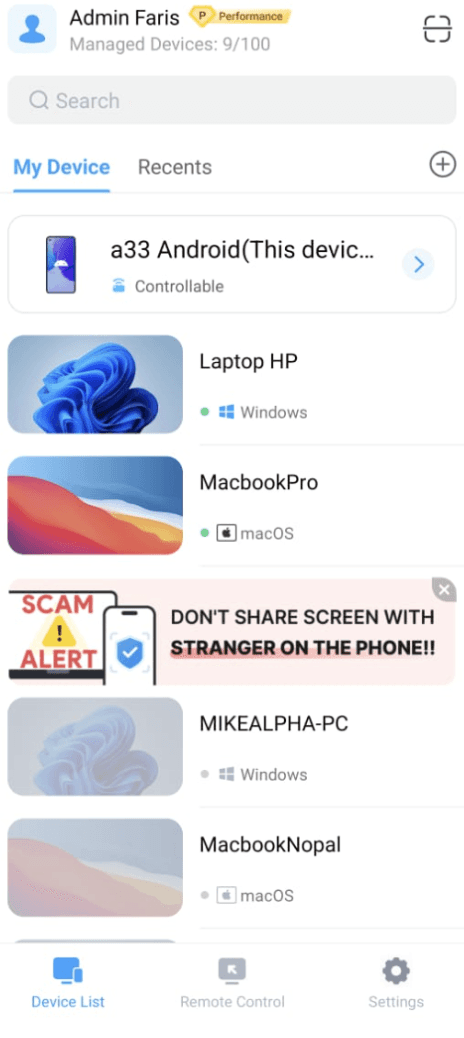
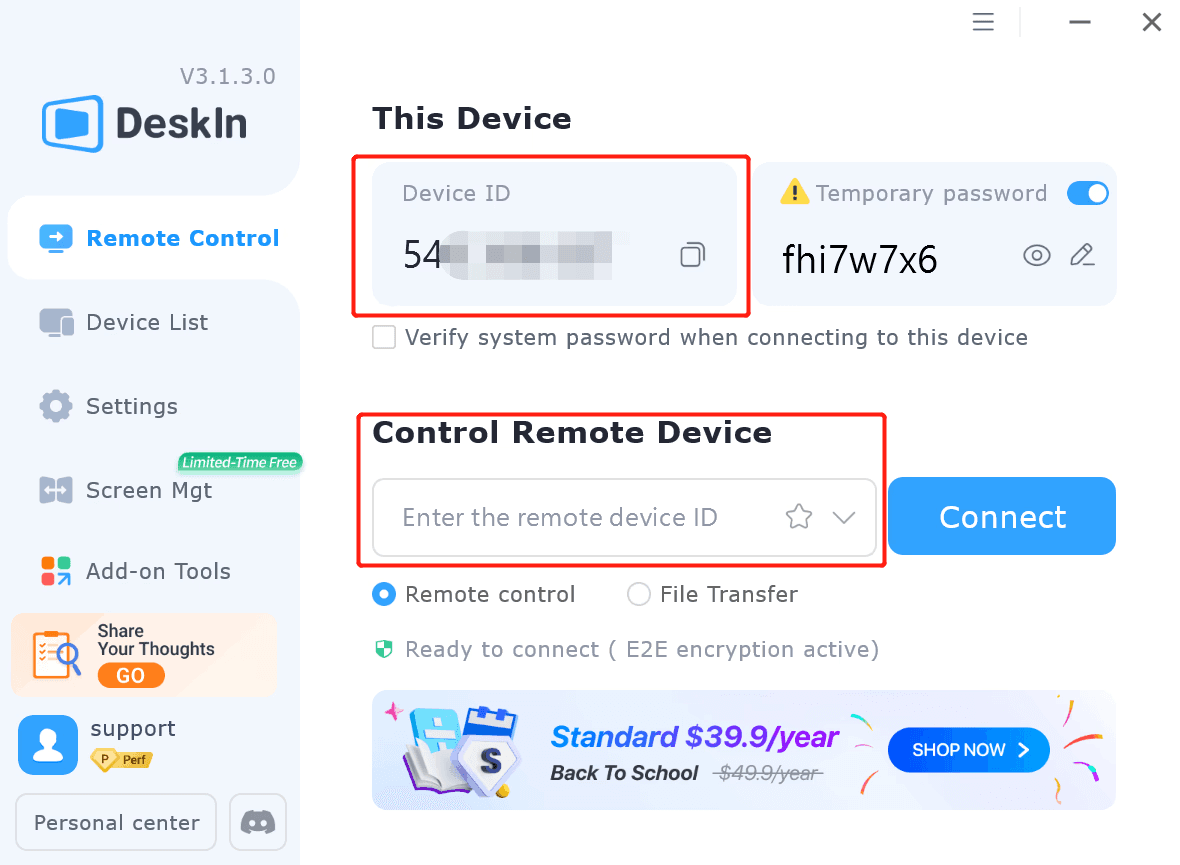
Nhận ID DeskIn của thiết bị từ xa mà bạn muốn điều khiển.
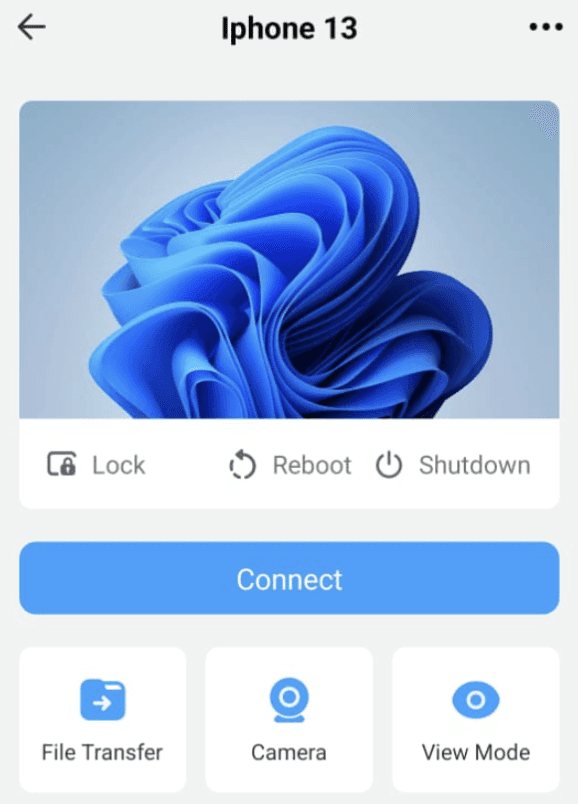
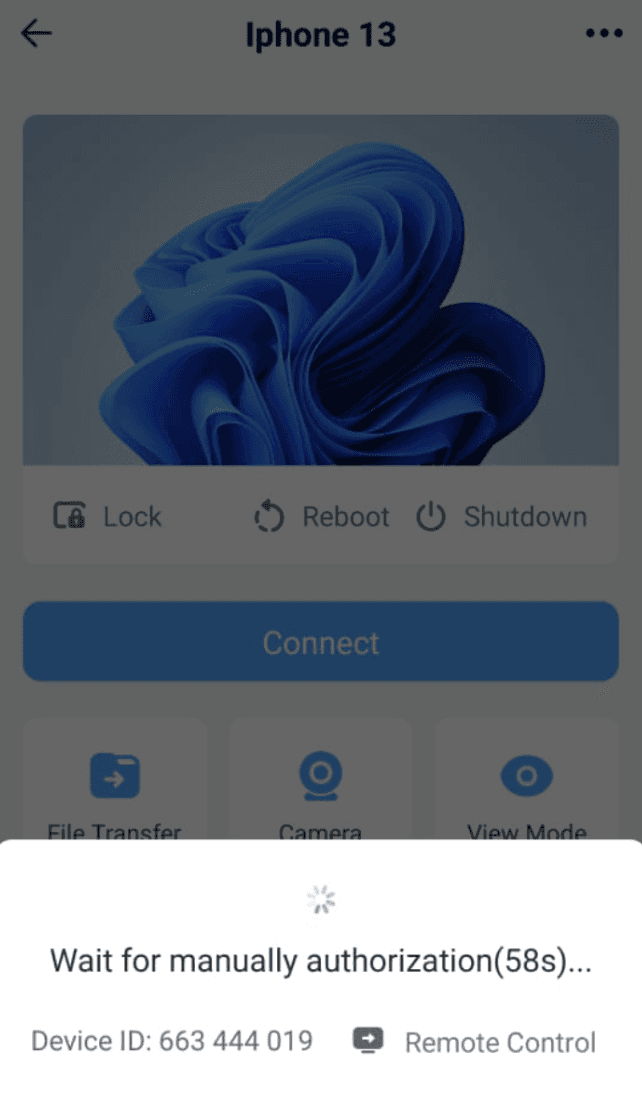
Nhập ID và kết nối, sau đó tận hưởng phiên làm việc từ xa mượt mà và an toàn ngay lập tức.
Những Lời Cuối
Kích hoạt Remote Desktop trên Windows 10 có thể nâng cao năng suất của bạn rất nhiều, cho dù bạn đang truy cập tệp công việc từ nhà hay cung cấp hỗ trợ cho một PC khác. Bằng cách thực hiện đúng các bước thiết lập và giải quyết các vấn đề phổ biến, bạn có thể đảm bảo rằng kết nối từ xa diễn ra suôn sẻ và an toàn.
Nếu bạn thấy Remote Desktop quá phức tạp hoặc bị giới hạn bởi yêu cầu hệ thống, các công cụ như DeskIn cung cấp một giải pháp đơn giản hơn và linh hoạt hơn. Hãy chọn phương pháp phù hợp nhất với nhu cầu của bạn, và tận hưởng việc truy cập từ xa liền mạch trên Windows 10!
Cách Kích Hoạt Remote Desktop Windows 10: Hướng Dẫn Dễ Dàng & Cách Khắc Phục Lỗi
Bạn muốn kích hoạt Remote Desktop trên Windows 10 nhưng không tìm thấy tùy chọn hoặc gặp vấn đề kết nối? Bạn không đơn độc. Nhiều người dùng gặp khó khăn vì Remote Desktop không có trên tất cả các phiên bản Windows 10, hoặc họ bỏ lỡ một vài bước cài đặt quan trọng.
Trong hướng dẫn này, chúng tôi sẽ hướng dẫn bạn cách nhanh chóng kích hoạt Remote Desktop trên Windows 10, giải thích các yêu cầu hệ thống bạn cần đáp ứng và giúp bạn khắc phục những vấn đề thường gặp. Đọc tiếp để kích hoạt Remote Desktop một cách suôn sẻ và bắt đầu điều khiển PC của bạn từ xa!
Các yêu cầu hệ thống để cho phép Remote Desktop trên Windows 10
Trước khi kích hoạt Remote Desktop trên PC Windows 10 của bạn, điều quan trọng là phải đảm bảo rằng hệ thống của bạn đáp ứng các yêu cầu. Những yêu cầu này đảm bảo rằng Remote Desktop có thể hoạt động đúng cách và cho phép kết nối từ xa mượt mà. Dưới đây là những yếu tố chính bạn cần xem xét.
Phiên bản Windows 10 Pro, Enterprise hoặc Education: Remote Desktop không được hỗ trợ trên Windows 10 Home. Nếu bạn đang sử dụng phiên bản Home, bạn sẽ cần nâng cấp lên Windows 10 Pro, Enterprise hoặc Education để kích hoạt tính năng này.
Kết nối mạng ổn định: Để Remote Desktop hoạt động đúng cách, cả PC cục bộ và từ xa phải được kết nối với một mạng ổn định và đáng tin cậy. Một kết nối internet kém hoặc không ổn định có thể dẫn đến phiên bị ngắt quãng hoặc hiệu suất kém.
Quyền Quản Trị Viên: Để kích hoạt Remote Desktop trên Windows 10, bạn cần có quyền quản trị trên PC. Tài khoản bạn đang sử dụng phải có quyền để thực hiện các thay đổi hệ thống, bao gồm cả việc kích hoạt Remote Desktop.
PC phải được bật và kết nối internet trong các phiên sử dụng từ xa: Để truy cập từ xa hoạt động, PC mục tiêu phải được bật và kết nối với internet. Nếu PC ở chế độ ngủ hoặc tắt, kết nối từ xa sẽ không thành công.
Bằng cách đảm bảo hệ thống của bạn đáp ứng những yêu cầu này, bạn có thể tránh được những vấn đề tiềm ẩn khi thiết lập Remote Desktop. Ở phần tiếp theo, chúng tôi sẽ hướng dẫn bạn qua các bước để kích hoạt Remote Desktop trên Windows 10.
Các bước chi tiết để kích hoạt Remote Desktop trên PC Windows 10
Kích hoạt Remote Desktop trên Windows 10 cho phép bạn truy cập PC từ xa từ một thiết bị khác, giúp bạn dễ dàng làm việc hoặc khắc phục sự cố từ xa. Hãy làm theo các bước dưới đây để thiết lập Remote Desktop trên thiết bị Windows 10 của bạn.
Bước 1. Mở Cài Đặt (Win + I > Hệ Thống)
Nhấn "phím Windows + I" để mở ứng dụng Cài Đặt.
Trong cửa sổ Cài đặt, nhấp vào tùy chọn "Hệ Thống" để tiếp tục.
Bước 2. Tìm và Bật Remote Desktop
Cuộn xuống trong phần "Hệ Thống" cho đến khi bạn tìm thấy Remote Desktop.
Chuyển công tắc sang "Bật" để kích hoạt tính năng.
Bạn sẽ thấy một thông báo xác nhận; nhấp "Xác nhận" để kích hoạt Remote Desktop.
Bước 3. Xác Nhận và Cho Phép Truy Cập
Ngay khi Remote Desktop được bật, bạn sẽ cần xác nhận rằng PC của bạn có thể truy cập từ xa.
Windows sẽ hiển thị tên PC, mà bạn sẽ cần để kết nối từ thiết bị khác.
Đảm bảo rằng tính năng Remote Desktop được bật cho việc truy cập từ xa.
Bước 4. Điều Chỉnh Cài Đặt Tường Lửa
Để đảm bảo PC của bạn có thể chấp nhận các kết nối từ xa, bạn cần cho phép lưu lượng Remote Desktop qua tường lửa. Làm theo các bước sau:
Mở "Control Panel" bằng cách nhấn "Win + R", gõ "control", và nhấn "Enter".
Đi tới "Hệ Thống và Bảo Mật", và sau đó chọn "Windows Defender Firewall".
Trong menu bên trái, nhấp vào "Cho phép một ứng dụng hoặc tính năng qua Windows Defender Firewall".
Đảm bảo rằng Remote Desktop được chọn cho cả hai hồ sơ mạng "Riêng tư" và "Công cộng".
Bước 5. Thêm Người Dùng Khác nếu Cần
Mặc định, chỉ có người dùng có quyền quản trị mới có thể truy cập PC từ xa. Nếu bạn muốn cấp quyền truy cập cho người dùng khác, hãy làm theo các bước sau:
Trong cài đặt Remote Desktop, nhấp vào "Chọn người dùng có thể truy cập PC này từ xa".
Bạn sẽ được yêu cầu thêm tên người dùng mà bạn muốn cấp quyền truy cập. Nhập tên của người dùng và nhấp "Thêm".
Các người dùng này giờ đây sẽ có thể kết nối từ xa đến PC của bạn, miễn là họ có thông tin đăng nhập đúng.
Làm thế nào để tìm Tên Máy tính Windows 10 hoặc Địa chỉ IP của bạn
Sau khi kích hoạt Remote Desktop, bạn sẽ cần tên máy tính hoặc địa chỉ IP của mình để thiết lập một kết nối thành công từ thiết bị khác. Đây là cách nhanh chóng để tìm thông tin này trên Windows 10.
Tìm Tên Máy Tính của bạn
Nhấn "Win + I" để mở ứng dụng Cài Đặt.
Đi tới "Hệ Thống > Giới thiệu".
Trong phần "Thông số thiết bị", tìm Tên thiết bị — đây là tên máy tính của bạn, mà bạn sẽ sử dụng cho các kết nối Remote Desktop.
Tìm Địa Chỉ IP của bạn
Nhấn "Win + R", gõ "cmd", và nhấn "Enter" để mở Dấu Nhắc Lệnh.
Trong cửa sổ Dấu Nhắc Lệnh, gõ "ipconfig" và nhấn "Enter".
Tìm Địa chỉ IPv4 dưới kết nối mạng đang hoạt động của bạn. Đây là địa chỉ IP của PC của bạn.
Sau khi bạn đã có tất cả thông tin cần thiết, bạn có thể bắt đầu kết nối bằng Remote Desktop Connection để dễ dàng truy cập từ xa vào một máy tính Windows khác!
👀 Mẹo:
Nếu bạn đang kết nối trong cùng một mạng cục bộ (LAN), việc sử dụng Tên thiết bị thường là đủ.
Đối với các kết nối qua internet, bạn có thể cần địa chỉ IP công cộng và cấu hình các cài đặt của bộ định tuyến như chuyển tiếp cổng.
Các cách khắc phục thường gặp về kích hoạt Remote Desktop Windows 10
Ngay cả sau khi thực hiện các bước thiết lập, bạn có thể gặp phải vấn đề khi cố gắng kích hoạt hoặc sử dụng Remote Desktop trên Windows 10. Dưới đây là câu trả lời và giải pháp cho một số vấn đề phổ biến nhất.
Không tìm thấy Remote Desktop Connection trên Windows 10?
Nếu bạn không thể tìm thấy cài đặt hoặc ứng dụng Remote Desktop trên thiết bị Windows 10 của bạn, có thể do một trong những lý do sau:
Phiên bản Windows 10 Home: Remote Desktop không có trên Windows 10 Home. Bạn sẽ cần nâng cấp lên Windows 10 Pro, Enterprise, hoặc Education để truy cập tính năng này.
Tính năng không được kích hoạt: Ngay cả trên các phiên bản hỗ trợ, Remote Desktop có thể không được bật mặc định. Hãy làm theo các bước đã được mô tả trước đó để kích hoạt nó.
Cài đặt ẩn: Đôi khi, các bản cập nhật hệ thống hoặc chính sách CNTT có thể ẩn cài đặt Remote Desktop. Đảm bảo rằng cài đặt Windows 10 của bạn được cập nhật và kiểm tra với quản trị viên hệ thống nếu cần thiết.
Không thể sử dụng Remote Desktop Connection trên Windows 10?
Nếu bạn đã kích hoạt Remote Desktop nhưng vẫn không thể kết nối, hãy kiểm tra các điều sau:
Cài đặt Tường Lửa: Đảm bảo rằng Remote Desktop được cho phép qua Windows Defender Firewall. Đi tới "Control Panel > Windows Defender Firewall > Cho phép một ứng dụng hoặc tính năng qua Windows Defender Firewall", và đảm bảo Remote Desktop được kích hoạt cho cả mạng riêng và công cộng.
Cấu hình Mạng: Remote Desktop yêu cầu kết nối mạng ổn định. Nếu bạn đang kết nối qua internet, bạn có thể cần cấu hình chuyển tiếp cổng (TCP 3389) trên bộ định tuyến của bạn.
Quyền Truy Cập Người Dùng: Mặc định, chỉ có các tài khoản quản trị mới được phép kết nối từ xa. Đảm bảo rằng tài khoản người dùng mà bạn đang cố gắng sử dụng có quyền truy cập từ xa. Bạn có thể thêm người dùng trong "Cài Đặt > Hệ Thống > Remote Desktop > Chọn người dùng có thể truy cập PC này từ xa".
Remote Desktop Connection có đi kèm với Windows 10 không?
Remote Desktop Connection có trong một số phiên bản nhất định của Windows 10, nhưng không phải tất cả:
Có sẵn: Các phiên bản Windows 10 Pro, Enterprise và Education đi kèm với chức năng Remote Desktop tích hợp sẵn.
Không có sẵn: Phiên bản Windows 10 Home không hỗ trợ việc lưu trữ Remote Desktop (chỉ có thể kết nối với các PC khác).
Nếu bạn sử dụng Windows 10 Home và muốn kích hoạt dịch vụ lưu trữ Remote Desktop, bạn sẽ cần phải nâng cấp lên phiên bản Pro hoặc khám phá các phần mềm Remote Desktop thay thế của bên thứ ba.
Bonus: Một Giải Pháp Đơn Giản Hơn cho Remote Desktop - Ứng Dụng DeskIn
Khi Remote Desktop tích hợp sẵn của Windows 10 rất mạnh mẽ, nhưng đôi khi có thể khó thiết lập, đặc biệt nếu bạn đang sử dụng phiên bản Home, gặp phải các cấu hình mạng hoặc gặp hạn chế từ tường lửa. Nếu bạn đang tìm kiếm một cách nhanh hơn, dễ dàng hơn, và linh hoạt hơn để truy cập PC của mình từ xa, DeskIn là một giải pháp thay thế được đề xuất cao.
Nhấp vào đây để tải xuống DeskIn
👀 DeskIn cung cấp:
Không có giới hạn phiên bản: Hoạt động trên Windows 10 Home, Pro và các phiên bản khác.
Cài đặt đơn giản: Không cần cấu hình tường lửa hoặc cổng.
Truy cập đa nền tảng: Kết nối từ Windows, macOS, Android, iOS, và cả các trình duyệt Web.
Hiệu suất cao: Tối ưu hóa cho các phiên làm việc từ xa mượt mà, ngay cả khi băng thông thấp.
Với DeskIn, bạn có thể bắt đầu điều khiển từ xa chỉ trong vài cú nhấp chuột, không cần thiết lập hệ thống phức tạp. Dưới đây là các bước ngắn gọn để bạn sử dụng nó.
Tải xuống và cài đặt DeskIn trên cả hai thiết bị cục bộ và từ xa.
Đăng ký và đăng nhập bằng cùng một tài khoản DeskIn trên cả hai thiết bị.
Nhận ID DeskIn của thiết bị từ xa mà bạn muốn điều khiển.
Nhập ID và kết nối, sau đó tận hưởng phiên làm việc từ xa mượt mà và an toàn ngay lập tức.
Những Lời Cuối
Kích hoạt Remote Desktop trên Windows 10 có thể nâng cao năng suất của bạn rất nhiều, cho dù bạn đang truy cập tệp công việc từ nhà hay cung cấp hỗ trợ cho một PC khác. Bằng cách thực hiện đúng các bước thiết lập và giải quyết các vấn đề phổ biến, bạn có thể đảm bảo rằng kết nối từ xa diễn ra suôn sẻ và an toàn.
Nếu bạn thấy Remote Desktop quá phức tạp hoặc bị giới hạn bởi yêu cầu hệ thống, các công cụ như DeskIn cung cấp một giải pháp đơn giản hơn và linh hoạt hơn. Hãy chọn phương pháp phù hợp nhất với nhu cầu của bạn, và tận hưởng việc truy cập từ xa liền mạch trên Windows 10!