Search Docs…
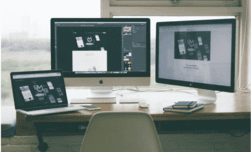
Việc làm việc với màn hình kép có thể cải thiện đáng kể hiệu quả công việc, đặc biệt là đối với các nhà thiết kế và kỹ sư cần thực hiện nhiều nhiệm vụ cùng lúc. Nhưng bạn có thực sự cần phải mua thêm một màn hình không? Màn hình tốt nhất có thể đã ở xung quanh bạn – đó chính là một chiếc máy tính bảng! Bài viết này sẽ giới thiệu cho bạn 6 mẹo tăng năng suất với màn hình kép và cách biến máy tính bảng của bạn thành một màn hình phụ cho máy tính của bạn.
6 mẹo tăng năng suất với màn hình kép:
1. Tiết kiệm thời gian chuyển đổi cửa sổ
Khi thực hiện nhiều nhiệm vụ, bạn có thể mở các cửa sổ riêng biệt trên hai màn hình, tiết kiệm thời gian chuyển đổi qua lại giữa các cửa sổ và làm cho không gian làm việc của bạn gọn gàng và ngăn nắp hơn.
2. Cải thiện hiệu suất hiệu đính
Khi hiệu đính văn bản hoặc dữ liệu, việc sử dụng chức năng chia màn hình có thể khiến văn bản trở nên quá nhỏ để đọc rõ ràng. Bạn có thể mở tệp trên hai màn hình tương ứng để đảm bảo kích thước phông chữ vừa đủ và bố cục nhất quán, giúp công việc hiệu đính dễ dàng hơn.
3. Cải thiện hiệu suất chỉnh sửa
Khi chỉnh sửa, bạn có thể mở phần mềm chỉnh sửa trên màn hình chính và tìm kiếm video và tài liệu trên màn hình còn lại để nâng cao hiệu suất chỉnh sửa.
4. Cái nhìn tốt hơn với hướng dọc
Khi bạn cần duyệt video hoặc tệp ở định dạng dọc, bạn có thể chuyển đổi hai màn hình thành hướng dọc để thoải mái hình ảnh hơn.
5. Biên soạn trong khi tham khảo thông tin
Dù bạn là sinh viên viết luận hay biên tập viên viết bài, bạn có thể cần tìm kiếm thông tin khi viết. Màn hình kép cho phép bạn làm cả hai việc này cùng một lúc, bạn cũng có thể sao chép và dán giữa 2 màn hình một cách liền mạch.
6. Phóng to chi tiết
Khi bạn đang làm việc thiết kế hoặc photoshop, bạn có thể phóng to một phần của hình ảnh trên màn hình thứ hai để xem chi tiết tốt hơn. Bạn cũng có thể di chuyển một không gian làm việc nhất định trong PS hoặc PR sang màn hình thứ hai, phóng to nó để sử dụng thuận tiện hơn.
Cách biến iPad/máy tính bảng Android thành một màn hình thứ hai?
Phương pháp 1: Sử dụng phần mềm điều khiển từ xa DeskIn
Hệ điều hành áp dụng: Hỗ trợ mở rộng màn hình đa nền tảng giữa máy tính Windows, iOS, Mac, Android và máy tính bảng
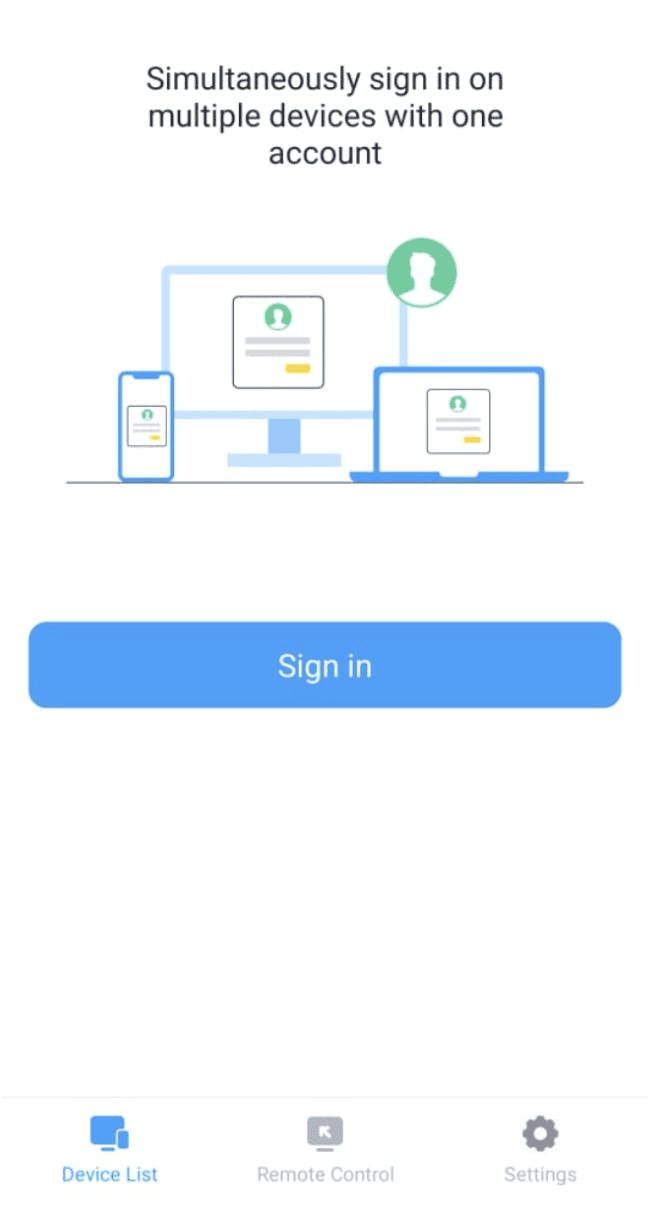
Bước 1: Tải xuống và đăng ký tài khoản DeskIn
Tải xuống DeskIn trên PC và iPad của bạn, đăng ký tài khoản miễn phí và đăng nhập riêng biệt
Chú ý: Nếu bạn đang đăng nhập trên một thiết bị mới lần đầu tiên, bạn cần xác minh email để đảm bảo an toàn cho tài khoản của bạn.

Bước 2: Mở rộng màn hình
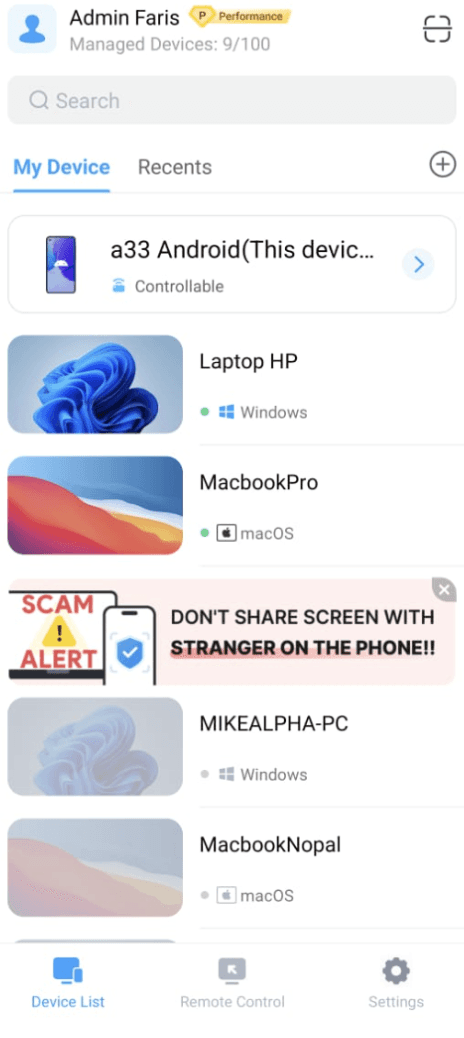
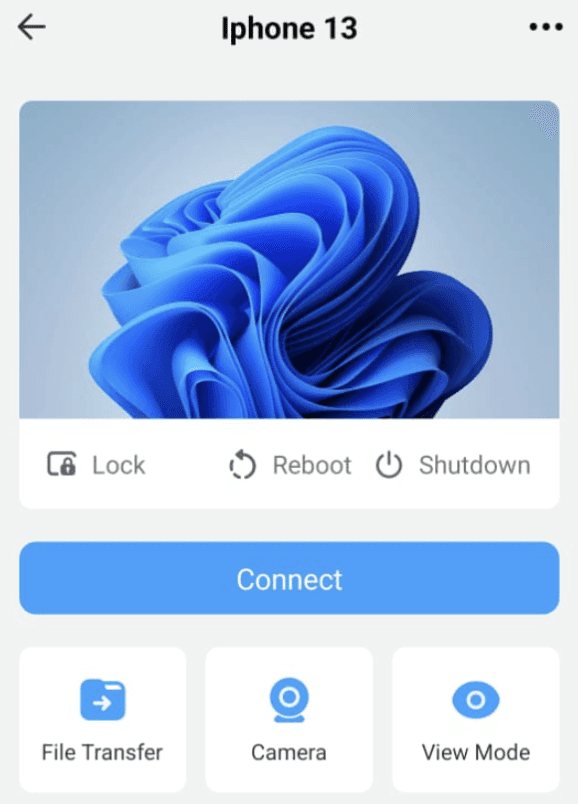
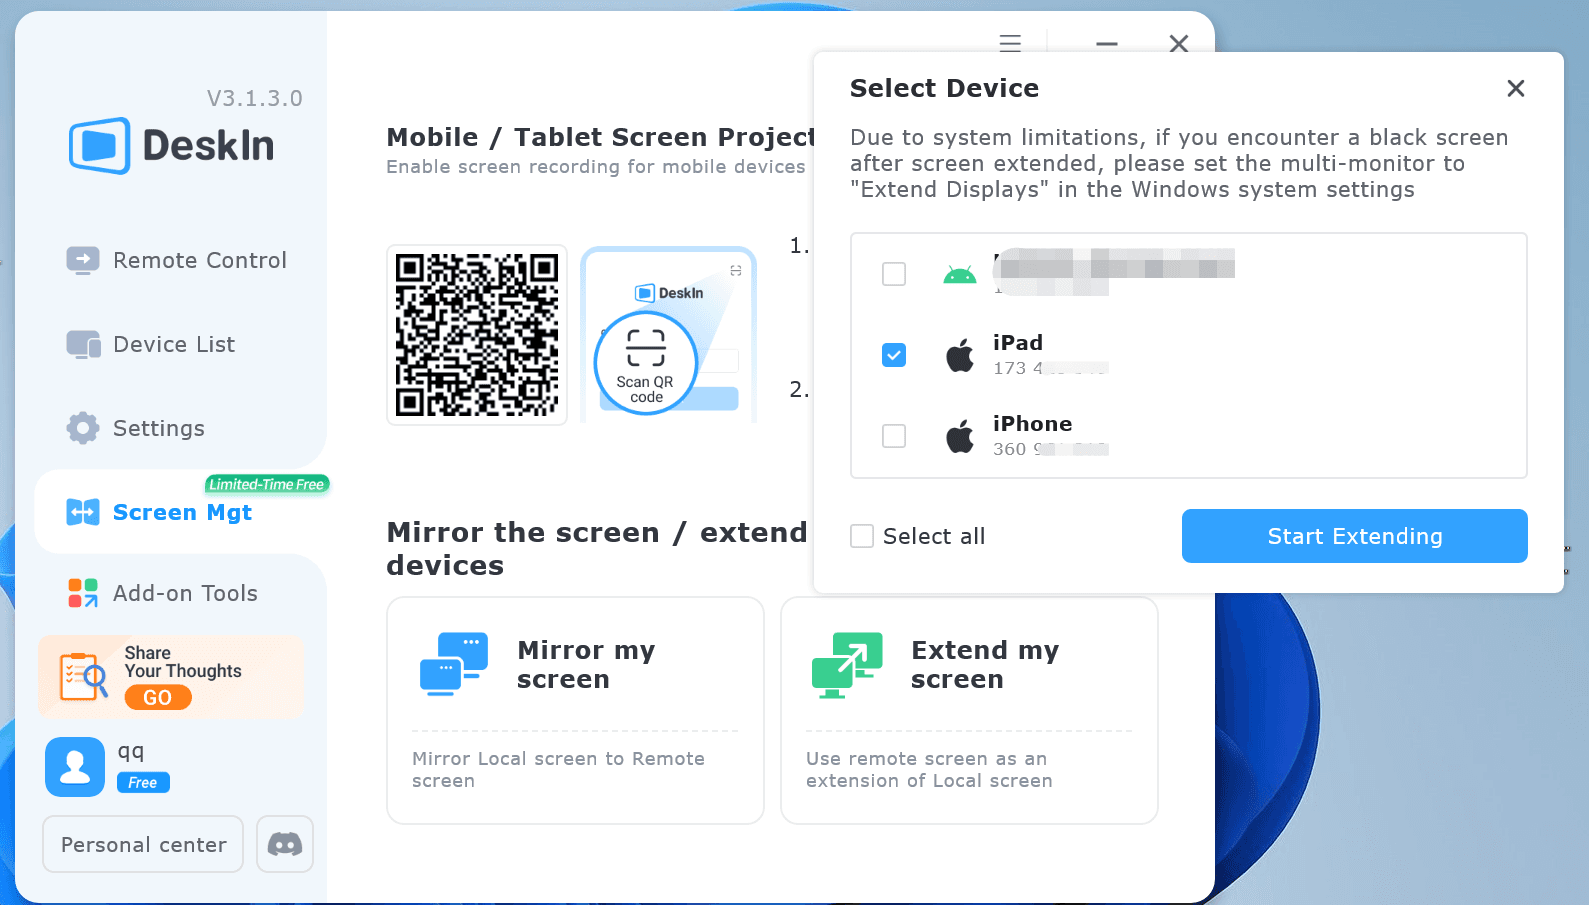
Trên DeskIn trên máy tính >> Đi tới "Quản lý Màn hình" >> Nhấp vào "Mở rộng màn hình của tôi"
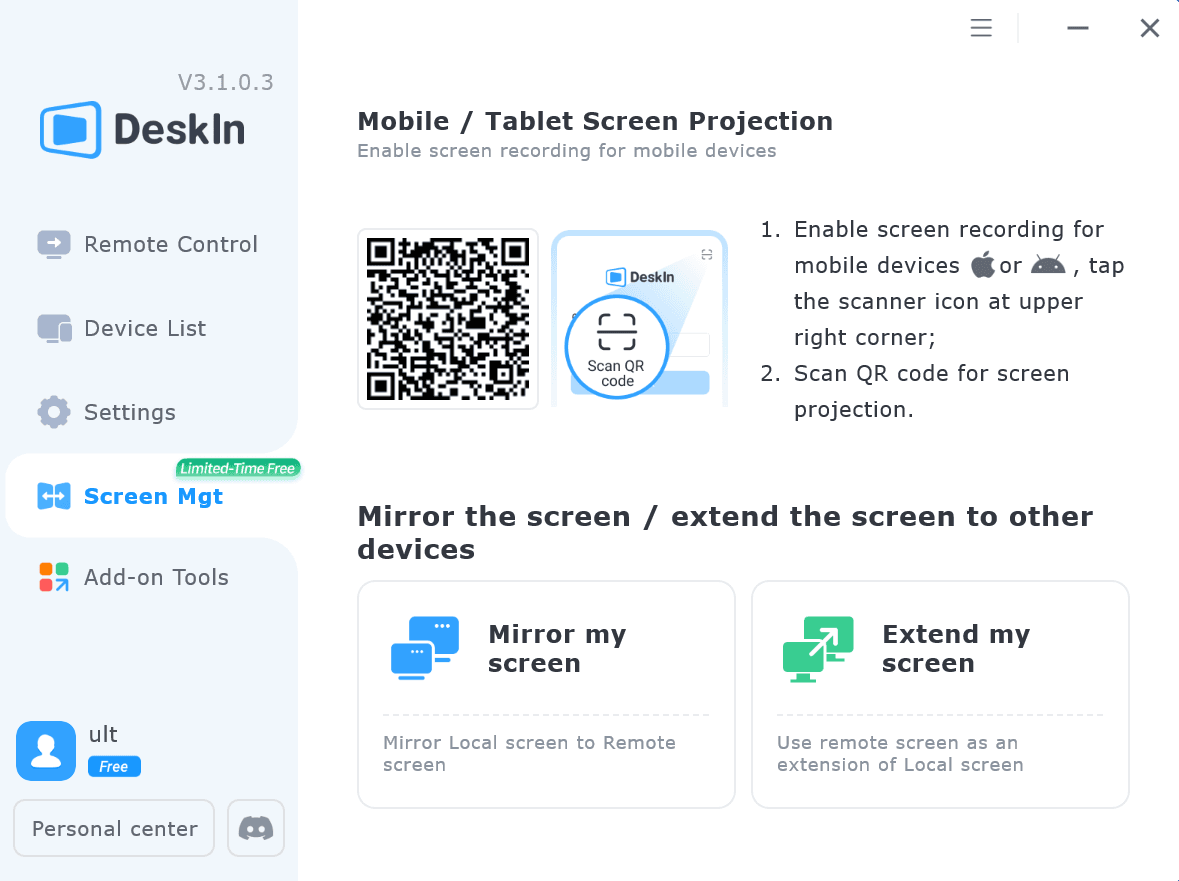
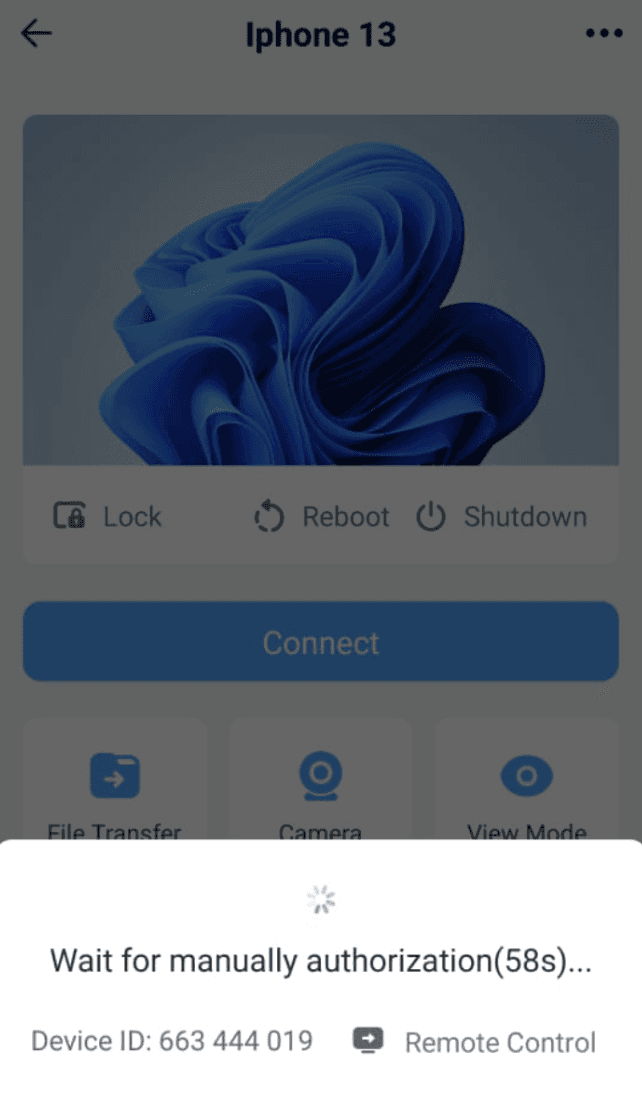
Chọn thiết bị bạn muốn mở rộng màn hình và nhấn "Bắt đầu Mở rộng".
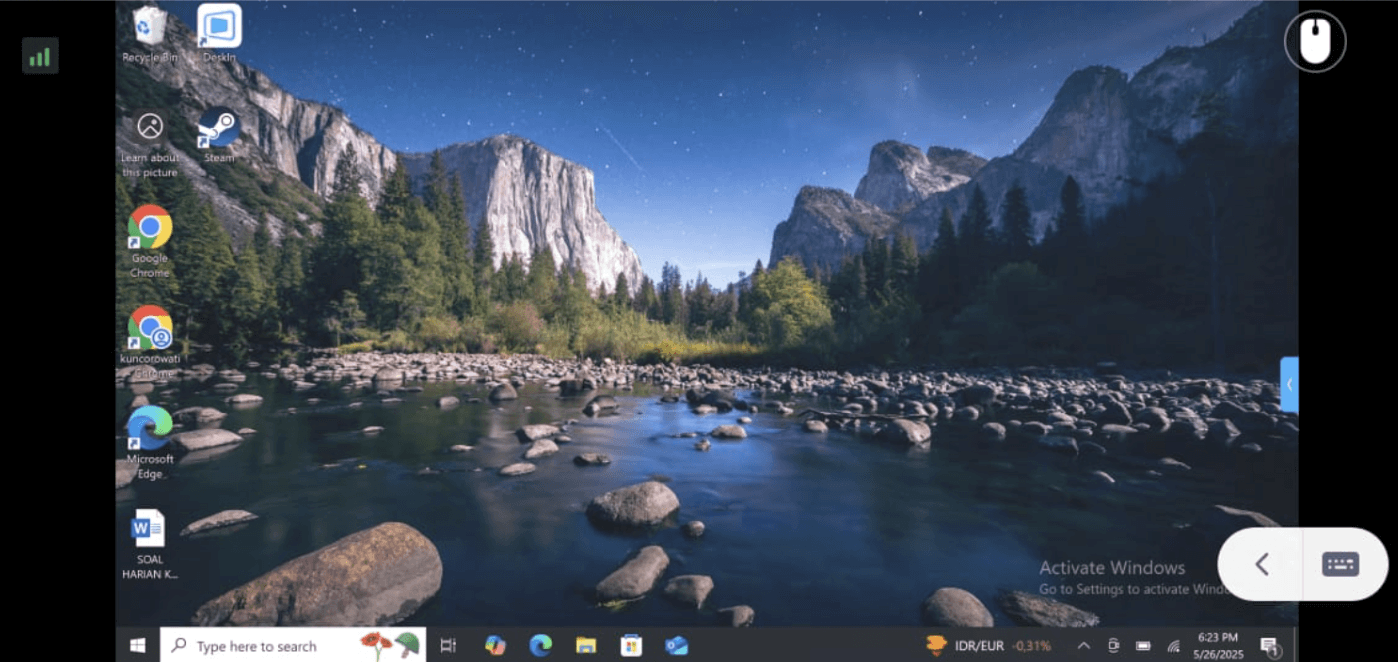
Sau khi kết nối thành công, iPad của bạn sẽ trở thành màn hình thứ hai cho Windows/Mac, và các cửa sổ có thể được di chuyển linh hoạt giữa hai màn hình.
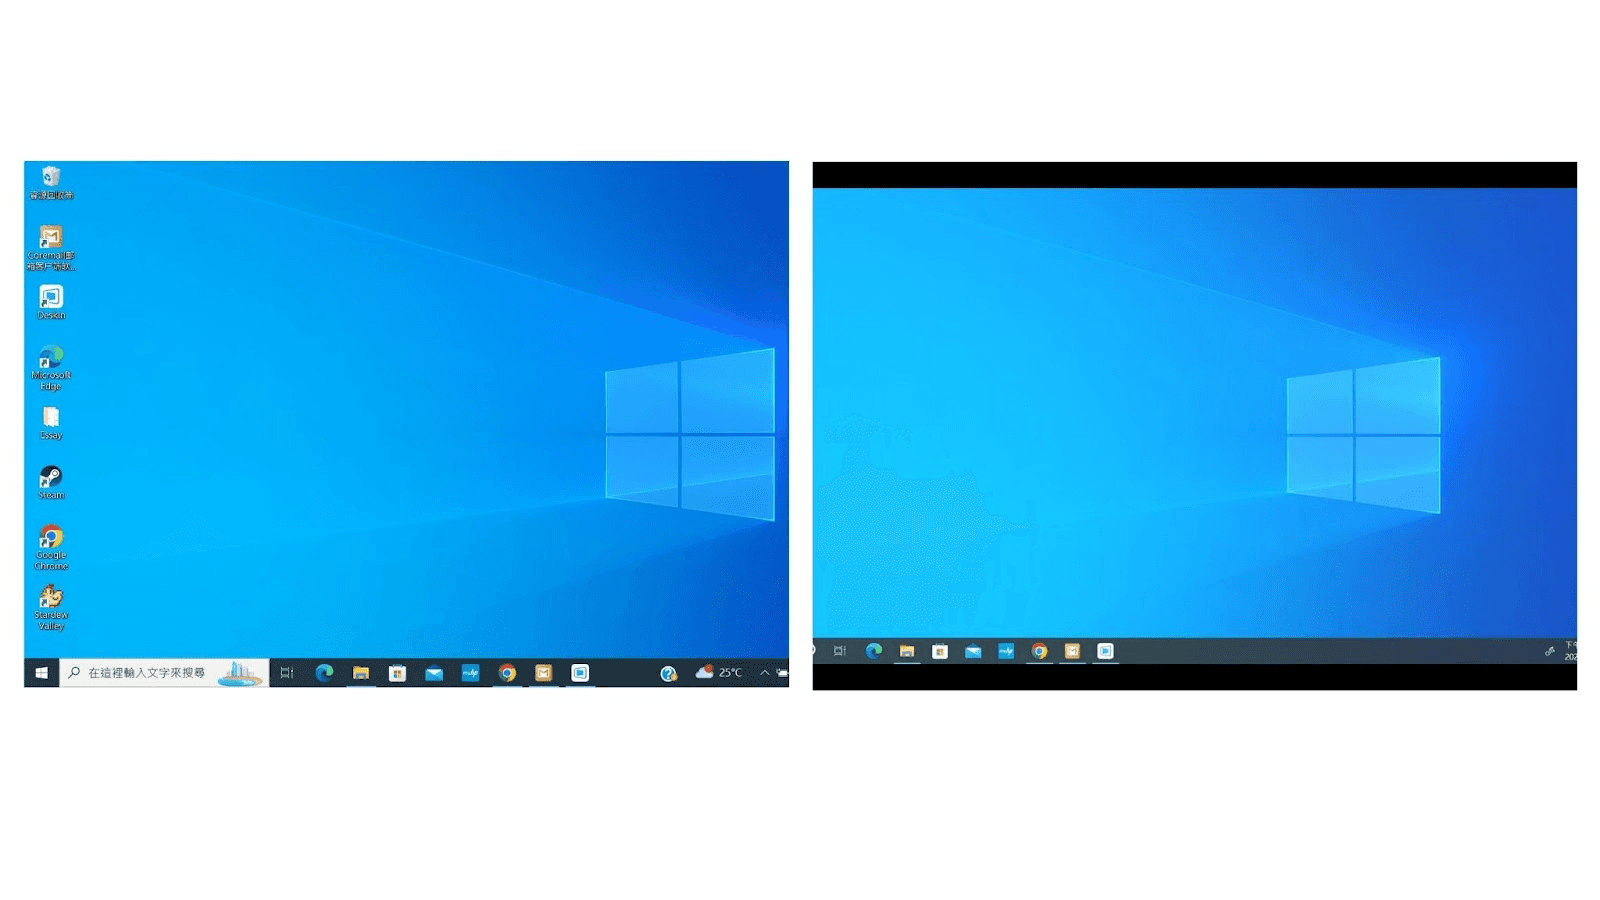
Màn hình máy tính (bên trái) và màn hình iPad (bên phải)
Bước 3: Cài đặt hiển thị hệ thống
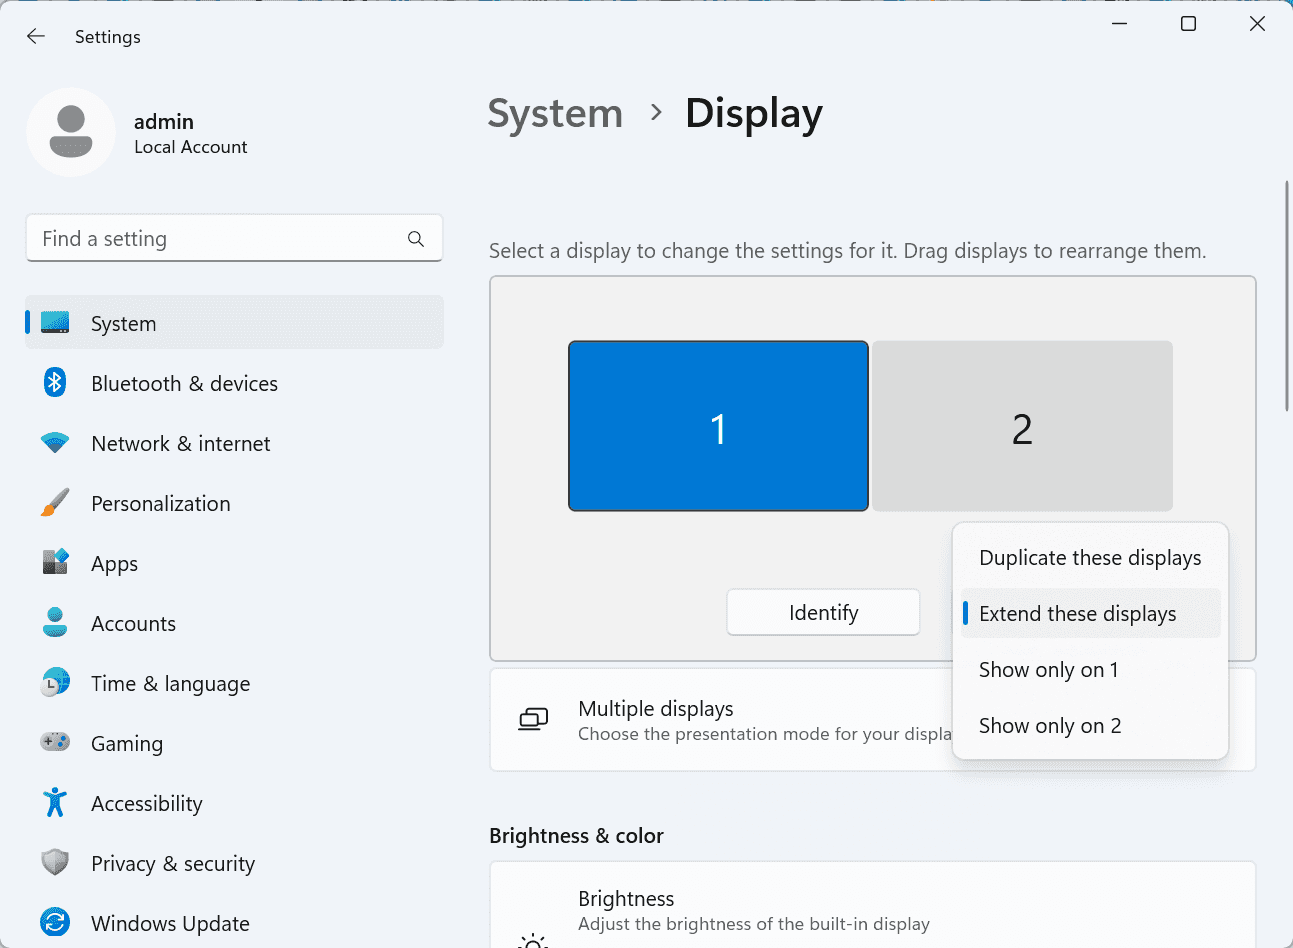
Sau khi mở rộng màn hình, nếu bạn thấy iPad của mình chỉ phản chiếu nội dung trên màn hình máy tính của bạn, vui lòng đi tới Cài đặt Hệ thống Windows>>Cài đặt Màn hình và đặt tùy chọn màn hình thành "Mở rộng các màn hình này".
Phương pháp 2: Sử dụng chức năng "Sidecar" của Apple
Hệ điều hành áp dụng: Mở rộng Mac sang Mac hoặc iPad
Tính năng tích hợp Sidecar của Apple cho phép bạn sử dụng iPad như một màn hình ngoài cho MacBook và iMac.
Yêu cầu:
1. Hai thiết bị nên đăng nhập vào cùng một Apple ID hoặc nằm trên cùng một mạng.
2. Cả hai thiết bị đều phải bật Bluetooth, Wi-Fi và khoảng cách không được vượt quá 10 mét (khoảng 10 mét).
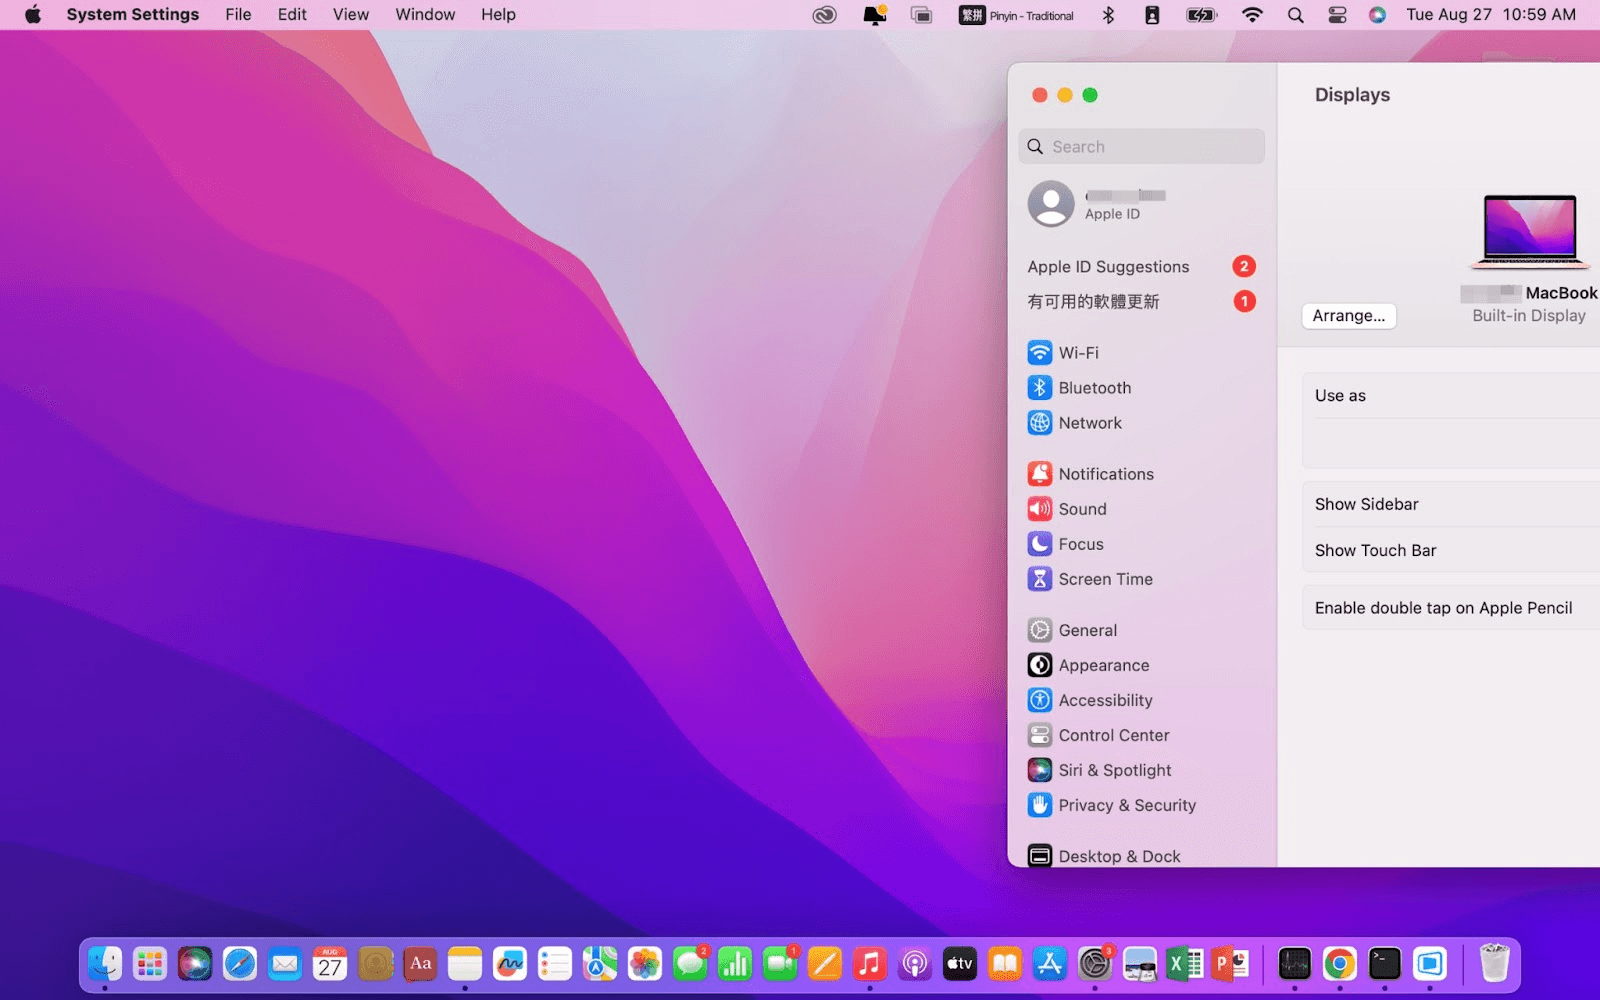
Bước 1 Cài đặt Hiển thị
Mở Cài đặt Hệ thống Mac >> Nhấp vào "Hiển thị" trong thanh bên >> Nhấp vào menu pop up " + " ở bên phải và chọn iPad của bạn.
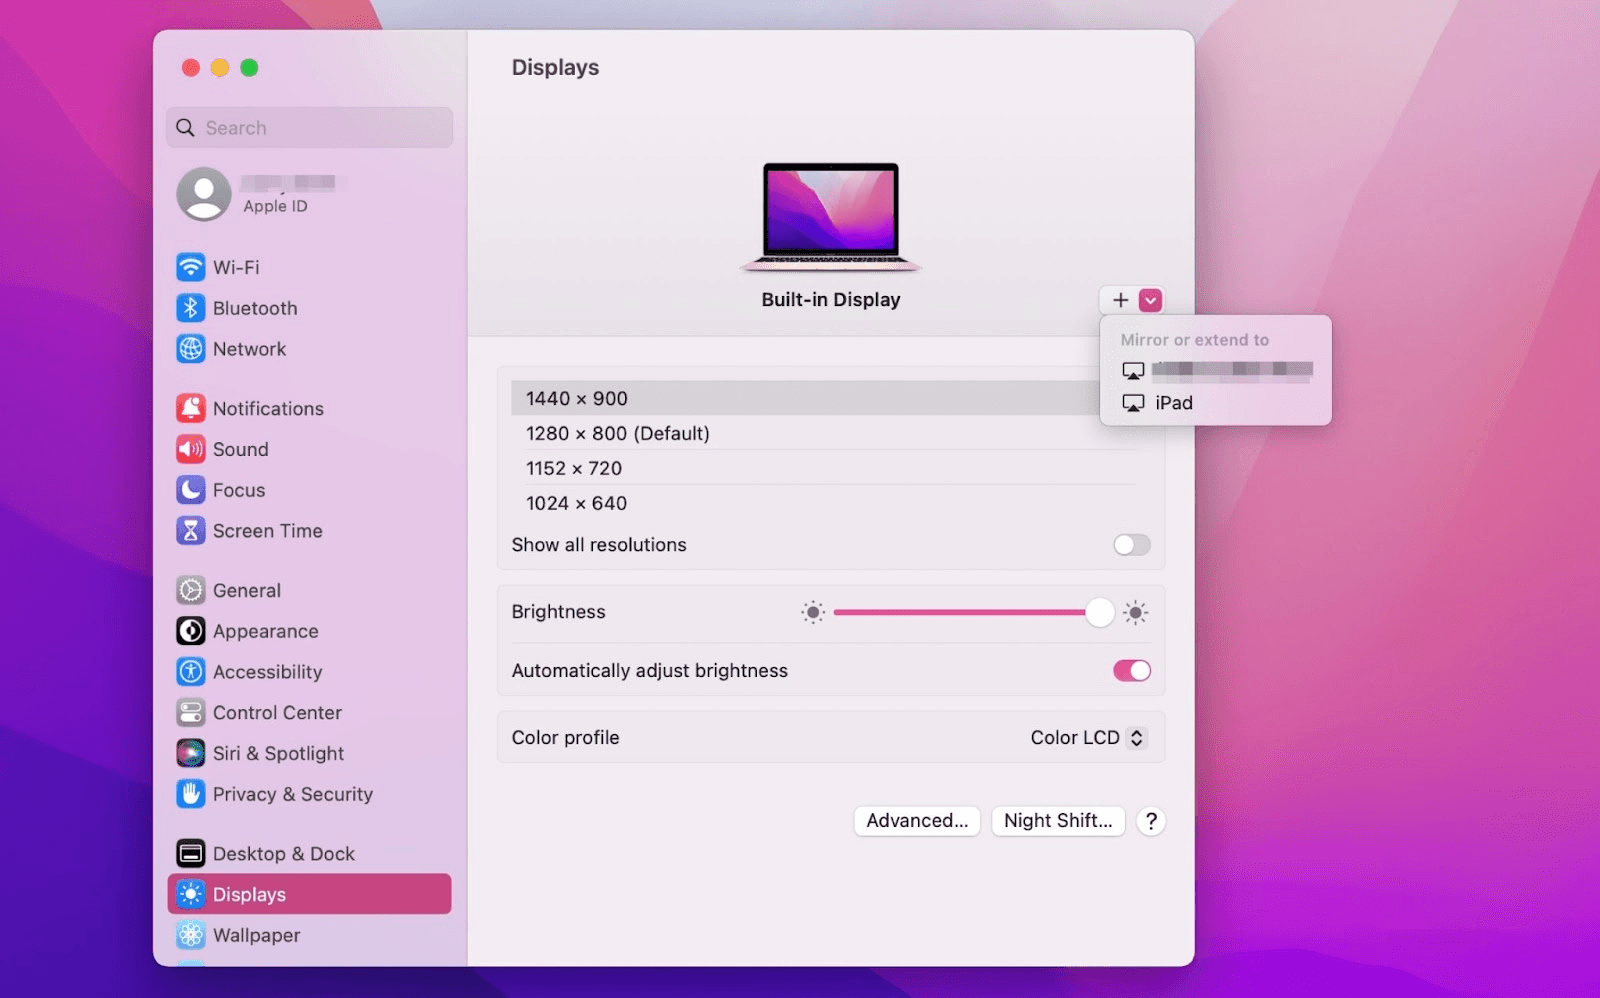
Chọn iPad, thay đổi cài đặt Sử dụng thành "Màn hình Mở rộng". Kiểm tra cài đặt Airplay trên thanh công cụ ở trên cùng của mac và đặt iPad thành "Sử dụng Như Màn hình Tách biệt".

Bước 2: Mở rộng màn hình
Sau khi hoàn tất các cài đặt, iPad của bạn sẽ trở thành màn hình thứ hai cho Mac của bạn. Bạn có thể kéo các cửa sổ từ Mac sang iPad một cách mượt mà. Bạn cũng có thể sử dụng thanh bên trên iPad hoặc thay đổi vị trí của thanh bên trong cài đặt hiển thị hệ thống.
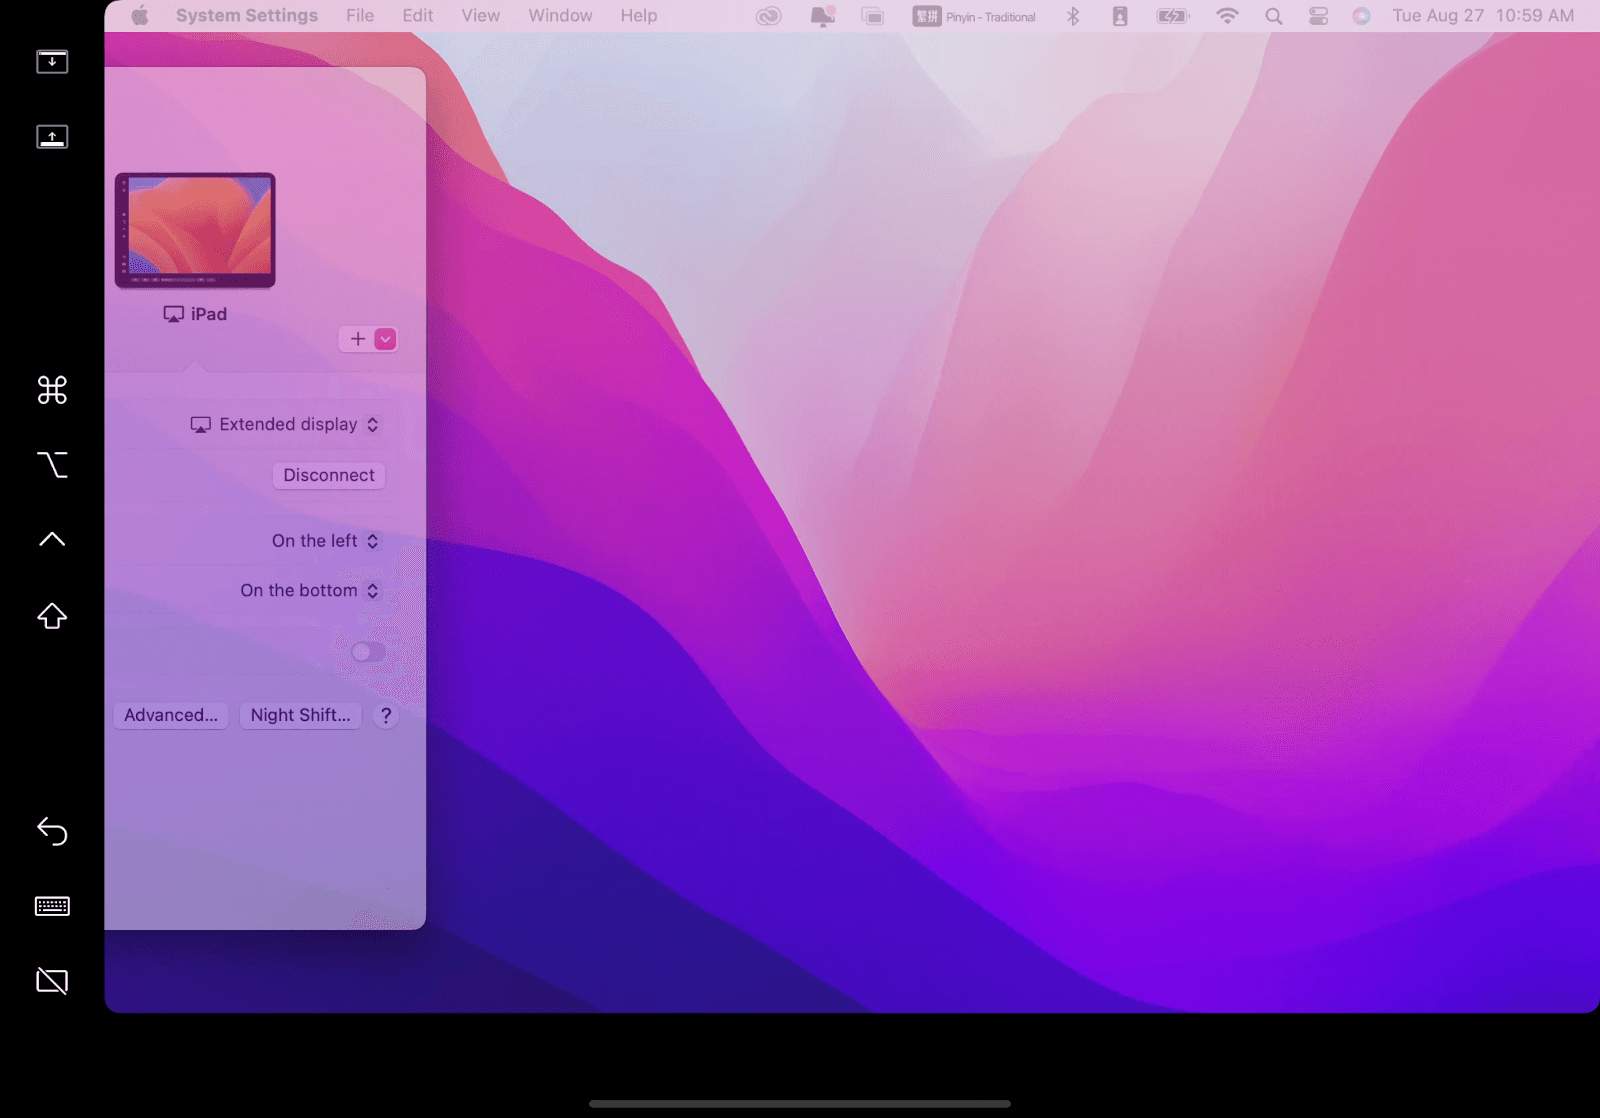
Màn hình MacBook (Bên trái) và màn hình iPad (Bên phải)
Phương pháp 3: Sử dụng chức năng “Màn hình thứ hai” của Samsung
Hệ điều hành áp dụng: Mở rộng máy tính Windows của bạn sang máy tính bảng Samsung
Bước 1: Vào trang "Màn hình thứ hai"
Đi tới "Bảng Cài đặt Nhanh" bằng cách vuốt xuống từ đầu màn hình máy tính bảng, nhấn vào biểu tượng "Màn hình Thứ Hai" để vào.
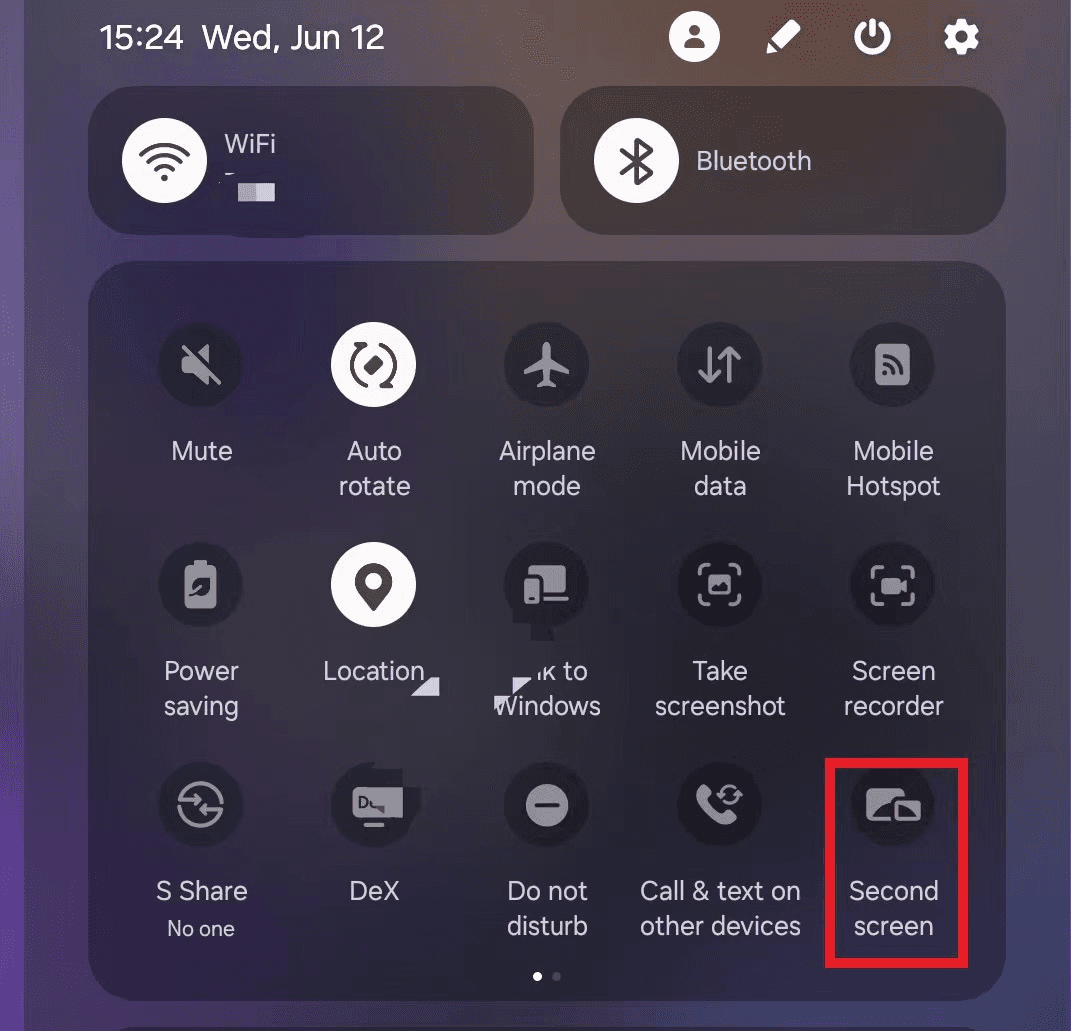
Thực hiện theo hướng dẫn của hệ thống để chọn chế độ kết nối mong muốn "Vẽ/Giải trí" hoặc "Video". Sau đó, ở lại trên trang "Màn hình thứ hai" và đừng rời đi.
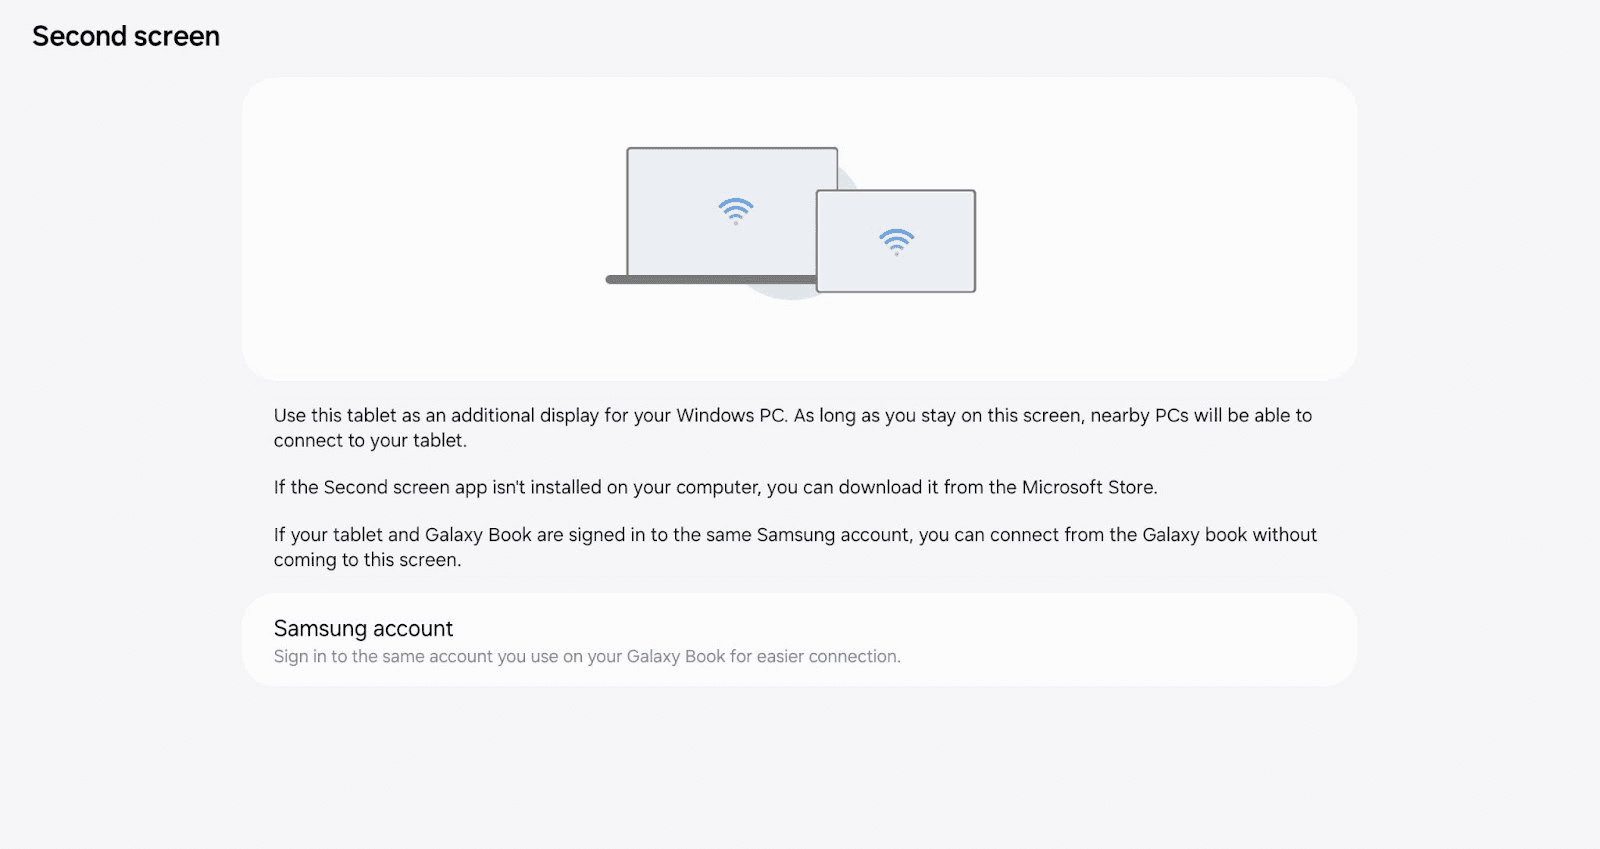
Bước 2: Mở rộng màn hình máy tính tới máy tính bảng
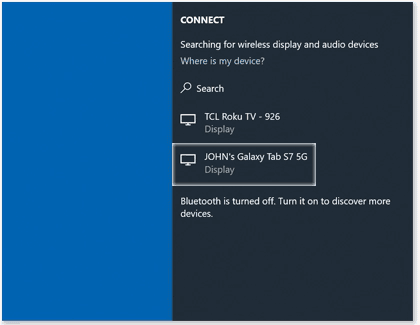
Nhấn "Windows+K" trên máy tính của bạn và chọn máy tính bảng mà bạn muốn mở rộng trong danh sách thiết bị hiện lên. (Giữ máy tính bảng của bạn trên trang Màn hình thứ hai và máy tính bảng của bạn sẽ xuất hiện trong danh sách thiết bị)
Kết luận
Bài viết này giới thiệu 6 mẹo về cách sử dụng màn hình kép để cải thiện hiệu quả công việc và cũng giới thiệu 3 phương pháp để bạn có thể biến máy tính bảng đang có thành một "màn hình thứ hai" cho máy tính Windows hoặc Mac mà không cần mua thêm màn hình kép. Điều này đặc biệt hữu ích cho những người cần thực hiện nhiều nhiệm vụ hoặc sử dụng nhiều ứng dụng cùng một lúc. Hãy thử ngay!
Việc làm việc với màn hình kép có thể cải thiện đáng kể hiệu quả công việc, đặc biệt là đối với các nhà thiết kế và kỹ sư cần thực hiện nhiều nhiệm vụ cùng lúc. Nhưng bạn có thực sự cần phải mua thêm một màn hình không? Màn hình tốt nhất có thể đã ở xung quanh bạn – đó chính là một chiếc máy tính bảng! Bài viết này sẽ giới thiệu cho bạn 6 mẹo tăng năng suất với màn hình kép và cách biến máy tính bảng của bạn thành một màn hình phụ cho máy tính của bạn.
6 mẹo tăng năng suất với màn hình kép:
1. Tiết kiệm thời gian chuyển đổi cửa sổ
Khi thực hiện nhiều nhiệm vụ, bạn có thể mở các cửa sổ riêng biệt trên hai màn hình, tiết kiệm thời gian chuyển đổi qua lại giữa các cửa sổ và làm cho không gian làm việc của bạn gọn gàng và ngăn nắp hơn.
2. Cải thiện hiệu suất hiệu đính
Khi hiệu đính văn bản hoặc dữ liệu, việc sử dụng chức năng chia màn hình có thể khiến văn bản trở nên quá nhỏ để đọc rõ ràng. Bạn có thể mở tệp trên hai màn hình tương ứng để đảm bảo kích thước phông chữ vừa đủ và bố cục nhất quán, giúp công việc hiệu đính dễ dàng hơn.
3. Cải thiện hiệu suất chỉnh sửa
Khi chỉnh sửa, bạn có thể mở phần mềm chỉnh sửa trên màn hình chính và tìm kiếm video và tài liệu trên màn hình còn lại để nâng cao hiệu suất chỉnh sửa.
4. Cái nhìn tốt hơn với hướng dọc
Khi bạn cần duyệt video hoặc tệp ở định dạng dọc, bạn có thể chuyển đổi hai màn hình thành hướng dọc để thoải mái hình ảnh hơn.
5. Biên soạn trong khi tham khảo thông tin
Dù bạn là sinh viên viết luận hay biên tập viên viết bài, bạn có thể cần tìm kiếm thông tin khi viết. Màn hình kép cho phép bạn làm cả hai việc này cùng một lúc, bạn cũng có thể sao chép và dán giữa 2 màn hình một cách liền mạch.
6. Phóng to chi tiết
Khi bạn đang làm việc thiết kế hoặc photoshop, bạn có thể phóng to một phần của hình ảnh trên màn hình thứ hai để xem chi tiết tốt hơn. Bạn cũng có thể di chuyển một không gian làm việc nhất định trong PS hoặc PR sang màn hình thứ hai, phóng to nó để sử dụng thuận tiện hơn.
Cách biến iPad/máy tính bảng Android thành một màn hình thứ hai?
Phương pháp 1: Sử dụng phần mềm điều khiển từ xa DeskIn
Hệ điều hành áp dụng: Hỗ trợ mở rộng màn hình đa nền tảng giữa máy tính Windows, iOS, Mac, Android và máy tính bảng
Bước 1: Tải xuống và đăng ký tài khoản DeskIn
Tải xuống DeskIn trên PC và iPad của bạn, đăng ký tài khoản miễn phí và đăng nhập riêng biệt
Chú ý: Nếu bạn đang đăng nhập trên một thiết bị mới lần đầu tiên, bạn cần xác minh email để đảm bảo an toàn cho tài khoản của bạn.
Bước 2: Mở rộng màn hình
Trên DeskIn trên máy tính >> Đi tới "Quản lý Màn hình" >> Nhấp vào "Mở rộng màn hình của tôi"
Chọn thiết bị bạn muốn mở rộng màn hình và nhấn "Bắt đầu Mở rộng".
Sau khi kết nối thành công, iPad của bạn sẽ trở thành màn hình thứ hai cho Windows/Mac, và các cửa sổ có thể được di chuyển linh hoạt giữa hai màn hình.
Màn hình máy tính (bên trái) và màn hình iPad (bên phải)
Bước 3: Cài đặt hiển thị hệ thống
Sau khi mở rộng màn hình, nếu bạn thấy iPad của mình chỉ phản chiếu nội dung trên màn hình máy tính của bạn, vui lòng đi tới Cài đặt Hệ thống Windows>>Cài đặt Màn hình và đặt tùy chọn màn hình thành "Mở rộng các màn hình này".
Phương pháp 2: Sử dụng chức năng "Sidecar" của Apple
Hệ điều hành áp dụng: Mở rộng Mac sang Mac hoặc iPad
Tính năng tích hợp Sidecar của Apple cho phép bạn sử dụng iPad như một màn hình ngoài cho MacBook và iMac.
Yêu cầu:
1. Hai thiết bị nên đăng nhập vào cùng một Apple ID hoặc nằm trên cùng một mạng.
2. Cả hai thiết bị đều phải bật Bluetooth, Wi-Fi và khoảng cách không được vượt quá 10 mét (khoảng 10 mét).
Bước 1 Cài đặt Hiển thị
Mở Cài đặt Hệ thống Mac >> Nhấp vào "Hiển thị" trong thanh bên >> Nhấp vào menu pop up " + " ở bên phải và chọn iPad của bạn.
Chọn iPad, thay đổi cài đặt Sử dụng thành "Màn hình Mở rộng". Kiểm tra cài đặt Airplay trên thanh công cụ ở trên cùng của mac và đặt iPad thành "Sử dụng Như Màn hình Tách biệt".
Bước 2: Mở rộng màn hình
Sau khi hoàn tất các cài đặt, iPad của bạn sẽ trở thành màn hình thứ hai cho Mac của bạn. Bạn có thể kéo các cửa sổ từ Mac sang iPad một cách mượt mà. Bạn cũng có thể sử dụng thanh bên trên iPad hoặc thay đổi vị trí của thanh bên trong cài đặt hiển thị hệ thống.
Màn hình MacBook (Bên trái) và màn hình iPad (Bên phải)
Phương pháp 3: Sử dụng chức năng “Màn hình thứ hai” của Samsung
Hệ điều hành áp dụng: Mở rộng máy tính Windows của bạn sang máy tính bảng Samsung
Bước 1: Vào trang "Màn hình thứ hai"
Đi tới "Bảng Cài đặt Nhanh" bằng cách vuốt xuống từ đầu màn hình máy tính bảng, nhấn vào biểu tượng "Màn hình Thứ Hai" để vào.
Thực hiện theo hướng dẫn của hệ thống để chọn chế độ kết nối mong muốn "Vẽ/Giải trí" hoặc "Video". Sau đó, ở lại trên trang "Màn hình thứ hai" và đừng rời đi.
Bước 2: Mở rộng màn hình máy tính tới máy tính bảng
Nhấn "Windows+K" trên máy tính của bạn và chọn máy tính bảng mà bạn muốn mở rộng trong danh sách thiết bị hiện lên. (Giữ máy tính bảng của bạn trên trang Màn hình thứ hai và máy tính bảng của bạn sẽ xuất hiện trong danh sách thiết bị)
Kết luận
Bài viết này giới thiệu 6 mẹo về cách sử dụng màn hình kép để cải thiện hiệu quả công việc và cũng giới thiệu 3 phương pháp để bạn có thể biến máy tính bảng đang có thành một "màn hình thứ hai" cho máy tính Windows hoặc Mac mà không cần mua thêm màn hình kép. Điều này đặc biệt hữu ích cho những người cần thực hiện nhiều nhiệm vụ hoặc sử dụng nhiều ứng dụng cùng một lúc. Hãy thử ngay!