Search Docs…
Chúng ta thường sử dụng email để chuyển các tập tin, nhưng hầu hết các dịch vụ email từ chối nhận các tệp đính kèm vượt quá một kích thước nhất định—khẳng định rằng điều này giúp ngăn chặn các cuộc tấn công độc hại và giảm thiểu rủi ro. Do đó, khi gửi các tệp lớn, bạn không thể dựa vào phương pháp phổ biến này. Tuy nhiên, còn có những cách khác dễ dàng tương đương để chuyển các tệp lớn. Bài viết này sẽ giới thiệu cho bạn ba trong số đó.
Phương pháp 1: Nén tệp trước khi gửi email
Các nhà cung cấp email thường có giới hạn về kích thước của các tệp đính kèm có thể được tải lên. Ví dụ, Gmail chỉ cho phép các tệp đính kèm có kích thước dưới 25MB, và Outlook chỉ cho phép các tệp đính kèm dưới 20MB. Để khắc phục điều này, bạn có thể nén tệp lớn xuống kích thước đáp ứng yêu cầu về tệp đính kèm của email.
Ưu điểm: Nén các tệp là cách đơn giản và trực tiếp nhất để giảm kích thước tệp cho phù hợp với các giới hạn đính kèm, cho phép bạn chuyển các tệp lớn qua email một cách trực tiếp.
Hạn chế: Nén tệp thường chỉ giảm kích thước tệp xuống khoảng một nửa so với kích thước ban đầu. Như vậy, phương pháp này chỉ phù hợp khi tệp vượt quá giới hạn kích thước một khoảng nhỏ. Ngoài ra, việc nén và giải nén các tệp có thể dẫn đến mất mát hoặc hư hỏng dữ liệu. Chẳng hạn, chất lượng của video hoặc hình ảnh có thể bị suy giảm.
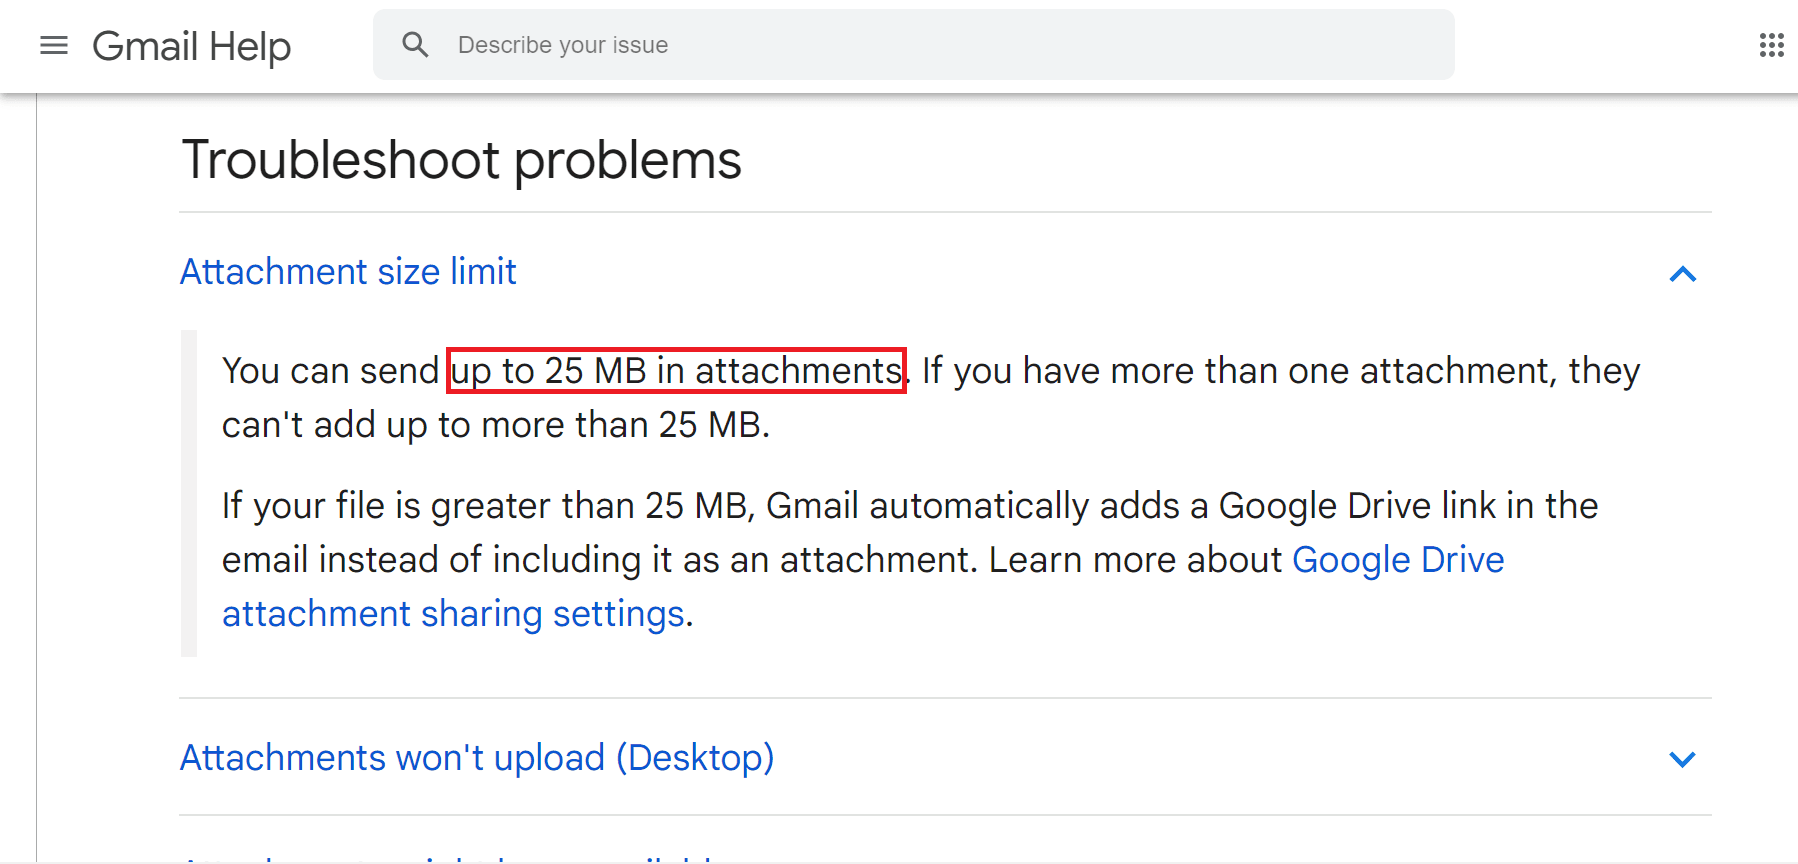
Gmail chỉ cho phép các tệp đính kèm dưới 25MB
Phương pháp 2: Sử dụng ổ đĩa đám mây để chuyển các tệp
Ngoài việc gửi qua email, còn có những cách khác để gửi các tệp lớn, chẳng hạn như sử dụng Ổ đĩa Đám mây.
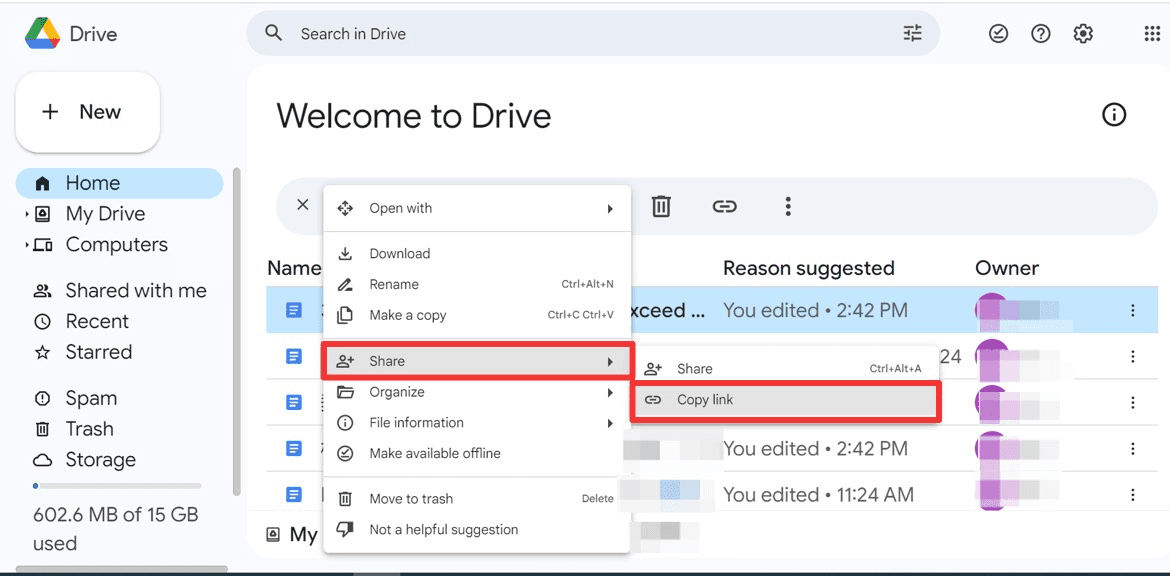
Tải các tệp lớn lên một ổ đĩa đám mây (chẳng hạn như Google Drive), sau đó bạn có thể gửi chúng cho bên kia bằng cách chia sẻ liên kết.
Ưu điểm: Phương pháp này đảm bảo chất lượng tệp tốt hơn và cho phép bạn gửi các tệp lớn hơn rất nhiều so với các tệp đính kèm email. Thêm vào đó, các tệp được lưu trữ trên đám mây và có thể được truy cập bất cứ lúc nào.
Hạn chế:1. Không gian lưu trữ miễn phí trên Google Drive giới hạn ở 15GB. Các ổ đĩa đám mây khác cũng có giới hạn lưu trữ miễn phí tương tự, vì vậy bạn có thể cần mua thêm không gian lưu trữ nếu cần.
2.Vì tệp phải được tải lên đám mây trước và sau đó được tải xuống bởi người nhận, thời gian chuyển đổi phụ thuộc vào điều kiện mạng của bạn. Quá trình này có thể mất nhiều thời gian hơn so với các phương pháp truyền thống.
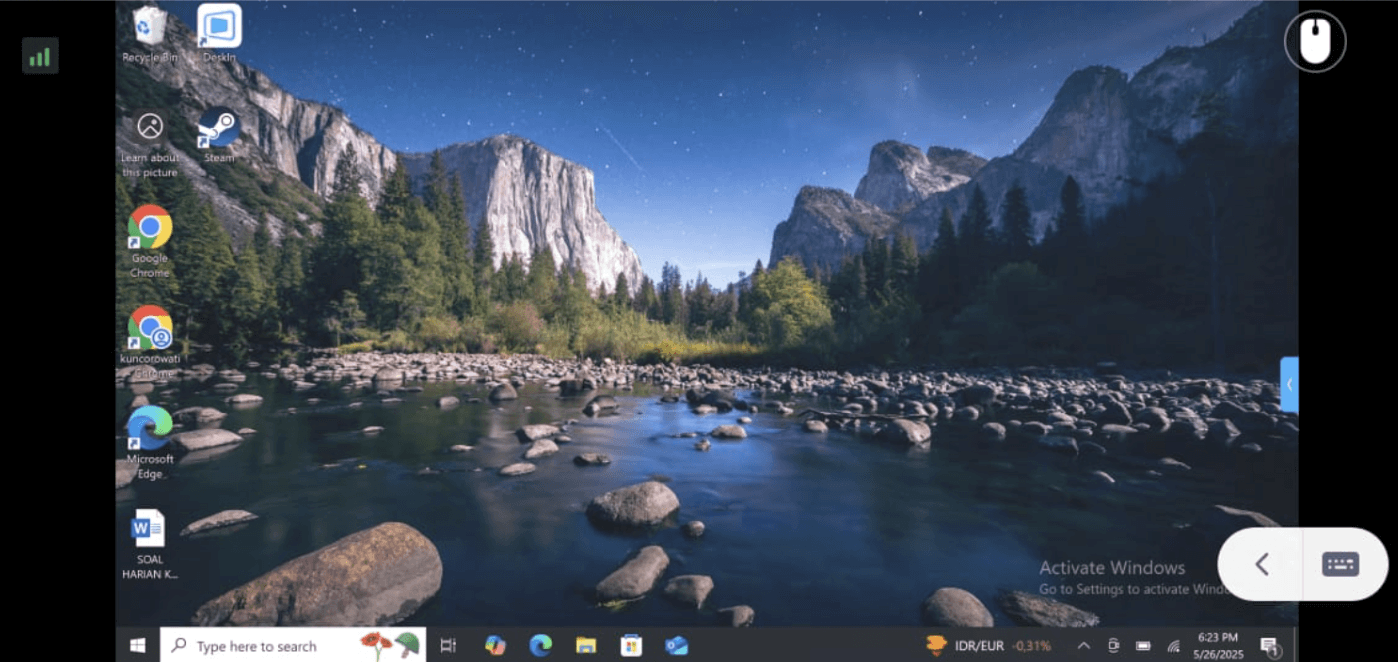
Phương pháp 3: Sử dụng phần mềm từ xa DeskIn để chuyển các tệp (Khuyến nghị nhất)
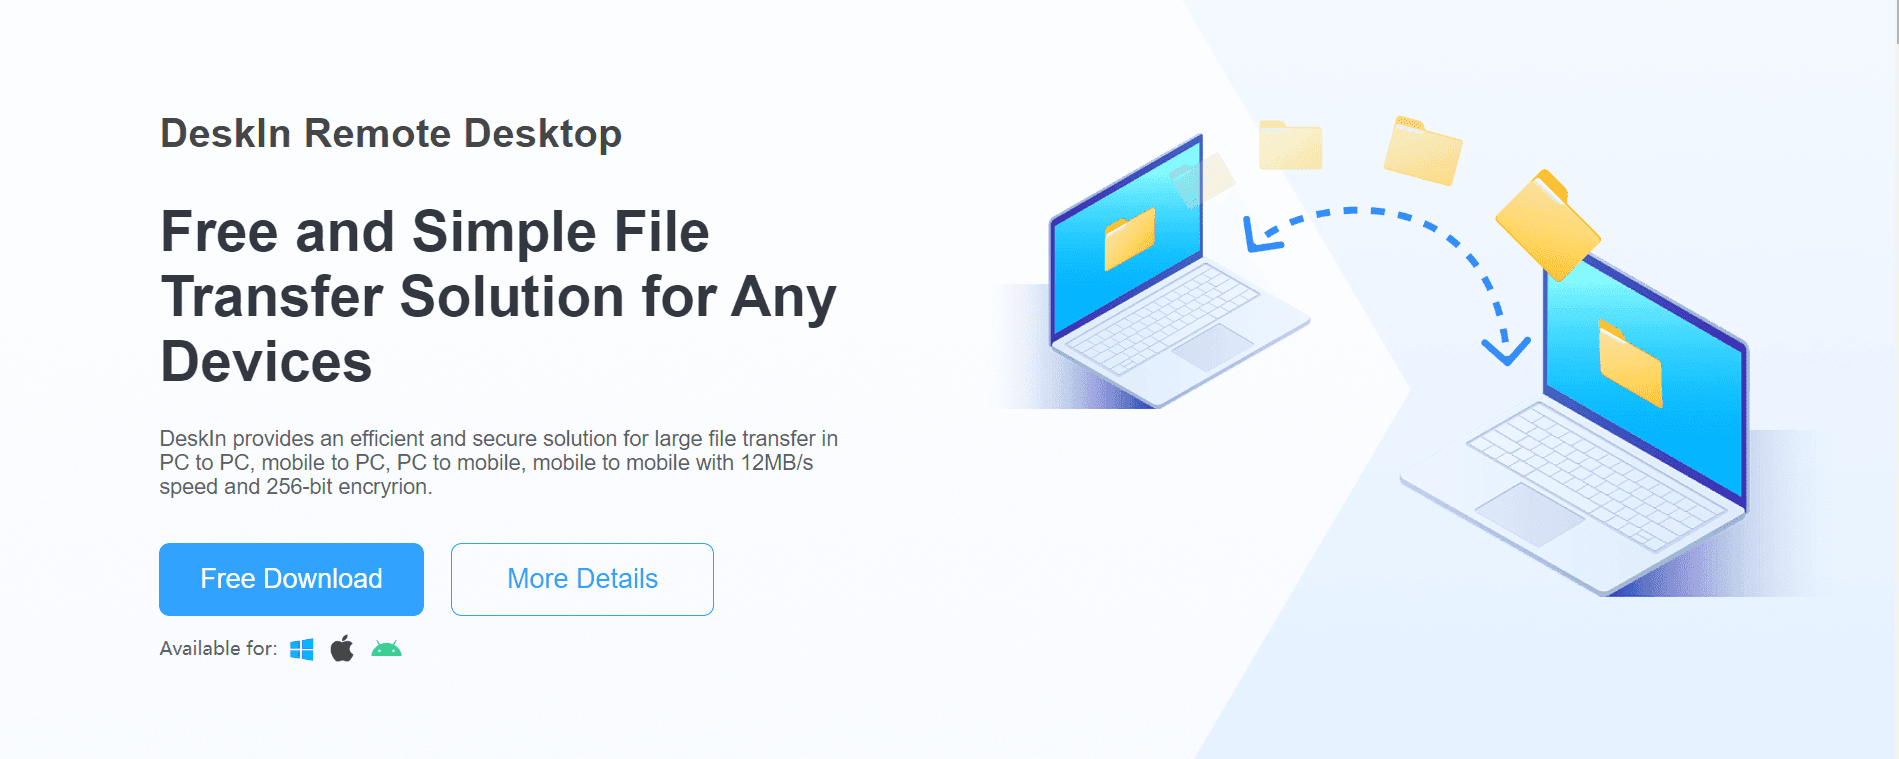
Hiện tại, hầu hết các phần mềm từ xa trên thị trường đều hỗ trợ chuyển tệp. DeskIn đã cải tiến chức năng chuyển tệp tiêu chuẩn để cung cấp trải nghiệm tốt hơn:
1. Phiên bản miễn phí đã hỗ trợ chuyển tệp mà không có giới hạn về kích thước và số lượng;
2. Tốc độ truyền nhanh, lên đến 12MB/s;
3. Đảm bảo các tệp của bạn vẫn bí mật và được bảo vệ khỏi truy cập trái phép bằng cách sử dụng mã hoá đầu cuối 256-bit;
4. Không cần phải tải lên hoặc tải xuống các tệp như một ổ đĩa đám mây. Bạn có thể chuyển trực tiếp các tệp từ thiết bị này sang thiết bị khác, tiết kiệm thời gian;
5.DeskIn hỗ trợ chuyển tệp liền mạch giữa các thiết bị khác nhau và hệ điều hành khác nhau. Dù bạn đang sử dụng PC Windows, Mac hay thiết bị di động, DeskIn cho phép bạn dễ dàng chuyển tệp giữa các nền tảng.
Cũng có những rủi ro về an ninh khi sử dụng email để chuyển các tệp. Ngay cả khi bạn nhập một ký tự sai, email của bạn có thể được gửi đến một người khác và không thể rút lại, điều này có thể dễ dàng dẫn đến rò rỉ thông tin. Khi sử dụng DeskIn, bạn cần phải khớp ID thiết bị và mật khẩu, hoặc xác minh không có mật khẩu thủ công từ máy tính của bên kia, điều này tránh việc chuyển cho đối tượng sai.
Làm thế nào để sử dụng DeskIn để chuyển tệp?
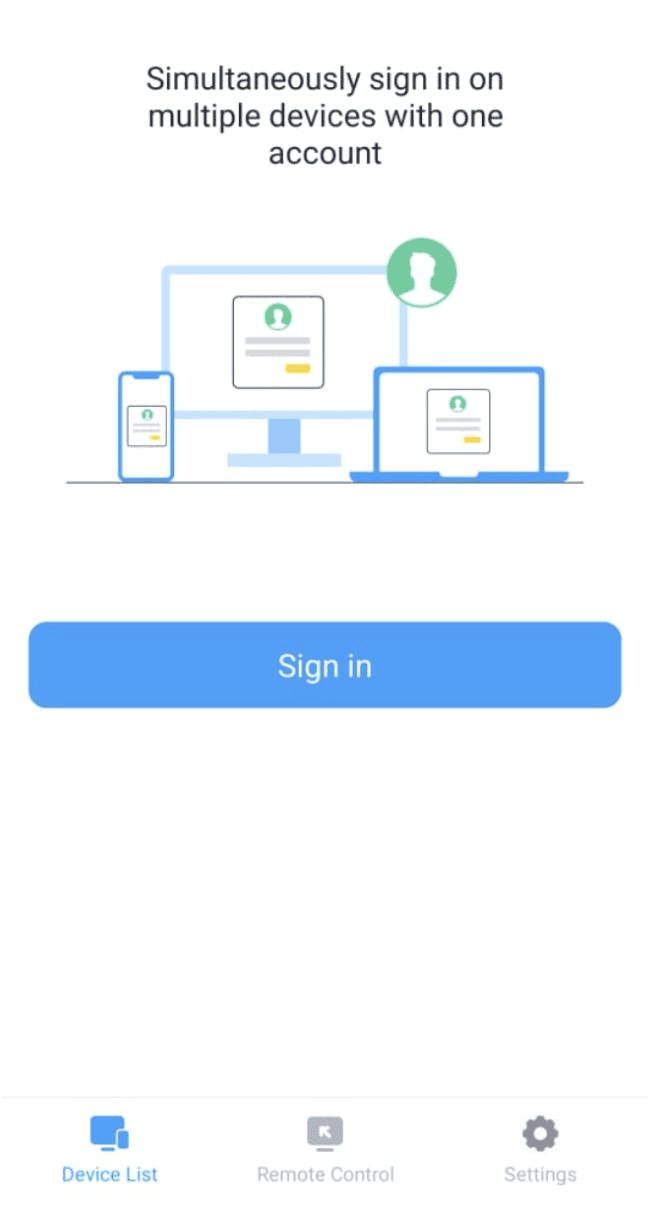
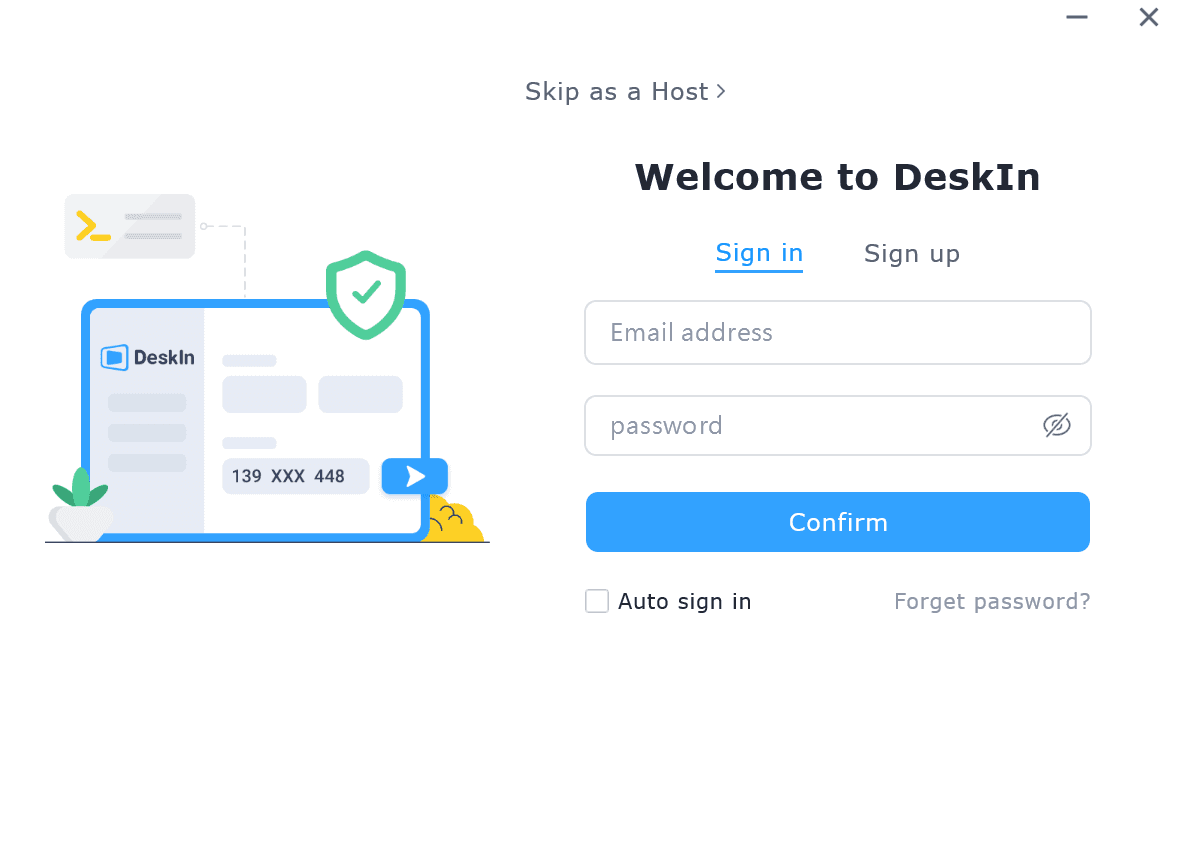
1.Tải DeskIn lần lượt trên thiết bị truyền và thiết bị truyền đích, đăng ký một tài khoản miễn phí và đăng nhập riêng biệt. Nếu bạn đang đăng nhập trên một thiết bị mới lần đầu tiên, bạn cần phải vào email đăng ký để hoàn tất xác minh.
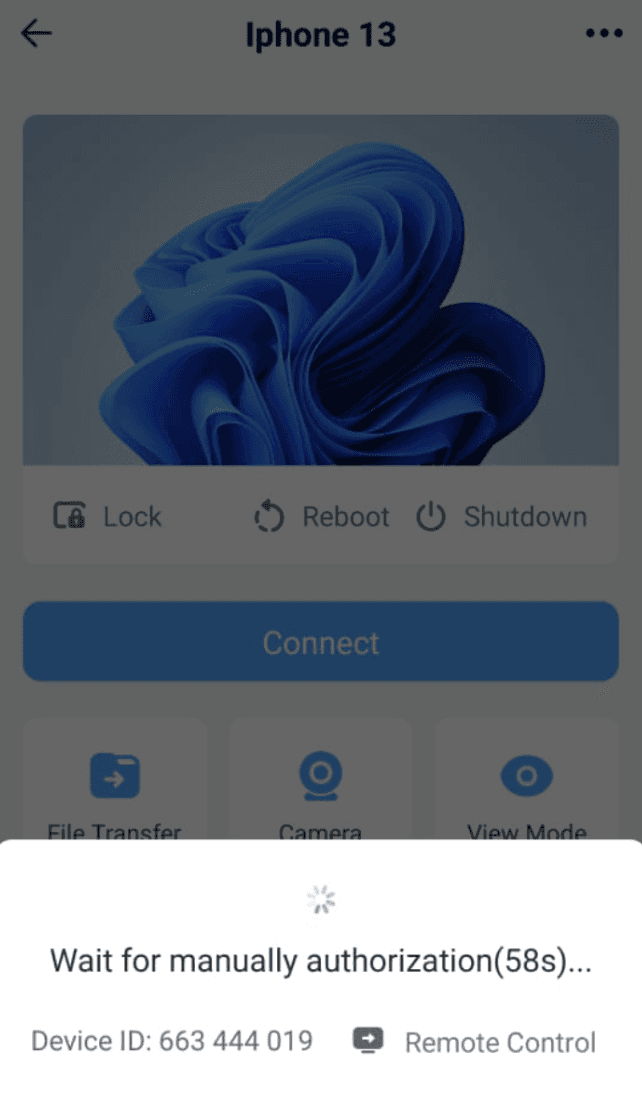
2. Sau khi đăng nhập thành công, nhập mã thiết bị của thiết bị cần chuyển, chọn chuyển tệp, sau đó chọn Kết nối. Bạn có thể chọn phương pháp mật khẩu hoặc xác minh không có mật khẩu thủ công.
3.Ba cách tìm “Chuyển Tệp” trên PC:
(1) Trong "Điều Khiển Từ Xa">>”Điều Khiển Thiết Bị Từ Xa”>>Chọn "Chuyển Tệp">>"Kết Nối".
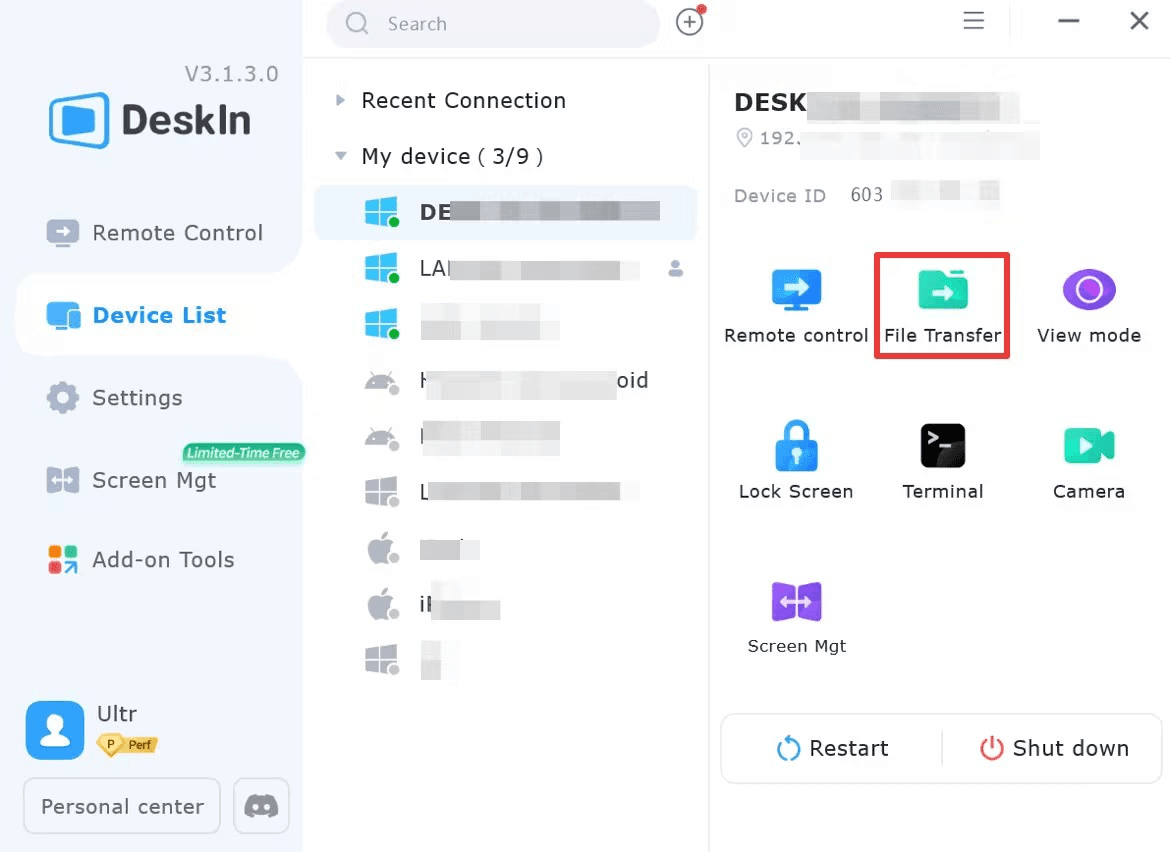
(2) Tìm thiết bị mà bạn muốn chuyển các tệp trong "Danh Sách Thiết Bị" và chọn "Chuyển Tệp" trong khu vực chức năng bên phải.
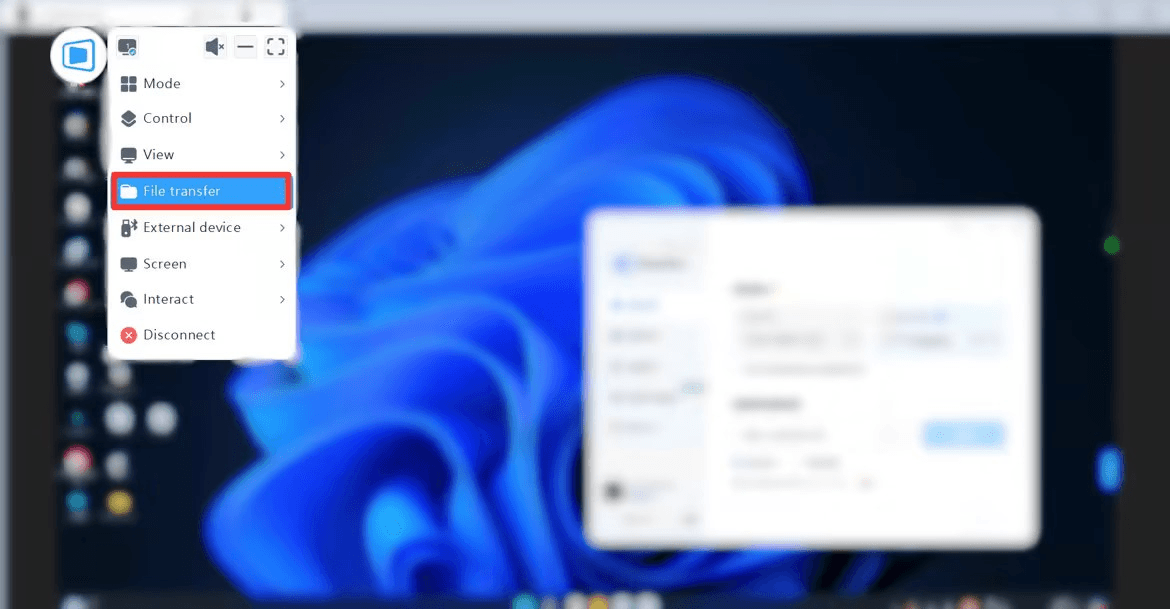
(3) Tìm "Chuyển Tệp" trong thanh công cụ của biểu tượng DeskIn trên trang điều khiển từ xa.
Sau khi tìm thấy "Chuyển Tệp", nhấp để kết nối bằng mật khẩu hoặc xác minh thủ công. Sau khi kết nối thành công, trang chuyển tệp sẽ xuất hiện.

Trong trang chuyển tệp, nhấp vào tệp bạn muốn gửi, chọn vị trí đích cho việc chuyển, và nhấp vào nút "Gửi" trên bên gửi để hoàn tất việc chuyển.
Bạn có thể nhấp “Gửi” hoặc bạn có thể kéo và thả trực tiếp các tệp cần chuyển để hoàn tất việc chuyển.
4.Ba cách tìm "Chuyển Tệp" trên các thiết bị di động:
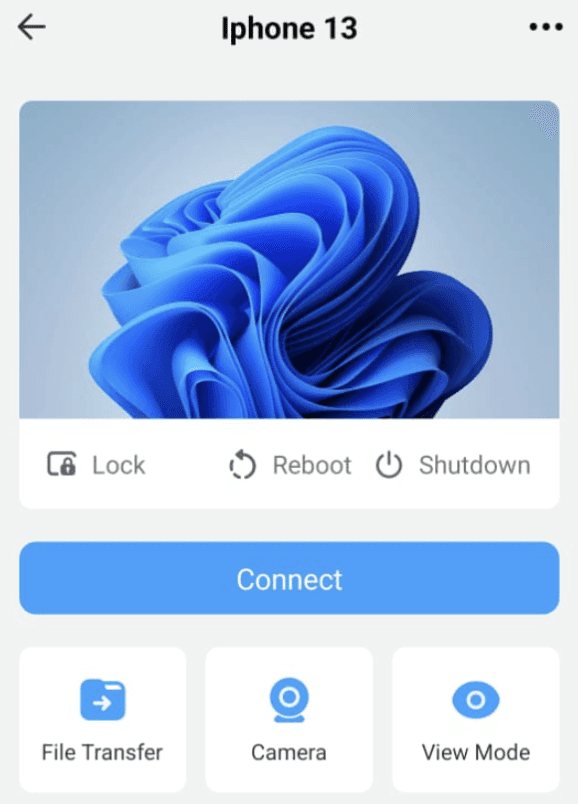
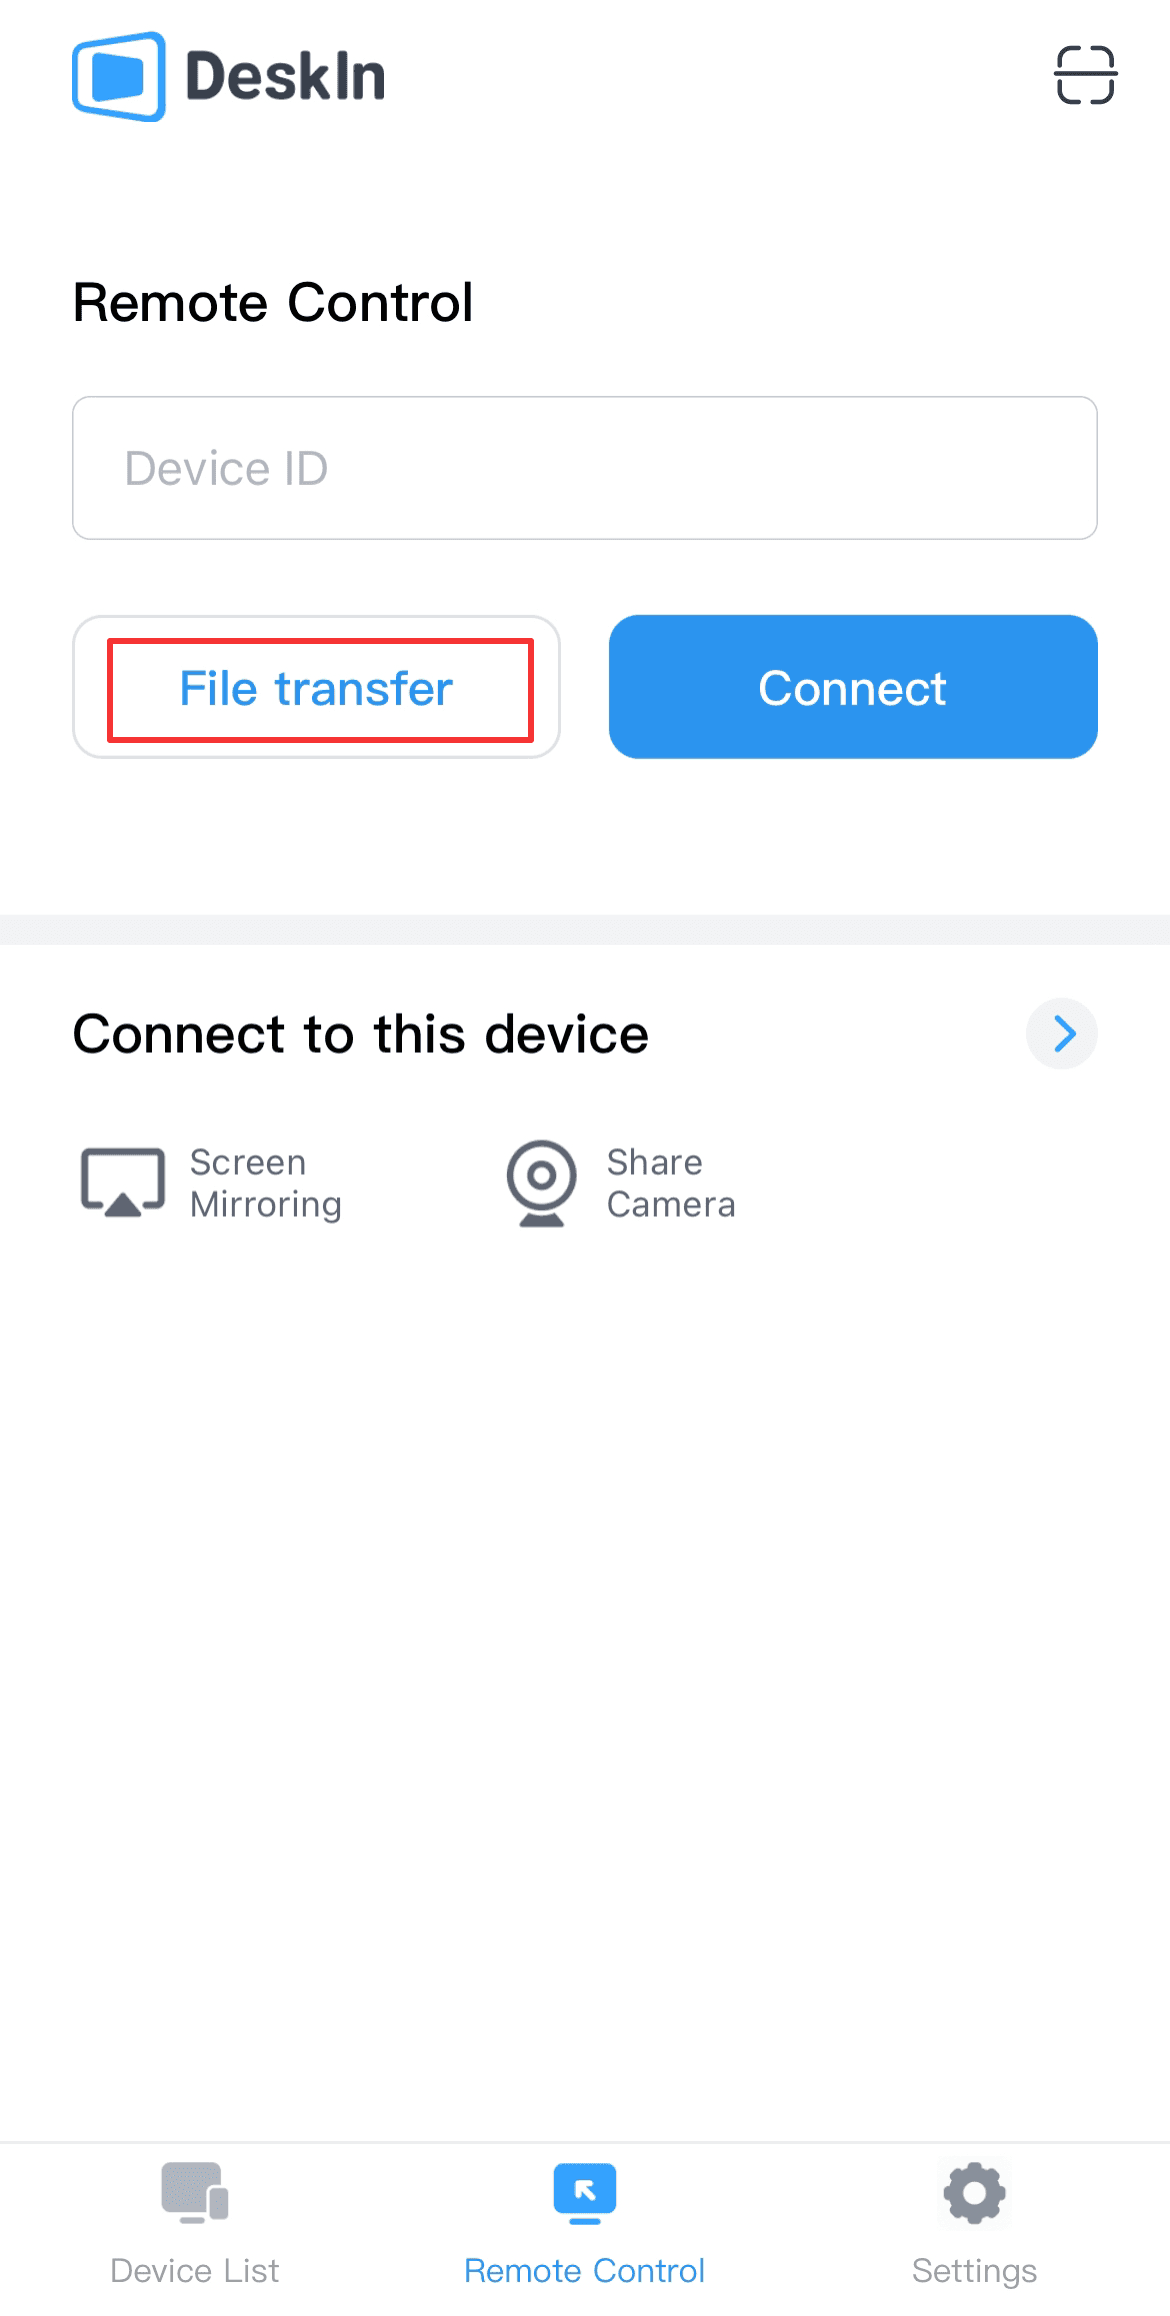
(1) "Điều Khiển Từ Xa" >> ID Thiết Bị điều khiển từ xa >> Chọn "Chuyển Tệp".
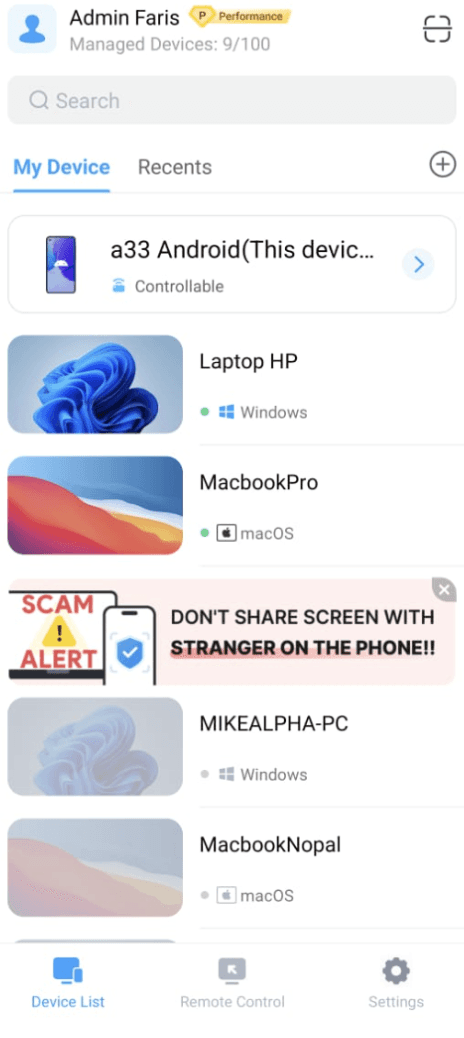
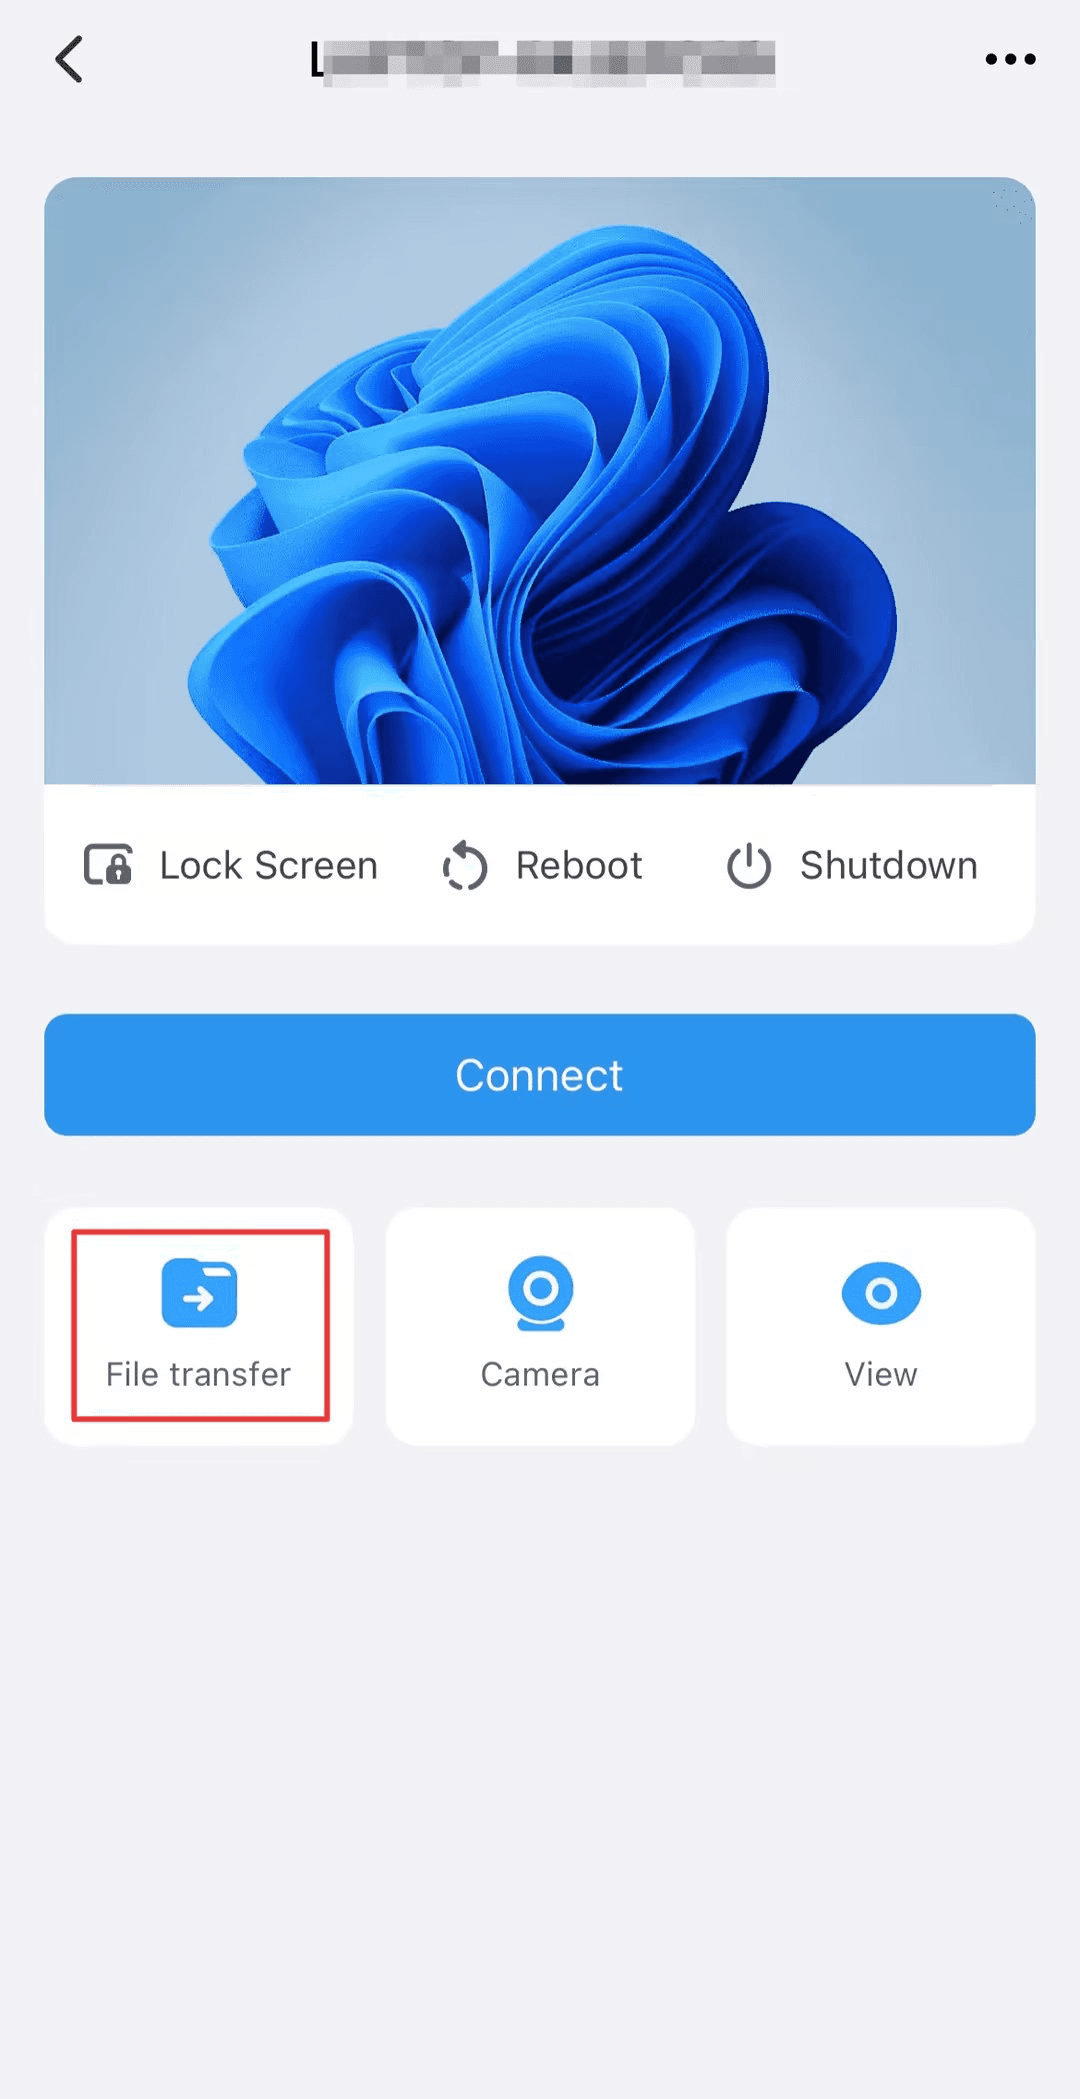
(2) Tìm thiết bị mà bạn muốn chuyển các tệp trong "Danh Sách Thiết Bị", nhấp để vào và chọn "chuyển tệp".
(3) Sau khi kết nối điều khiển từ xa thành công, vào "Tương Tác" >> "Chuyển Tệp".

Sau khi tìm thấy "Chuyển Tệp", nhấp để kết nối bằng mật khẩu hoặc xác minh thủ công. Sau khi kết nối thành công, trang chuyển tệp sẽ xuất hiện.
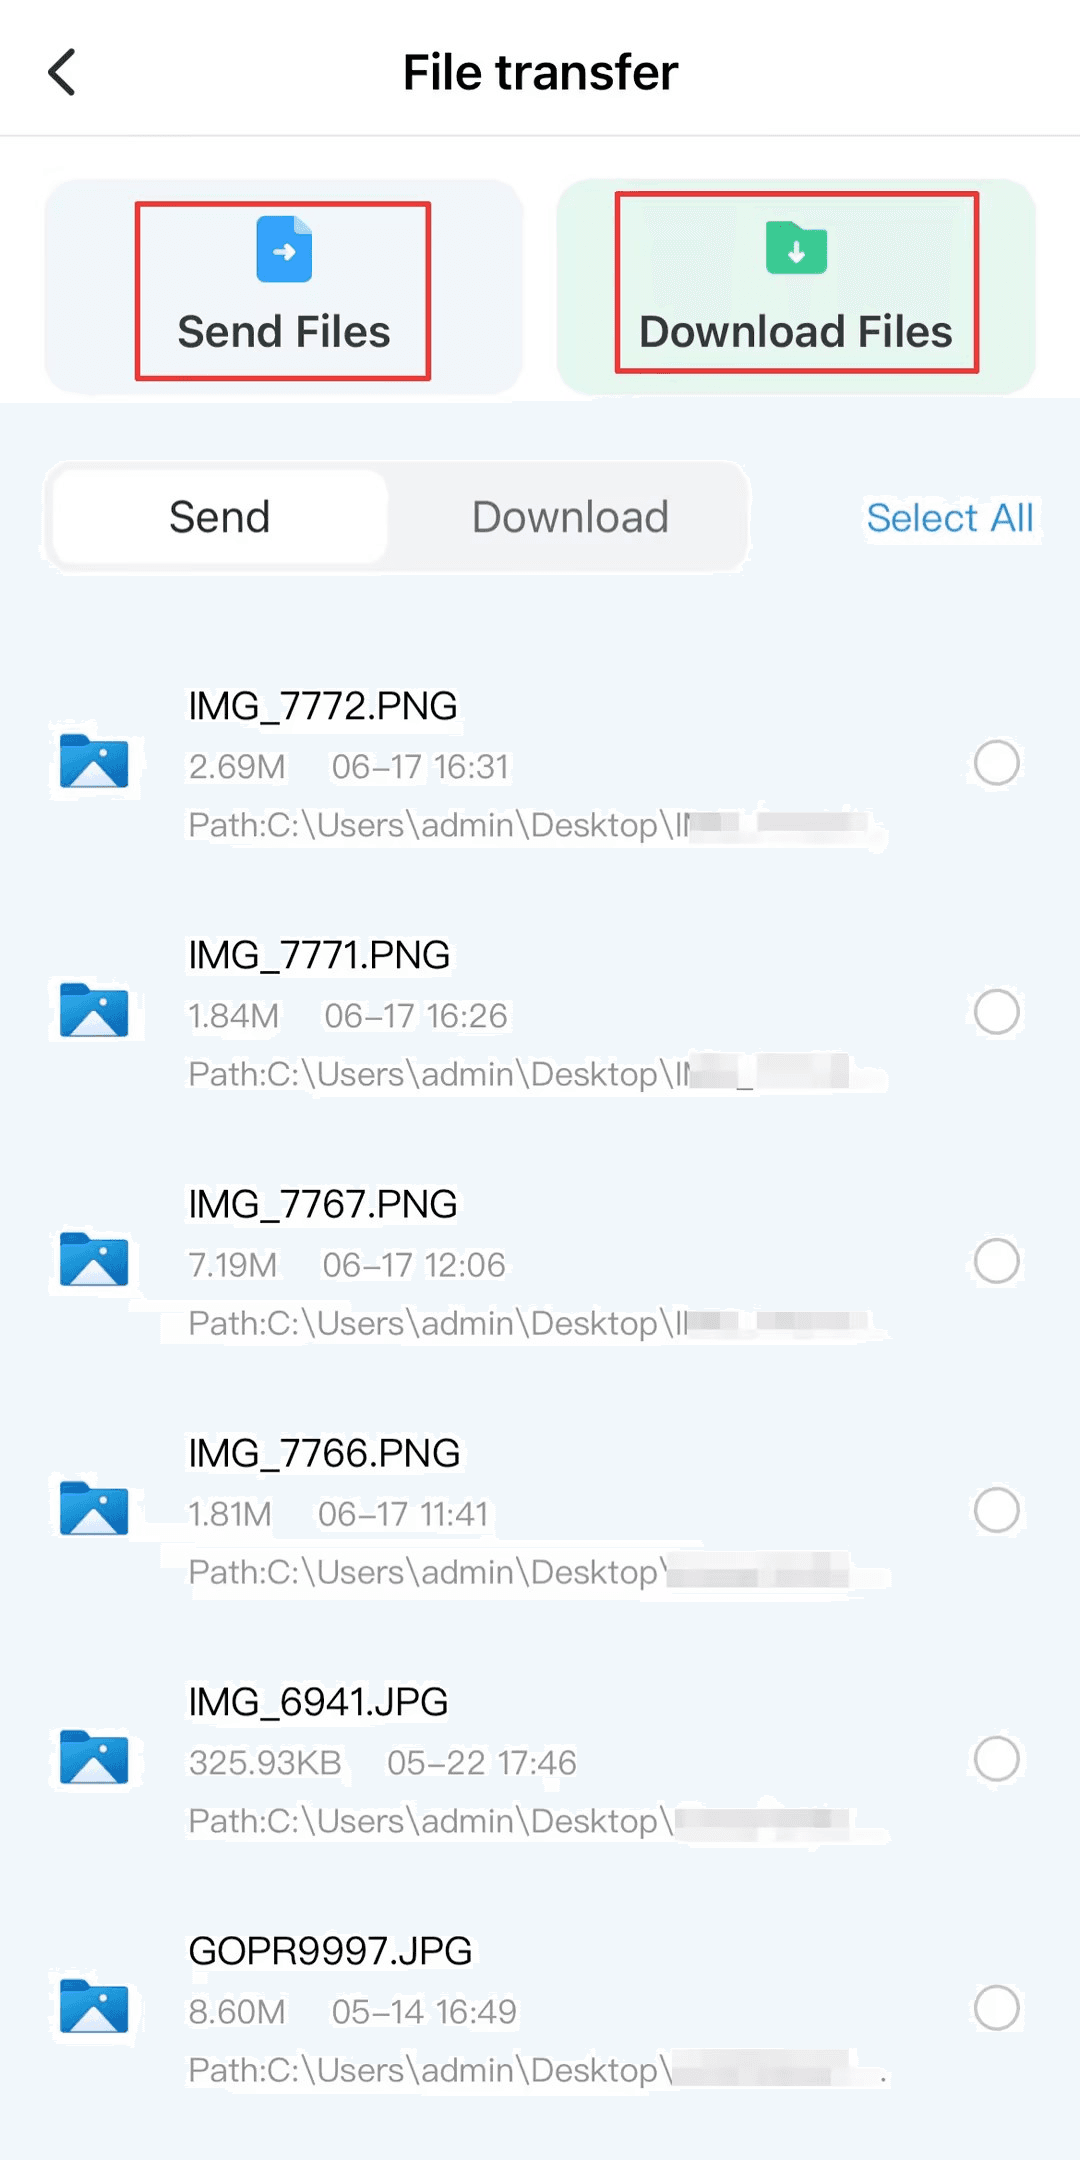
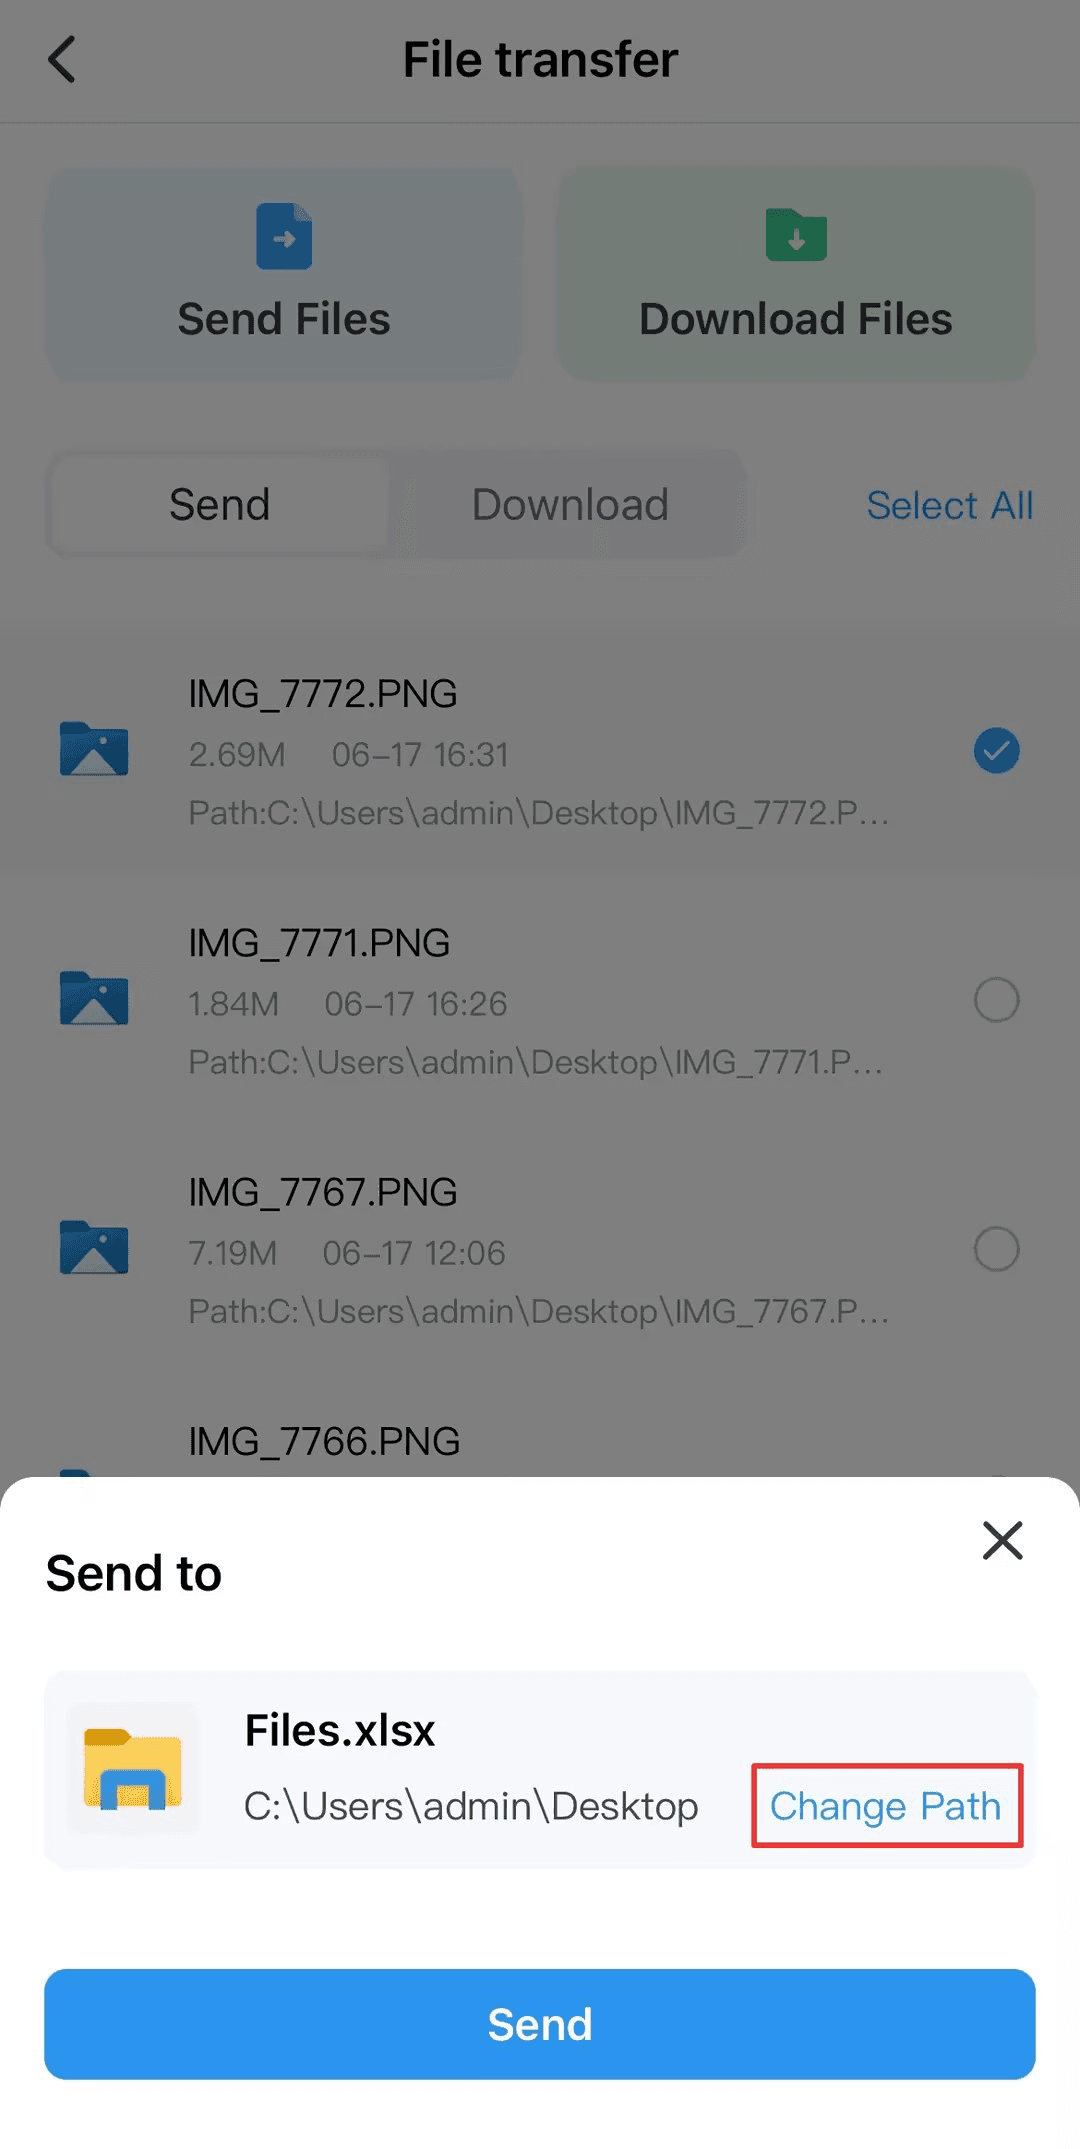
Nhấp "Gửi Tệp", chọn tệp trên thiết bị di động của bạn, "Thay Đổi Đường Dẫn" để chọn vị trí đích cho việc chuyển, và cuối cùng nhấp "Gửi".
Chọn "Tải Tệp" để tải các tệp từ thiết bị từ xa. Chọn tệp bạn muốn tải và nhấp "Tải Xuống".
Kết luận
Bài viết này giới thiệu 3 phương pháp chuyển các tệp lớn và phân tích các ưu điểm và hạn chế của chúng. Được khuyến nghị rằng bạn nên sử dụng phương pháp thứ ba - sử dụng DeskIn để chuyển các tệp. Nó miễn phí và hỗ trợ chuyển đa nền tảng mà không có giới hạn về kích thước và số lượng tệp, tốc độ truyền cao, và bạn không phải hy sinh chất lượng tệp. Đây là lựa chọn lý tưởng cho việc truyền tải các tệp lớn, bạn nên chắc chắn thử nghiệm nó.
Chúng ta thường sử dụng email để chuyển các tập tin, nhưng hầu hết các dịch vụ email từ chối nhận các tệp đính kèm vượt quá một kích thước nhất định—khẳng định rằng điều này giúp ngăn chặn các cuộc tấn công độc hại và giảm thiểu rủi ro. Do đó, khi gửi các tệp lớn, bạn không thể dựa vào phương pháp phổ biến này. Tuy nhiên, còn có những cách khác dễ dàng tương đương để chuyển các tệp lớn. Bài viết này sẽ giới thiệu cho bạn ba trong số đó.
Phương pháp 1: Nén tệp trước khi gửi email
Các nhà cung cấp email thường có giới hạn về kích thước của các tệp đính kèm có thể được tải lên. Ví dụ, Gmail chỉ cho phép các tệp đính kèm có kích thước dưới 25MB, và Outlook chỉ cho phép các tệp đính kèm dưới 20MB. Để khắc phục điều này, bạn có thể nén tệp lớn xuống kích thước đáp ứng yêu cầu về tệp đính kèm của email.
Ưu điểm: Nén các tệp là cách đơn giản và trực tiếp nhất để giảm kích thước tệp cho phù hợp với các giới hạn đính kèm, cho phép bạn chuyển các tệp lớn qua email một cách trực tiếp.
Hạn chế: Nén tệp thường chỉ giảm kích thước tệp xuống khoảng một nửa so với kích thước ban đầu. Như vậy, phương pháp này chỉ phù hợp khi tệp vượt quá giới hạn kích thước một khoảng nhỏ. Ngoài ra, việc nén và giải nén các tệp có thể dẫn đến mất mát hoặc hư hỏng dữ liệu. Chẳng hạn, chất lượng của video hoặc hình ảnh có thể bị suy giảm.
Gmail chỉ cho phép các tệp đính kèm dưới 25MB
Phương pháp 2: Sử dụng ổ đĩa đám mây để chuyển các tệp
Ngoài việc gửi qua email, còn có những cách khác để gửi các tệp lớn, chẳng hạn như sử dụng Ổ đĩa Đám mây.
Tải các tệp lớn lên một ổ đĩa đám mây (chẳng hạn như Google Drive), sau đó bạn có thể gửi chúng cho bên kia bằng cách chia sẻ liên kết.
Ưu điểm: Phương pháp này đảm bảo chất lượng tệp tốt hơn và cho phép bạn gửi các tệp lớn hơn rất nhiều so với các tệp đính kèm email. Thêm vào đó, các tệp được lưu trữ trên đám mây và có thể được truy cập bất cứ lúc nào.
Hạn chế:1. Không gian lưu trữ miễn phí trên Google Drive giới hạn ở 15GB. Các ổ đĩa đám mây khác cũng có giới hạn lưu trữ miễn phí tương tự, vì vậy bạn có thể cần mua thêm không gian lưu trữ nếu cần.
2.Vì tệp phải được tải lên đám mây trước và sau đó được tải xuống bởi người nhận, thời gian chuyển đổi phụ thuộc vào điều kiện mạng của bạn. Quá trình này có thể mất nhiều thời gian hơn so với các phương pháp truyền thống.
Phương pháp 3: Sử dụng phần mềm từ xa DeskIn để chuyển các tệp (Khuyến nghị nhất)
Hiện tại, hầu hết các phần mềm từ xa trên thị trường đều hỗ trợ chuyển tệp. DeskIn đã cải tiến chức năng chuyển tệp tiêu chuẩn để cung cấp trải nghiệm tốt hơn:
1. Phiên bản miễn phí đã hỗ trợ chuyển tệp mà không có giới hạn về kích thước và số lượng;
2. Tốc độ truyền nhanh, lên đến 12MB/s;
3. Đảm bảo các tệp của bạn vẫn bí mật và được bảo vệ khỏi truy cập trái phép bằng cách sử dụng mã hoá đầu cuối 256-bit;
4. Không cần phải tải lên hoặc tải xuống các tệp như một ổ đĩa đám mây. Bạn có thể chuyển trực tiếp các tệp từ thiết bị này sang thiết bị khác, tiết kiệm thời gian;
5.DeskIn hỗ trợ chuyển tệp liền mạch giữa các thiết bị khác nhau và hệ điều hành khác nhau. Dù bạn đang sử dụng PC Windows, Mac hay thiết bị di động, DeskIn cho phép bạn dễ dàng chuyển tệp giữa các nền tảng.
Cũng có những rủi ro về an ninh khi sử dụng email để chuyển các tệp. Ngay cả khi bạn nhập một ký tự sai, email của bạn có thể được gửi đến một người khác và không thể rút lại, điều này có thể dễ dàng dẫn đến rò rỉ thông tin. Khi sử dụng DeskIn, bạn cần phải khớp ID thiết bị và mật khẩu, hoặc xác minh không có mật khẩu thủ công từ máy tính của bên kia, điều này tránh việc chuyển cho đối tượng sai.
Làm thế nào để sử dụng DeskIn để chuyển tệp?
1.Tải DeskIn lần lượt trên thiết bị truyền và thiết bị truyền đích, đăng ký một tài khoản miễn phí và đăng nhập riêng biệt. Nếu bạn đang đăng nhập trên một thiết bị mới lần đầu tiên, bạn cần phải vào email đăng ký để hoàn tất xác minh.
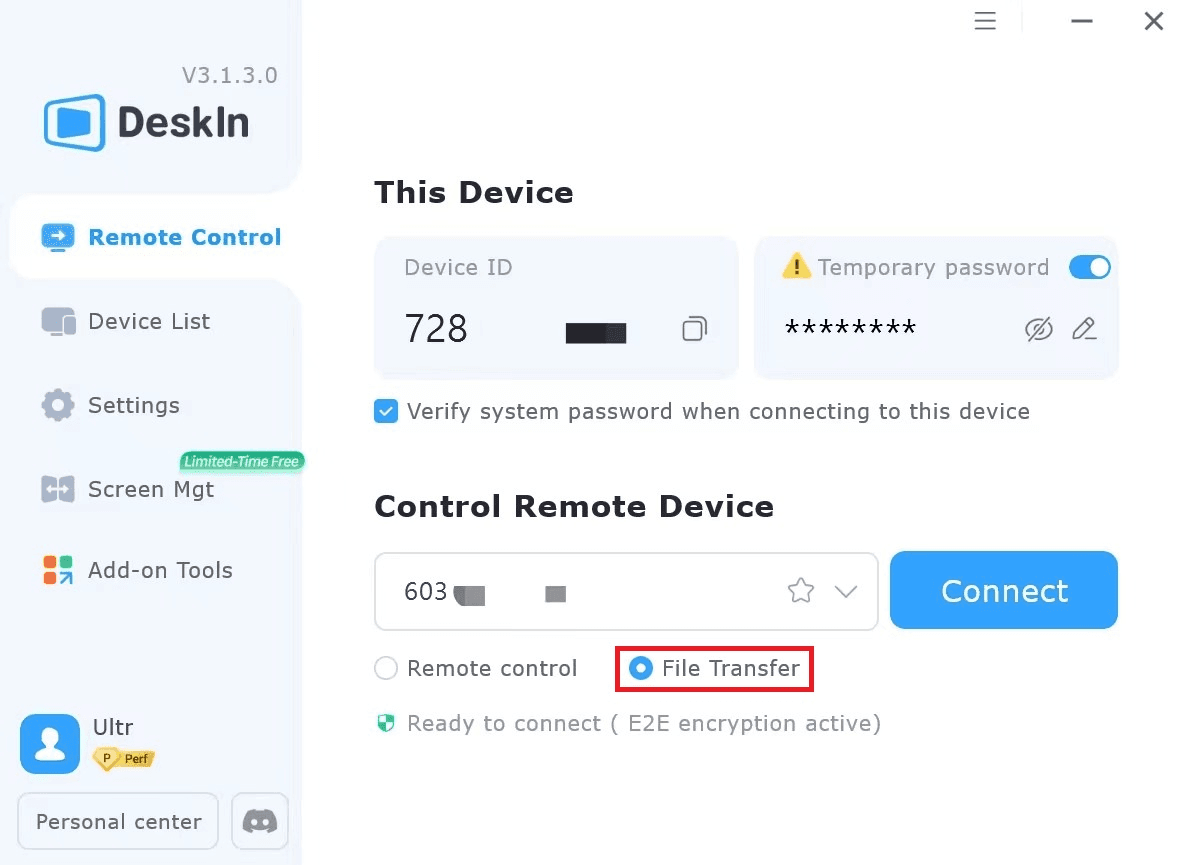
2. Sau khi đăng nhập thành công, nhập mã thiết bị của thiết bị cần chuyển, chọn chuyển tệp, sau đó chọn Kết nối. Bạn có thể chọn phương pháp mật khẩu hoặc xác minh không có mật khẩu thủ công.
3.Ba cách tìm “Chuyển Tệp” trên PC:
(1) Trong "Điều Khiển Từ Xa">>”Điều Khiển Thiết Bị Từ Xa”>>Chọn "Chuyển Tệp">>"Kết Nối".
(2) Tìm thiết bị mà bạn muốn chuyển các tệp trong "Danh Sách Thiết Bị" và chọn "Chuyển Tệp" trong khu vực chức năng bên phải.
(3) Tìm "Chuyển Tệp" trong thanh công cụ của biểu tượng DeskIn trên trang điều khiển từ xa.
Sau khi tìm thấy "Chuyển Tệp", nhấp để kết nối bằng mật khẩu hoặc xác minh thủ công. Sau khi kết nối thành công, trang chuyển tệp sẽ xuất hiện.
Trong trang chuyển tệp, nhấp vào tệp bạn muốn gửi, chọn vị trí đích cho việc chuyển, và nhấp vào nút "Gửi" trên bên gửi để hoàn tất việc chuyển.
Bạn có thể nhấp “Gửi” hoặc bạn có thể kéo và thả trực tiếp các tệp cần chuyển để hoàn tất việc chuyển.
4.Ba cách tìm "Chuyển Tệp" trên các thiết bị di động:
(1) "Điều Khiển Từ Xa" >> ID Thiết Bị điều khiển từ xa >> Chọn "Chuyển Tệp".
(2) Tìm thiết bị mà bạn muốn chuyển các tệp trong "Danh Sách Thiết Bị", nhấp để vào và chọn "chuyển tệp".
(3) Sau khi kết nối điều khiển từ xa thành công, vào "Tương Tác" >> "Chuyển Tệp".
Sau khi tìm thấy "Chuyển Tệp", nhấp để kết nối bằng mật khẩu hoặc xác minh thủ công. Sau khi kết nối thành công, trang chuyển tệp sẽ xuất hiện.
Nhấp "Gửi Tệp", chọn tệp trên thiết bị di động của bạn, "Thay Đổi Đường Dẫn" để chọn vị trí đích cho việc chuyển, và cuối cùng nhấp "Gửi".
Chọn "Tải Tệp" để tải các tệp từ thiết bị từ xa. Chọn tệp bạn muốn tải và nhấp "Tải Xuống".
Kết luận
Bài viết này giới thiệu 3 phương pháp chuyển các tệp lớn và phân tích các ưu điểm và hạn chế của chúng. Được khuyến nghị rằng bạn nên sử dụng phương pháp thứ ba - sử dụng DeskIn để chuyển các tệp. Nó miễn phí và hỗ trợ chuyển đa nền tảng mà không có giới hạn về kích thước và số lượng tệp, tốc độ truyền cao, và bạn không phải hy sinh chất lượng tệp. Đây là lựa chọn lý tưởng cho việc truyền tải các tệp lớn, bạn nên chắc chắn thử nghiệm nó.