Search Docs…
3 Cách để kết nối Mac với PC chia sẻ màn hình Máy tính từ xa
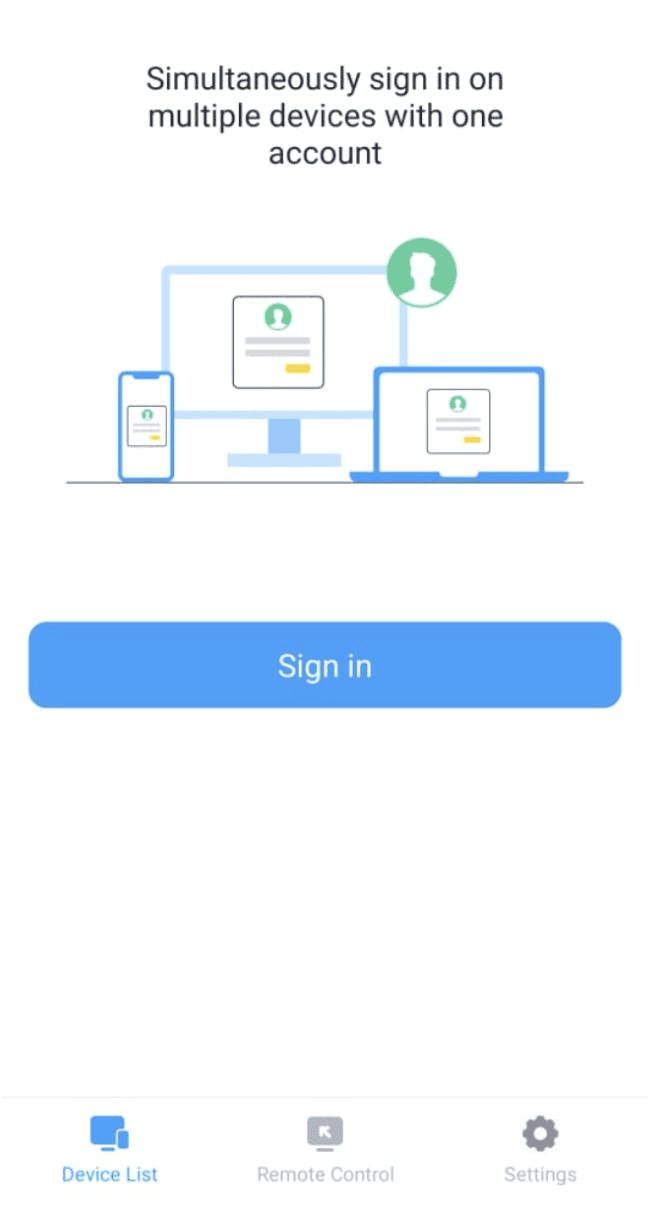
Trong môi trường làm việc và học tập hỗn hợp ngày nay, việc chia sẻ màn hình và truy cập máy tính từ xa đã trở thành những công cụ thiết yếu. Dù bạn đang trình bày, cung cấp hỗ trợ kỹ thuật, hay làm việc trên nhiều thiết bị, khả năng chia sẻ màn hình giữa Windows và Mac giúp đơn giản hóa sự hợp tác và nâng cao hiệu suất làm việc.
Tuy nhiên, việc kết nối một Mac với một PC để chia sẻ màn hình máy tính từ xa không phải lúc nào cũng đơn giản, vì các hệ thống, cài đặt và công cụ khác nhau có thể làm cho quá trình này trở nên phức tạp. Hướng dẫn này sẽ dẫn bạn qua các phương pháp rõ ràng, từng bước, bao gồm các ứng dụng phản chiếu màn hình đáng tin cậy như DeskIn, để kết nối Mac của bạn với một PC Windows, giúp bạn có thể phản chiếu màn hình, điều khiển máy tính từ xa và đảm bảo tương tác liền mạch giữa các nền tảng.
Nhấp vào đây để tải xuống DeskIn
Bạn có thể sử dụng Remote Desktop từ Windows đến Mac không?
Có, bạn có thể, nhưng điều này đòi hỏi cấu hình và công cụ phù hợp. Khác với hai thiết bị Windows có thể trực tiếp liên lạc qua Giao thức Remote Desktop (RDP) tích hợp sẵn của Microsoft, macOS không hỗ trợ việc bị truy cập qua RDP. Thay vào đó, nó sử dụng các giao thức thay thế, nổi bật nhất là VNC (Virtual Network Computing), cho phép chia sẻ màn hình và truy cập từ xa.
VNC là một giao thức đa nền tảng cho phép điều khiển từ xa một Mac từ một PC Windows, làm cho nó trở nên lý tưởng cho các môi trường có thiết bị lẫn lộn. Bằng cách bật chia sẻ màn hình trên Mac và sử dụng một trình xem tương thích VNC trên máy Windows, người dùng có thể thiết lập một kết nối ổn định. Ngoài ra, các ứng dụng của bên thứ ba đơn giản hóa quá trình bằng cách cung cấp hỗ trợ cho cả hai nền tảng và tính năng hiệu suất nâng cao. Trong các phần tiếp theo, chúng ta sẽ khám phá những cách tốt nhất để giúp bạn chia sẻ và điều khiển màn hình giữa Mac và PC một cách liền mạch.
Phương pháp 1. Sử dụng chức năng Chia sẻ màn hình tích hợp của Mac với VNC trên Windows
Một trong những cách trực tiếp nhất để kết nối Mac với chia sẻ màn hình máy tính từ xa của PC là kích hoạt tính năng Chia sẻ màn hình tích hợp trên macOS và truy cập nó từ Windows bằng cách sử dụng trình xem VNC. macOS sử dụng giao thức VNC (Virtual Network Computing), được hỗ trợ bởi nhiều ứng dụng miễn phí và trả phí trên Windows.
Bước 1. Kích hoạt Chia sẻ màn hình trên Mac
Đi tới "Cài đặt Hệ thống > Chung > Chia sẻ".
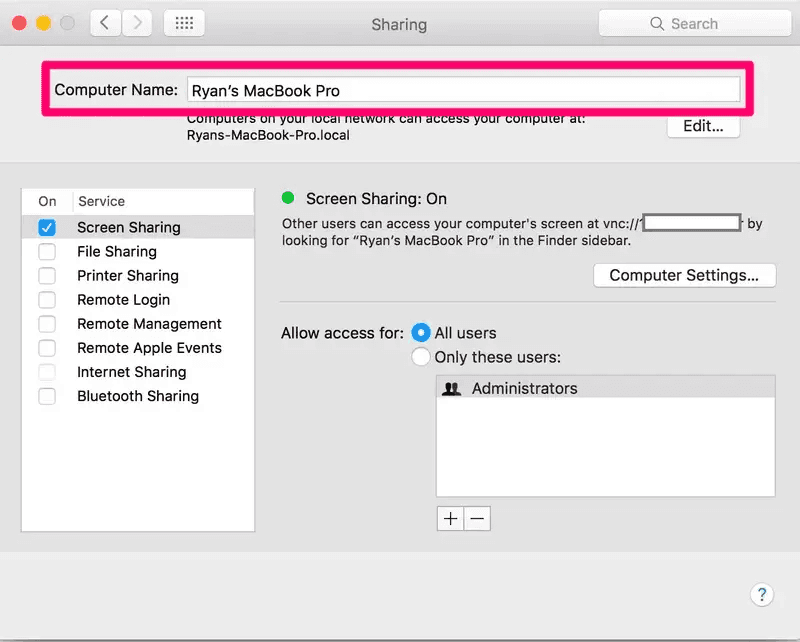
Bật "Chia sẻ màn hình".
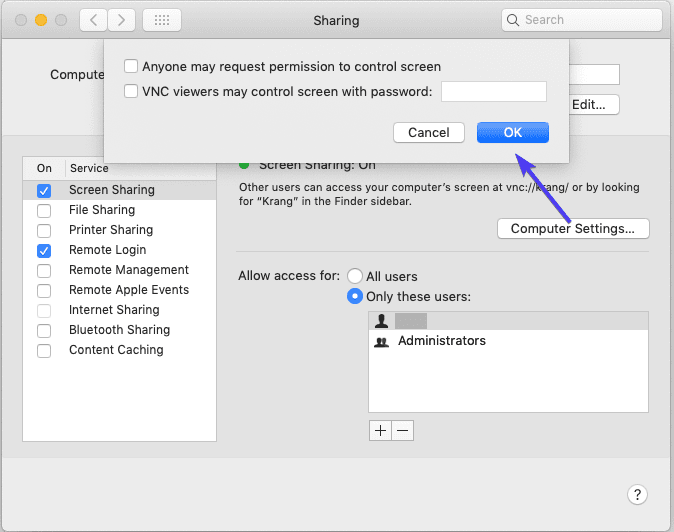
Nhấp vào biểu tượng thông tin bên cạnh Chia sẻ màn hình để xem hoặc thay đổi cài đặt.
Chọn ai có thể truy cập vào Mac: "Tất cả người dùng" hoặc "Chỉ những người dùng này".
Ghi lại địa chỉ IP của Mac của bạn được hiển thị dưới "Cho phép truy cập cho" — bạn sẽ cần địa chỉ này ở bước tiếp theo.
Bước 2. Kết nối với Mac từ Windows bằng cách sử dụng trình xem VNC
Cài đặt một ứng dụng VNC như RealVNC, TightVNC, hoặc UltraVNC trên PC Windows của bạn. Sau đó:
Mở trình xem VNC và nhập địa chỉ IP của Mac của bạn (ví dụ: 192.168.1.12).
Nếu cần, thêm cổng 5900 (ví dụ: 192.168.1.12:5900).
Nhập tên người dùng và mật khẩu của tài khoản người dùng Mac (hoặc mật khẩu VNC nếu đã được cấu hình).
Bây giờ bạn nên thấy màn hình desktop của Mac trên màn hình Windows của bạn và có thể tương tác với nó trong thời gian thực.
Phương pháp này đáng tin cậy và không yêu cầu cài đặt phần mềm bổ sung trên Mac của bạn, nhưng giao diện và hiệu suất có thể cảm thấy cơ bản so với các ứng dụng bên thứ ba chuyên dụng.
Phương pháp 2. Sử dụng Microsoft Remote Desktop cho chia sẻ từ Mac đến PC
Nếu bạn muốn chia sẻ màn hình máy tính từ Mac đến PC Windows, các công cụ của chính Microsoft làm điều này thật dễ dàng và an toàn. Trong khi Windows sử dụng RDP (Giao thức Remote Desktop) — mà macOS không hỗ trợ tích hợp — bạn vẫn có thể bắt đầu một phiên làm việc từ Mac đến Windows bằng cách sử dụng Microsoft Remote Desktop client.
Bước 1. Kích hoạt Remote Desktop trên PC Windows
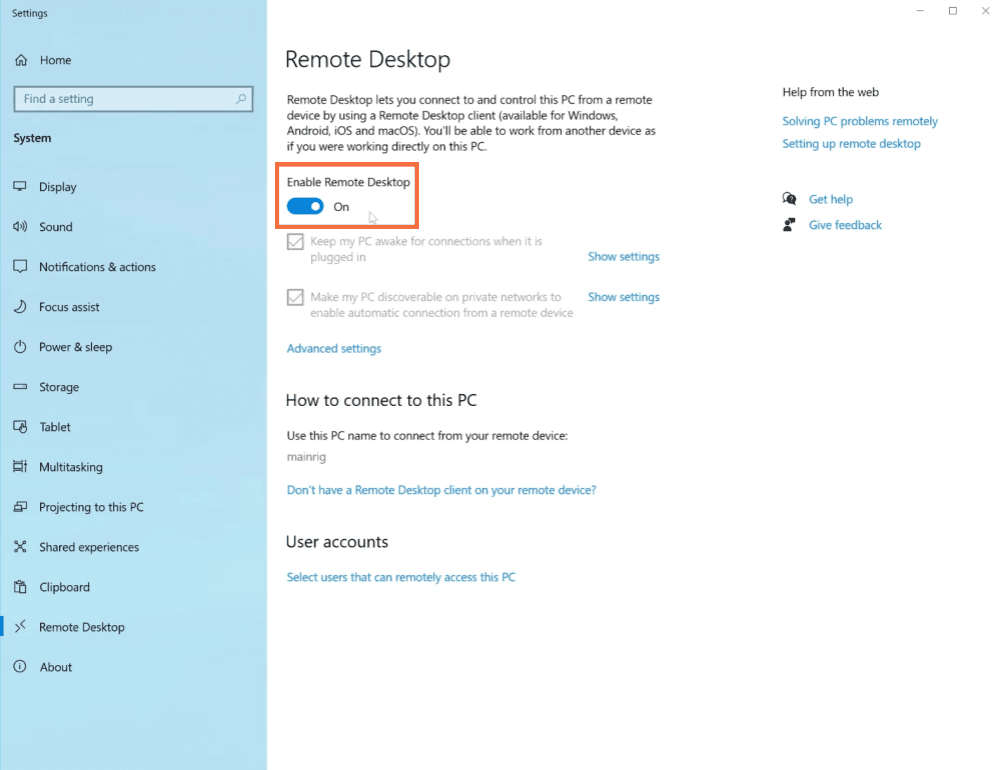
Trên PC Windows của bạn, đi đến "Cài đặt > Hệ thống > Remote Desktop".
Bật "Remote Desktop".
Xác nhận tên PC được liệt kê dưới "Cách kết nối với PC này" — bạn sẽ cần điều này sau.
Đảm bảo tài khoản người dùng bạn đang sử dụng có quyền truy cập từ xa.
(Tùy chọn) Cho phép kết nối chỉ với "Xác thực mức độ mạng (NLA)" để tăng cường bảo mật.
Đảm bảo PC được kết nối với cùng một mạng như Mac hoặc được cấu hình đúng cho truy cập bên ngoài.
Bước 2. Sử dụng Microsoft Remote Desktop trên Mac
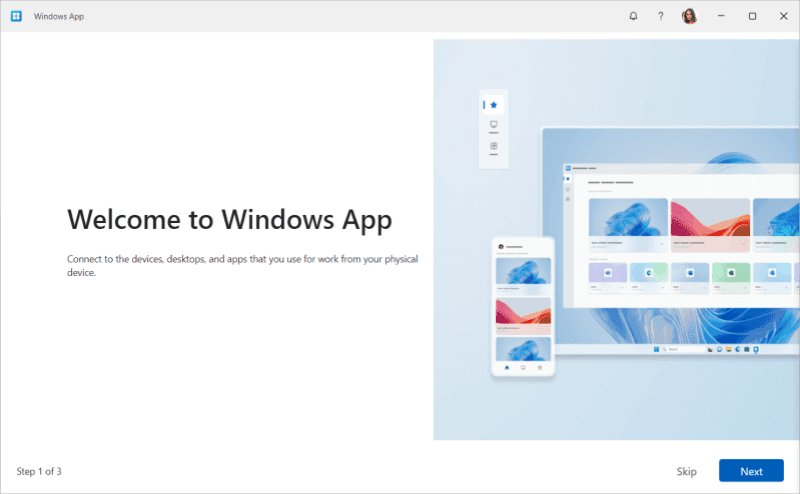
💡 Lưu ý: Nếu bạn đang sử dụng các hệ thống mới nhất, Microsoft cung cấp Windows App thay thế, một phiên bản đa nền tảng mới kết hợp RDP, Windows 365, và Azure Virtual Desktop. Nó cũng có sẵn cho macOS, cung cấp giao diện hiện đại và hiệu suất mượt mà hơn.
Tải xuống client Microsoft Remote Desktop từ Mac App Store.
Mở ứng dụng và nhấp vào biểu tượng + để thêm một PC.
Nhập tên PC hoặc địa chỉ IP, và nhập thông tin đăng nhập của Windows của bạn.
Nhấp vào "Lưu," sau đó nhấp đúp vào kết nối để khởi động phiên làm việc.
Phương pháp 3. Phản chiếu màn hình Mac sang PC qua công cụ bên thứ ba: DeskIn
Nếu bạn đang tìm kiếm một cách để phản chiếu màn hình từ MacBook sang PC với cấu hình tối thiểu và hình ảnh mượt mà, các công cụ bên thứ ba cung cấp nhiều tính linh hoạt và độ rõ nét hình ảnh hơn so với các giao thức truyền thống như VNC hoặc RDP. Dù bạn đang trình bày, hợp tác trong một nhiệm vụ đa thiết bị, hay mở rộng không gian làm việc của bạn, một công cụ phản chiếu màn hình đáng tin cậy sẽ giúp quá trình trở nên liền mạch.
DeskIn là một ứng dụng máy tính từ xa và phản chiếu màn hình hiện đại hoạt động trên macOS, Windows và các nền tảng khác. Nó cho phép bạn phản chiếu màn hình Mac của mình sang PC Windows một cách không dây với độ phân giải cao và độ trễ thấp. Ngoài phản chiếu, DeskIn hỗ trợ điều khiển từ xa, quản lý nhiều thiết bị và chuyển tệp, khiến nó trở thành giải pháp toàn diện tuyệt vời. Nó cũng hoạt động mà không cần cấu hình mạng phức tạp, cung cấp phản chiếu màn hình không dây từ Mac sang Windows chỉ trong vài cú nhấp chuột.
Nhấp vào đây để tải xuống DeskIn
👍 Các tính năng nổi bật của DeskIn cho chia sẻ màn hình từ Mac đến PC
Phản chiếu màn hình đa nền tảng – Phản chiếu màn hình Mac của bạn sang PC Windows trong thời gian thực, lý tưởng cho các buổi trình bày, hợp tác và thuyết trình.
Hỗ trợ điều khiển từ xa – Cung cấp các tính năng điều khiển tùy chọn, cho phép các phiên tương tác giữa các nền tảng.
Kết nối không dây – Không cần mạng chung hoặc nhập địa chỉ IP thủ công; hoạt động qua internet.
Hiệu suất cao – Độ trễ thấp và phản chiếu độ phân giải cao, phù hợp cho cả công việc và các tác vụ sáng tạo.
Miễn phí cho việc sử dụng cá nhân – DeskIn cung cấp một mức miễn phí hào phóng, biến nó thành một giải pháp tiết kiệm chi phí.
Đăng nhập dễ dàng qua tài khoản – Không cần cấu hình mạng phức tạp—chỉ cần đăng nhập và kết nối.
DeskIn được coi là ứng dụng phản chiếu màn hình tốt nhất trên điện thoại di động và máy tính. Bây giờ, hãy xem nó hoạt động như thế nào.
Bước 1. Cài đặt DeskIn trên cả Mac và PC
Truy cập trang web chính thức của DeskIn và tải xuống ứng dụng cho cả Mac và Windows.
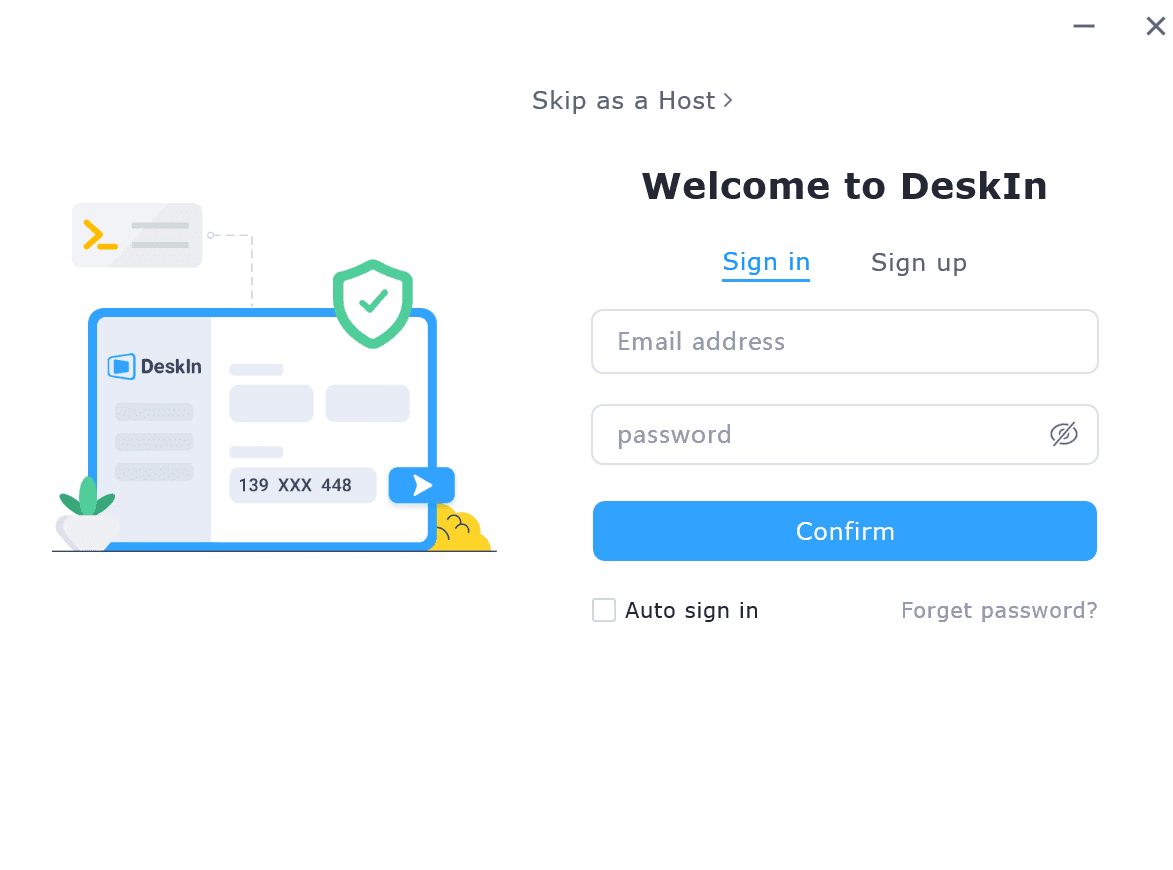
Cài đặt ứng dụng trên cả hai thiết bị và đăng nhập bằng cùng một tài khoản DeskIn.
Bước 2. Bắt đầu phản chiếu màn hình từ Mac sang PC
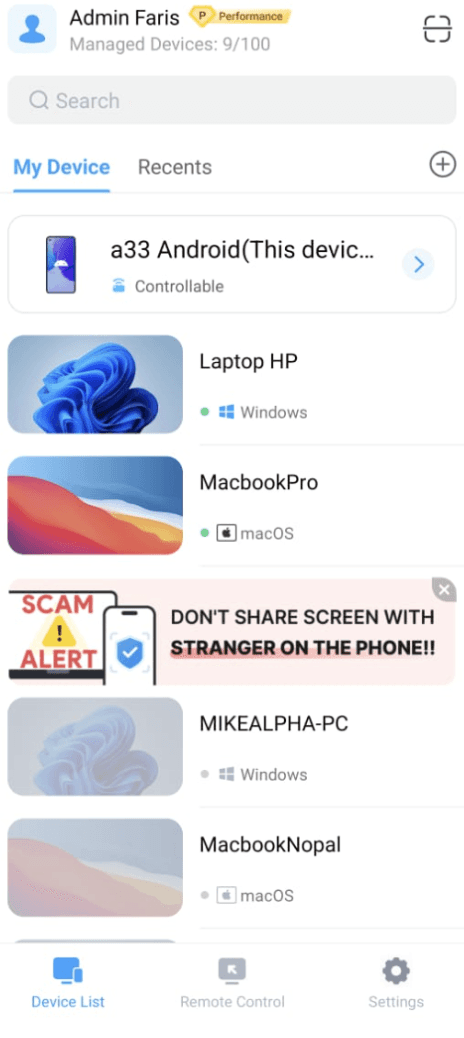
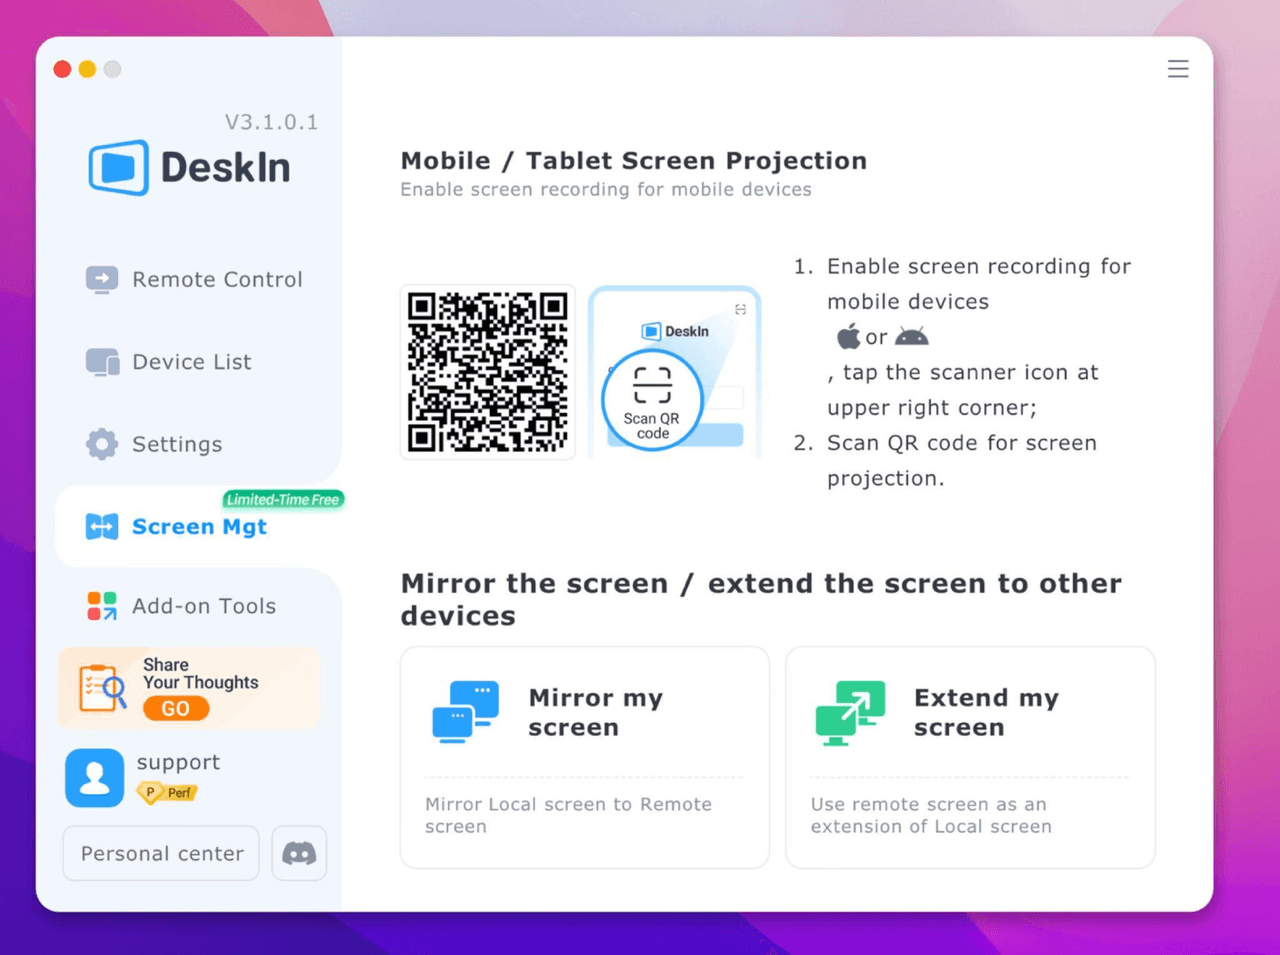
Trên PC của bạn, mở DeskIn và tìm ID thiết bị và mật khẩu kết nối.
Nhập ID thiết bị và mật khẩu kết nối của PC Windows của bạn trên Mac của bạn.
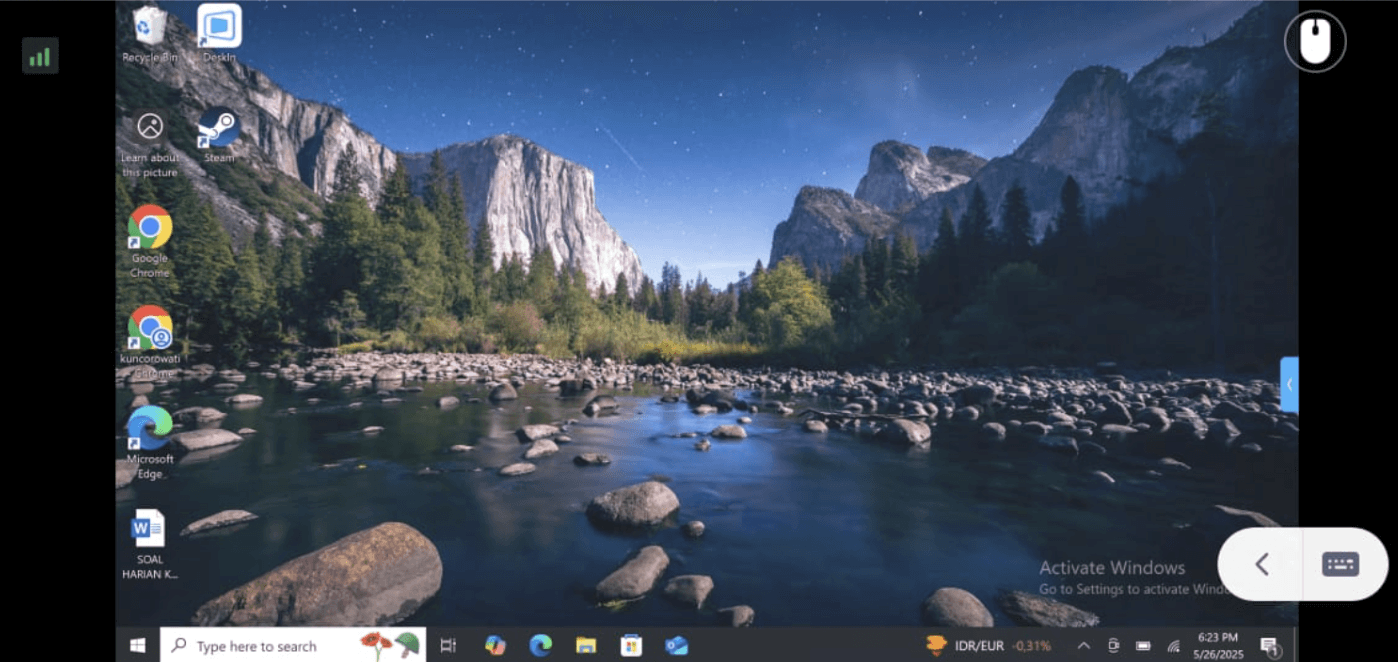
Khi đã kết nối, màn hình PC của bạn sẽ ngay lập tức xuất hiện trên Mac, cho phép xem và tương tác liền mạch.
Câu hỏi thường gặp về Remote Desktop và Chia sẻ màn hình giữa Mac và PC
Điểm khác biệt giữa phản chiếu màn hình và máy tính từ xa là gì?
Phản chiếu màn hình hiển thị màn hình của một thiết bị trên thiết bị khác mà không có tương tác, lý tưởng cho các buổi trình bày hoặc xem thụ động. Máy tính từ xa, ngược lại, cho phép bạn hoàn toàn kiểm soát hệ thống, bàn phím và chuột của thiết bị từ xa, cho phép thực hiện các nhiệm vụ năng suất sâu hơn.
Có an toàn khi chia sẻ màn hình giữa Windows và Mac không?
Chia sẻ màn hình thường an toàn khi bạn sử dụng các ứng dụng đáng tin cậy và kết nối an toàn. Luôn kích hoạt bảo vệ bằng mật khẩu, sử dụng các giao thức mã hóa như VNC hoặc RDP, và tránh chia sẻ màn hình qua mạng công cộng mà không có VPN.
Suy nghĩ cuối cùng
Cho dù bạn đang tổ chức một lớp học từ xa, trình bày slide trên nhiều thiết bị, hay quản lý các hệ thống đa nền tảng từ nhà hoặc văn phòng, chia sẻ màn hình giữa Mac và PC đã trở thành một công cụ mạnh mẽ cho năng suất hiện đại. Từ việc phản chiếu hiển thị thụ động đến kiểm soát máy tính từ xa, có giải pháp cho mọi nhu cầu.
Nếu bạn muốn sự dễ sử dụng, độ ổn định và hỗ trợ đa nền tảng, DeskIn nổi bật như là sự khuyến nghị hàng đầu. Việc thiết lập trực quan, hiệu suất phản chiếu mượt mà và phương pháp kết nối an toàn của nó làm cho nó trở nên lý tưởng cho cả người dùng kỹ thuật và người mới bắt đầu. Cuối cùng, lựa chọn tốt nhất của bạn phụ thuộc vào sở thích nền tảng của bạn, mức độ thoải mái về kỹ thuật và liệu bạn có ưu tiên hiển thị hình ảnh hay kiểm soát tương tác đầy đủ, vì vậy hãy chọn công cụ phù hợp nhất với quy trình làm việc của bạn.
3 Cách để kết nối Mac với PC chia sẻ màn hình Máy tính từ xa
Trong môi trường làm việc và học tập hỗn hợp ngày nay, việc chia sẻ màn hình và truy cập máy tính từ xa đã trở thành những công cụ thiết yếu. Dù bạn đang trình bày, cung cấp hỗ trợ kỹ thuật, hay làm việc trên nhiều thiết bị, khả năng chia sẻ màn hình giữa Windows và Mac giúp đơn giản hóa sự hợp tác và nâng cao hiệu suất làm việc.
Tuy nhiên, việc kết nối một Mac với một PC để chia sẻ màn hình máy tính từ xa không phải lúc nào cũng đơn giản, vì các hệ thống, cài đặt và công cụ khác nhau có thể làm cho quá trình này trở nên phức tạp. Hướng dẫn này sẽ dẫn bạn qua các phương pháp rõ ràng, từng bước, bao gồm các ứng dụng phản chiếu màn hình đáng tin cậy như DeskIn, để kết nối Mac của bạn với một PC Windows, giúp bạn có thể phản chiếu màn hình, điều khiển máy tính từ xa và đảm bảo tương tác liền mạch giữa các nền tảng.
Nhấp vào đây để tải xuống DeskIn
Bạn có thể sử dụng Remote Desktop từ Windows đến Mac không?
Có, bạn có thể, nhưng điều này đòi hỏi cấu hình và công cụ phù hợp. Khác với hai thiết bị Windows có thể trực tiếp liên lạc qua Giao thức Remote Desktop (RDP) tích hợp sẵn của Microsoft, macOS không hỗ trợ việc bị truy cập qua RDP. Thay vào đó, nó sử dụng các giao thức thay thế, nổi bật nhất là VNC (Virtual Network Computing), cho phép chia sẻ màn hình và truy cập từ xa.
VNC là một giao thức đa nền tảng cho phép điều khiển từ xa một Mac từ một PC Windows, làm cho nó trở nên lý tưởng cho các môi trường có thiết bị lẫn lộn. Bằng cách bật chia sẻ màn hình trên Mac và sử dụng một trình xem tương thích VNC trên máy Windows, người dùng có thể thiết lập một kết nối ổn định. Ngoài ra, các ứng dụng của bên thứ ba đơn giản hóa quá trình bằng cách cung cấp hỗ trợ cho cả hai nền tảng và tính năng hiệu suất nâng cao. Trong các phần tiếp theo, chúng ta sẽ khám phá những cách tốt nhất để giúp bạn chia sẻ và điều khiển màn hình giữa Mac và PC một cách liền mạch.
Phương pháp 1. Sử dụng chức năng Chia sẻ màn hình tích hợp của Mac với VNC trên Windows
Một trong những cách trực tiếp nhất để kết nối Mac với chia sẻ màn hình máy tính từ xa của PC là kích hoạt tính năng Chia sẻ màn hình tích hợp trên macOS và truy cập nó từ Windows bằng cách sử dụng trình xem VNC. macOS sử dụng giao thức VNC (Virtual Network Computing), được hỗ trợ bởi nhiều ứng dụng miễn phí và trả phí trên Windows.
Bước 1. Kích hoạt Chia sẻ màn hình trên Mac
Đi tới "Cài đặt Hệ thống > Chung > Chia sẻ".
Bật "Chia sẻ màn hình".
Nhấp vào biểu tượng thông tin bên cạnh Chia sẻ màn hình để xem hoặc thay đổi cài đặt.
Chọn ai có thể truy cập vào Mac: "Tất cả người dùng" hoặc "Chỉ những người dùng này".
Ghi lại địa chỉ IP của Mac của bạn được hiển thị dưới "Cho phép truy cập cho" — bạn sẽ cần địa chỉ này ở bước tiếp theo.
Bước 2. Kết nối với Mac từ Windows bằng cách sử dụng trình xem VNC
Cài đặt một ứng dụng VNC như RealVNC, TightVNC, hoặc UltraVNC trên PC Windows của bạn. Sau đó:
Mở trình xem VNC và nhập địa chỉ IP của Mac của bạn (ví dụ: 192.168.1.12).
Nếu cần, thêm cổng 5900 (ví dụ: 192.168.1.12:5900).
Nhập tên người dùng và mật khẩu của tài khoản người dùng Mac (hoặc mật khẩu VNC nếu đã được cấu hình).
Bây giờ bạn nên thấy màn hình desktop của Mac trên màn hình Windows của bạn và có thể tương tác với nó trong thời gian thực.
Phương pháp này đáng tin cậy và không yêu cầu cài đặt phần mềm bổ sung trên Mac của bạn, nhưng giao diện và hiệu suất có thể cảm thấy cơ bản so với các ứng dụng bên thứ ba chuyên dụng.
Phương pháp 2. Sử dụng Microsoft Remote Desktop cho chia sẻ từ Mac đến PC
Nếu bạn muốn chia sẻ màn hình máy tính từ Mac đến PC Windows, các công cụ của chính Microsoft làm điều này thật dễ dàng và an toàn. Trong khi Windows sử dụng RDP (Giao thức Remote Desktop) — mà macOS không hỗ trợ tích hợp — bạn vẫn có thể bắt đầu một phiên làm việc từ Mac đến Windows bằng cách sử dụng Microsoft Remote Desktop client.
Bước 1. Kích hoạt Remote Desktop trên PC Windows
Trên PC Windows của bạn, đi đến "Cài đặt > Hệ thống > Remote Desktop".
Bật "Remote Desktop".
Xác nhận tên PC được liệt kê dưới "Cách kết nối với PC này" — bạn sẽ cần điều này sau.
Đảm bảo tài khoản người dùng bạn đang sử dụng có quyền truy cập từ xa.
(Tùy chọn) Cho phép kết nối chỉ với "Xác thực mức độ mạng (NLA)" để tăng cường bảo mật.
Đảm bảo PC được kết nối với cùng một mạng như Mac hoặc được cấu hình đúng cho truy cập bên ngoài.
Bước 2. Sử dụng Microsoft Remote Desktop trên Mac
💡 Lưu ý: Nếu bạn đang sử dụng các hệ thống mới nhất, Microsoft cung cấp Windows App thay thế, một phiên bản đa nền tảng mới kết hợp RDP, Windows 365, và Azure Virtual Desktop. Nó cũng có sẵn cho macOS, cung cấp giao diện hiện đại và hiệu suất mượt mà hơn.
Tải xuống client Microsoft Remote Desktop từ Mac App Store.
Mở ứng dụng và nhấp vào biểu tượng + để thêm một PC.
Nhập tên PC hoặc địa chỉ IP, và nhập thông tin đăng nhập của Windows của bạn.
Nhấp vào "Lưu," sau đó nhấp đúp vào kết nối để khởi động phiên làm việc.
Phương pháp 3. Phản chiếu màn hình Mac sang PC qua công cụ bên thứ ba: DeskIn
Nếu bạn đang tìm kiếm một cách để phản chiếu màn hình từ MacBook sang PC với cấu hình tối thiểu và hình ảnh mượt mà, các công cụ bên thứ ba cung cấp nhiều tính linh hoạt và độ rõ nét hình ảnh hơn so với các giao thức truyền thống như VNC hoặc RDP. Dù bạn đang trình bày, hợp tác trong một nhiệm vụ đa thiết bị, hay mở rộng không gian làm việc của bạn, một công cụ phản chiếu màn hình đáng tin cậy sẽ giúp quá trình trở nên liền mạch.
DeskIn là một ứng dụng máy tính từ xa và phản chiếu màn hình hiện đại hoạt động trên macOS, Windows và các nền tảng khác. Nó cho phép bạn phản chiếu màn hình Mac của mình sang PC Windows một cách không dây với độ phân giải cao và độ trễ thấp. Ngoài phản chiếu, DeskIn hỗ trợ điều khiển từ xa, quản lý nhiều thiết bị và chuyển tệp, khiến nó trở thành giải pháp toàn diện tuyệt vời. Nó cũng hoạt động mà không cần cấu hình mạng phức tạp, cung cấp phản chiếu màn hình không dây từ Mac sang Windows chỉ trong vài cú nhấp chuột.
Nhấp vào đây để tải xuống DeskIn
👍 Các tính năng nổi bật của DeskIn cho chia sẻ màn hình từ Mac đến PC
Phản chiếu màn hình đa nền tảng – Phản chiếu màn hình Mac của bạn sang PC Windows trong thời gian thực, lý tưởng cho các buổi trình bày, hợp tác và thuyết trình.
Hỗ trợ điều khiển từ xa – Cung cấp các tính năng điều khiển tùy chọn, cho phép các phiên tương tác giữa các nền tảng.
Kết nối không dây – Không cần mạng chung hoặc nhập địa chỉ IP thủ công; hoạt động qua internet.
Hiệu suất cao – Độ trễ thấp và phản chiếu độ phân giải cao, phù hợp cho cả công việc và các tác vụ sáng tạo.
Miễn phí cho việc sử dụng cá nhân – DeskIn cung cấp một mức miễn phí hào phóng, biến nó thành một giải pháp tiết kiệm chi phí.
Đăng nhập dễ dàng qua tài khoản – Không cần cấu hình mạng phức tạp—chỉ cần đăng nhập và kết nối.
DeskIn được coi là ứng dụng phản chiếu màn hình tốt nhất trên điện thoại di động và máy tính. Bây giờ, hãy xem nó hoạt động như thế nào.
Bước 1. Cài đặt DeskIn trên cả Mac và PC
Truy cập trang web chính thức của DeskIn và tải xuống ứng dụng cho cả Mac và Windows.
Cài đặt ứng dụng trên cả hai thiết bị và đăng nhập bằng cùng một tài khoản DeskIn.
Bước 2. Bắt đầu phản chiếu màn hình từ Mac sang PC
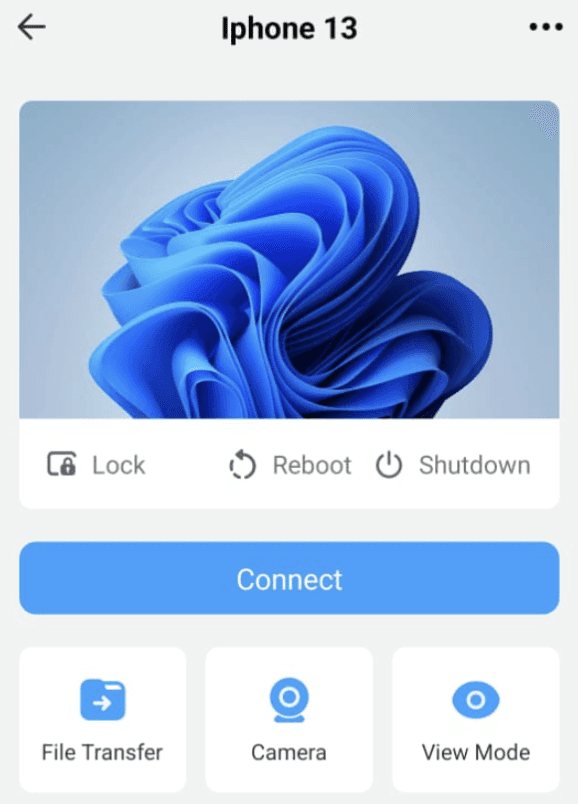
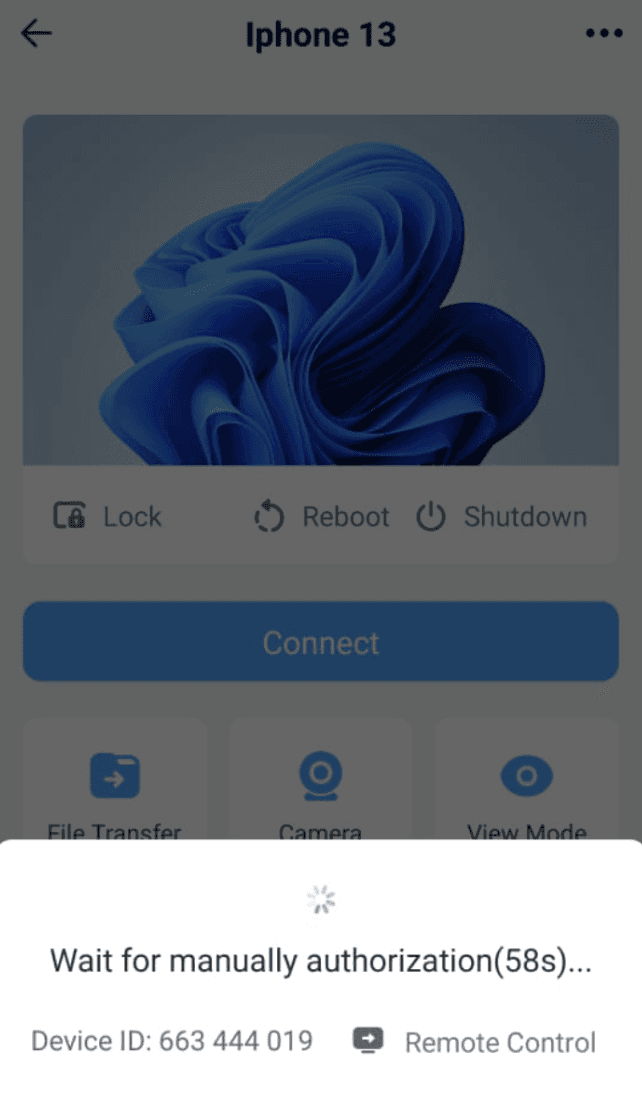
Trên PC của bạn, mở DeskIn và tìm ID thiết bị và mật khẩu kết nối.
Nhập ID thiết bị và mật khẩu kết nối của PC Windows của bạn trên Mac của bạn.
Khi đã kết nối, màn hình PC của bạn sẽ ngay lập tức xuất hiện trên Mac, cho phép xem và tương tác liền mạch.
Câu hỏi thường gặp về Remote Desktop và Chia sẻ màn hình giữa Mac và PC
Điểm khác biệt giữa phản chiếu màn hình và máy tính từ xa là gì?
Phản chiếu màn hình hiển thị màn hình của một thiết bị trên thiết bị khác mà không có tương tác, lý tưởng cho các buổi trình bày hoặc xem thụ động. Máy tính từ xa, ngược lại, cho phép bạn hoàn toàn kiểm soát hệ thống, bàn phím và chuột của thiết bị từ xa, cho phép thực hiện các nhiệm vụ năng suất sâu hơn.
Có an toàn khi chia sẻ màn hình giữa Windows và Mac không?
Chia sẻ màn hình thường an toàn khi bạn sử dụng các ứng dụng đáng tin cậy và kết nối an toàn. Luôn kích hoạt bảo vệ bằng mật khẩu, sử dụng các giao thức mã hóa như VNC hoặc RDP, và tránh chia sẻ màn hình qua mạng công cộng mà không có VPN.
Suy nghĩ cuối cùng
Cho dù bạn đang tổ chức một lớp học từ xa, trình bày slide trên nhiều thiết bị, hay quản lý các hệ thống đa nền tảng từ nhà hoặc văn phòng, chia sẻ màn hình giữa Mac và PC đã trở thành một công cụ mạnh mẽ cho năng suất hiện đại. Từ việc phản chiếu hiển thị thụ động đến kiểm soát máy tính từ xa, có giải pháp cho mọi nhu cầu.
Nếu bạn muốn sự dễ sử dụng, độ ổn định và hỗ trợ đa nền tảng, DeskIn nổi bật như là sự khuyến nghị hàng đầu. Việc thiết lập trực quan, hiệu suất phản chiếu mượt mà và phương pháp kết nối an toàn của nó làm cho nó trở nên lý tưởng cho cả người dùng kỹ thuật và người mới bắt đầu. Cuối cùng, lựa chọn tốt nhất của bạn phụ thuộc vào sở thích nền tảng của bạn, mức độ thoải mái về kỹ thuật và liệu bạn có ưu tiên hiển thị hình ảnh hay kiểm soát tương tác đầy đủ, vì vậy hãy chọn công cụ phù hợp nhất với quy trình làm việc của bạn.