Search Docs…

Apple Remote Desktop là một công cụ quản lý từ xa dành cho người dùng macOS, nhưng nó chỉ hỗ trợ hệ sinh thái của Apple và có chức năng hạn chế nhưng giá cao. Là một lựa chọn thay thế mạnh mẽ hơn, DeskIn cung cấp hỗ trợ đa nền tảng, kết nối ổn định và chức năng phong phú, làm cho nó trở nên lý tưởng cho nhu cầu làm việc từ xa và hỗ trợ kỹ thuật.


Apple Remote Desktop

Apple Remote Desktop (ARD) là phần mềm điều khiển từ xa được thiết kế đặc biệt cho macOS. Nó có thể được sử dụng để quản lý các thiết bị Mac từ xa, thực hiện phân phối và triển khai phần mềm, và cung cấp hỗ trợ kỹ thuật cho các thiết bị từ xa.

Điểm mạnh:

  1. Tích hợp cao: ARD được tích hợp sâu vào hệ thống macOS, với khả năng vận hành mượt mà và không cần cấu hình thêm. Tất cả các tính năng tích hợp sẵn của macOS có thể hoạt động mượt mà từ xa.

  2. Phù hợp cho quản lý nhiều thiết bị: Hỗ trợ các tác vụ theo lô để nhanh chóng phân phối phần mềm và quản lý nhiều thiết bị Mac.

  3. Bảo mật cao: Apple có danh tiếng về việc tập trung vào quyền riêng tư hơn các công ty công nghệ khác. Là một phần của hệ sinh thái, ARD cũng có mức độ bảo mật cao.

Nhược điểm:

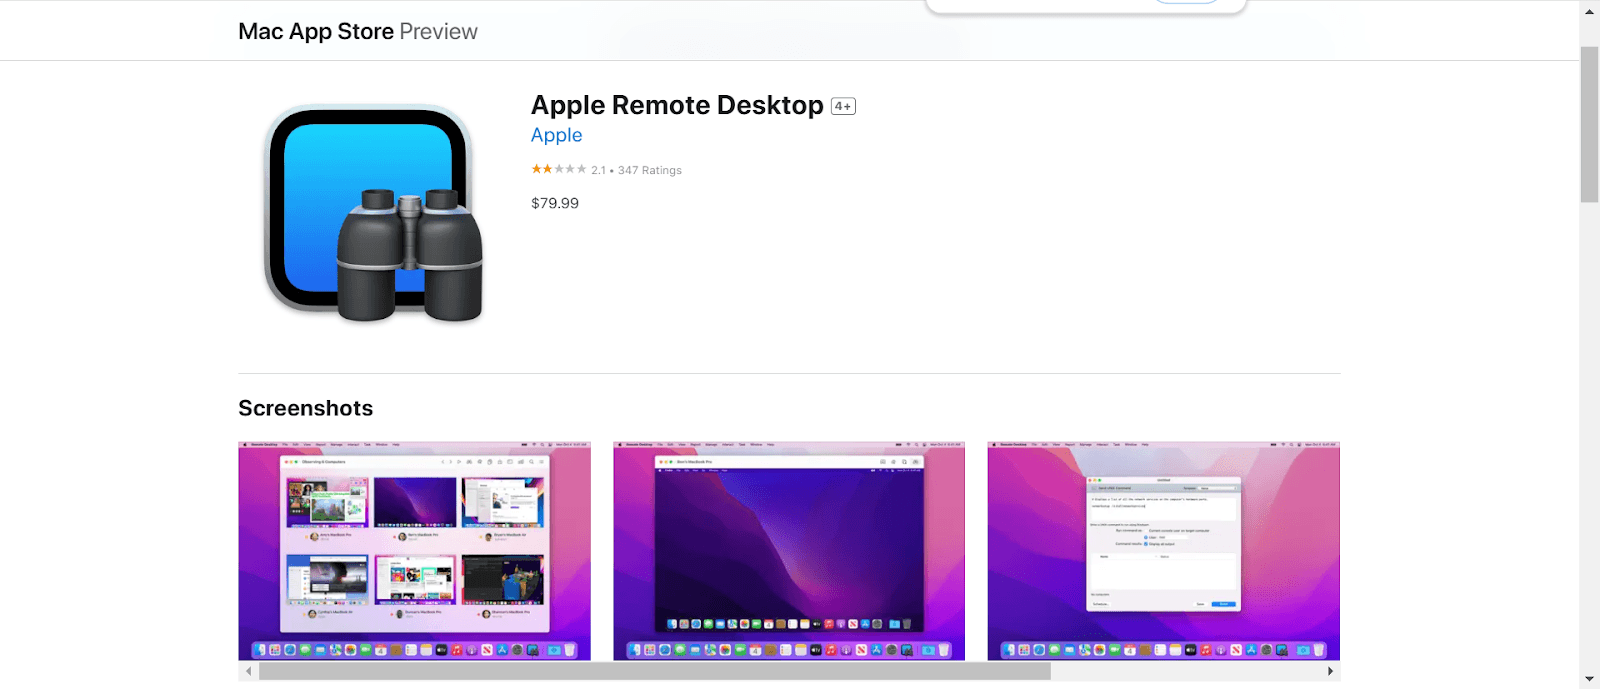
  1. Đắt tiền: ARD không có phiên bản miễn phí, và bạn phải trả $79.99 chỉ để tải phần mềm. Chi phí thử nghiệm và mắc lỗi đối với người dùng cá nhân tương đối cao.

  2. Hạn chế hệ thống: Nó chỉ hỗ trợ các thiết bị macOS và không thể kết nối với các hệ thống khác như Windows. Nó không phù hợp cho người dùng có yêu cầu đa nền tảng.

  3. Chỉ có chức năng cơ bản: ARD chủ yếu tập trung vào truy cập từ xa và thiếu các chức năng đa dạng như quản lý màn hình.

  4. Cập nhật chậm: ARD không được cập nhật thường xuyên, dẫn đến nhiều lỗi không được giải quyết kịp thời. Một số người dùng cũng đã báo cáo rằng phiên bản mới có nhiều lỗi hơn phiên bản cũ.

  5. Vấn đề kết nối: Các máy Mac dựa trên Intel bị hạn chế khi truy cập vào các máy Mac M1 (FileVault và Tường lửa được bật) bằng cách chia sẻ màn hình trong một số phiên bản hệ điều hành. Tuy nhiên, việc vô hiệu hóa FV có thể gây ra vấn đề bảo mật.

  6. Vấn đề Chế độ Hiệu suất cao: ARD có thể gặp phải các hiện tượng bất thường về hình ảnh hoặc âm thanh khi Chế độ Hiệu suất cao được bật, đặc biệt khi sử dụng thiết bị ngoại vi (như mixer) hoặc điều chỉnh độ phân giải.

Apple Remote Desktop thực sự đã từng là lựa chọn công cụ từ xa tốt nhất cho người dùng Mac trong quá khứ, nhưng trong những năm gần đây, nó ngày càng trở nên nhiều lỗi và không nâng cấp tính năng. Điểm số trong App Store đã giảm xuống còn 2.1. Có lẽ người dùng Mac có thể chọn phần mềm điều khiển từ xa khác hữu ích và tiết kiệm chi phí hơn.

DeskIn: Lựa chọn tốt nhất cho người dùng macOS

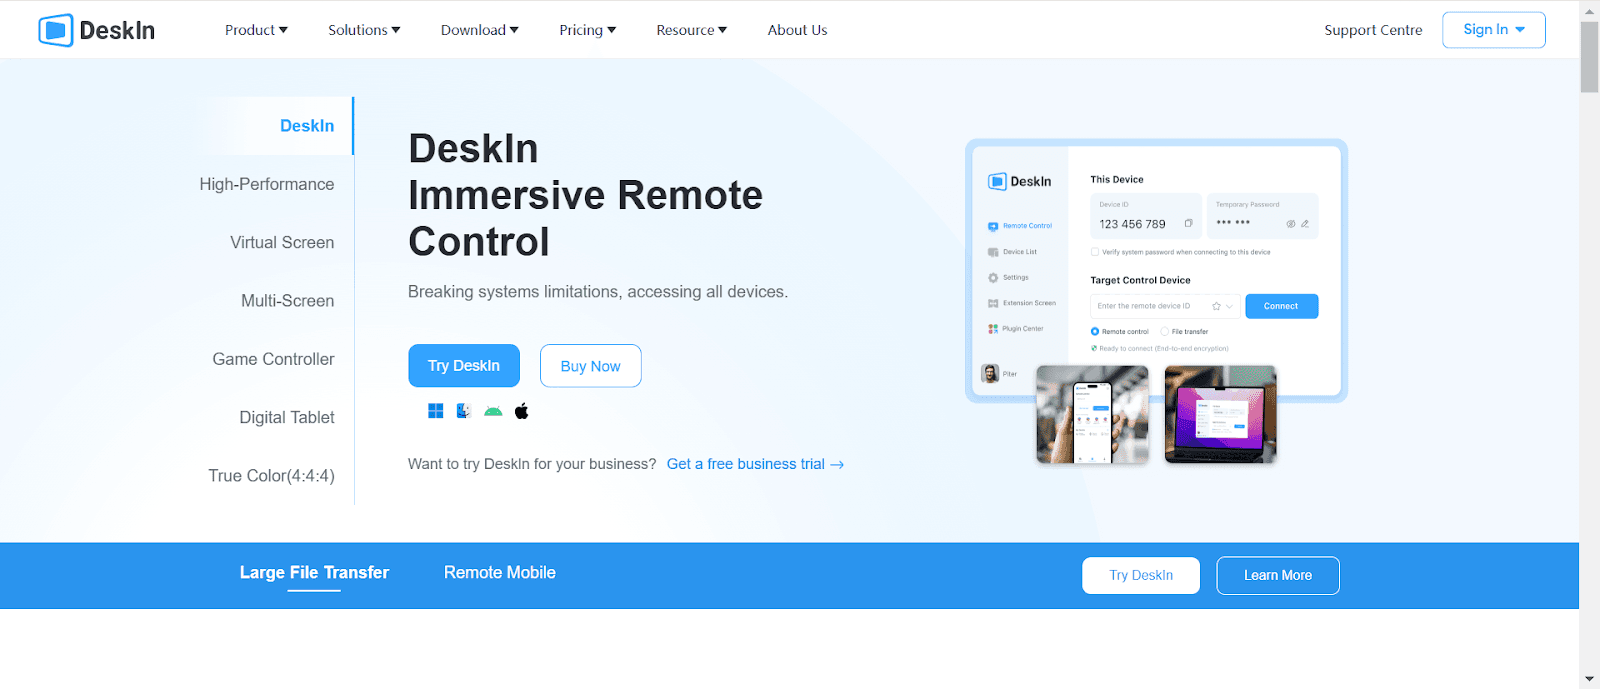
DeskIn là một công cụ điều khiển từ xa hỗ trợ đa nền tảng, phong phú tính năng, không chỉ phù hợp cho thiết bị Apple mà còn bao gồm cả Windows và thiết bị di động, cung cấp cho người dùng trải nghiệm từ xa linh hoạt và mượt mà hơn.

Ưu điểm của DeskIn:

  • Hỗ trợ đa nền tảng

    • DeskIn hỗ trợ thiết bị Windows, macOS, iOS và Android. Người dùng có thể dễ dàng truy cập các thiết bị của hệ thống khác, vượt qua giới hạn mà Apple Remote Desktop chỉ hỗ trợ macOS.

  • Kết nối từ xa hiệu quả và ổn định

    • Độ trễ thấp: DeskIn có thể đạt được độ trễ ≤40ms, cung cấp phản hồi gần như ngay lập tức, phù hợp cho trò chơi, thiết kế từ xa và nhu cầu phản hồi tức thì.

    • Chất lượng hình ảnh độ phân giải cao: Hỗ trợ chất lượng hình ảnh lên đến 4K/60FPS, mã màu 4:4:4, đảm bảo trình bày hoàn hảo các chi tiết.

  • Các kịch bản ứng dụng đa chức năng

    • Điều khiển từ xa: Truy cập vào thiết bị hiệu suất cao từ xa của bạn để làm việc bất cứ lúc nào và ở bất kỳ đâu.

    • Quản lý màn hình: Bạn có thể sử dụng máy tính bảng, điện thoại di động hoặc máy tính của bạn làm màn hình phụ cho Mac của bạn, hoặc dễ dàng chiếu Mac của bạn lên các thiết bị khác. Cũng hỗ trợ tạo màn hình ảo cho thiết bị từ xa tại chỗ nhằm cải thiện hiệu suất công việc.

    • Chuyển file: Tốc độ chuyển lên đến 12MB/s, không có giới hạn về kích thước hoặc định dạng file.

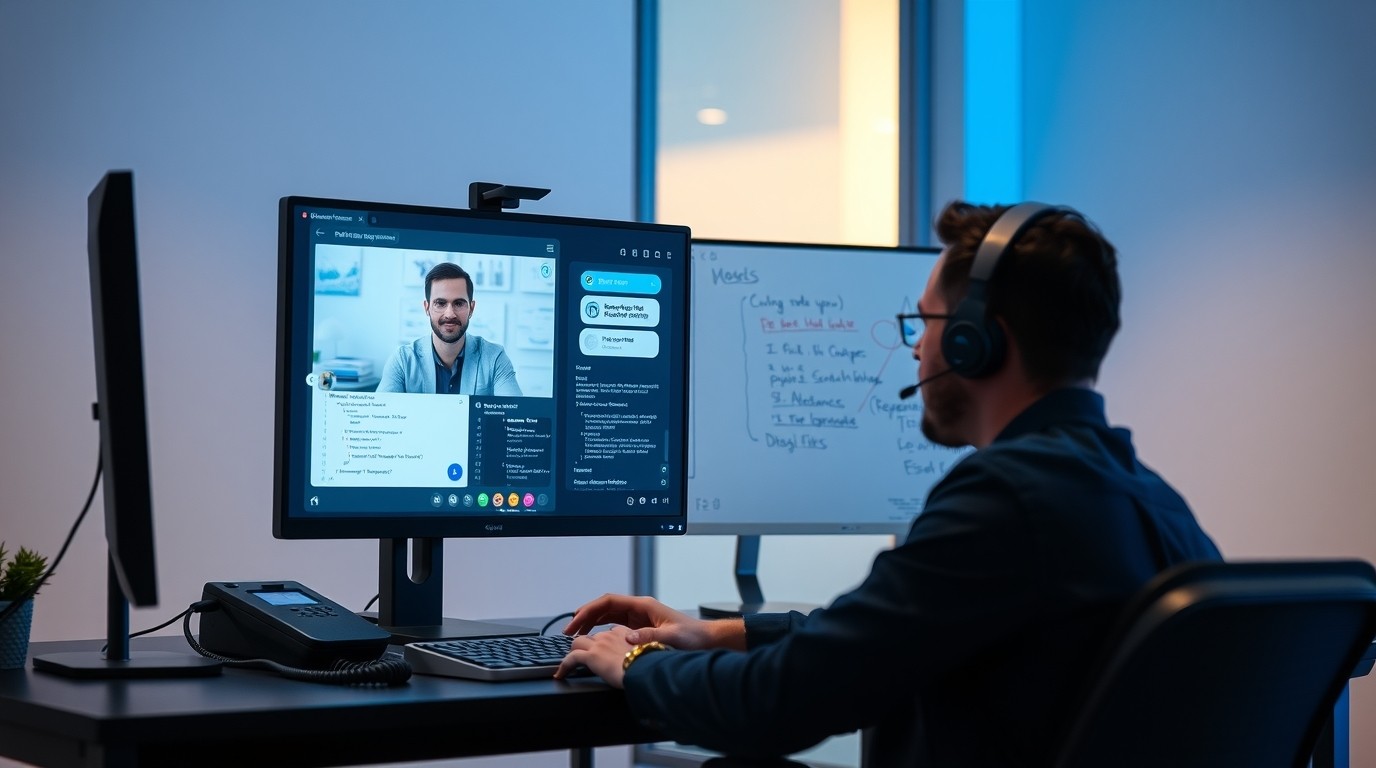
    • Chức năng chú thích bảng trắng và gọi âm thanh: Cung cấp chức năng chú thích và chức năng gọi âm thanh tích hợp, phù hợp cho hợp tác nhóm và phản hồi tức thời.

    • Chơi game từ xa: Chuột chơi game, chế độ chơi game, chức năng xem 3D cho phép bạn chơi game từ xa mượt mà trên Mac.

  • Bảo mật

    • DeskIn sử dụng mã hóa 256-bit để đảm bảo an toàn cho việc truyền tải dữ liệu. Bất kể bạn ở đâu, bạn có thể thực hiện truy cập không giám sát với mật khẩu bảo mật.

  • Giá hợp lý

    • So với chi phí tải xuống $79.99 của ARD, DeskIn cung cấp phiên bản miễn phí mạnh mẽ và các gói đăng ký cao cấp với giá hợp lý thích hợp cho cá nhân và doanh nghiệp nhỏ và vừa.

Các tính năng ứng dụng của DeskIn

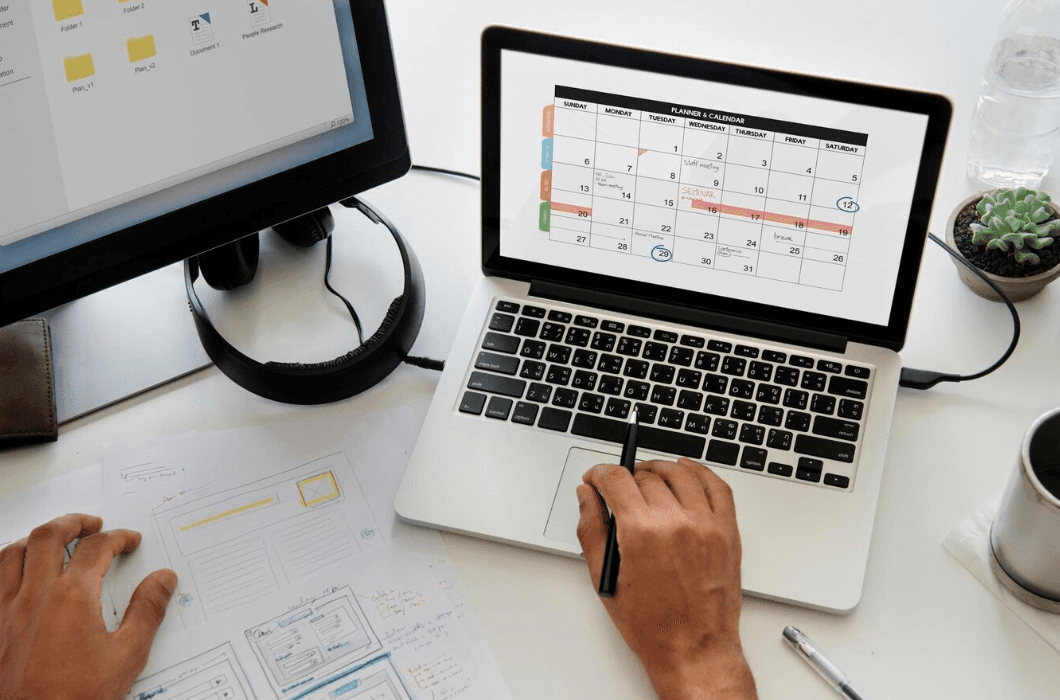
  • Làm việc từ xa: Dù bạn ở đâu, bạn cũng có thể sử dụng DeskIn để kết nối với máy tính làm việc của bạn và xử lý các công việc hàng ngày.

  • Hợp tác từ xa: Dễ dàng chuyển file, chia sẻ clipboard, thực hiện gọi âm thanh và hợp tác với các thành viên trong nhóm từ xa bất cứ lúc nào.

  • Hỗ trợ kỹ thuật: Cung cấp hỗ trợ kỹ thuật từ xa tức thì cho khách hàng hoặc đồng nghiệp để giải quyết các vấn đề kỹ thuật khác nhau.

  • Giảng dạy từ xa: Dễ dàng giảng dạy và trình bày từ xa với các chức năng chia sẻ màn hình và chú thích của DeskIn.

  • Giải trí: Chiếu video hoặc màn hình Mac của bạn lên các thiết bị khác.

  • Chơi Game từ xa: Dễ dàng sử dụng PC Windows từ xa để chơi game trên Mac của bạn.

Cách sử dụng DeskIn trên máy tính để bàn Apple?

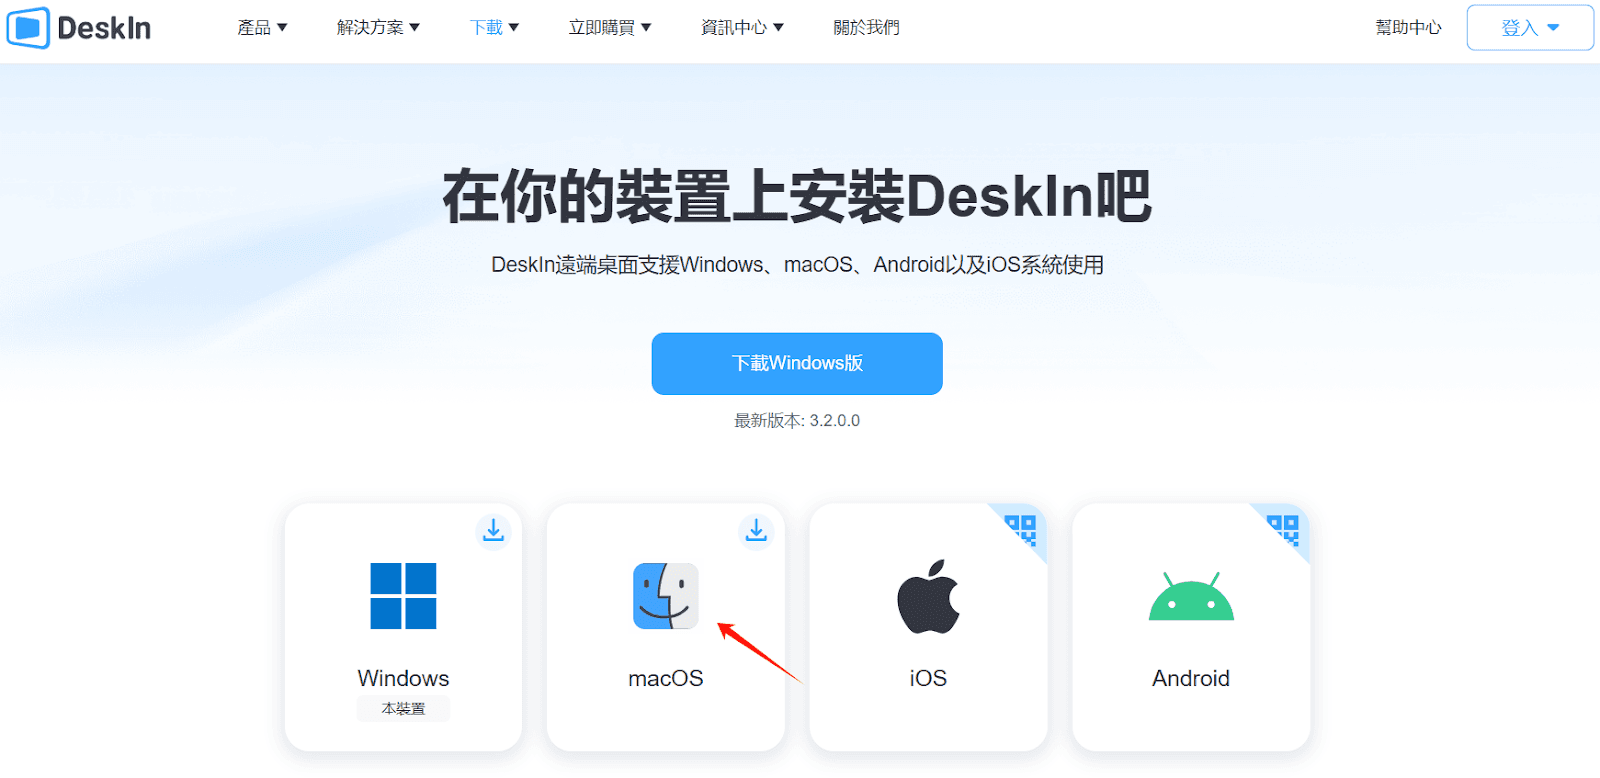
1. Tải về và cài đặt
Vào trang web chính thức của DeskIn, tải về và cài đặt phần mềm DeskIn trên Mac và các thiết bị khác của bạn.


2. Đăng ký và đăng nhập
Đăng ký tài khoản miễn phí và đăng nhập, bạn cần thực hiện xác minh email cho lần đăng nhập đầu tiên.

3. Kết nối
Nhập ID thiết bị của thiết bị từ xa trên bảng điều khiển, nhấp vào "Bắt đầu kết nối" và nhập mật khẩu để truy cập vào máy tính từ xa.


Kết luận

DeskIn là lựa chọn thay thế lý tưởng cho Apple Remote Desktop, đặc biệt phù hợp cho người dùng yêu cầu kết nối đa nền tảng, hiệu quả và ổn định. Không chỉ đơn giản để vận hành và phong phú về chức năng, mà nó còn cực kỳ tiết kiệm, mang đến cho bạn trải nghiệm vô song cho công việc hoặc giải trí. Tải DeskIn ngay bây giờ và khám phá những khả năng mới cho việc vận hành từ xa!

What’s next?
How to Enable Remote Desktop on Windows 10 [Best Guide]

How to Enable Remote Desktop on Windows 10 [Best Guide]

How to Enable Remote Desktop Windows 10: Easy Guide & Error Fixes

Want to enable Remote Desktop on Windows 10 but can't find the option or encounter connection issues? You're not alone. Many users run into confusion because Remote Desktop isn't available on all Windows 10 editions, or they miss a few critical setup steps.

In this guide, we'll walk you through how to quickly enable Remote Desktop on Windows 10, explain the system requirements you need to meet, and help you troubleshoot common problems. Read on to turn on Remote Desktop smoothly and start controlling your PC remotely!

System Requirements to Allow Remote Desktop on Windows 10

Before enabling Remote Desktop on your Windows 10 PC, it's essential to ensure that your system meets the requirements. These requirements ensure that Remote Desktop can function properly and allow for a smooth remote connection. Below are the key factors you need to consider.

  • Windows 10 Pro, Enterprise, or Education Edition: Remote Desktop is not supported on Windows 10 Home. If you're using the Home edition, you will need to upgrade to Windows 10 Pro, Enterprise, or Education to enable the feature.

  • Stable Network Connection: For Remote Desktop to function properly, both the local and remote PCs must be connected to a stable and reliable network. A poor or intermittent internet connection could result in dropped sessions or poor performance.

  • Administrator Account Permissions: To enable Remote Desktop on Windows 10, you need to have administrative privileges on the PC. The account you're using must have permission to make system changes, including enabling Remote Desktop.

  • PC Must Be Powered On and Connected to the Internet During Remote Sessions: For remote access to work, the target PC must be powered on and connected to the internet. If the PC is asleep or turned off, the remote connection will fail.

By ensuring your system meets these requirements, you can avoid potential issues when setting up Remote Desktop. In the next section, we'll guide you through the steps to enable Remote Desktop on Windows 10.

Detailed Steps to Turn on Remote Desktop on Windows 10 PC

Enabling Remote Desktop on Windows 10 allows you to remotely access your PC from another device, making it easier to work or troubleshoot from a distance. Follow the steps below to set up Remote Desktop on your Windows 10 device.

Step 1. Open Settings (Win + I > System)

  • Press the "Windows key + I" to open the Settings app.

  • In the Settings window, click on the "System" option to proceed.

Step 2. Find and Turn On Remote Desktop

  • Scroll down within the "System" section until you find Remote Desktop.

  • Toggle the switch to "On" to enable the feature.

  • You will see a confirmation prompt; click "Confirm" to activate Remote Desktop.

Set Up Remote Desktop Feature on Windows

Step 3. Confirm and Allow Access

  • Once Remote Desktop is turned on, you will need to confirm that your PC is accessible remotely.

  • Windows will show the PC name, which you'll need to connect from another device.

  • Make sure the Remote Desktop feature is enabled for remote access.

Step 4. Adjust Firewall Settings

To ensure your PC can accept remote connections, you need to allow Remote Desktop traffic through the firewall. Follow these steps:

  • Open the "Control Panel" by pressing "Win + R", typing "control", and pressing "Enter".

  • Go to "System and Security", and then select "Windows Defender Firewall".

  • In the left-hand menu, click "Allow an app or feature through Windows Defender Firewall".

  • Ensure that Remote Desktop is checked for both "Private" and "Public" network profiles.

Enable Remote Desktop on Windows Firewall Settings

Step 5. Add Additional Users if Needed

By default, only users with administrator privileges can remotely access the PC. If you want to grant access to other users, follow these steps:

  • In the Remote Desktop settings, click on "Select users that can remotely access this PC".

  • You will be prompted to add the usernames of users you wish to grant access to. Enter the name of the user, and click "Add".

  • These users will now be able to connect remotely to your PC, provided they have the correct login credentials.

How to Find Your Windows 10 Computer Name or IP Address

After enabling Remote Desktop, you'll need your computer's name or IP address to establish a successful connection from another device. Here's how to quickly find this information on Windows 10.

Find Your Computer Name

  1. Press "Win + I" to open the Settings app.

  2. Navigate to "System > About".

  3. Under the "Device specifications" section, look for Device name — this is your computer's name, which you'll use for Remote Desktop connections.

Find Your Computer Name on Windows PC

Find Your IP Address

  1. Press "Win + R", type "cmd", and press "Enter" to open the Command Prompt.

  2. In the Command Prompt window, type "ipconfig" and press "Enter".

  3. Look for the IPv4 Address under your active network connection. This is your PC's IP address.

Find Your IP Address on Windows PC

After you've got all the information you need, you can start to connect with the Remote Desktop Connection to easily remote access another Windows computer!

👀 Tips:

  • If you are connecting within the same local network (LAN), using the Device name is usually enough.

  • For connections over the internet, you might need the public IP address and configure router settings like port forwarding.

Common Fixes About Remote Desktop Windows 10 Activation

Even after following the setup steps, you might encounter issues when trying to activate or use Remote Desktop on Windows 10. Below are answers and solutions to some of the most common problems.

Can't Find Remote Desktop Connection Windows 10?

If you can't locate the Remote Desktop settings or app on your Windows 10 device, it could be due to one of the following reasons:

  • Windows 10 Home Edition: Remote Desktop is not available on Windows 10 Home. You will need to upgrade to Windows 10 Pro, Enterprise, or Education to access this feature.

  • Feature Not Enabled: Even on supported editions, Remote Desktop may not be turned on by default. Follow the steps outlined earlier to enable it manually.

  • Hidden Settings: Sometimes, system updates or IT policies may hide Remote Desktop settings. Ensure your Windows 10 installation is up-to-date and check with your system administrator if needed.

Cannot Use Remote Desktop Connection on Windows 10?

If you have enabled Remote Desktop but still cannot connect, check the following:

  • Firewall Settings: Ensure that Remote Desktop is allowed through Windows Defender Firewall. Go to "Control Panel > Windows Defender Firewall > Allow an app or feature through Windows Defender Firewall", and make sure Remote Desktop is enabled for both private and public networks.

  • Network Configuration: Remote Desktop requires a stable network connection. If you're connecting over the internet, you may need to configure port forwarding (TCP 3389) on your router.

  • User Permissions: By default, only administrator accounts are allowed to connect remotely. Make sure the user account you are trying to use has remote access permission. You can add users in "Settings > System > Remote Desktop > Select users that can remotely access this PC".

Does Remote Desktop Connection Come with Windows 10?

Remote Desktop Connection is included in certain editions of Windows 10, but not all:

  • Included: Windows 10 Pro, Enterprise, and Education editions come with built-in Remote Desktop functionality.

  • Not Included: Windows 10 Home edition does not support Remote Desktop hosting (only connecting to other PCs is possible).

    • If you're using Windows 10 Home and want to enable Remote Desktop hosting, you will need to upgrade to a Pro version or explore third-party remote desktop software alternatives.

Bonus: An Easier Alternative to Remote Desktop - DeskIn App

While Windows 10's built-in Remote Desktop is powerful, it can sometimes be complicated to set up, especially if you're using the Home edition, dealing with network configurations, or facing firewall restrictions. If you're looking for a faster, easier, and more flexible way to access your PC remotely, DeskIn is a highly recommended alternative.

Click here to download DeskIn

👀 DeskIn offers:

  • No version limitations: Works across Windows 10 Home, Pro, and other editions.

  • Simple setup: No need to configure firewalls or ports.

  • Cross-platform access: Connect from Windows, macOS, Android, iOS, and even Web browsers.

  • High-speed performance: Optimized for smooth remote sessions, even on lower bandwidths.

With DeskIn, you can start remote control in just a few clicks, no complicated system settings required. Here are the brief steps for you to use it.

  1. Download and install DeskIn on both your local and remote devices.

  2. Sign up and log in with the same DeskIn account on both sides.

  3. Get the DeskIn ID of the remote device you want to control.

  4. Enter the ID and connect, then enjoy a smooth and secure remote session instantly.

Remote Access Windows via DeskIn

Final Words

Enabling Remote Desktop on Windows 10 can greatly enhance your productivity, whether you're accessing work files from home or providing support to another PC. By following the correct setup steps and addressing common issues, you can ensure a smooth and secure remote connection.

If you find Remote Desktop too complicated or limited by system requirements, tools like DeskIn offer a simpler and more flexible alternative. Choose the method that best fits your needs, and enjoy seamless remote access on Windows 10!

Click here to download DeskIn

How to Enable Remote Desktop on Windows 10 [Best Guide]

How to Enable Remote Desktop on Windows 10 [Best Guide]

How to Enable Remote Desktop Windows 10: Easy Guide & Error Fixes

Want to enable Remote Desktop on Windows 10 but can't find the option or encounter connection issues? You're not alone. Many users run into confusion because Remote Desktop isn't available on all Windows 10 editions, or they miss a few critical setup steps.

In this guide, we'll walk you through how to quickly enable Remote Desktop on Windows 10, explain the system requirements you need to meet, and help you troubleshoot common problems. Read on to turn on Remote Desktop smoothly and start controlling your PC remotely!

System Requirements to Allow Remote Desktop on Windows 10

Before enabling Remote Desktop on your Windows 10 PC, it's essential to ensure that your system meets the requirements. These requirements ensure that Remote Desktop can function properly and allow for a smooth remote connection. Below are the key factors you need to consider.

  • Windows 10 Pro, Enterprise, or Education Edition: Remote Desktop is not supported on Windows 10 Home. If you're using the Home edition, you will need to upgrade to Windows 10 Pro, Enterprise, or Education to enable the feature.

  • Stable Network Connection: For Remote Desktop to function properly, both the local and remote PCs must be connected to a stable and reliable network. A poor or intermittent internet connection could result in dropped sessions or poor performance.

  • Administrator Account Permissions: To enable Remote Desktop on Windows 10, you need to have administrative privileges on the PC. The account you're using must have permission to make system changes, including enabling Remote Desktop.

  • PC Must Be Powered On and Connected to the Internet During Remote Sessions: For remote access to work, the target PC must be powered on and connected to the internet. If the PC is asleep or turned off, the remote connection will fail.

By ensuring your system meets these requirements, you can avoid potential issues when setting up Remote Desktop. In the next section, we'll guide you through the steps to enable Remote Desktop on Windows 10.

Detailed Steps to Turn on Remote Desktop on Windows 10 PC

Enabling Remote Desktop on Windows 10 allows you to remotely access your PC from another device, making it easier to work or troubleshoot from a distance. Follow the steps below to set up Remote Desktop on your Windows 10 device.

Step 1. Open Settings (Win + I > System)

  • Press the "Windows key + I" to open the Settings app.

  • In the Settings window, click on the "System" option to proceed.

Step 2. Find and Turn On Remote Desktop

  • Scroll down within the "System" section until you find Remote Desktop.

  • Toggle the switch to "On" to enable the feature.

  • You will see a confirmation prompt; click "Confirm" to activate Remote Desktop.

Set Up Remote Desktop Feature on Windows

Step 3. Confirm and Allow Access

  • Once Remote Desktop is turned on, you will need to confirm that your PC is accessible remotely.

  • Windows will show the PC name, which you'll need to connect from another device.

  • Make sure the Remote Desktop feature is enabled for remote access.

Step 4. Adjust Firewall Settings

To ensure your PC can accept remote connections, you need to allow Remote Desktop traffic through the firewall. Follow these steps:

  • Open the "Control Panel" by pressing "Win + R", typing "control", and pressing "Enter".

  • Go to "System and Security", and then select "Windows Defender Firewall".

  • In the left-hand menu, click "Allow an app or feature through Windows Defender Firewall".

  • Ensure that Remote Desktop is checked for both "Private" and "Public" network profiles.

Enable Remote Desktop on Windows Firewall Settings

Step 5. Add Additional Users if Needed

By default, only users with administrator privileges can remotely access the PC. If you want to grant access to other users, follow these steps:

  • In the Remote Desktop settings, click on "Select users that can remotely access this PC".

  • You will be prompted to add the usernames of users you wish to grant access to. Enter the name of the user, and click "Add".

  • These users will now be able to connect remotely to your PC, provided they have the correct login credentials.

How to Find Your Windows 10 Computer Name or IP Address

After enabling Remote Desktop, you'll need your computer's name or IP address to establish a successful connection from another device. Here's how to quickly find this information on Windows 10.

Find Your Computer Name

  1. Press "Win + I" to open the Settings app.

  2. Navigate to "System > About".

  3. Under the "Device specifications" section, look for Device name — this is your computer's name, which you'll use for Remote Desktop connections.

Find Your Computer Name on Windows PC

Find Your IP Address

  1. Press "Win + R", type "cmd", and press "Enter" to open the Command Prompt.

  2. In the Command Prompt window, type "ipconfig" and press "Enter".

  3. Look for the IPv4 Address under your active network connection. This is your PC's IP address.

Find Your IP Address on Windows PC

After you've got all the information you need, you can start to connect with the Remote Desktop Connection to easily remote access another Windows computer!

👀 Tips:

  • If you are connecting within the same local network (LAN), using the Device name is usually enough.

  • For connections over the internet, you might need the public IP address and configure router settings like port forwarding.

Common Fixes About Remote Desktop Windows 10 Activation

Even after following the setup steps, you might encounter issues when trying to activate or use Remote Desktop on Windows 10. Below are answers and solutions to some of the most common problems.

Can't Find Remote Desktop Connection Windows 10?

If you can't locate the Remote Desktop settings or app on your Windows 10 device, it could be due to one of the following reasons:

  • Windows 10 Home Edition: Remote Desktop is not available on Windows 10 Home. You will need to upgrade to Windows 10 Pro, Enterprise, or Education to access this feature.

  • Feature Not Enabled: Even on supported editions, Remote Desktop may not be turned on by default. Follow the steps outlined earlier to enable it manually.

  • Hidden Settings: Sometimes, system updates or IT policies may hide Remote Desktop settings. Ensure your Windows 10 installation is up-to-date and check with your system administrator if needed.

Cannot Use Remote Desktop Connection on Windows 10?

If you have enabled Remote Desktop but still cannot connect, check the following:

  • Firewall Settings: Ensure that Remote Desktop is allowed through Windows Defender Firewall. Go to "Control Panel > Windows Defender Firewall > Allow an app or feature through Windows Defender Firewall", and make sure Remote Desktop is enabled for both private and public networks.

  • Network Configuration: Remote Desktop requires a stable network connection. If you're connecting over the internet, you may need to configure port forwarding (TCP 3389) on your router.

  • User Permissions: By default, only administrator accounts are allowed to connect remotely. Make sure the user account you are trying to use has remote access permission. You can add users in "Settings > System > Remote Desktop > Select users that can remotely access this PC".

Does Remote Desktop Connection Come with Windows 10?

Remote Desktop Connection is included in certain editions of Windows 10, but not all:

  • Included: Windows 10 Pro, Enterprise, and Education editions come with built-in Remote Desktop functionality.

  • Not Included: Windows 10 Home edition does not support Remote Desktop hosting (only connecting to other PCs is possible).

    • If you're using Windows 10 Home and want to enable Remote Desktop hosting, you will need to upgrade to a Pro version or explore third-party remote desktop software alternatives.

Bonus: An Easier Alternative to Remote Desktop - DeskIn App

While Windows 10's built-in Remote Desktop is powerful, it can sometimes be complicated to set up, especially if you're using the Home edition, dealing with network configurations, or facing firewall restrictions. If you're looking for a faster, easier, and more flexible way to access your PC remotely, DeskIn is a highly recommended alternative.

Click here to download DeskIn

👀 DeskIn offers:

  • No version limitations: Works across Windows 10 Home, Pro, and other editions.

  • Simple setup: No need to configure firewalls or ports.

  • Cross-platform access: Connect from Windows, macOS, Android, iOS, and even Web browsers.

  • High-speed performance: Optimized for smooth remote sessions, even on lower bandwidths.

With DeskIn, you can start remote control in just a few clicks, no complicated system settings required. Here are the brief steps for you to use it.

  1. Download and install DeskIn on both your local and remote devices.

  2. Sign up and log in with the same DeskIn account on both sides.

  3. Get the DeskIn ID of the remote device you want to control.

  4. Enter the ID and connect, then enjoy a smooth and secure remote session instantly.

Remote Access Windows via DeskIn

Final Words

Enabling Remote Desktop on Windows 10 can greatly enhance your productivity, whether you're accessing work files from home or providing support to another PC. By following the correct setup steps and addressing common issues, you can ensure a smooth and secure remote connection.

If you find Remote Desktop too complicated or limited by system requirements, tools like DeskIn offer a simpler and more flexible alternative. Choose the method that best fits your needs, and enjoy seamless remote access on Windows 10!

Click here to download DeskIn

Remote Desktop Connection Windows: How to Set Up & Use It?

Remote Desktop Connection Windows: How to Set Up & Use It?

Remote Desktop Connection Windows: How to Set Up & Use It?

With Microsoft officially discontinuing the UWP version of Remote Desktop, many users are now seeking reliable ways to connect remotely to their Windows devices. Fortunately, Windows still offers a built-in solution, Remote Desktop Connection, which allows users to access and control their PCs from virtually anywhere. Whether you're using Windows 10 or Windows 11, setting up a remote desktop connection on Windows remains a straightforward and effective way to stay productive across multiple devices.

In this article, we'll walk you through everything you need to know about enabling and using Remote Desktop Connection on Windows, address common issues you might encounter, and introduce a powerful alternative for those looking for even more flexibility and performance.

👀 Related Info:

Microsoft Remote Desktop Shutting Down: All You Need to Know

What Is Remote Desktop Connection?

Remote Desktop Connection is a built-in feature in Windows that allows users to connect to and operate a Windows PC from another device, regardless of location. Though Microsoft has released the Windows app as an updated solution, this tool is still useful if you want to access your work computers while traveling, provide remote support, or even collaborate with team members across different locations.

Remote Desktop Connection uses the Remote Desktop Protocol (RDP) to establish a secure connection between devices. Whether you're using Windows 10 or Windows 11, setting up remote desktop connection on Windows can significantly enhance your workflow, offering flexibility and convenience for a wide range of scenarios.

Common Use Cases for Remote Desktop Connection

  • Remote Work and Team Collaboration: With more businesses shifting to remote or hybrid work models, Remote Desktop Connection enables employees to access their office PCs from home or while traveling, ensuring they can continue working seamlessly on critical files and applications.

  • Remote Support and Troubleshooting: IT professionals and technical support teams frequently use Remote Desktop Connection to assist users with troubleshooting or to remotely configure settings on a device. This eliminates the need for in-person visits, saving time and resources.

  • Accessing Personal Files and Applications: Users can also utilize Remote Desktop Connection to access personal computers from their laptops or mobile devices, making it easy to retrieve files or run applications as if they were sitting right in front of their desktop.

  • Remote Gaming and Entertainment: Gamers can take advantage of Remote Desktop Connection to stream games from their gaming PC to another device, such as a laptop or tablet, for a seamless gaming experience, even while away from home.

In short, Remote Desktop Connection on Windows serves a wide array of practical purposes, from professional work to personal leisure activities, offering users a powerful tool to stay connected to their Windows PC from virtually anywhere.

How to Use Remote Desktop Connection on Windows 10/11

Now that we understand what Remote Desktop Connection is, let's learn how to connect to it from your local computer. Here's a simple guide on how to get started with Remote Desktop Connection.

Step 1. Press "Win + I" to open the Settings app. Go to "System > Remote Desktop", and then click on "Enable Remote Desktop" and confirm when prompted.

Set Up Remote Desktop Feature on Windows

📌 Note: The Remote Desktop Connection feature has system requirements. If you are a Windows Home user, you may not be able to enable it. If you encounter similar problems, please read the post below for more information.

👉How to Enable Remote Desktop Windows 10: Easy Guide & Error Fixes

Step 2. On your local computer (whether it's a Windows PC, Mac, or another device), you need to open the Remote Desktop Connection application. On Windows, you can do this by pressing "Win + R" to open the Run dialog, then typing "mstsc" and hitting Enter. Alternatively, you can search for Remote Desktop Connection in the Start menu.

Step 3. In the Remote Desktop Connection window that opens, you'll be asked to enter the IP address or computer name of the remote PC you want to connect to. You can find this information on the remote PC by following the steps mentioned in the previous section (Settings > System > About > Device Name). After entering the correct details, click "Connect".

Step 4. Once you click "Connect", a login prompt will appear. Enter the username and password of an account that has remote access rights on the target PC. This could be your admin account or any user account you've granted access to.

Enter PC Address for Remote Desktop Connection

After logging in, you'll see the remote Windows desktop appear on your local screen, allowing you to control the PC as if you were sitting in front of it.

A Better Alternative: Connect to Your Windows PC Easily with DeskIn

If you're looking for a more stable and efficient remote desktop experience, consider using a more advanced tool: DeskIn. It stands out with several key advantages compared to the traditional Remote Desktop Connection, which makes the whole connection process quick and easy.

Click here to download DeskIn

DeskIn Official Website

Why DeskIn is the Smarter Choice?

  • High Stability and Ultra-Low Latency: With over 200 global acceleration nodes, DeskIn ensures stable, high-speed remote connections — even across continents. Unlike Remote Desktop Connection, which often lags on weaker networks, DeskIn keeps your operations smooth and responsive in any environment.

  • No Public IP or Complex Setup Needed: Forget about port forwarding, VPNs, or public IP addresses. DeskIn simplifies everything: just install the app, log in, and start controlling your PC — no technical barriers.

  • Access Anytime from PC, Mobile, or Tablet: DeskIn supports Windows, macOS, iOS, and Android, giving you full control across devices. Compared to Remote Desktop Connection, DeskIn's mobile access is faster, easier, and needs no extra configuration.

  • Free for Commercial Use: DeskIn's free plan allows remote control of up to three devices, even for business needs — a major advantage over Remote Desktop, which may require additional licensing depending on your Windows edition.

  • Perfect for Any Scenario: Whether working remotely, gaming, supporting clients, or retrieving files on the go, DeskIn adapts effortlessly. It offers smart features like automatic resolution adjustment, session reconnection, and robust encryption for secure access.

To make it easy to remotely access Windows PCs, you can check out the comparison table (based on DeskIn's latest feature set) below for an easier decision.

Feature

DeskIn Connection

Remote Desktop Connection

Connection Stability

Very stable, with high availability

May experience interruptions on weaker networks

Compatibility

Supports Windows, macOS, iOS, and Android

Only available for Windows PCs

Mobile Support

Full mobile/tablet support

Limited mobile/tablet options

Setup

Easy, no public IP required

Requires network configuration and a public IP

Ease of Use

Install & connect easily

Requires enabling system settings and firewall rules

Free Version for Business

Yes, up to 3 devices

Limited, requires the correct Windows edition

Connect to Your Windows PC Anywhere with DeskIn

Getting started with DeskIn is straightforward, even if you're new to remote desktop tools. Follow these simple steps to remotely access your Windows PC anytime, anywhere.

Step 1. First, head over to DeskIn's official website and download the appropriate version for your device — whether it's Windows, macOS, iOS, or Android. After downloading, install the app following the on-screen instructions.

Click here to download DeskIn

Step 2. Once installed, open the DeskIn application. If you already have an account, simply log in with your credentials. If you're a new user, you can quickly create an account within minutes — it's completely free.

Log into DeskIn on PC

Step 3. After logging in, just use the device ID and password on your target PC to connect. Then, select the Windows PC you want to control and initiate the connection. Now, you'll gain full remote access, enabling you to work, manage files, or troubleshoot issues from virtually anywhere.

Remote Access Windows via DeskIn

Final Words

In conclusion, whether you choose Remote Desktop Connection on Windows or switch to a more advanced tool like DeskIn, both options can enhance your remote desktop experience, making it more efficient and accessible.

While Remote Desktop Connection is a reliable solution for basic remote access, DeskIn offers higher stability, better compatibility across devices, and a more seamless connection for various use cases. By selecting the right tool based on your needs, you can enjoy a smoother and more productive remote working experience.

Click here to download DeskIn


Remote Desktop Connection Windows: How to Set Up & Use It?

Remote Desktop Connection Windows: How to Set Up & Use It?

Remote Desktop Connection Windows: How to Set Up & Use It?

With Microsoft officially discontinuing the UWP version of Remote Desktop, many users are now seeking reliable ways to connect remotely to their Windows devices. Fortunately, Windows still offers a built-in solution, Remote Desktop Connection, which allows users to access and control their PCs from virtually anywhere. Whether you're using Windows 10 or Windows 11, setting up a remote desktop connection on Windows remains a straightforward and effective way to stay productive across multiple devices.

In this article, we'll walk you through everything you need to know about enabling and using Remote Desktop Connection on Windows, address common issues you might encounter, and introduce a powerful alternative for those looking for even more flexibility and performance.

👀 Related Info:

Microsoft Remote Desktop Shutting Down: All You Need to Know

What Is Remote Desktop Connection?

Remote Desktop Connection is a built-in feature in Windows that allows users to connect to and operate a Windows PC from another device, regardless of location. Though Microsoft has released the Windows app as an updated solution, this tool is still useful if you want to access your work computers while traveling, provide remote support, or even collaborate with team members across different locations.

Remote Desktop Connection uses the Remote Desktop Protocol (RDP) to establish a secure connection between devices. Whether you're using Windows 10 or Windows 11, setting up remote desktop connection on Windows can significantly enhance your workflow, offering flexibility and convenience for a wide range of scenarios.

Common Use Cases for Remote Desktop Connection

  • Remote Work and Team Collaboration: With more businesses shifting to remote or hybrid work models, Remote Desktop Connection enables employees to access their office PCs from home or while traveling, ensuring they can continue working seamlessly on critical files and applications.

  • Remote Support and Troubleshooting: IT professionals and technical support teams frequently use Remote Desktop Connection to assist users with troubleshooting or to remotely configure settings on a device. This eliminates the need for in-person visits, saving time and resources.

  • Accessing Personal Files and Applications: Users can also utilize Remote Desktop Connection to access personal computers from their laptops or mobile devices, making it easy to retrieve files or run applications as if they were sitting right in front of their desktop.

  • Remote Gaming and Entertainment: Gamers can take advantage of Remote Desktop Connection to stream games from their gaming PC to another device, such as a laptop or tablet, for a seamless gaming experience, even while away from home.

In short, Remote Desktop Connection on Windows serves a wide array of practical purposes, from professional work to personal leisure activities, offering users a powerful tool to stay connected to their Windows PC from virtually anywhere.

How to Use Remote Desktop Connection on Windows 10/11

Now that we understand what Remote Desktop Connection is, let's learn how to connect to it from your local computer. Here's a simple guide on how to get started with Remote Desktop Connection.

Step 1. Press "Win + I" to open the Settings app. Go to "System > Remote Desktop", and then click on "Enable Remote Desktop" and confirm when prompted.

Set Up Remote Desktop Feature on Windows

📌 Note: The Remote Desktop Connection feature has system requirements. If you are a Windows Home user, you may not be able to enable it. If you encounter similar problems, please read the post below for more information.

👉How to Enable Remote Desktop Windows 10: Easy Guide & Error Fixes

Step 2. On your local computer (whether it's a Windows PC, Mac, or another device), you need to open the Remote Desktop Connection application. On Windows, you can do this by pressing "Win + R" to open the Run dialog, then typing "mstsc" and hitting Enter. Alternatively, you can search for Remote Desktop Connection in the Start menu.

Step 3. In the Remote Desktop Connection window that opens, you'll be asked to enter the IP address or computer name of the remote PC you want to connect to. You can find this information on the remote PC by following the steps mentioned in the previous section (Settings > System > About > Device Name). After entering the correct details, click "Connect".

Step 4. Once you click "Connect", a login prompt will appear. Enter the username and password of an account that has remote access rights on the target PC. This could be your admin account or any user account you've granted access to.

Enter PC Address for Remote Desktop Connection

After logging in, you'll see the remote Windows desktop appear on your local screen, allowing you to control the PC as if you were sitting in front of it.

A Better Alternative: Connect to Your Windows PC Easily with DeskIn

If you're looking for a more stable and efficient remote desktop experience, consider using a more advanced tool: DeskIn. It stands out with several key advantages compared to the traditional Remote Desktop Connection, which makes the whole connection process quick and easy.

Click here to download DeskIn

DeskIn Official Website

Why DeskIn is the Smarter Choice?

  • High Stability and Ultra-Low Latency: With over 200 global acceleration nodes, DeskIn ensures stable, high-speed remote connections — even across continents. Unlike Remote Desktop Connection, which often lags on weaker networks, DeskIn keeps your operations smooth and responsive in any environment.

  • No Public IP or Complex Setup Needed: Forget about port forwarding, VPNs, or public IP addresses. DeskIn simplifies everything: just install the app, log in, and start controlling your PC — no technical barriers.

  • Access Anytime from PC, Mobile, or Tablet: DeskIn supports Windows, macOS, iOS, and Android, giving you full control across devices. Compared to Remote Desktop Connection, DeskIn's mobile access is faster, easier, and needs no extra configuration.

  • Free for Commercial Use: DeskIn's free plan allows remote control of up to three devices, even for business needs — a major advantage over Remote Desktop, which may require additional licensing depending on your Windows edition.

  • Perfect for Any Scenario: Whether working remotely, gaming, supporting clients, or retrieving files on the go, DeskIn adapts effortlessly. It offers smart features like automatic resolution adjustment, session reconnection, and robust encryption for secure access.

To make it easy to remotely access Windows PCs, you can check out the comparison table (based on DeskIn's latest feature set) below for an easier decision.

Feature

DeskIn Connection

Remote Desktop Connection

Connection Stability

Very stable, with high availability

May experience interruptions on weaker networks

Compatibility

Supports Windows, macOS, iOS, and Android

Only available for Windows PCs

Mobile Support

Full mobile/tablet support

Limited mobile/tablet options

Setup

Easy, no public IP required

Requires network configuration and a public IP

Ease of Use

Install & connect easily

Requires enabling system settings and firewall rules

Free Version for Business

Yes, up to 3 devices

Limited, requires the correct Windows edition

Connect to Your Windows PC Anywhere with DeskIn

Getting started with DeskIn is straightforward, even if you're new to remote desktop tools. Follow these simple steps to remotely access your Windows PC anytime, anywhere.

Step 1. First, head over to DeskIn's official website and download the appropriate version for your device — whether it's Windows, macOS, iOS, or Android. After downloading, install the app following the on-screen instructions.

Click here to download DeskIn

Step 2. Once installed, open the DeskIn application. If you already have an account, simply log in with your credentials. If you're a new user, you can quickly create an account within minutes — it's completely free.

Log into DeskIn on PC

Step 3. After logging in, just use the device ID and password on your target PC to connect. Then, select the Windows PC you want to control and initiate the connection. Now, you'll gain full remote access, enabling you to work, manage files, or troubleshoot issues from virtually anywhere.

Remote Access Windows via DeskIn

Final Words

In conclusion, whether you choose Remote Desktop Connection on Windows or switch to a more advanced tool like DeskIn, both options can enhance your remote desktop experience, making it more efficient and accessible.

While Remote Desktop Connection is a reliable solution for basic remote access, DeskIn offers higher stability, better compatibility across devices, and a more seamless connection for various use cases. By selecting the right tool based on your needs, you can enjoy a smoother and more productive remote working experience.

Click here to download DeskIn


Don't miss out.

Don't miss out.

Don't miss out.

Contact Us

Email: support@deskin.io

Office: 6 Shenton Way, #36-01 OUE Downtown 1, Singapore 068809

Copyright © 2025 Zuler Technology PTE. LTD. All rights reserved.

Contact Us

Email: support@deskin.io

Office: 6 Shenton Wy, #36-01 OUE Downtown 1, Singapore 068809

Copyright © 2025 Zuler Technology PTE. LTD. All rights reserved.

Contact Us

support@deskin.io

6 Shenton Way, #36-01 OUE Downtown 1, Singapore 068809

Copyright © 2025 Zuler Technology PTE. LTD. All rights reserved.