Search Docs…
Đối với những người làm đa nhiệm, việc có một màn hình thứ hai có thể làm tăng năng suất lao động một cách đáng kể. Nếu bạn là người làm việc ở nhà hoặc là sinh viên mà không có màn hình kép, đây là cách mà bạn có thể dễ dàng biến iPad idle của mình thành một màn hình thứ hai cho máy tính.
Lợi ích của việc sử dụng iPad làm màn hình phụ:
1. Tăng không gian màn hình để hiển thị nhiều nội dung cùng một lúc. Đối với người dùng đa nhiệm, họ có thể tránh việc chuyển đổi qua lại giữa các cửa sổ, tiết kiệm thời gian.
2. Mỗi màn hình hoạt động độc lập, giúp không gian làm việc được tổ chức hơn.
Khi chỉnh sửa video, một màn hình được sử dụng cho việc chỉnh sửa và màn hình còn lại để đặt tài liệu. Khi viết bài, một màn hình dành cho việc viết, màn hình còn lại để tìm kiếm thông tin, v.v.
3. Kích thước màn hình của iPad đủ lớn, và chất lượng hiển thị khá tốt. Đối với những người có nhu cầu công việc thiết kế hoặc sử dụng MacBook, có thể nó sẽ tiết kiệm chi phí hơn việc mua thêm một màn hình, và không có vấn đề về sự khác biệt màu sắc.
4. Nhiều người có sẵn iPad tại nhà. Bằng cách sử dụng thiết bị mà bạn đã có làm màn hình phụ, bạn tiết kiệm được chi phí mua thêm một màn hình và không gian để đặt màn hình đó.
Cách sử dụng iPad làm màn hình phụ cho Mac?
Tính năng gốc của Apple là Apple Sidecar cho phép bạn sử dụng iPad như một màn hình ngoài cho MacBook và iMac. Chỉ cần thực hiện một vài cài đặt đơn giản và bạn có thể đạt được một kết nối liền mạch giữa iPad của bạn và máy tính.
Lưu ý: Để sử dụng Apple Sidecar, hai thiết bị cần đăng nhập vào cùng một Apple ID hoặc ở trên cùng một mạng. Cả hai thiết bị nên có Bluetooth và Wi-Fi bật và khoảng cách không được vượt quá 10 mét (khoảng 10 mét).
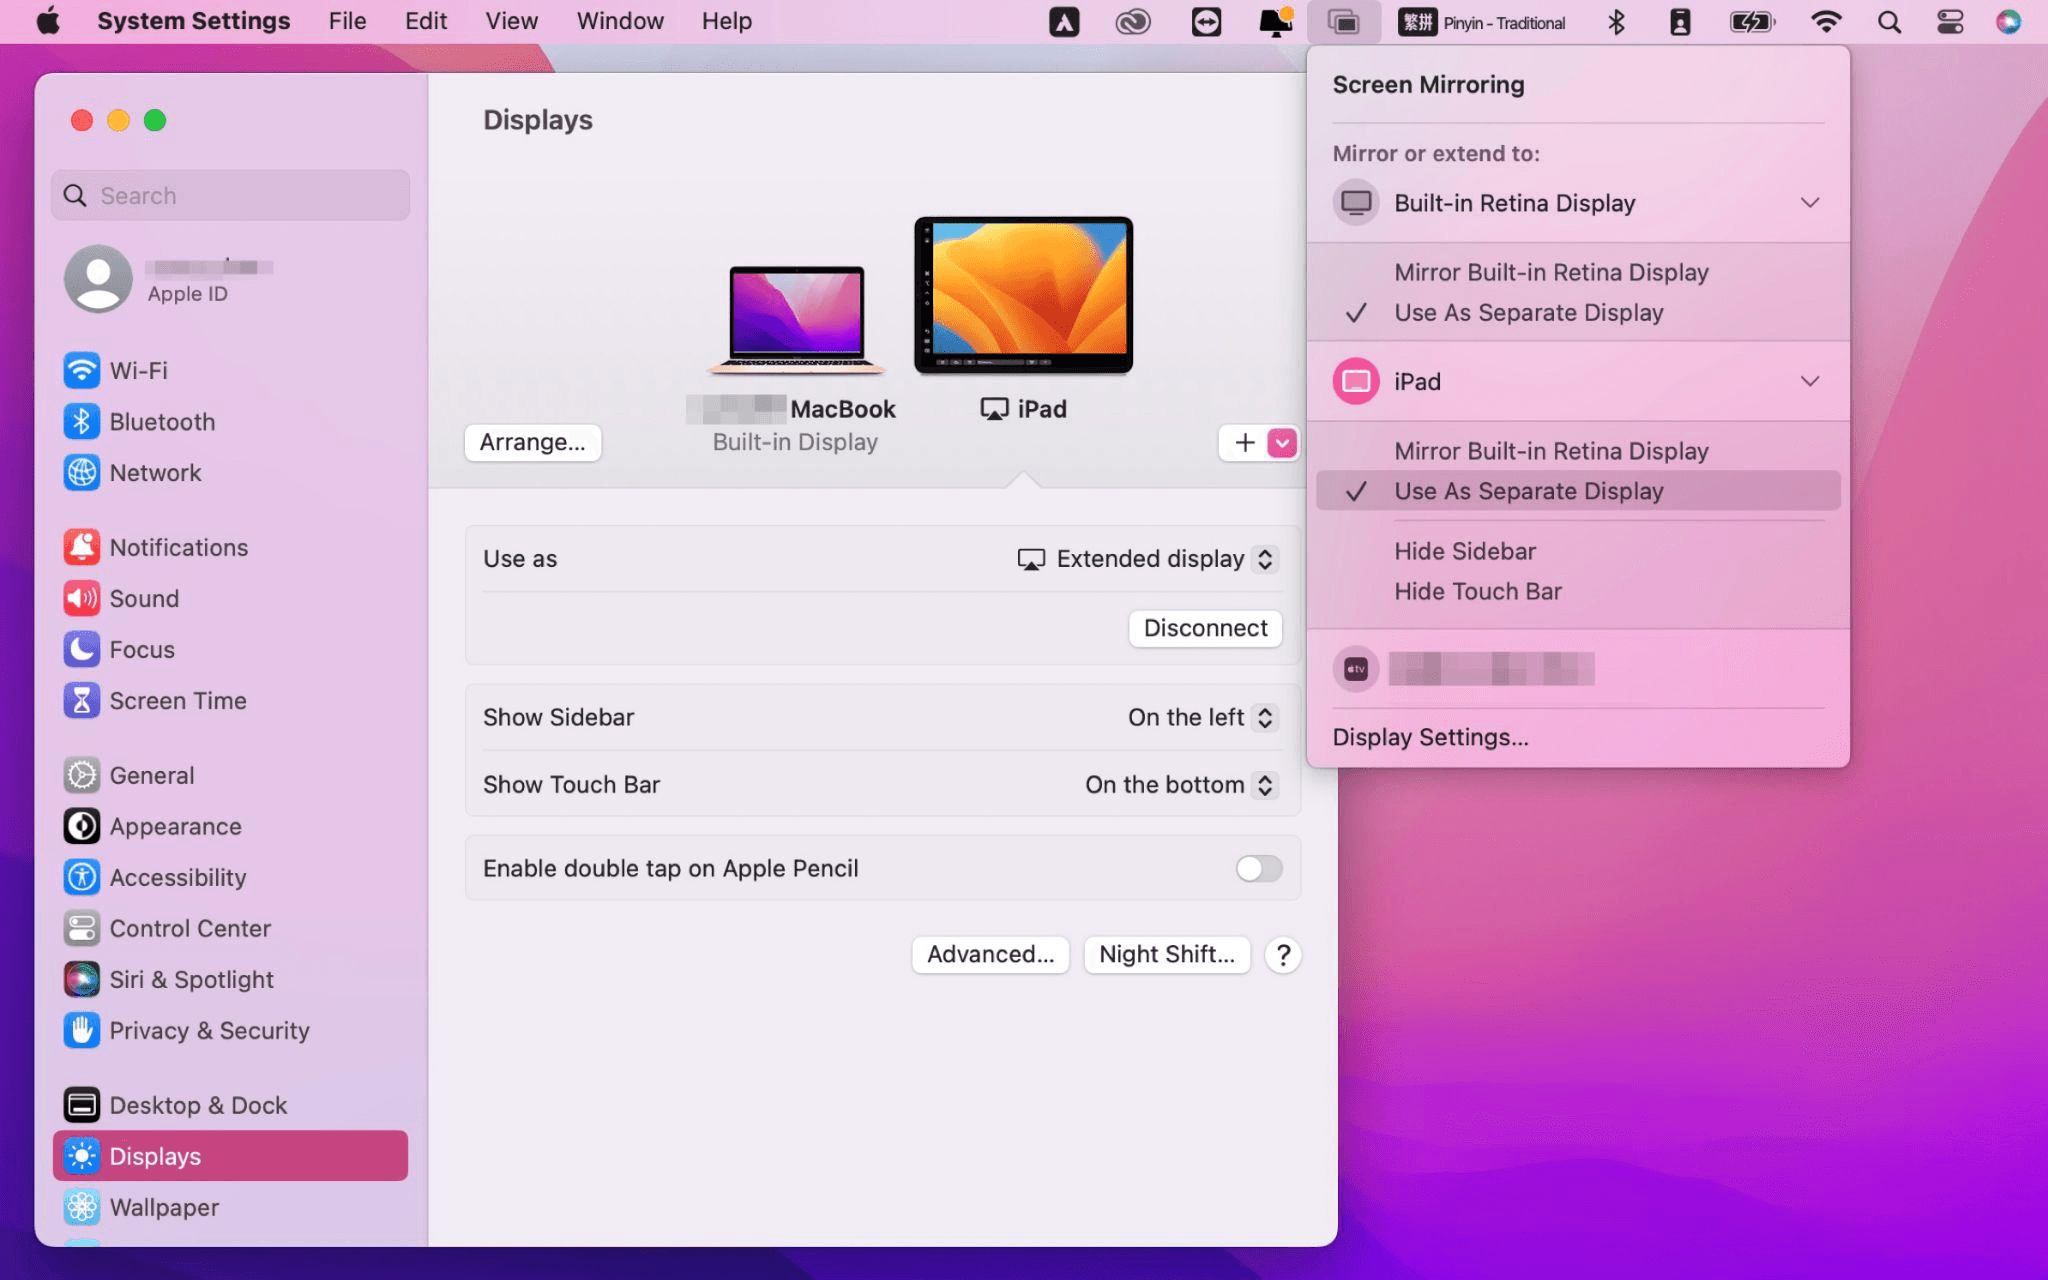
Bước 1: Cài đặt Màn hình:
Mở Cài đặt Hệ thống Mac >> Nhấn "Màn hình" trong thanh bên >> Nhấn vào menu pop up " + " ở bên phải và chọn iPad của bạn.
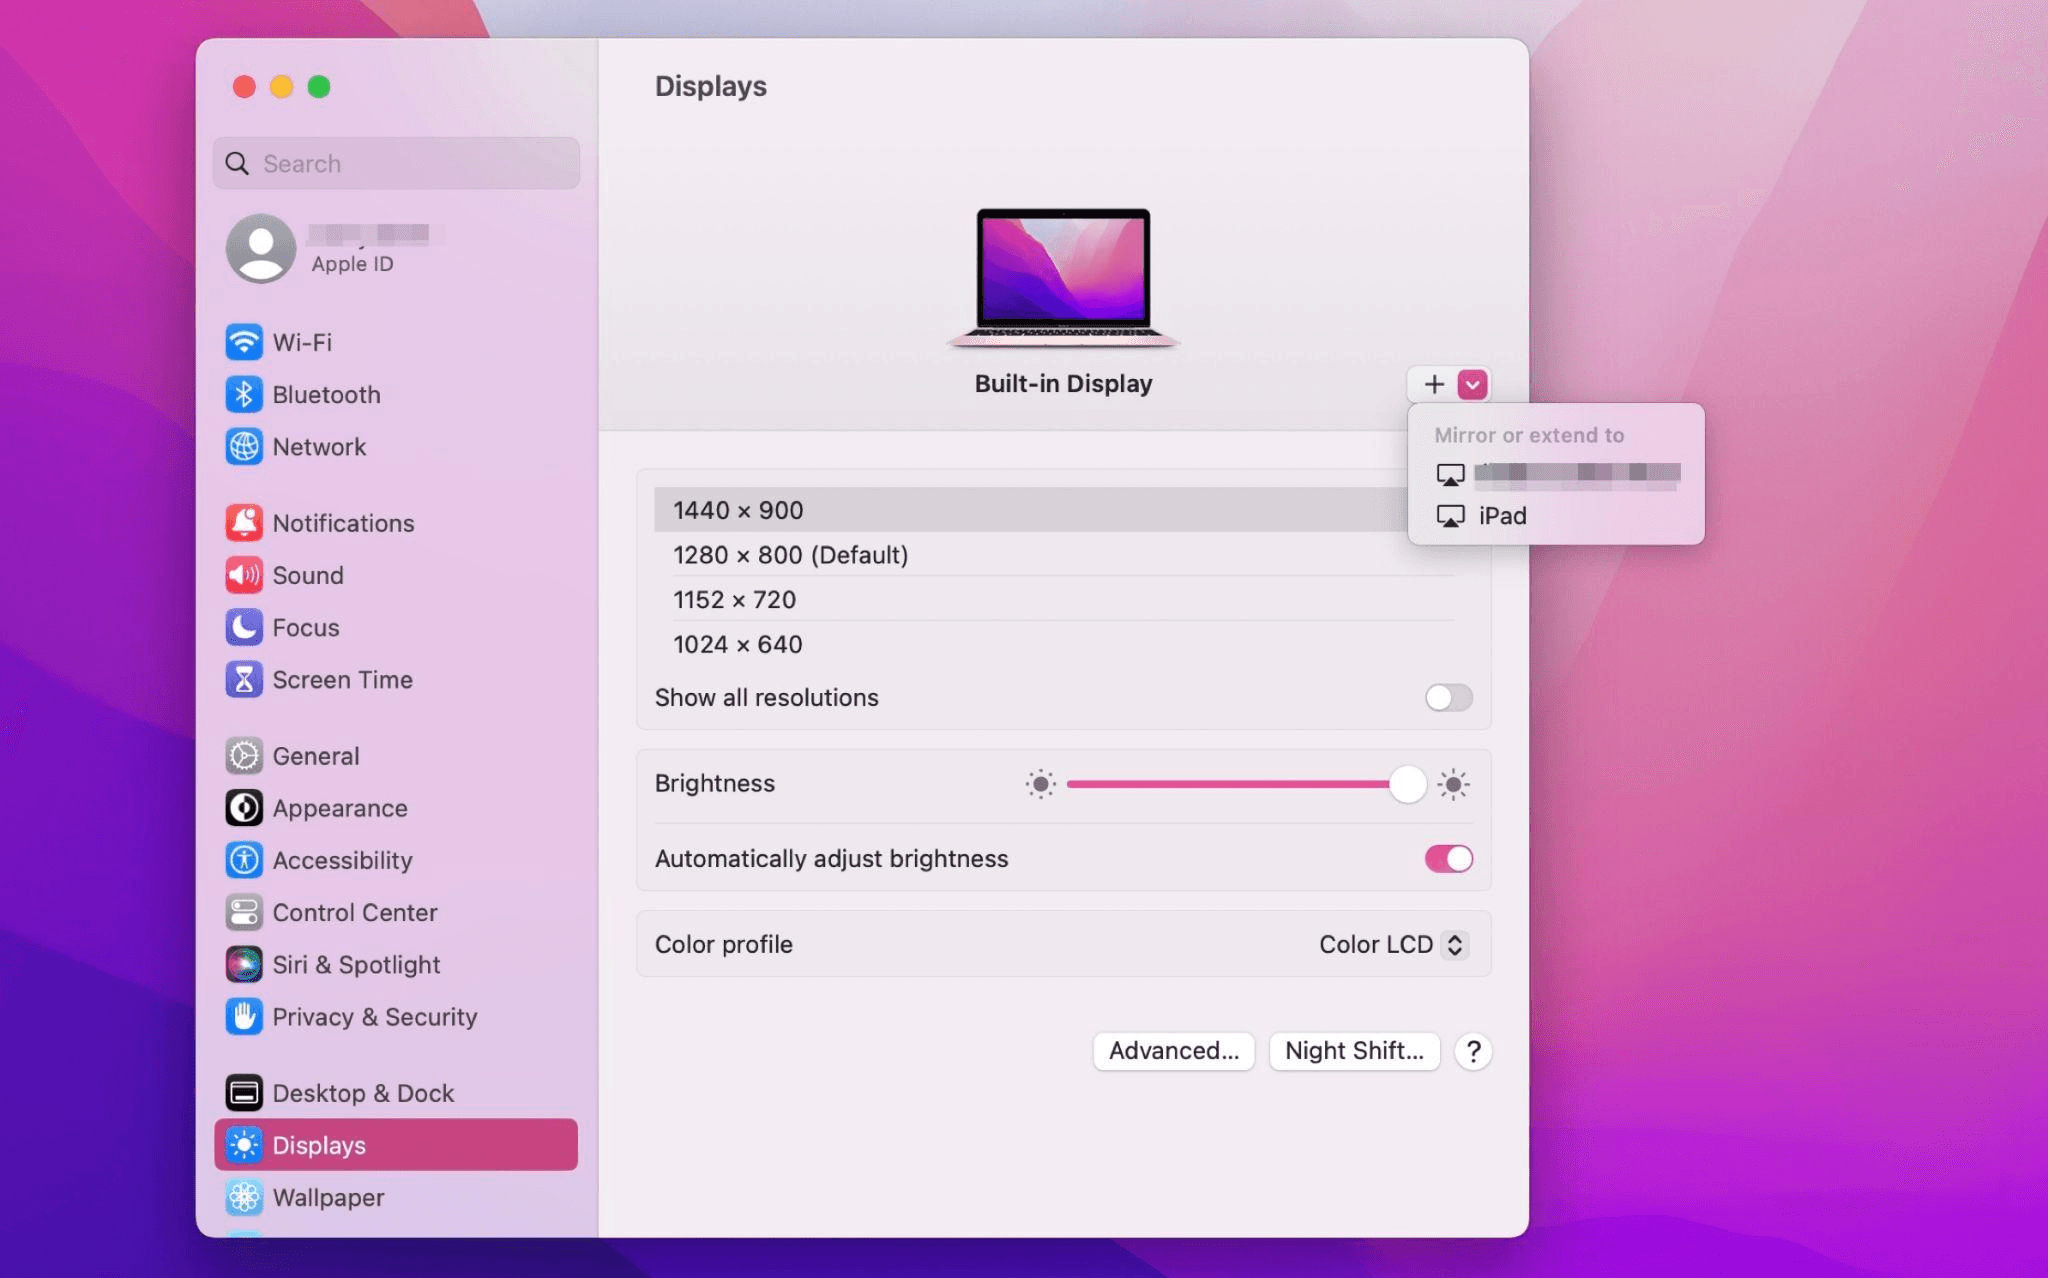
Chọn iPad, thay đổi cài đặt Sử dụng thành "Màn hình mở rộng". Kiểm tra cài đặt Airplay trên thanh công cụ trên cùng của mac và đặt iPad thành "Sử dụng như Màn hình riêng biệt".
Bước 2: Mở rộng Màn hình
Sau khi hoàn tất cài đặt, iPad của bạn sẽ trở thành màn hình thứ hai cho Mac của bạn. Bạn có thể kéo các cửa sổ từ Mac sang iPad một cách mượt mà. Bạn cũng có thể sử dụng thanh bên trên iPad hoặc thay đổi vị trí của thanh bên trong cài đặt hiển thị hệ thống.

Màn hình MacBook (Trái) và Màn hình iPad (Phải)
Cách sử dụng iPad làm màn hình phụ cho Windows?
Apple Sidecar chỉ hỗ trợ mac được phát hành sau năm 2016 và iPadOS13 hoặc mới hơn. Nếu bạn đang sử dụng thiết bị Apple cũ hoặc thiết bị Windows, bạn vẫn có thể sử dụng phần mềm từ xa DeskIn để thực hiện việc mở rộng màn hình. Nó hỗ trợ sử dụng iPad làm màn hình thứ hai cho Mac và Windows, và độ mượt mà không kém cạnh gì Sidecar.
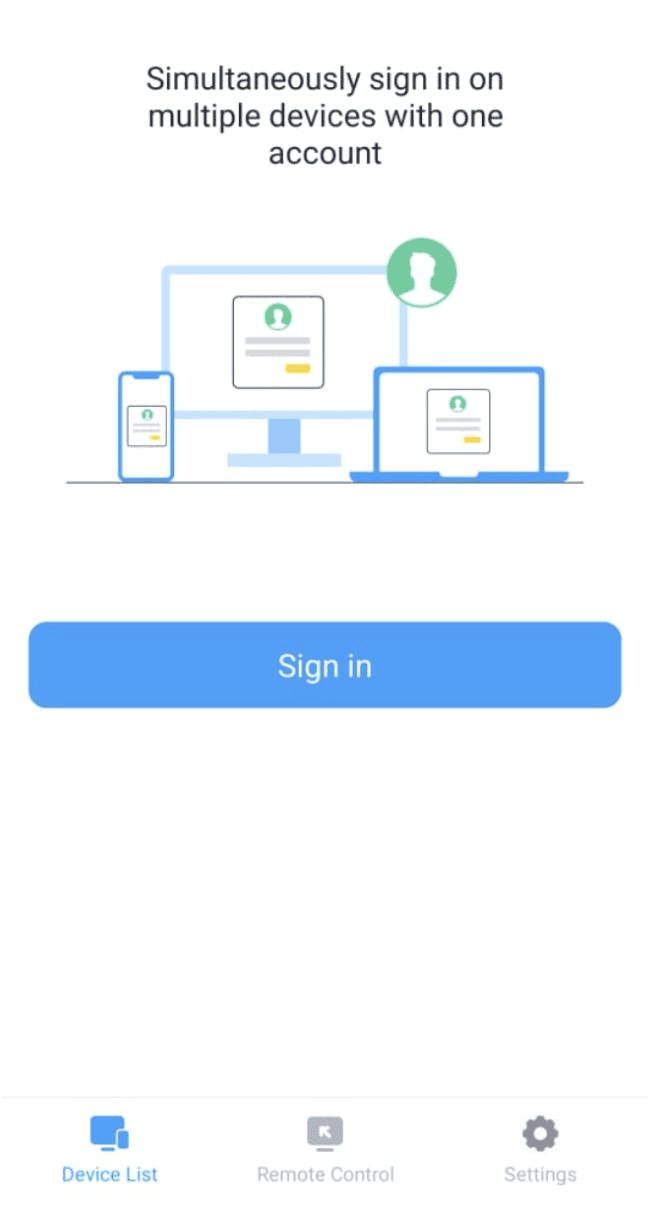
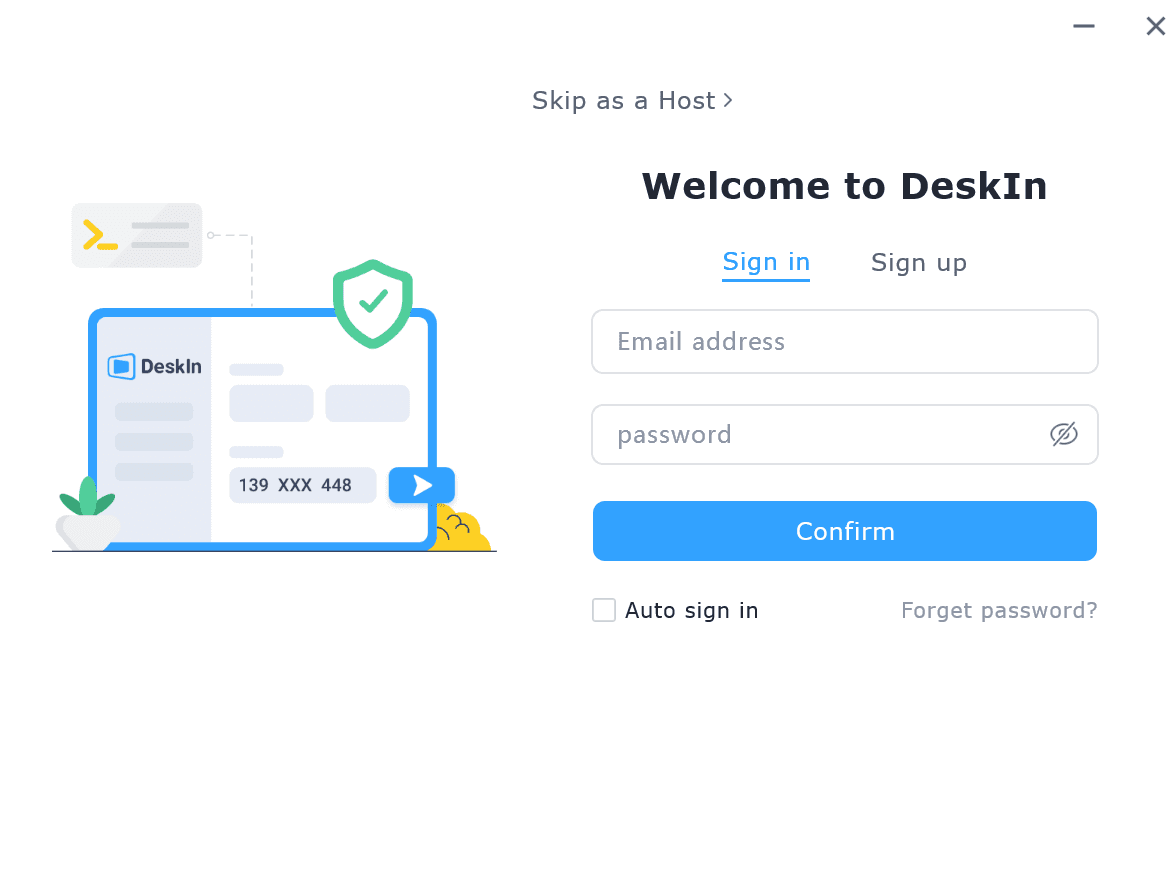
Bước 1: Tải xuống và Đăng ký Tài khoản DeskIn
Tải xuống DeskIn trên máy tính và iPad của bạn, đăng ký tài khoản miễn phí và đăng nhập riêng biệt.
Lưu ý: Trong lần đăng nhập đầu tiên vào một thiết bị mới, bạn cần hoàn tất xác minh email, điều này nhằm bảo vệ sự an toàn cho tài khoản của bạn.
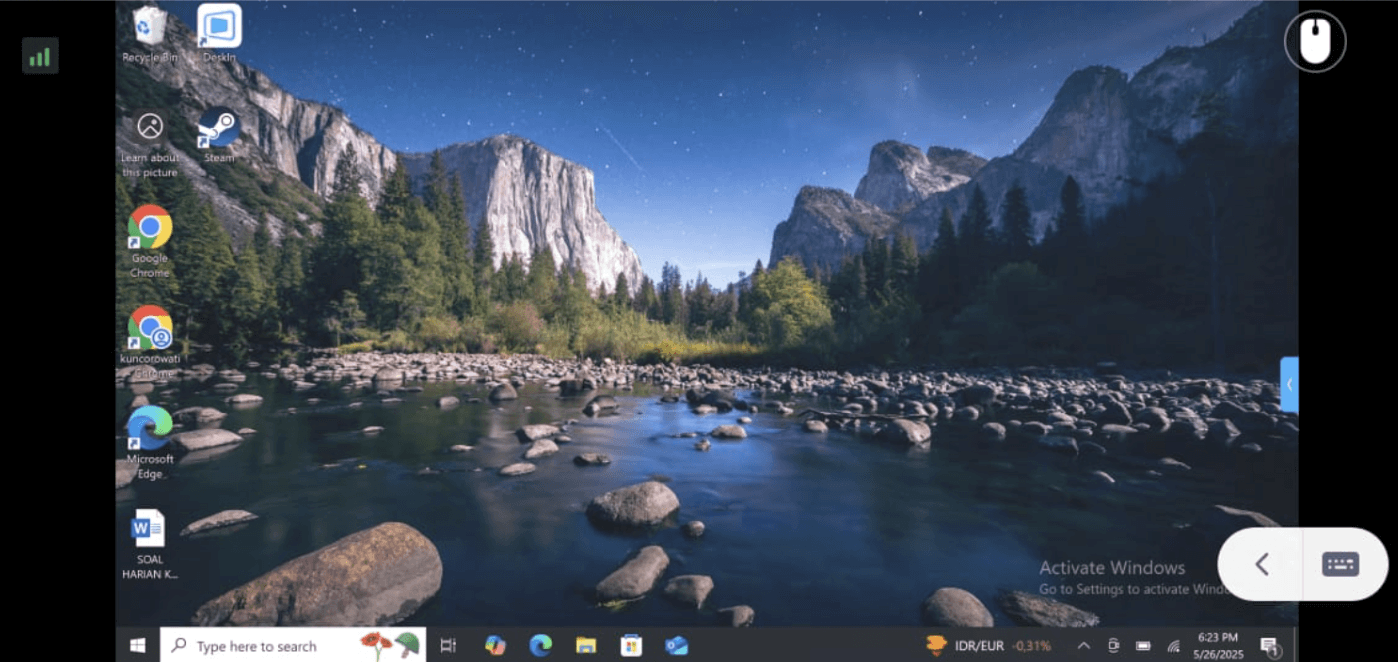
Bước 2: Mở rộng Màn hình
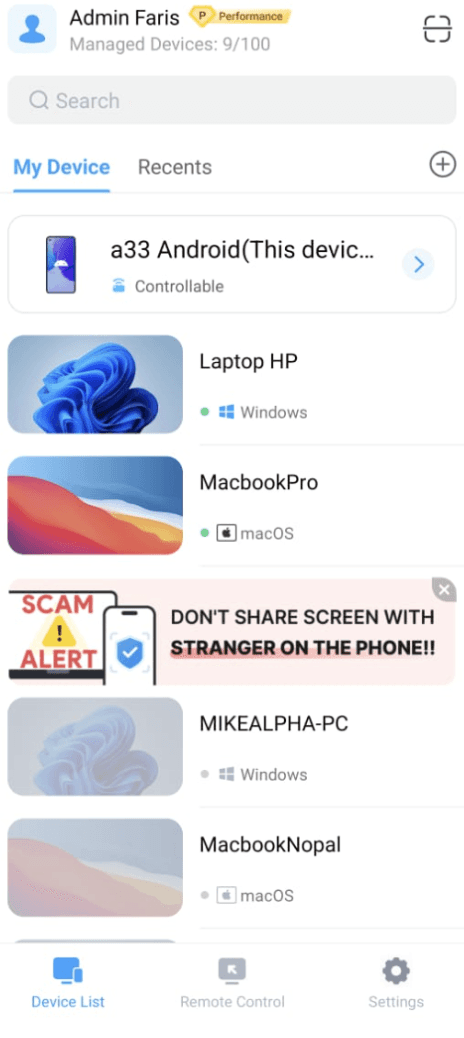
Mở ứng dụng DeskIn trên máy tính Windows/Mac của bạn >> Đi đến Tab "Quản lý Màn hình" >> Nhấn vào “Mở rộng màn hình của tôi”
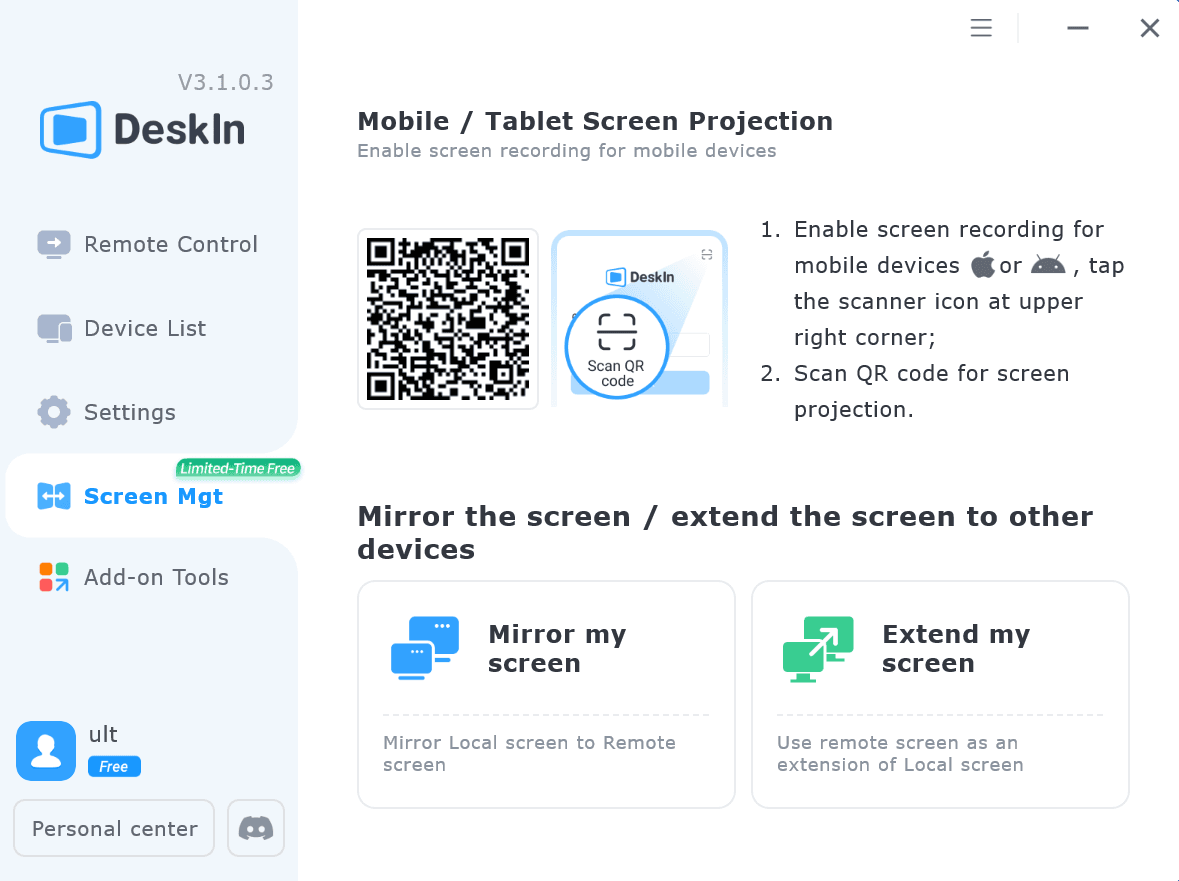
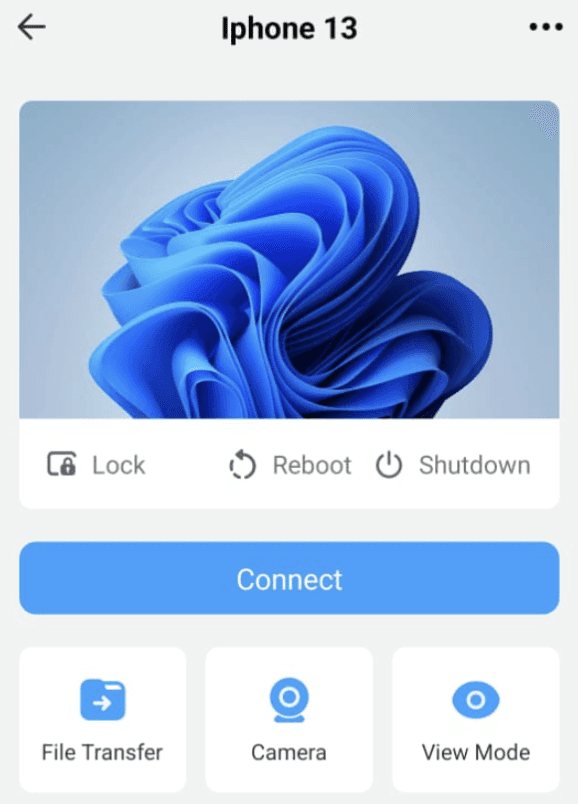
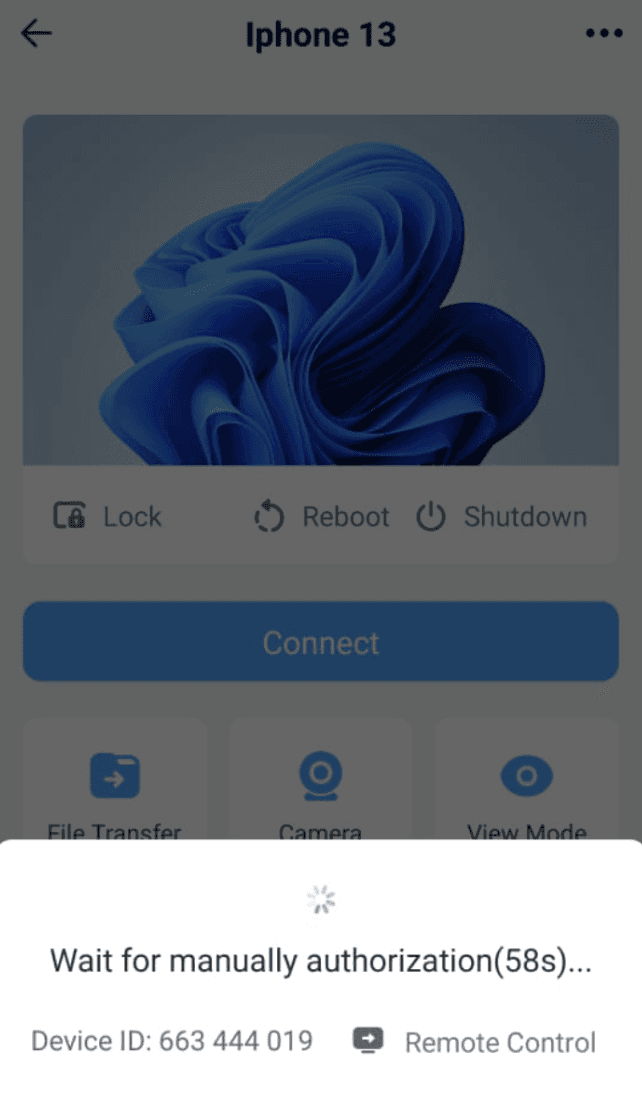
Chọn iPad của bạn và nhấn “Bắt đầu mở rộng”. Khi kết nối, iPad của bạn sẽ trở thành màn hình thứ hai của máy tính Windows/Mac của bạn, bạn có thể di chuyển các cửa sổ giữa hai màn hình như thể chúng là một.
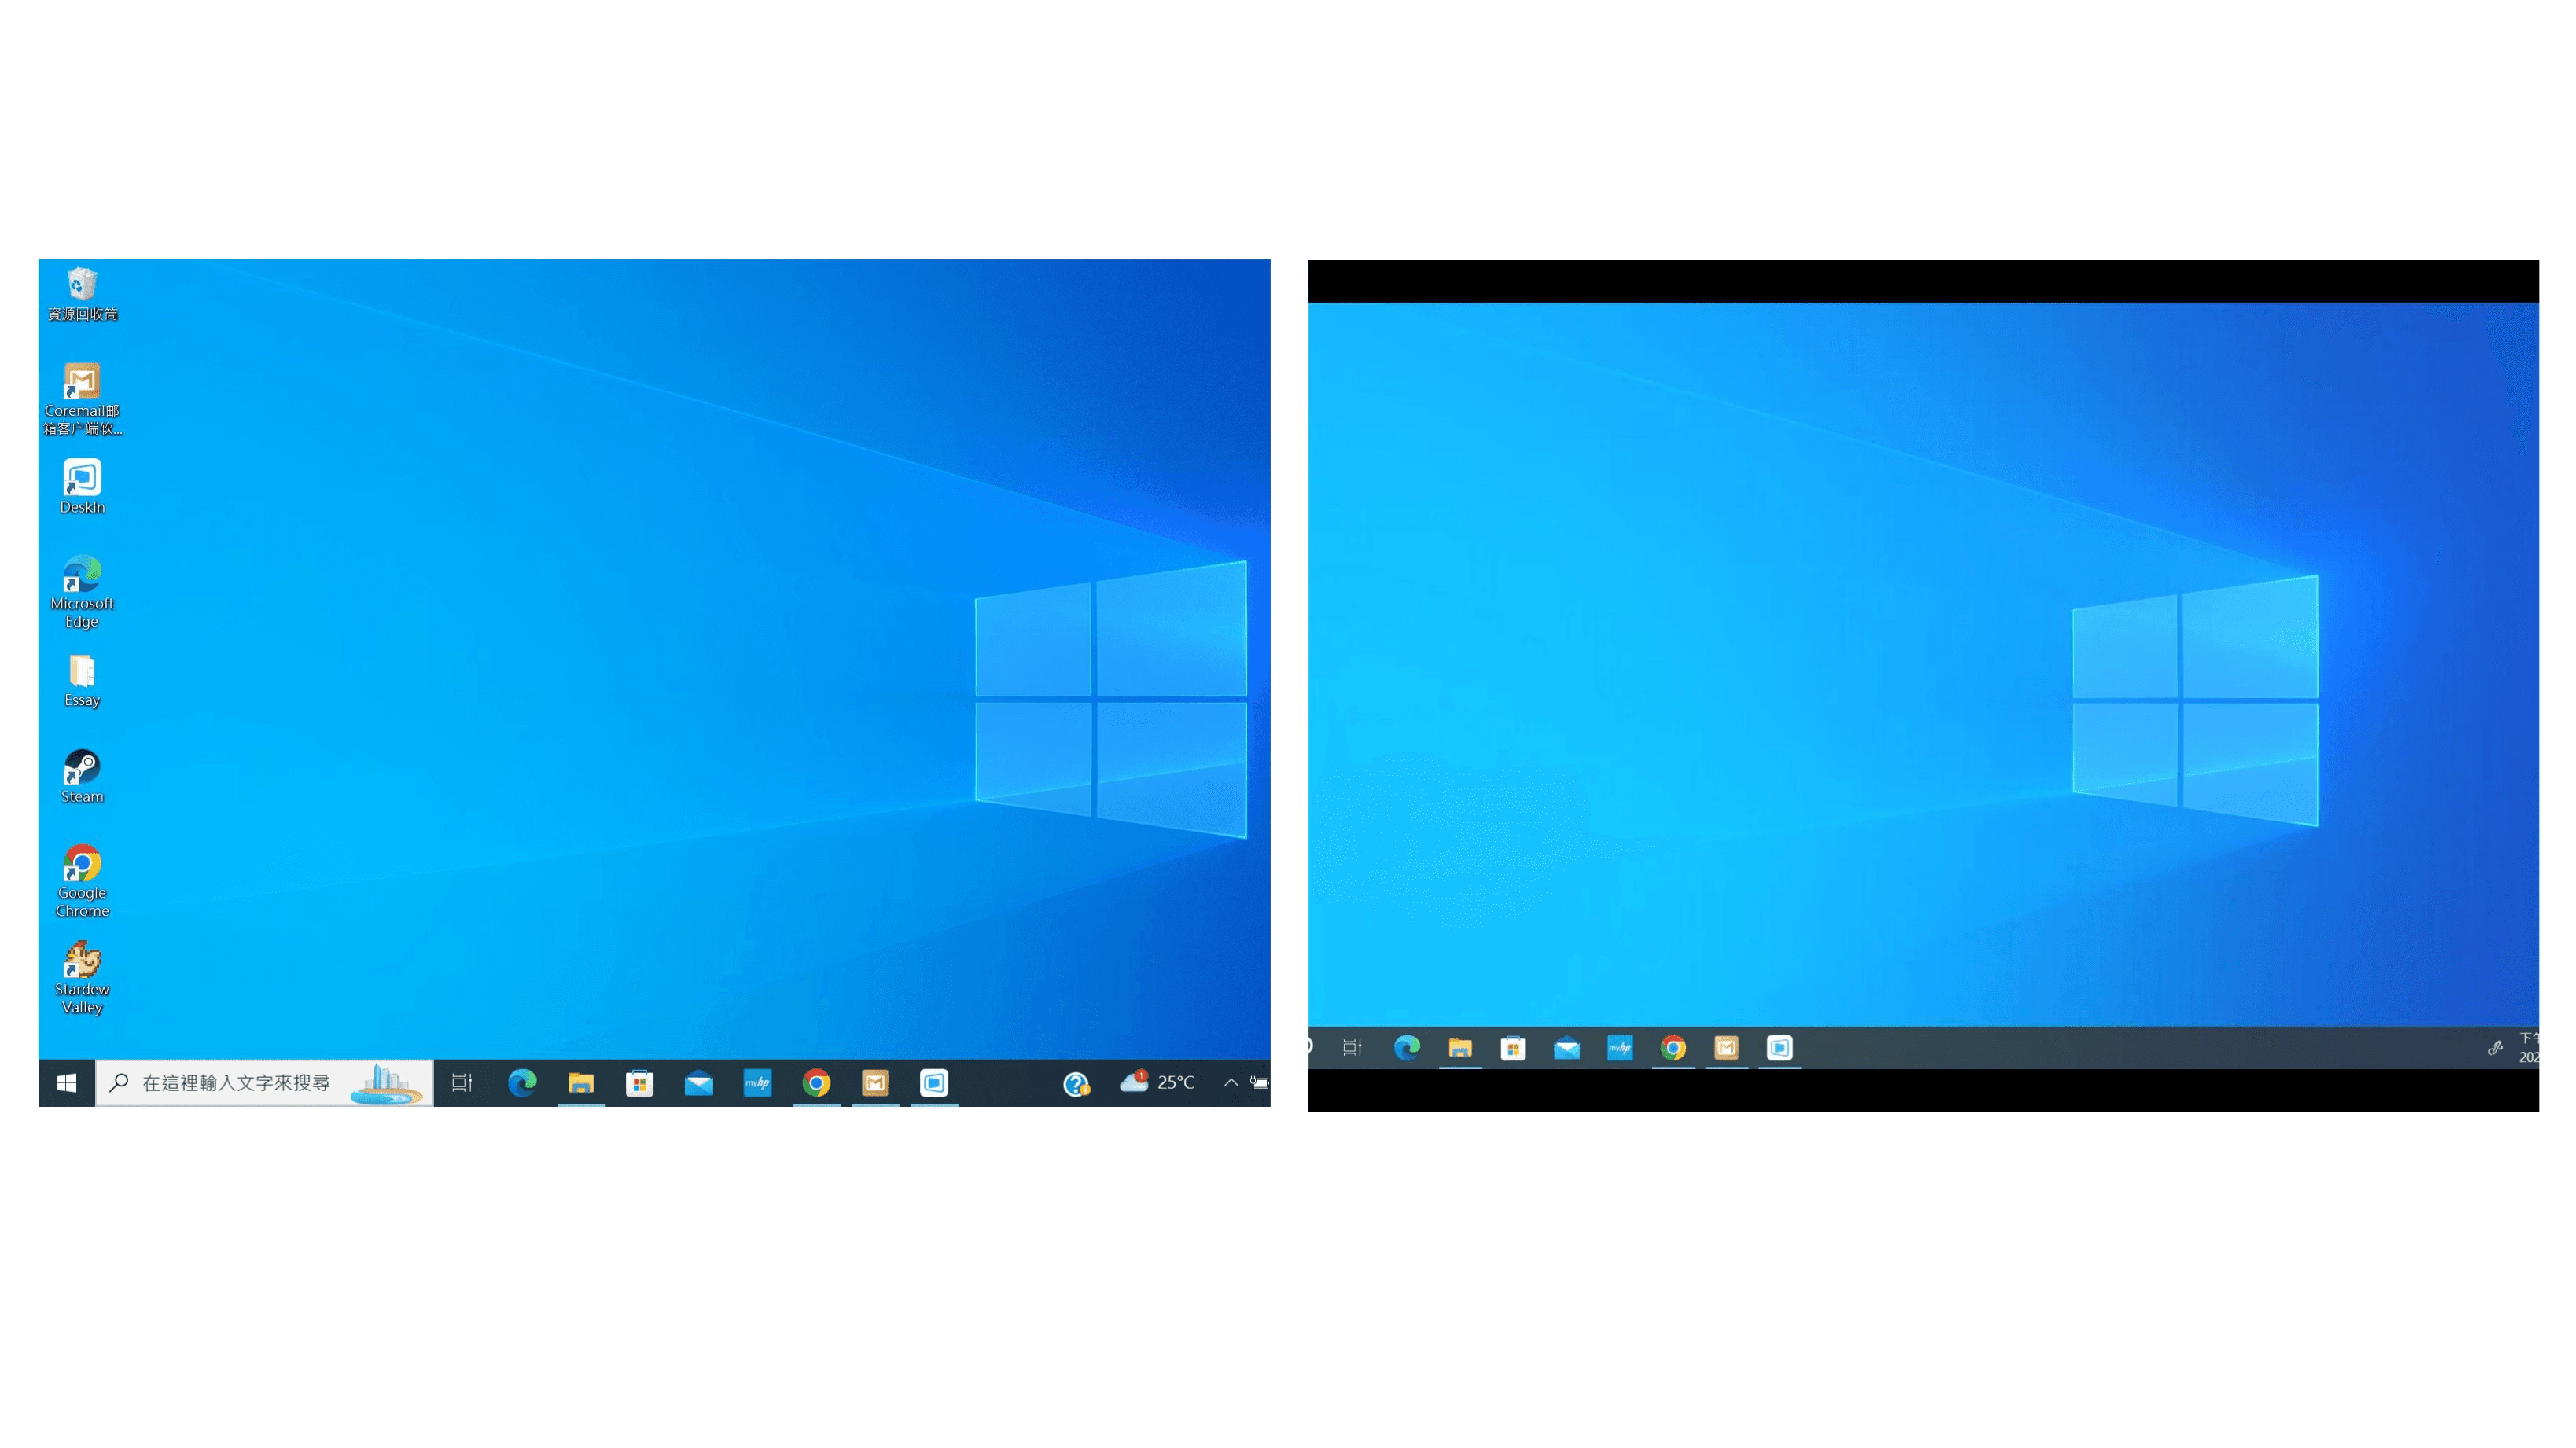
Màn hình Máy tính (Trái) và Màn hình iPad (Phải)
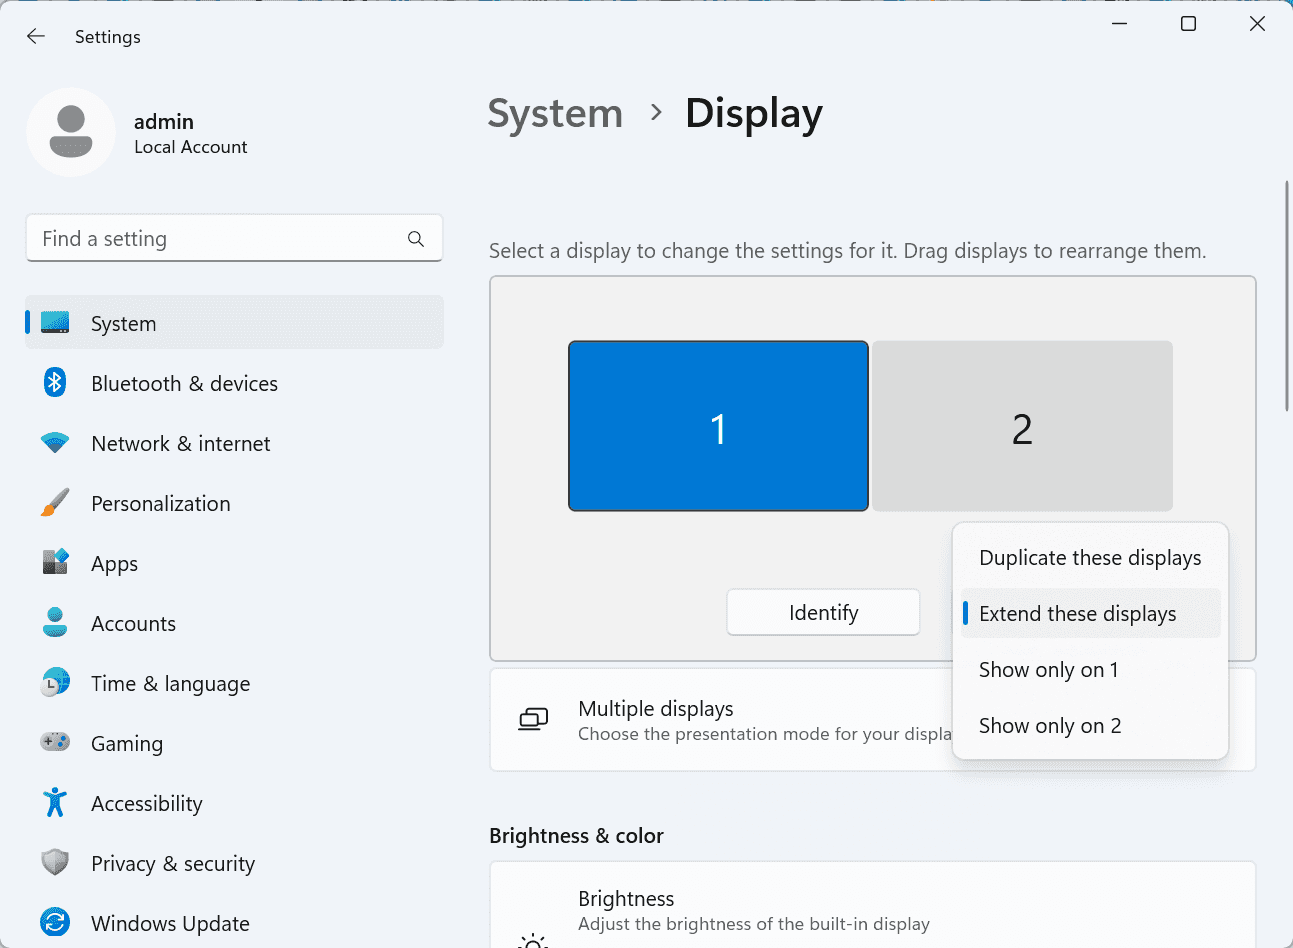
Bước 3: Cài đặt Hiển thị Hệ thống
Sau khi mở rộng, nếu bạn thấy rằng iPad của bạn chỉ đang phản chiếu nội dung trên màn hình máy tính của bạn, hãy truy cập Cài đặt Hệ thống Windows >> Cài đặt Hiển thị và thay đổi tùy chọn màn hình thành "Mở rộng những màn hình này". Bạn cũng có thể điều chỉnh vị trí màn hình bằng cách kéo hai màn hình lại với nhau.
Kết luận
Bài viết này giới thiệu cách sử dụng phần mềm máy tính từ xa DeskIn để biến iPad thành một "màn hình thứ hai" cho máy tính Mac và Windows. Điều này đặc biệt hữu ích cho những người cần xử lý nhiều nhiệm vụ cùng một lúc và muốn nâng cao năng suất. Nếu bạn đang tìm kiếm một công cụ mở rộng màn hình làm việc trên MacBook, iPad, máy tính bảng Android và PC Windows của bạn, DeskIn remote desktop là giải pháp tốt nhất cho bạn. Tải xuống DeskIn và thử ngay bây giờ!
Đối với những người làm đa nhiệm, việc có một màn hình thứ hai có thể làm tăng năng suất lao động một cách đáng kể. Nếu bạn là người làm việc ở nhà hoặc là sinh viên mà không có màn hình kép, đây là cách mà bạn có thể dễ dàng biến iPad idle của mình thành một màn hình thứ hai cho máy tính.
Lợi ích của việc sử dụng iPad làm màn hình phụ:
1. Tăng không gian màn hình để hiển thị nhiều nội dung cùng một lúc. Đối với người dùng đa nhiệm, họ có thể tránh việc chuyển đổi qua lại giữa các cửa sổ, tiết kiệm thời gian.
2. Mỗi màn hình hoạt động độc lập, giúp không gian làm việc được tổ chức hơn.
Khi chỉnh sửa video, một màn hình được sử dụng cho việc chỉnh sửa và màn hình còn lại để đặt tài liệu. Khi viết bài, một màn hình dành cho việc viết, màn hình còn lại để tìm kiếm thông tin, v.v.
3. Kích thước màn hình của iPad đủ lớn, và chất lượng hiển thị khá tốt. Đối với những người có nhu cầu công việc thiết kế hoặc sử dụng MacBook, có thể nó sẽ tiết kiệm chi phí hơn việc mua thêm một màn hình, và không có vấn đề về sự khác biệt màu sắc.
4. Nhiều người có sẵn iPad tại nhà. Bằng cách sử dụng thiết bị mà bạn đã có làm màn hình phụ, bạn tiết kiệm được chi phí mua thêm một màn hình và không gian để đặt màn hình đó.
Cách sử dụng iPad làm màn hình phụ cho Mac?
Tính năng gốc của Apple là Apple Sidecar cho phép bạn sử dụng iPad như một màn hình ngoài cho MacBook và iMac. Chỉ cần thực hiện một vài cài đặt đơn giản và bạn có thể đạt được một kết nối liền mạch giữa iPad của bạn và máy tính.
Lưu ý: Để sử dụng Apple Sidecar, hai thiết bị cần đăng nhập vào cùng một Apple ID hoặc ở trên cùng một mạng. Cả hai thiết bị nên có Bluetooth và Wi-Fi bật và khoảng cách không được vượt quá 10 mét (khoảng 10 mét).
Bước 1: Cài đặt Màn hình:
Mở Cài đặt Hệ thống Mac >> Nhấn "Màn hình" trong thanh bên >> Nhấn vào menu pop up " + " ở bên phải và chọn iPad của bạn.
Chọn iPad, thay đổi cài đặt Sử dụng thành "Màn hình mở rộng". Kiểm tra cài đặt Airplay trên thanh công cụ trên cùng của mac và đặt iPad thành "Sử dụng như Màn hình riêng biệt".
Bước 2: Mở rộng Màn hình
Sau khi hoàn tất cài đặt, iPad của bạn sẽ trở thành màn hình thứ hai cho Mac của bạn. Bạn có thể kéo các cửa sổ từ Mac sang iPad một cách mượt mà. Bạn cũng có thể sử dụng thanh bên trên iPad hoặc thay đổi vị trí của thanh bên trong cài đặt hiển thị hệ thống.
Màn hình MacBook (Trái) và Màn hình iPad (Phải)
Cách sử dụng iPad làm màn hình phụ cho Windows?
Apple Sidecar chỉ hỗ trợ mac được phát hành sau năm 2016 và iPadOS13 hoặc mới hơn. Nếu bạn đang sử dụng thiết bị Apple cũ hoặc thiết bị Windows, bạn vẫn có thể sử dụng phần mềm từ xa DeskIn để thực hiện việc mở rộng màn hình. Nó hỗ trợ sử dụng iPad làm màn hình thứ hai cho Mac và Windows, và độ mượt mà không kém cạnh gì Sidecar.
Bước 1: Tải xuống và Đăng ký Tài khoản DeskIn
Tải xuống DeskIn trên máy tính và iPad của bạn, đăng ký tài khoản miễn phí và đăng nhập riêng biệt.
Lưu ý: Trong lần đăng nhập đầu tiên vào một thiết bị mới, bạn cần hoàn tất xác minh email, điều này nhằm bảo vệ sự an toàn cho tài khoản của bạn.
Bước 2: Mở rộng Màn hình
Mở ứng dụng DeskIn trên máy tính Windows/Mac của bạn >> Đi đến Tab "Quản lý Màn hình" >> Nhấn vào “Mở rộng màn hình của tôi”
Chọn iPad của bạn và nhấn “Bắt đầu mở rộng”. Khi kết nối, iPad của bạn sẽ trở thành màn hình thứ hai của máy tính Windows/Mac của bạn, bạn có thể di chuyển các cửa sổ giữa hai màn hình như thể chúng là một.
Màn hình Máy tính (Trái) và Màn hình iPad (Phải)
Bước 3: Cài đặt Hiển thị Hệ thống
Sau khi mở rộng, nếu bạn thấy rằng iPad của bạn chỉ đang phản chiếu nội dung trên màn hình máy tính của bạn, hãy truy cập Cài đặt Hệ thống Windows >> Cài đặt Hiển thị và thay đổi tùy chọn màn hình thành "Mở rộng những màn hình này". Bạn cũng có thể điều chỉnh vị trí màn hình bằng cách kéo hai màn hình lại với nhau.
Kết luận
Bài viết này giới thiệu cách sử dụng phần mềm máy tính từ xa DeskIn để biến iPad thành một "màn hình thứ hai" cho máy tính Mac và Windows. Điều này đặc biệt hữu ích cho những người cần xử lý nhiều nhiệm vụ cùng một lúc và muốn nâng cao năng suất. Nếu bạn đang tìm kiếm một công cụ mở rộng màn hình làm việc trên MacBook, iPad, máy tính bảng Android và PC Windows của bạn, DeskIn remote desktop là giải pháp tốt nhất cho bạn. Tải xuống DeskIn và thử ngay bây giờ!