Search Docs…
Làm thế nào để sử dụng Mac trên Windows: Hướng dẫn Toàn diện cho năm 2025
Là một người đã dành hai thập kỷ điều hướng thế giới phức tạp của tính tương thích đa nền tảng, tôi đã chứng kiến vô số chuyên gia vật lộn với một tình huống phổ biến: chạy ứng dụng Mac trên hệ thống Windows. Bất kể bạn là một nhà thiết kế đồ họa sử dụng công cụ chỉ dành riêng cho macOS, một nhà phát triển làm việc trên nhiều nền tảng, hay vừa mới chuyển từ Mac sang Windows nhưng vẫn gặp khó khăn với một số ứng dụng, thử thách thực sự là hiện hữu.
Theo các thống kê gần đây được công bố bởi Statista, Windows vẫn chiếm ưu thế với khoảng 73% thị phần hệ điều hành máy tính để bàn trên toàn cầu, trong khi macOS chỉ chiếm khoảng 15%. Tuy nhiên, điều này không làm giảm thực tế rằng một số ứng dụng sáng tạo và năng suất mạnh mẽ nhất vẫn chỉ có trên hệ sinh thái của Apple. Tin tốt? Rào cản giữa các nền tảng này đã trở nên dễ dàng hơn bao giờ hết.
Phá vỡ Bức tường giữa Mac và Windows
Trong môi trường làm việc ngày càng từ xa và linh hoạt, việc bị ràng buộc bởi các hạn chế của hệ điều hành có thể ảnh hưởng nghiêm trọng đến năng suất và hiệu quả công việc của bạn. Một cuộc khảo sát của FlexJobs cho thấy 87% nhân viên làm việc từ xa cần tính năng hoạt động đa nền tảng để duy trì năng suất tối ưu.
Hãy khám phá cách bạn có thể thoát khỏi những giới hạn này và chạy ứng dụng Mac yêu thích của bạn trực tiếp trên máy tính Windows của bạn.
📌 Thông báo Năng suất: Chạy ứng dụng Mac trên Windows không chỉ là về sự tiện lợi - đó là về việc khai thác toàn bộ tiềm năng năng suất của bạn. Các nghiên cứu cho thấy rằng những chuyên gia có thể chuyển đổi liền mạch giữa các nền tảng báo cáo sự hài lòng cao hơn 34% với quy trình làm việc kỹ thuật số của họ. Cách truy cập từ xa vào Windows từ các thiết bị khác [Đã Kiểm Tra!]
Hiểu các lựa chọn của bạn để Chạy Ứng dụng Mac trên Windows
Trước khi đi vào các công cụ cụ thể, điều quan trọng là hiểu hai cách tiếp cận chính để chạy ứng dụng macOS trên máy tính Windows. Mỗi cách đều có những ưu điểm và nhược điểm riêng tùy thuộc vào thiết lập và nhu cầu của bạn.
Tùy chọn 1: Máy ảo (VM)
Các máy ảo như VMware Workstation hoặc VirtualBox cho phép bạn chạy macOS trong một cửa sổ trên máy tính Windows của bạn. Giống như việc có một chiếc Mac ảo bên trong PC của bạn.
Ưu điểm:
Môi trường macOS đầy đủ
Compatible with many Mac applications
Hỗ trợ nhiều phiên bản của macOS
Nhược điểm:
Cần một PC mạnh mẽ
Không lý tưởng cho các ứng dụng nặng hoặc yêu cầu đồ họa cao
Cài đặt có thể phức tạp
Có thể gây ra lo ngại pháp lý theo các điều khoản giấy phép của Apple
Phù hợp nhất cho: Người dùng chỉ có một PC Windows và cần truy cập định kỳ vào macOS để thử nghiệm, phát triển hoặc các ứng dụng cụ thể.
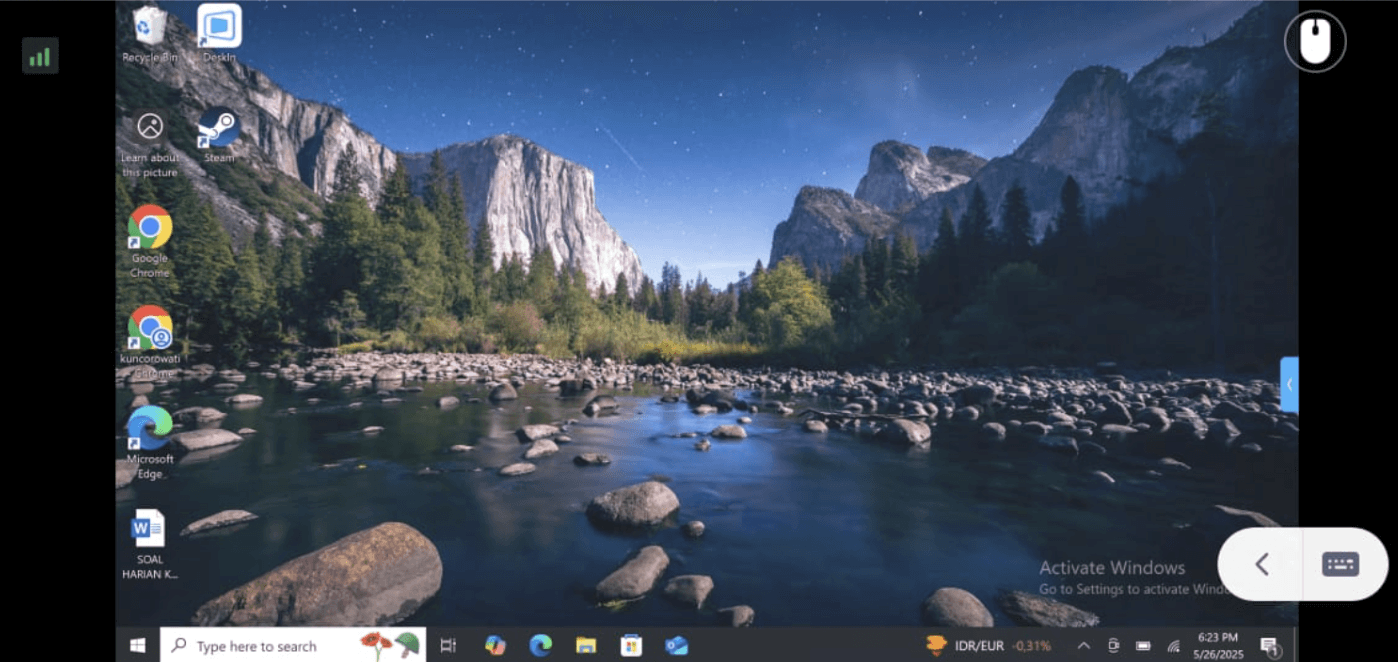
Tùy chọn 2: Công cụ truy cập từ xa (ví dụ. DeskIn)
Phương pháp này cho phép bạn điều khiển một chiếc Mac thực tế từ thiết bị Windows của bạn. Chiếc Mac có thể là một máy vật lý bạn sở hữu hoặc một máy chủ Mac trên đám mây.
Ưu điểm:
Hiệu suất gần như bản địa
Ít nặng trên tài nguyên Windows
Cài đặt nhanh chóng và dễ dàng
Nhược điểm:
Cần truy cập vào một chiếc Mac thực sự
Phụ thuộc vào chất lượng kết nối internet
Phù hợp nhất cho: Người dùng đã có quyền truy cập vào một chiếc Mac và muốn trải nghiệm mượt mà hơn mà không gặp phức tạp khi giả lập.
👉 đọc thêm:
Cách chọn tùy chọn phù hợp
Cài đặt của bạn | Cách tiếp cận được khuyến nghị |
Nếu bạn chỉ có một PC Windows | Sử dụng máy ảo |
Nếu bạn có cả Mac và PC Windows | Sử dụng công cụ truy cập từ xa như DeskIn |
Biết được sự khác biệt ngay từ đầu sẽ giúp bạn tránh thời gian cài đặt không cần thiết và chọn được giải pháp hiệu quả nhất cho nhu cầu của bạn.
Hướng dẫn từng bước: Cách chạy ứng dụng Mac trên Windows
Bây giờ mà chúng ta đã hiểu các lựa chọn, hãy xem xét các phương pháp thực hiện thực tế để chạy ứng dụng Mac trên Windows.
Cài đặt một Máy ảo
Nếu bạn cần một môi trường macOS hoàn chỉnh, việc thiết lập một máy ảo có thể là lựa chọn tốt nhất của bạn. Đây là cách làm:
Chọn phần mềm ảo hóa của bạn:
VMware Workstation Pro (mất phí)
VirtualBox (miễn phí)
Parallels (mất phí, hiện có sẵn cho Windows)
Lấy macOS:
Chỉ cho mục đích thử nghiệm và phát triển
Đảm bảo bạn tuân thủ EULA của Apple
Các bước cài đặt:
Tạo một máy ảo mới trong phần mềm đã chọn của bạn
Phân bổ tài nguyên phù hợp (ít nhất 4GB RAM, 2 nhân CPU)
Cài đặt macOS bằng phương tiện khởi động phù hợp
Cài đặt VMware Tools hoặc VirtualBox Guest Additions
Mẹo tối ưu hóa:
Phân bổ thêm RAM và nhân CPU để có hiệu suất tốt hơn
Bật tăng tốc 3D nếu có sẵn
Use an SSD for storage
Tắt các hiệu ứng hình ảnh không cần thiết trong macOS
Theo các bài kiểm tra chuẩn 2024 của TechRadar, một máy ảo được cấu hình đúng trên phần cứng hiện đại có thể đạt khoảng 70-80% hiệu suất của bản gốc cho hầu hết các ứng dụng.
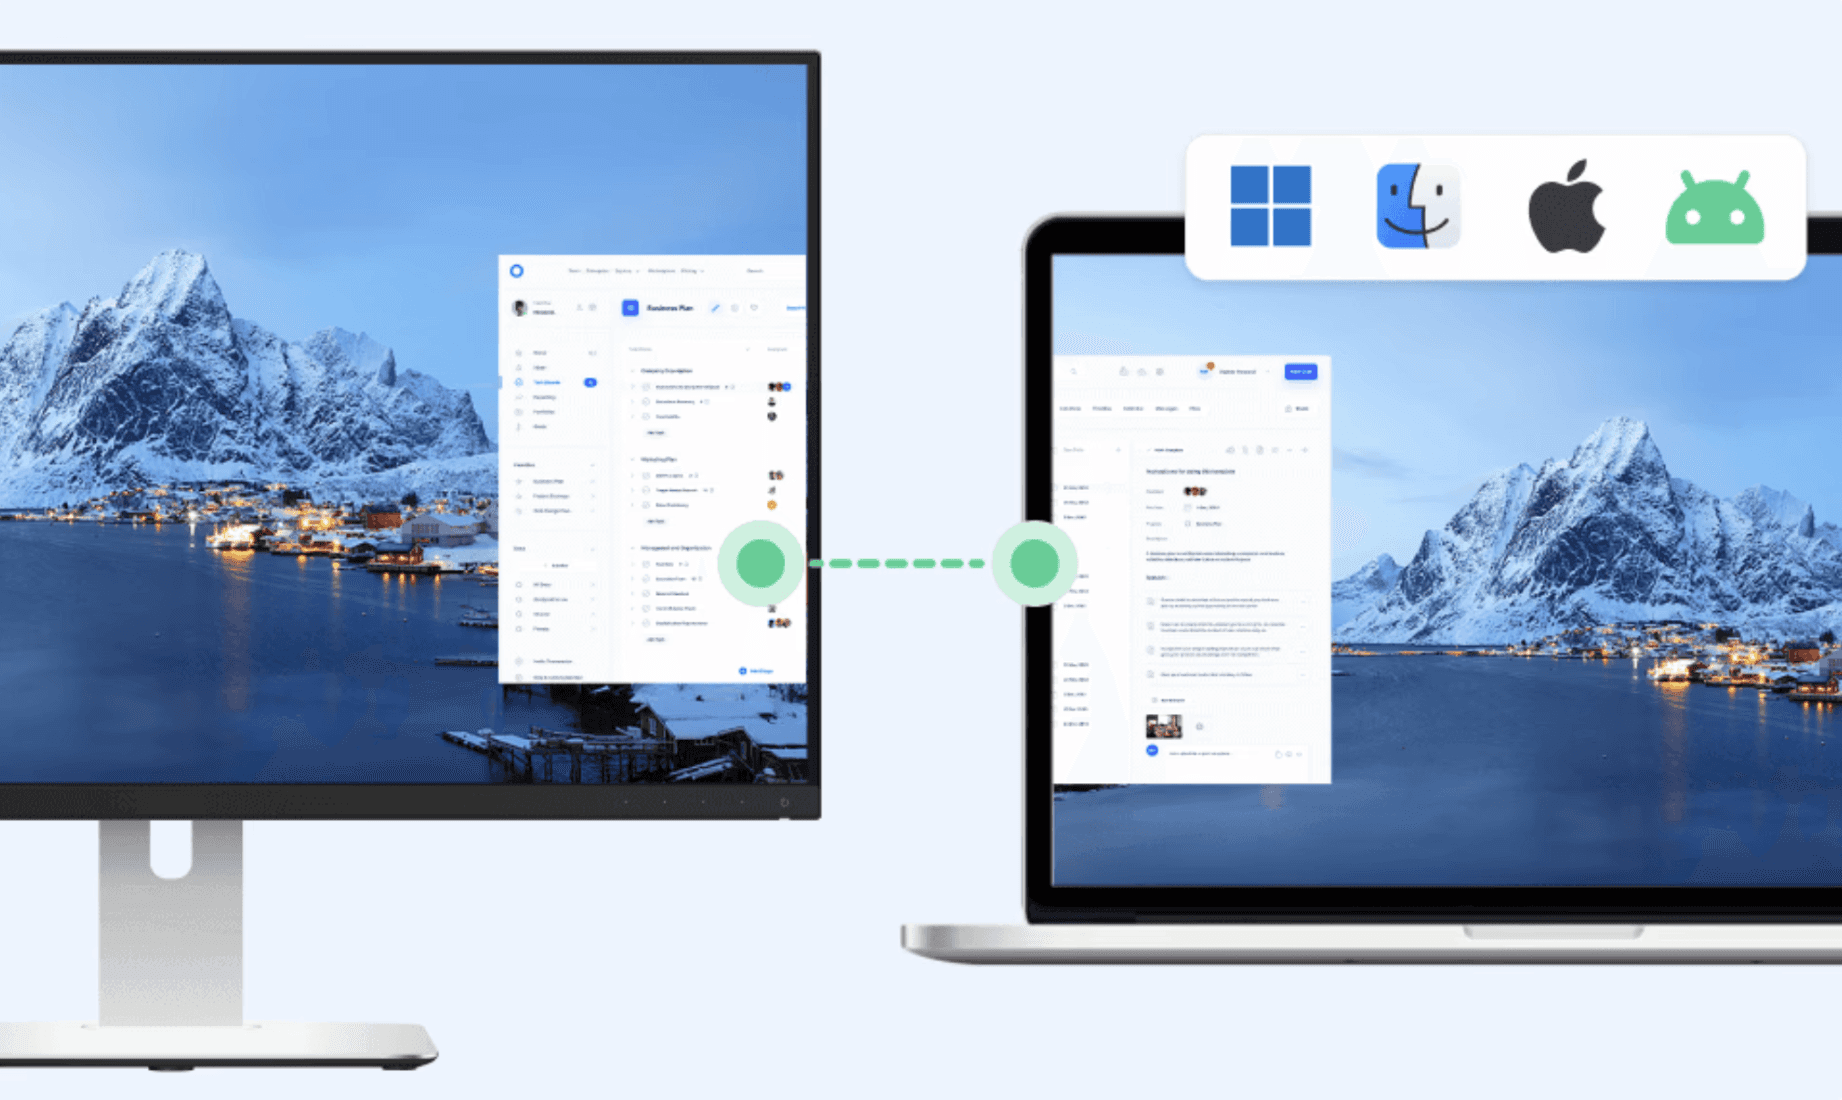
Đơn giản hơn với các Giải pháp Đa nền tảng
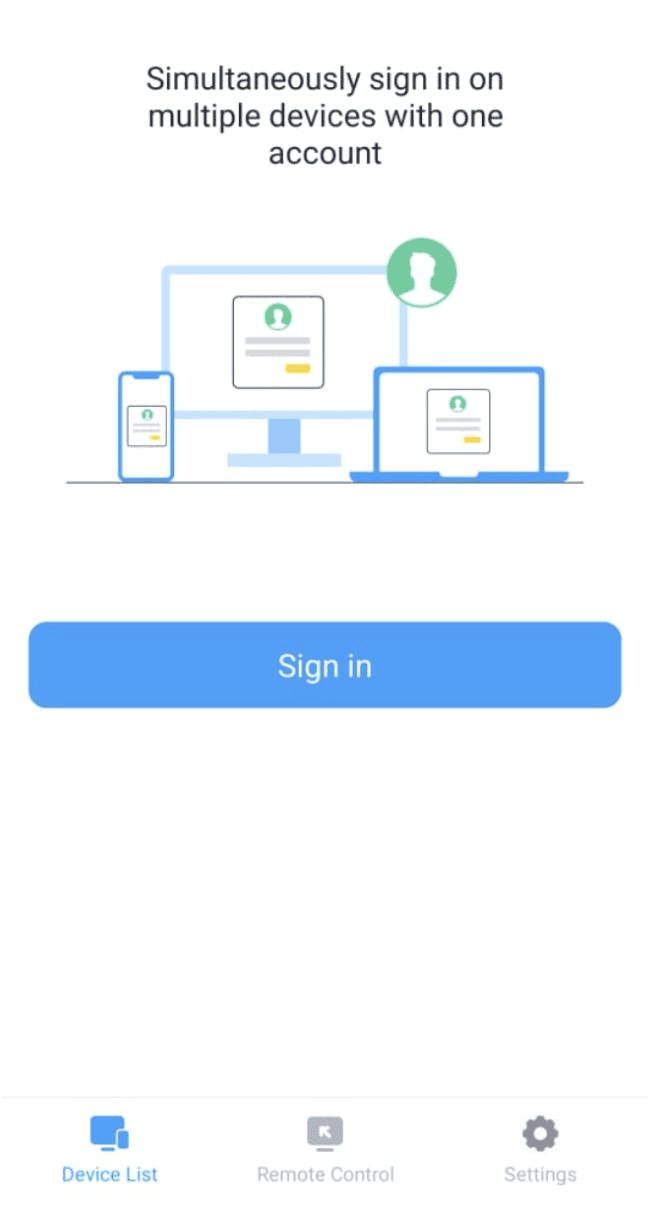
Để có trải nghiệm liền mạch hơn với ít rắc rối kỹ thuật, các công cụ truy cập từ xa đa nền tảng như DeskIn cung cấp một lựa chọn thuyết phục:
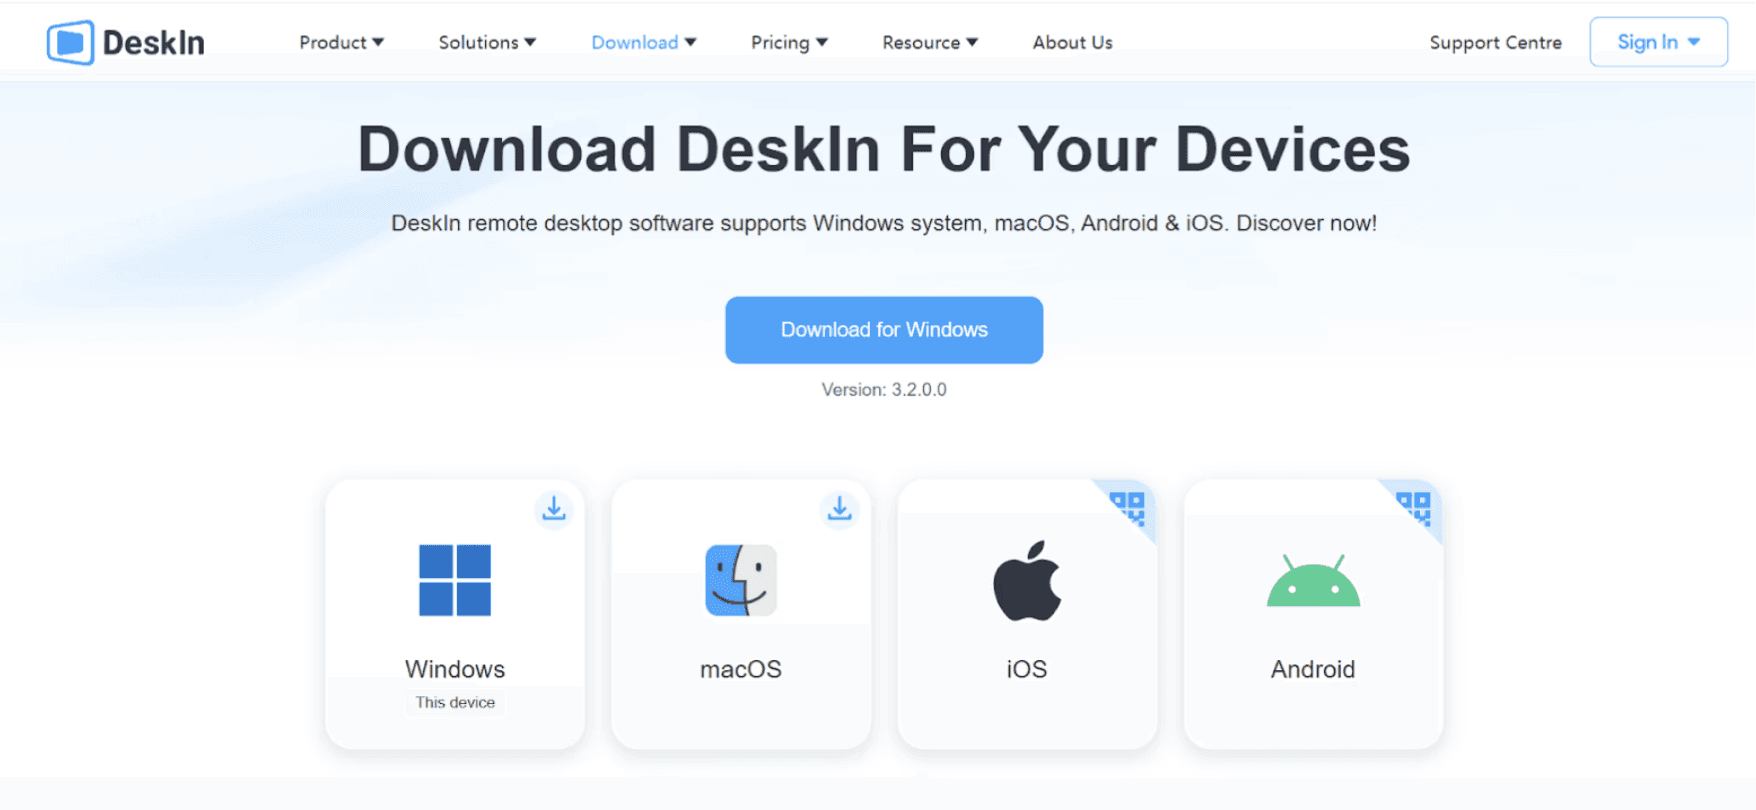
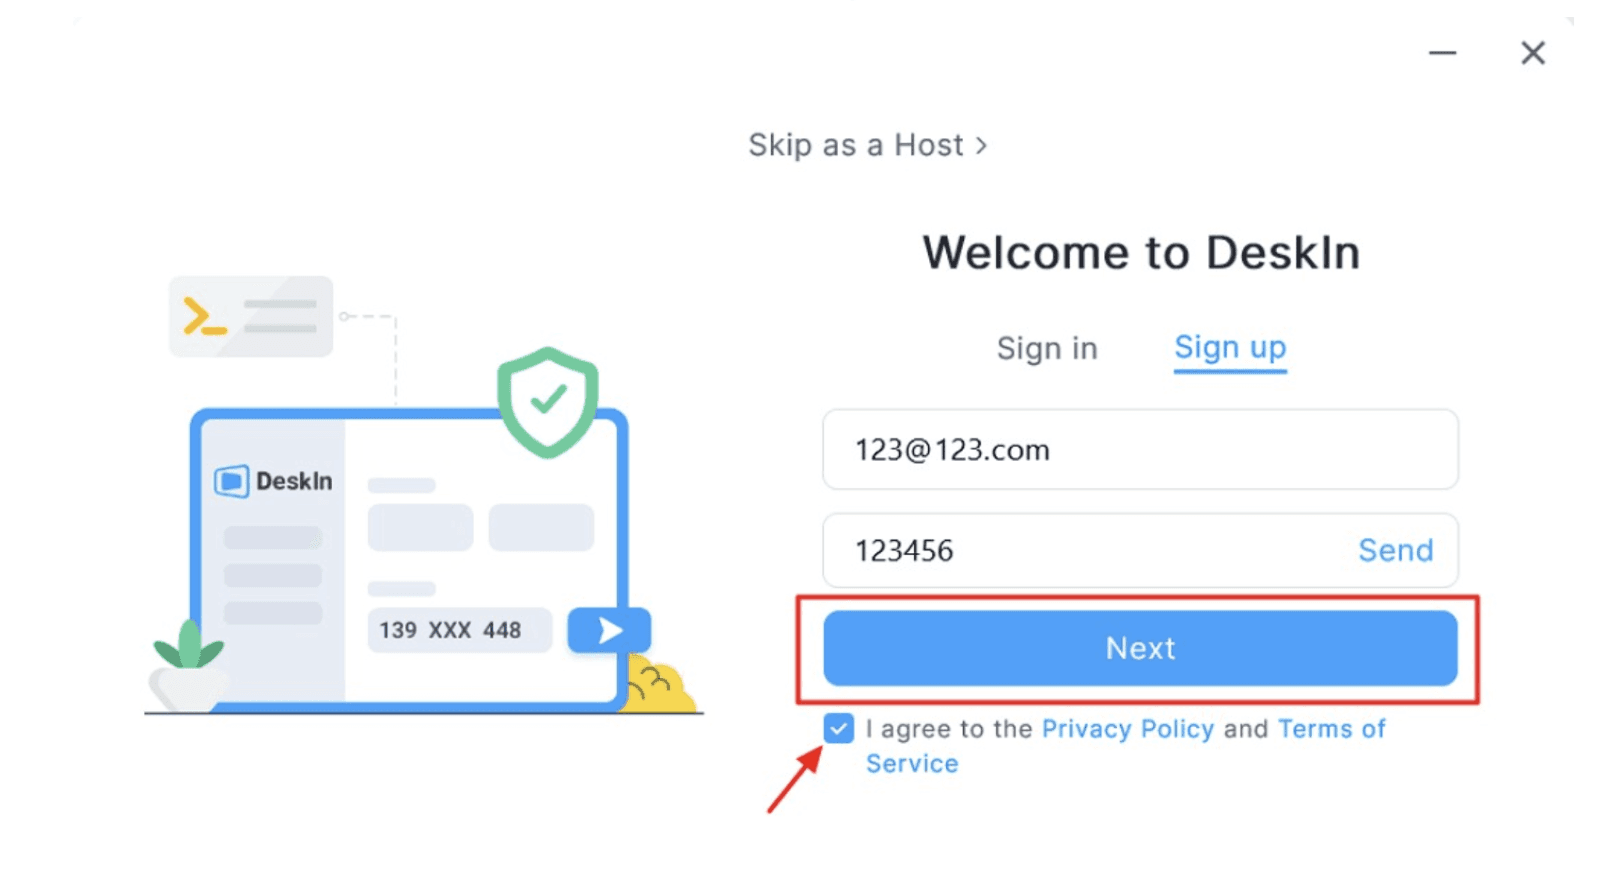
Tải xuống DeskIn:
Cài đặt DeskIn trên cả PC Windows và Mac mà bạn muốn truy cập
Quy trình cài đặt đơn giản:
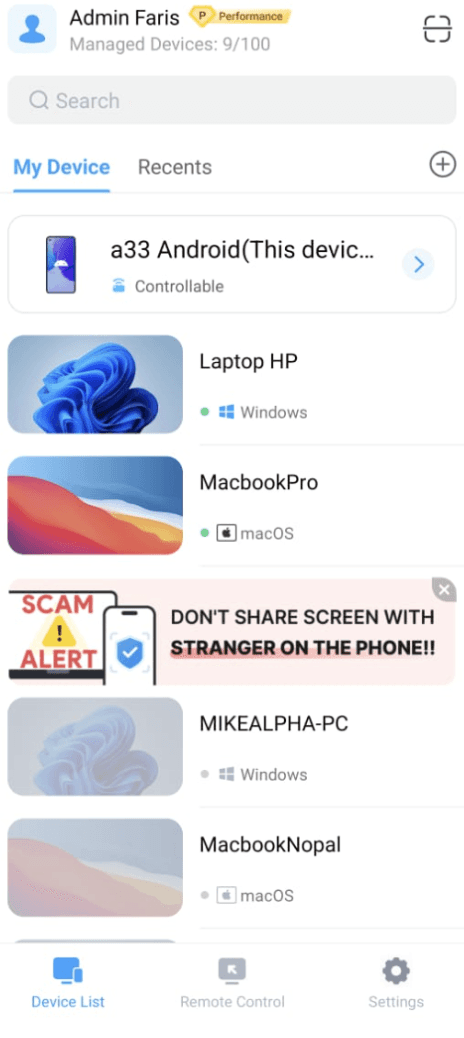
Tạo một tài khoản DeskIn và đăng nhập trên cả hai thiết bị
Kết nối các thiết bị Mac của bạn qua giao diện thân thiện
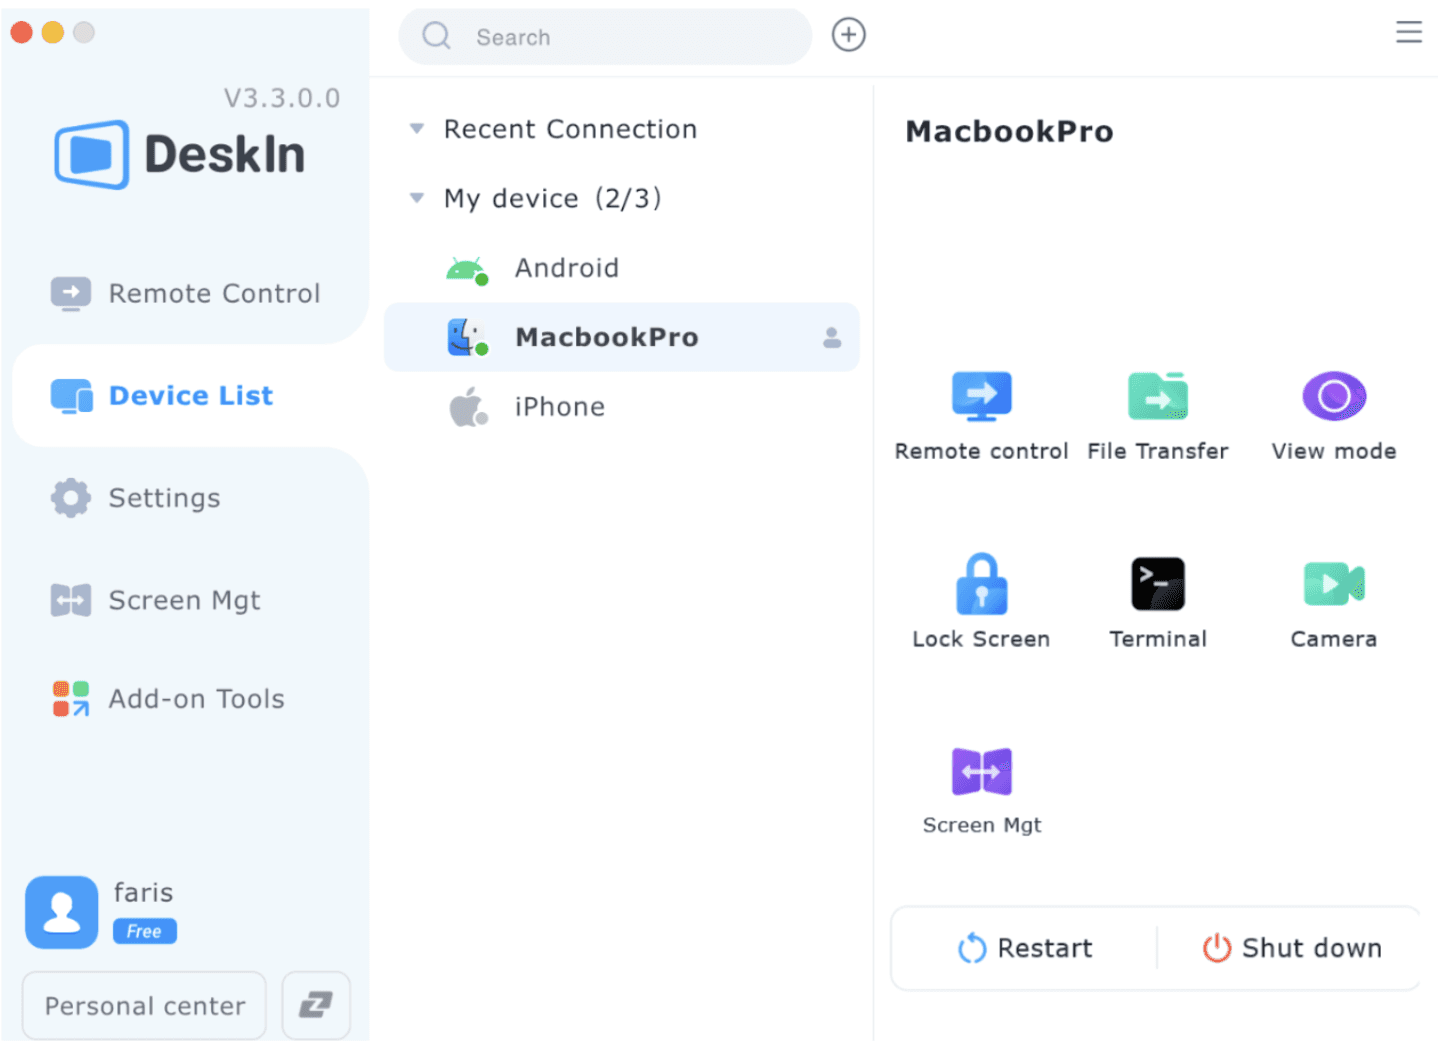
Chọn nút điều khiển từ xa để có quyền truy cập đầy đủ vào Mac của bạn
Chọn ứng dụng Mac nào bạn muốn truy cập trên Windows
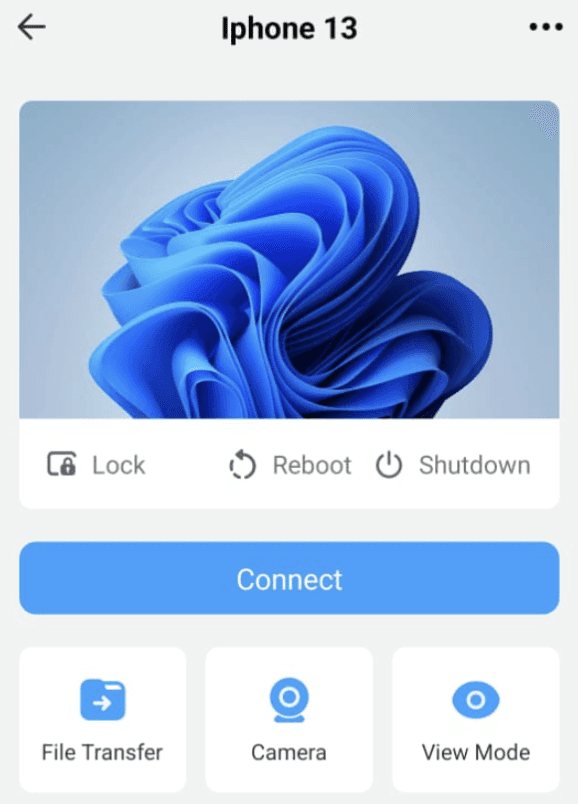
Chạy ứng dụng Mac trực tiếp:
Khởi chạy bất kỳ ứng dụng Mac nào qua giao diện của DeskIn
Trải nghiệm hiệu suất gần như bản địa với độ trễ tối thiểu
Chuyển tệp dễ dàng giữa các hệ điều hành
Cải thiện năng suất:
Thiết lập các phím tắt cho các ứng dụng Mac thường xuyên sử dụng
Cấu hình đồng bộ hóa tự động giữa các thiết bị
Tùy chỉnh cài đặt hiển thị và hiệu suất
Tối ưu hóa hiệu suất khi chạy ứng dụng Mac trên Windows
Bất kể phương pháp nào bạn chọn, những mẹo tối ưu hóa này sẽ giúp bạn đạt được hiệu suất tốt nhất khi chạy ứng dụng Mac trên Windows:
Các yếu tố phần cứng:
Đảm bảo máy tính Windows của bạn vượt qua các yêu cầu tối thiểu cho ảo hóa
Lưu trữ SSD có sự khác biệt lớn trong hiệu suất
RAM lớn hơn được khuyến nghị cho hoạt động mượt mà
Tối ưu hóa mạng:
Đối với các giải pháp từ xa hoặc đám mây, hãy sử dụng kết nối có dây khi có thể
Ưu tiên lưu lượng người dùng Mac trên mạng của bạn bằng cách sử dụng cài đặt QoS
Xem xét một mạng riêng dành cho công việc đa nền tảng
Các điều chỉnh phần mềm:
Đóng các ứng dụng không cần thiết trên cả hai hệ thống
Cập nhật tất cả trình điều khiển và phần mềm thường xuyên
Sử dụng cài đặt hiển thị tối ưu cho các ứng dụng cụ thể của bạn
Chiến lược quản lý tệp:
Thiết lập một thư mục chia sẻ có thể truy cập từ cả hai hệ điều hành
Use cloud storage as an intermediary when necessary
Xem xét hệ thống chuyển tệp tích hợp của DeskIn cho các tệp lớn
Ai được lợi nhiều nhất từ việc chạy ứng dụng Mac trên Windows
Khả năng chạy ứng dụng Mac trên Windows đặc biệt có giá trị cho một số loại chuyên nghiệp:
Các chuyên gia sáng tạo cần truy cập vào Adobe Creative Suite hoặc Final Cut Pro. Tìm hiểu cách điều này nâng cao ý tưởng sáng tạo của bạn với các tính năng hiệu suất cao
Các nhà phát triển xây dựng ứng dụng cho cả môi trường macOS và Windows
Các kỹ sư số chuyển đổi giữa máy tính Windows cung cấp từ công ty và Mac cá nhân
Các cơ sở giáo dục có môi trường đa thiết bị
Các doanh nghiệp nhỏ chuyển đổi giữa các nền tảng hoặc hỗ trợ các chính sách BYOD
Theo một báo cáo lực lượng lao động của LinkedIn, những chuyên gia thể hiện sự thành thạo đa nền tảng có thể kiếm được mức lương cao hơn 15% trong các lĩnh vực kỹ thuật và sáng tạo, nhấn mạnh giá trị của kỹ năng này.
Phá vỡ các giới hạn nền tảng
Các ngày bị ràng buộc bởi lựa chọn hệ điều hành của bạn đã qua. Bất kể bạn là người dùng Windows cần truy cập định kỳ vào phần mềm độc quyền của Mac hay một chuyên gia duy trì công việc đa nền tảng, các giải pháp như DeskIn làm cho việc chạy ứng dụng Mac trên Windows trở nên dễ dàng hơn bao giờ hết.
Bằng cách làm theo các phương pháp được nêu trong hướng dẫn này, bạn có thể tạo ra một trải nghiệm đa nền tảng liền mạch mà nâng cao năng suất và mở rộng khả năng kỹ thuật số của bạn. Các rào cản kỹ thuật đã từng ngăn cách các hệ sinh thái này đã phần lớn tan biến, để lại cho chúng ta những lựa chọn linh hoạt và mạnh mẽ để làm việc trên nhiều nền tảng.
Sẵn sàng trải nghiệm sự tự do khi chạy ứng dụng Mac trên hệ thống Windows của bạn? Tải xuống DeskIn ngay hôm nay và khám phá cách năng suất đa nền tảng có thể đơn giản như thế nào. Giải pháp thân thiện với người dùng của chúng tôi loại bỏ sự phức tạp thường gắn liền với việc chạy ứng dụng Mac trên Windows, cho phép bạn tập trung vào những điều quan trọng - công việc của bạn, không phải là công cụ của bạn.
Làm thế nào để sử dụng Mac trên Windows: Hướng dẫn Toàn diện cho năm 2025
Là một người đã dành hai thập kỷ điều hướng thế giới phức tạp của tính tương thích đa nền tảng, tôi đã chứng kiến vô số chuyên gia vật lộn với một tình huống phổ biến: chạy ứng dụng Mac trên hệ thống Windows. Bất kể bạn là một nhà thiết kế đồ họa sử dụng công cụ chỉ dành riêng cho macOS, một nhà phát triển làm việc trên nhiều nền tảng, hay vừa mới chuyển từ Mac sang Windows nhưng vẫn gặp khó khăn với một số ứng dụng, thử thách thực sự là hiện hữu.
Theo các thống kê gần đây được công bố bởi Statista, Windows vẫn chiếm ưu thế với khoảng 73% thị phần hệ điều hành máy tính để bàn trên toàn cầu, trong khi macOS chỉ chiếm khoảng 15%. Tuy nhiên, điều này không làm giảm thực tế rằng một số ứng dụng sáng tạo và năng suất mạnh mẽ nhất vẫn chỉ có trên hệ sinh thái của Apple. Tin tốt? Rào cản giữa các nền tảng này đã trở nên dễ dàng hơn bao giờ hết.
Phá vỡ Bức tường giữa Mac và Windows
Trong môi trường làm việc ngày càng từ xa và linh hoạt, việc bị ràng buộc bởi các hạn chế của hệ điều hành có thể ảnh hưởng nghiêm trọng đến năng suất và hiệu quả công việc của bạn. Một cuộc khảo sát của FlexJobs cho thấy 87% nhân viên làm việc từ xa cần tính năng hoạt động đa nền tảng để duy trì năng suất tối ưu.
Hãy khám phá cách bạn có thể thoát khỏi những giới hạn này và chạy ứng dụng Mac yêu thích của bạn trực tiếp trên máy tính Windows của bạn.
📌 Thông báo Năng suất: Chạy ứng dụng Mac trên Windows không chỉ là về sự tiện lợi - đó là về việc khai thác toàn bộ tiềm năng năng suất của bạn. Các nghiên cứu cho thấy rằng những chuyên gia có thể chuyển đổi liền mạch giữa các nền tảng báo cáo sự hài lòng cao hơn 34% với quy trình làm việc kỹ thuật số của họ. Cách truy cập từ xa vào Windows từ các thiết bị khác [Đã Kiểm Tra!]
Hiểu các lựa chọn của bạn để Chạy Ứng dụng Mac trên Windows
Trước khi đi vào các công cụ cụ thể, điều quan trọng là hiểu hai cách tiếp cận chính để chạy ứng dụng macOS trên máy tính Windows. Mỗi cách đều có những ưu điểm và nhược điểm riêng tùy thuộc vào thiết lập và nhu cầu của bạn.
Tùy chọn 1: Máy ảo (VM)
Các máy ảo như VMware Workstation hoặc VirtualBox cho phép bạn chạy macOS trong một cửa sổ trên máy tính Windows của bạn. Giống như việc có một chiếc Mac ảo bên trong PC của bạn.
Ưu điểm:
Môi trường macOS đầy đủ
Compatible with many Mac applications
Hỗ trợ nhiều phiên bản của macOS
Nhược điểm:
Cần một PC mạnh mẽ
Không lý tưởng cho các ứng dụng nặng hoặc yêu cầu đồ họa cao
Cài đặt có thể phức tạp
Có thể gây ra lo ngại pháp lý theo các điều khoản giấy phép của Apple
Phù hợp nhất cho: Người dùng chỉ có một PC Windows và cần truy cập định kỳ vào macOS để thử nghiệm, phát triển hoặc các ứng dụng cụ thể.
Tùy chọn 2: Công cụ truy cập từ xa (ví dụ. DeskIn)
Phương pháp này cho phép bạn điều khiển một chiếc Mac thực tế từ thiết bị Windows của bạn. Chiếc Mac có thể là một máy vật lý bạn sở hữu hoặc một máy chủ Mac trên đám mây.
Ưu điểm:
Hiệu suất gần như bản địa
Ít nặng trên tài nguyên Windows
Cài đặt nhanh chóng và dễ dàng
Nhược điểm:
Cần truy cập vào một chiếc Mac thực sự
Phụ thuộc vào chất lượng kết nối internet
Phù hợp nhất cho: Người dùng đã có quyền truy cập vào một chiếc Mac và muốn trải nghiệm mượt mà hơn mà không gặp phức tạp khi giả lập.
👉 đọc thêm:
Cách chọn tùy chọn phù hợp
Cài đặt của bạn | Cách tiếp cận được khuyến nghị |
Nếu bạn chỉ có một PC Windows | Sử dụng máy ảo |
Nếu bạn có cả Mac và PC Windows | Sử dụng công cụ truy cập từ xa như DeskIn |
Biết được sự khác biệt ngay từ đầu sẽ giúp bạn tránh thời gian cài đặt không cần thiết và chọn được giải pháp hiệu quả nhất cho nhu cầu của bạn.
Hướng dẫn từng bước: Cách chạy ứng dụng Mac trên Windows
Bây giờ mà chúng ta đã hiểu các lựa chọn, hãy xem xét các phương pháp thực hiện thực tế để chạy ứng dụng Mac trên Windows.
Cài đặt một Máy ảo
Nếu bạn cần một môi trường macOS hoàn chỉnh, việc thiết lập một máy ảo có thể là lựa chọn tốt nhất của bạn. Đây là cách làm:
Chọn phần mềm ảo hóa của bạn:
VMware Workstation Pro (mất phí)
VirtualBox (miễn phí)
Parallels (mất phí, hiện có sẵn cho Windows)
Lấy macOS:
Chỉ cho mục đích thử nghiệm và phát triển
Đảm bảo bạn tuân thủ EULA của Apple
Các bước cài đặt:
Tạo một máy ảo mới trong phần mềm đã chọn của bạn
Phân bổ tài nguyên phù hợp (ít nhất 4GB RAM, 2 nhân CPU)
Cài đặt macOS bằng phương tiện khởi động phù hợp
Cài đặt VMware Tools hoặc VirtualBox Guest Additions
Mẹo tối ưu hóa:
Phân bổ thêm RAM và nhân CPU để có hiệu suất tốt hơn
Bật tăng tốc 3D nếu có sẵn
Use an SSD for storage
Tắt các hiệu ứng hình ảnh không cần thiết trong macOS
Theo các bài kiểm tra chuẩn 2024 của TechRadar, một máy ảo được cấu hình đúng trên phần cứng hiện đại có thể đạt khoảng 70-80% hiệu suất của bản gốc cho hầu hết các ứng dụng.
Đơn giản hơn với các Giải pháp Đa nền tảng
Để có trải nghiệm liền mạch hơn với ít rắc rối kỹ thuật, các công cụ truy cập từ xa đa nền tảng như DeskIn cung cấp một lựa chọn thuyết phục:
Tải xuống DeskIn:
Cài đặt DeskIn trên cả PC Windows và Mac mà bạn muốn truy cập
Quy trình cài đặt đơn giản:
Tạo một tài khoản DeskIn và đăng nhập trên cả hai thiết bị
Kết nối các thiết bị Mac của bạn qua giao diện thân thiện
Chọn nút điều khiển từ xa để có quyền truy cập đầy đủ vào Mac của bạn
Chọn ứng dụng Mac nào bạn muốn truy cập trên Windows
Chạy ứng dụng Mac trực tiếp:
Khởi chạy bất kỳ ứng dụng Mac nào qua giao diện của DeskIn
Trải nghiệm hiệu suất gần như bản địa với độ trễ tối thiểu
Chuyển tệp dễ dàng giữa các hệ điều hành
Cải thiện năng suất:
Thiết lập các phím tắt cho các ứng dụng Mac thường xuyên sử dụng
Cấu hình đồng bộ hóa tự động giữa các thiết bị
Tùy chỉnh cài đặt hiển thị và hiệu suất
Tối ưu hóa hiệu suất khi chạy ứng dụng Mac trên Windows
Bất kể phương pháp nào bạn chọn, những mẹo tối ưu hóa này sẽ giúp bạn đạt được hiệu suất tốt nhất khi chạy ứng dụng Mac trên Windows:
Các yếu tố phần cứng:
Đảm bảo máy tính Windows của bạn vượt qua các yêu cầu tối thiểu cho ảo hóa
Lưu trữ SSD có sự khác biệt lớn trong hiệu suất
RAM lớn hơn được khuyến nghị cho hoạt động mượt mà
Tối ưu hóa mạng:
Đối với các giải pháp từ xa hoặc đám mây, hãy sử dụng kết nối có dây khi có thể
Ưu tiên lưu lượng người dùng Mac trên mạng của bạn bằng cách sử dụng cài đặt QoS
Xem xét một mạng riêng dành cho công việc đa nền tảng
Các điều chỉnh phần mềm:
Đóng các ứng dụng không cần thiết trên cả hai hệ thống
Cập nhật tất cả trình điều khiển và phần mềm thường xuyên
Sử dụng cài đặt hiển thị tối ưu cho các ứng dụng cụ thể của bạn
Chiến lược quản lý tệp:
Thiết lập một thư mục chia sẻ có thể truy cập từ cả hai hệ điều hành
Use cloud storage as an intermediary when necessary
Xem xét hệ thống chuyển tệp tích hợp của DeskIn cho các tệp lớn
Ai được lợi nhiều nhất từ việc chạy ứng dụng Mac trên Windows
Khả năng chạy ứng dụng Mac trên Windows đặc biệt có giá trị cho một số loại chuyên nghiệp:
Các chuyên gia sáng tạo cần truy cập vào Adobe Creative Suite hoặc Final Cut Pro. Tìm hiểu cách điều này nâng cao ý tưởng sáng tạo của bạn với các tính năng hiệu suất cao
Các nhà phát triển xây dựng ứng dụng cho cả môi trường macOS và Windows
Các kỹ sư số chuyển đổi giữa máy tính Windows cung cấp từ công ty và Mac cá nhân
Các cơ sở giáo dục có môi trường đa thiết bị
Các doanh nghiệp nhỏ chuyển đổi giữa các nền tảng hoặc hỗ trợ các chính sách BYOD
Theo một báo cáo lực lượng lao động của LinkedIn, những chuyên gia thể hiện sự thành thạo đa nền tảng có thể kiếm được mức lương cao hơn 15% trong các lĩnh vực kỹ thuật và sáng tạo, nhấn mạnh giá trị của kỹ năng này.
Phá vỡ các giới hạn nền tảng
Các ngày bị ràng buộc bởi lựa chọn hệ điều hành của bạn đã qua. Bất kể bạn là người dùng Windows cần truy cập định kỳ vào phần mềm độc quyền của Mac hay một chuyên gia duy trì công việc đa nền tảng, các giải pháp như DeskIn làm cho việc chạy ứng dụng Mac trên Windows trở nên dễ dàng hơn bao giờ hết.
Bằng cách làm theo các phương pháp được nêu trong hướng dẫn này, bạn có thể tạo ra một trải nghiệm đa nền tảng liền mạch mà nâng cao năng suất và mở rộng khả năng kỹ thuật số của bạn. Các rào cản kỹ thuật đã từng ngăn cách các hệ sinh thái này đã phần lớn tan biến, để lại cho chúng ta những lựa chọn linh hoạt và mạnh mẽ để làm việc trên nhiều nền tảng.
Sẵn sàng trải nghiệm sự tự do khi chạy ứng dụng Mac trên hệ thống Windows của bạn? Tải xuống DeskIn ngay hôm nay và khám phá cách năng suất đa nền tảng có thể đơn giản như thế nào. Giải pháp thân thiện với người dùng của chúng tôi loại bỏ sự phức tạp thường gắn liền với việc chạy ứng dụng Mac trên Windows, cho phép bạn tập trung vào những điều quan trọng - công việc của bạn, không phải là công cụ của bạn.