Search Docs…
Miễn phí! Đây Là Cách Kết Nối Hai Điện Thoại Android Từ Xa
Trong thế giới di động hiện nay, việc kết nối hai điện thoại Android từ xa có thể mở ra những mức độ tiện lợi, năng suất và hỗ trợ mới. Dù bạn đang cố gắng giúp một người bạn khắc phục sự cố, gửi tệp mà không cần máy tính, hay phản chiếu màn hình cho các bài thuyết trình, việc kết nối từ xa giữa hai điện thoại Android là cực kỳ hữu ích.
Với những công cụ và kiến thức đúng đắn, những tình huống phổ biến như hỗ trợ kỹ thuật từ xa, làm việc hợp tác, hay thậm chí chơi game trên thiết bị khác là hoàn toàn có thể. Hãy cùng khám phá những cách đã được thử nghiệm để đạt được truy cập từ xa từ Android sang Android, bắt đầu với giải pháp đáng tin cậy nhất.
Cách Tốt Nhất Để Kết Nối Hai Điện Thoại Android Từ Xa: Sử Dụng DeskIn
Nếu bạn đang tìm kiếm cách kết nối hai điện thoại Android từ xa hiệu quả và an toàn nhất, DeskIn nổi bật như là sự lựa chọn hàng đầu. Được thiết kế cho cả người dùng thông thường và chuyên nghiệp, ứng dụng Android của DeskIn cung cấp kiểm soát theo thời gian thực, chia sẻ tệp, và phản chiếu màn hình trên điện thoại Android, tất cả với thiết lập đơn giản và trải nghiệm người dùng mượt mà.
Điều làm cho DeskIn trở nên độc đáo là sự kết hợp của hiệu suất cao, khả năng tương thích đa nền tảng, và bảo mật cấp doanh nghiệp, tất cả được gói gọn trong một giao diện dễ sử dụng. Dù bạn đang sử dụng Samsung hay một thiết bị Android khác, DeskIn cung cấp một giải pháp linh hoạt, đáng tin cậy cho việc truy cập từ xa Android sang Android.
👍 Tại Sao Chọn DeskIn Để Kết Nối Từ Xa:
Kết Nối Ổn Định: Được hỗ trợ bởi hơn 200 nút toàn cầu để đảm bảo độ trễ thấp và hiệu suất nhất quán, ngay cả trên các mạng không dây yếu.
Chức Năng Đầy Đủ Tính Năng: Kiểm soát một điện thoại Android khác, chuyển tệp lên tới 12MB/s, phản chiếu màn hình, chú thích, thực hiện cuộc gọi thoại và nhiều hơn nữa.
Hỗ Trợ Đa Nền Tảng: Có sẵn trên Android, iOS, Windows, và macOS để tích hợp liền mạch giữa tất cả các thiết bị của bạn.
Bảo Mật Nâng Cao: Bao gồm xác minh email, màn hình riêng tư, kiểm soát danh sách đen/trắng, và cài đặt truy cập không có người giám sát.
Kế Hoạch Tiết Kiệm Chi Phí: Cung cấp phiên bản miễn phí hào phóng và giá cả cạnh tranh so với các giải pháp điều khiển từ xa khác.
Bây giờ, hãy cùng tìm hiểu cách kết nối từ xa hai thiết bị Android của bạn bằng ứng dụng DeskIn.
Bước 1. Truy cập trang web chính thức của DeskIn hoặc tìm kiếm nó trên Google Play, và cài đặt ứng dụng trên cả hai thiết bị Android. nhấp vào đây để tải xuống
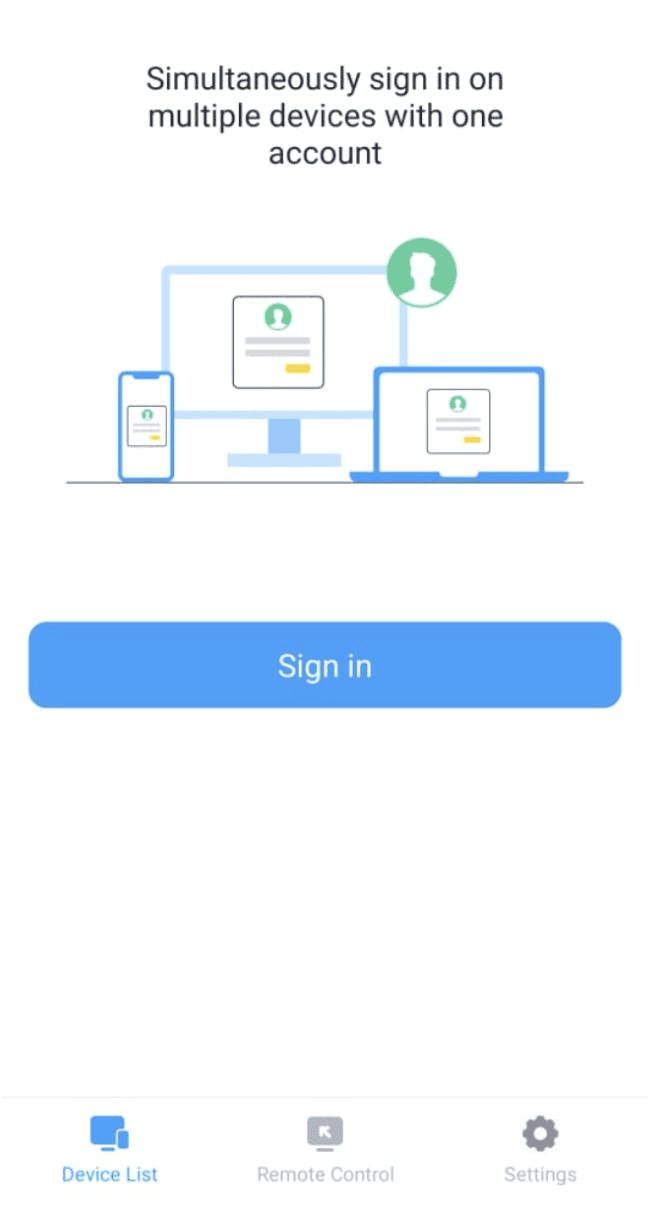
Bước 2. Đăng ký bằng địa chỉ email của bạn và xác minh tài khoản. Đăng nhập trên cả hai thiết bị để thiết lập truy cập an toàn.
📌 Lưu Ý: Khi đăng nhập vào tài khoản của bạn lần đầu tiên trên một thiết bị mới, bạn cần hoàn thành xác minh email để đảm bảo bảo mật tài khoản.
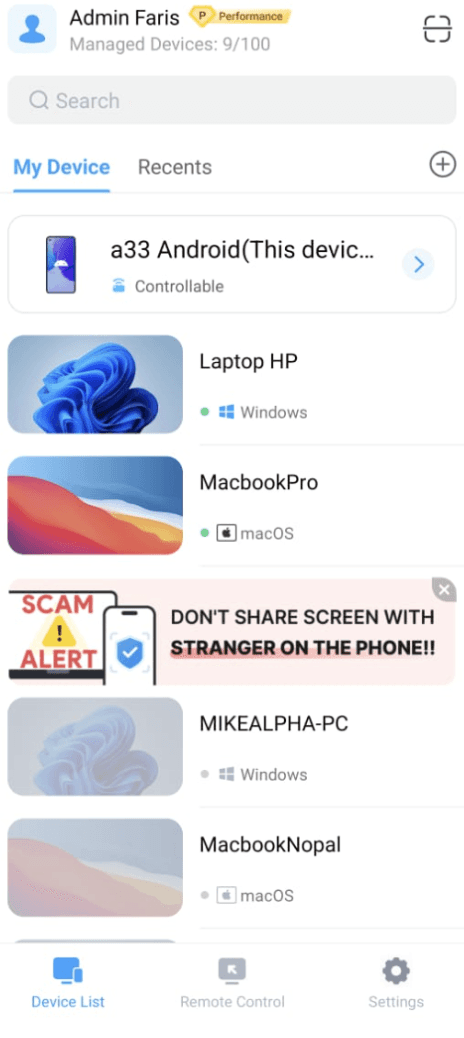
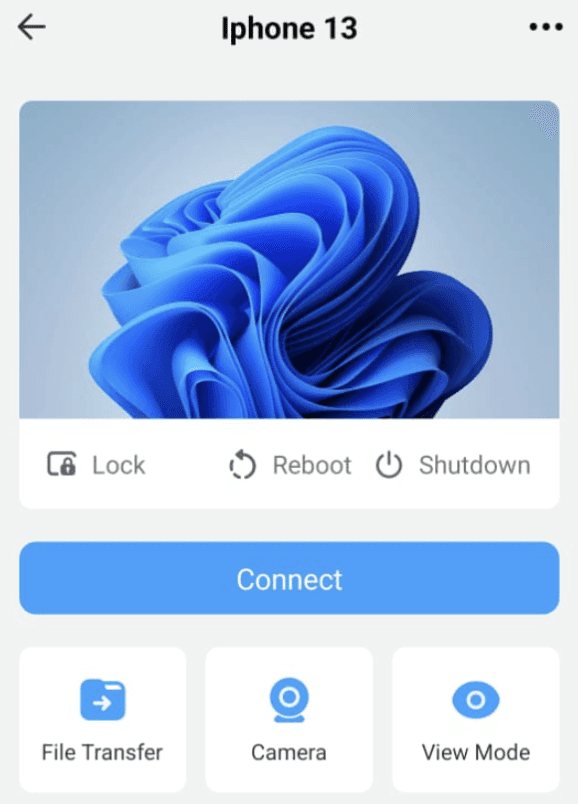
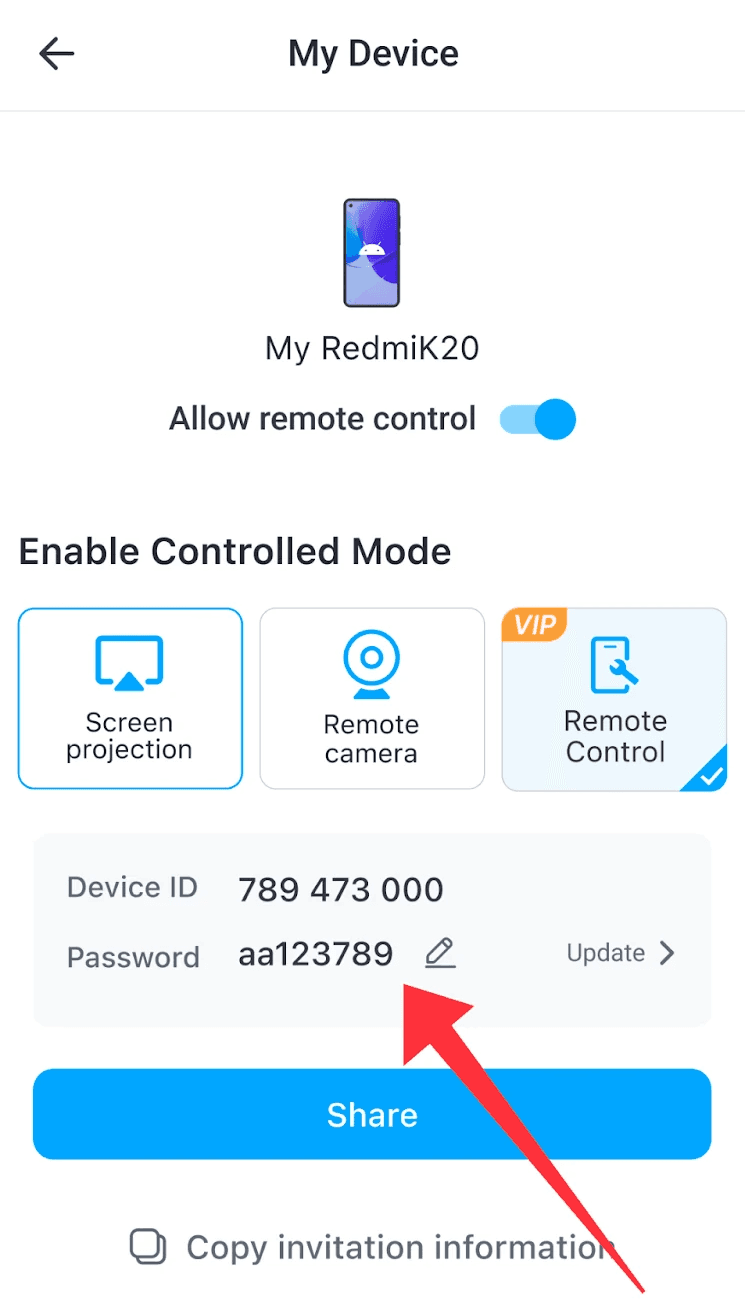
Bước 3. Sau khi đăng nhập, xác nhận ID thiết bị của điện thoại Android mà bạn muốn điều khiển. Trên thiết bị điều khiển, nhập ID thiết bị đó và mật khẩu tương ứng. Đảm bảo rằng thiết bị mục tiêu đã bật "Cho phép điều khiển từ xa" trong cài đặt DeskIn.
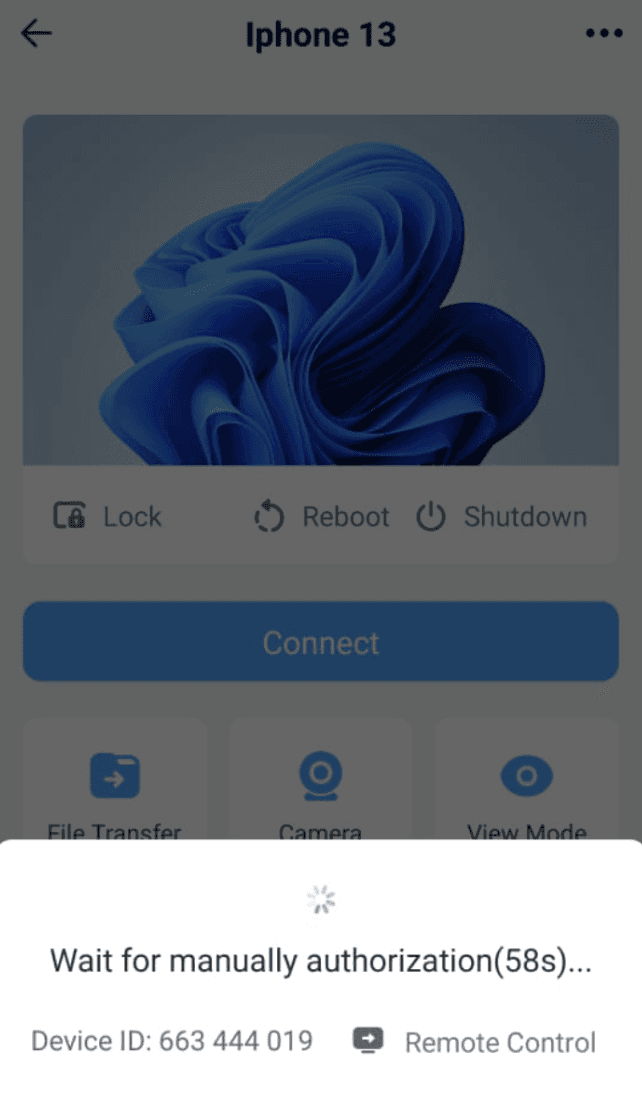
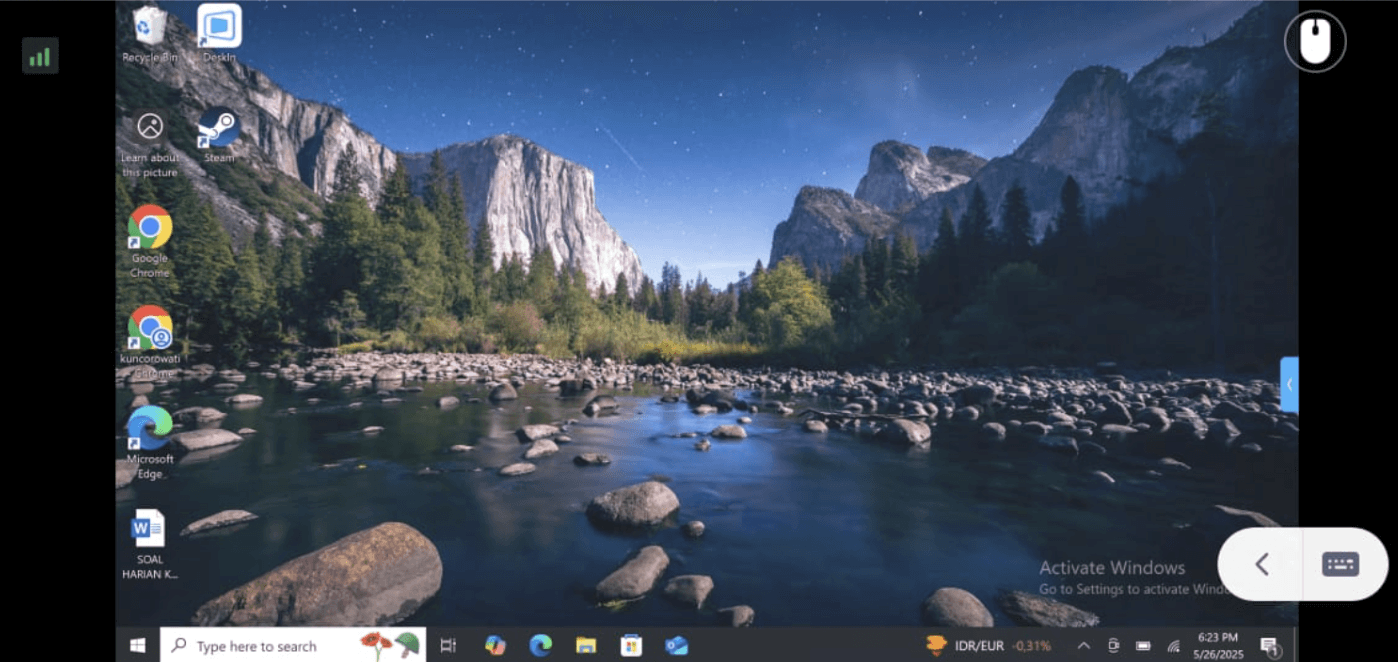
Bước 4. Khi kết nối được thiết lập, bạn có thể điều khiển từ xa điện thoại Android còn lại. Bạn sẽ có thể khởi động các ứng dụng, gửi tin nhắn, chuyển tệp, v.v.
👀 Bạn Cũng Có Thể Thích:
Làm Thế Nào Để Kết Nối Điện Thoại Android Của Tôi Với PC [Hướng Dẫn Đầy Đủ]
Tại Sao Tôi Không Thể Điều Khiển Từ Xa Thiết Bị Android Của Mình? Đã Khắc Phục!
Các Cách Khác Để Hai Thiết Bị Android Kết Nối
Khi DeskIn cung cấp một giải pháp toàn diện và an toàn cho truy cập từ xa Android đến Android, cũng có những phương pháp tích hợp có thể giúp bạn thiết lập kết nối giữa hai thiết bị Android, đặc biệt cho các tác vụ như chia sẻ tệp hoặc ghép đôi nhanh. Dưới đây là 2 phương pháp không dây thường được sử dụng.
Sử Dụng Bluetooth Để Chuyển Tệp Không Dây
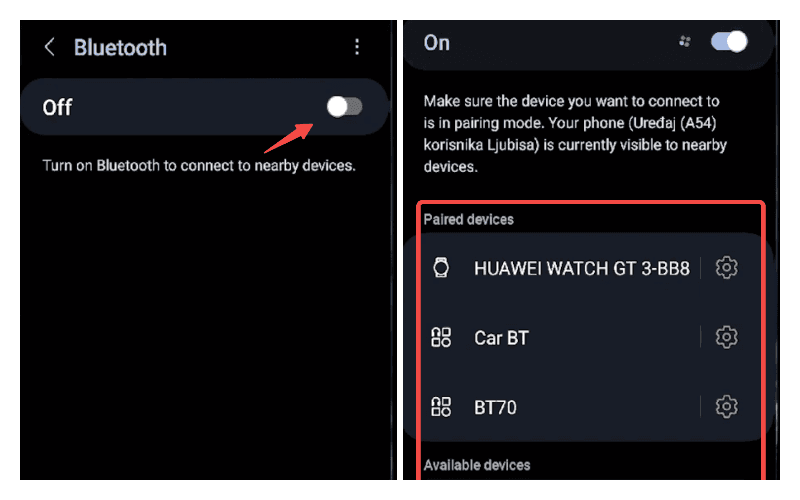
Bluetooth là một trong những phương pháp cổ điển và đơn giản nhất để kết nối hai điện thoại Android không dây, lý tưởng cho việc chuyển tệp ở khoảng cách gần và ghép đôi thiết bị cơ bản. Mặc dù không phù hợp cho việc điều khiển từ xa hoàn toàn, nhưng nó vẫn hữu ích để chia sẻ phương tiện, danh bạ, hoặc tệp nhỏ giữa các thiết bị. Dưới đây là cách kết nối hai thiết bị Android từ xa qua bluetooth:
Mở "Cài đặt" trên cả hai điện thoại Android và bật Bluetooth.
Trên một điện thoại, chạm vào "Ghép đôi thiết bị mới", và chọn điện thoại còn lại từ danh sách các thiết bị có sẵn.
Xác nhận yêu cầu ghép đôi trên cả hai thiết bị.
Khi đã kết nối, bạn có thể chọn các tệp, chạm vào "Chia sẻ", và chọn Bluetooth làm phương thức chia sẻ.
Chấp nhận tệp đến trên thiết bị nhận.
Sử Dụng Wi-Fi Direct
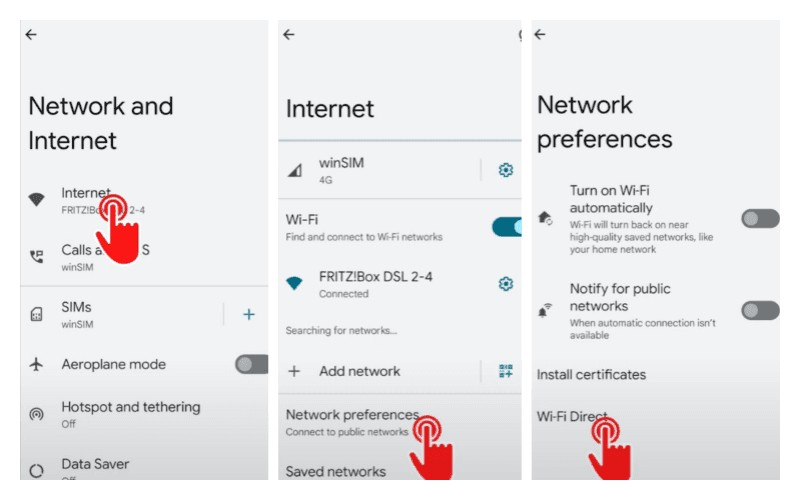
Wi-Fi Direct (hoặc WLAN Direct) cho phép hai thiết bị Android kết nối không dây với tốc độ cao hơn Bluetooth, mà không cần kết nối internet hoặc bộ định tuyến bên ngoài. Đây là một sự thay thế tốt khi bạn muốn chuyển tệp lớn giữa các điện thoại. Dưới đây là các bước chi tiết cho nó.
Đi tới "Cài đặt > Kết nối > Wi-Fi" trên cả hai thiết bị Android.
Chạm vào "Tùy chọn Wi-Fi Direct" (thường được tìm thấy qua menu ba chấm hoặc cài đặt nâng cao).
Điện thoại của bạn sẽ bắt đầu quét. Chọn thiết bị còn lại khi nó xuất hiện.
Chấp nhận yêu cầu kết nối trên thiết bị thứ hai.
Sử dụng một ứng dụng tương thích (như Thư viện hoặc Trình quản lý tệp) để chia sẻ tệp qua Wi-Fi Direct.
Các Tình Huống Thực Tế Để Kết Nối Từ Xa Các Thiết Bị Android
Ngoài việc thiết lập kỹ thuật, điều quan trọng là hiểu các trường hợp sử dụng thực tế cho truy cập từ xa Android đến Android. Dù là vì sự tiện lợi cá nhân, sự hợp tác chuyên nghiệp, hay giúp đỡ người khác, những tình huống này cho thấy tại sao việc biết cách kết nối hai điện thoại Android từ xa lại ngày càng có giá trị.
Hỗ Trợ Từ Xa và Khắc Phục Sự Cố
Một trong những lý do phổ biến nhất để kết nối từ xa hai thiết bị Android là để cung cấp hỗ trợ kỹ thuật. Nếu một người bạn hoặc thành viên trong gia đình gặp khó khăn với cài đặt, ứng dụng, hoặc vấn đề mạng, bạn có thể trực tiếp điều khiển thiết bị Android của họ để khắc phục, mà không cần hướng dẫn qua điện thoại quá dài. Điều này đặc biệt hữu ích cho việc hỗ trợ người dùng lớn tuổi hoặc ít am hiểu công nghệ, cho phép bạn nhấn, vuốt, và điều hướng từ xa, làm cho việc sửa chữa nhanh chóng và dễ dàng hơn.
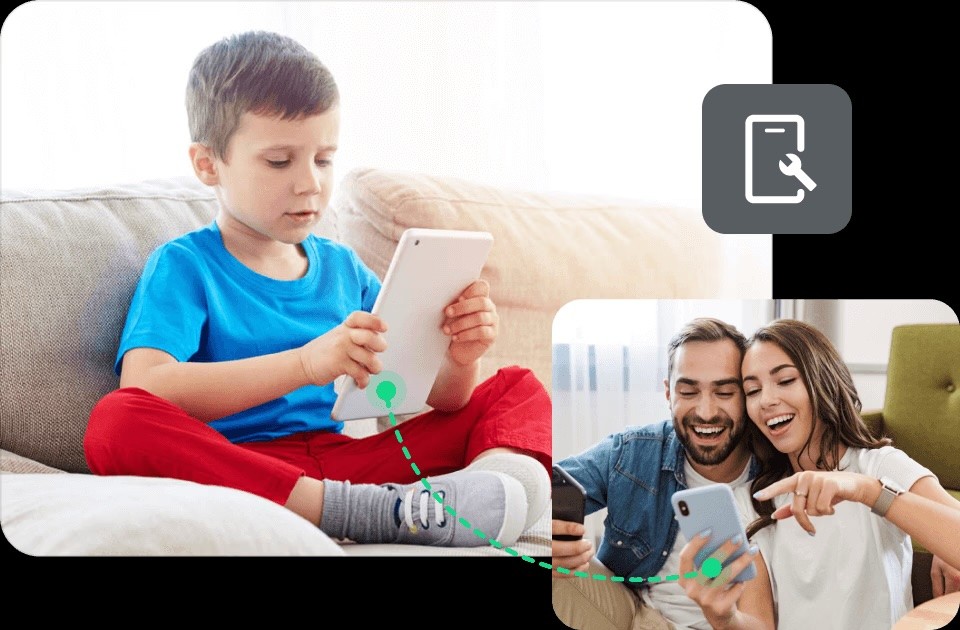
Để Giám Sát Phụ Huynh
Các bậc phụ huynh có thể giám sát từ xa thiết bị Android của trẻ em để đảm bảo duyệt web an toàn, quản lý thời gian sử dụng màn hình, hoặc kiểm tra thời gian sử dụng ứng dụng. Truy cập từ xa cung cấp sự giám sát tốt hơn mà không cần phải trực tiếp cầm điện thoại của trẻ.
Để Truy Cập Camera Từ Xa
Một số ứng dụng điều khiển từ xa, như DeskIn, cho phép truy cập vào camera của thiết bị, biến một điện thoại Android thành một camera an ninh di động. Điều này hữu ích cho việc kiểm tra vật nuôi, an ninh nhà cửa, hoặc giám sát các môi trường từ xa.
Chia Sẻ Tệp và Hợp Tác
Cần gửi tệp lớn hoặc làm việc cùng nhau trên các thiết bị? Kết nối từ xa giữa các điện thoại Android cho phép bạn chuyển các tài liệu, ảnh, và video trực tiếp, mà không cần phụ thuộc vào dịch vụ đám mây. Nó hoàn hảo cho học sinh chia sẻ bài tập, đồng nghiệp hợp tác trên dự án, hoặc những người sáng tạo trao đổi tài sản trong thời gian thực, tất cả với tốc độ chuyển nhanh và không có giới hạn về loại tệp.
Phản Chiếu Màn Hình Để Thuyết Trình và Chia Sẻ Phương Tiện
Phản chiếu màn hình cho phép bạn hiển thị màn hình của một thiết bị Android trên thiết bị khác, lý tưởng cho các bài thuyết trình di động, chia sẻ phương tiện, hoặc trình diễn chức năng ứng dụng. Nó hoạt động ngay cả trên các mạng khác nhau, làm cho nó trở thành một công cụ hữu ích cho các cuộc họp, du lịch, hoặc giải trí thoải mái.
Các Câu Hỏi Thường Gặp Về Truy Cập Từ Xa Android Đến Android
Tôi có thể kết nối từ xa hai điện thoại Android một cách không dây không?
Có. Hầu hết các giải pháp truy cập từ xa hiện đại hỗ trợ kết nối không dây qua Wi-Fi hoặc dữ liệu di động. Điều này có nghĩa là hai thiết bị không cần phải nằm trên cùng một mạng cục bộ, cho phép bạn kết nối từ xa hai điện thoại Android ngay cả khi chúng cách xa hàng dặm.
Tôi có thể điều khiển cài đặt cuộc gọi hoặc trả lời cuộc gọi từ xa không?
Một số công cụ nâng cao cung cấp quyền kiểm soát một phần đối với các tính năng liên quan đến cuộc gọi. Mặc dù bạn có thể không thể trả lời cuộc gọi điện thoại thông thường trực tiếp qua truy cập từ xa, một số ứng dụng cho phép bạn:
Xem và quản lý thông báo cuộc gọi đến
Điều chỉnh nhạc chuông hoặc cài đặt âm thanh
Sử dụng giao tiếp thoại trong phiên để hỗ trợ theo thời gian thực
Truy cập từ xa có an toàn và riêng tư không?
Bảo mật phụ thuộc vào ứng dụng mà bạn chọn. Các ứng dụng truy cập từ xa đáng tin cậy sử dụng mã hóa mạnh mẽ, đăng nhập an toàn (như xác minh email hoặc xác thực hai yếu tố), và các cài đặt bảo mật như che màn hình hoặc kiểm soát danh sách đen/danh sách trắng. Luôn lựa chọn các công cụ đáng tin cậy để đảm bảo dữ liệu của bạn được bảo vệ trong các phiên từ xa.
Nó có hoạt động trên điện thoại Samsung không?
Có chứ. Hầu hết các ứng dụng truy cập từ xa hoàn toàn tương thích với Samsung và các thương hiệu Android phổ biến khác. Một số ứng dụng thậm chí bao gồm tối ưu hóa cụ thể cho Samsung để cải thiện hiệu suất hoặc tích hợp hệ thống sâu hơn.
Kết Luận
Khả năng kết nối hai điện thoại Android từ xa mở ra một loạt các khả năng—từ hỗ trợ kỹ thuật liền mạch và chuyển tệp cho đến chia sẻ màn hình và thuyết trình di động. Dù bạn đang cung cấp hỗ trợ từ xa cho một người bạn, hợp tác trên một dự án, hoặc chỉ đơn giản là tìm kiếm một cách thông minh hơn để quản lý nhiều thiết bị, truy cập từ xa Android đến Android mang lại sự tiện lợi, kiểm soát, và linh hoạt.
Giữa nhiều công cụ có sẵn, DeskIn nổi bật với bộ tính năng mạnh mẽ, khả năng tương thích đa nền tảng, và các phiên truy cập từ xa an toàn. Với các chức năng như kiểm soát thiết bị đầy đủ, chuyển tệp nhanh, và phản chiếu màn hình qua dữ liệu di động, DeskIn làm cho việc kết nối từ xa hai điện thoại Android trở nên dễ dàng hơn bao giờ hết cho cả sử dụng chuyên nghiệp và cá nhân!
Miễn phí! Đây Là Cách Kết Nối Hai Điện Thoại Android Từ Xa
Trong thế giới di động hiện nay, việc kết nối hai điện thoại Android từ xa có thể mở ra những mức độ tiện lợi, năng suất và hỗ trợ mới. Dù bạn đang cố gắng giúp một người bạn khắc phục sự cố, gửi tệp mà không cần máy tính, hay phản chiếu màn hình cho các bài thuyết trình, việc kết nối từ xa giữa hai điện thoại Android là cực kỳ hữu ích.
Với những công cụ và kiến thức đúng đắn, những tình huống phổ biến như hỗ trợ kỹ thuật từ xa, làm việc hợp tác, hay thậm chí chơi game trên thiết bị khác là hoàn toàn có thể. Hãy cùng khám phá những cách đã được thử nghiệm để đạt được truy cập từ xa từ Android sang Android, bắt đầu với giải pháp đáng tin cậy nhất.
Cách Tốt Nhất Để Kết Nối Hai Điện Thoại Android Từ Xa: Sử Dụng DeskIn
Nếu bạn đang tìm kiếm cách kết nối hai điện thoại Android từ xa hiệu quả và an toàn nhất, DeskIn nổi bật như là sự lựa chọn hàng đầu. Được thiết kế cho cả người dùng thông thường và chuyên nghiệp, ứng dụng Android của DeskIn cung cấp kiểm soát theo thời gian thực, chia sẻ tệp, và phản chiếu màn hình trên điện thoại Android, tất cả với thiết lập đơn giản và trải nghiệm người dùng mượt mà.
Điều làm cho DeskIn trở nên độc đáo là sự kết hợp của hiệu suất cao, khả năng tương thích đa nền tảng, và bảo mật cấp doanh nghiệp, tất cả được gói gọn trong một giao diện dễ sử dụng. Dù bạn đang sử dụng Samsung hay một thiết bị Android khác, DeskIn cung cấp một giải pháp linh hoạt, đáng tin cậy cho việc truy cập từ xa Android sang Android.
👍 Tại Sao Chọn DeskIn Để Kết Nối Từ Xa:
Kết Nối Ổn Định: Được hỗ trợ bởi hơn 200 nút toàn cầu để đảm bảo độ trễ thấp và hiệu suất nhất quán, ngay cả trên các mạng không dây yếu.
Chức Năng Đầy Đủ Tính Năng: Kiểm soát một điện thoại Android khác, chuyển tệp lên tới 12MB/s, phản chiếu màn hình, chú thích, thực hiện cuộc gọi thoại và nhiều hơn nữa.
Hỗ Trợ Đa Nền Tảng: Có sẵn trên Android, iOS, Windows, và macOS để tích hợp liền mạch giữa tất cả các thiết bị của bạn.
Bảo Mật Nâng Cao: Bao gồm xác minh email, màn hình riêng tư, kiểm soát danh sách đen/trắng, và cài đặt truy cập không có người giám sát.
Kế Hoạch Tiết Kiệm Chi Phí: Cung cấp phiên bản miễn phí hào phóng và giá cả cạnh tranh so với các giải pháp điều khiển từ xa khác.
Bây giờ, hãy cùng tìm hiểu cách kết nối từ xa hai thiết bị Android của bạn bằng ứng dụng DeskIn.
Bước 1. Truy cập trang web chính thức của DeskIn hoặc tìm kiếm nó trên Google Play, và cài đặt ứng dụng trên cả hai thiết bị Android. nhấp vào đây để tải xuống
Bước 2. Đăng ký bằng địa chỉ email của bạn và xác minh tài khoản. Đăng nhập trên cả hai thiết bị để thiết lập truy cập an toàn.
📌 Lưu Ý: Khi đăng nhập vào tài khoản của bạn lần đầu tiên trên một thiết bị mới, bạn cần hoàn thành xác minh email để đảm bảo bảo mật tài khoản.
Bước 3. Sau khi đăng nhập, xác nhận ID thiết bị của điện thoại Android mà bạn muốn điều khiển. Trên thiết bị điều khiển, nhập ID thiết bị đó và mật khẩu tương ứng. Đảm bảo rằng thiết bị mục tiêu đã bật "Cho phép điều khiển từ xa" trong cài đặt DeskIn.
Bước 4. Khi kết nối được thiết lập, bạn có thể điều khiển từ xa điện thoại Android còn lại. Bạn sẽ có thể khởi động các ứng dụng, gửi tin nhắn, chuyển tệp, v.v.
👀 Bạn Cũng Có Thể Thích:
Làm Thế Nào Để Kết Nối Điện Thoại Android Của Tôi Với PC [Hướng Dẫn Đầy Đủ]
Tại Sao Tôi Không Thể Điều Khiển Từ Xa Thiết Bị Android Của Mình? Đã Khắc Phục!
Các Cách Khác Để Hai Thiết Bị Android Kết Nối
Khi DeskIn cung cấp một giải pháp toàn diện và an toàn cho truy cập từ xa Android đến Android, cũng có những phương pháp tích hợp có thể giúp bạn thiết lập kết nối giữa hai thiết bị Android, đặc biệt cho các tác vụ như chia sẻ tệp hoặc ghép đôi nhanh. Dưới đây là 2 phương pháp không dây thường được sử dụng.
Sử Dụng Bluetooth Để Chuyển Tệp Không Dây
Bluetooth là một trong những phương pháp cổ điển và đơn giản nhất để kết nối hai điện thoại Android không dây, lý tưởng cho việc chuyển tệp ở khoảng cách gần và ghép đôi thiết bị cơ bản. Mặc dù không phù hợp cho việc điều khiển từ xa hoàn toàn, nhưng nó vẫn hữu ích để chia sẻ phương tiện, danh bạ, hoặc tệp nhỏ giữa các thiết bị. Dưới đây là cách kết nối hai thiết bị Android từ xa qua bluetooth:
Mở "Cài đặt" trên cả hai điện thoại Android và bật Bluetooth.
Trên một điện thoại, chạm vào "Ghép đôi thiết bị mới", và chọn điện thoại còn lại từ danh sách các thiết bị có sẵn.
Xác nhận yêu cầu ghép đôi trên cả hai thiết bị.
Khi đã kết nối, bạn có thể chọn các tệp, chạm vào "Chia sẻ", và chọn Bluetooth làm phương thức chia sẻ.
Chấp nhận tệp đến trên thiết bị nhận.
Sử Dụng Wi-Fi Direct
Wi-Fi Direct (hoặc WLAN Direct) cho phép hai thiết bị Android kết nối không dây với tốc độ cao hơn Bluetooth, mà không cần kết nối internet hoặc bộ định tuyến bên ngoài. Đây là một sự thay thế tốt khi bạn muốn chuyển tệp lớn giữa các điện thoại. Dưới đây là các bước chi tiết cho nó.
Đi tới "Cài đặt > Kết nối > Wi-Fi" trên cả hai thiết bị Android.
Chạm vào "Tùy chọn Wi-Fi Direct" (thường được tìm thấy qua menu ba chấm hoặc cài đặt nâng cao).
Điện thoại của bạn sẽ bắt đầu quét. Chọn thiết bị còn lại khi nó xuất hiện.
Chấp nhận yêu cầu kết nối trên thiết bị thứ hai.
Sử dụng một ứng dụng tương thích (như Thư viện hoặc Trình quản lý tệp) để chia sẻ tệp qua Wi-Fi Direct.
Các Tình Huống Thực Tế Để Kết Nối Từ Xa Các Thiết Bị Android
Ngoài việc thiết lập kỹ thuật, điều quan trọng là hiểu các trường hợp sử dụng thực tế cho truy cập từ xa Android đến Android. Dù là vì sự tiện lợi cá nhân, sự hợp tác chuyên nghiệp, hay giúp đỡ người khác, những tình huống này cho thấy tại sao việc biết cách kết nối hai điện thoại Android từ xa lại ngày càng có giá trị.
Hỗ Trợ Từ Xa và Khắc Phục Sự Cố
Một trong những lý do phổ biến nhất để kết nối từ xa hai thiết bị Android là để cung cấp hỗ trợ kỹ thuật. Nếu một người bạn hoặc thành viên trong gia đình gặp khó khăn với cài đặt, ứng dụng, hoặc vấn đề mạng, bạn có thể trực tiếp điều khiển thiết bị Android của họ để khắc phục, mà không cần hướng dẫn qua điện thoại quá dài. Điều này đặc biệt hữu ích cho việc hỗ trợ người dùng lớn tuổi hoặc ít am hiểu công nghệ, cho phép bạn nhấn, vuốt, và điều hướng từ xa, làm cho việc sửa chữa nhanh chóng và dễ dàng hơn.
Để Giám Sát Phụ Huynh
Các bậc phụ huynh có thể giám sát từ xa thiết bị Android của trẻ em để đảm bảo duyệt web an toàn, quản lý thời gian sử dụng màn hình, hoặc kiểm tra thời gian sử dụng ứng dụng. Truy cập từ xa cung cấp sự giám sát tốt hơn mà không cần phải trực tiếp cầm điện thoại của trẻ.
Để Truy Cập Camera Từ Xa
Một số ứng dụng điều khiển từ xa, như DeskIn, cho phép truy cập vào camera của thiết bị, biến một điện thoại Android thành một camera an ninh di động. Điều này hữu ích cho việc kiểm tra vật nuôi, an ninh nhà cửa, hoặc giám sát các môi trường từ xa.
Chia Sẻ Tệp và Hợp Tác
Cần gửi tệp lớn hoặc làm việc cùng nhau trên các thiết bị? Kết nối từ xa giữa các điện thoại Android cho phép bạn chuyển các tài liệu, ảnh, và video trực tiếp, mà không cần phụ thuộc vào dịch vụ đám mây. Nó hoàn hảo cho học sinh chia sẻ bài tập, đồng nghiệp hợp tác trên dự án, hoặc những người sáng tạo trao đổi tài sản trong thời gian thực, tất cả với tốc độ chuyển nhanh và không có giới hạn về loại tệp.
Phản Chiếu Màn Hình Để Thuyết Trình và Chia Sẻ Phương Tiện
Phản chiếu màn hình cho phép bạn hiển thị màn hình của một thiết bị Android trên thiết bị khác, lý tưởng cho các bài thuyết trình di động, chia sẻ phương tiện, hoặc trình diễn chức năng ứng dụng. Nó hoạt động ngay cả trên các mạng khác nhau, làm cho nó trở thành một công cụ hữu ích cho các cuộc họp, du lịch, hoặc giải trí thoải mái.
Các Câu Hỏi Thường Gặp Về Truy Cập Từ Xa Android Đến Android
Tôi có thể kết nối từ xa hai điện thoại Android một cách không dây không?
Có. Hầu hết các giải pháp truy cập từ xa hiện đại hỗ trợ kết nối không dây qua Wi-Fi hoặc dữ liệu di động. Điều này có nghĩa là hai thiết bị không cần phải nằm trên cùng một mạng cục bộ, cho phép bạn kết nối từ xa hai điện thoại Android ngay cả khi chúng cách xa hàng dặm.
Tôi có thể điều khiển cài đặt cuộc gọi hoặc trả lời cuộc gọi từ xa không?
Một số công cụ nâng cao cung cấp quyền kiểm soát một phần đối với các tính năng liên quan đến cuộc gọi. Mặc dù bạn có thể không thể trả lời cuộc gọi điện thoại thông thường trực tiếp qua truy cập từ xa, một số ứng dụng cho phép bạn:
Xem và quản lý thông báo cuộc gọi đến
Điều chỉnh nhạc chuông hoặc cài đặt âm thanh
Sử dụng giao tiếp thoại trong phiên để hỗ trợ theo thời gian thực
Truy cập từ xa có an toàn và riêng tư không?
Bảo mật phụ thuộc vào ứng dụng mà bạn chọn. Các ứng dụng truy cập từ xa đáng tin cậy sử dụng mã hóa mạnh mẽ, đăng nhập an toàn (như xác minh email hoặc xác thực hai yếu tố), và các cài đặt bảo mật như che màn hình hoặc kiểm soát danh sách đen/danh sách trắng. Luôn lựa chọn các công cụ đáng tin cậy để đảm bảo dữ liệu của bạn được bảo vệ trong các phiên từ xa.
Nó có hoạt động trên điện thoại Samsung không?
Có chứ. Hầu hết các ứng dụng truy cập từ xa hoàn toàn tương thích với Samsung và các thương hiệu Android phổ biến khác. Một số ứng dụng thậm chí bao gồm tối ưu hóa cụ thể cho Samsung để cải thiện hiệu suất hoặc tích hợp hệ thống sâu hơn.
Kết Luận
Khả năng kết nối hai điện thoại Android từ xa mở ra một loạt các khả năng—từ hỗ trợ kỹ thuật liền mạch và chuyển tệp cho đến chia sẻ màn hình và thuyết trình di động. Dù bạn đang cung cấp hỗ trợ từ xa cho một người bạn, hợp tác trên một dự án, hoặc chỉ đơn giản là tìm kiếm một cách thông minh hơn để quản lý nhiều thiết bị, truy cập từ xa Android đến Android mang lại sự tiện lợi, kiểm soát, và linh hoạt.
Giữa nhiều công cụ có sẵn, DeskIn nổi bật với bộ tính năng mạnh mẽ, khả năng tương thích đa nền tảng, và các phiên truy cập từ xa an toàn. Với các chức năng như kiểm soát thiết bị đầy đủ, chuyển tệp nhanh, và phản chiếu màn hình qua dữ liệu di động, DeskIn làm cho việc kết nối từ xa hai điện thoại Android trở nên dễ dàng hơn bao giờ hết cho cả sử dụng chuyên nghiệp và cá nhân!