Search Docs…
DeskIn hỗ trợ màn hình mở rộng, nhưng đôi khi bạn có thể thấy rằng bạn không thể sử dụng nó. Bài viết này sẽ giải thích một số tình huống thất bại khi mở rộng màn hình và giải pháp.
Tình huống 1: Chỉ có màn hình phản chiếu khi mở màn hình mở rộng
Nếu bạn thấy rằng hai màn hình chỉ đang phản chiếu và bạn không thể thao tác trên màn hình thứ hai, vui lòng kiểm tra cài đặt hiển thị hệ thống của bạn.
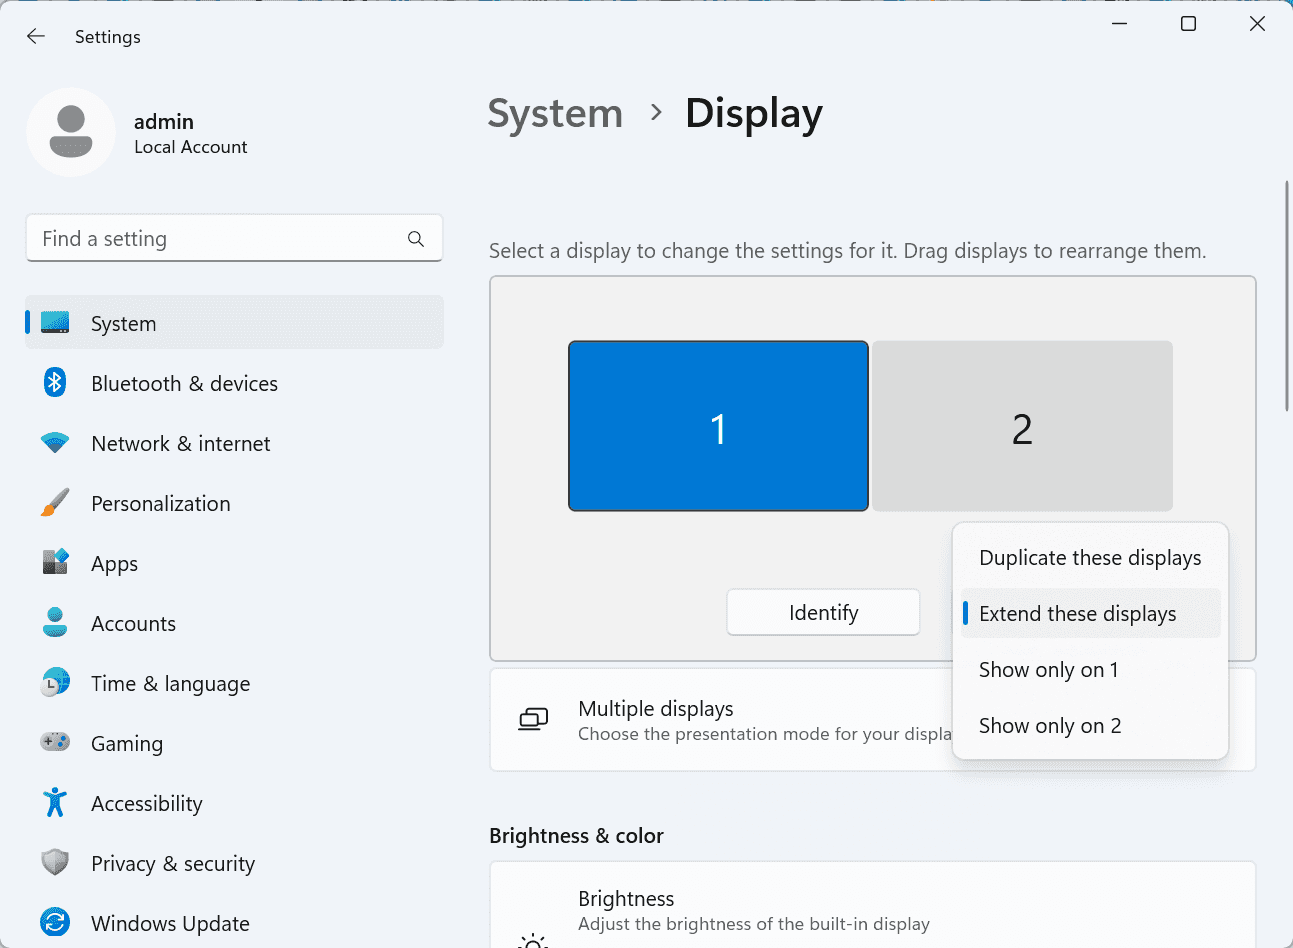
Cài đặt hiển thị hệ thống Windows:
Đi tới Cài đặt Hệ thống Windows >> Cài đặt Hiển thị, chọn màn hình thứ hai và thay đổi cài đặt thành "Mở rộng những màn hình này". Bạn cũng có thể kéo và thả để điều chỉnh vị trí của hai màn hình theo thói quen sử dụng của bạn.
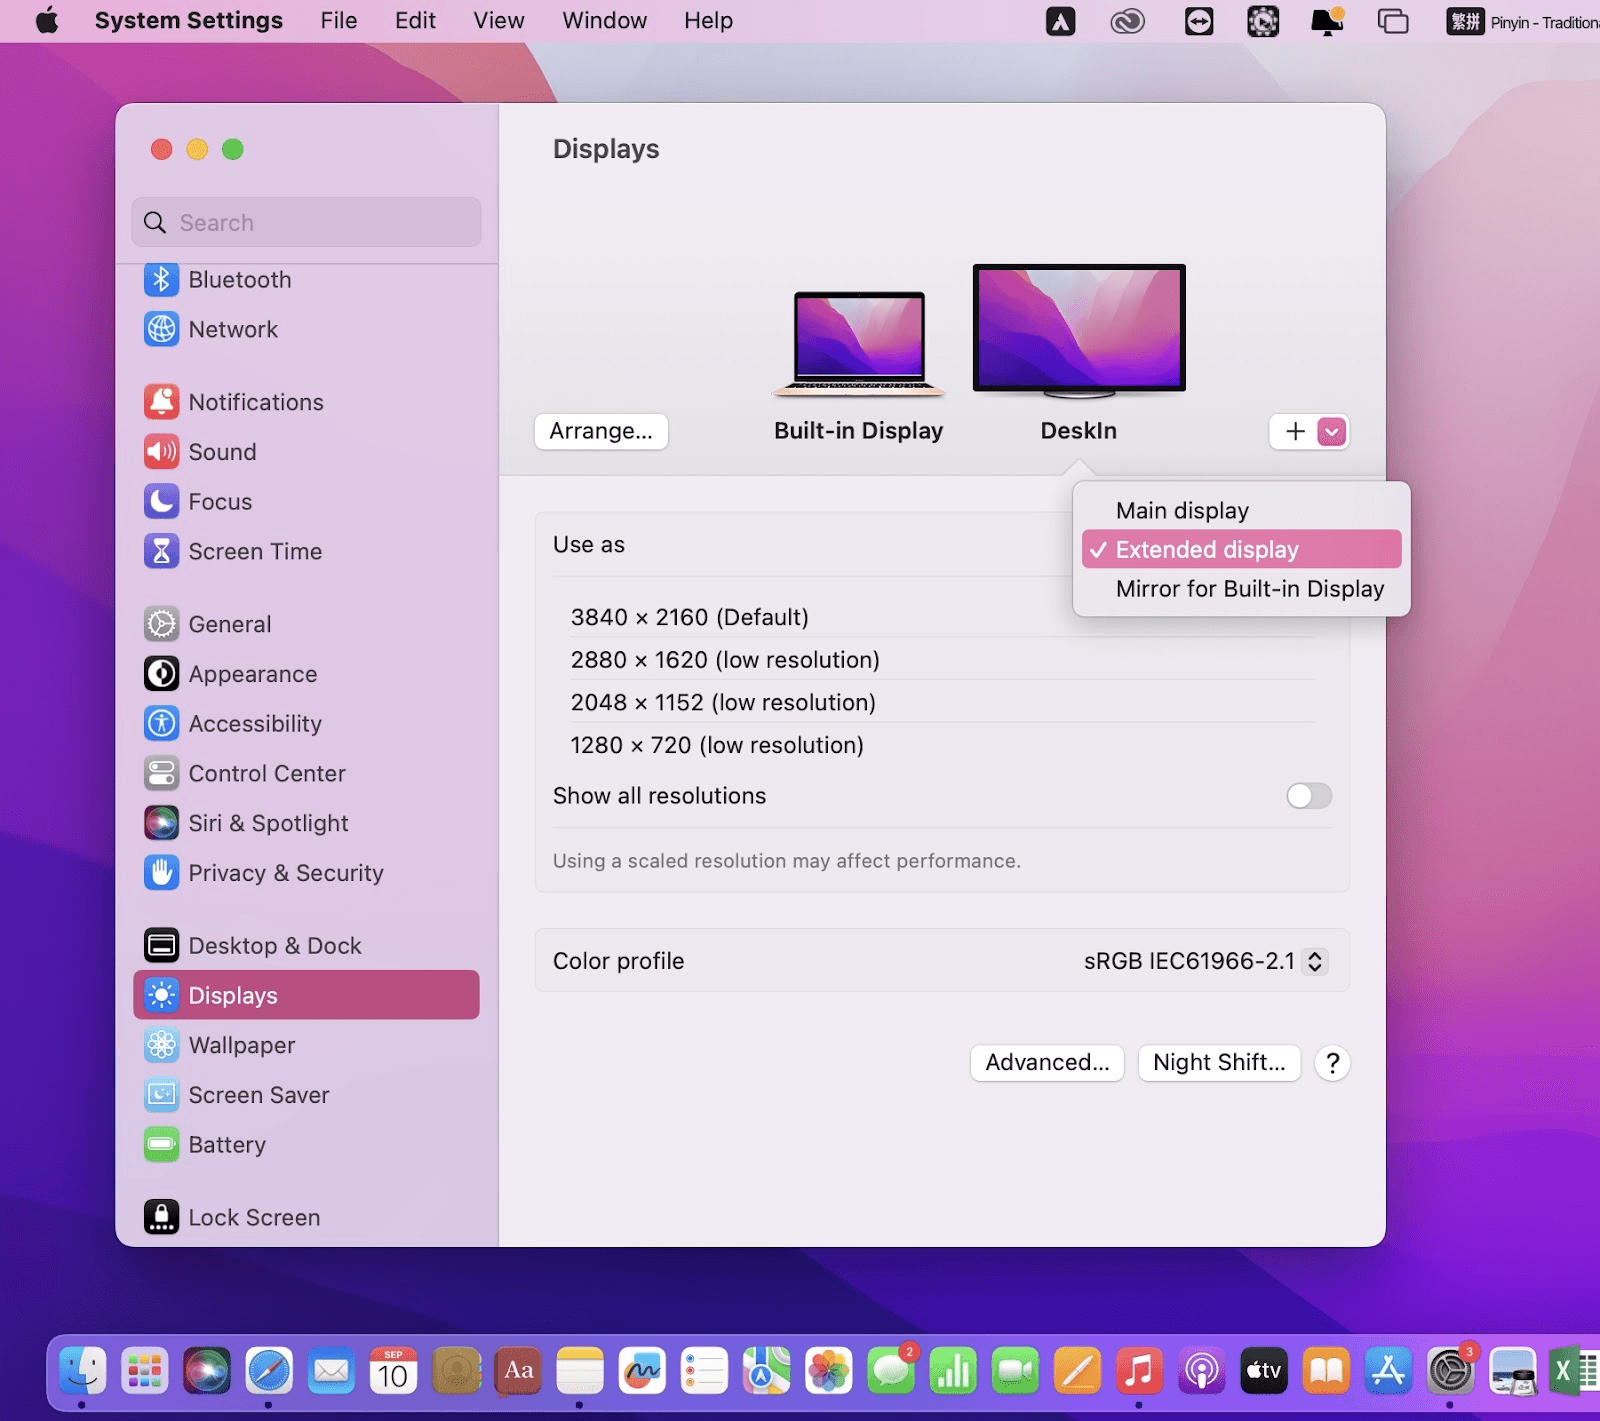
Cài đặt hệ thống MacOS:
Nhấp vào biểu tượng Apple trên thanh công cụ ở trên cùng để vào Cài đặt Hệ thống >> Cài đặt Hiển thị, chọn màn hình DeskIn (tức là màn hình mở rộng) và đặt tùy chọn màn hình thành "Màn hình Mở rộng". Bạn cũng có thể nhấp vào "Sắp xếp…" để điều chỉnh vị trí của hai màn hình.
Tình huống 2: “Hệ thống hiện tại chưa được hỗ trợ”?
Những tính năng màn hình mở rộng của DeskIn hoạt động trên các phiên bản và hệ điều hành này:
-DeskIn 2.9.0 trở lên
-Windows 1903 trở lên
-macOS 10.15 Catalina trở lên
-Android 6 trở lên
-iOS 10 trở lên
Ngoài ra, nếu bộ nhớ CPU của bạn nhỏ hoặc mức sử dụng quá cao, điều này cũng có thể gây ra thất bại trong việc mở rộng màn hình.
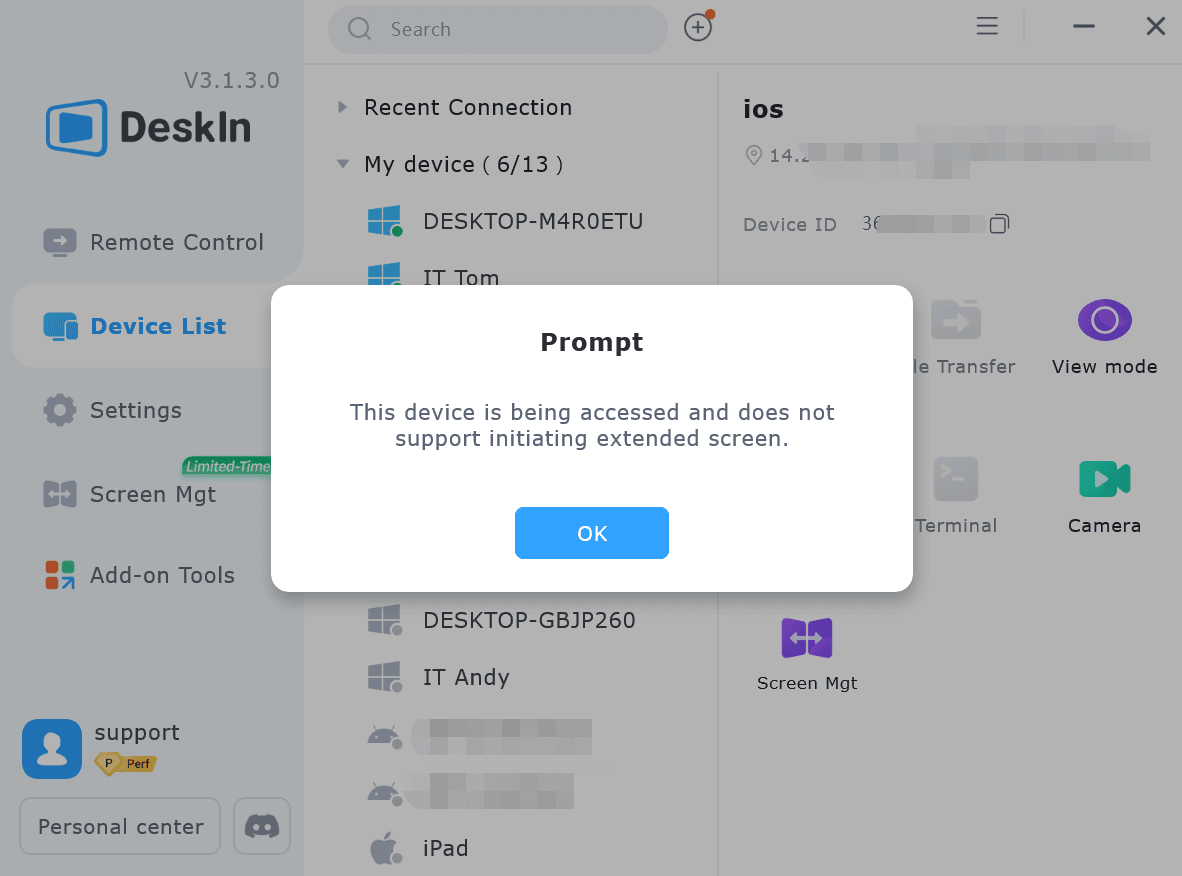
Tình huống 3: Tại sao có thông báo nói rằng “không hỗ trợ khởi động màn hình mở rộng”?
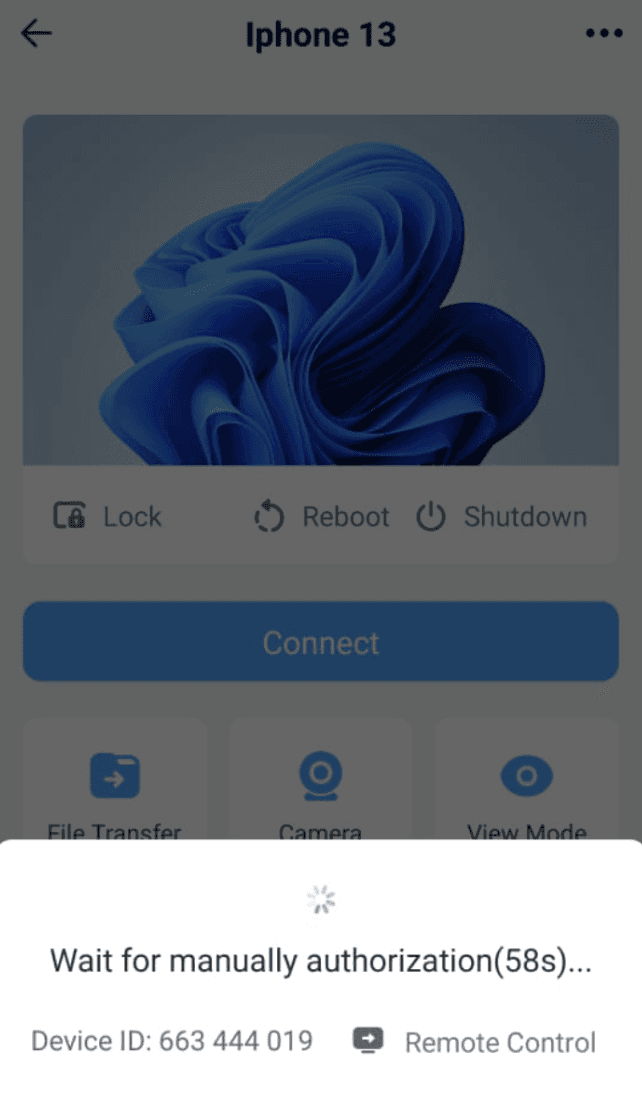
Vui lòng lưu ý rằng bạn không cần phải có kết nối từ xa trước khi mở rộng màn hình! Khi bạn thấy thông báo sau, hãy kiểm tra xem thiết bị của bạn có đang ở trong phiên kết nối hay không. Kết thúc kết nối trước, sau đó bạn có thể mở rộng màn hình.
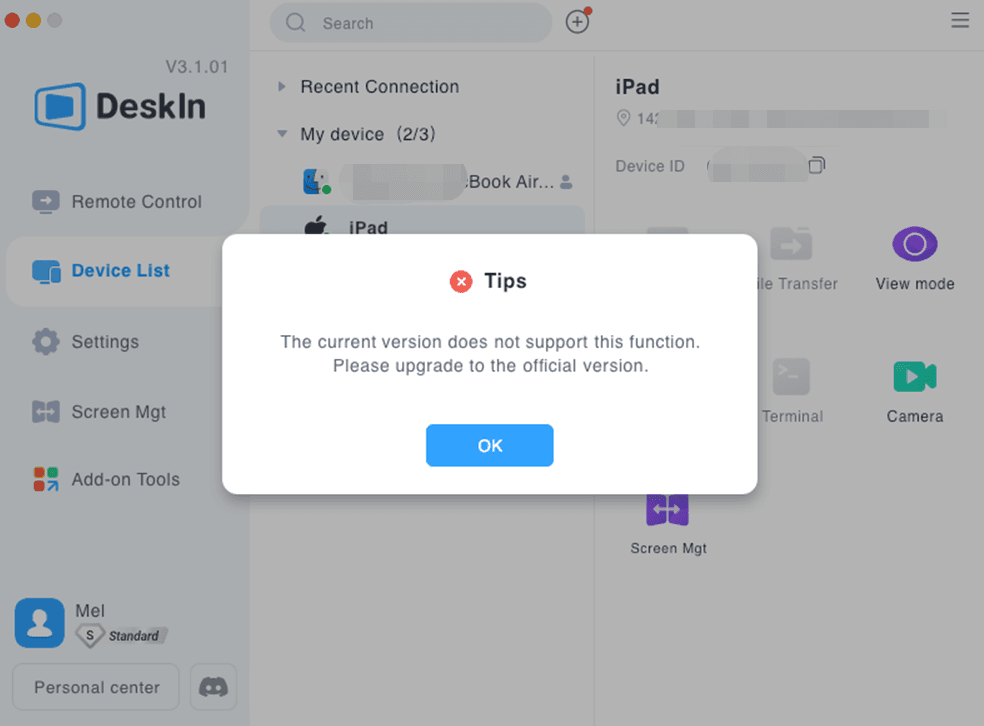
Tình huống 4: “Phiên bản hiện tại không hỗ trợ tính năng này”?
Khi bạn thấy thông báo này, vui lòng truy cập trang web chính thức của DeskIn để tải xuống phiên bản DeskIn cập nhật: DeskIn Personal | Ứng dụng Remote Desktop miễn phí với hơn 40 triệu người dùng
Lưu ý: Phiên bản Mac Appstore 3.1.01 không hỗ trợ màn hình mở rộng, vui lòng truy cập trang web chính thức của DeskIn để tải xuống phiên bản đầy đủ tính năng 3.1.0.1 để sử dụng tính năng này.
Nếu bạn cần thêm trợ giúp, vui lòng liên hệ với DeskIn qua email: support@deskin.io
DeskIn hỗ trợ màn hình mở rộng, nhưng đôi khi bạn có thể thấy rằng bạn không thể sử dụng nó. Bài viết này sẽ giải thích một số tình huống thất bại khi mở rộng màn hình và giải pháp.
Tình huống 1: Chỉ có màn hình phản chiếu khi mở màn hình mở rộng
Nếu bạn thấy rằng hai màn hình chỉ đang phản chiếu và bạn không thể thao tác trên màn hình thứ hai, vui lòng kiểm tra cài đặt hiển thị hệ thống của bạn.
Cài đặt hiển thị hệ thống Windows:
Đi tới Cài đặt Hệ thống Windows >> Cài đặt Hiển thị, chọn màn hình thứ hai và thay đổi cài đặt thành "Mở rộng những màn hình này". Bạn cũng có thể kéo và thả để điều chỉnh vị trí của hai màn hình theo thói quen sử dụng của bạn.
Cài đặt hệ thống MacOS:
Nhấp vào biểu tượng Apple trên thanh công cụ ở trên cùng để vào Cài đặt Hệ thống >> Cài đặt Hiển thị, chọn màn hình DeskIn (tức là màn hình mở rộng) và đặt tùy chọn màn hình thành "Màn hình Mở rộng". Bạn cũng có thể nhấp vào "Sắp xếp…" để điều chỉnh vị trí của hai màn hình.
Tình huống 2: “Hệ thống hiện tại chưa được hỗ trợ”?
Những tính năng màn hình mở rộng của DeskIn hoạt động trên các phiên bản và hệ điều hành này:
-DeskIn 2.9.0 trở lên
-Windows 1903 trở lên
-macOS 10.15 Catalina trở lên
-Android 6 trở lên
-iOS 10 trở lên
Ngoài ra, nếu bộ nhớ CPU của bạn nhỏ hoặc mức sử dụng quá cao, điều này cũng có thể gây ra thất bại trong việc mở rộng màn hình.
Tình huống 3: Tại sao có thông báo nói rằng “không hỗ trợ khởi động màn hình mở rộng”?
Vui lòng lưu ý rằng bạn không cần phải có kết nối từ xa trước khi mở rộng màn hình! Khi bạn thấy thông báo sau, hãy kiểm tra xem thiết bị của bạn có đang ở trong phiên kết nối hay không. Kết thúc kết nối trước, sau đó bạn có thể mở rộng màn hình.
Tình huống 4: “Phiên bản hiện tại không hỗ trợ tính năng này”?
Khi bạn thấy thông báo này, vui lòng truy cập trang web chính thức của DeskIn để tải xuống phiên bản DeskIn cập nhật: DeskIn Personal | Ứng dụng Remote Desktop miễn phí với hơn 40 triệu người dùng
Lưu ý: Phiên bản Mac Appstore 3.1.01 không hỗ trợ màn hình mở rộng, vui lòng truy cập trang web chính thức của DeskIn để tải xuống phiên bản đầy đủ tính năng 3.1.0.1 để sử dụng tính năng này.
Nếu bạn cần thêm trợ giúp, vui lòng liên hệ với DeskIn qua email: support@deskin.io